_GOTOBOTTOM
Modern (1975-today): USA
Modern aircraft of the United States.
Mentor
Joey
_VISITCOMMUNITY
Jerusalem, Israel
Joined: October 15, 2003
KitMaker: 90 posts
AeroScale: 0 posts
Posted: Monday, April 05, 2004 - 07:57 AM UTC
Hi Mal
I'll get to work
Etched seat belts?
I took a look, thanks for all the work your putting into helping me. :-)
Thanks
Yonaton
Holdfast
Staff MemberPresident
IPMS-UK KITMAKER BRANCH
#056
_VISITCOMMUNITY
England - South West, United Kingdom
Joined: September 30, 2002
KitMaker: 8,581 posts
AeroScale: 4,913 posts
Posted: Tuesday, April 06, 2004 - 08:22 AM UTC
Hi Yonaton,

Quoted Text

Etched seat belts?


Yes, after market etched brass seat belts. I guess the answer is no. Not to worry we can have a go at making some simple ones, or you could add the pilot?
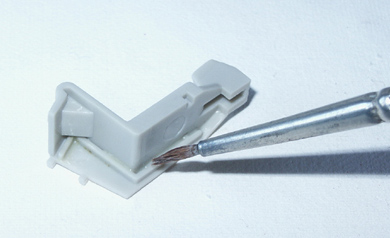
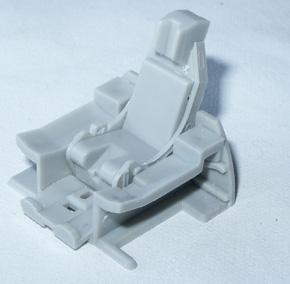
I built up the ejection seat this morning, before going to work :-)


I've left off the firing handle, this will get painted seperately.

Quoted Text

I took a look, thanks for all the work your putting into helping me.


Not a problem Yonaton, it's a pleasure to help a young member of the modelling community and that's what Armorama is all about.
Mal
Joey
_VISITCOMMUNITY
Jerusalem, Israel
Joined: October 15, 2003
KitMaker: 90 posts
AeroScale: 0 posts
Posted: Tuesday, April 06, 2004 - 10:34 AM UTC
Hi Mal
I want to add the pilot.
I built the ejection seat (liquid cement is great :-) ). It came out just like yours (I wasn't able to take a good picture of it), should I glue it to the cockpit?
Ready for more
Yonaton
firemann816
_VISITCOMMUNITY
Alabama, United States
Joined: September 14, 2003
KitMaker: 790 posts
AeroScale: 0 posts
Posted: Tuesday, April 06, 2004 - 04:35 PM UTC
Holdfast -
Youve been great to help this young man out, and even build the kit along with him.
I want to offer one opinion
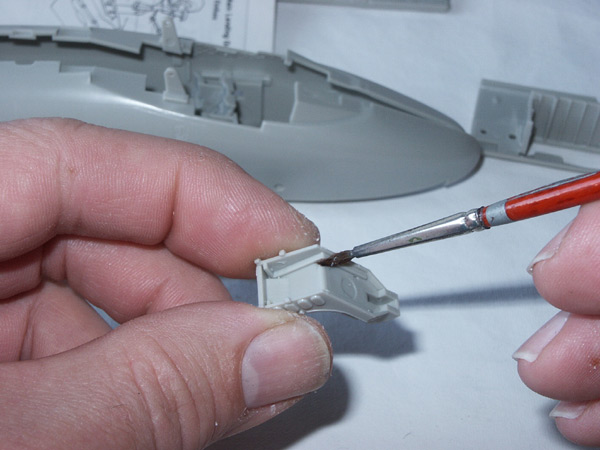
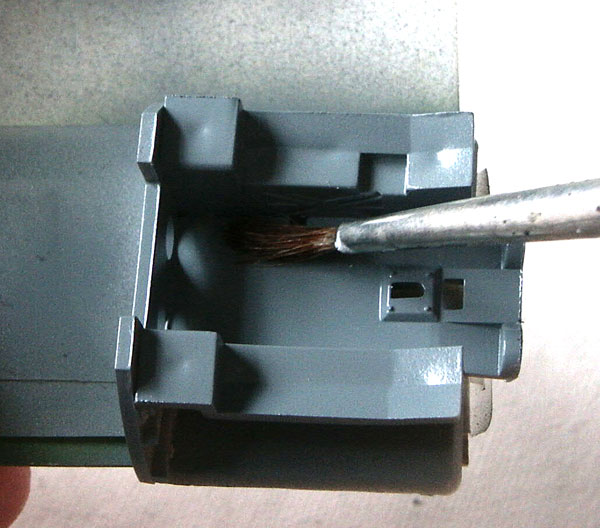
Any other brand of liquid cement I also would say trash the built in brush
BUT
the Tamiya one is as small as 1/0 and pretty flexible.
A (dedicated) brush will always be preferred, but for some reason Tamiya got there's right, while most other vendors offer you something just short of the ones in rubber cement bottles.

Cheers to you both, what a great example of community.
Joey
_VISITCOMMUNITY
Jerusalem, Israel
Joined: October 15, 2003
KitMaker: 90 posts
AeroScale: 0 posts
Posted: Wednesday, April 07, 2004 - 12:09 AM UTC
Hi
I agree with firemann816, I used the built in brush from the Tamiya cement and it worked great.
Thanks
Yonaton
Holdfast
Staff MemberPresident
IPMS-UK KITMAKER BRANCH
#056
_VISITCOMMUNITY
England - South West, United Kingdom
Joined: September 30, 2002
KitMaker: 8,581 posts
AeroScale: 4,913 posts
Posted: Wednesday, April 07, 2004 - 08:26 AM UTC
Thanks firemann816, having never seen Tamiya liquid cement but having seen the "brushes" in plenty of others I didn't know, my appologies to Mr Tamiya. It's nice to see something considered insignificant by most suppliers treated properly by one of the big boys :-)
Yonaton,
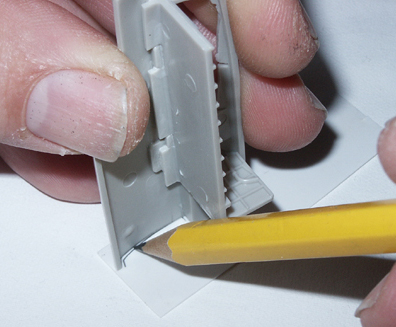
No :-) don't glue it in yet, there's plenty of time and lots to do first. First of all just for your information, I have drilled out the handle on the right of the seat. You don't have to but it's an easy little improvement, if you have micro drills. Take a drill that fills the "slot", drill a hole at each end, then cut out the web left in between.
OK, time for some painting. The cockpit tub, ejection seat and inside the fuselage halves, where the quilting is. Before painting anything though it needs to be washed. I use Isopropynol (rubbing alcohol) but you can use soapy water. Add a drop of dish washing soap to a small bowl with warm water in it. With an old, or new tooth brush scrub the parts. rinse them off and let them dry. This is necessary to remove the mold release oil and the oil off from your hands. If you don't wash the parts, the paint wont stick. Now painting, I'm guessing that you have Tamiya paints? The golden rule, when hand painting is several thin coats. If you try to paint with one coat you will fail. Tamiya paints are not very good for hand painting, so I've heard, but being acrylic they will dry fast. Hand brushing multiple coats particularly applies to White, Yellow and Red, where you may find that you need more than normal. Do not dispair, take your time and expect to apply 3 or even as many as 5 coats or more. You can of course paint the pilot as well, which will keep you busy :-) I will paint my pilot ( do you see what you are doing to me, I don't put pilots in my models :-) ) I used to paint figures, a very long time a go, and I will use artist's oils. I will post pics of my progress on the pilot as well. I don't know what "light grey the instructions are refering to, so you could start another thread asking the question? Somebody out there might know

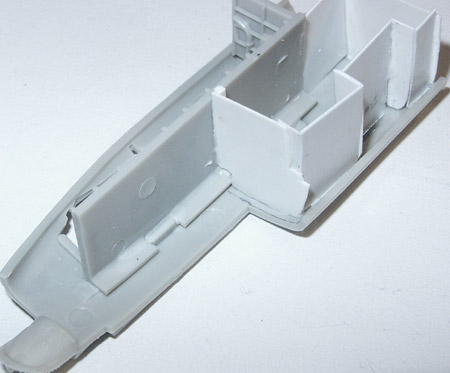
One thing that needs to be done, before the fuselage hlaves are closed, is to prepare locations for the nose weight. If you have fishing sinkers then they could just be super glued into position. I don't,so this morning ,before going to work, I started to box in areas, in the nose to take the weight. I have taken pics but haven't managed to download them yet. I will try and do that tomorrow.

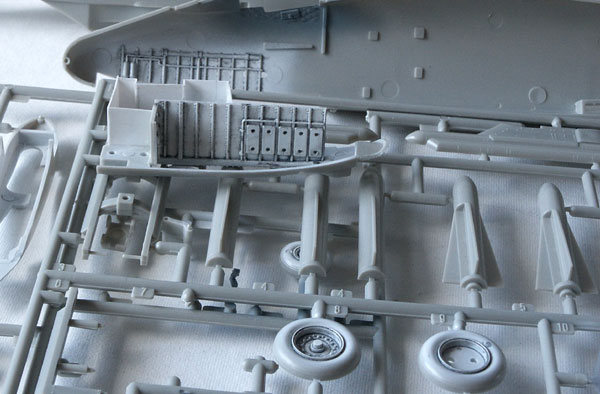
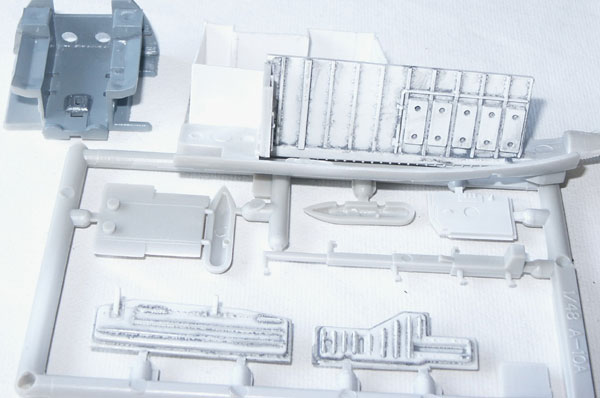
You can also glue together parts A13, C32 and 33. You may have seen these in my workbench gallery? If not do take a look, I have annotated them, highlighting flash and seam lines to be removed. Remember, cut off the sprue, clean up, test fit then glue.

Study the parts that make up the engines, in step 3.

I'll be back tomorrow
Mal
Holdfast
Staff MemberPresident
IPMS-UK KITMAKER BRANCH
#056
_VISITCOMMUNITY
England - South West, United Kingdom
Joined: September 30, 2002
KitMaker: 8,581 posts
AeroScale: 4,913 posts
Posted: Thursday, April 08, 2004 - 09:10 AM UTC
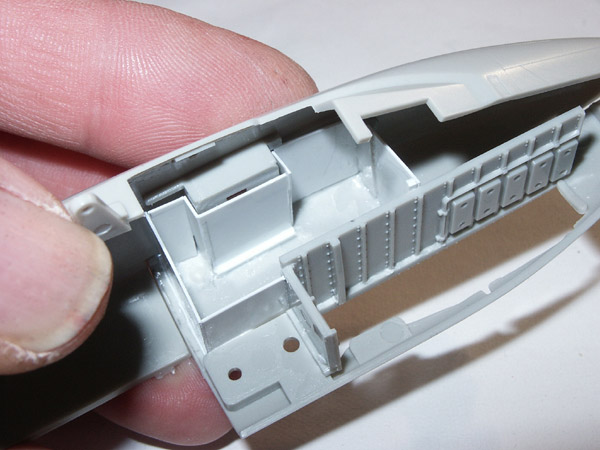
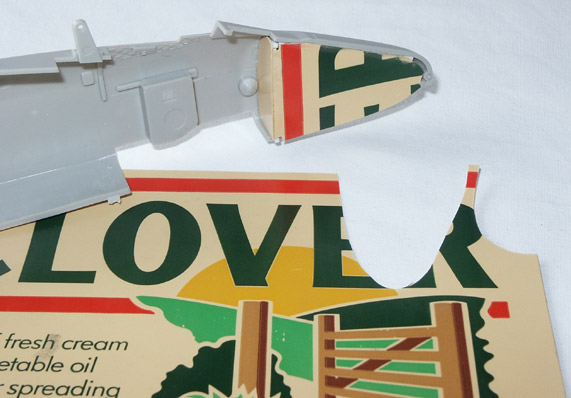
OK, When you have the nose wheel parts glued together, and they are dry you need to sort out where and how you will fit in enough weight to prevent tail sitting. Tamiya suggest 25-30g is enough? What you have to remember is that the cocpit will hve to fit in there as well, so how ever you do it you must constantly check that nothing fouls it. Like I said yesterday, if you have fishing sinkers they can simply be super glued int place. I don't so I am boxing in areas, around the nose to take lead shot. Heres the pics:
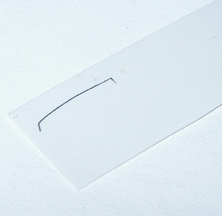
Getting the base profile.

This is what you get.

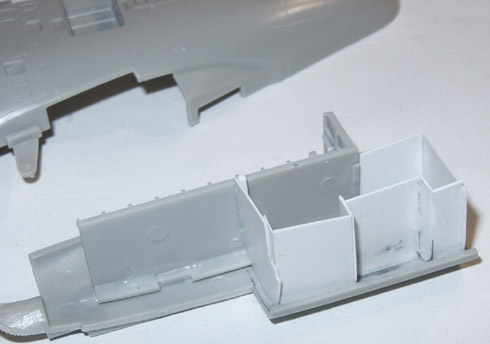
This is the section I managed to do before going to work, it took me about 30 mins. I have used thin plastic card, there is no measuring involved just cut (using scissors) test fit, cut, test fit, etc glue, with liquid cement. I have used square section plastic rod a couple of times. If you don't have plastic card then you could use "household" plastic card such as that found in margarine tubs.

A view from the other side:

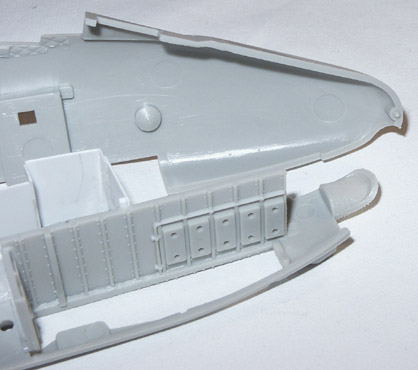
More space in the nose:

And more space at the fron of the nose wheel bay:

There are other ways to get weight in the nose, but lead shot allows more weight in any given space.
Mal
Holdfast
Staff MemberPresident
IPMS-UK KITMAKER BRANCH
#056
_VISITCOMMUNITY
England - South West, United Kingdom
Joined: September 30, 2002
KitMaker: 8,581 posts
AeroScale: 4,913 posts
Posted: Sunday, April 11, 2004 - 07:40 AM UTC
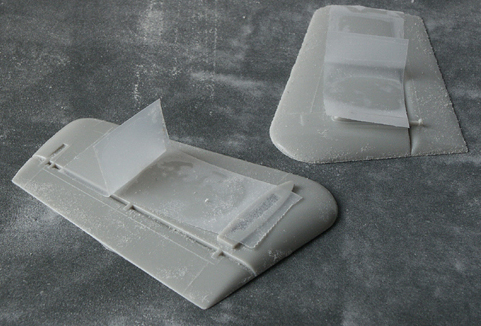
Here's some more boxing in, for the weight, this time using a margarine tub lid.

It will require trimming to allow the muzzle cut out for the avenger cannon to fit, but that's no problem.
Mal
Joey
_VISITCOMMUNITY
Jerusalem, Israel
Joined: October 15, 2003
KitMaker: 90 posts
AeroScale: 0 posts
Posted: Wednesday, April 14, 2004 - 12:03 AM UTC
Hi Mal
I painted everything besides the pilot and I glued A13 C32 and 33.
I'm still looking for a weight
What should I do next? :-)
Thanks
Yonaton
Holdfast
Staff MemberPresident
IPMS-UK KITMAKER BRANCH
#056
_VISITCOMMUNITY
England - South West, United Kingdom
Joined: September 30, 2002
KitMaker: 8,581 posts
AeroScale: 4,913 posts
Posted: Monday, April 19, 2004 - 07:10 AM UTC
Hi Yonaton, sorry for taking so long to get back, I've been a bit busy.
Weight
If you can't get hold of fishing weights or lead shot, then small nuts (as in nuts and bolts) will do. If you can't get anything like that then plastacine will work, but you will need more of it. Basically anything that you can fix into the front end of the fuselage, without fouling any of the interior parts will do. The further forward the weight is the less you will need, so plastacine is good, if you can get enough, far enough, forward. keep looking, there is plenty to do in the meantime.
Clearcoat
Have you heard of "Future" ? It's a clear acrylic floor polish by Johnson and Johnson, called Klear in the UK . If you have it where you are it's likely called something different. It would be very handy if you can find some, as we need something to protect the paint so we can add a wash. You will also need to have a matt varnish as well.
Next up
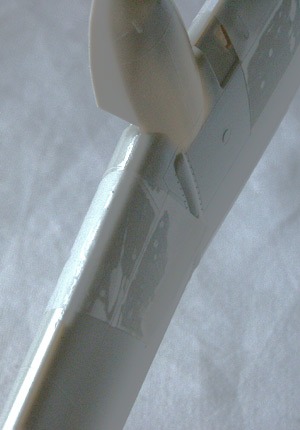
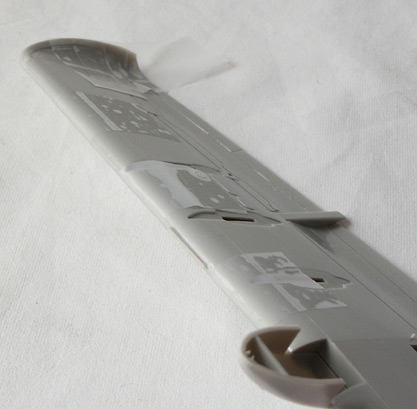
You can join the wings, parts B1, B3 and B2, B4 plus A11,A12 and A9, A10 plus C6,C36. However do not add the Fin/Rudder parts (A9,10,11,12) to the Tail plane parts (C6,36) and do not add parts C13 and C14 to the wings, yet.
After checking the fit of the fin parts I decided to sand the mating surfaces. This removes the locating pins but gives a better fit. Use masking tape handles to hold them, go carfully, so as not to sand unevenly. Tape a piece of 400 grit emery paper to a board or piece of glass, so you have a flat surface.


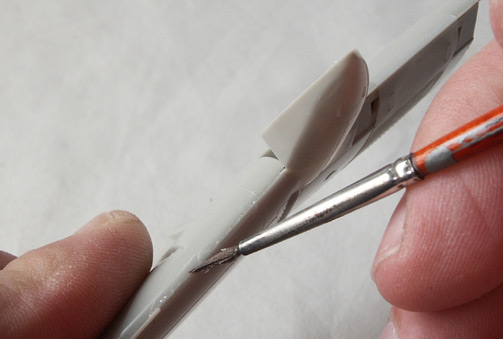
Hold the parts together, apply liquid cement.


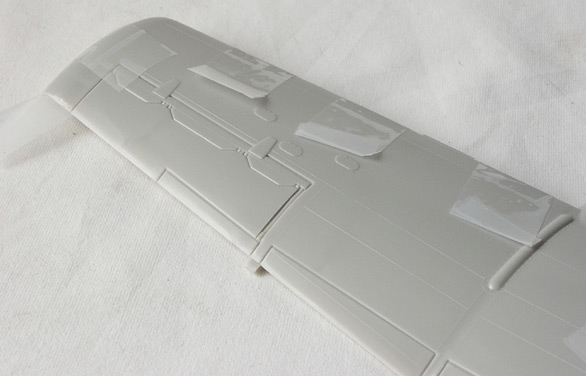
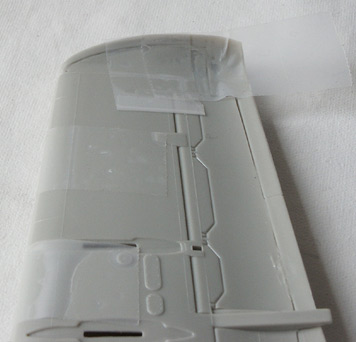
Apply masking tape to hold the join.


Work along the leading edge of the wing, taping as you go.


A tip when applying tape, to hold joints, turn over the tip of one end. This will make it much easier to remove.


Make sure that the underside of the downturned wing tip is lined up and again hold in position with tape.The rear edge of my wing didn't need tape.


Let these parts dry overnight before taking off the masking tape.

Engines
You can also make a start on the engines.
Cut the parts off the sprues and clean them up, Glue parts E10, E7 and paint. Paint part E11 and the inside (only) of the exhaust end, after where part E11 fits. Do not glue parts E11, E29,E28 just yet. Test fit E28/29, before painting and try and get as good a fit as possible (this internal seam is going to be vertually impossible to illiminate, after closing the two halves) I have tried, yet, but sanding the halves might be a good idea, but you must be carful not to take away to much, or part E11 may not, then fit.
Hand painting metalics.
A good tip for when painting with matalic paint is, do not stir the paint. Remove a little of the paint, from the tin, your brush handle will do the job. Place this paint on a a piece of plastic (a piece of card with a plastic bag over it will do). You need to add a little thinner to it and you will be able to paint with it quite easily.
As I haven't done any painting yet, I'm a bit behind. I am debating wether or not to hand paint, rather than my normal airbrushing. I'm beginning to lean towards hand painting, but it is a very long time since I did this, other than detail stuff. Could be a change of pace though.
Later.
Mal
Joey
_VISITCOMMUNITY
Jerusalem, Israel
Joined: October 15, 2003
KitMaker: 90 posts
AeroScale: 0 posts
Posted: Saturday, May 01, 2004 - 04:53 AM UTC
Hi Mal
Should I paint E28 and E 29?
All done, what's next? :-)
Thanks
Yonaton
Holdfast
Staff MemberPresident
IPMS-UK KITMAKER BRANCH
#056
_VISITCOMMUNITY
England - South West, United Kingdom
Joined: September 30, 2002
KitMaker: 8,581 posts
AeroScale: 4,913 posts
Posted: Friday, May 07, 2004 - 08:28 AM UTC
Sorry for taking so long to answer, I'm having to concentrate on my Typhoon for the Overlord 2004 Campaign, so I'm a bit behind.
At this stage only paint the inside of E28/29, but test fit them and get the best possible join. I have sanded the mating faces flat. This will be painted once it is joined together and the seams have been eliminated. Before they are joined E 11, E 10 and E 7 will get a wash. Before you can do this, though, I need to know if you have "Future" (reference " Clear coat" in my previous post. because the paintwork needs protecting before you can add a wash.
I will try and get back this weekend, with some pics. In the meantime you could start putting together the ordnance.
Have you found something for the nose weight, yet?
Later.
Mal
P.S. I got your email.
Joey
_VISITCOMMUNITY
Jerusalem, Israel
Joined: October 15, 2003
KitMaker: 90 posts
AeroScale: 0 posts
Posted: Monday, May 17, 2004 - 08:37 AM UTC
Hi Mal
I found a weight, still looking for "Future".
What's next?
Thanks
Yonaton
Joey
_VISITCOMMUNITY
Jerusalem, Israel
Joined: October 15, 2003
KitMaker: 90 posts
AeroScale: 0 posts
Posted: Saturday, June 19, 2004 - 06:54 AM UTC
Hi
I need something to protect the paint from a wash, I found something called: Supra Sofix by Thompson
Is that good for the job?

Thanks
Yonaton
Holdfast
Staff MemberPresident
IPMS-UK KITMAKER BRANCH
#056
_VISITCOMMUNITY
England - South West, United Kingdom
Joined: September 30, 2002
KitMaker: 8,581 posts
AeroScale: 4,913 posts
Posted: Sunday, June 20, 2004 - 02:18 AM UTC
Hi Yonaton,
I've never heard of Supra Sofix, Future is an acrylic floor polish. It doesn't matter what you use, as long as it forms a barrier between your paint and the thinners in the wash. Hobby gloss varnish will do, as long as it's unaffected by the thinners in your wash. So an acrylic varnish, might do the trick. It also needs to be gloss, so that the wash will flow properly.

Have you got the wings together?

Mal
Joey
_VISITCOMMUNITY
Jerusalem, Israel
Joined: October 15, 2003
KitMaker: 90 posts
AeroScale: 0 posts
Posted: Sunday, June 20, 2004 - 12:57 PM UTC
Hi Mal
I did everything besides the engine.

Yonaton
Holdfast
Staff MemberPresident
IPMS-UK KITMAKER BRANCH
#056
_VISITCOMMUNITY
England - South West, United Kingdom
Joined: September 30, 2002
KitMaker: 8,581 posts
AeroScale: 4,913 posts
Posted: Monday, June 21, 2004 - 07:51 AM UTC
OK, I'm a bit behind, things have been a bit hectic this end, but calming down now. I haven't finished painting the engine, or the cockpit, hand brushing was a mistake I can't really help you progress though until we can sort out this Future thing. I will try and get the cockpit painted, then I can take pics, of the next stage, so you can see what all the fuss is about

Stay with me, we'll get back on track soon.

Mal
Joey
_VISITCOMMUNITY
Jerusalem, Israel
Joined: October 15, 2003
KitMaker: 90 posts
AeroScale: 0 posts
Posted: Tuesday, June 22, 2004 - 12:58 PM UTC
OK, I'll keep looking for Future.

Yonaton
Holdfast
Staff MemberPresident
IPMS-UK KITMAKER BRANCH
#056
_VISITCOMMUNITY
England - South West, United Kingdom
Joined: September 30, 2002
KitMaker: 8,581 posts
AeroScale: 4,913 posts
Posted: Wednesday, July 07, 2004 - 08:14 AM UTC
I have done the basic grey painting of the cocpit, I also painted the wheel wells, wheel well doors, wheels and undercarriage legs, in gloss white. I added parts C34 and C35 to the nose wheel leg and parts C3 to the main wheel legs (if you do this make sure you get them the correct way round, look at how the strut locates and where. After the paint was dry I hand brushed Klear ( acrylic floor polish, made by Johnsons in the UK) which protected the paint when I added a wash of dark grey enamel paint. If you don't do this then the thinners used to make the wash will "eat" the paint. Unless that is you use water based acrylic paint for the wash. However this tends to look great when it is first applied, but breaks up as it dries. It is possible to paint, using acrylic paint, or cover with model acrylic varnish, but this can be "eaten by the thinners in the wash also. It is why I use Klear, I haven't found anything that affects it apart from amonia and Isopropynol, neither of which you would use as a thinner ( apart from Isopropynol, in some acrylic paints, such as Tamiya)


The dark grey wash, on the white painted parts dose appear overdone, this can be toned down with a dry brushing of white.

I have almost finished painting the cockpit, then the instrument decals can be applied, over a coat of Klear, then we will start to get this thing together. It wont take long from then to get to the painting stage :-)

Mal
 _GOTOTOP