_GOTOBOTTOM
World War II
Discuss WWII and the era directly before and after the war from 1935-1949.
Hosted by Rowan Baylis
Messerschmitt Me 262 A-2a/U2 1/48 Dual Build
AussieReg
Staff MemberAssociate Editor
AUTOMODELER
#007
_VISITCOMMUNITY
Victoria, Australia
Joined: June 09, 2009
KitMaker: 8,156 posts
AeroScale: 3,756 posts
Posted: Sunday, February 23, 2020 - 11:37 PM UTC


Hi folks.

With the "Schwalbe II" Campaign only a week away from kicking off, the discussion thread is a great read with a stack of excellent reference images.

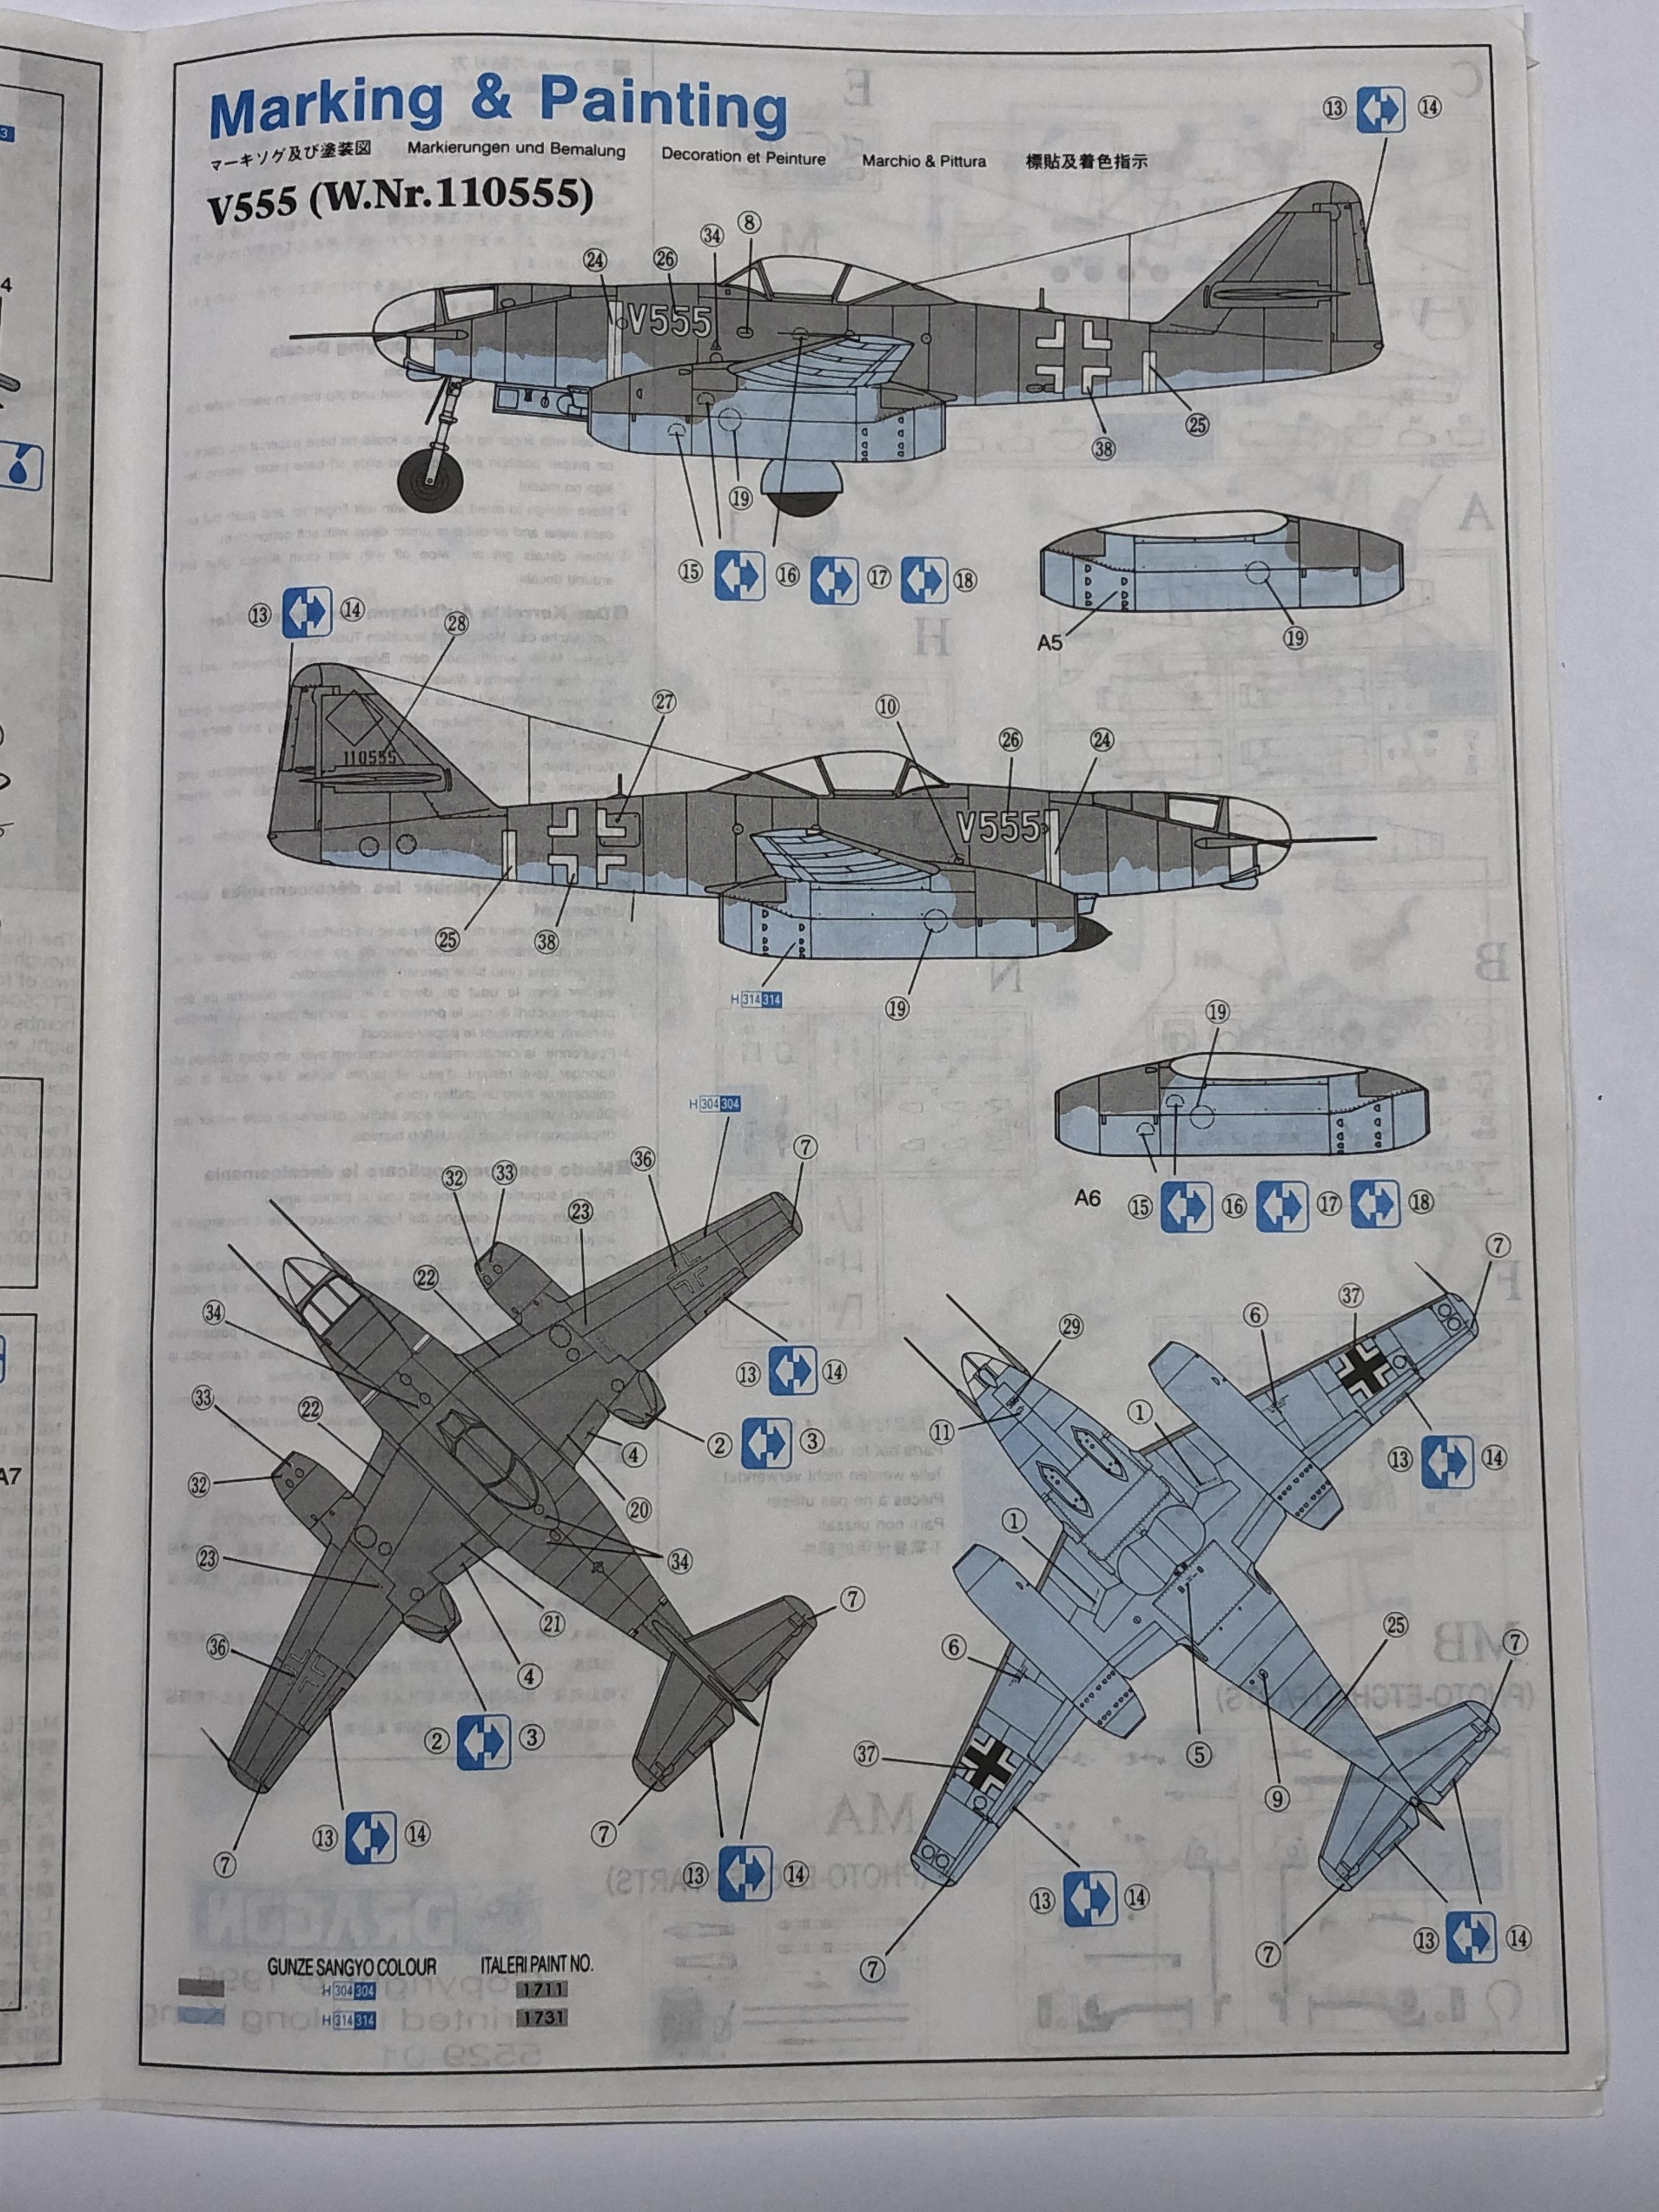
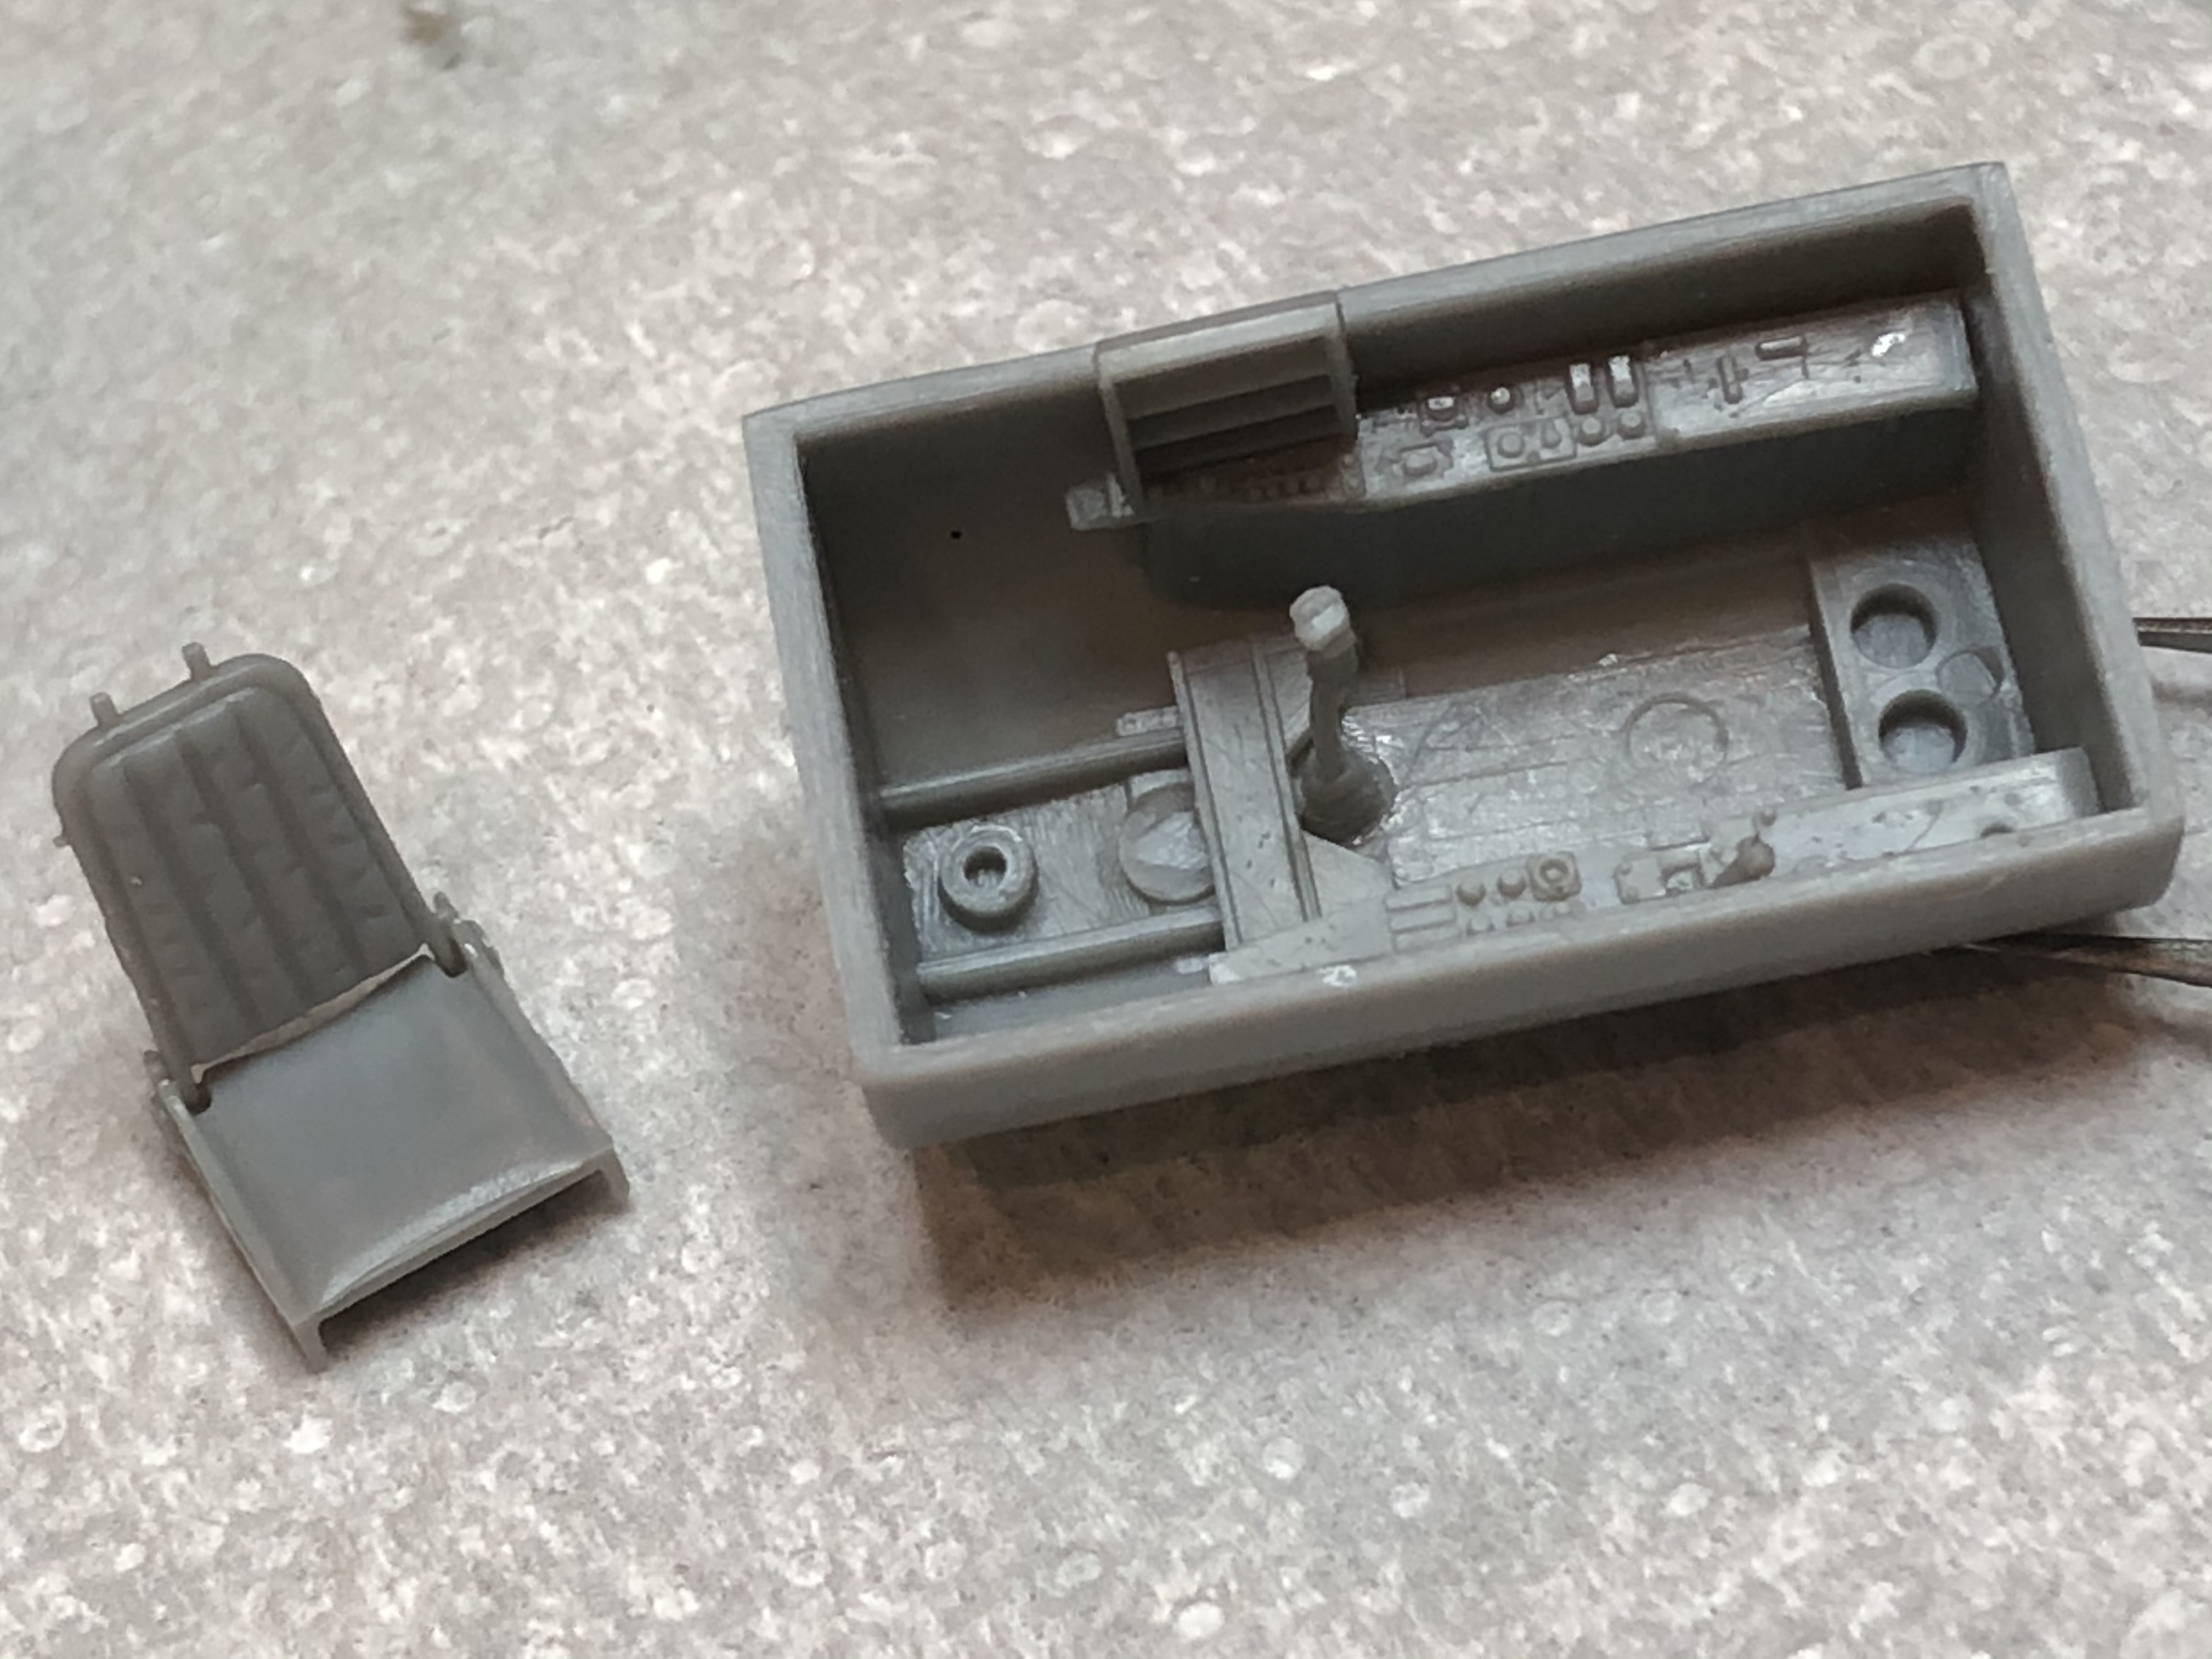
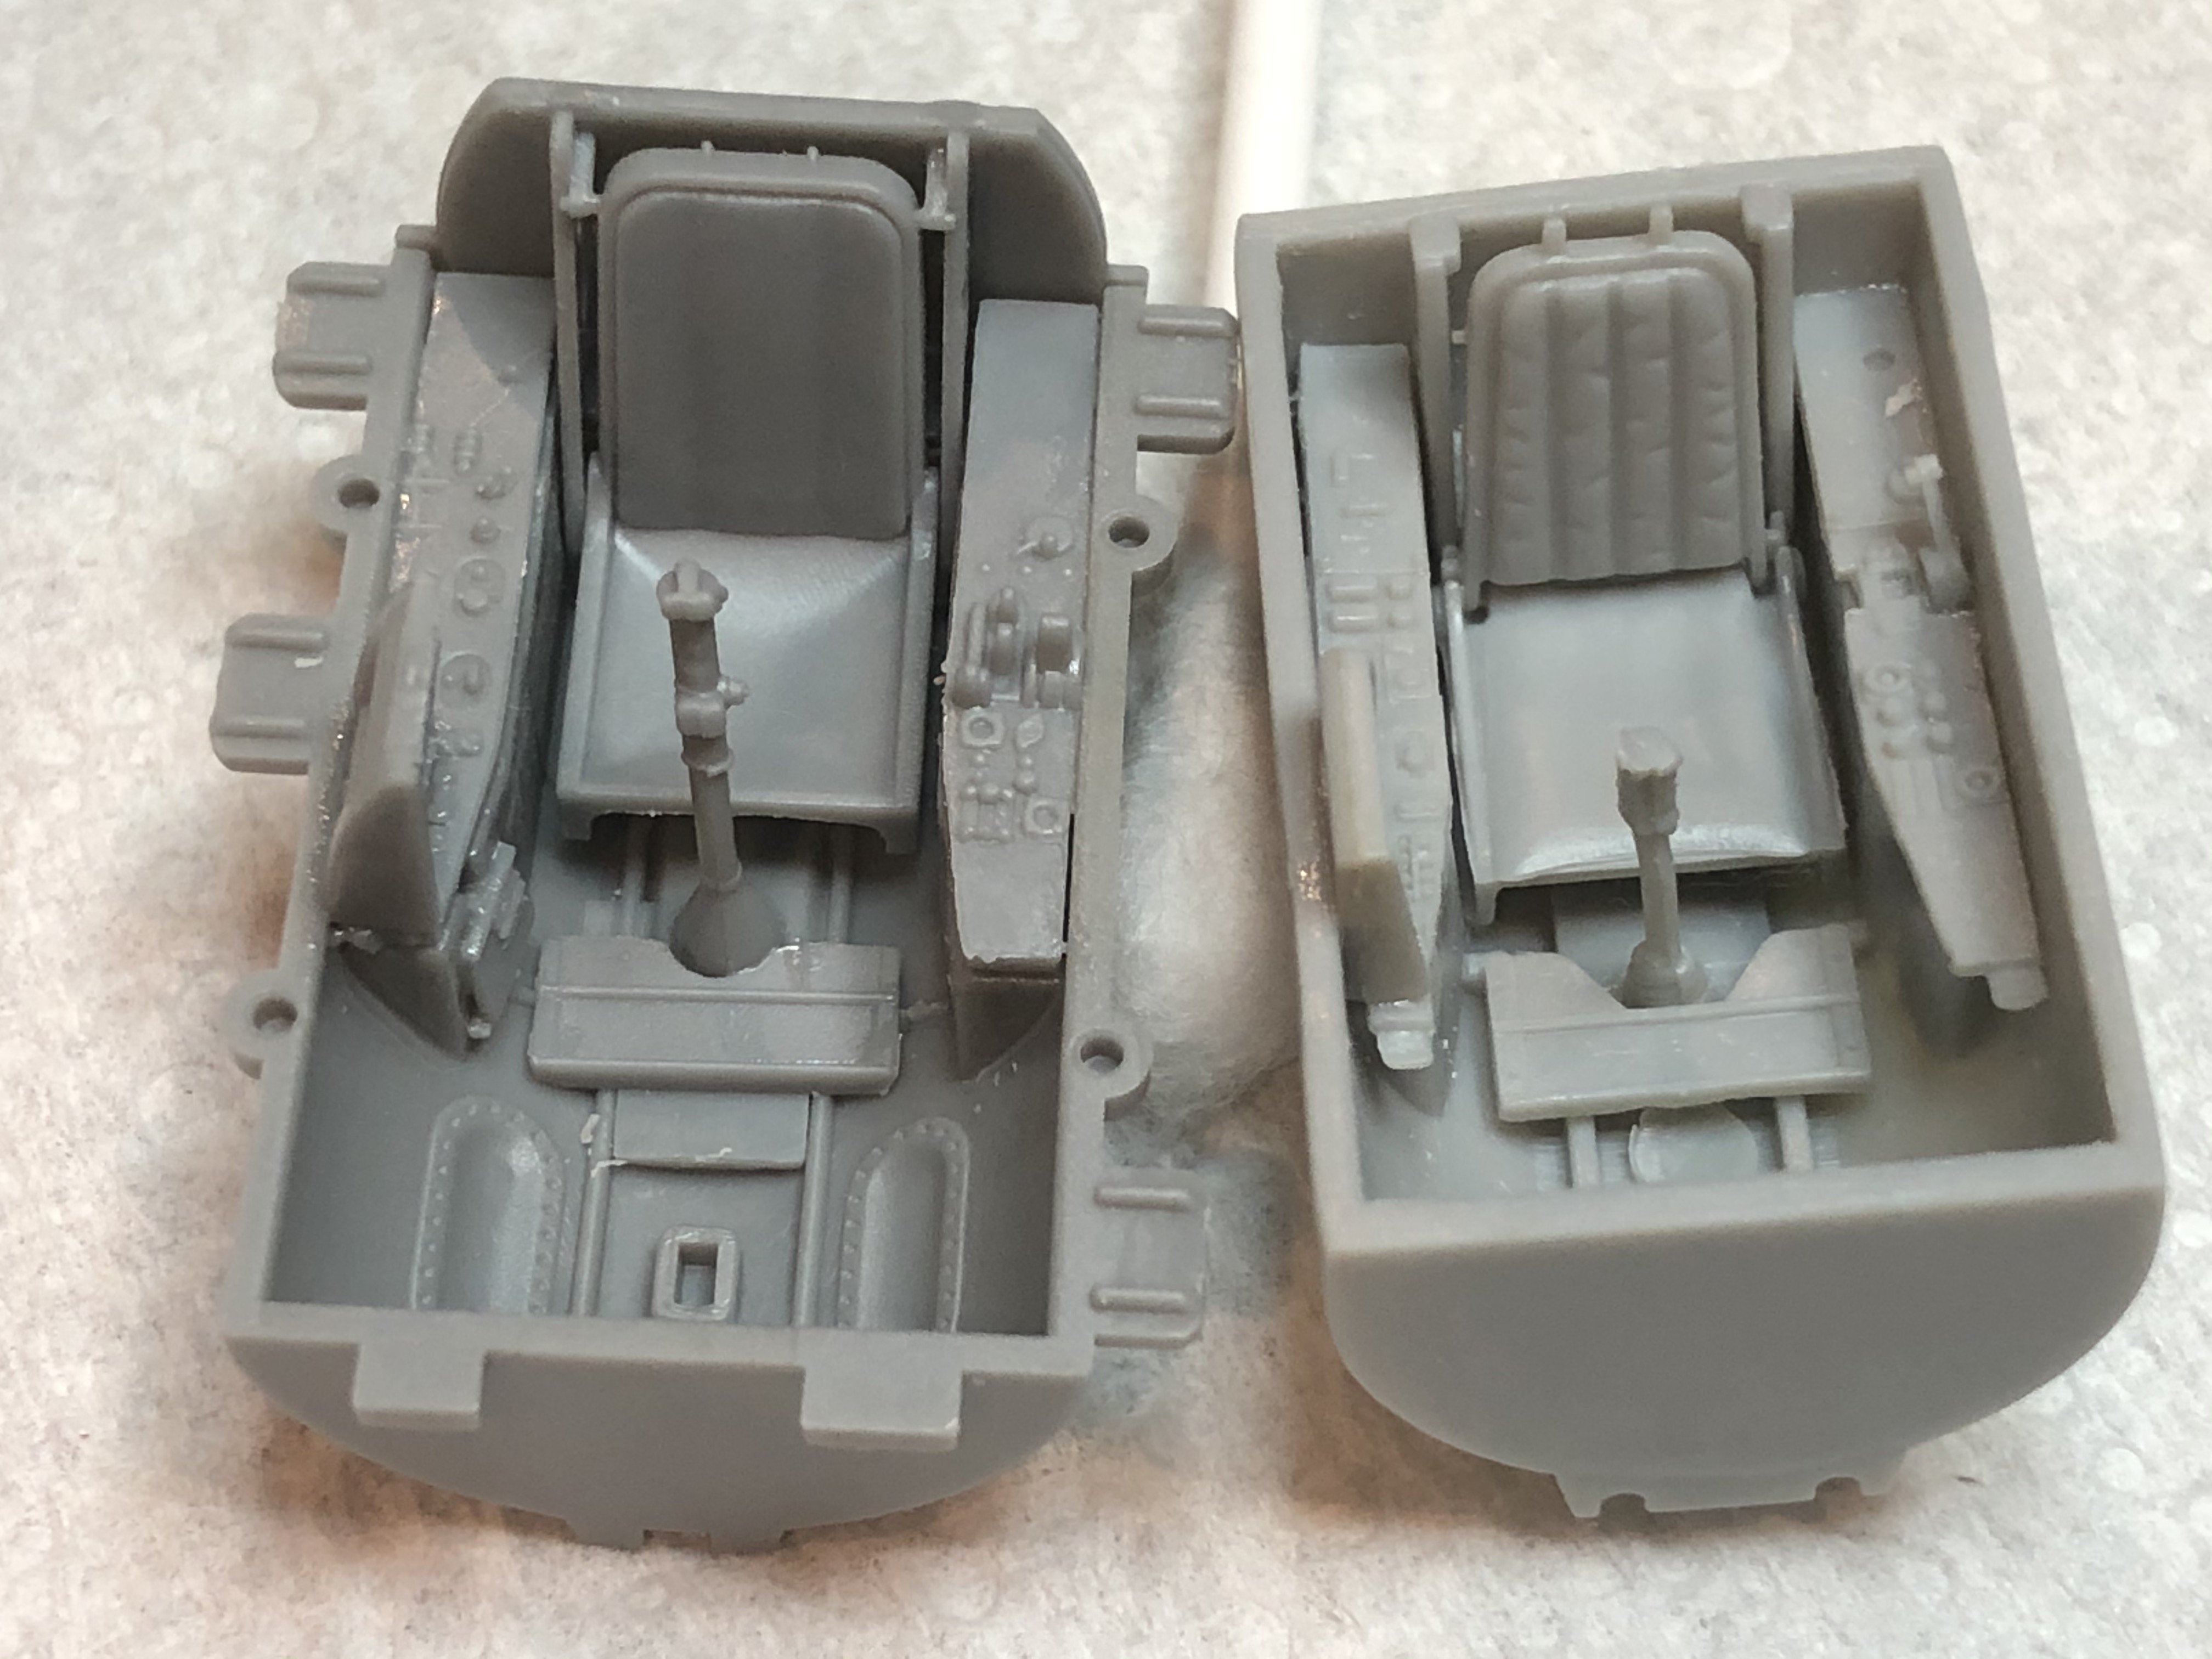
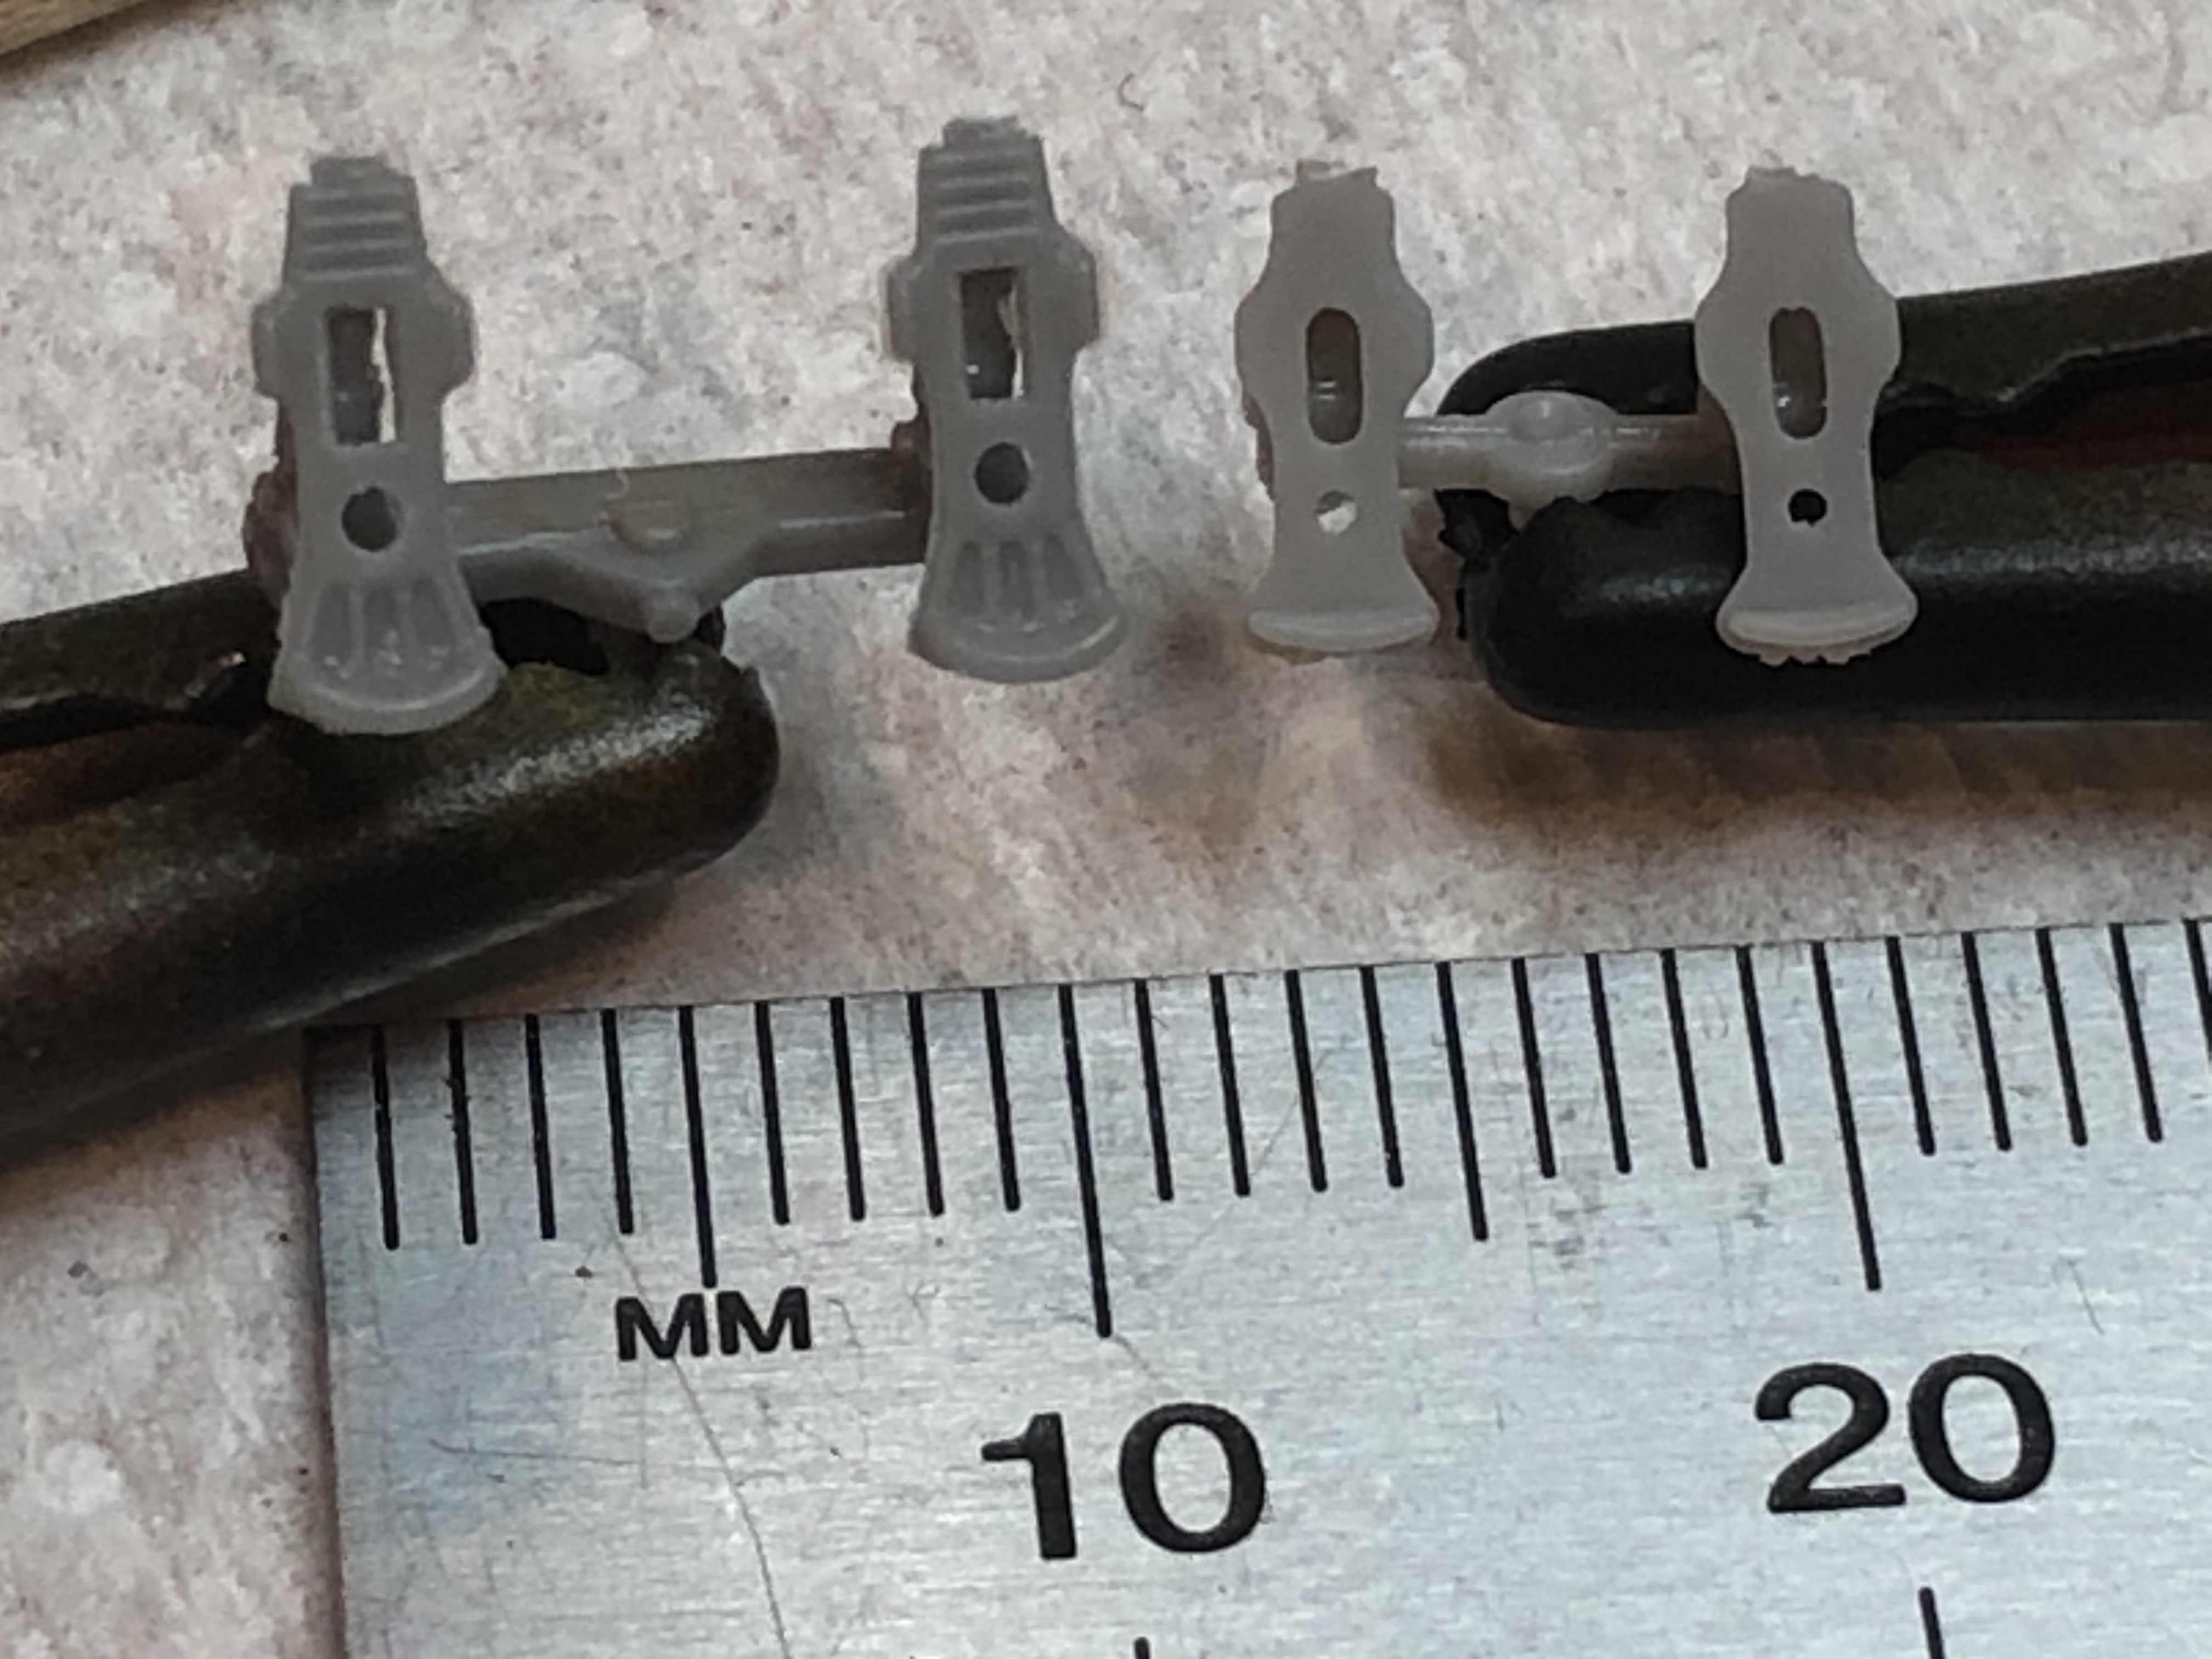
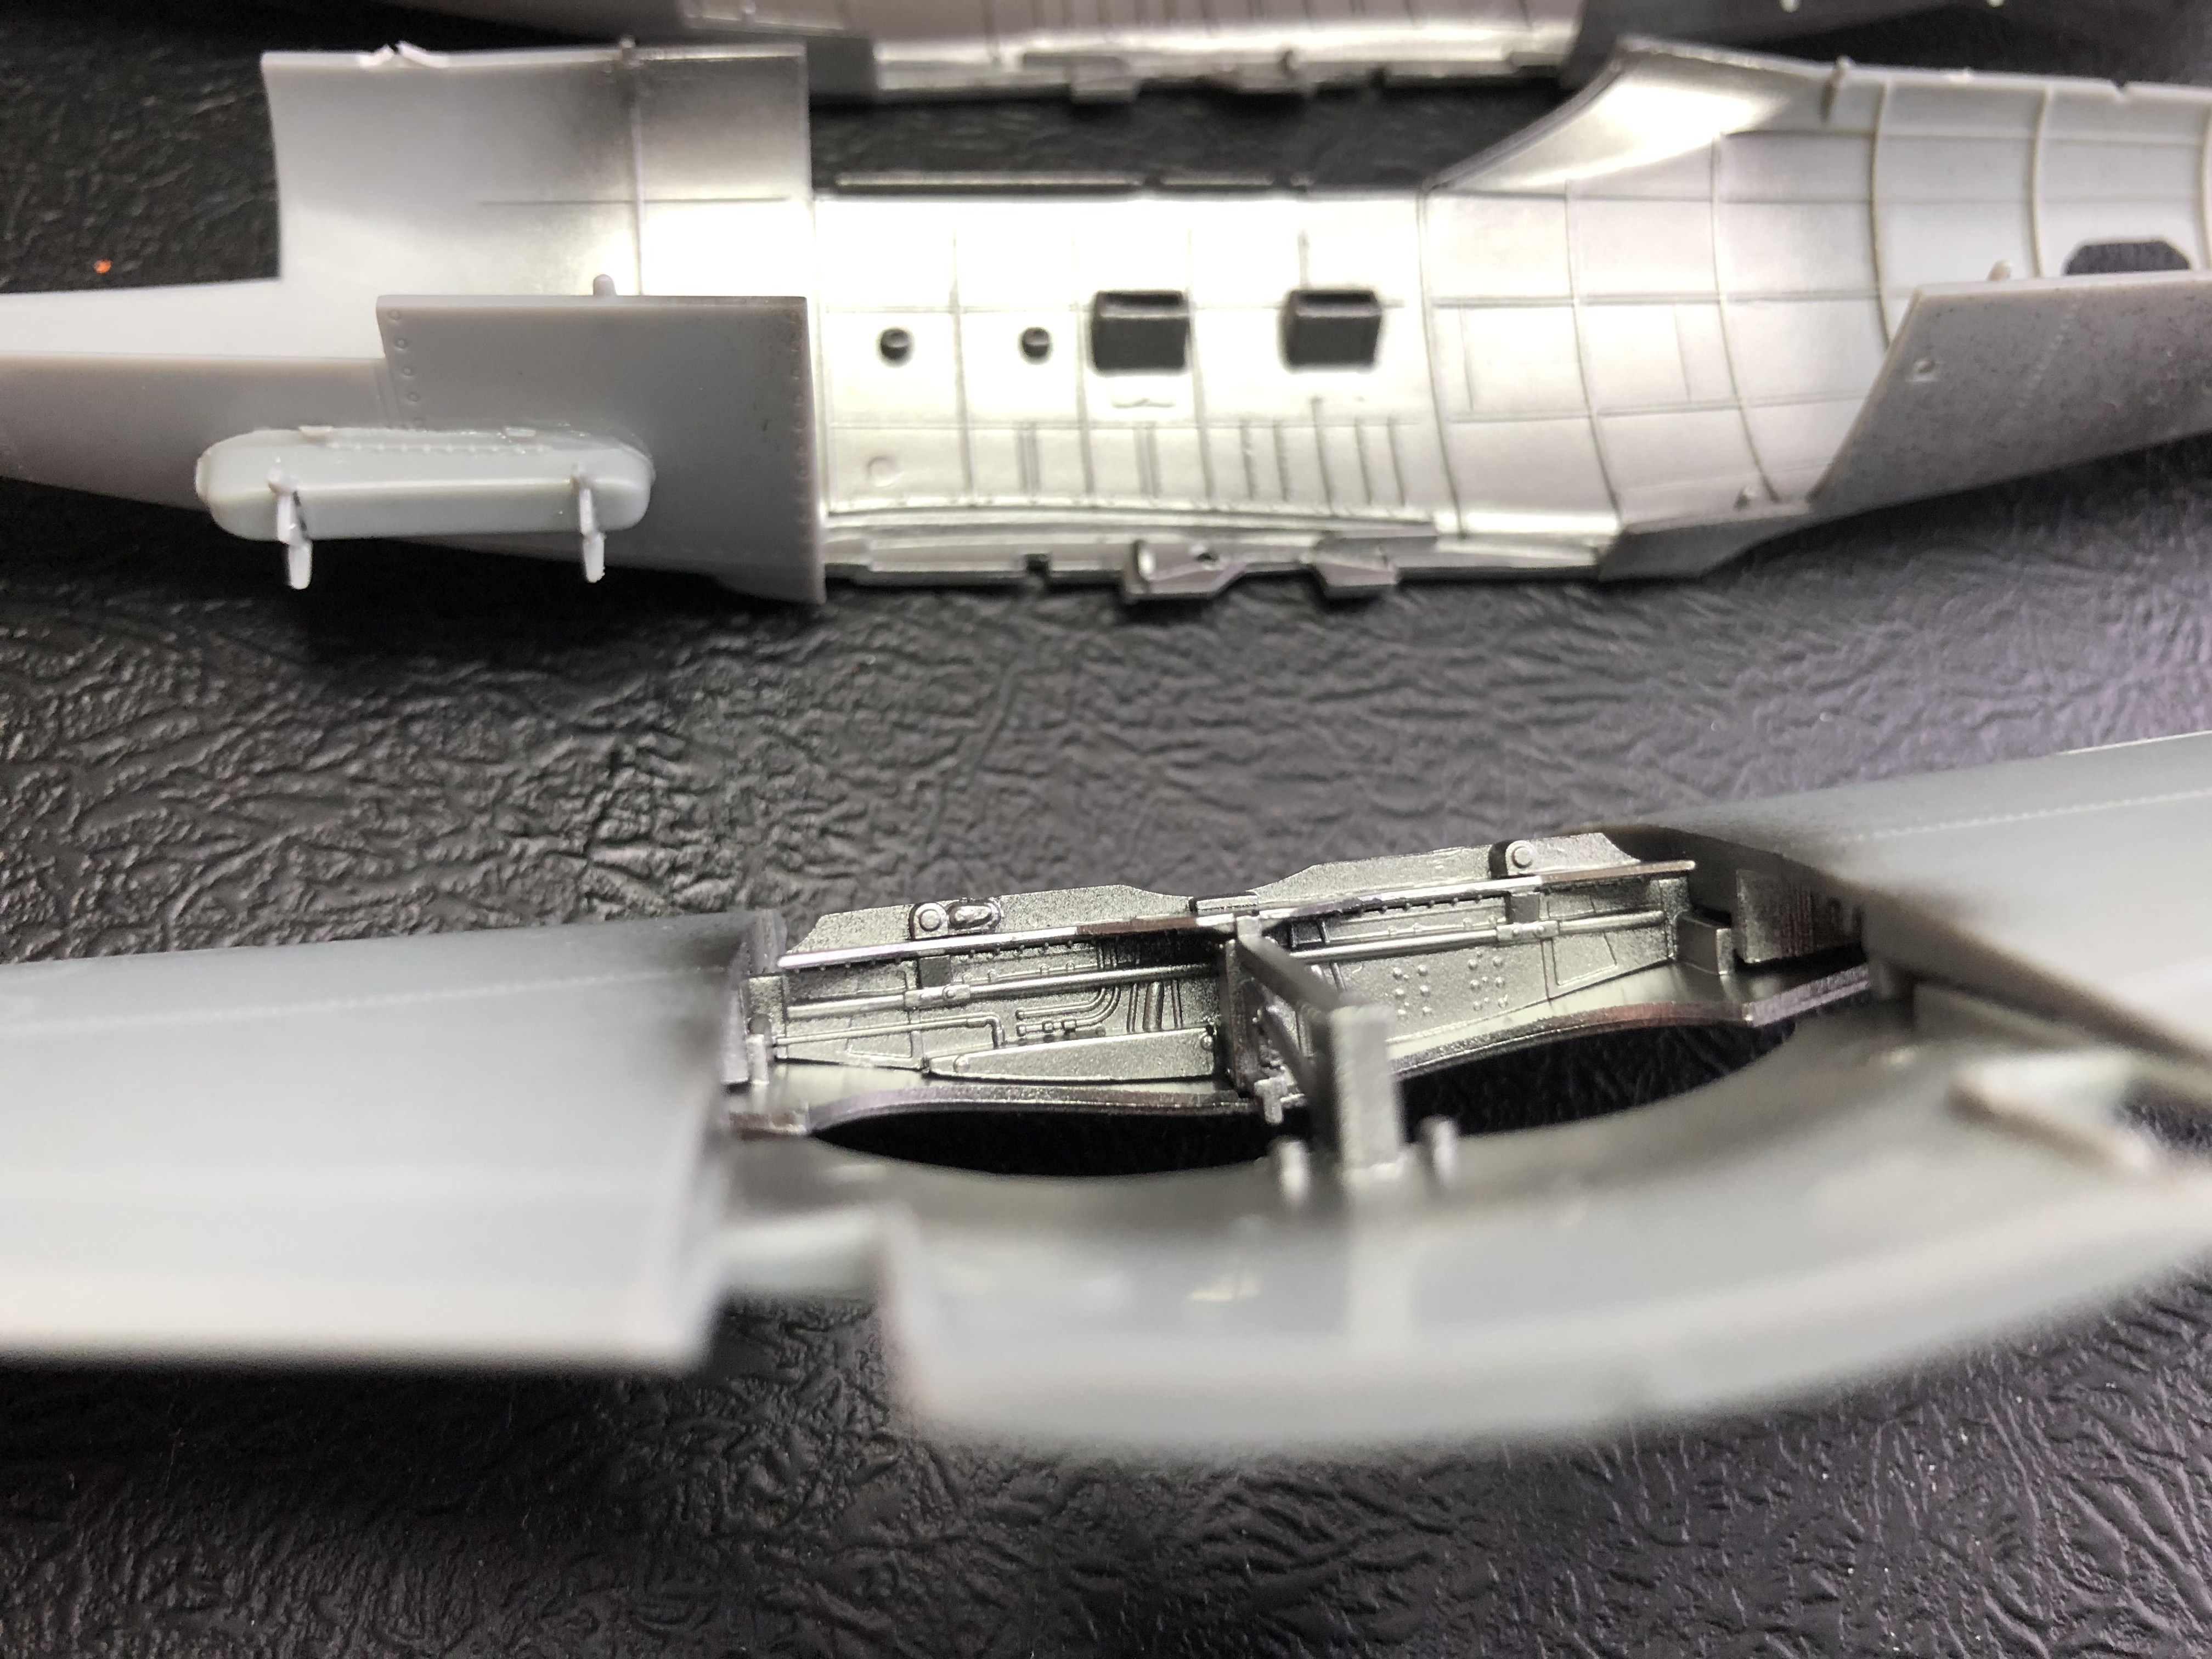
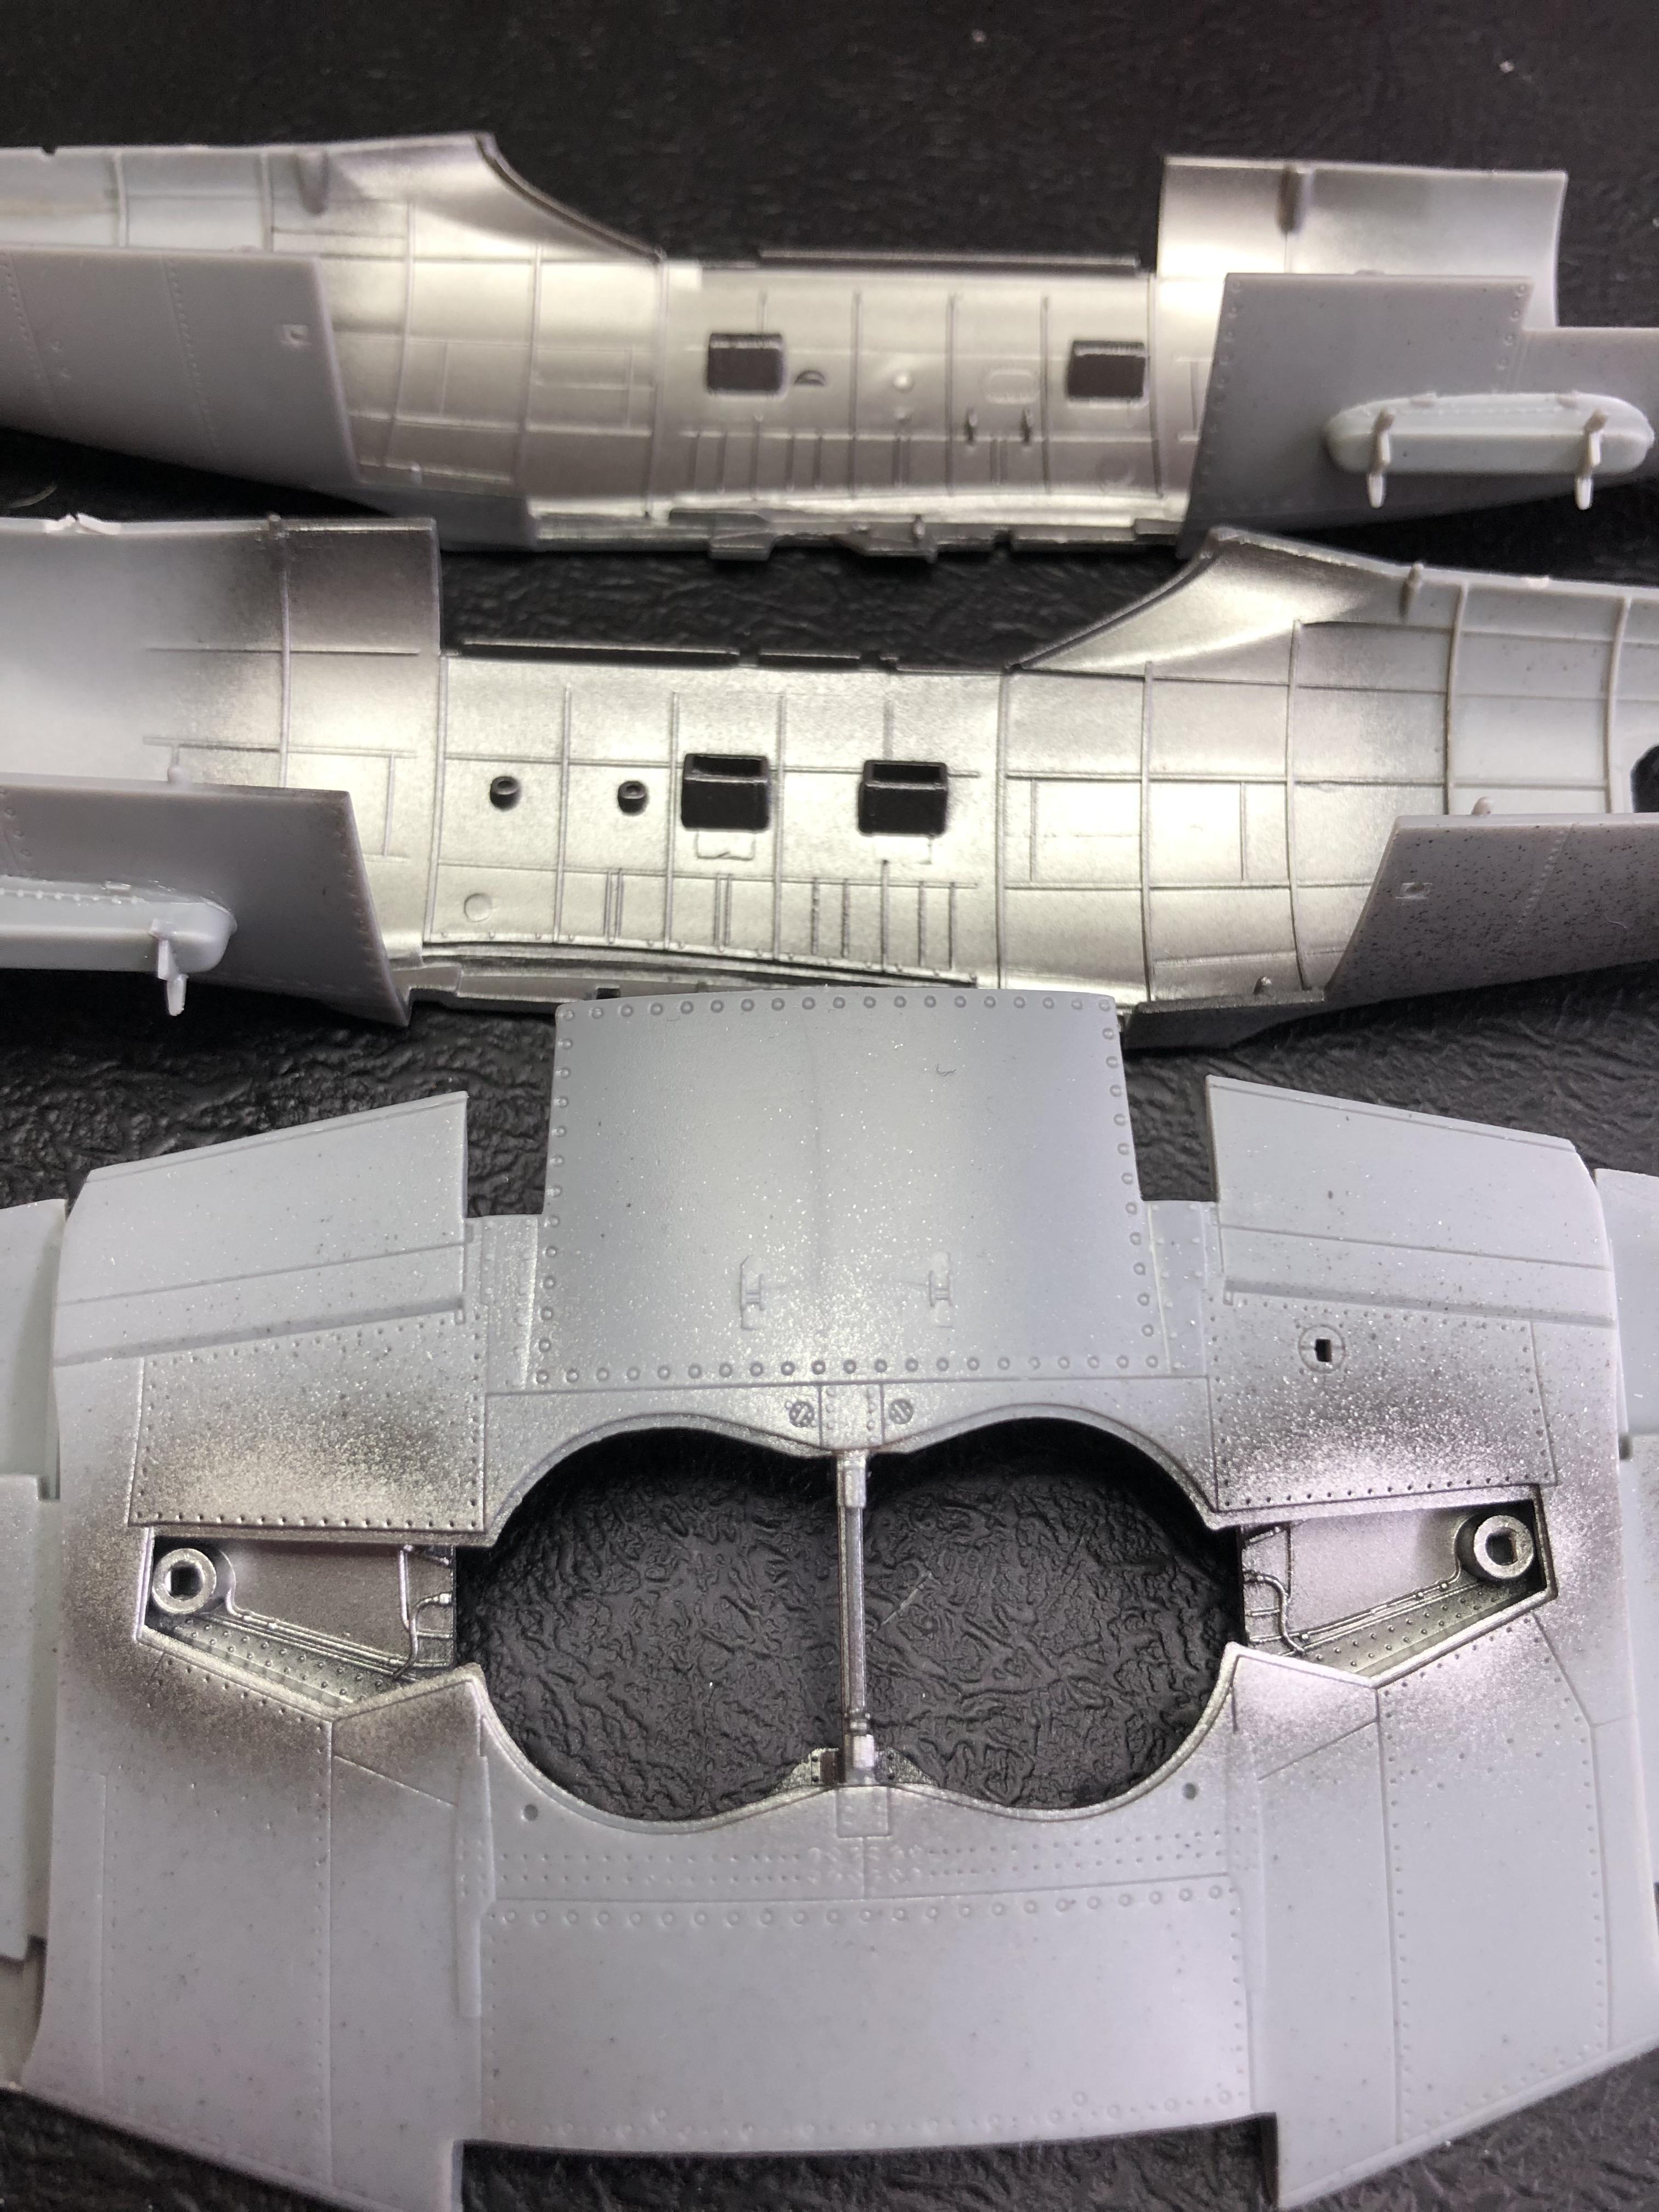
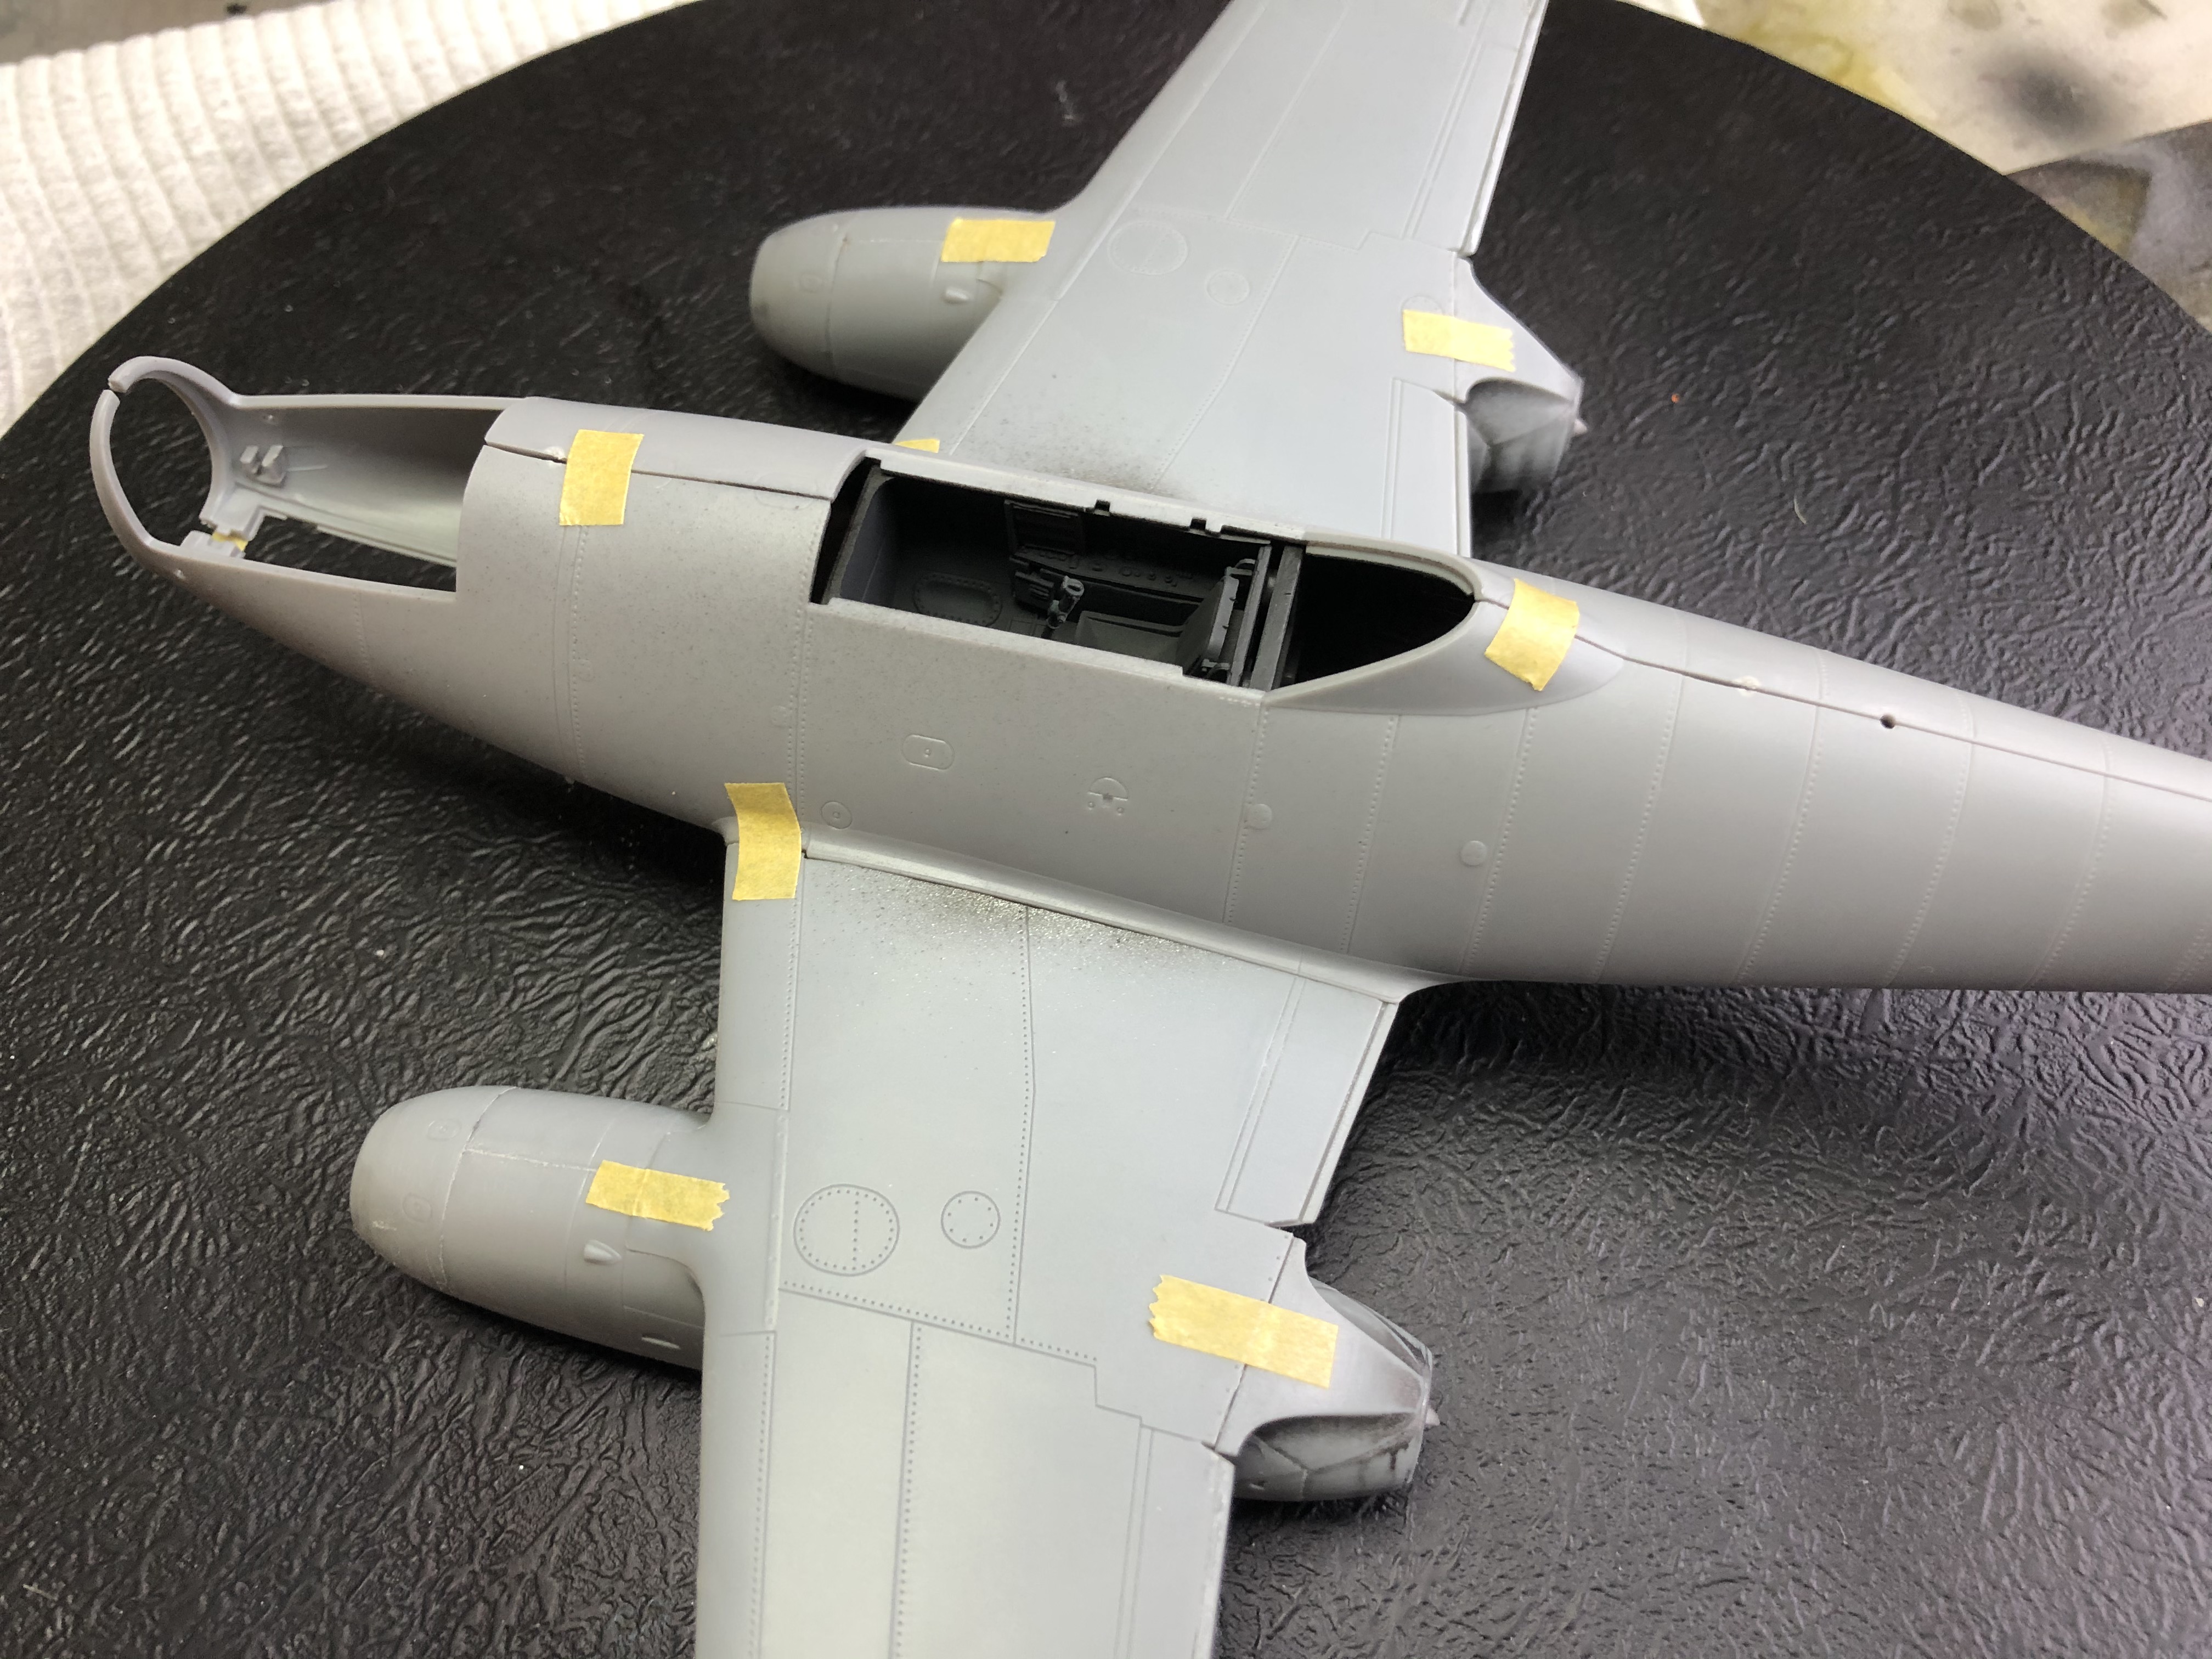
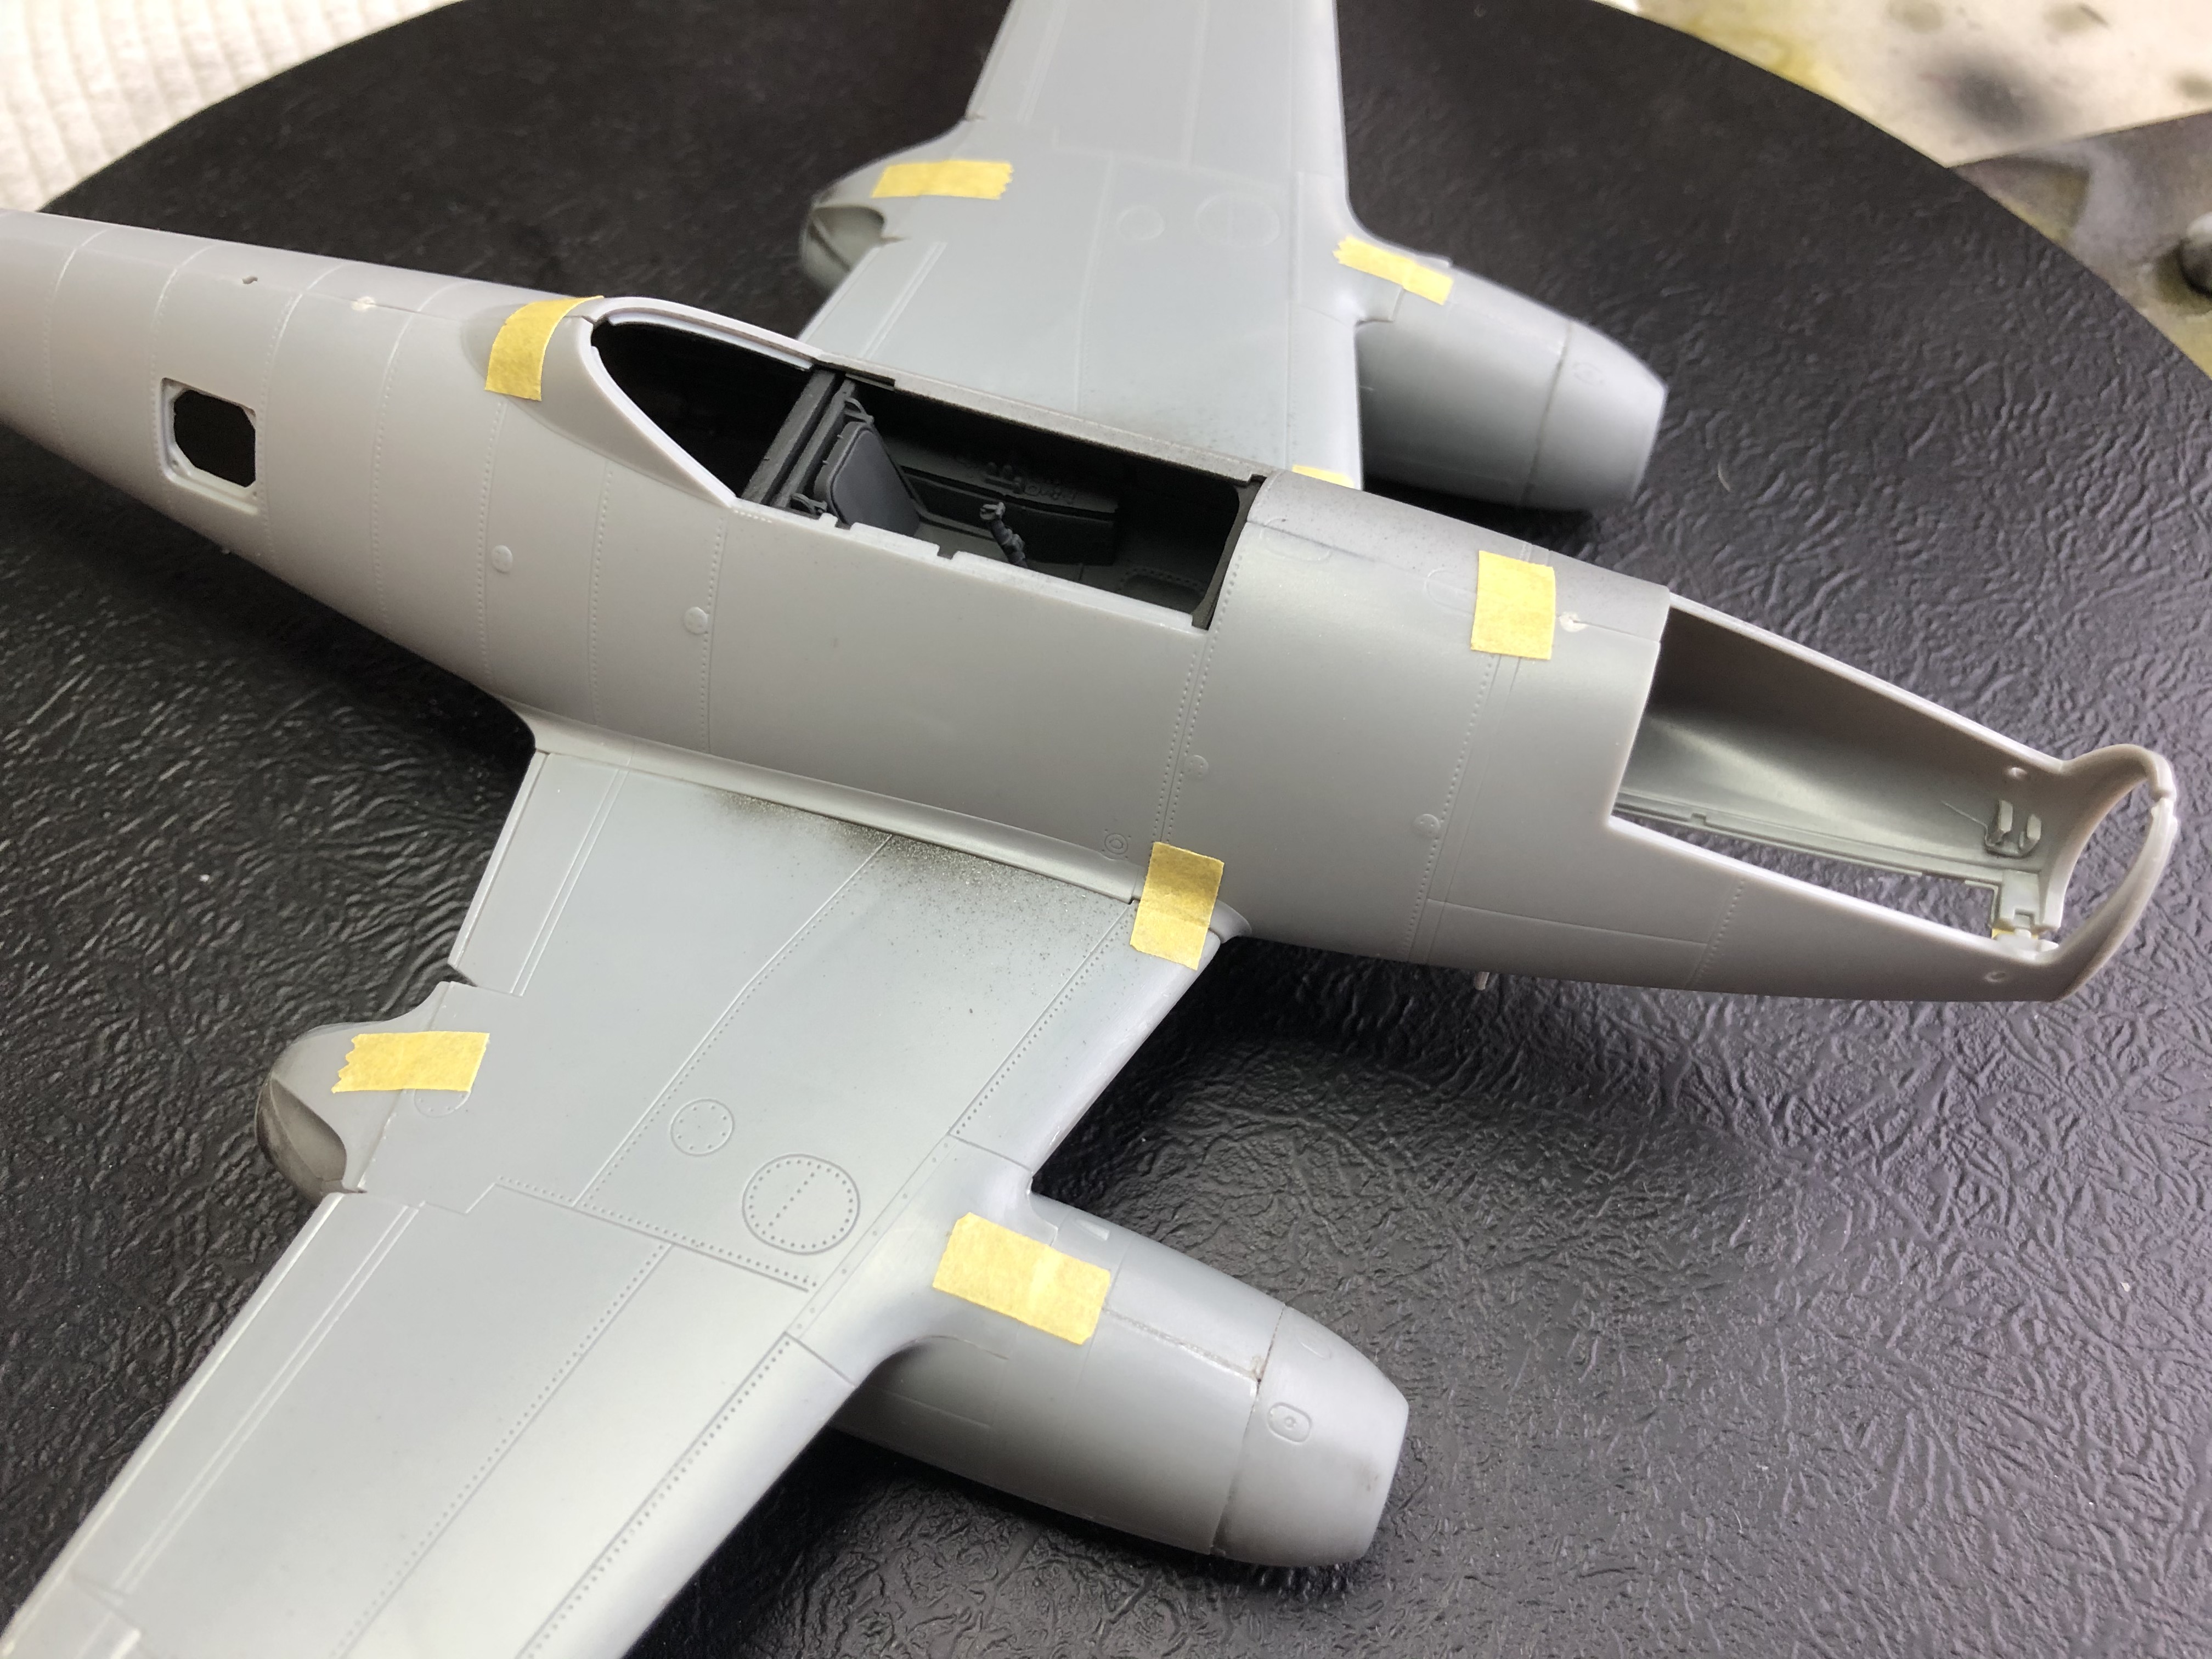
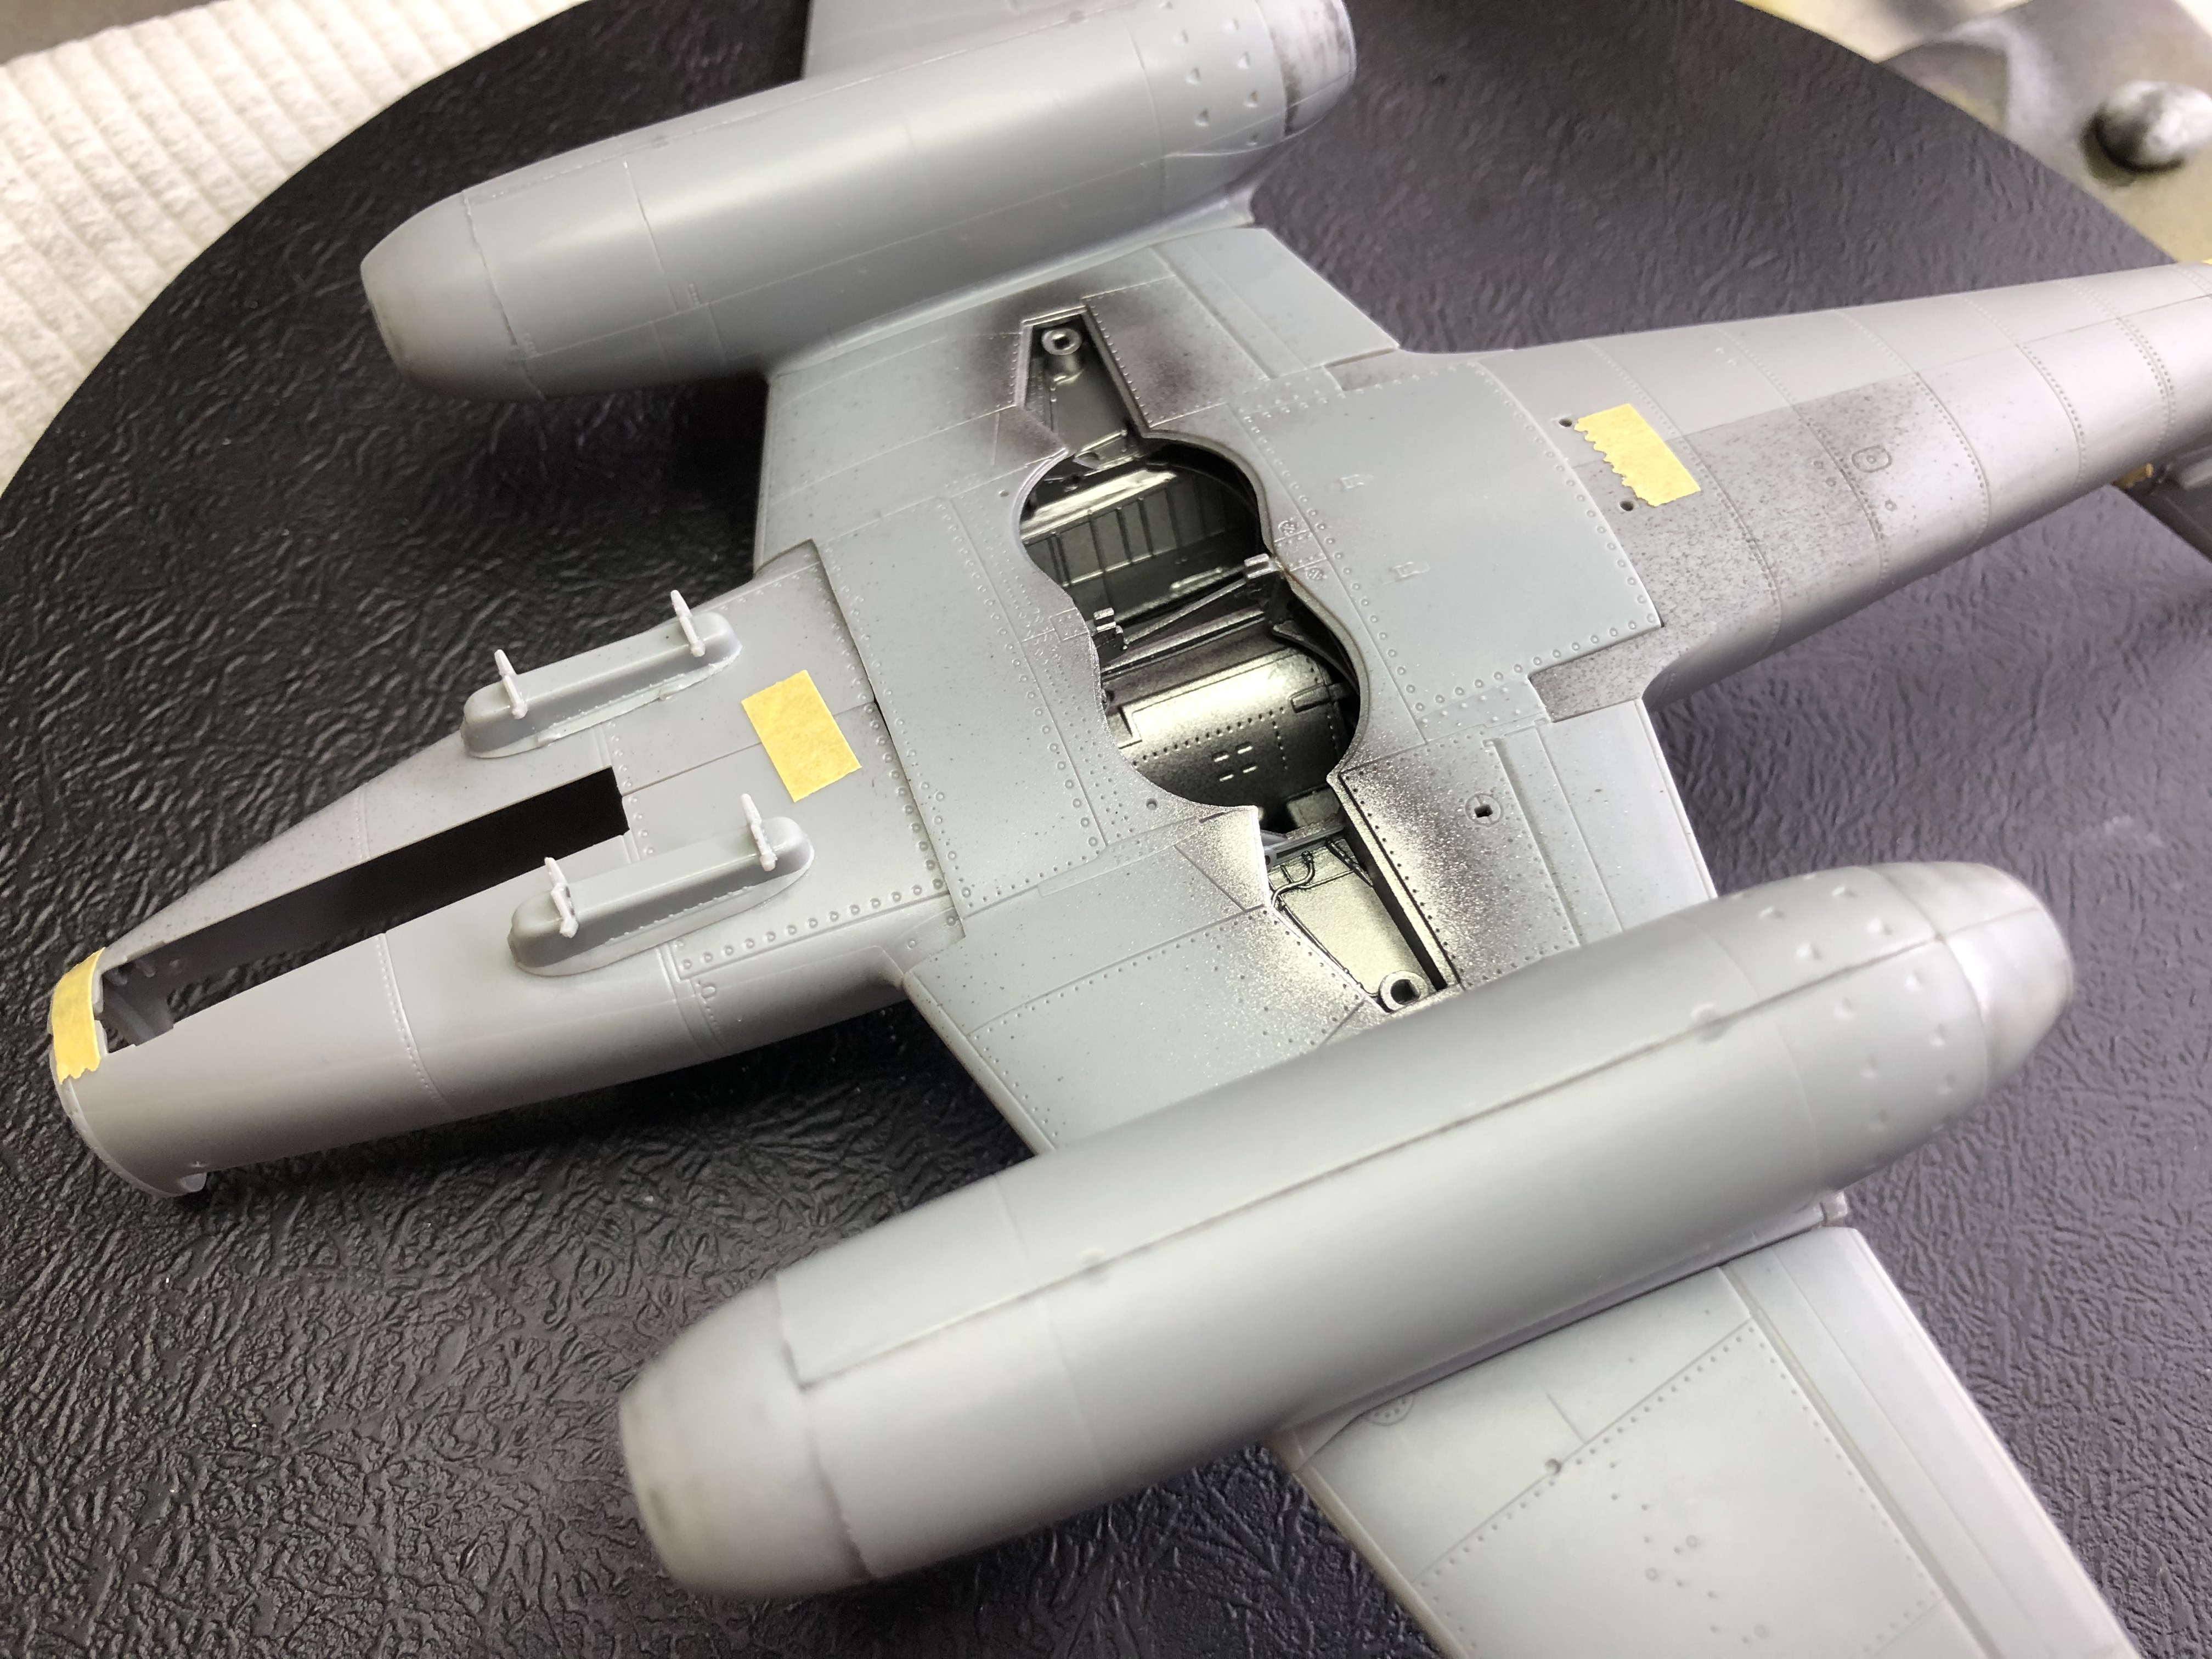
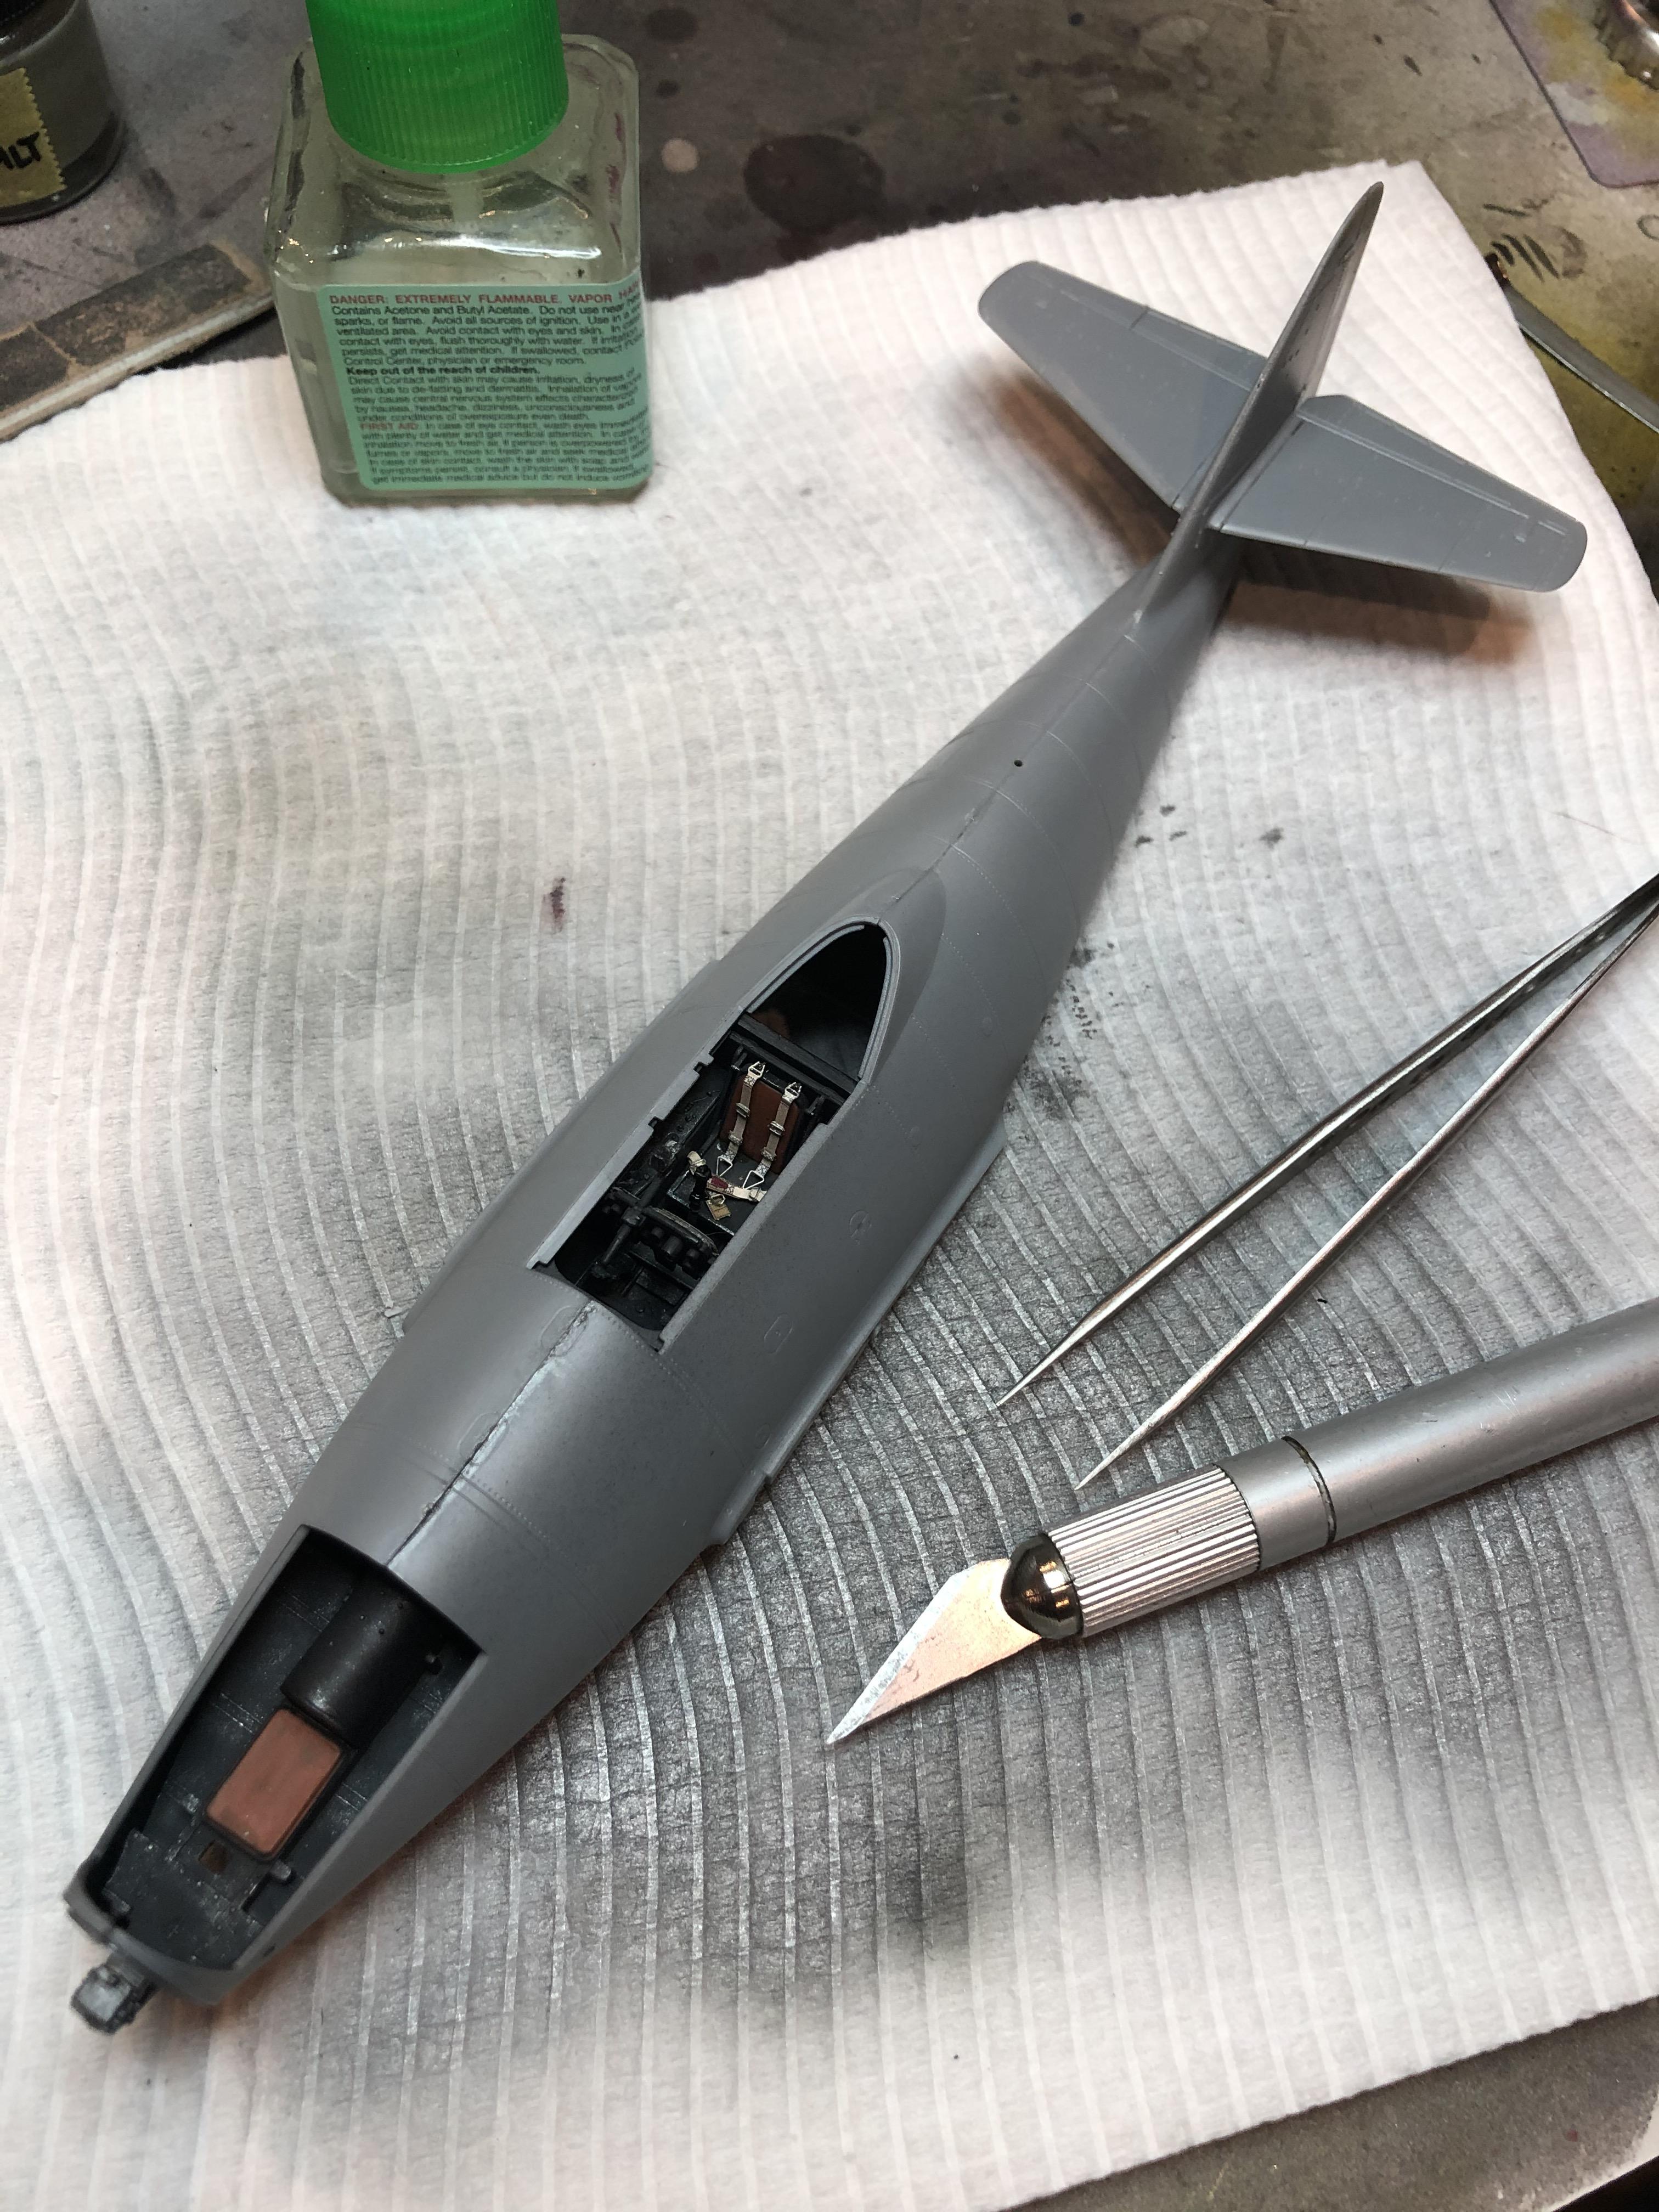
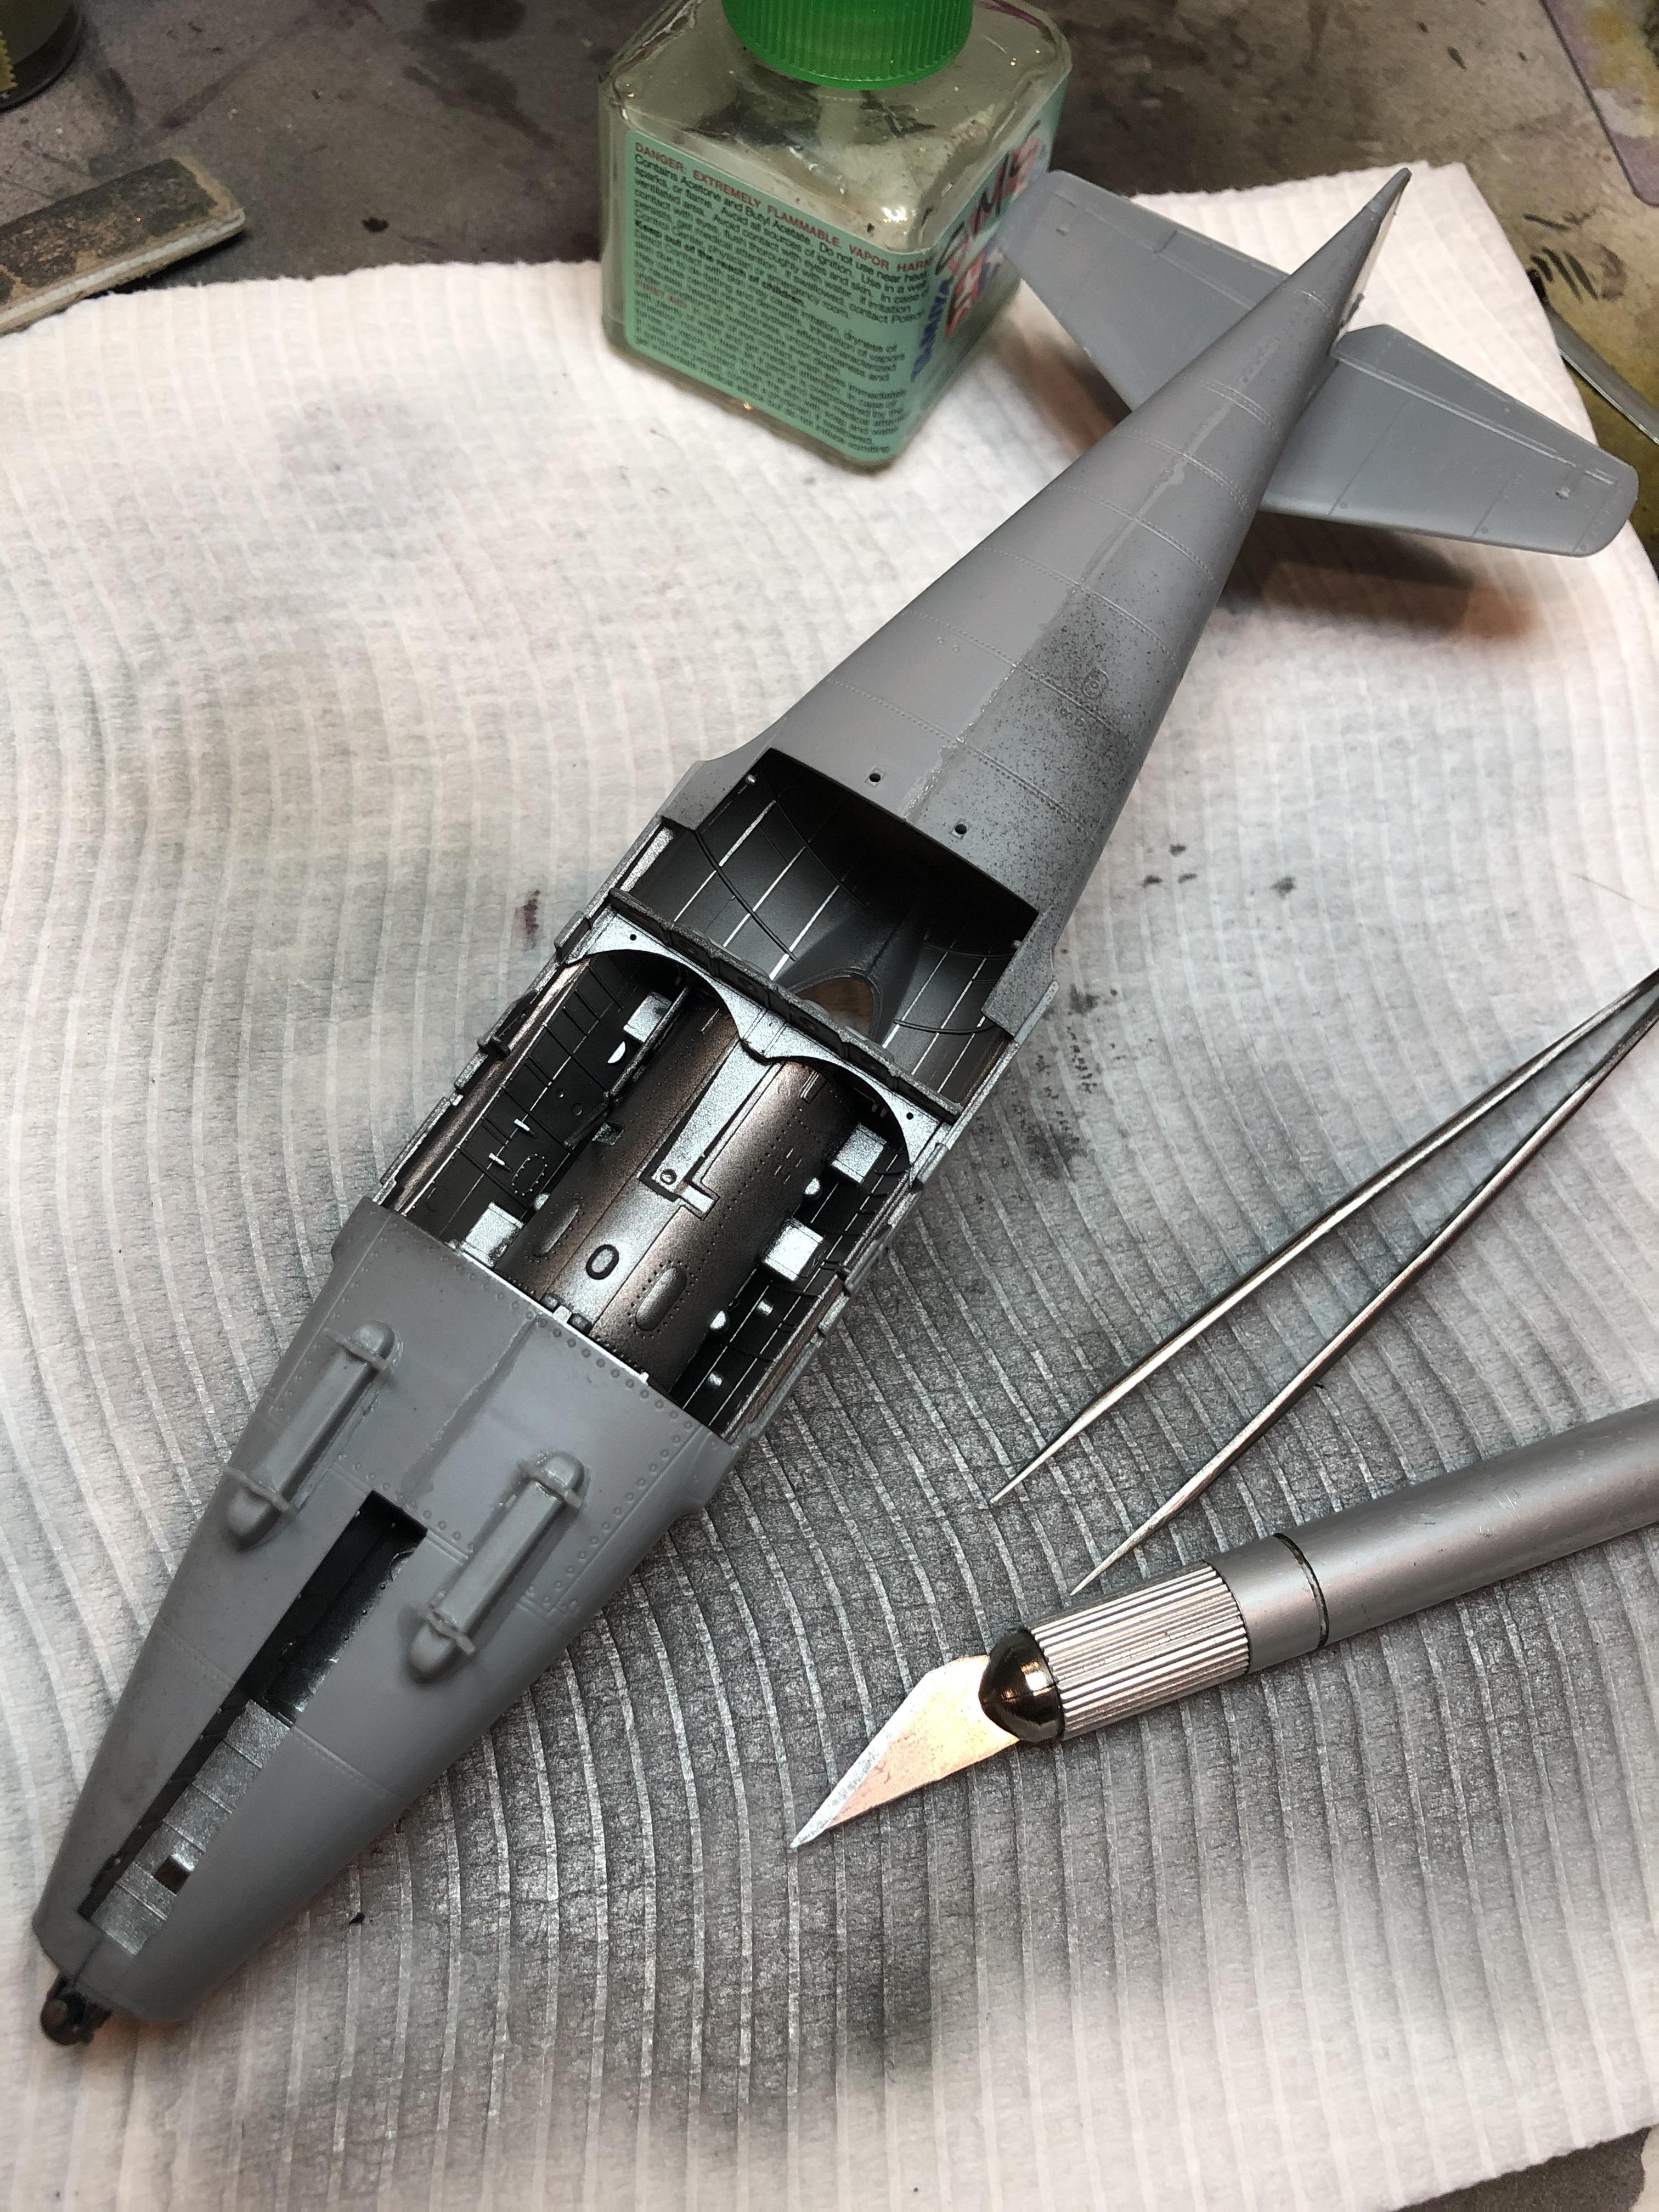
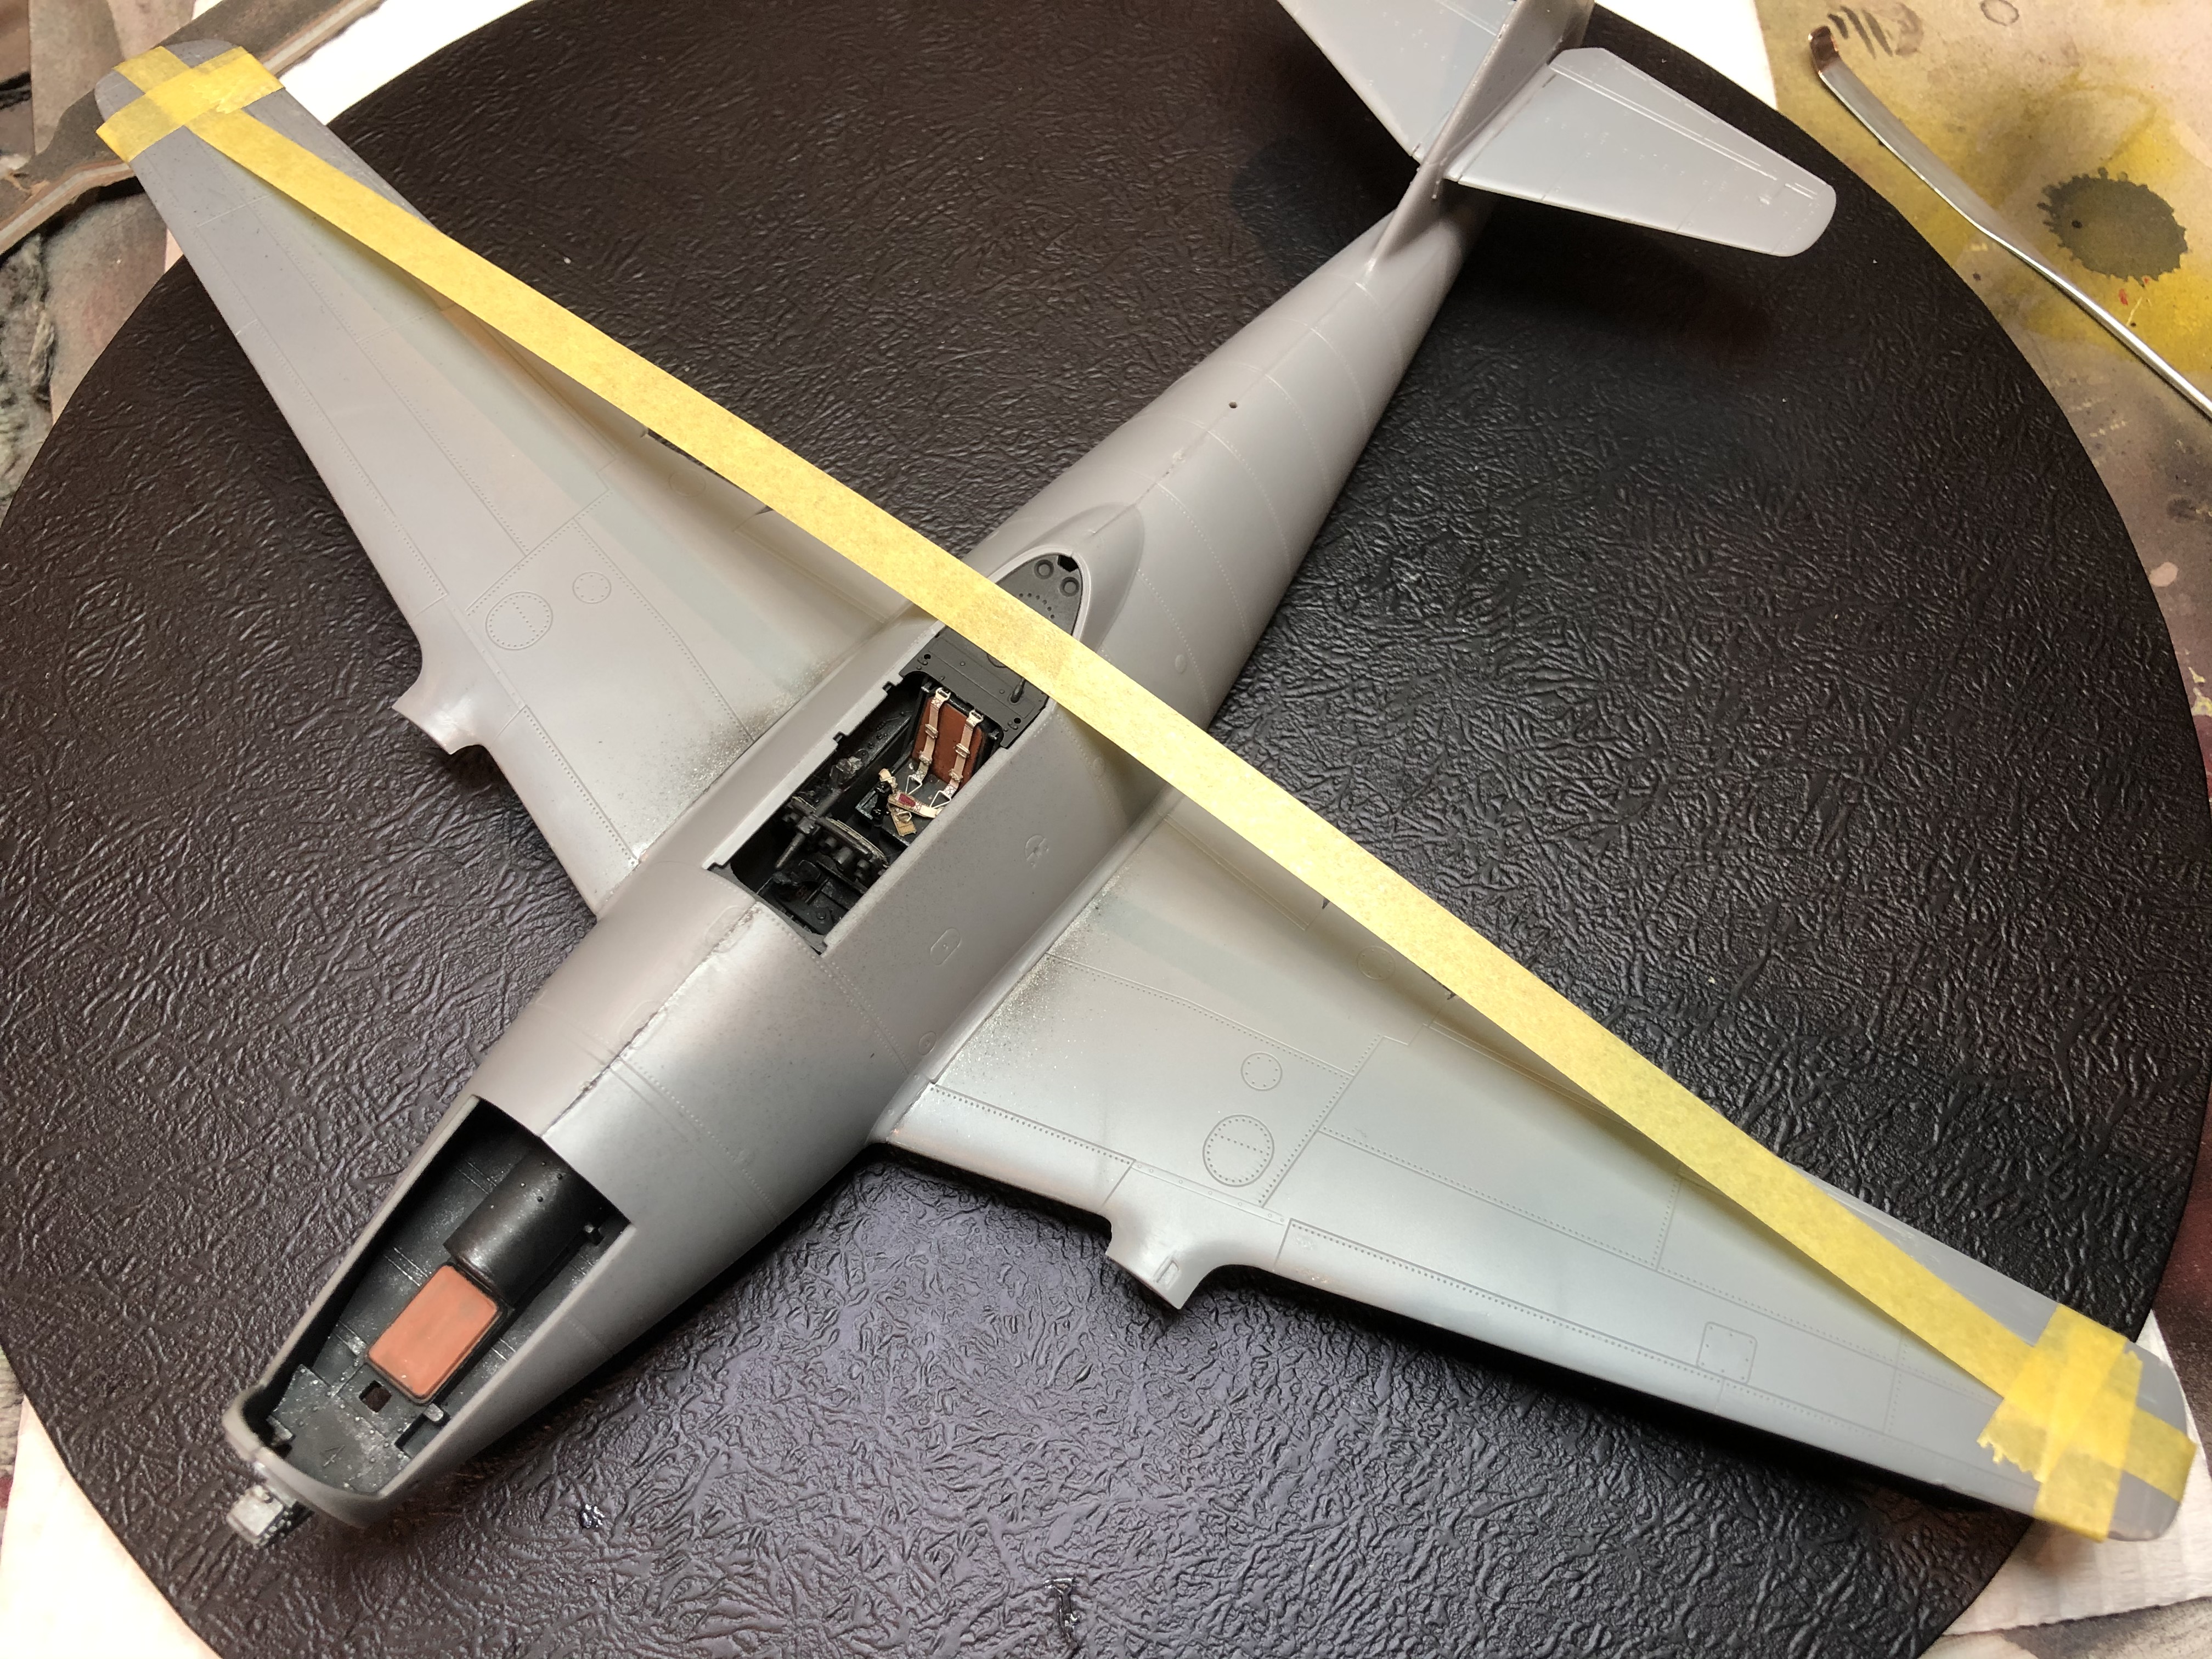
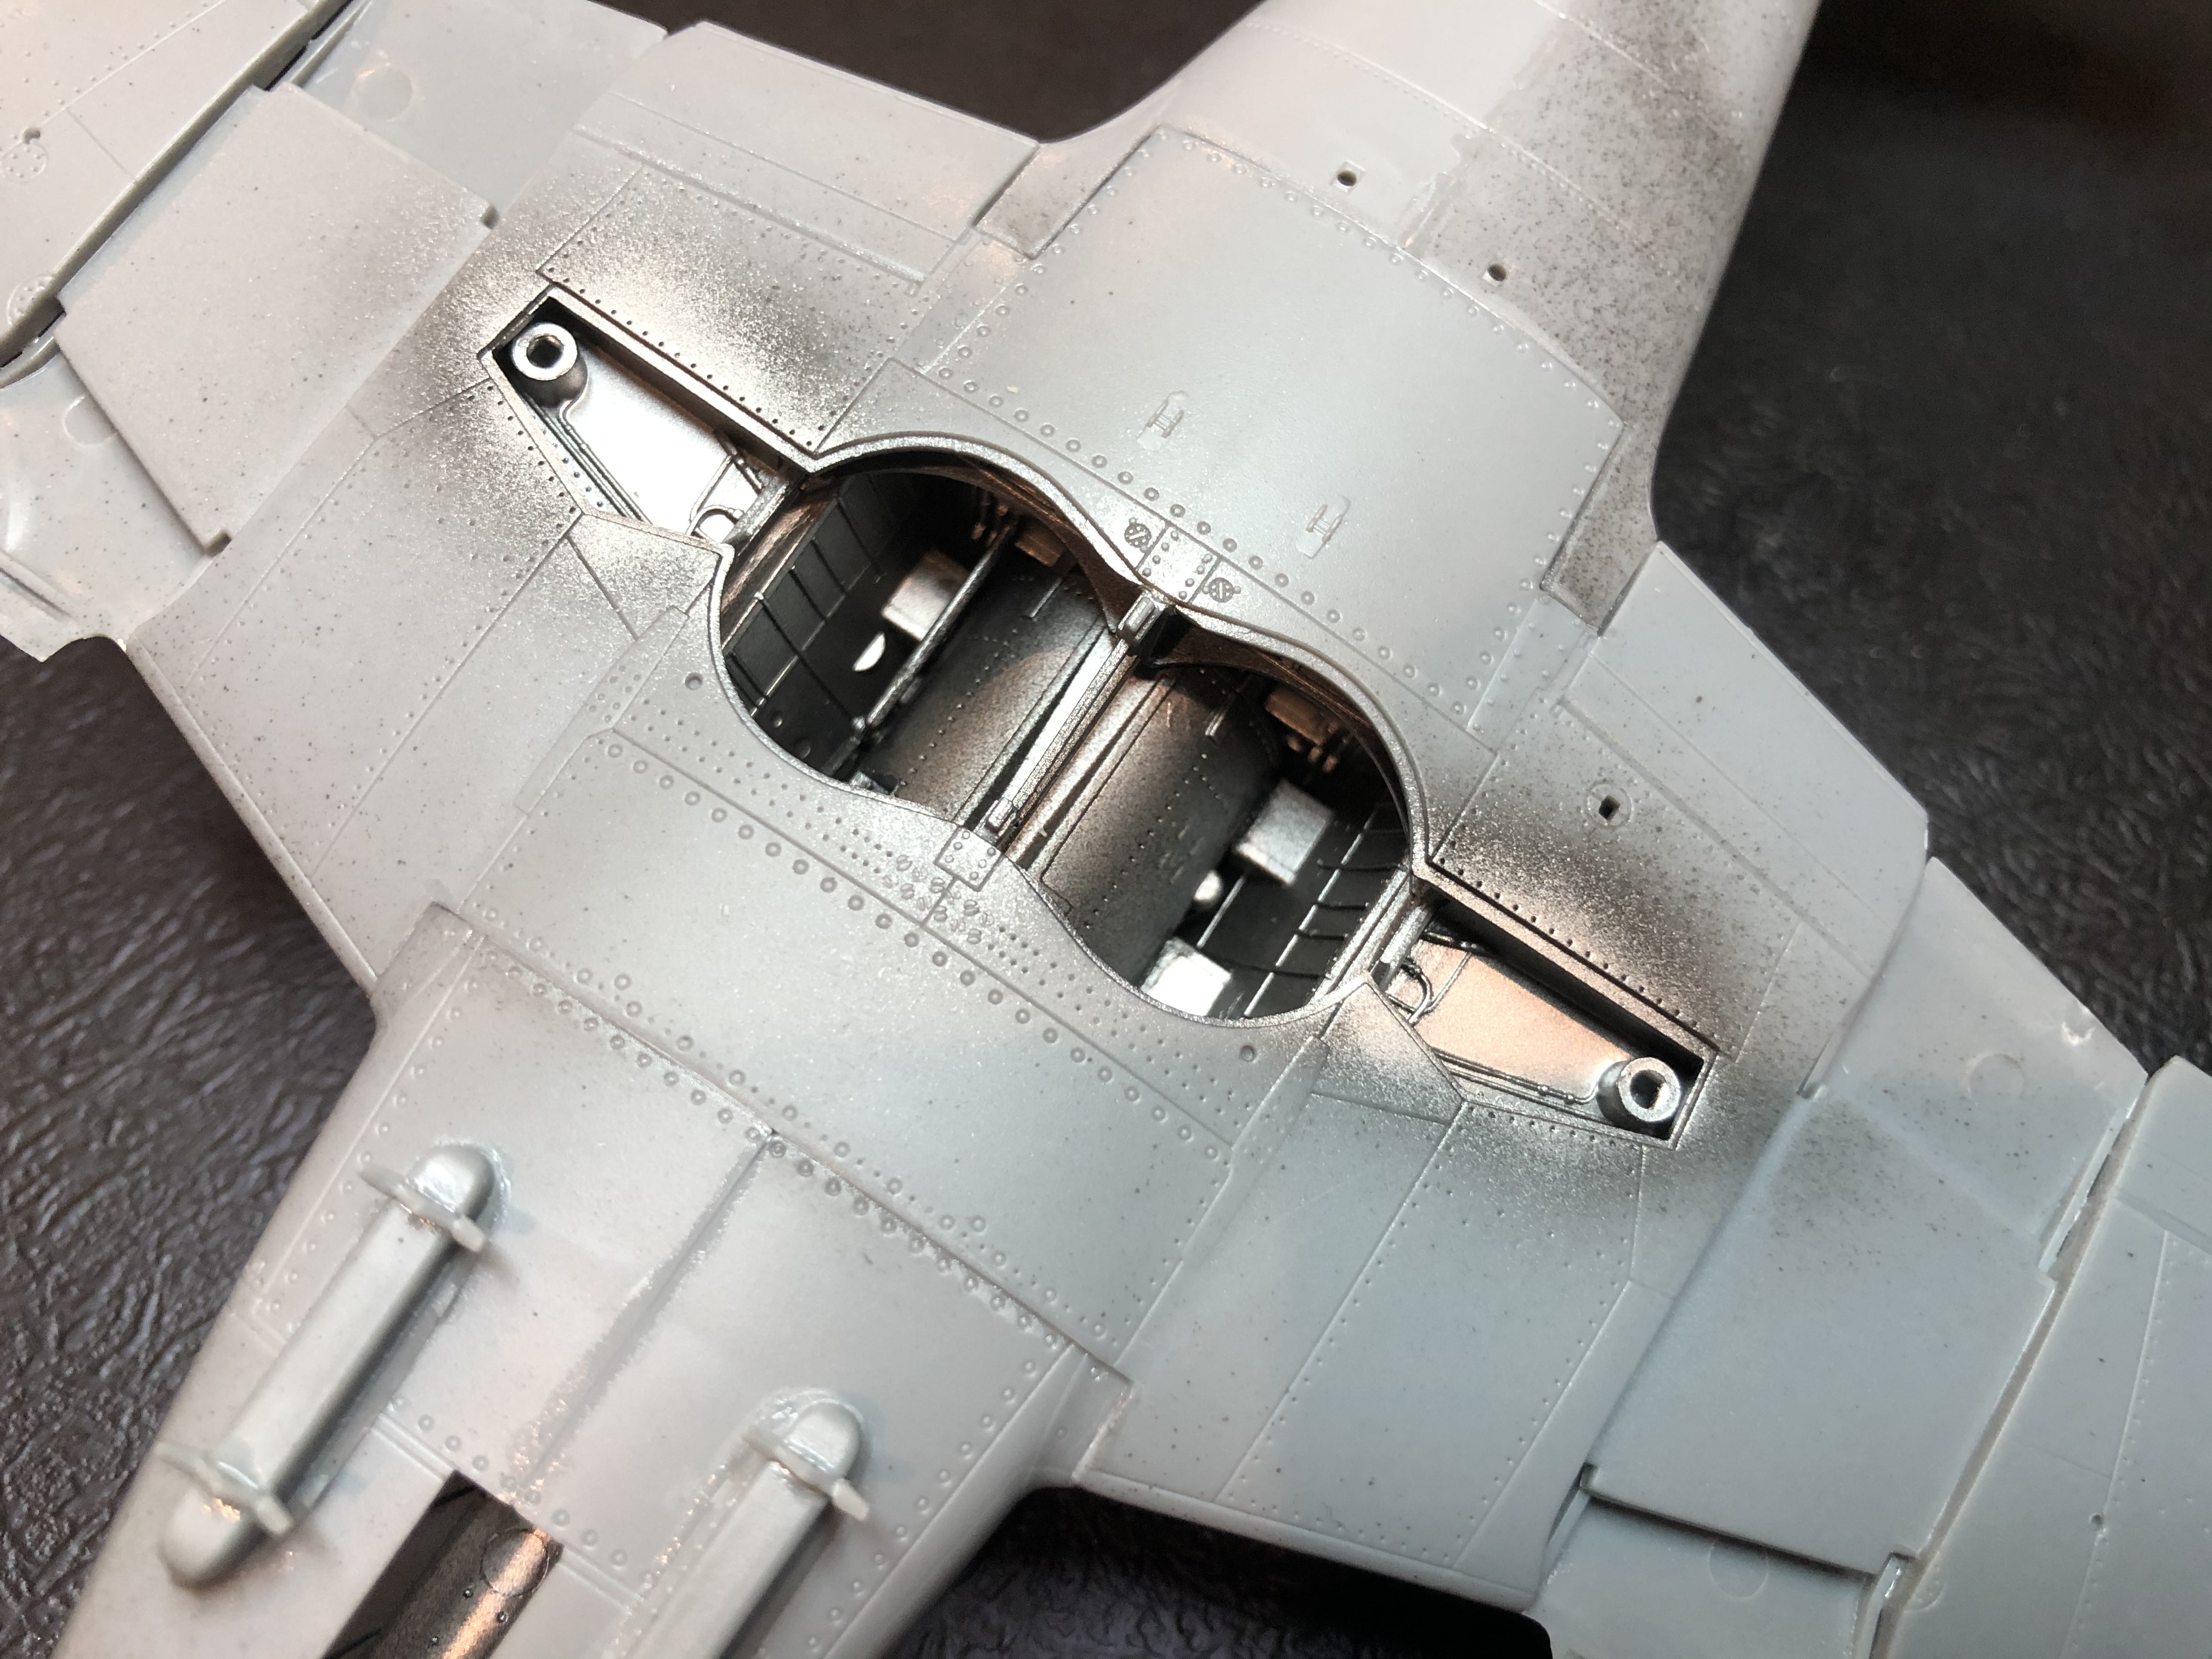
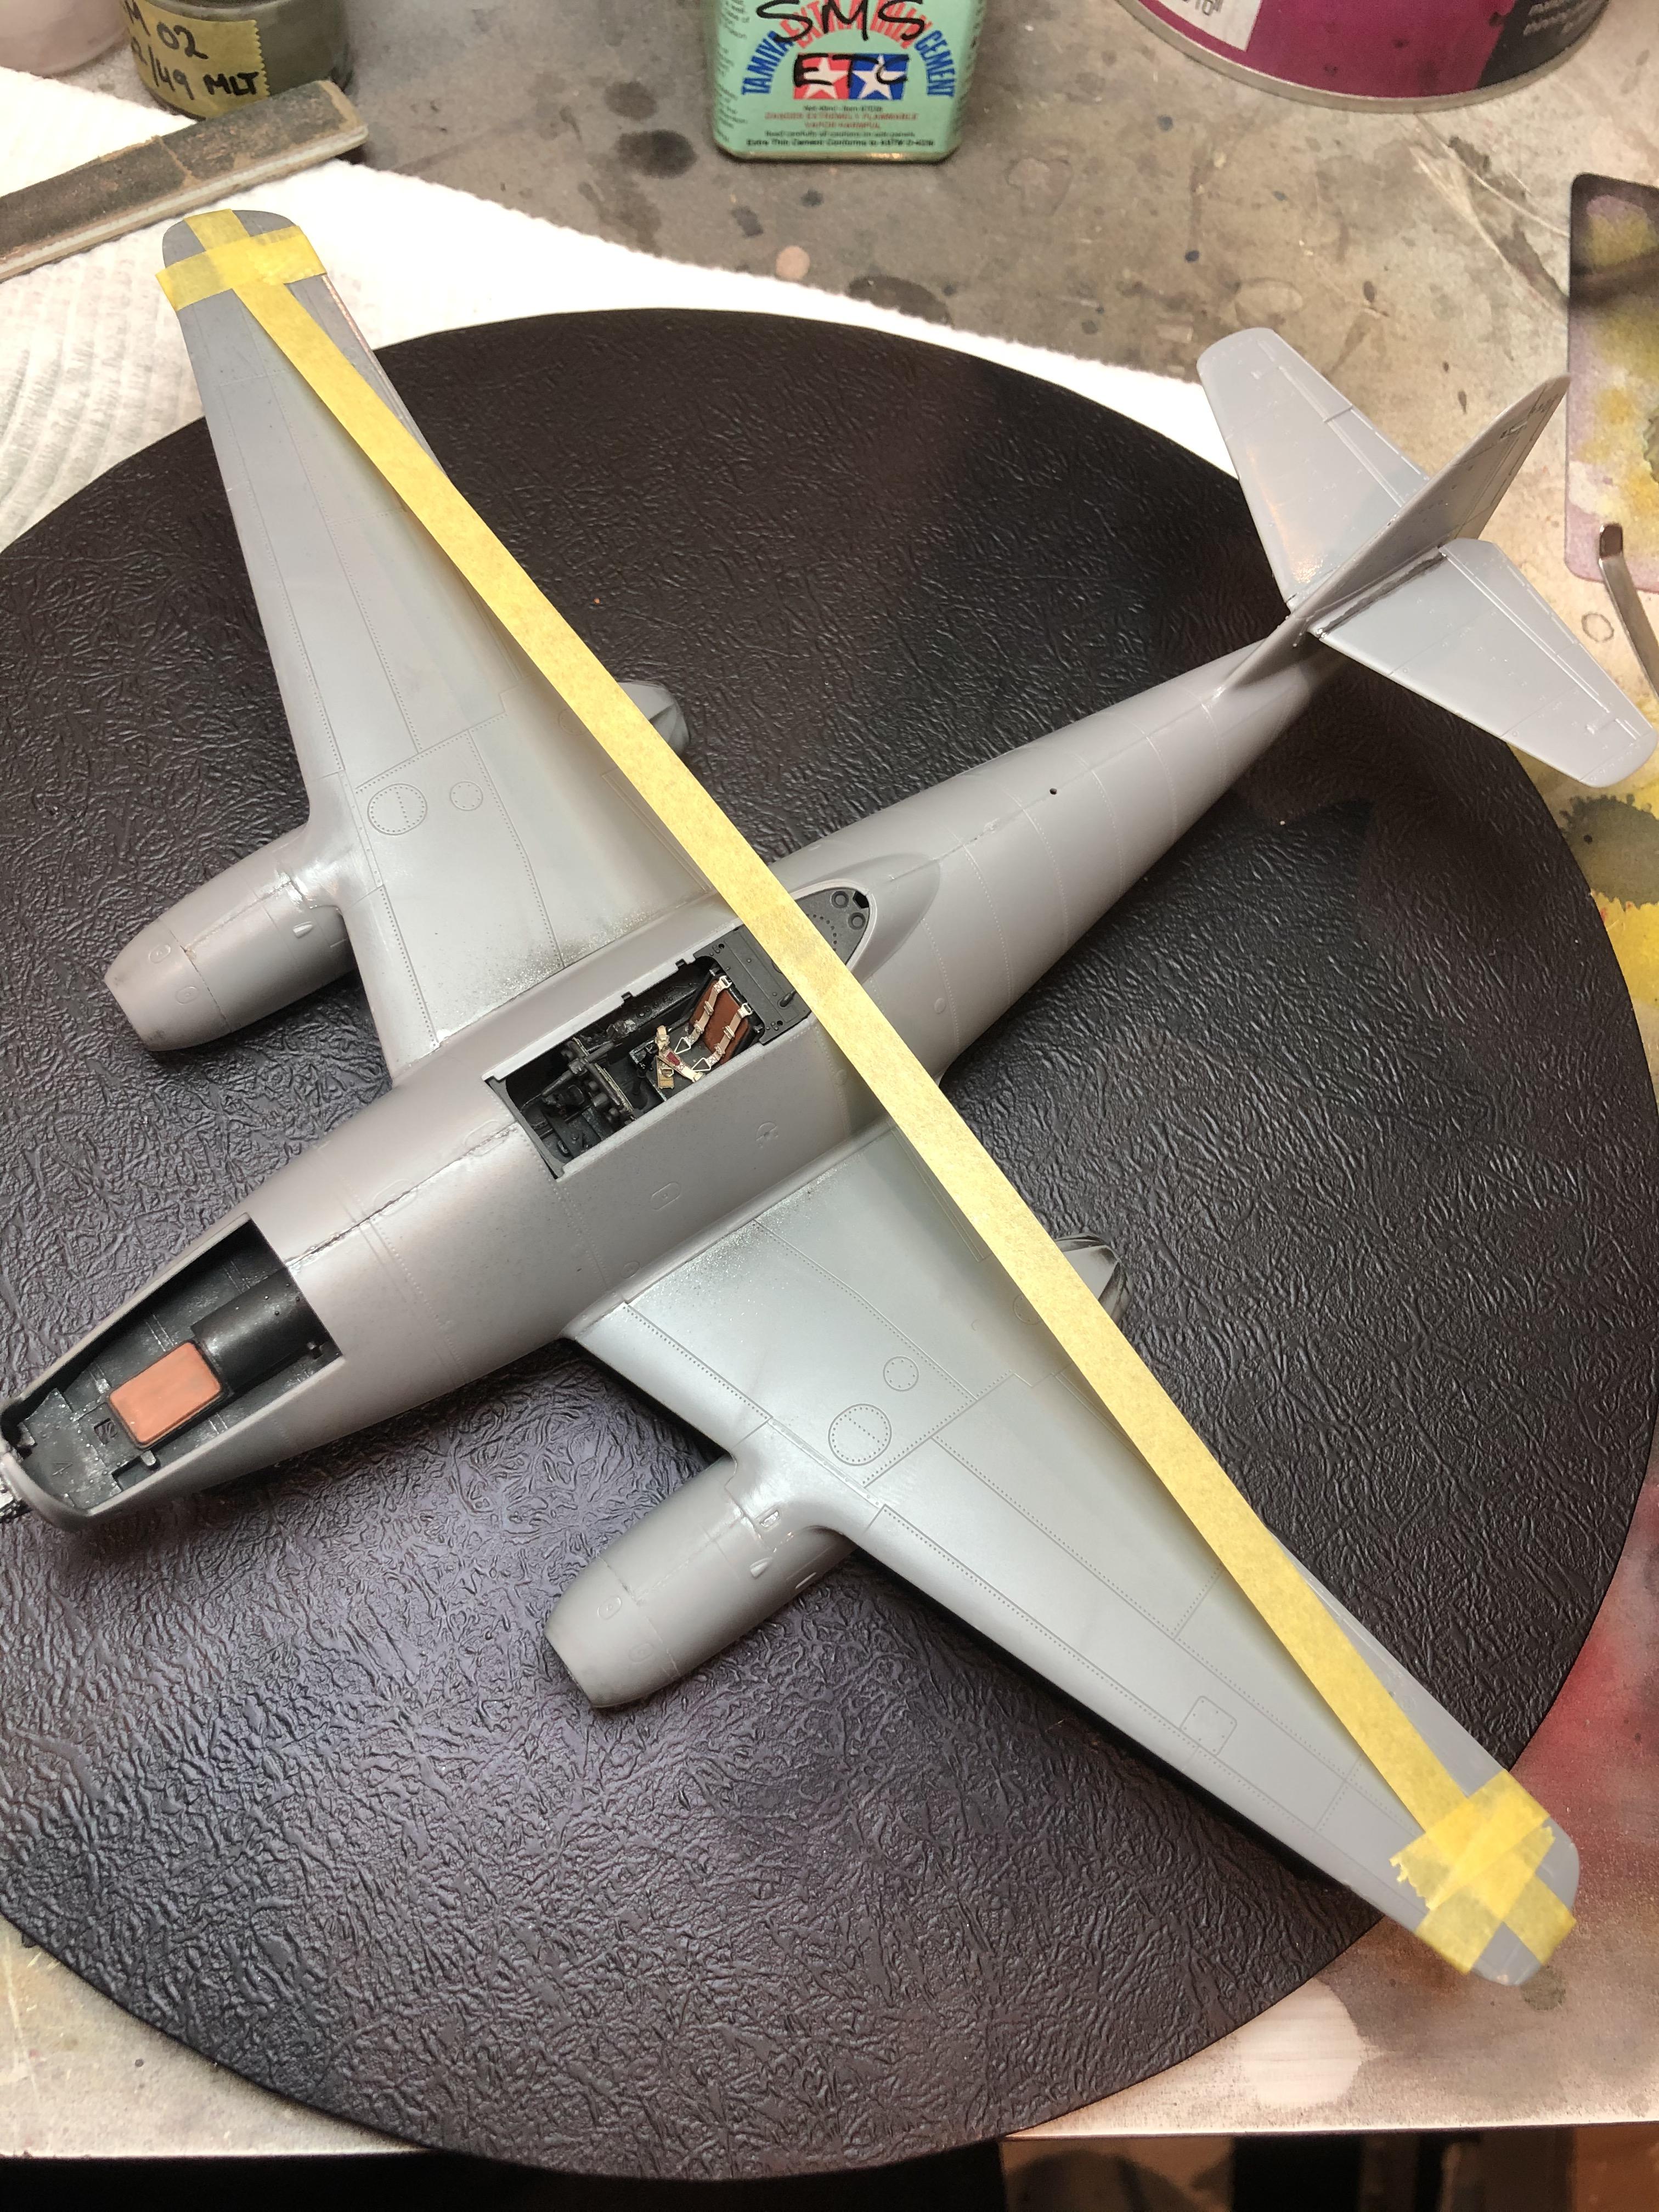
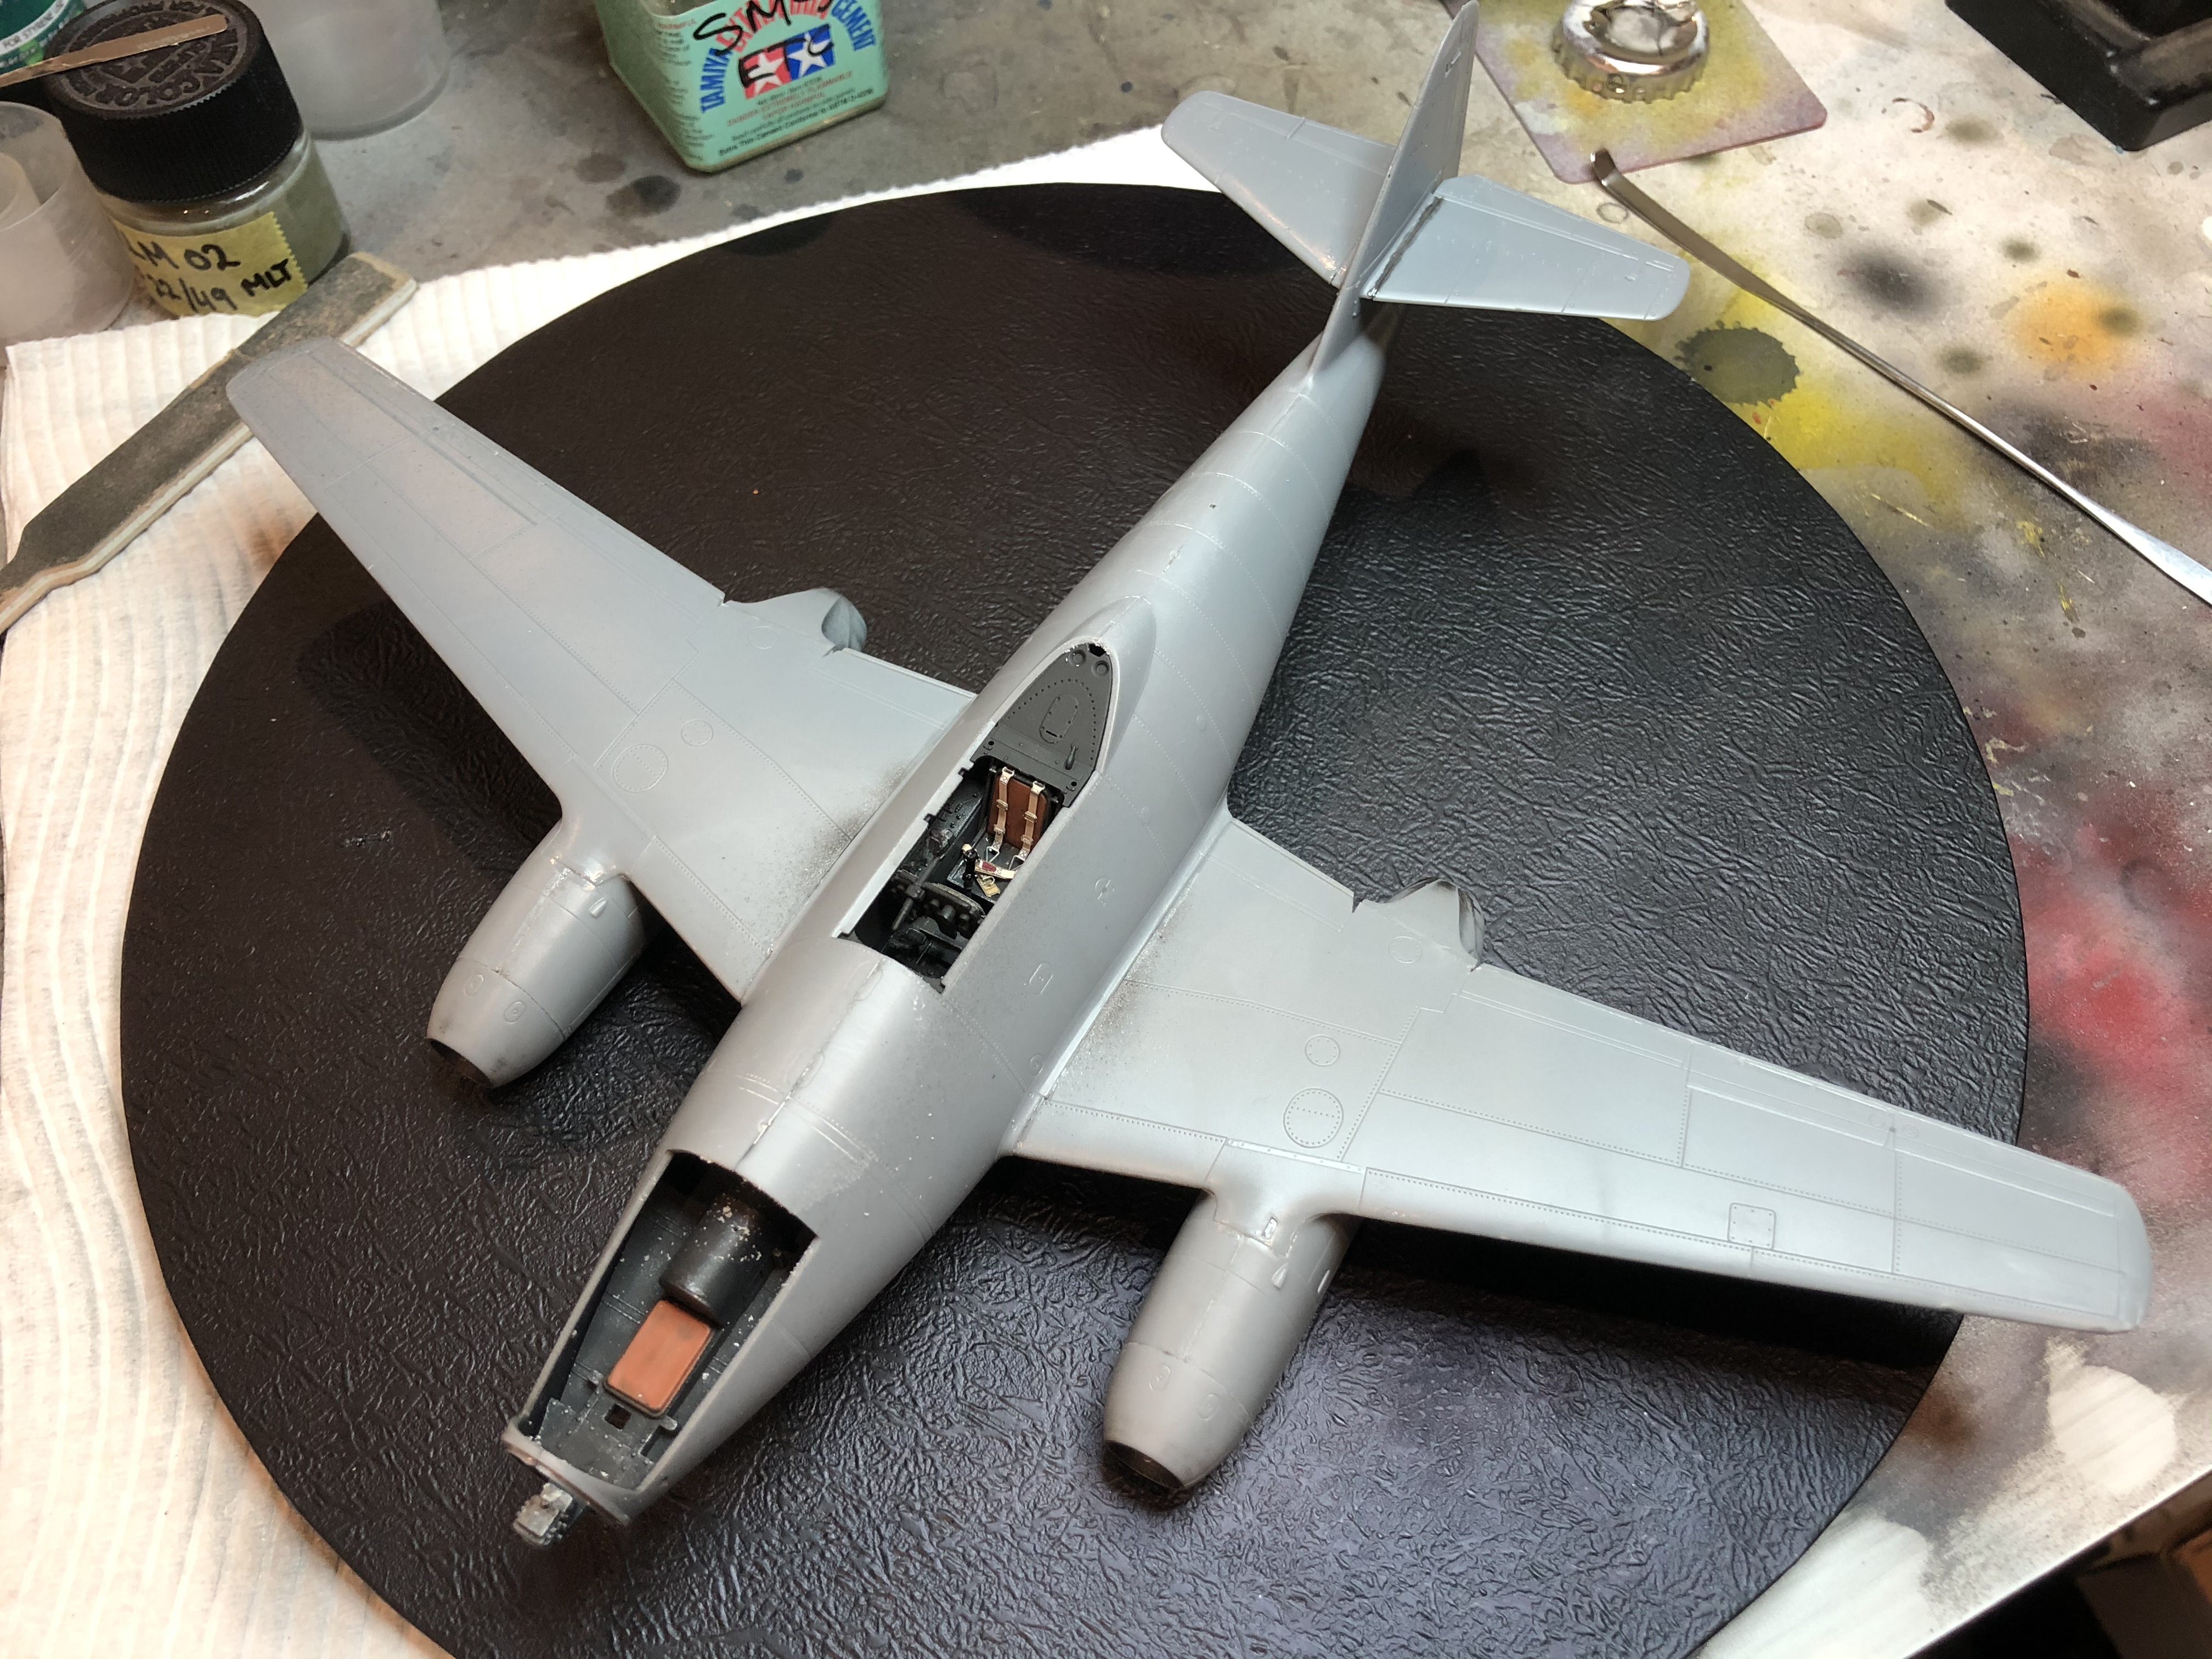
I am going to have a go at a dual build of the A-2a/U2 variant in 1/48 scale, having both the Dragon and Hobby Boss kits in the stash. The Dragon kit is a reboxing of the older TriMaster kit originally released in the late 80's I believe. The Hobby Boss kit is a new tool released in 2016, and I have picked up the "white box" version with PE frets from Eduard included.

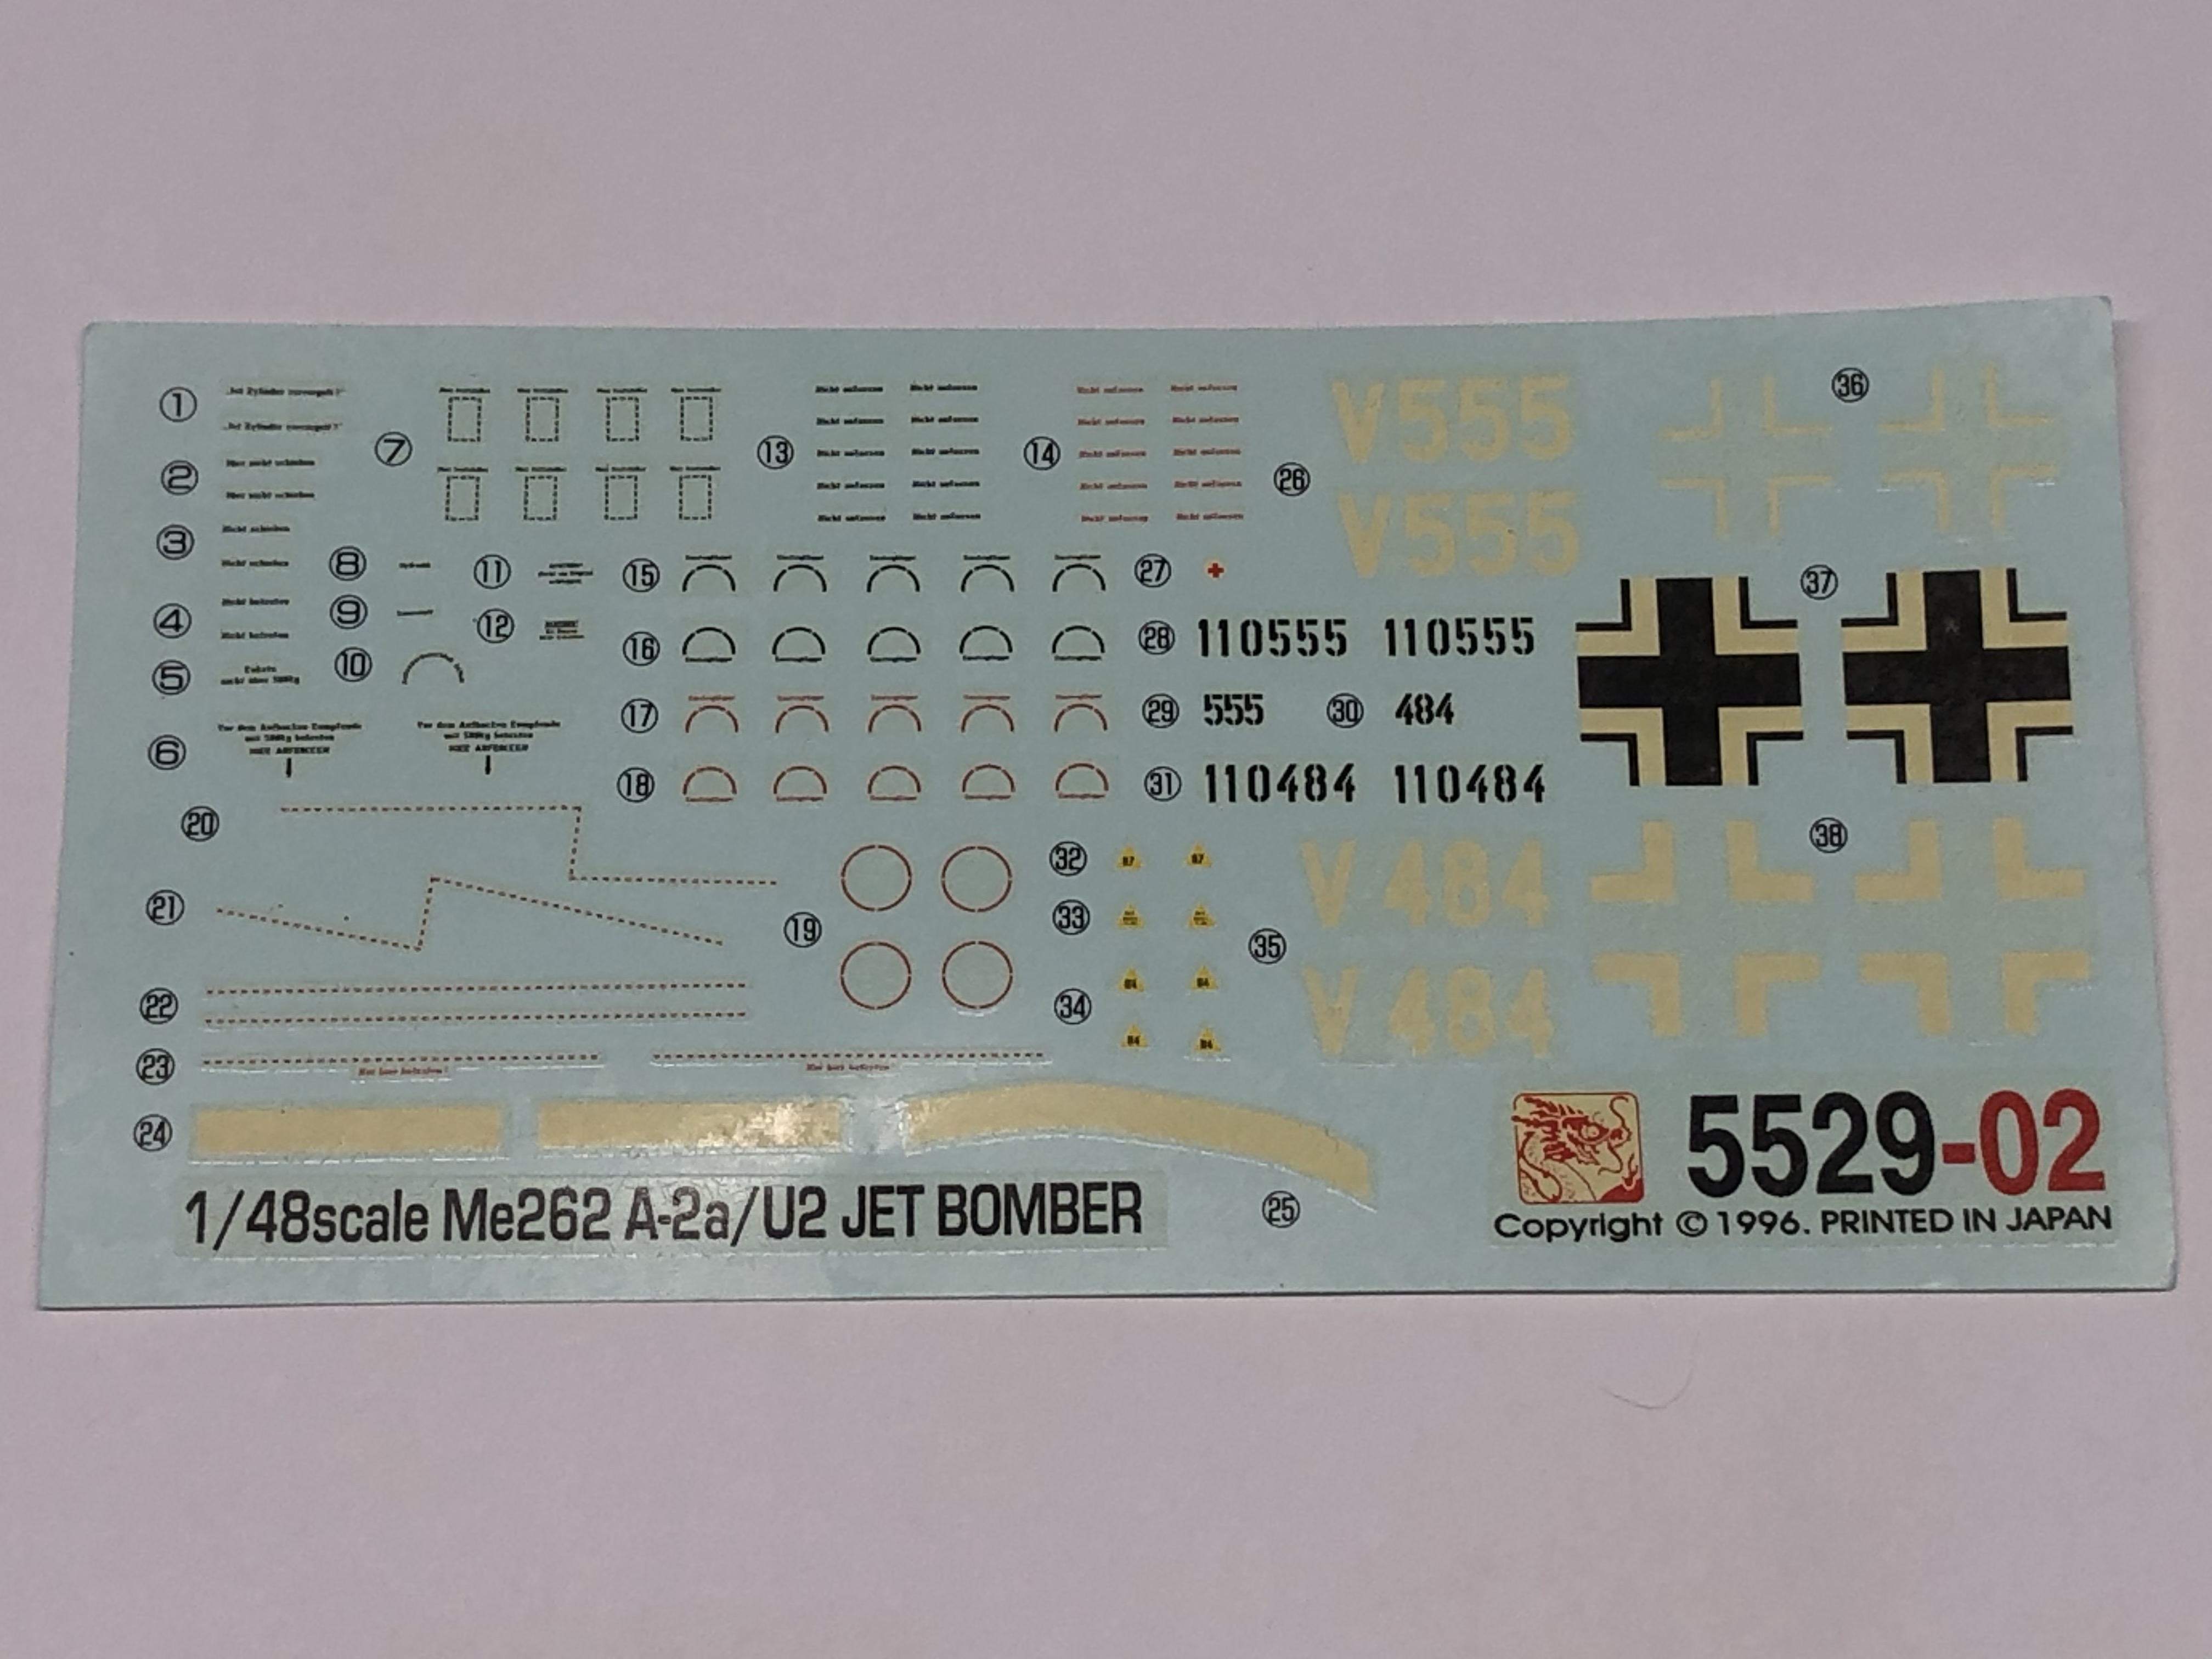
This is an unusual variant of the Me 262 in that only 2 airframes were actually built. Both kits have decals for both airframes, so my plan is to build one of each. I have copied the following variant history from www.kagero.com.eu . . .

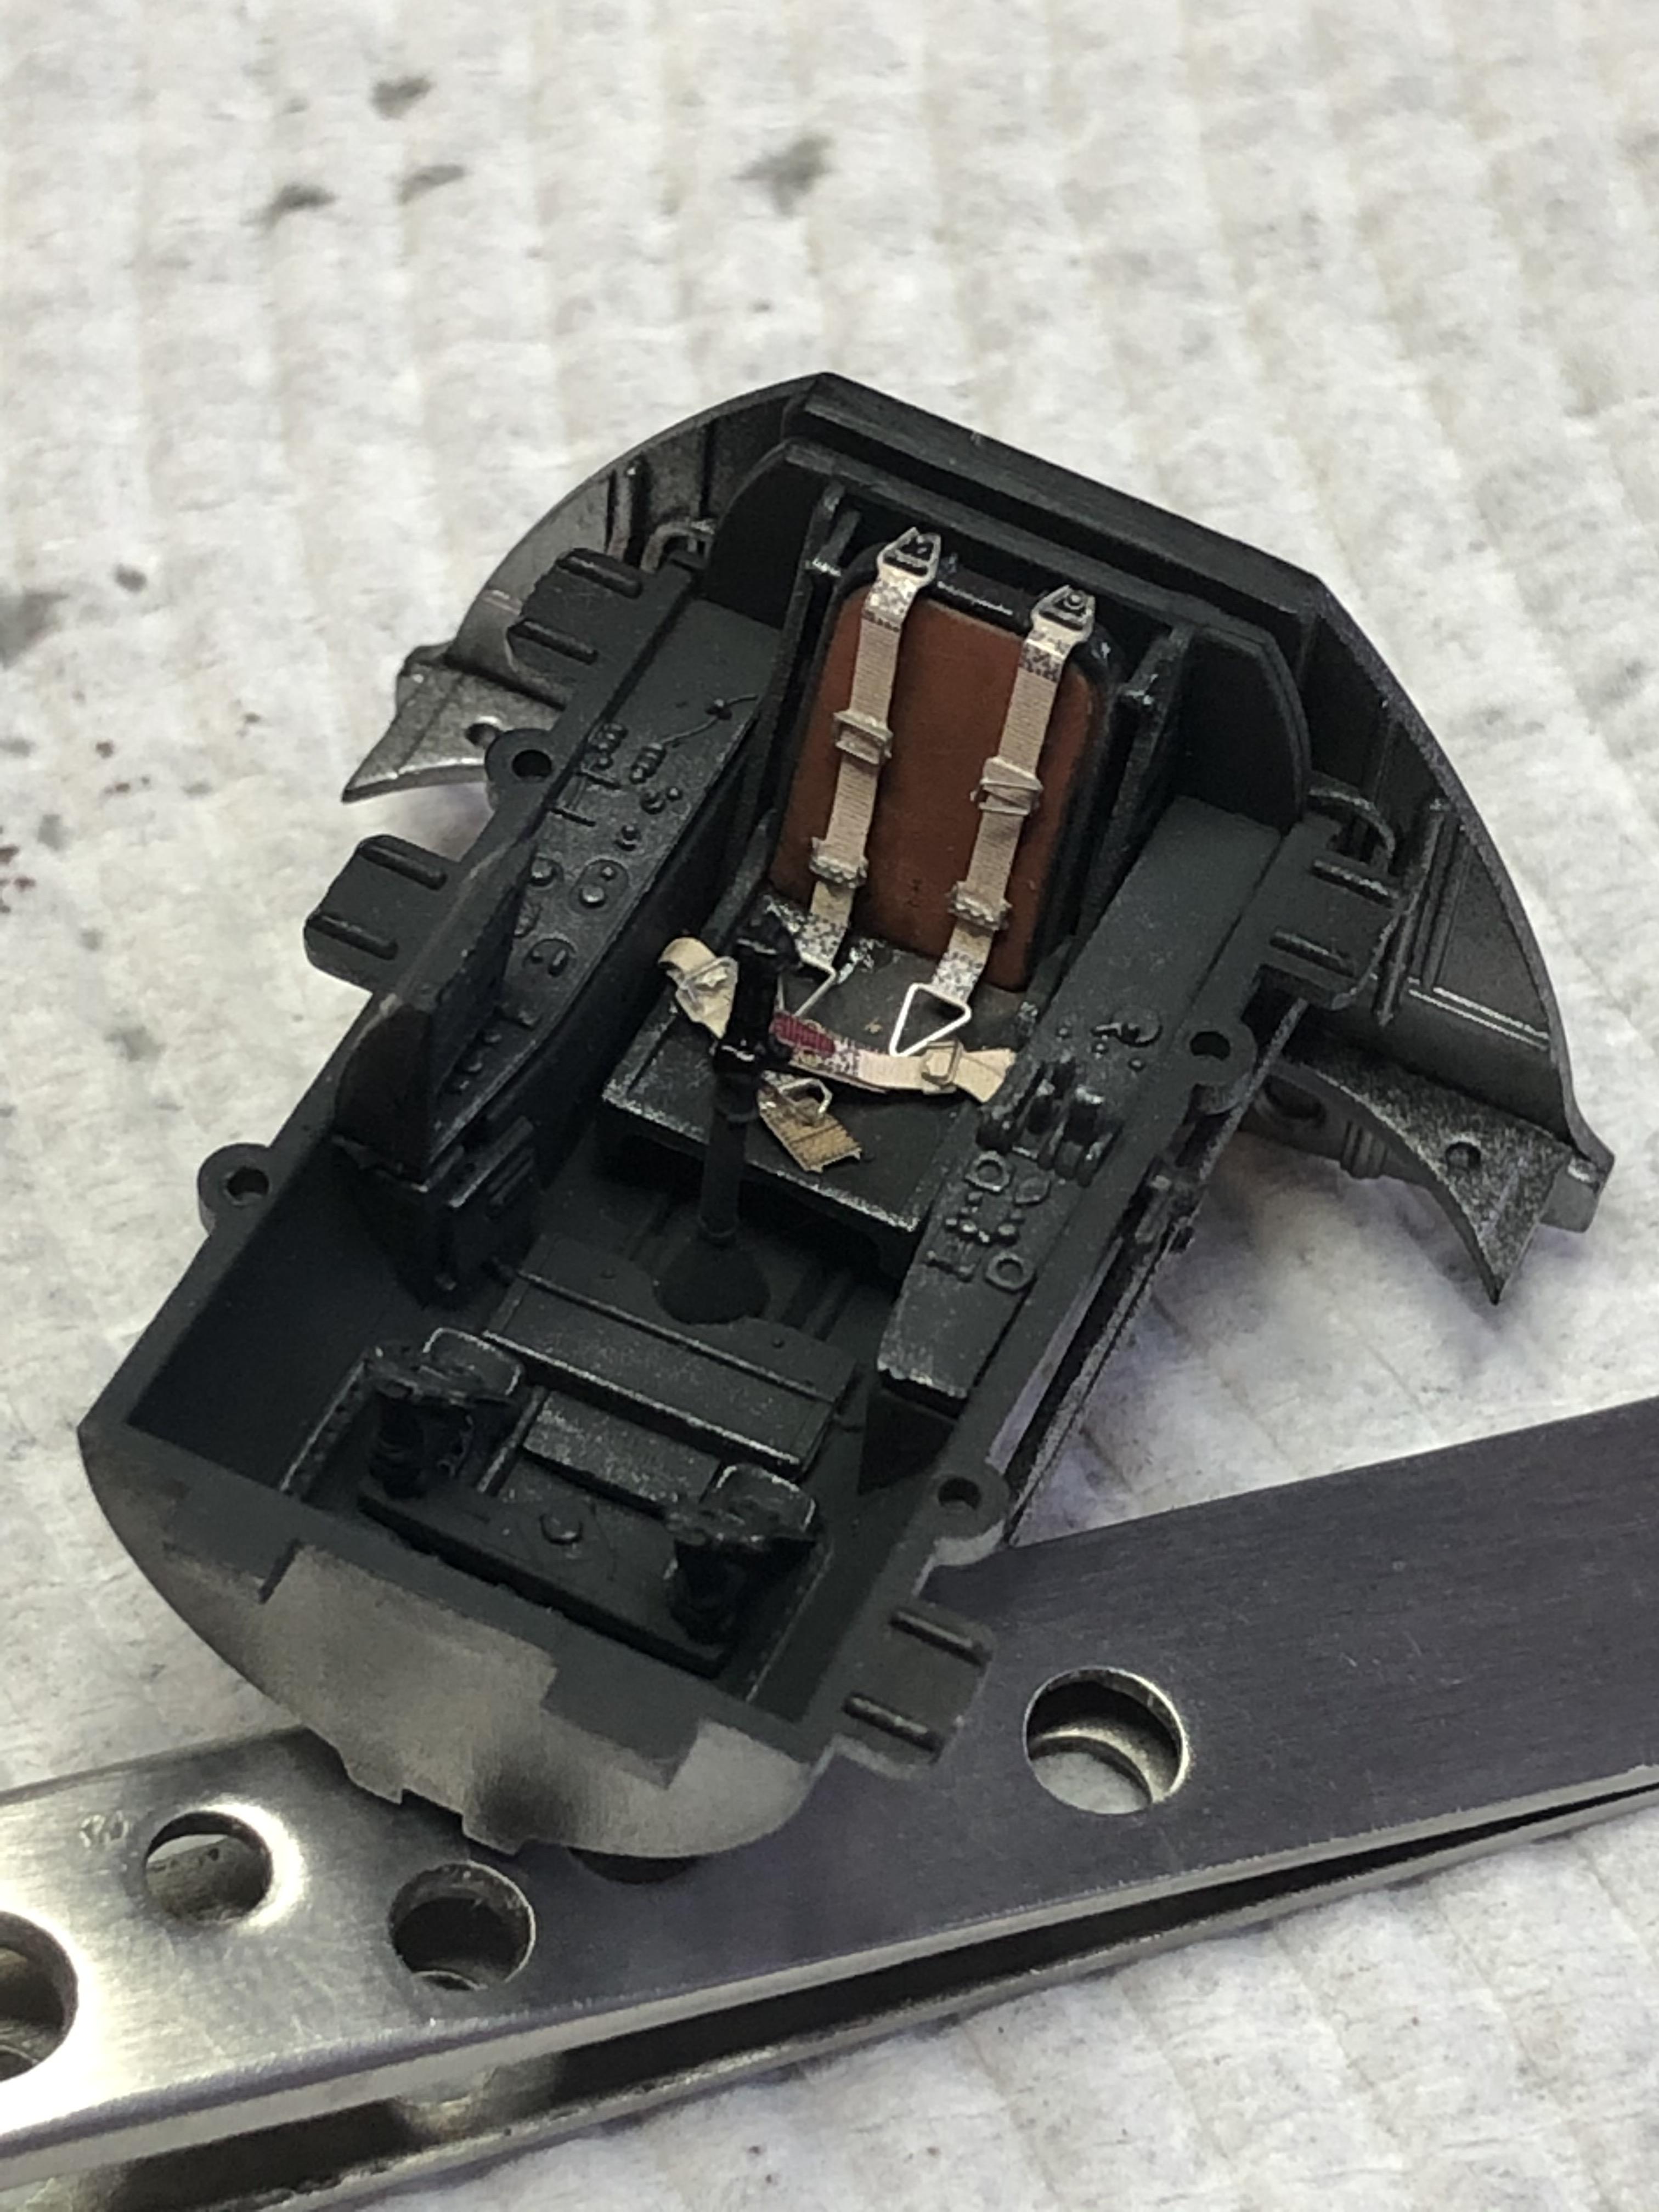
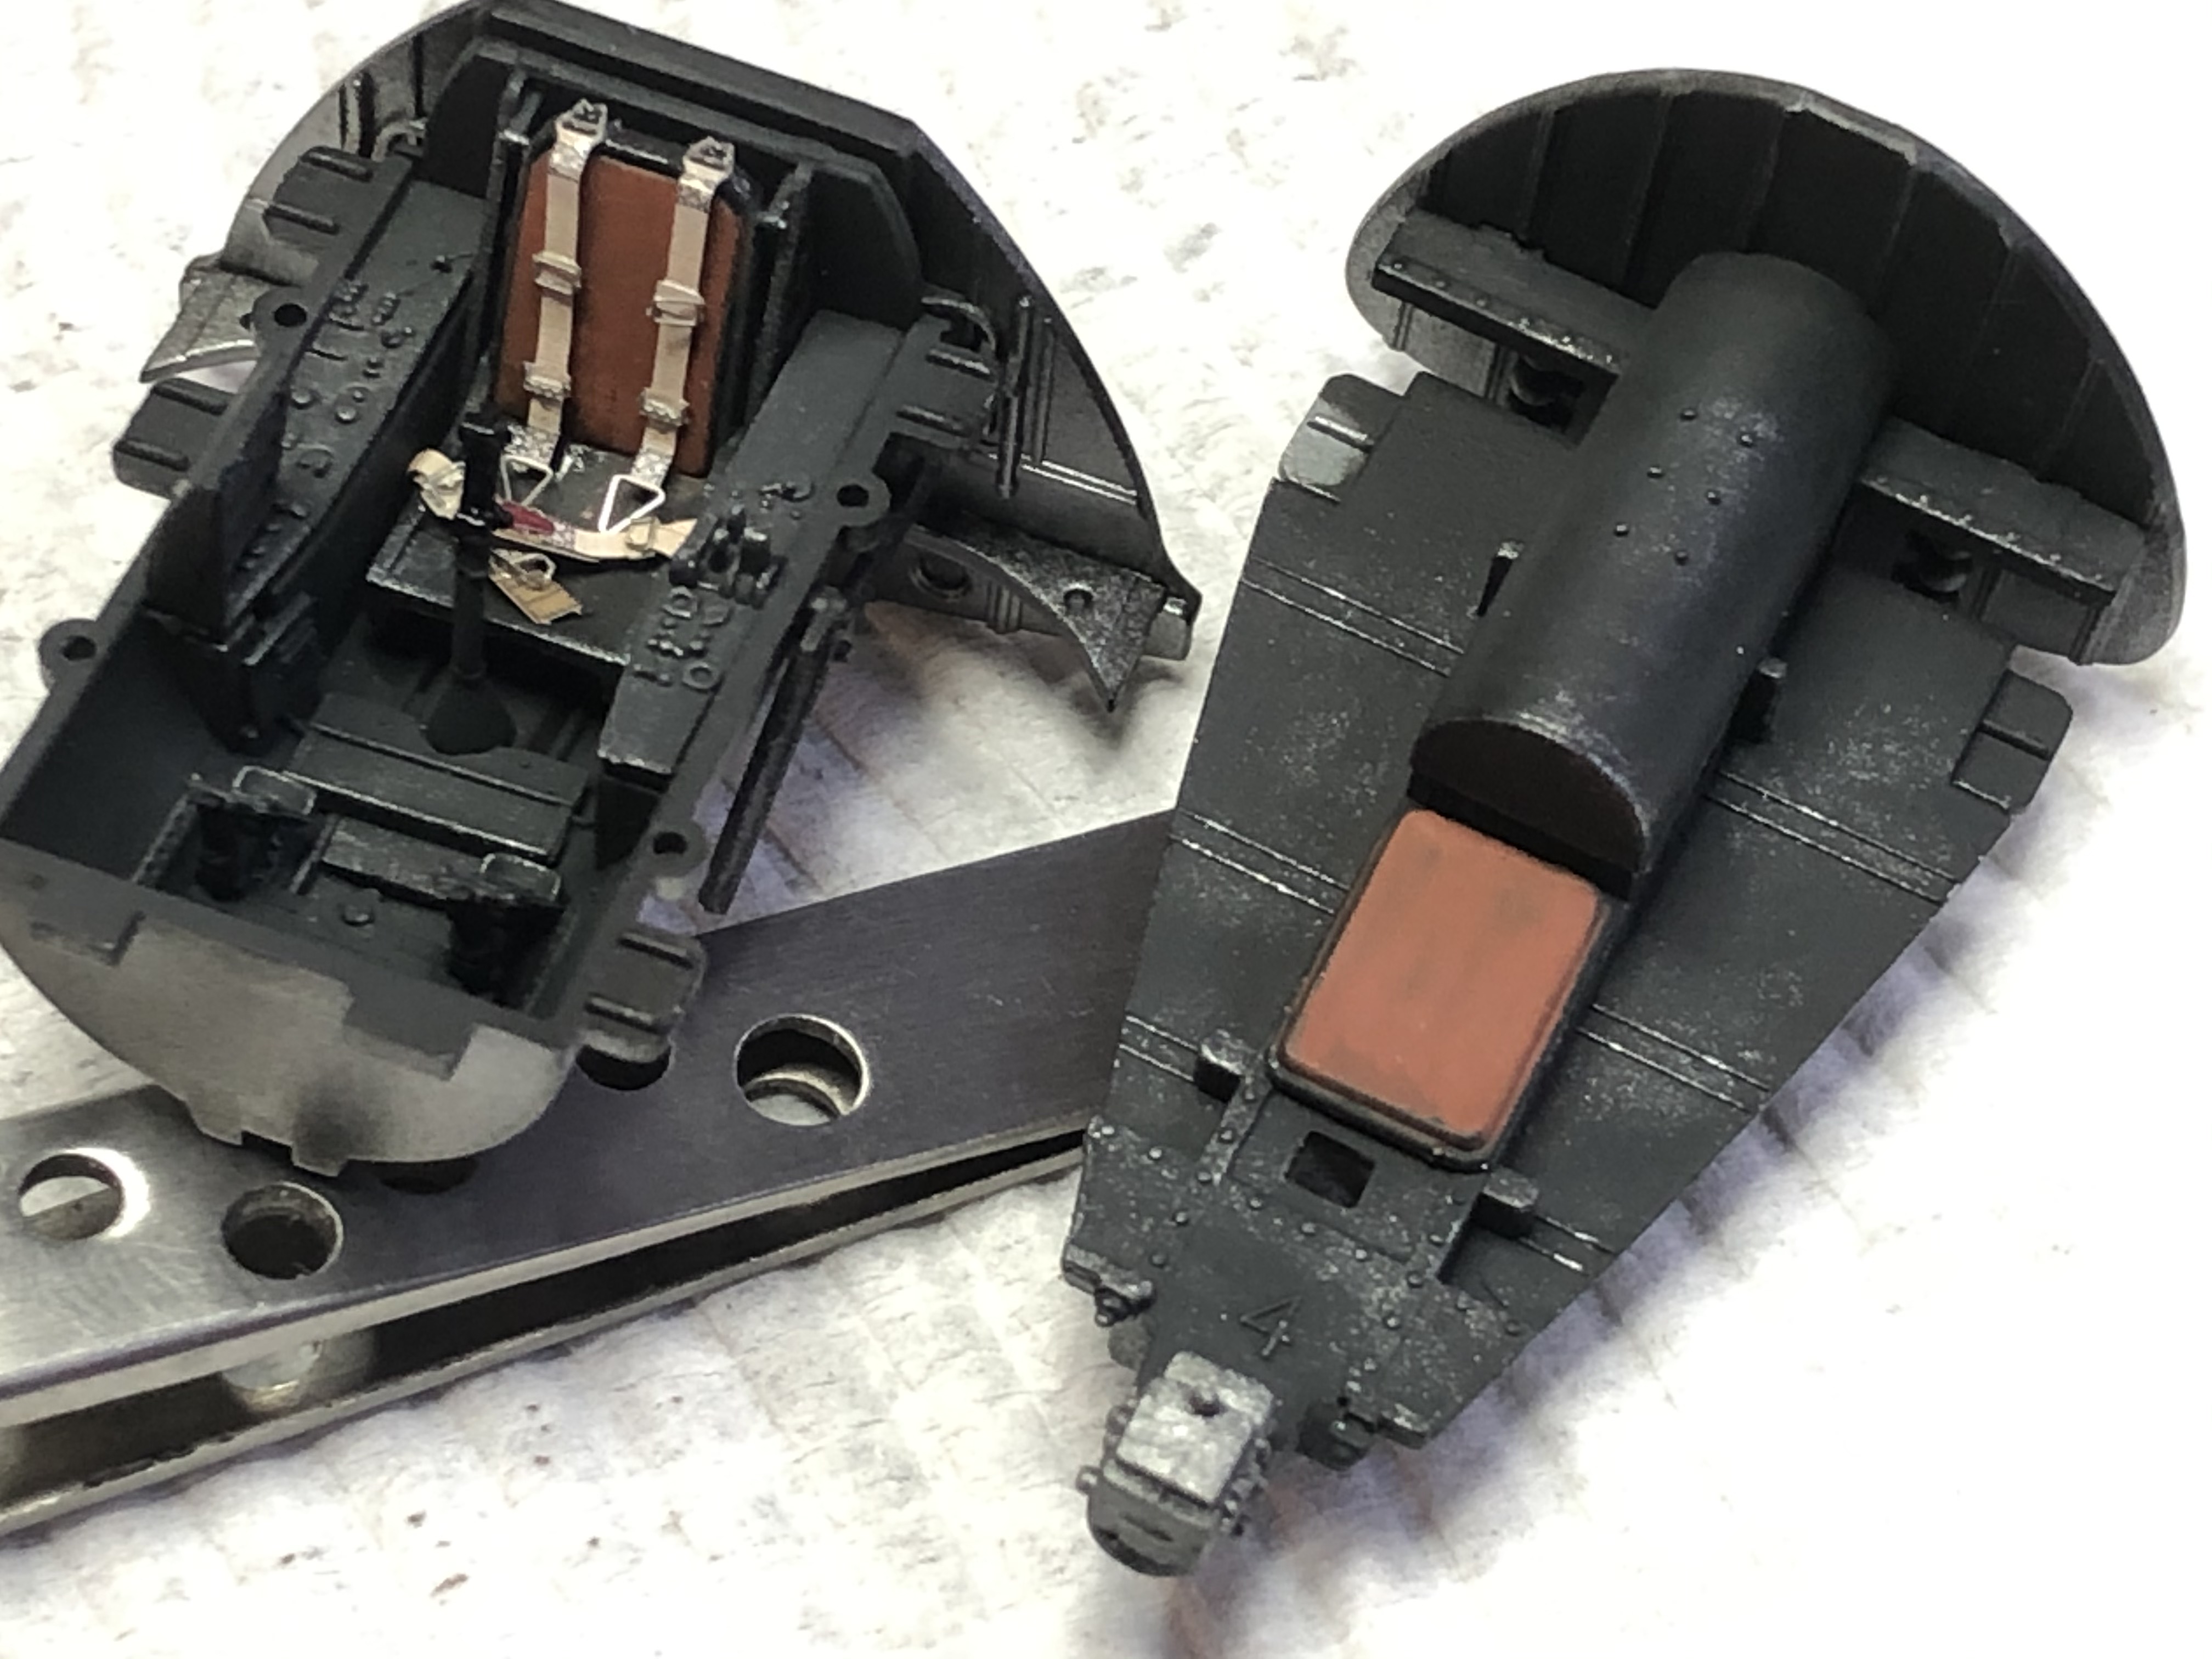
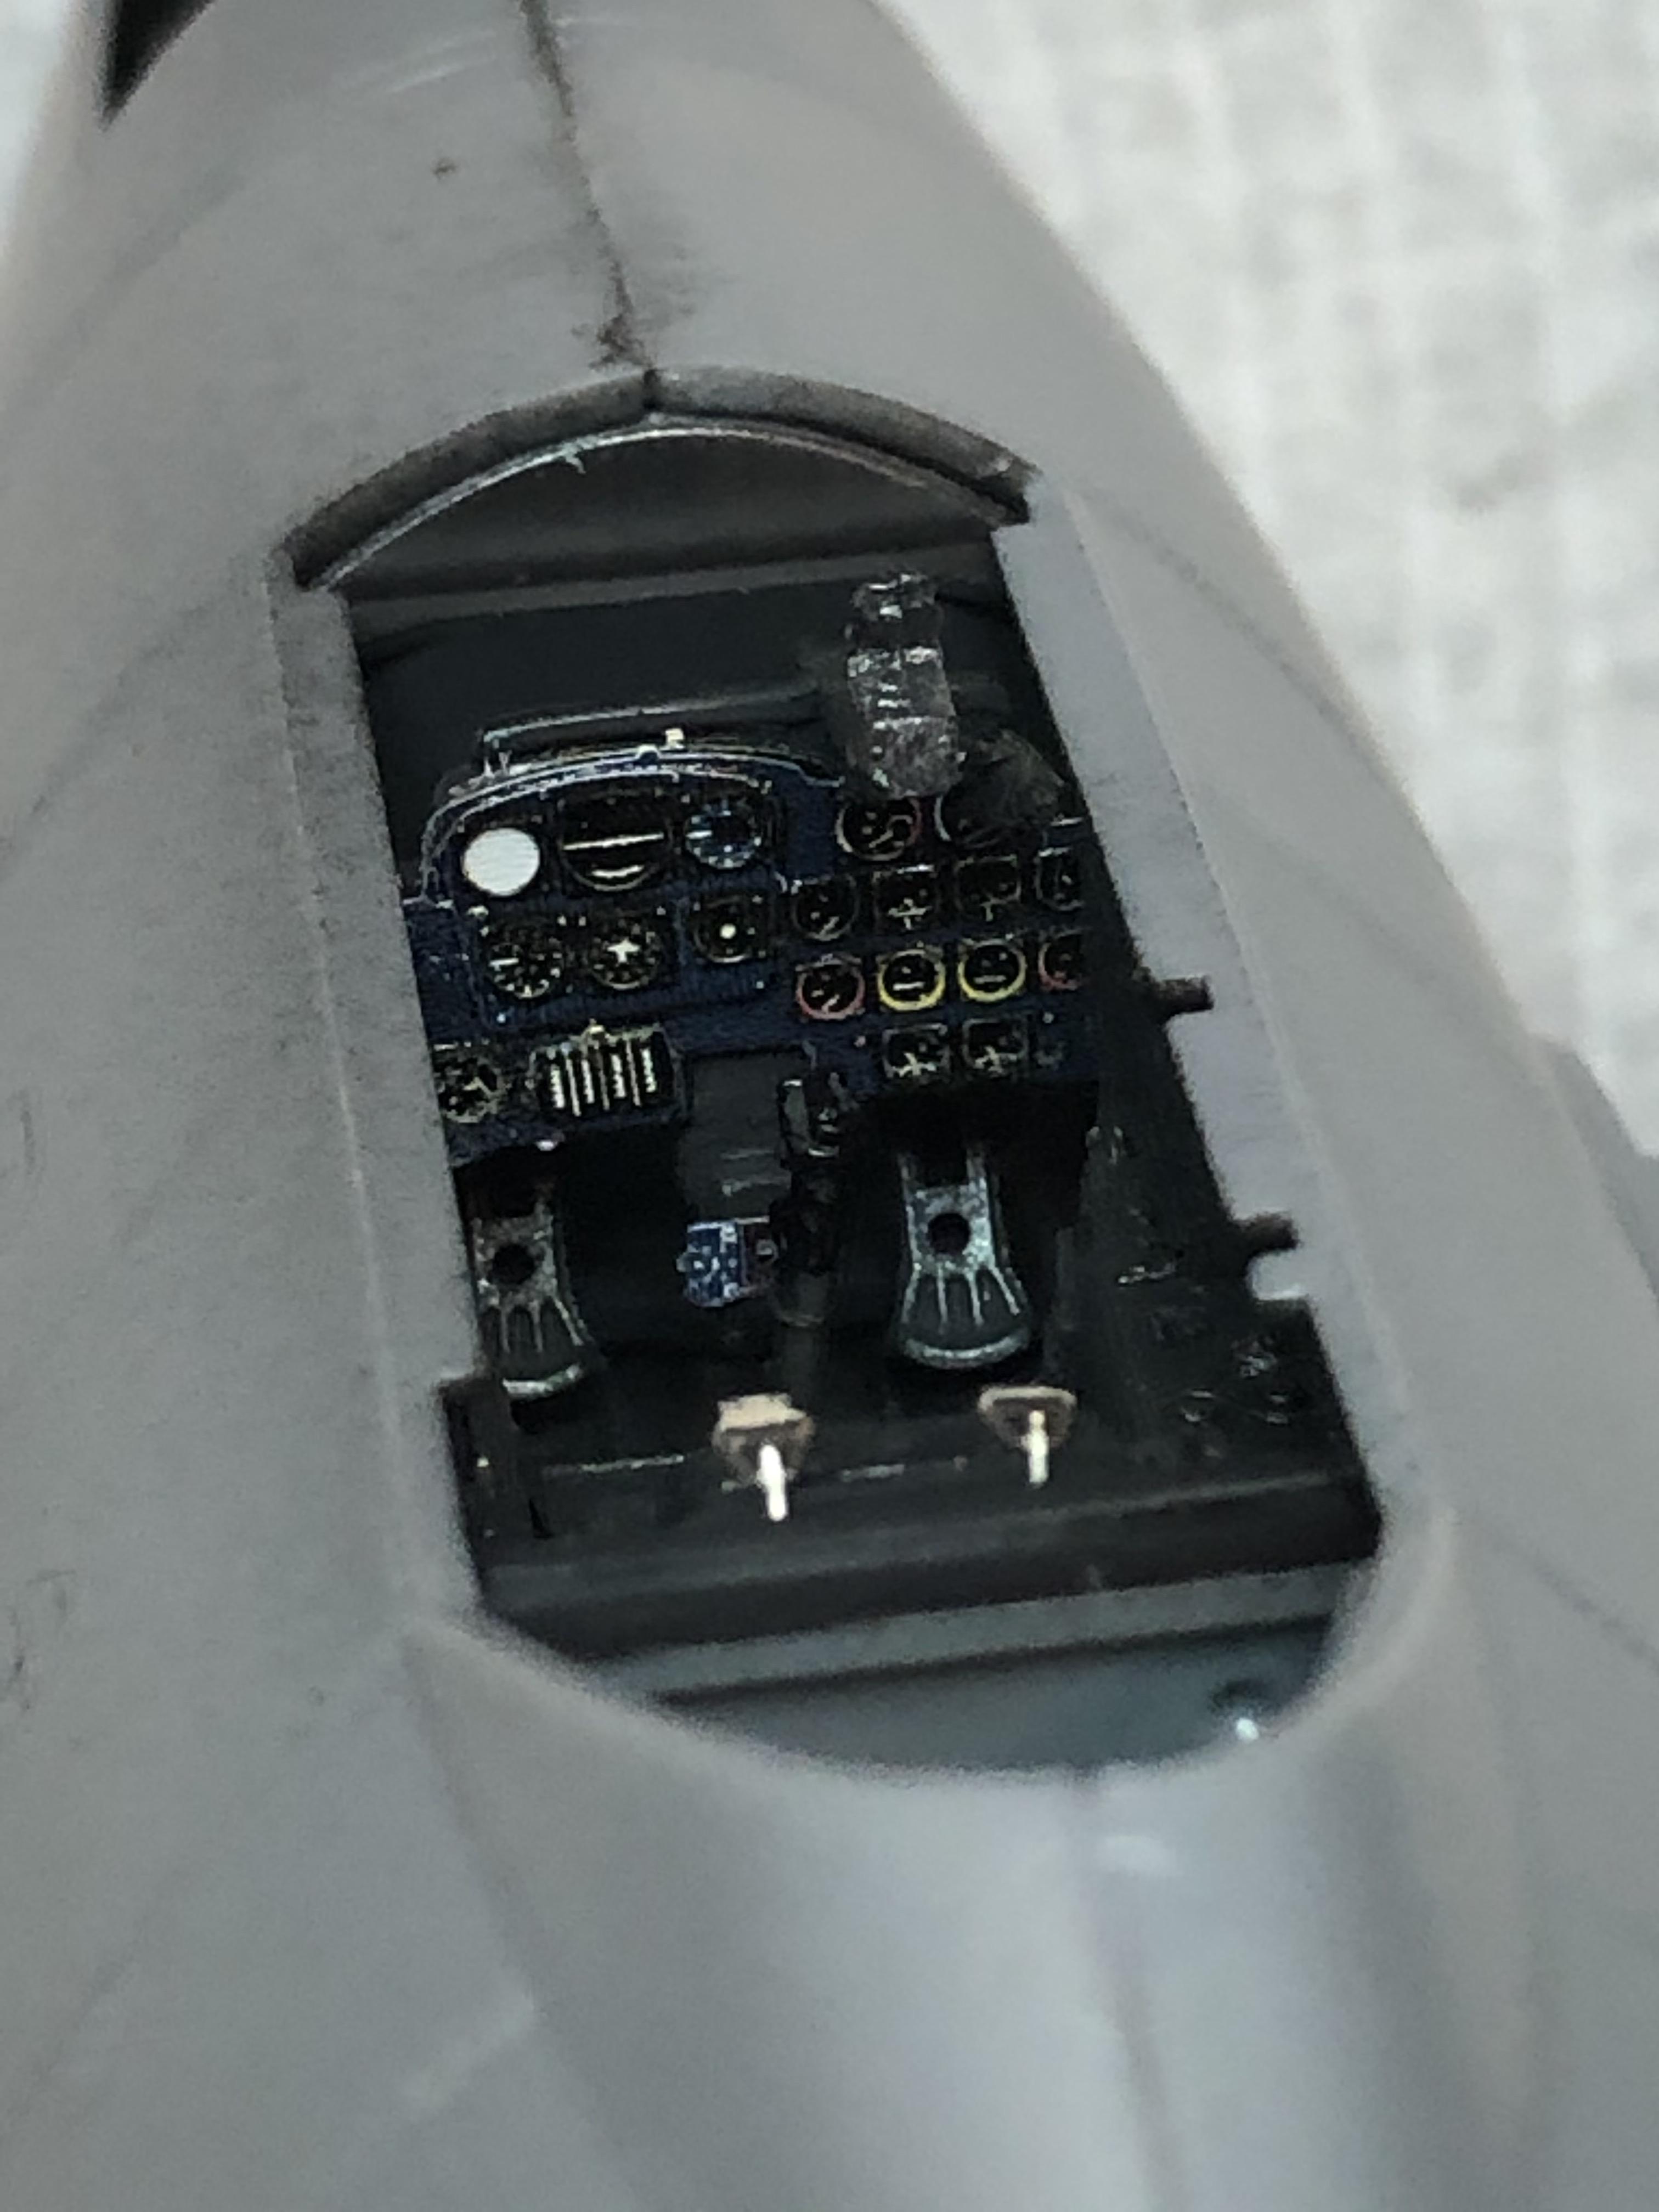
Another variant was a two-seater - the Me 262 A-2a/U2 Schnellstbomber mit Lotfe (the fastest bomber with Lotfe). The aircraft (W.Nr. 110 484, also known as the second Me 262 V8) was modified with a bombardier station (Loftkanzel) in place of the armament. Limited space in the cramped compartment meant that the bombardier operated the Lotfe 7H bomb sight in a lying in a prone position. The aircraft made its first flight in September 1944 before it was transferred to Lechfeld on October 22. There, by the end of 1944, it flew 22 test missions. Messerschmitt reported on two bombing trials carried out in December 1944. During one of them, on December 5, the crew (Baur – pilot and Bayer – bombardier) dropped a single 250 kg bomb from the altitude of 2 000 m while flying at 600 km/h.
The bomber second prototype (W.Nr. 110 555) was completed in January 1945 and featured a modified bombardier’s compartment – the Lotfekanzel II. The aircraft also received alternative designation Me 262 V11. The prototype first flew in February 1945 and by the end of March had completed 16 test sorties. The aircraft was lost on March 30, 1945 when it crashed during a forced landing attempt.


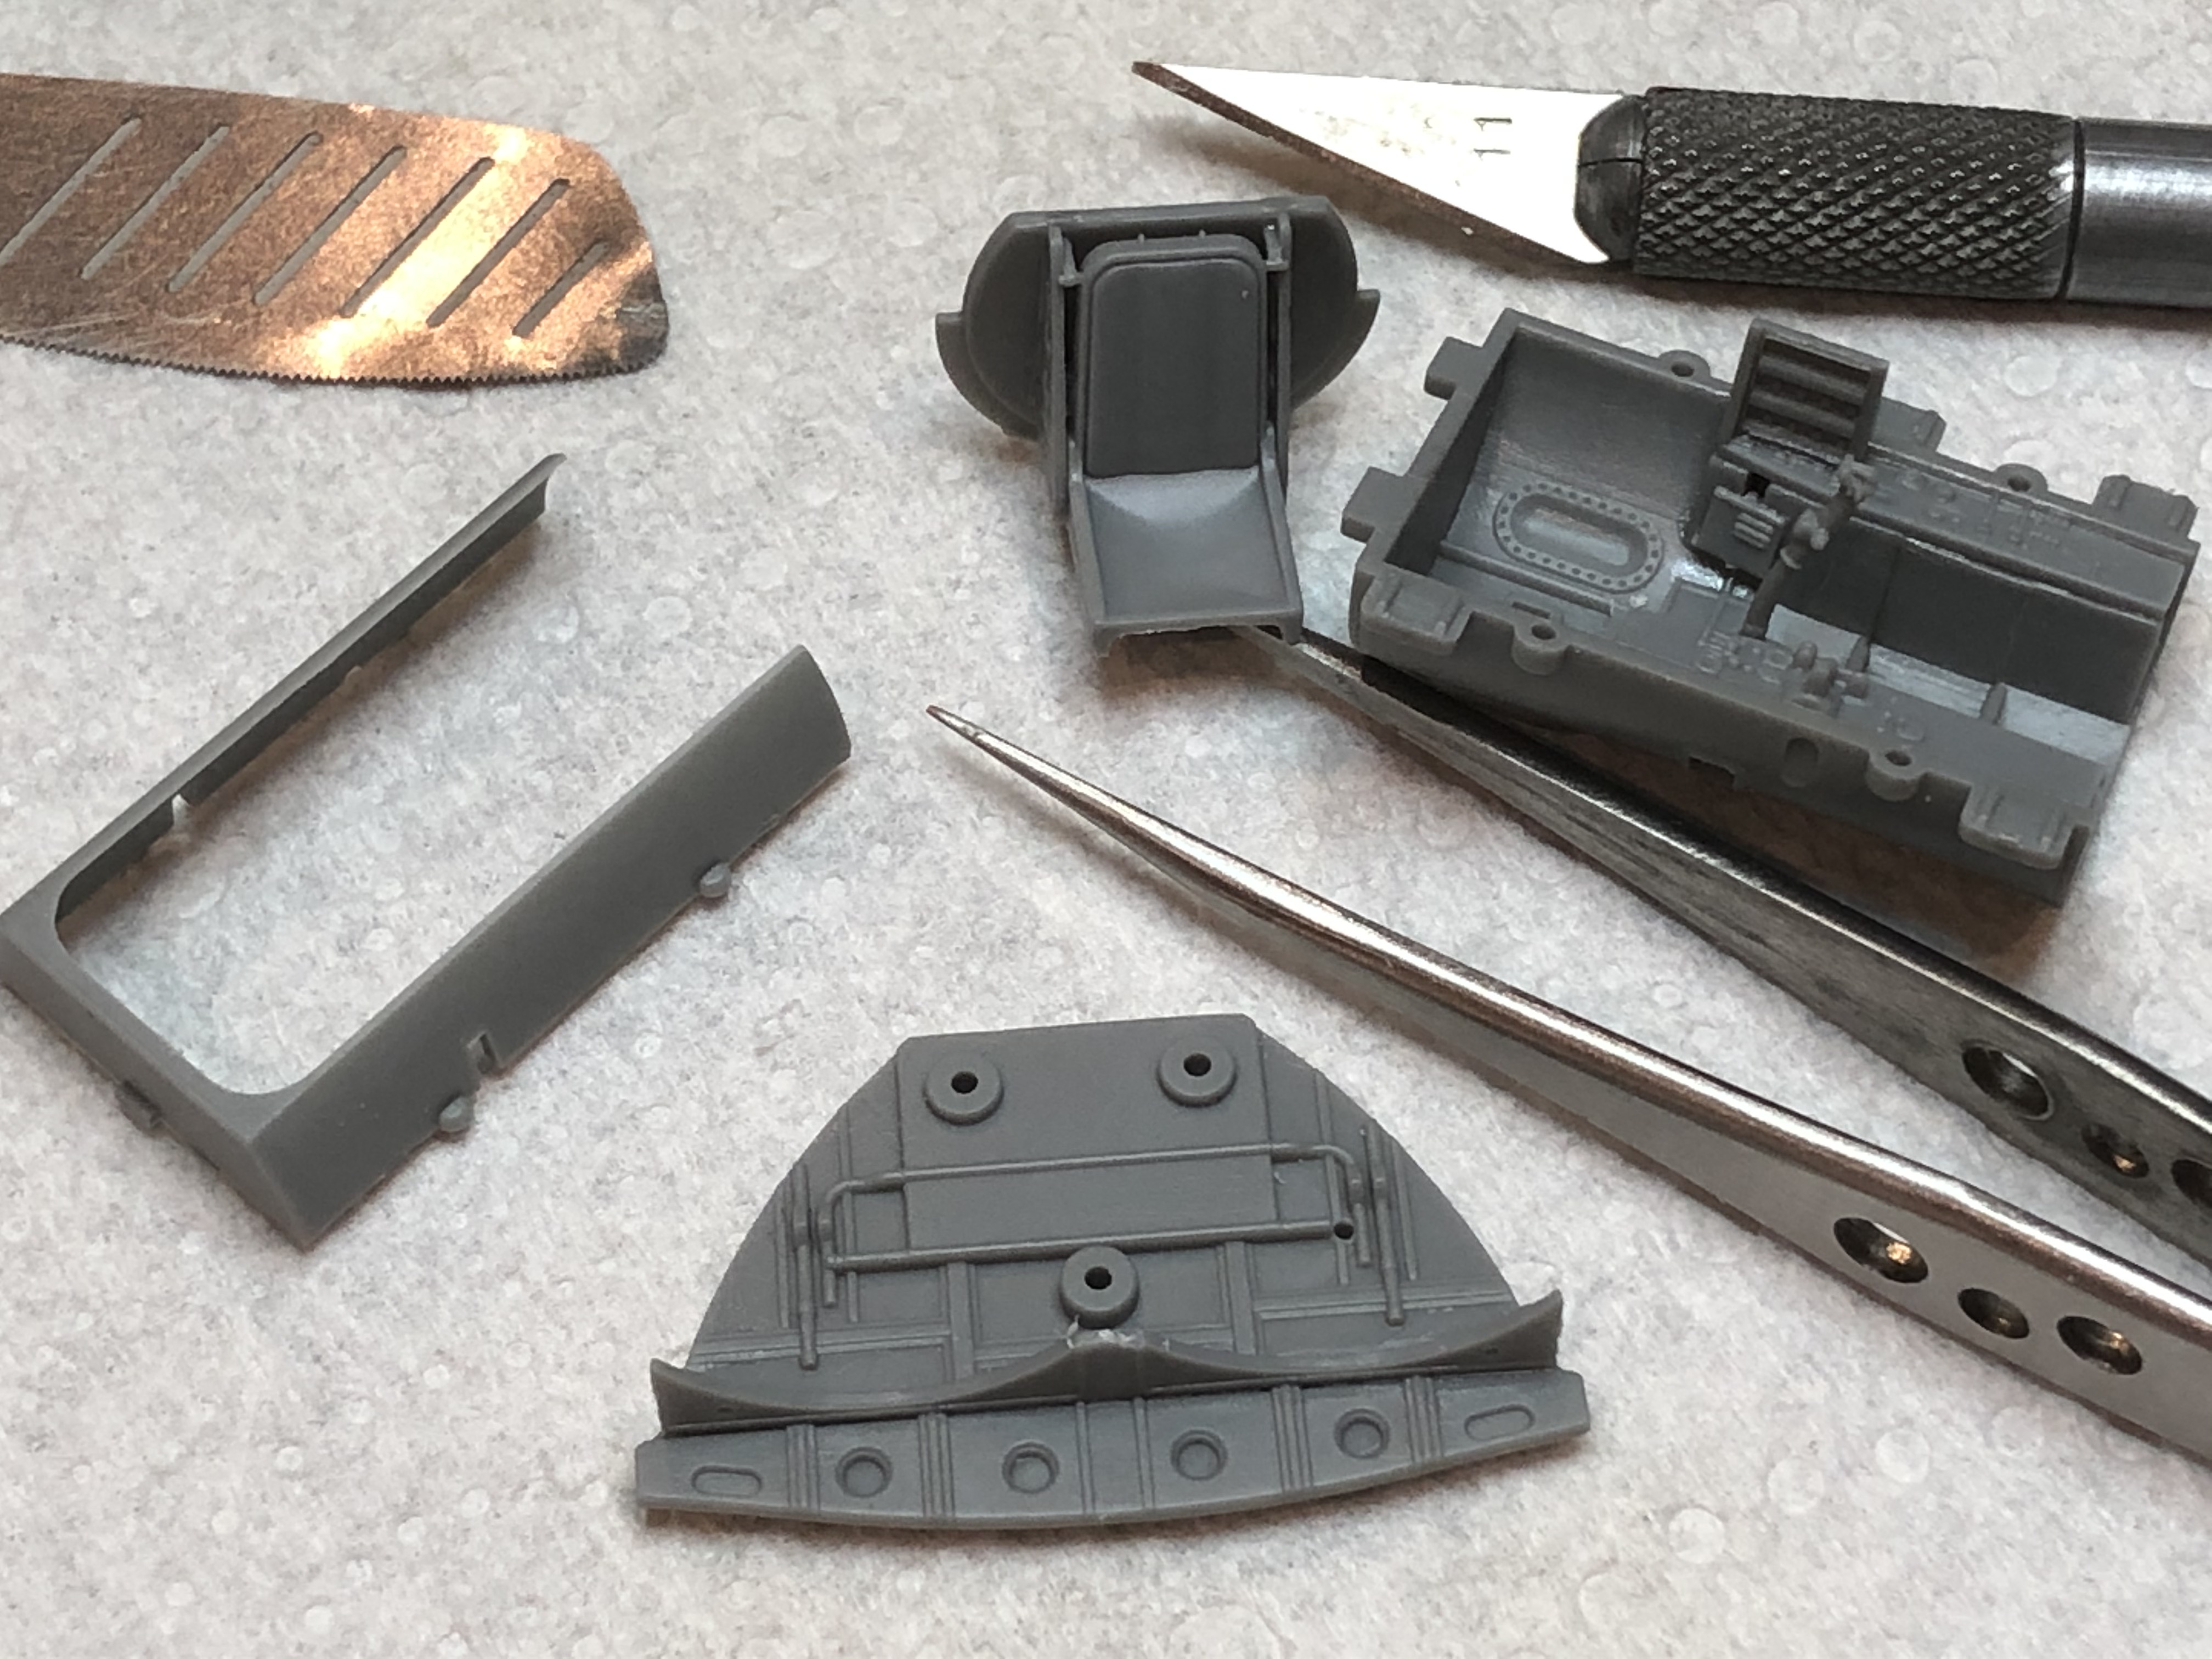
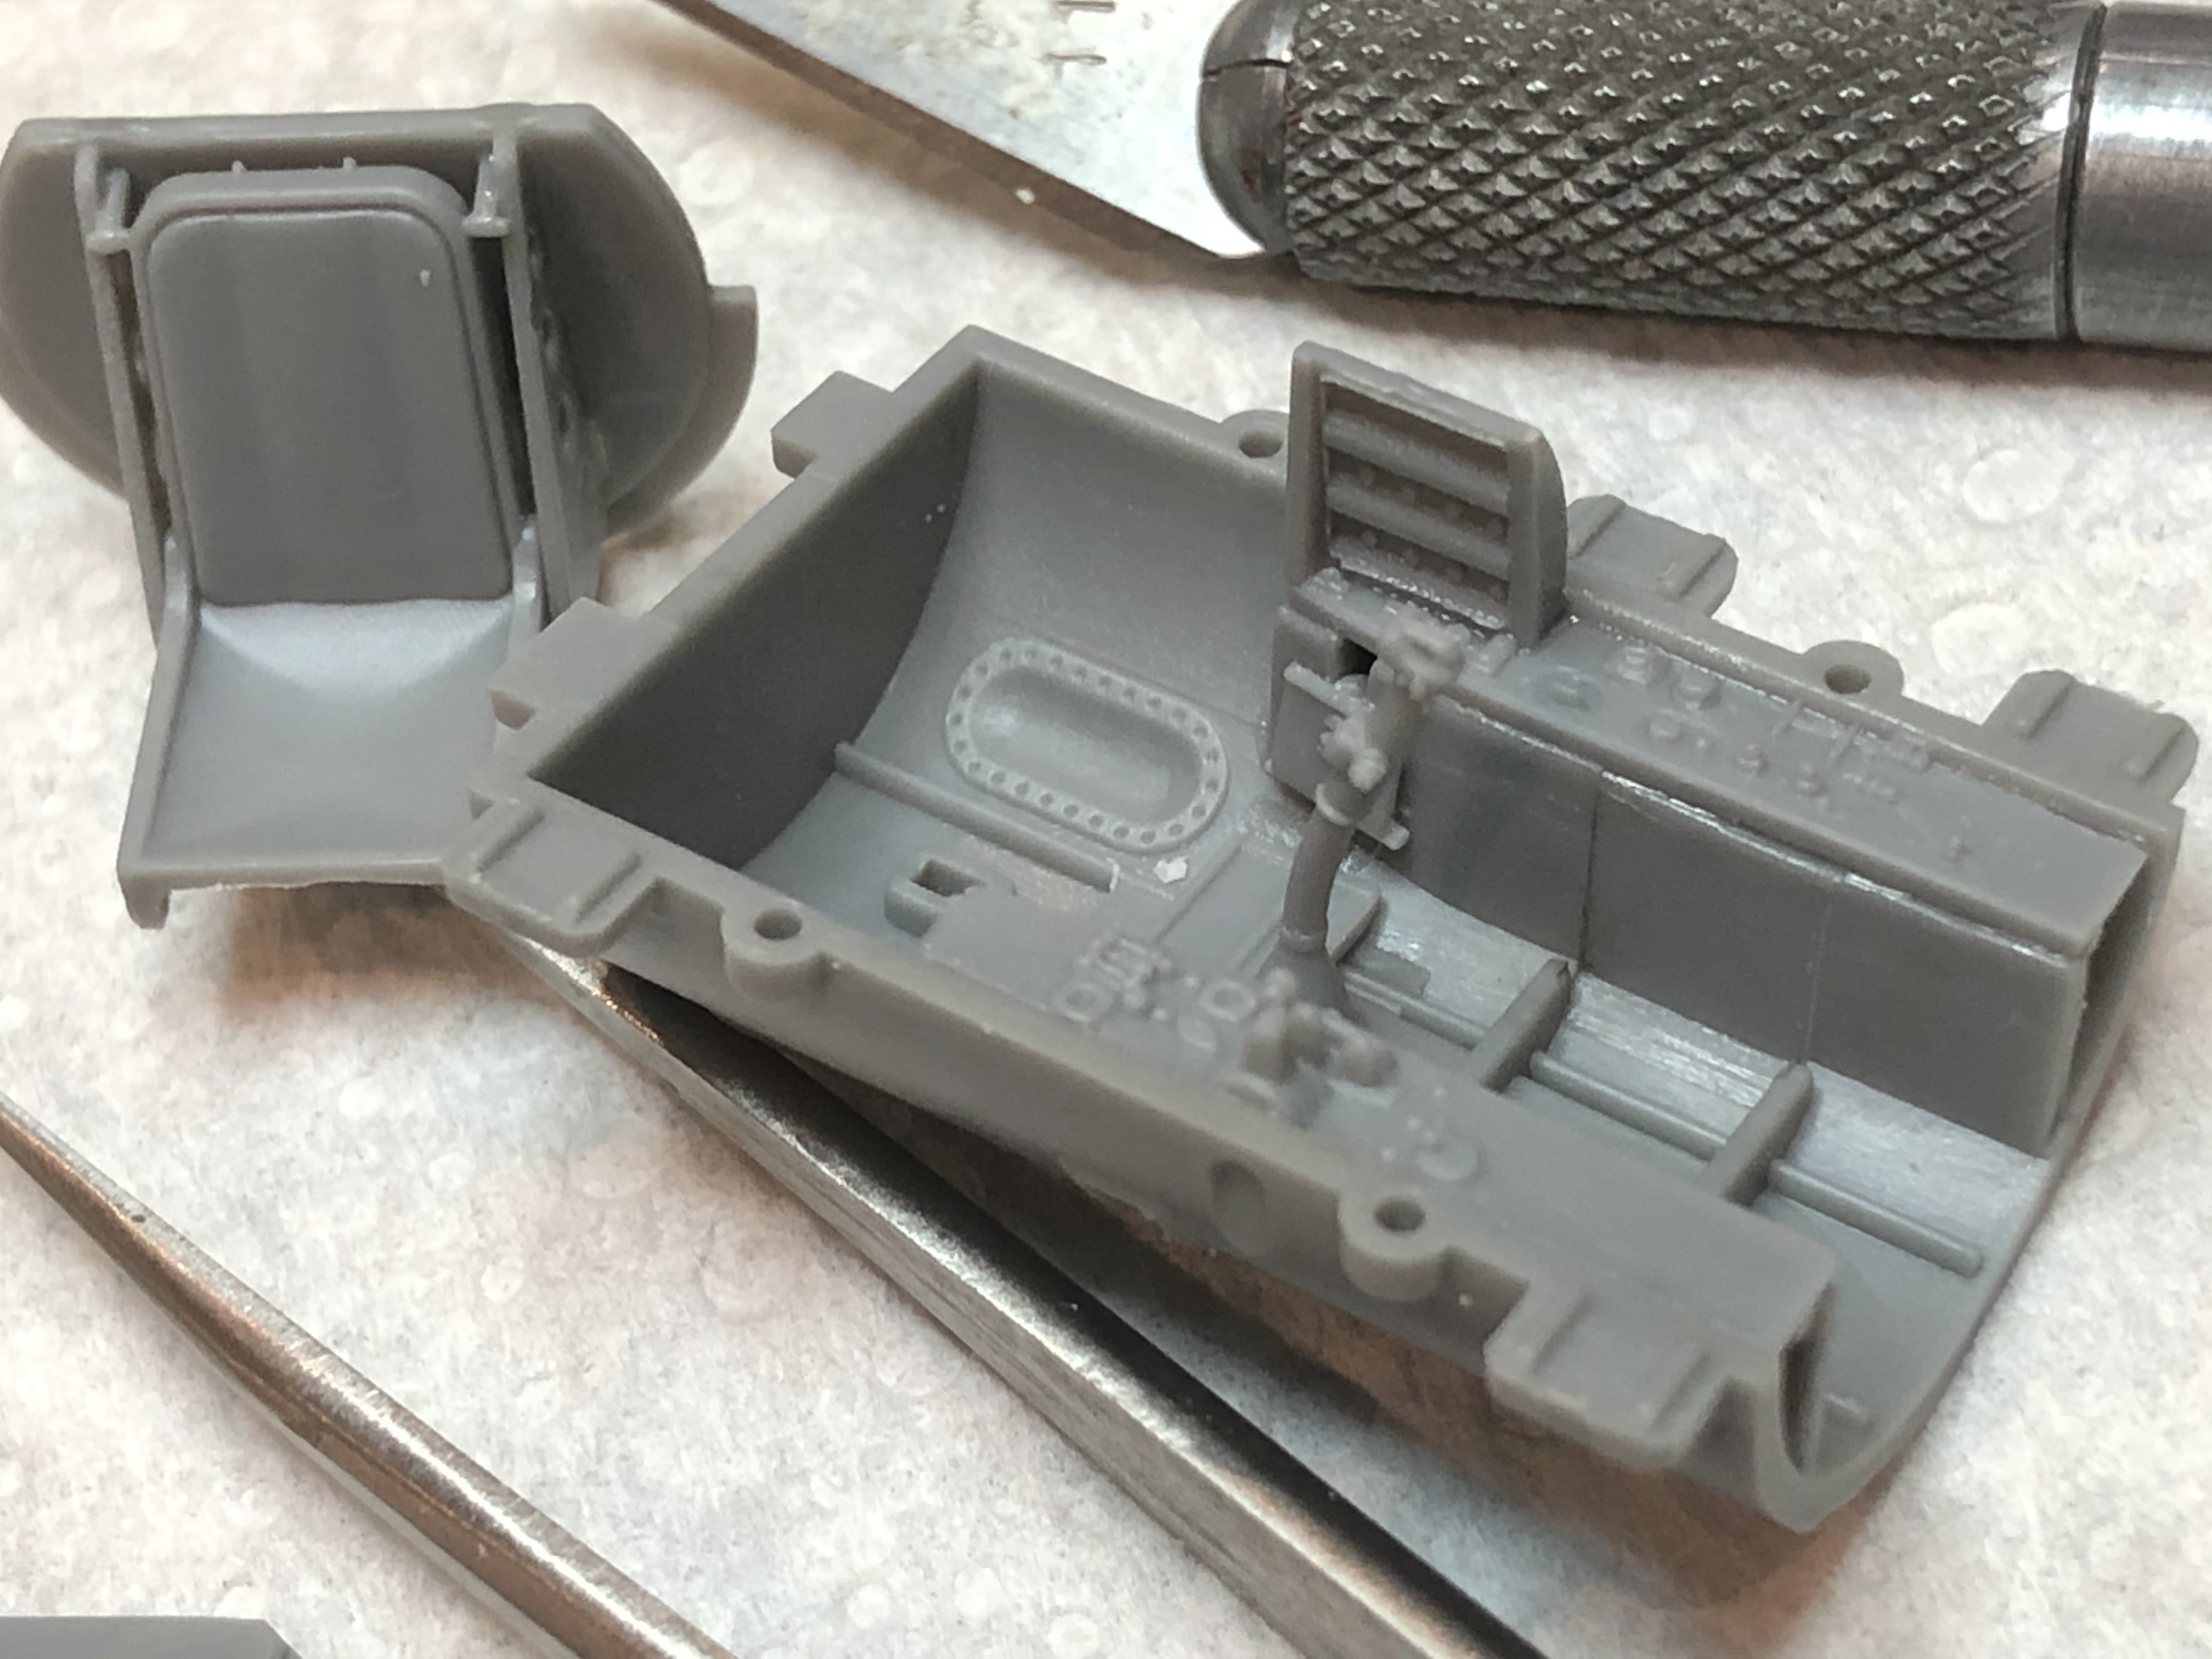
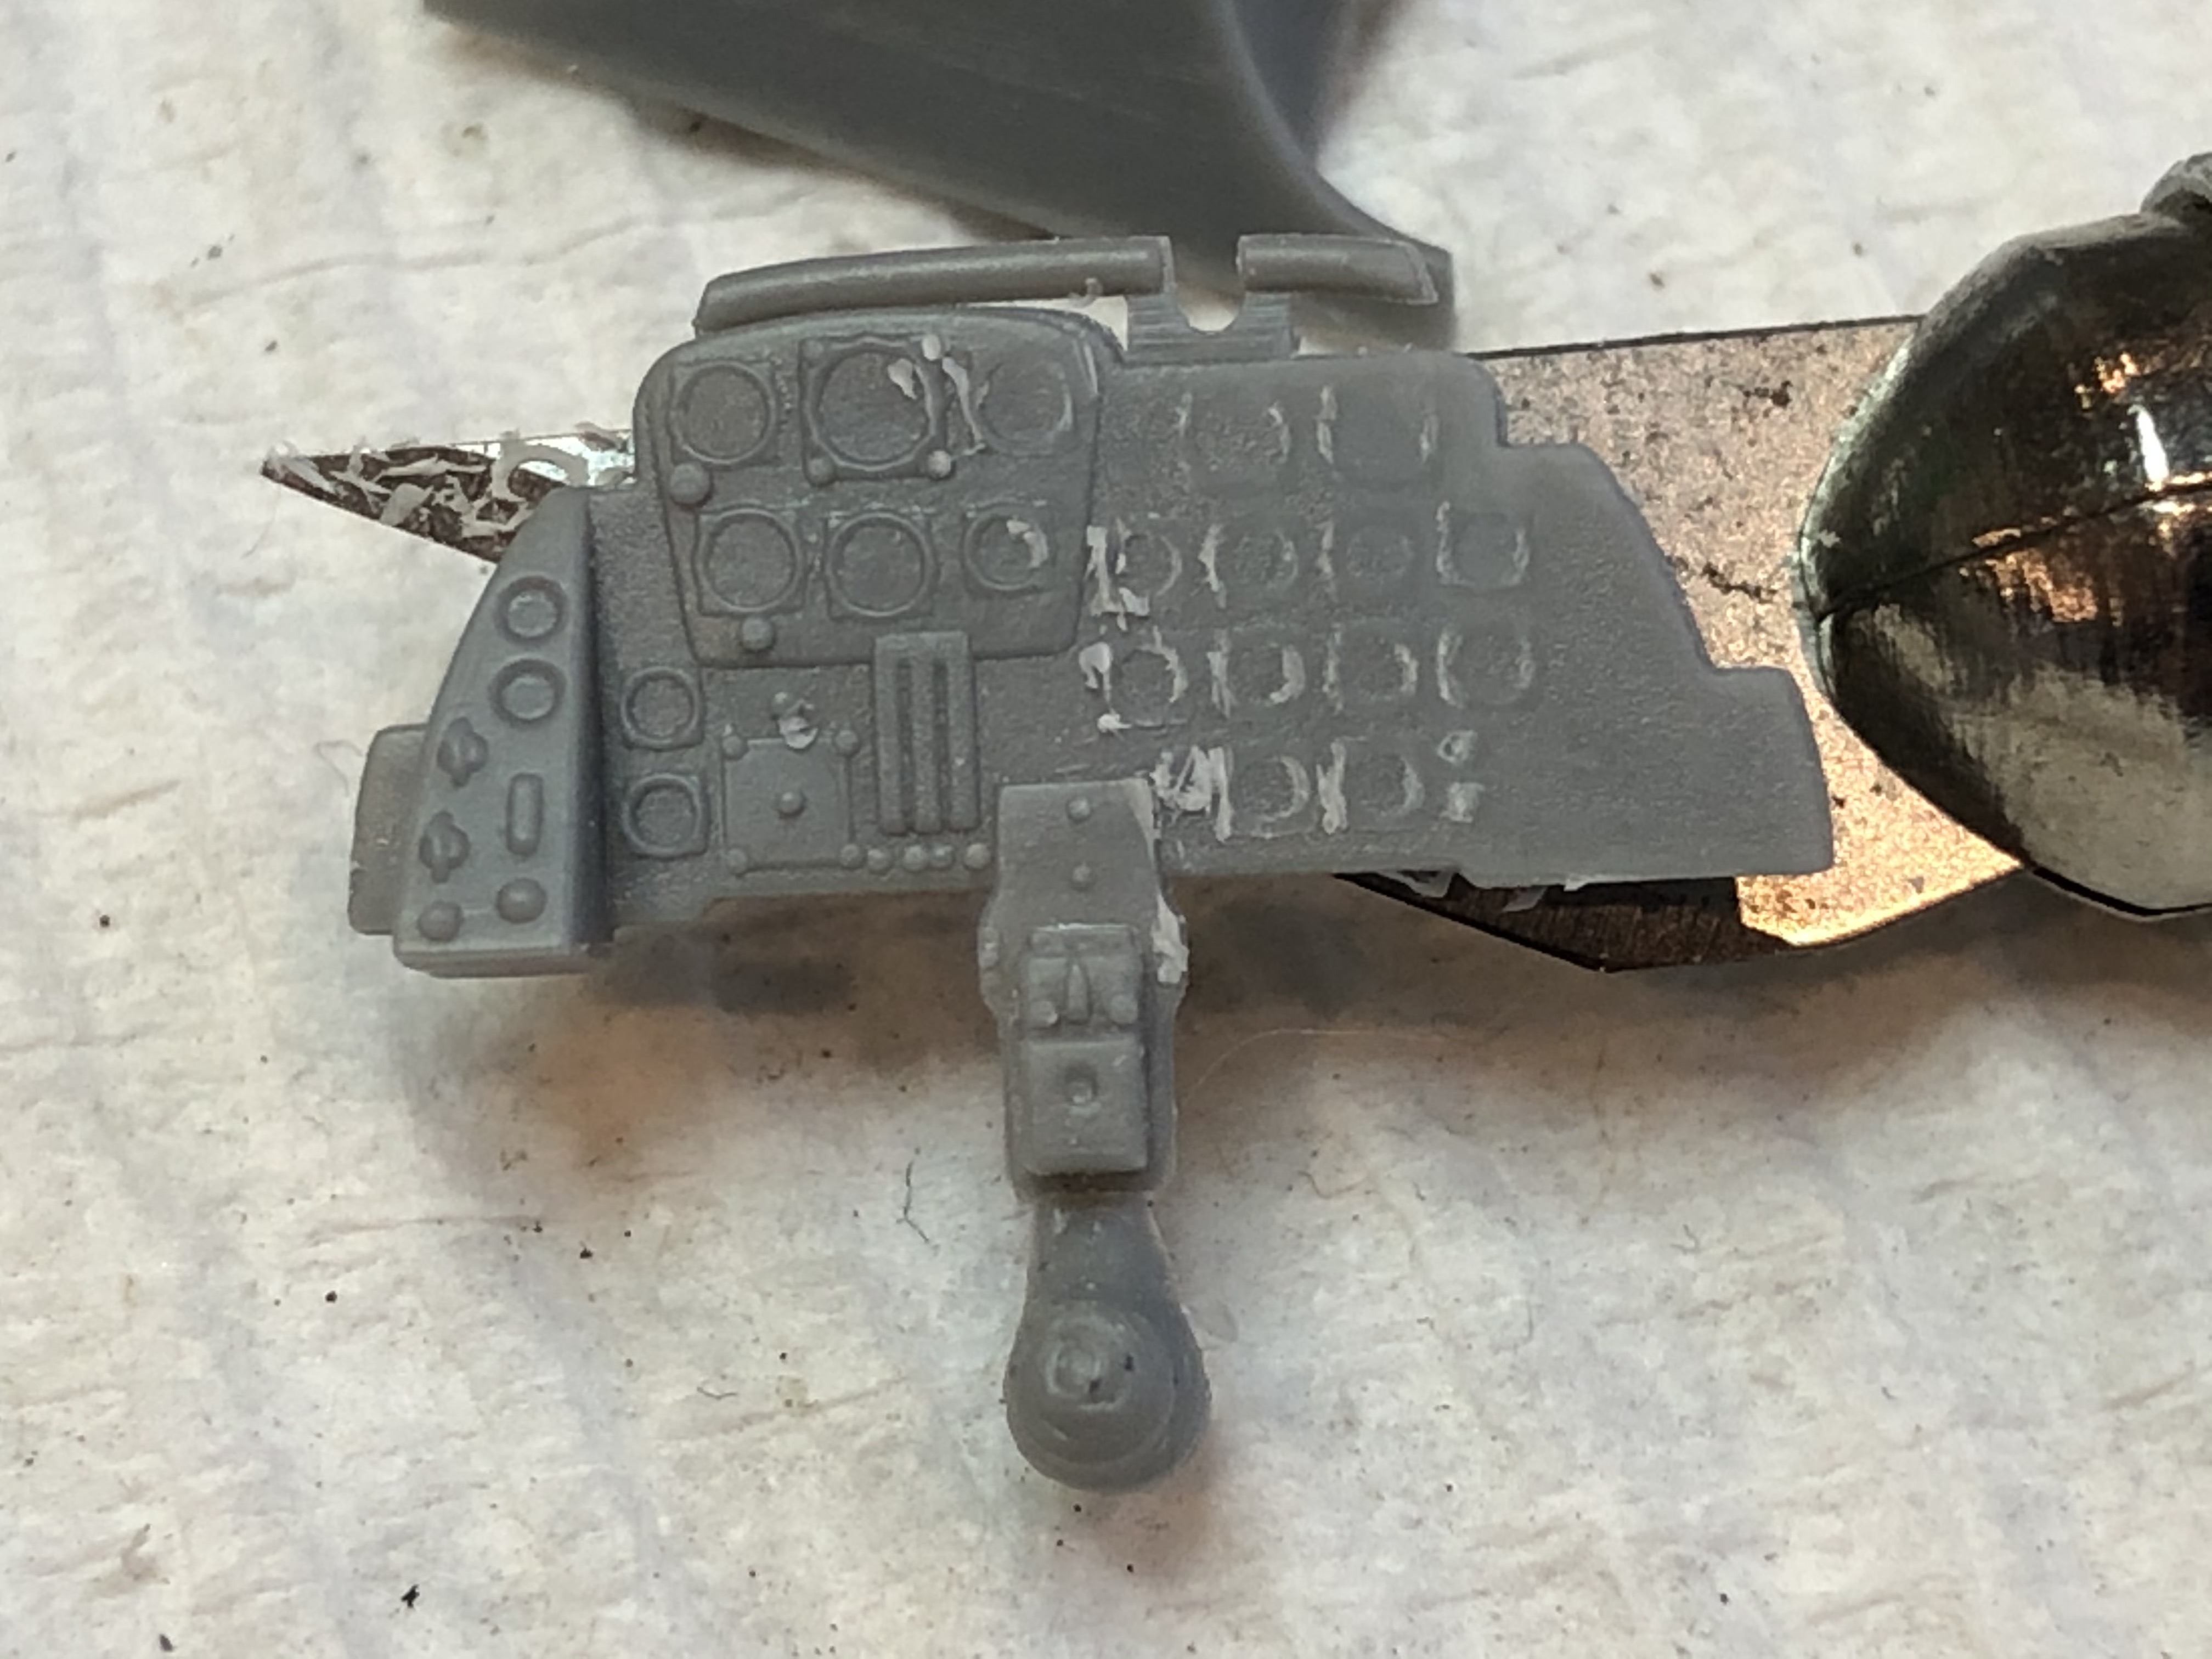
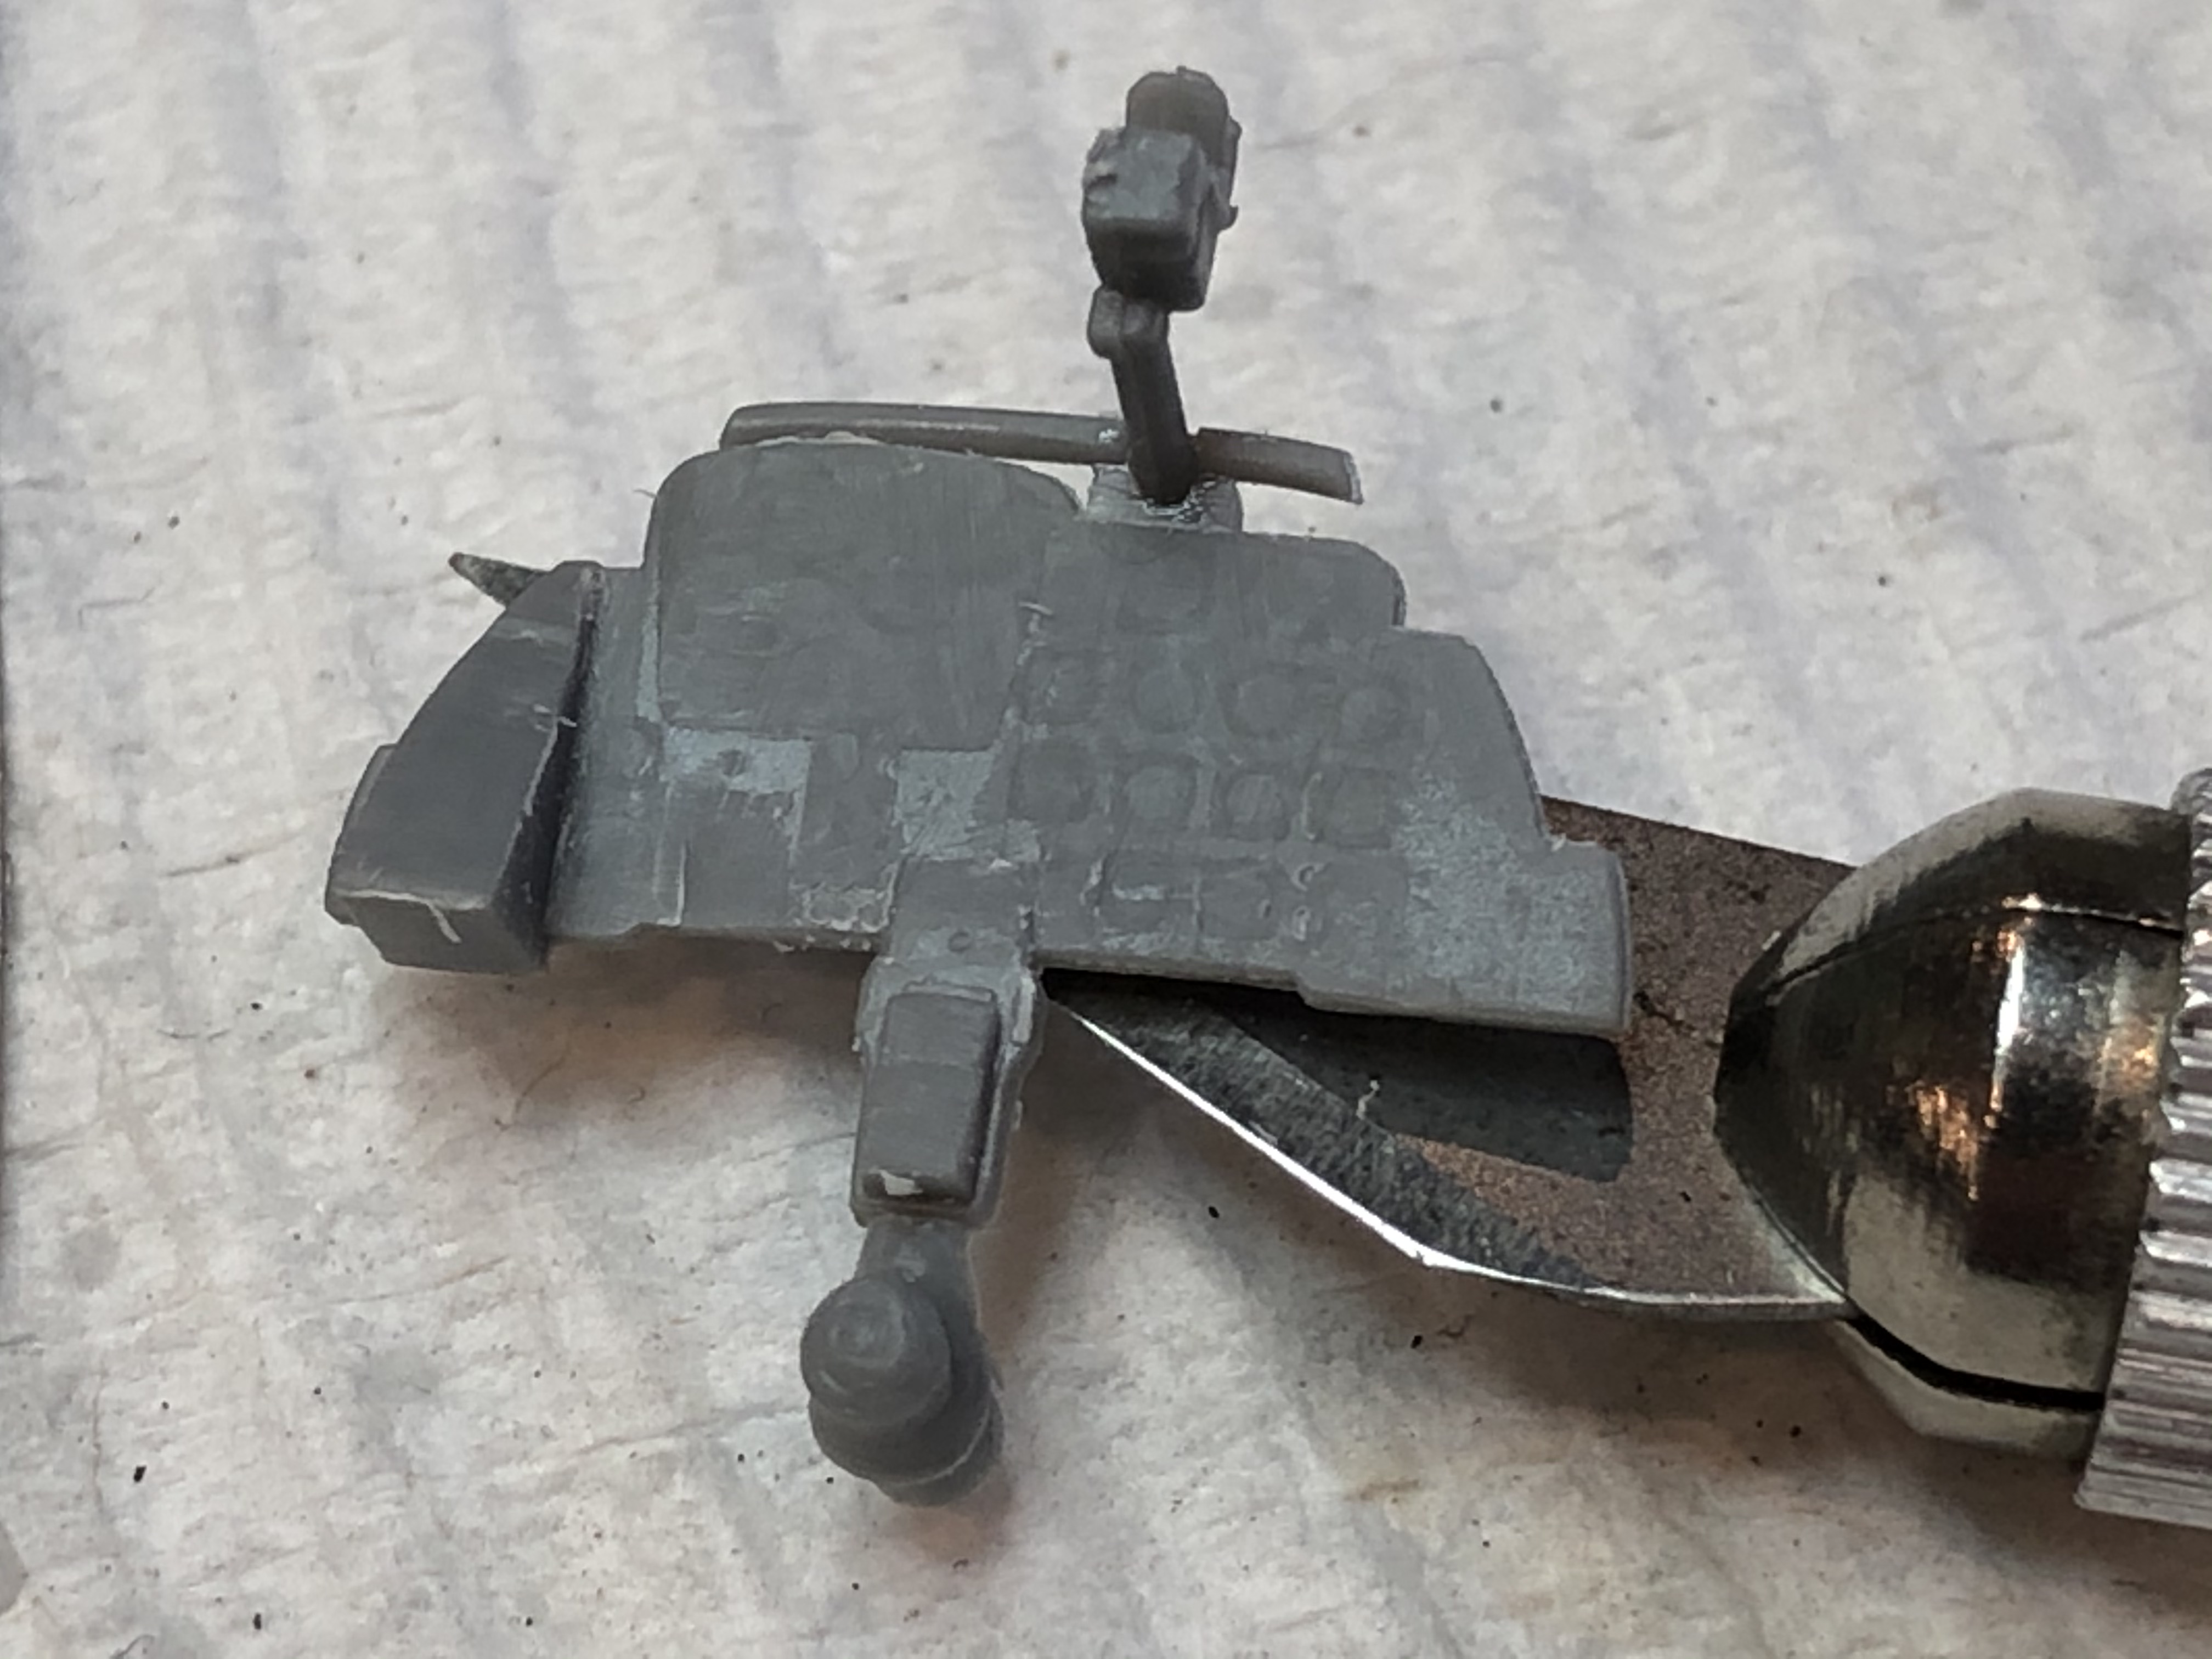
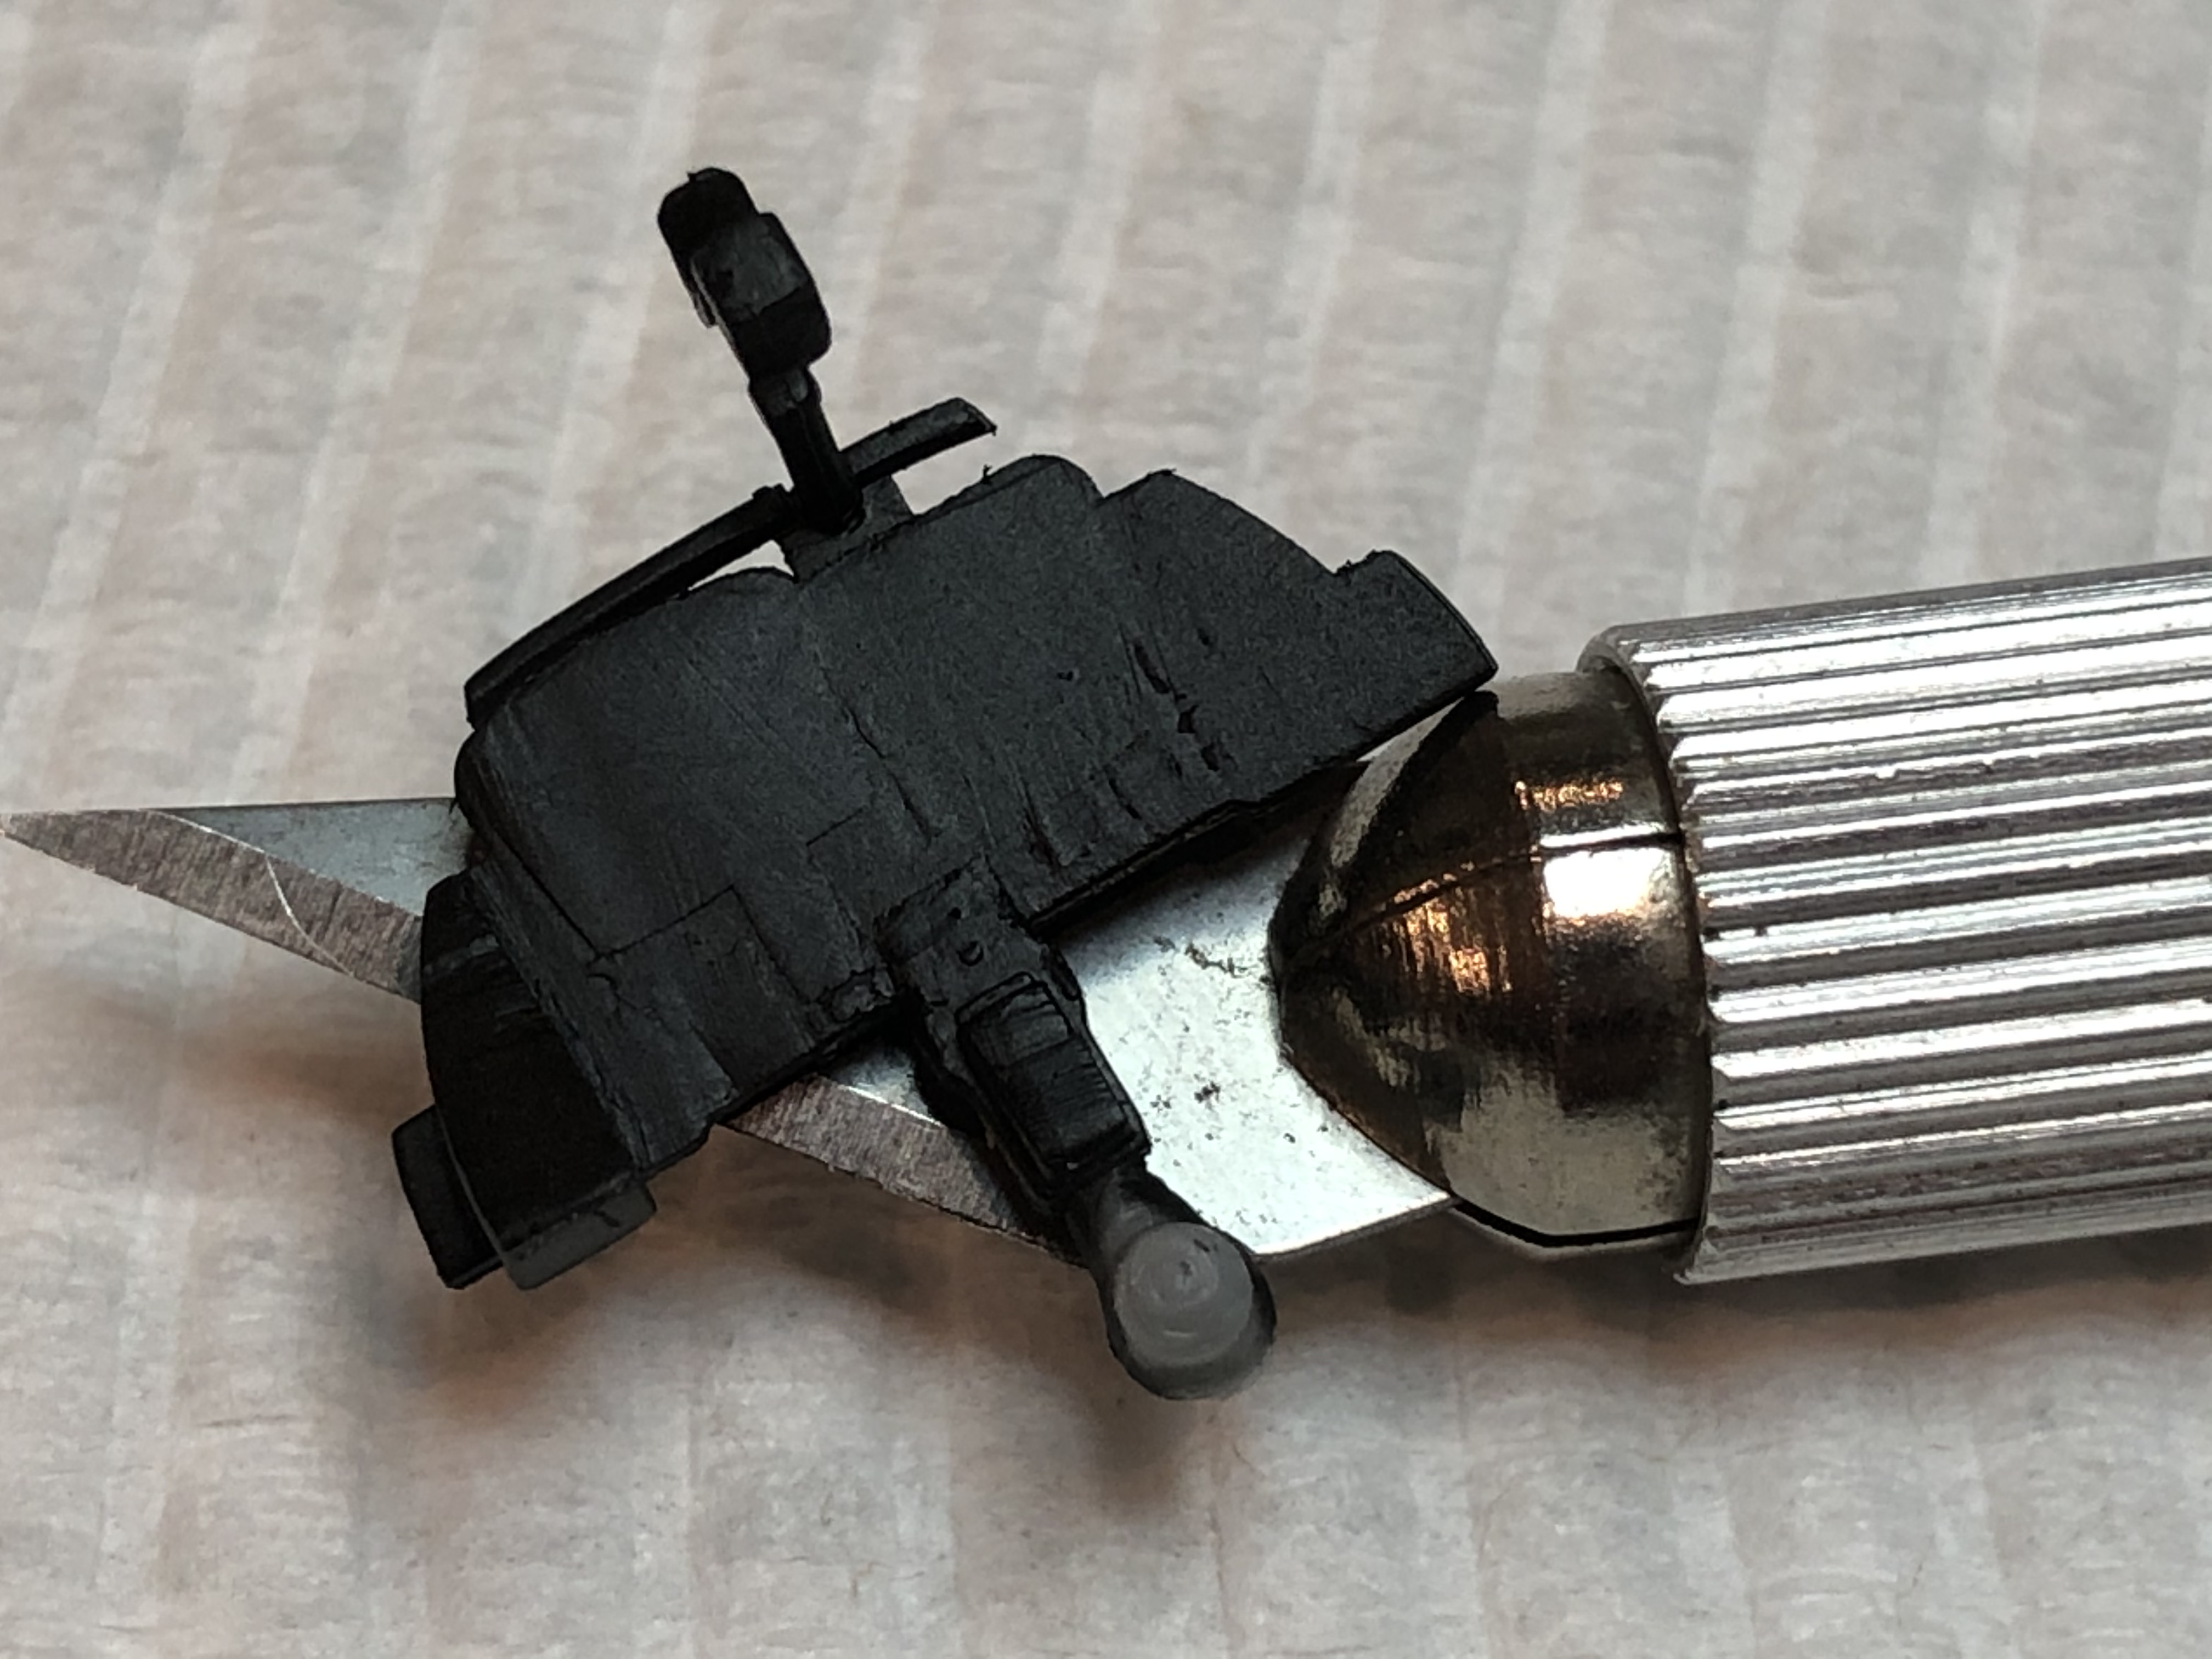
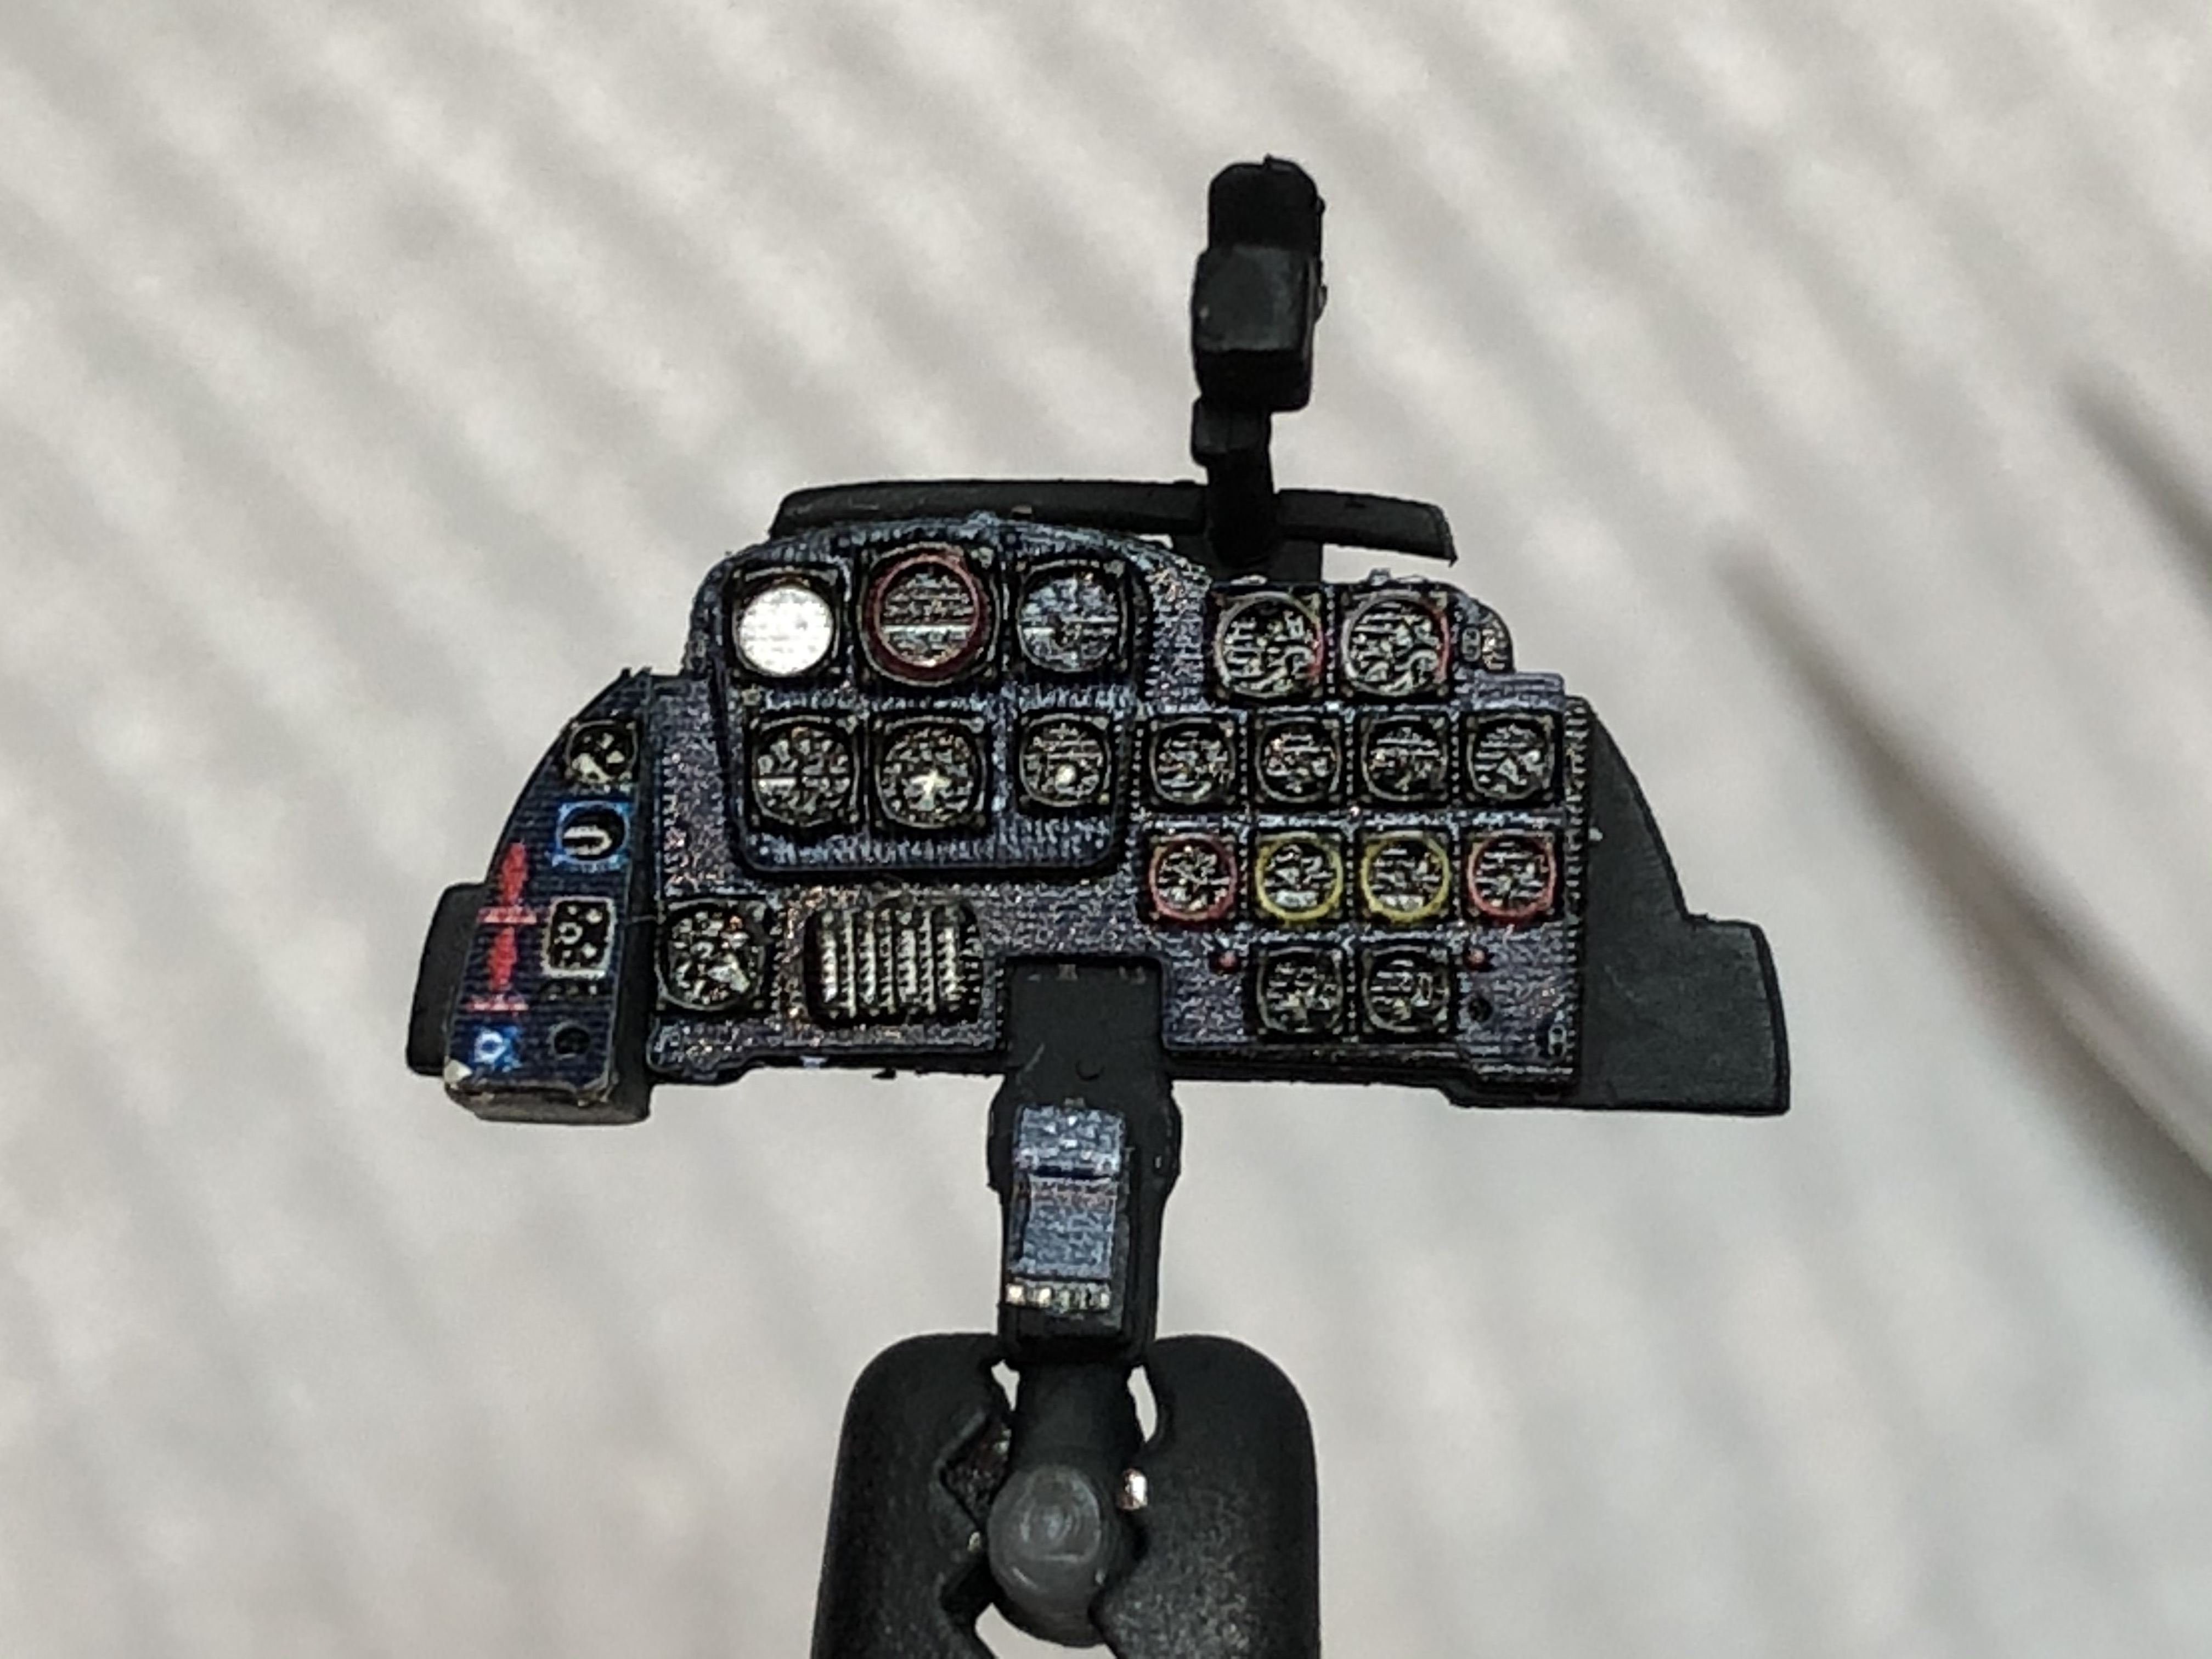
I will post up detailed sprue shots of both kits shortly, and try to include as much comparative detail on the build process, fit and detail for both kits as I go.

Please don't hesitate to ask if you want to see any specific details or have any questions along the way, I will try to answer as best I can.

Cheers, D

Edit: I've just noticed something in the Kagero information. V555 was lost on March 30, 1945. That was the very day that Eric Clapton was born, one of my all-time favourite guitarists. My birthday is March 30 as well. Hmmmm . . . . . .
AussieReg
Staff MemberAssociate Editor
AUTOMODELER
#007
_VISITCOMMUNITY
Victoria, Australia
Joined: June 09, 2009
KitMaker: 8,156 posts
AeroScale: 3,756 posts
Posted: Monday, February 24, 2020 - 12:38 AM UTC
First up some pics of the Hobby Boss kit. Mine is a "white box" edition so these box images are from the Hobby Boss website.


Instruction manual, A4 booklet format. No colour call-outs, these are on the box base.


Decal sheet


Eduard PE fret, pre-coloured and self-adhesive.


And on to the sprues. A few detail shots here, I will post more during the build process.


Clear sprues individually bagged and wrapped in protective foam sheet, a nice touch.


White metal nose gear bay for counterweight, another nice touch!


Overall some nice fine surface detail and clean moulds, as expected for a 2016 release.

Cheers, D
RussellE
#306
_VISITCOMMUNITY
Victoria, Australia
Joined: June 27, 2010
KitMaker: 3,959 posts
AeroScale: 598 posts
Posted: Monday, February 24, 2020 - 08:42 AM UTC
well! I can't not follow this!

Strapped in for one heck of a ride!

"...the bombardier operated the Lotfe 7H bomb sight in a lying in a prone position." War is cr*p, but this just takes the mickey! Poor sods!
AussieReg
Staff MemberAssociate Editor
AUTOMODELER
#007
_VISITCOMMUNITY
Victoria, Australia
Joined: June 09, 2009
KitMaker: 8,156 posts
AeroScale: 3,756 posts
Posted: Monday, February 24, 2020 - 07:27 PM UTC

Quoted Text

well! I can't not follow this! Strapped in for one heck of a ride!


Thanks Russ, I'm looking forward to this one! The Schwalbe II Campaign should be really good, lots of variety in the kits already put forward and great subject matter!


Quoted Text

"...the bombardier operated the Lotfe 7H bomb sight in a lying in a prone position." War is cr*p, but this just takes the mickey! Poor sods!


Indeed, lying flat on their stomach for the duration of the flight with no room to move. Just as well there were only 2 airframes built and maybe a couple of dozen actual flights!

Cheers, D
AussieReg
Staff MemberAssociate Editor
AUTOMODELER
#007
_VISITCOMMUNITY
Victoria, Australia
Joined: June 09, 2009
KitMaker: 8,156 posts
AeroScale: 3,756 posts
Posted: Monday, February 24, 2020 - 07:35 PM UTC
Next up is the Dragon kit, as said earlier this is a reboxing of the TriMaster kit from the late 80's with a couple of PE frets included.

Box art, instructions and decals.


Sprue shots with a few odd close detail shots.


PE Frets


Vinyl Tyres (not my favourite things!)


Clear Sprues


And there we have it, the materials I have to work with for the next 6 months in this project!

Cheers, D
rochaped
_VISITCOMMUNITY
Lisboa, Portugal
Joined: August 27, 2010
KitMaker: 679 posts
AeroScale: 669 posts
Posted: Monday, February 24, 2020 - 11:18 PM UTC
Damian,

Perhaps the most unusual 262, and you manage to plunge over two different kits.
Presenting what is inside each box is a very nice touch, the Dragon mould does look surpassed by HB plastic, and those vinyl tires... planning on replacing them?

Cheers
Pedro
AussieReg
Staff MemberAssociate Editor
AUTOMODELER
#007
_VISITCOMMUNITY
Victoria, Australia
Joined: June 09, 2009
KitMaker: 8,156 posts
AeroScale: 3,756 posts
Posted: Monday, February 24, 2020 - 11:45 PM UTC
Hi Pedro.

Thanks for checking in here. I will put together the rims and vinyl tyres on the Dragon kit and see how they look, but I have also ordered a set of Eduard resin replacements as a backup.


These are designed for the Tamiya A-1a kit, but they will do the job if required here.

You are also correct about the details. The Hobby Boss kit has much sharper and finer details than the Dragon kit, and the plastic feels a bit firmer as well. We will know for sure once I get stuck in!

Cheers, D
Jessie_C
_VISITCOMMUNITY
British Columbia, Canada
Joined: September 03, 2009
KitMaker: 6,965 posts
AeroScale: 6,247 posts
Posted: Tuesday, February 25, 2020 - 08:57 AM UTC
That poor bomb-aimer looks terribly uncomfortable. It's lucky for him that the 262's range kept flights under an hour.
GazzaS
#424
_VISITCOMMUNITY
Queensland, Australia
Joined: April 23, 2015
KitMaker: 4,648 posts
AeroScale: 1,938 posts
Posted: Tuesday, February 25, 2020 - 06:20 PM UTC
Damian,
Glad to see you motivated! Only 3 days to go!

Gaz
AussieReg
Staff MemberAssociate Editor
AUTOMODELER
#007
_VISITCOMMUNITY
Victoria, Australia
Joined: June 09, 2009
KitMaker: 8,156 posts
AeroScale: 3,756 posts
Posted: Tuesday, February 25, 2020 - 06:27 PM UTC

Quoted Text

Damian, Glad to see you motivated! Only 3 days to go!Gaz


Yes indeed mate, having a hard time holding back the Xacto and TET right now

Cheers, D
AussieReg
Staff MemberAssociate Editor
AUTOMODELER
#007
_VISITCOMMUNITY
Victoria, Australia
Joined: June 09, 2009
KitMaker: 8,156 posts
AeroScale: 3,756 posts
Posted: Tuesday, February 25, 2020 - 06:51 PM UTC
Ok, how about some reference images!

First up is airframe V484. I can only find 3 images tagged as this one, and only 1 image clearly shows the 484 code.


Airframe V555 on the other hand was quite a celebrity, especially when the US forces found it and made quite a show of disassembling it.
First a few shots in flight and intact.


Next a dozen shots on the ground after a forced landing and abandonment, only to be found intact by US forces.


And finally, lifted back onto its feet and disassembled.


Some really nice clear images amongst them, plenty of detail to be found.

Interesting to note that in the first 3 images of V555, the airframe number is not seen on the front wheel cover, but in the final image it is clearly visible. Perhaps the first 3 images were taken prior to it having the full paint job and stencilling done.

If anybody has any other images of these aircraft that aren't shown here, please feel free to post them up.

Cheers, D
AussieReg
Staff MemberAssociate Editor
AUTOMODELER
#007
_VISITCOMMUNITY
Victoria, Australia
Joined: June 09, 2009
KitMaker: 8,156 posts
AeroScale: 3,756 posts
Posted: Monday, March 16, 2020 - 09:37 AM UTC
Well folks, styrene has been cut, TET has been applied! The first 3 stages of Part 1 on the Hobby Boss kit are done, 15 parts involved here. Once they have cured I will apply some sprue goo to the joins to neaten things up a bit. The styrene on the HB kit responds well to TET and the fit and details are quite good.


Another hour at the bench, this time work on the Dragon cockpit.


And a couple of dry-fit side-by-side shots.


Cheers, D
RussellE
#306
_VISITCOMMUNITY
Victoria, Australia
Joined: June 27, 2010
KitMaker: 3,959 posts
AeroScale: 598 posts
Posted: Wednesday, March 18, 2020 - 03:45 PM UTC
nice update and reference images D!

Please, can you tell me what the brand of razor saw is I can see in one of your pics and where they're available? Ta.
AussieReg
Staff MemberAssociate Editor
AUTOMODELER
#007
_VISITCOMMUNITY
Victoria, Australia
Joined: June 09, 2009
KitMaker: 8,156 posts
AeroScale: 3,756 posts
Posted: Wednesday, March 18, 2020 - 05:27 PM UTC

Quoted Text

nice update and reference images D!

Please, can you tell me what the brand of razor saw is I can see in one of your pics and where they're available? Ta.


Hey Russ.

To be honest I can't remember where I got it from! It was quite a few years ago, maybe Models&Hobbies in Boronia. It is part of a set that comes on a PE Fret style presentation. I think I have a photo of the set somewhere in the archives, I will have a dig around tonight!

Cheers, D
magnusf
_VISITCOMMUNITY
Stockholm, Sweden
Joined: May 02, 2006
KitMaker: 1,953 posts
AeroScale: 1,902 posts
Posted: Wednesday, March 18, 2020 - 08:10 PM UTC
Damian! I've always been fond of this odd version of the 262, and now you're building TWO of them ! We're in for a treat!

Russell! I use this razor saw, or rather I use the blade only with a few layers of tape wrapped around the coarse edge as a handle, only using the fine toothed side ever.


Magnus
RussellE
#306
_VISITCOMMUNITY
Victoria, Australia
Joined: June 27, 2010
KitMaker: 3,959 posts
AeroScale: 598 posts
Posted: Wednesday, March 18, 2020 - 08:57 PM UTC

Quoted Text

Damian! I've always been fond of this odd version of the 262, and now you're building TWO of them ! We're in for a treat!

Russell! I use this razor saw, or rather I use the blade only with a few layers of tape wrapped around the coarse edge as a handle, only using the fine toothed side ever.


Magnus


Indeed we are in for a treat Magnus!

Thanks for the tip on the saw. Even better that it's an Australian site!

But, even better, you can just buy the blades

Best health to everyone!
AussieReg
Staff MemberAssociate Editor
AUTOMODELER
#007
_VISITCOMMUNITY
Victoria, Australia
Joined: June 09, 2009
KitMaker: 8,156 posts
AeroScale: 3,756 posts
Posted: Wednesday, March 18, 2020 - 11:41 PM UTC
Magnus, thanks for checking in mate, great to have you on board! That JLC Razor Saw has been very popular for many years now, I must get around to adding one to the kit soon!

Russ, here's a pic of the set of blades.


As I said earlier, they came on a PE style fret. I use these to cut the parts off the sprue, instead of normal cutters. I find that I never get any distortion of the parts this way. I will keep an eye out in my travels and let you know if I see anything similar.

Cheers, D
RussellE
#306
_VISITCOMMUNITY
Victoria, Australia
Joined: June 27, 2010
KitMaker: 3,959 posts
AeroScale: 598 posts
Posted: Thursday, March 19, 2020 - 09:28 PM UTC

Quoted Text


As I said earlier, they came on a PE style fret. I use these to cut the parts off the sprue, instead of normal cutters. I find that I never get any distortion of the parts this way. I will keep an eye out in my travels and let you know if I see anything similar.

Cheers, D


Interesting that they came as a PE set! My gosh, they must be very thin!

Agree that sometimes its better to saw through frets rather than cut them, as the plastic may not take the strain...
AussieReg
Staff MemberAssociate Editor
AUTOMODELER
#007
_VISITCOMMUNITY
Victoria, Australia
Joined: June 09, 2009
KitMaker: 8,156 posts
AeroScale: 3,756 posts
Posted: Thursday, July 09, 2020 - 11:57 PM UTC
Time to get back to the Hobby Boss kit, I got stuck in to some cutting, trimming, sub assemblies and test fitting. So far so good, no major issues to report with all parts cleaning up nicely and the test fit shows generally neat fit.

Wings and engine assemblies


Cockpit assembly


Bomb aimer/nose-wheel bay assembly


The surface details are quite crisp and the plastic is behaving nicely using Tamiya Extra Thin cement.

As always, time is against me with my overly ambitious projects, so I'm going to focus on finishing the Hobby Boss kit for the Schwalbe II Campaign, and then later work through the Dragon kit with comparative photos here.

Cheers, D
AussieReg
Staff MemberAssociate Editor
AUTOMODELER
#007
_VISITCOMMUNITY
Victoria, Australia
Joined: June 09, 2009
KitMaker: 8,156 posts
AeroScale: 3,756 posts
Posted: Friday, July 10, 2020 - 12:05 AM UTC
I got some momentum up tonight, and managed some airbrush time on this build. Primer is Mr Surfacer 1500 thinned with Mr Levelling Thinner (about 50/50), and the metal finish is AK Xtreme Metal Steel.


After an hour or so to cure I moved on to assembling the engine pods. They went together very nicely with no significant gaps and panel lines matching up perfectly. There will be very minimal clean-up work required here, which suits me fine!


Cheers, D
AussieReg
Staff MemberAssociate Editor
AUTOMODELER
#007
_VISITCOMMUNITY
Victoria, Australia
Joined: June 09, 2009
KitMaker: 8,156 posts
AeroScale: 3,756 posts
Posted: Sunday, July 12, 2020 - 11:31 AM UTC
I laid down some AK Xtreme Metal Steel on the interior walls (that will be visible) and the main gear wells. The kit has a few detail items inside the rear fuselage and calls for a full interior paint job, but I don't see the point as it will be closed up in a couple of days. Perhaps some time in the future I will do another build of this kit with some access panels removed, the details look very nice.


I decided to do a test dry assembly before I got too much further with the cockpit construction and detailing, to make sure no "adjustments" are required, and very happy to say that everything just snapped into place very neatly.


With every build I aim to introduce a new technique or product into my arsenal, and with this build it is Eduard's pre-coloured self-adhesive PE set. It feels a bit like cheating, but my eyes and hands aren't up to the task of doing justice to the fine detail on the instrument panel of this kit.

IP detail removal in progress.

All gone.

Black primer.

8 PE parts added


Up close in the photo it looks a bit rough, but from a foot away and inside the closed cockpit, it looks a million dollars! I will definitely be looking at this product for future builds.

Cheers, D
AussieReg
Staff MemberAssociate Editor
AUTOMODELER
#007
_VISITCOMMUNITY
Victoria, Australia
Joined: June 09, 2009
KitMaker: 8,156 posts
AeroScale: 3,756 posts
Posted: Wednesday, July 15, 2020 - 05:16 PM UTC
July 13 update

A little more progress on the office spaces. I gave the pilot and bomb aimer some comfy Red Leather (courtesy of Vallejo Model Colour), and the pilot got a bit of safety gear to keep the OH&S inspectors happy. The bomb aimer can just bounce around in his little space apparently


A bit of a wash to dull things down and I'm almost ready to close this one up!

July 14 update

A very productive and enjoyable session at the bench tonight, and at the end we have reached the unmistakable Schwalbe airframe!


I will leave the tape in place overnight to get the dihedral nice and tight, then move on to fitting the clear parts and masking them up.

Once the cement has cured fully I will post some closer shots of the joins.

Cheers, D
AussieReg
Staff MemberAssociate Editor
AUTOMODELER
#007
_VISITCOMMUNITY
Victoria, Australia
Joined: June 09, 2009
KitMaker: 8,156 posts
AeroScale: 3,756 posts
Posted: Wednesday, July 15, 2020 - 09:41 PM UTC
Tension tape removed, we have an airframe!


Lets have a close look at the various joins -

LEFT WING
Upper wing root

Upper front nacelle join

Upper rear nacelle join

Inner underside nacelle join

Outer underside nacelle join


RIGHT WING
Upper wing root

Upper front nacelle join

Upper rear nacelle join

Inner underside nacelle join

Outer underside nacelle join


LEFT STABILIZER
Upper Join

Lower Join


RIGHT STABILIZER
Upper Join

Lower Join


UNDERSIDE FRONT


UNDERSIDE REAR


Generally excellent fit with no filling and just a light sand required. The only areas for concern are the top join on the LH stabilizer, where I have added a thin bead of sprue goo, and the upper rear nacelle joins on both sides. I have applied a small bead of cement to those joins and clamped them with strong spring clamps to see it they close up.

Cheers, D
litespeed
Staff MemberNews Reporter
AEROSCALE
_VISITCOMMUNITY
England - North West, United Kingdom
Joined: October 15, 2009
KitMaker: 1,976 posts
AeroScale: 1,789 posts
Posted: Wednesday, July 15, 2020 - 10:10 PM UTC
Looking great Damian, the fit is superb
AussieReg
Staff MemberAssociate Editor
AUTOMODELER
#007
_VISITCOMMUNITY
Victoria, Australia
Joined: June 09, 2009
KitMaker: 8,156 posts
AeroScale: 3,756 posts
Posted: Wednesday, July 15, 2020 - 10:34 PM UTC

Quoted Text

Looking great Damian, the fit is superb


Thanks Tim, and yes, I can highly recommend this kit so far. I think the small gap on the LH stabilizer could have been easily avoided if I was more diligent with my test fitting. A little trimming on the end of the locating tabs would have seen it fit right into place.

Cheers, D
 _GOTOTOP