

Richard,
Welcome back to the modeling bench. I'll be following your build with much interest my friend.
After two years your work to date is like you never missed a beat. Outstanding detailing. The cockpit is up to your high standards for sure.
Being a car guy these days, I prefer lacquer primers, but I've used the Badger primers as well, and even lacquer paint plays well with them.
Joel
Hosted by Rowan Baylis
1/48 A6M2b Type 21 build
Joel_W

Joined: December 04, 2010
KitMaker: 11,666 posts
AeroScale: 7,410 posts
Posted: Saturday, June 27, 2020 - 09:46 AM UTC


rdt1953
Joined: February 06, 2015
KitMaker: 1,098 posts
AeroScale: 900 posts
Posted: Saturday, June 27, 2020 - 11:37 AM UTC
Thanks Joel - good to hear from you and nice to feel the model mojo returning.
The Commando project was pretty consuming- energy , attention and $$ but well worth it .Now I need to start sorting out some issues so it runs as good as it looks !
Cheers - Richard
The Commando project was pretty consuming- energy , attention and $$ but well worth it .Now I need to start sorting out some issues so it runs as good as it looks !
Cheers - Richard
rdt1953
Joined: February 06, 2015
KitMaker: 1,098 posts
AeroScale: 900 posts
Posted: Friday, July 10, 2020 - 04:19 AM UTC
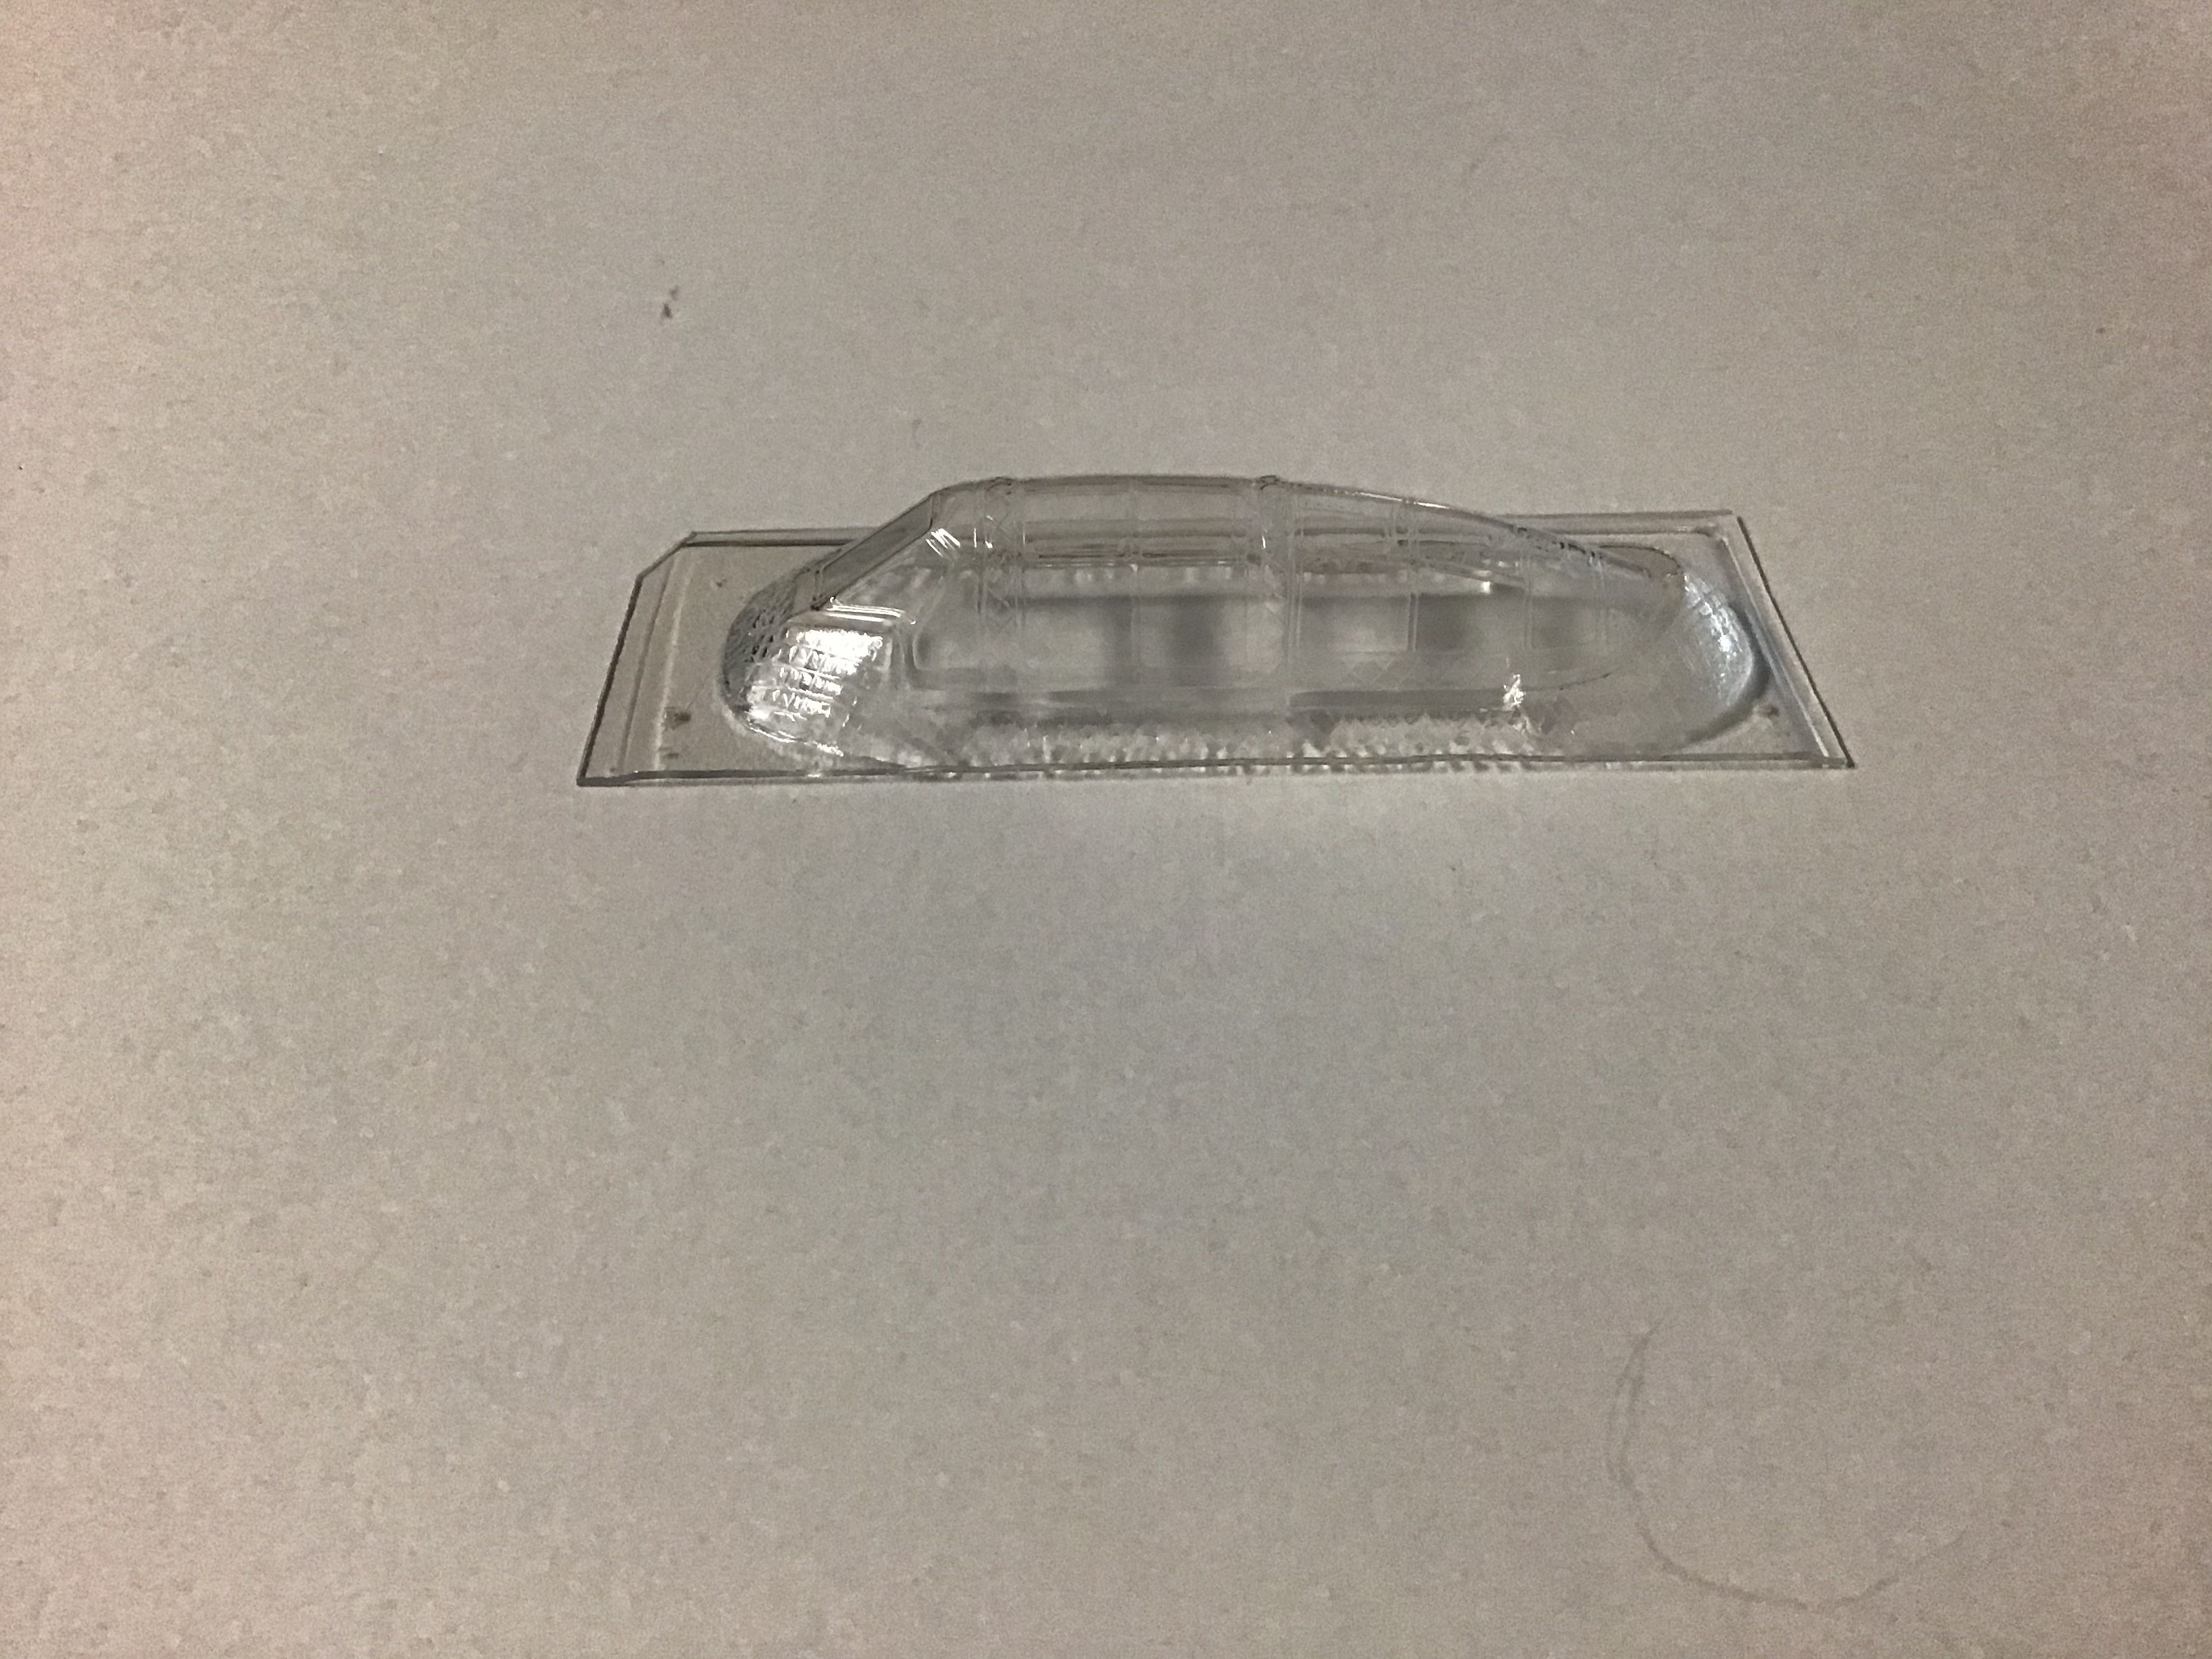
After a brief delay because I clicked on the wrong Rob Taurus canopy - seems I ordered for the Tamiya kit instead of the Hasegawa - I am now back to work as the correct ones have arrived.
Rob Taurus Vac Canopies are superb - thin with sharp detail ( some have more detail than the injection kit parts) and they are styrene so they will bond to the fuselage with styrene cement.
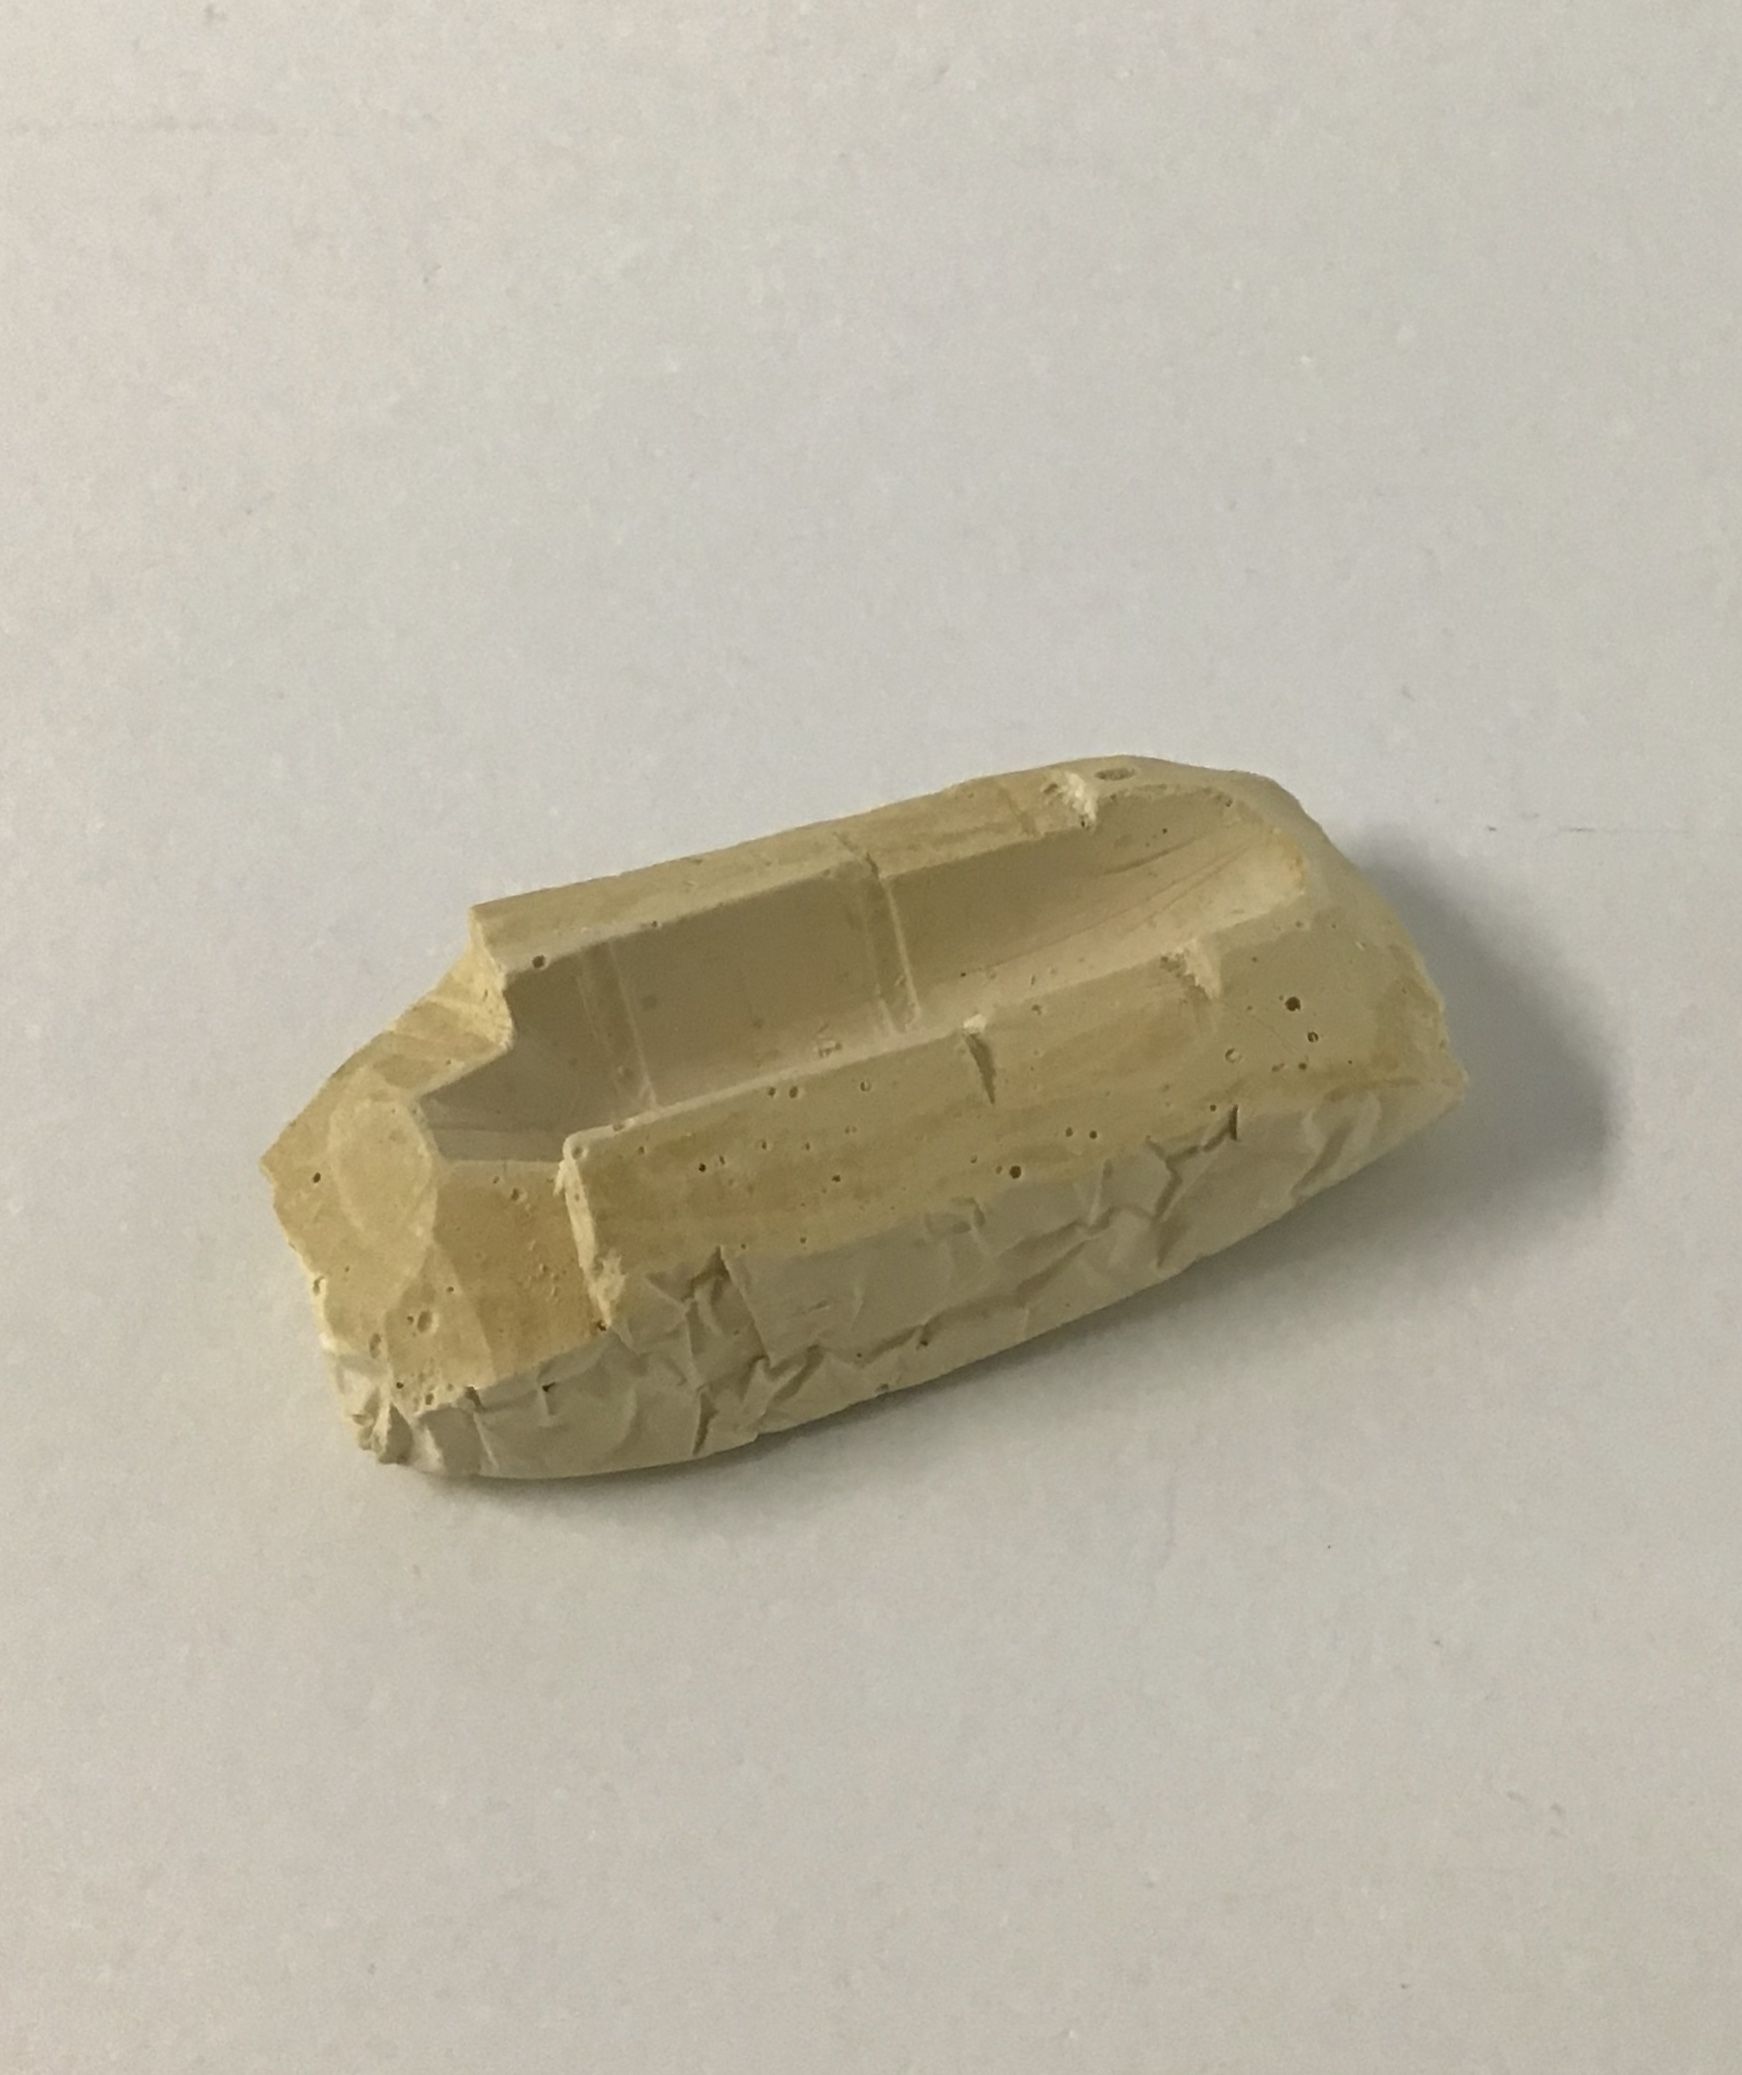
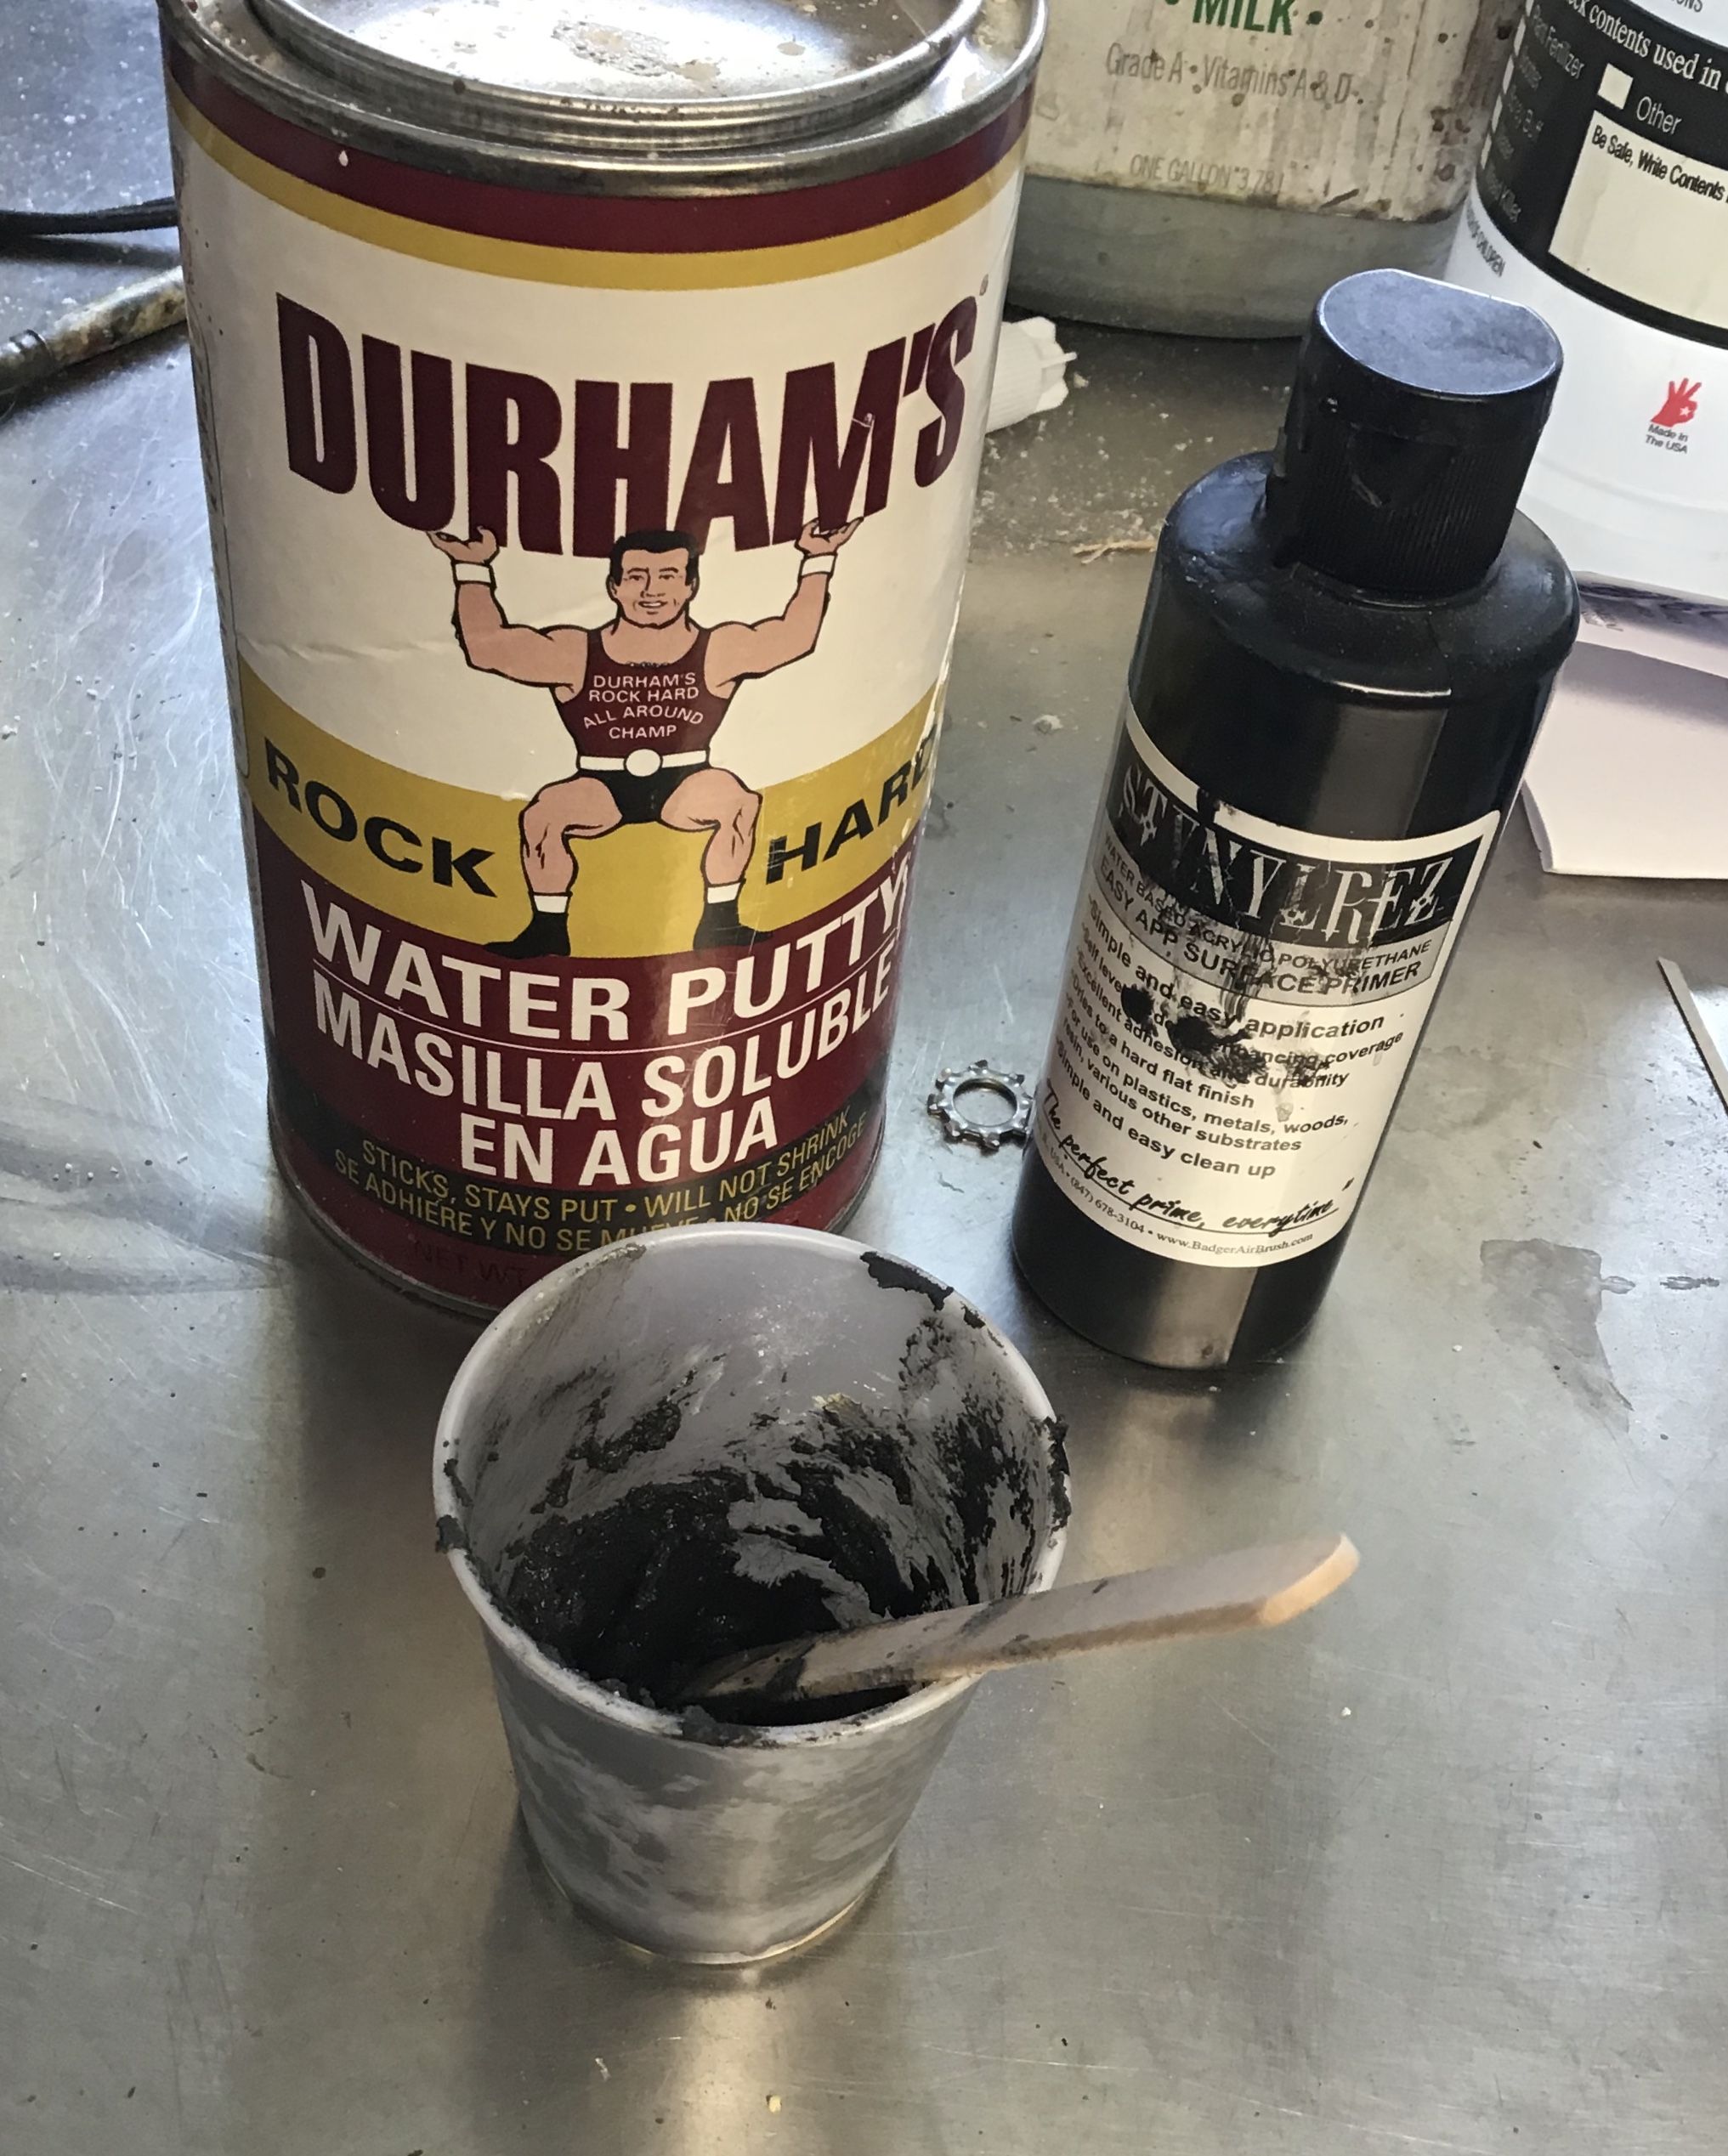
I like to use a product called Durham's Water Putty to make male and female fixtures to support the vac canopies while cutting and fitting. The male casting for cutting the canopy from it's matrix and the female to support the canopy while tuning up the edges where they meet the fuselage.
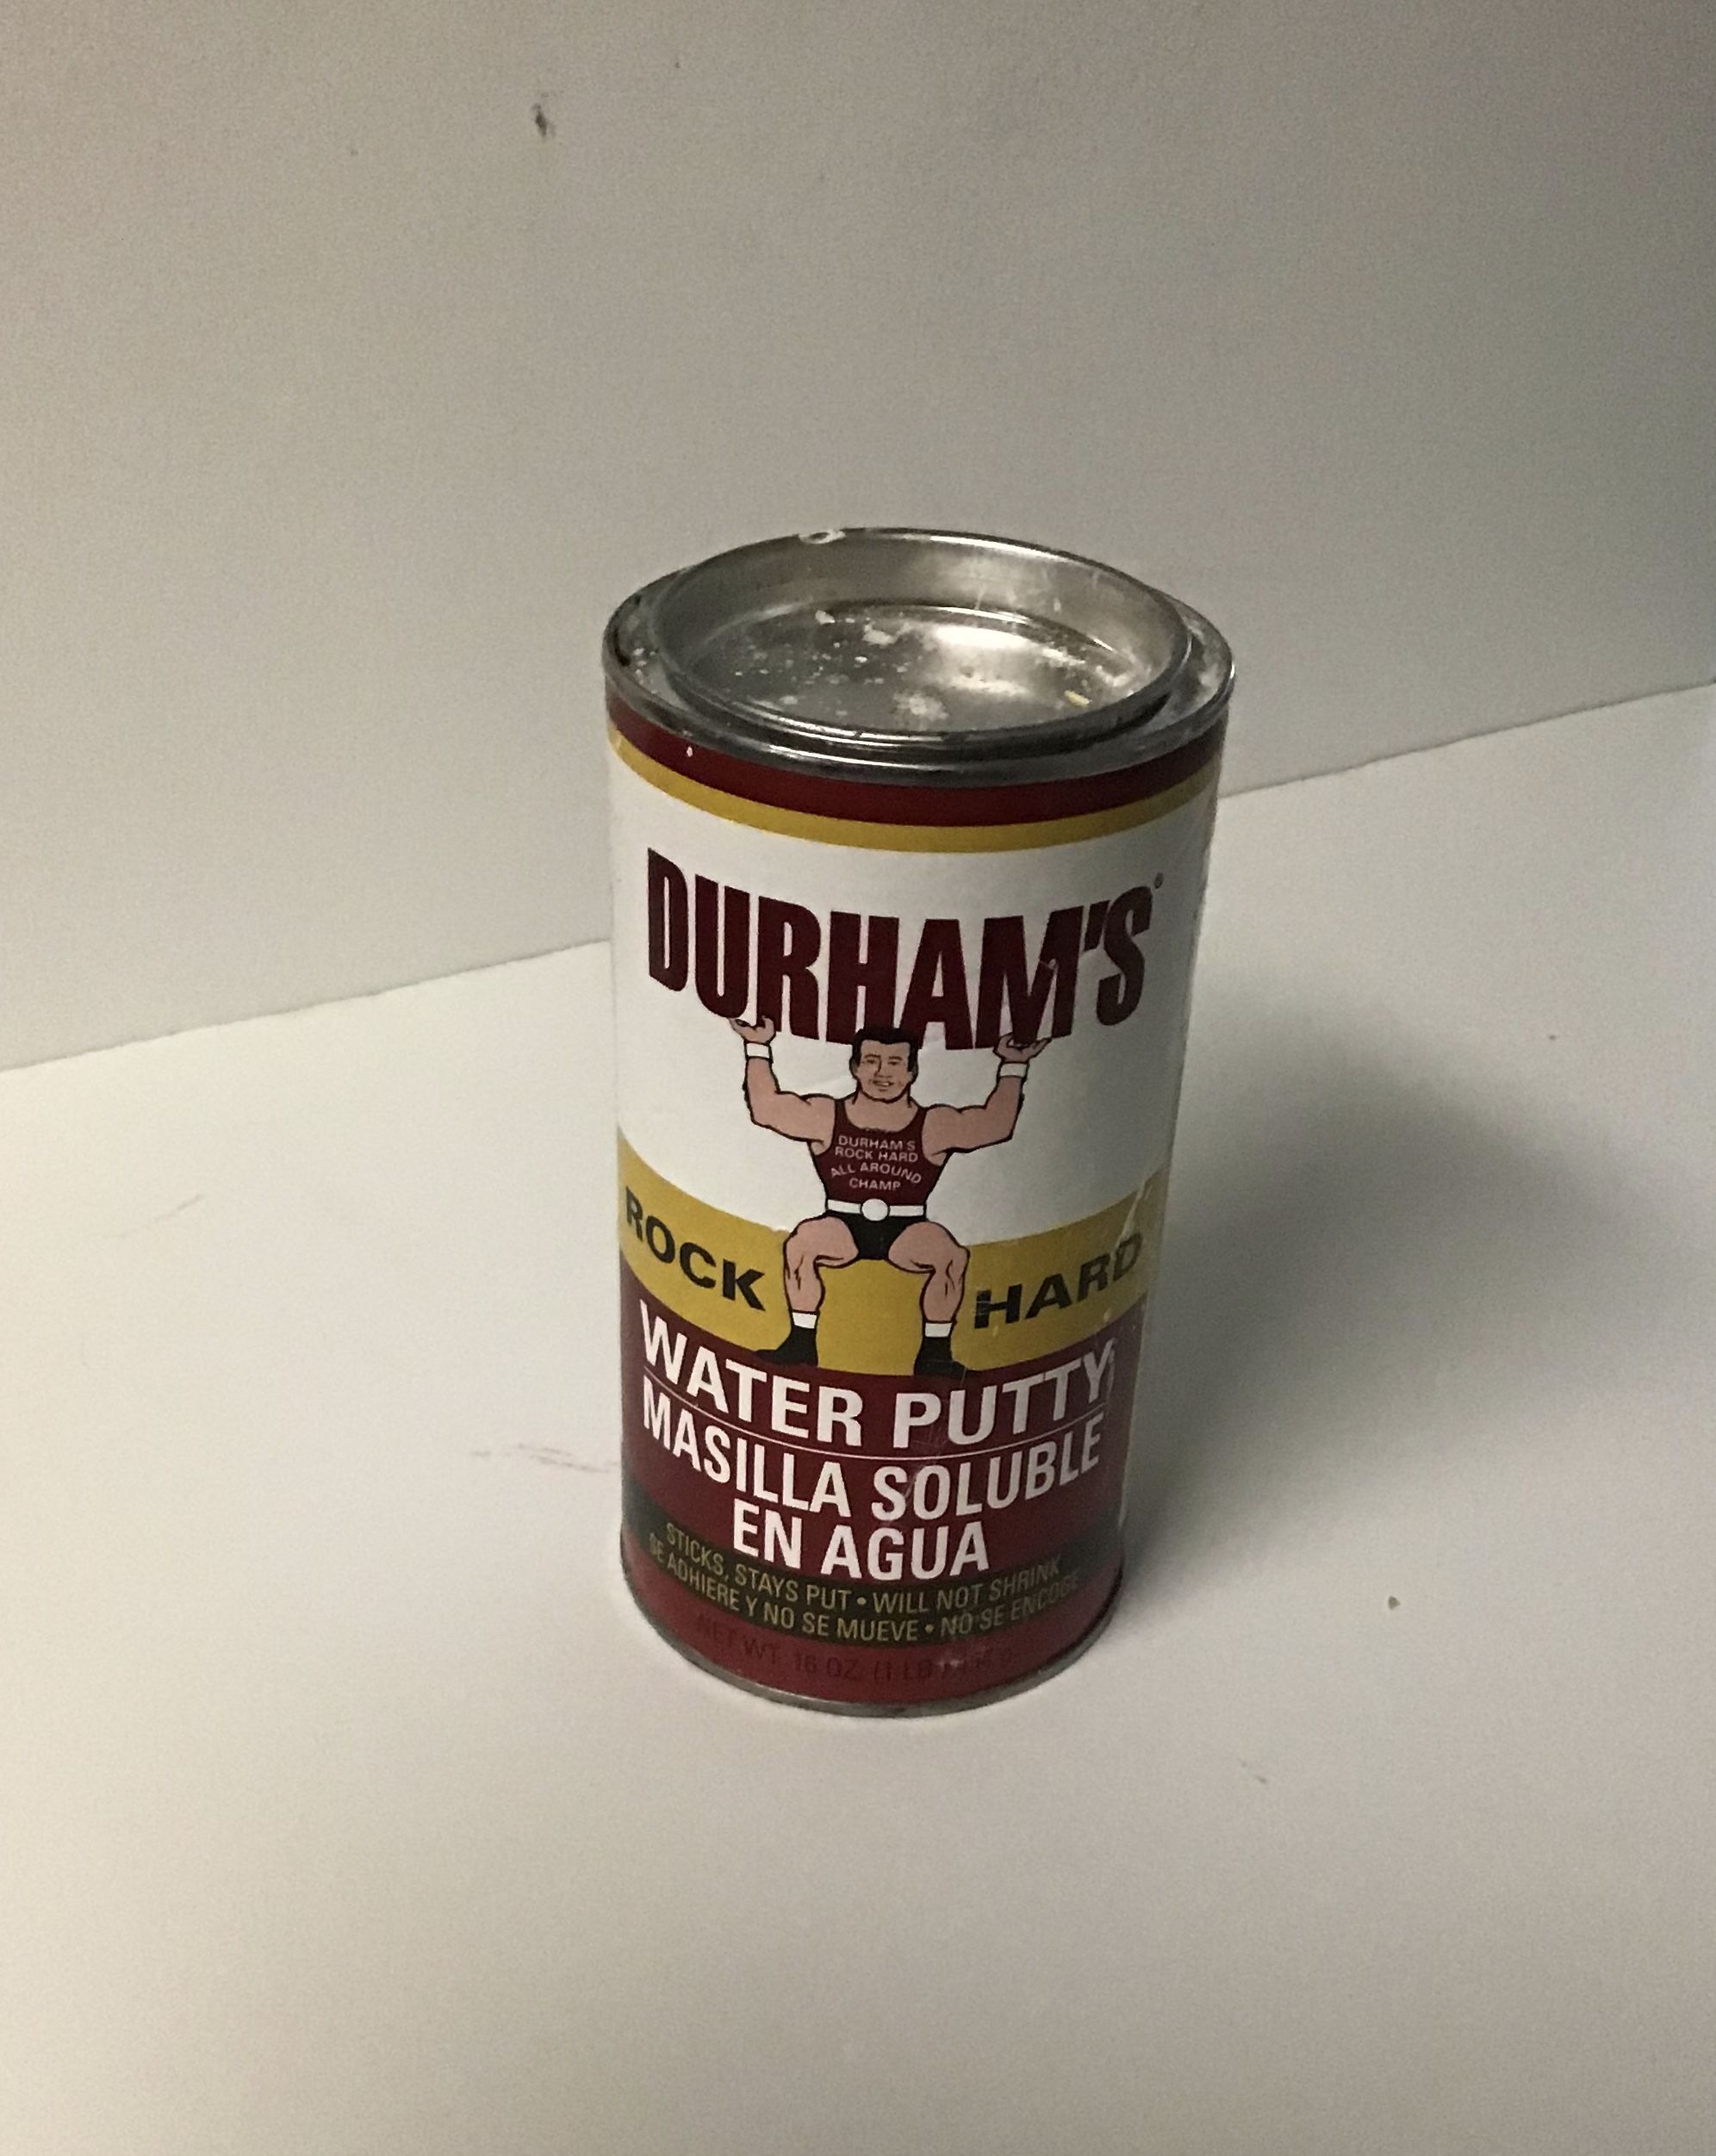
Durham's is a plaster base product and could not be easier to use . It dries quickly - an hour or so and comes in powder form- simply mix with water to a pourable consistency and pour into canopy for the male fixture and around the canopy for the female .
A simple box formed of foil does nicely.

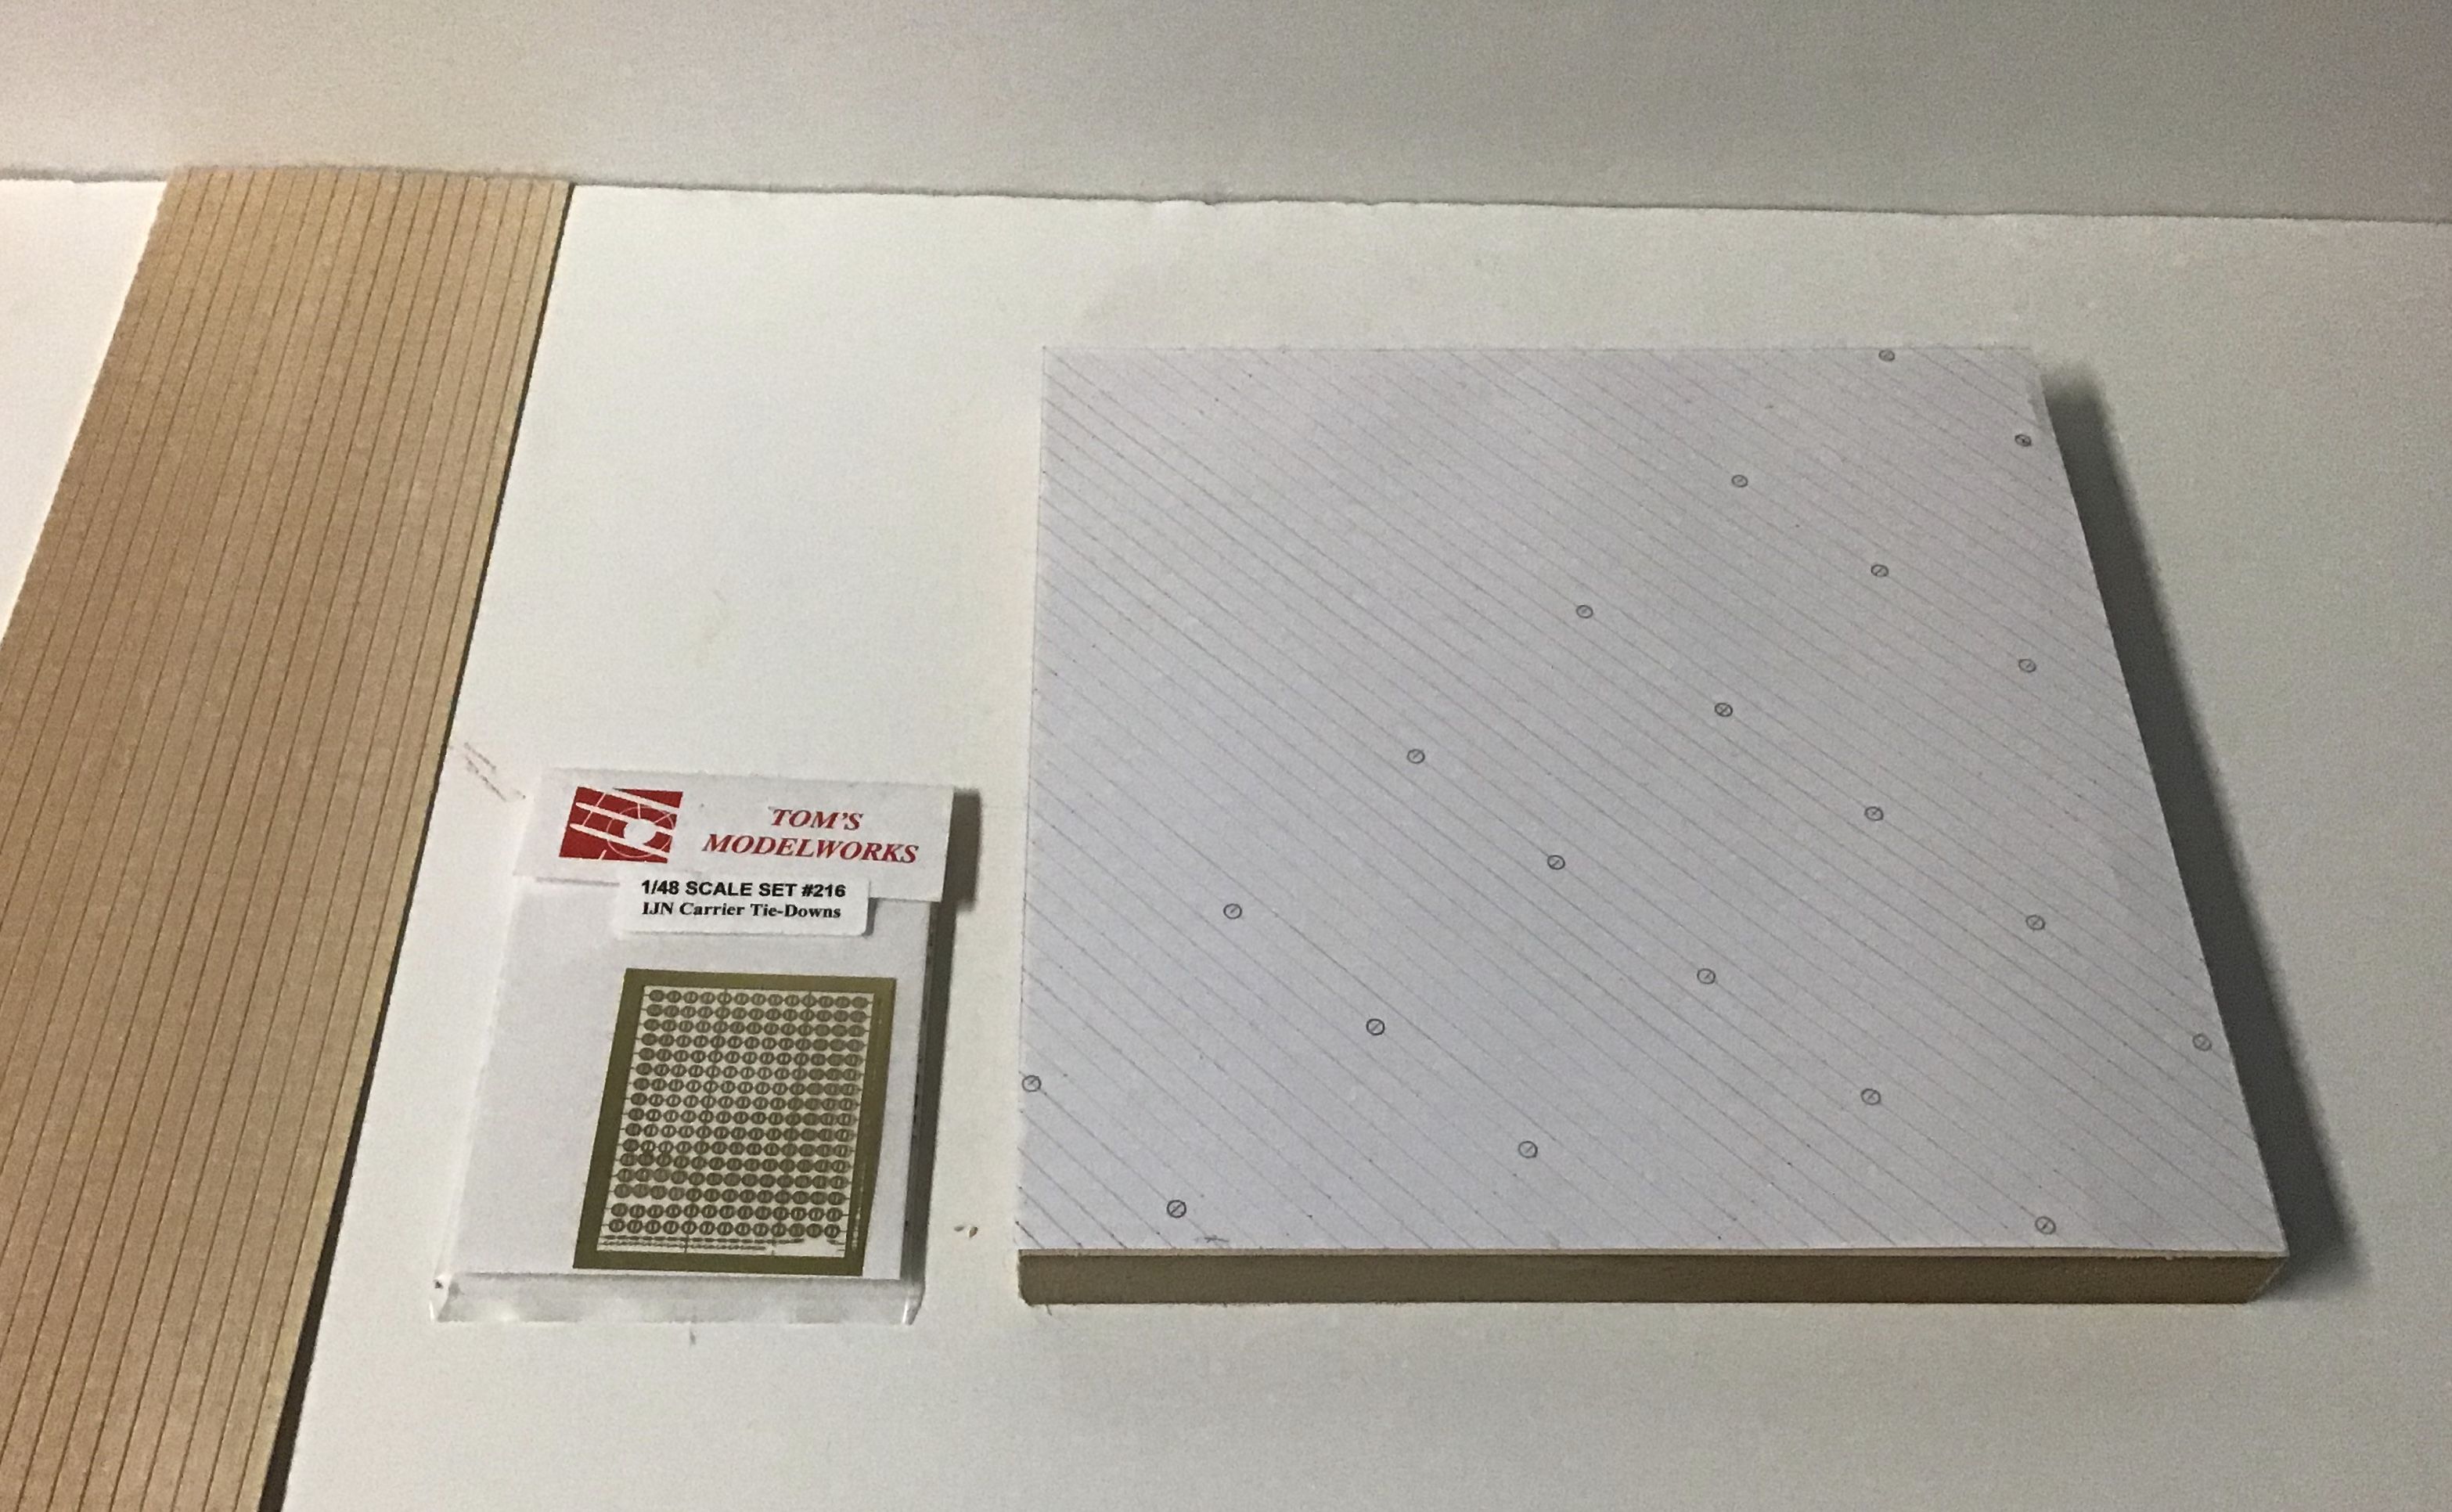
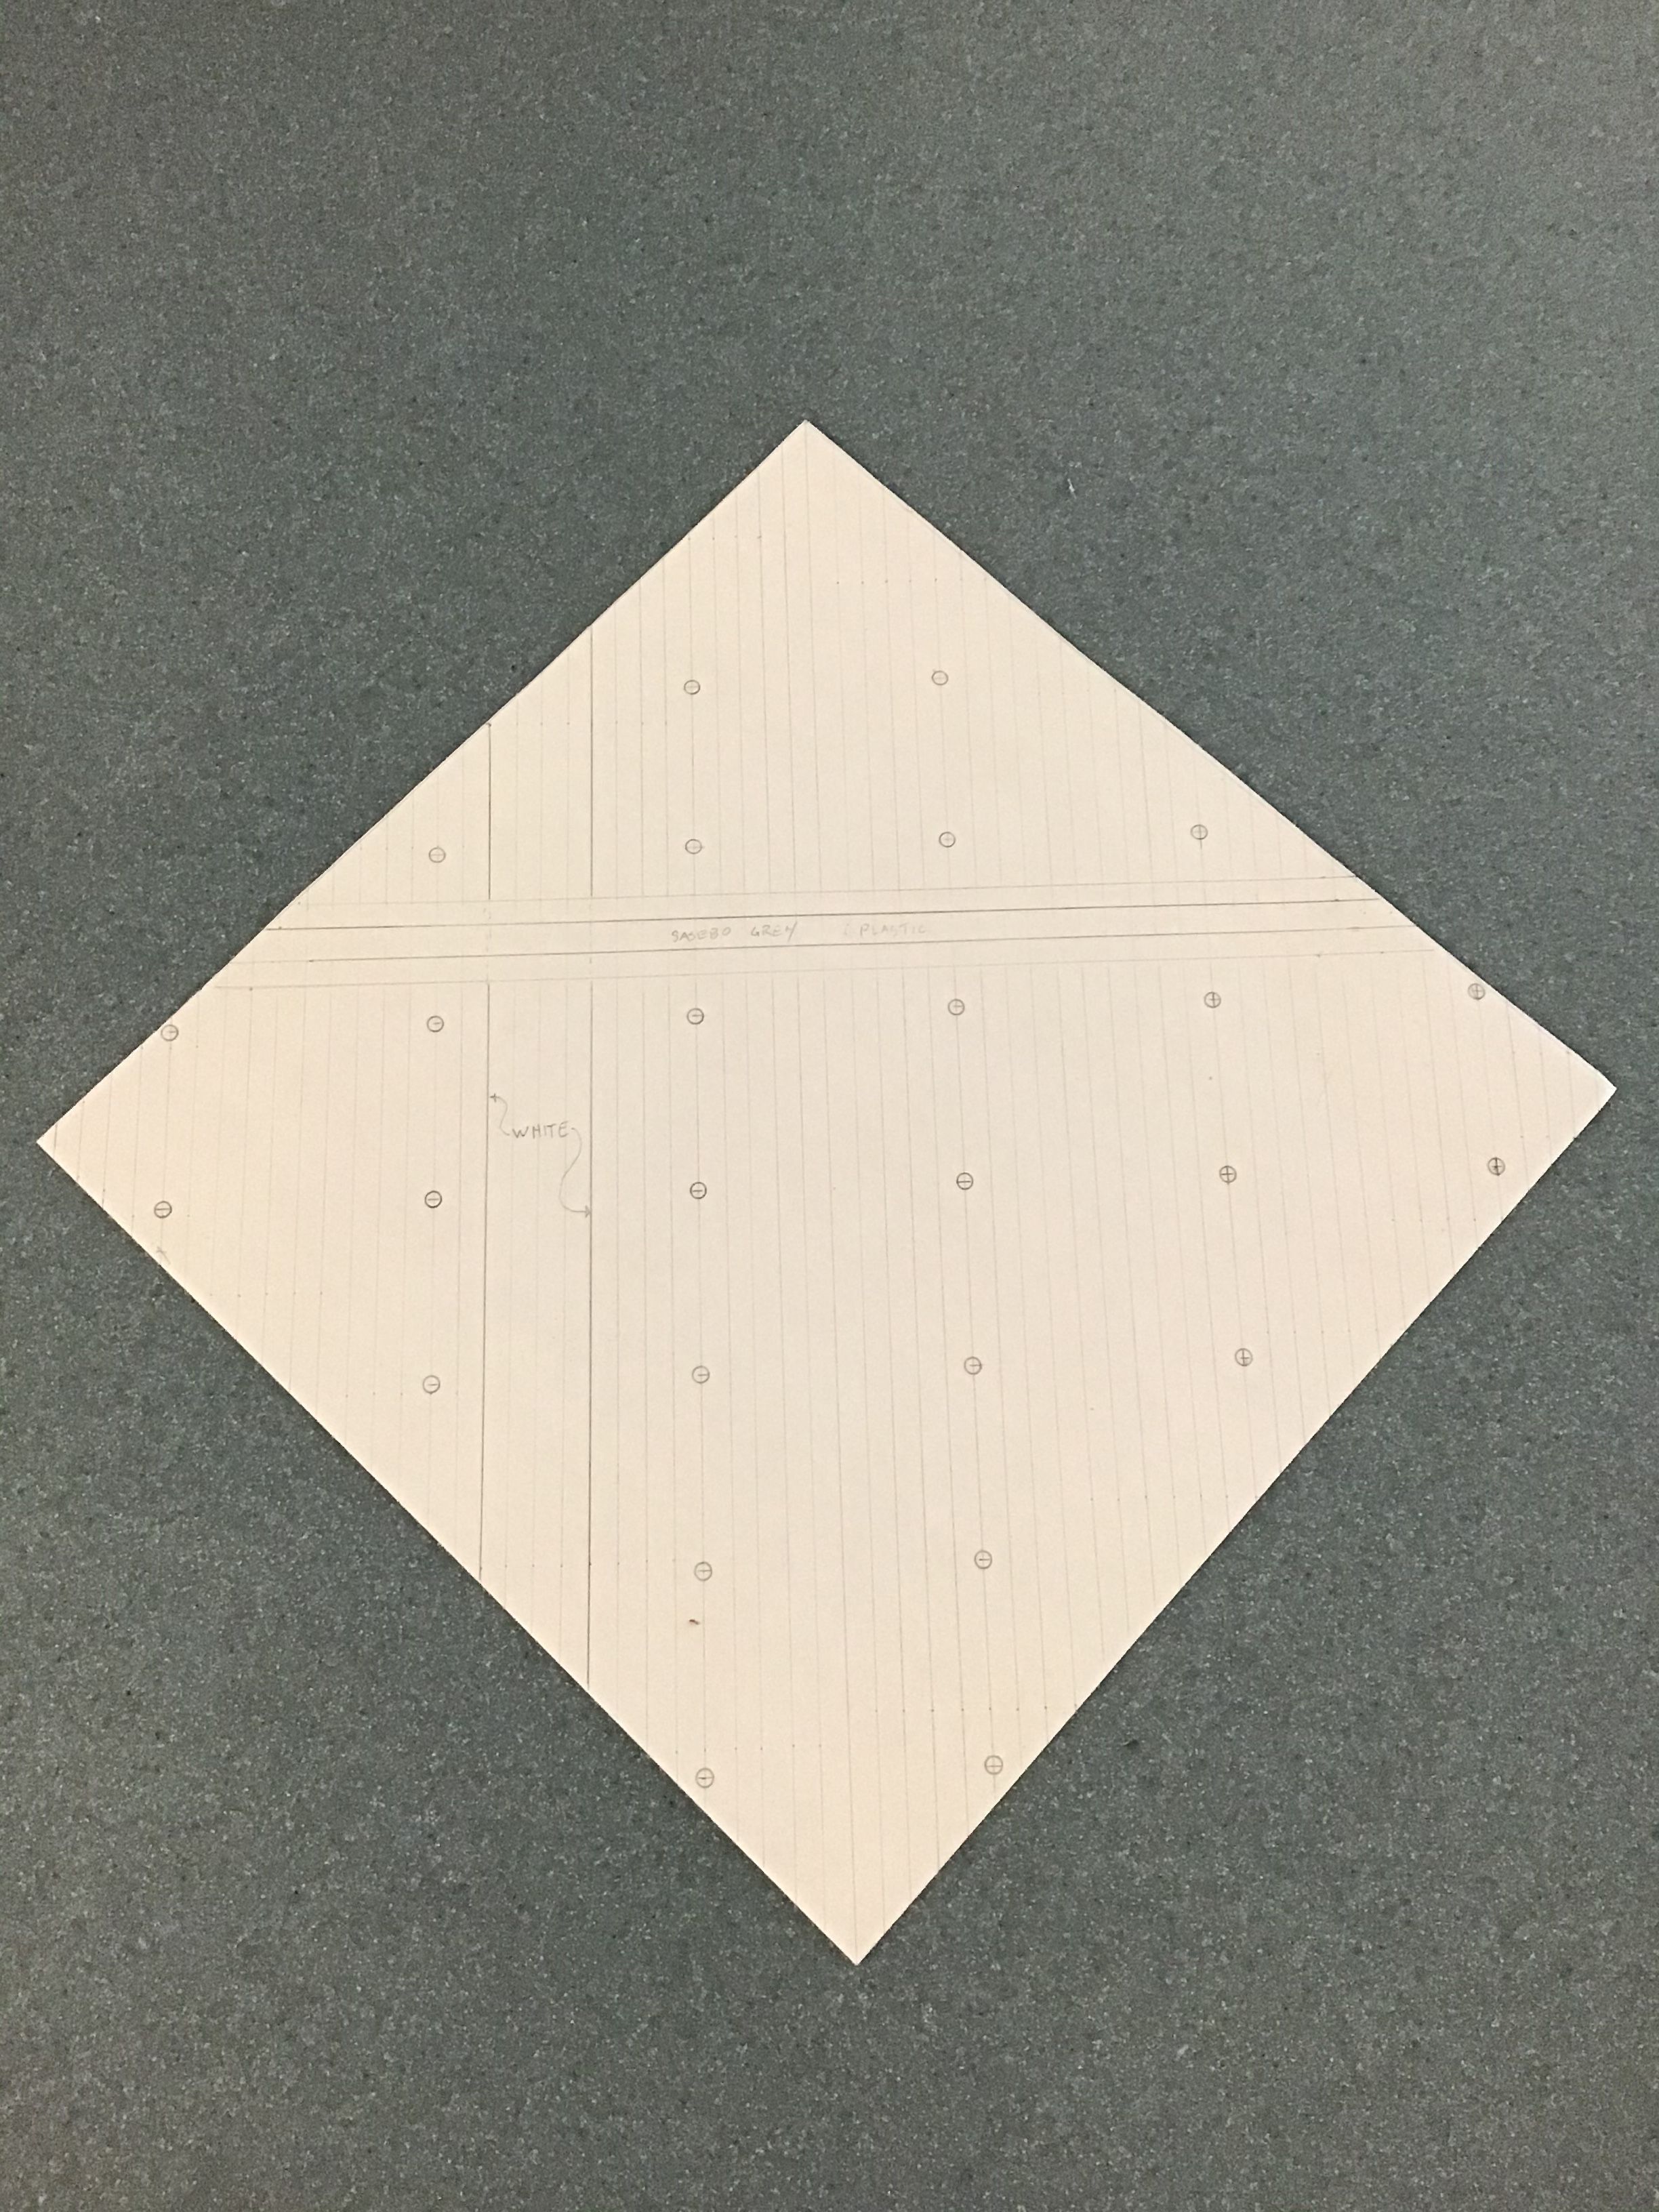
I've also begun work on the carrier deck base - a piece of MDF will be covered with sawn basswood sheet decking and will be using Tom's Modelworks photo etch IJN tie downs. I've begun to lay out the tie downs on paper but waiting for more reference material on the Kaga to arrive .
Thanks to Tim Reynaga for help with the type of wood her decks were made of - Hinoki Cypress . I think the natural basswood will represent the light color of the deck very well.
Thanks for looking ! Richard
Rob Taurus Vac Canopies are superb - thin with sharp detail ( some have more detail than the injection kit parts) and they are styrene so they will bond to the fuselage with styrene cement.
I like to use a product called Durham's Water Putty to make male and female fixtures to support the vac canopies while cutting and fitting. The male casting for cutting the canopy from it's matrix and the female to support the canopy while tuning up the edges where they meet the fuselage.
Durham's is a plaster base product and could not be easier to use . It dries quickly - an hour or so and comes in powder form- simply mix with water to a pourable consistency and pour into canopy for the male fixture and around the canopy for the female .
A simple box formed of foil does nicely.
I've also begun work on the carrier deck base - a piece of MDF will be covered with sawn basswood sheet decking and will be using Tom's Modelworks photo etch IJN tie downs. I've begun to lay out the tie downs on paper but waiting for more reference material on the Kaga to arrive .
Thanks to Tim Reynaga for help with the type of wood her decks were made of - Hinoki Cypress . I think the natural basswood will represent the light color of the deck very well.
Thanks for looking ! Richard

Redhand

#522
Joined: January 20, 2013
KitMaker: 1,460 posts
AeroScale: 1,443 posts
Posted: Friday, July 10, 2020 - 04:25 AM UTC
Quoted Text
I like to use a product called Durham's Water Putty to make male and female fixtures to support the vac canopies while cutting and fitting. The male casting for cutting the canopy from it's matrix and the female to support the canopy while tuning up the edges where they meet the fuselage.
Richard
A fantastic idea on the water putty!


Lakota

#123
Joined: November 17, 2008
KitMaker: 1,202 posts
AeroScale: 292 posts
Posted: Friday, July 10, 2020 - 05:43 AM UTC
Richard,
I really appreciate your step-by-step explanations and detailed photos of your build. Your posts are well-written and will be a great resource if I every get to building my A6M2.
Take care & Stay Safe,
Don "Lakota"
I really appreciate your step-by-step explanations and detailed photos of your build. Your posts are well-written and will be a great resource if I every get to building my A6M2.
Take care & Stay Safe,
Don "Lakota"
rdt1953
Joined: February 06, 2015
KitMaker: 1,098 posts
AeroScale: 900 posts
Posted: Friday, July 17, 2020 - 01:47 PM UTC
Some more progress ...
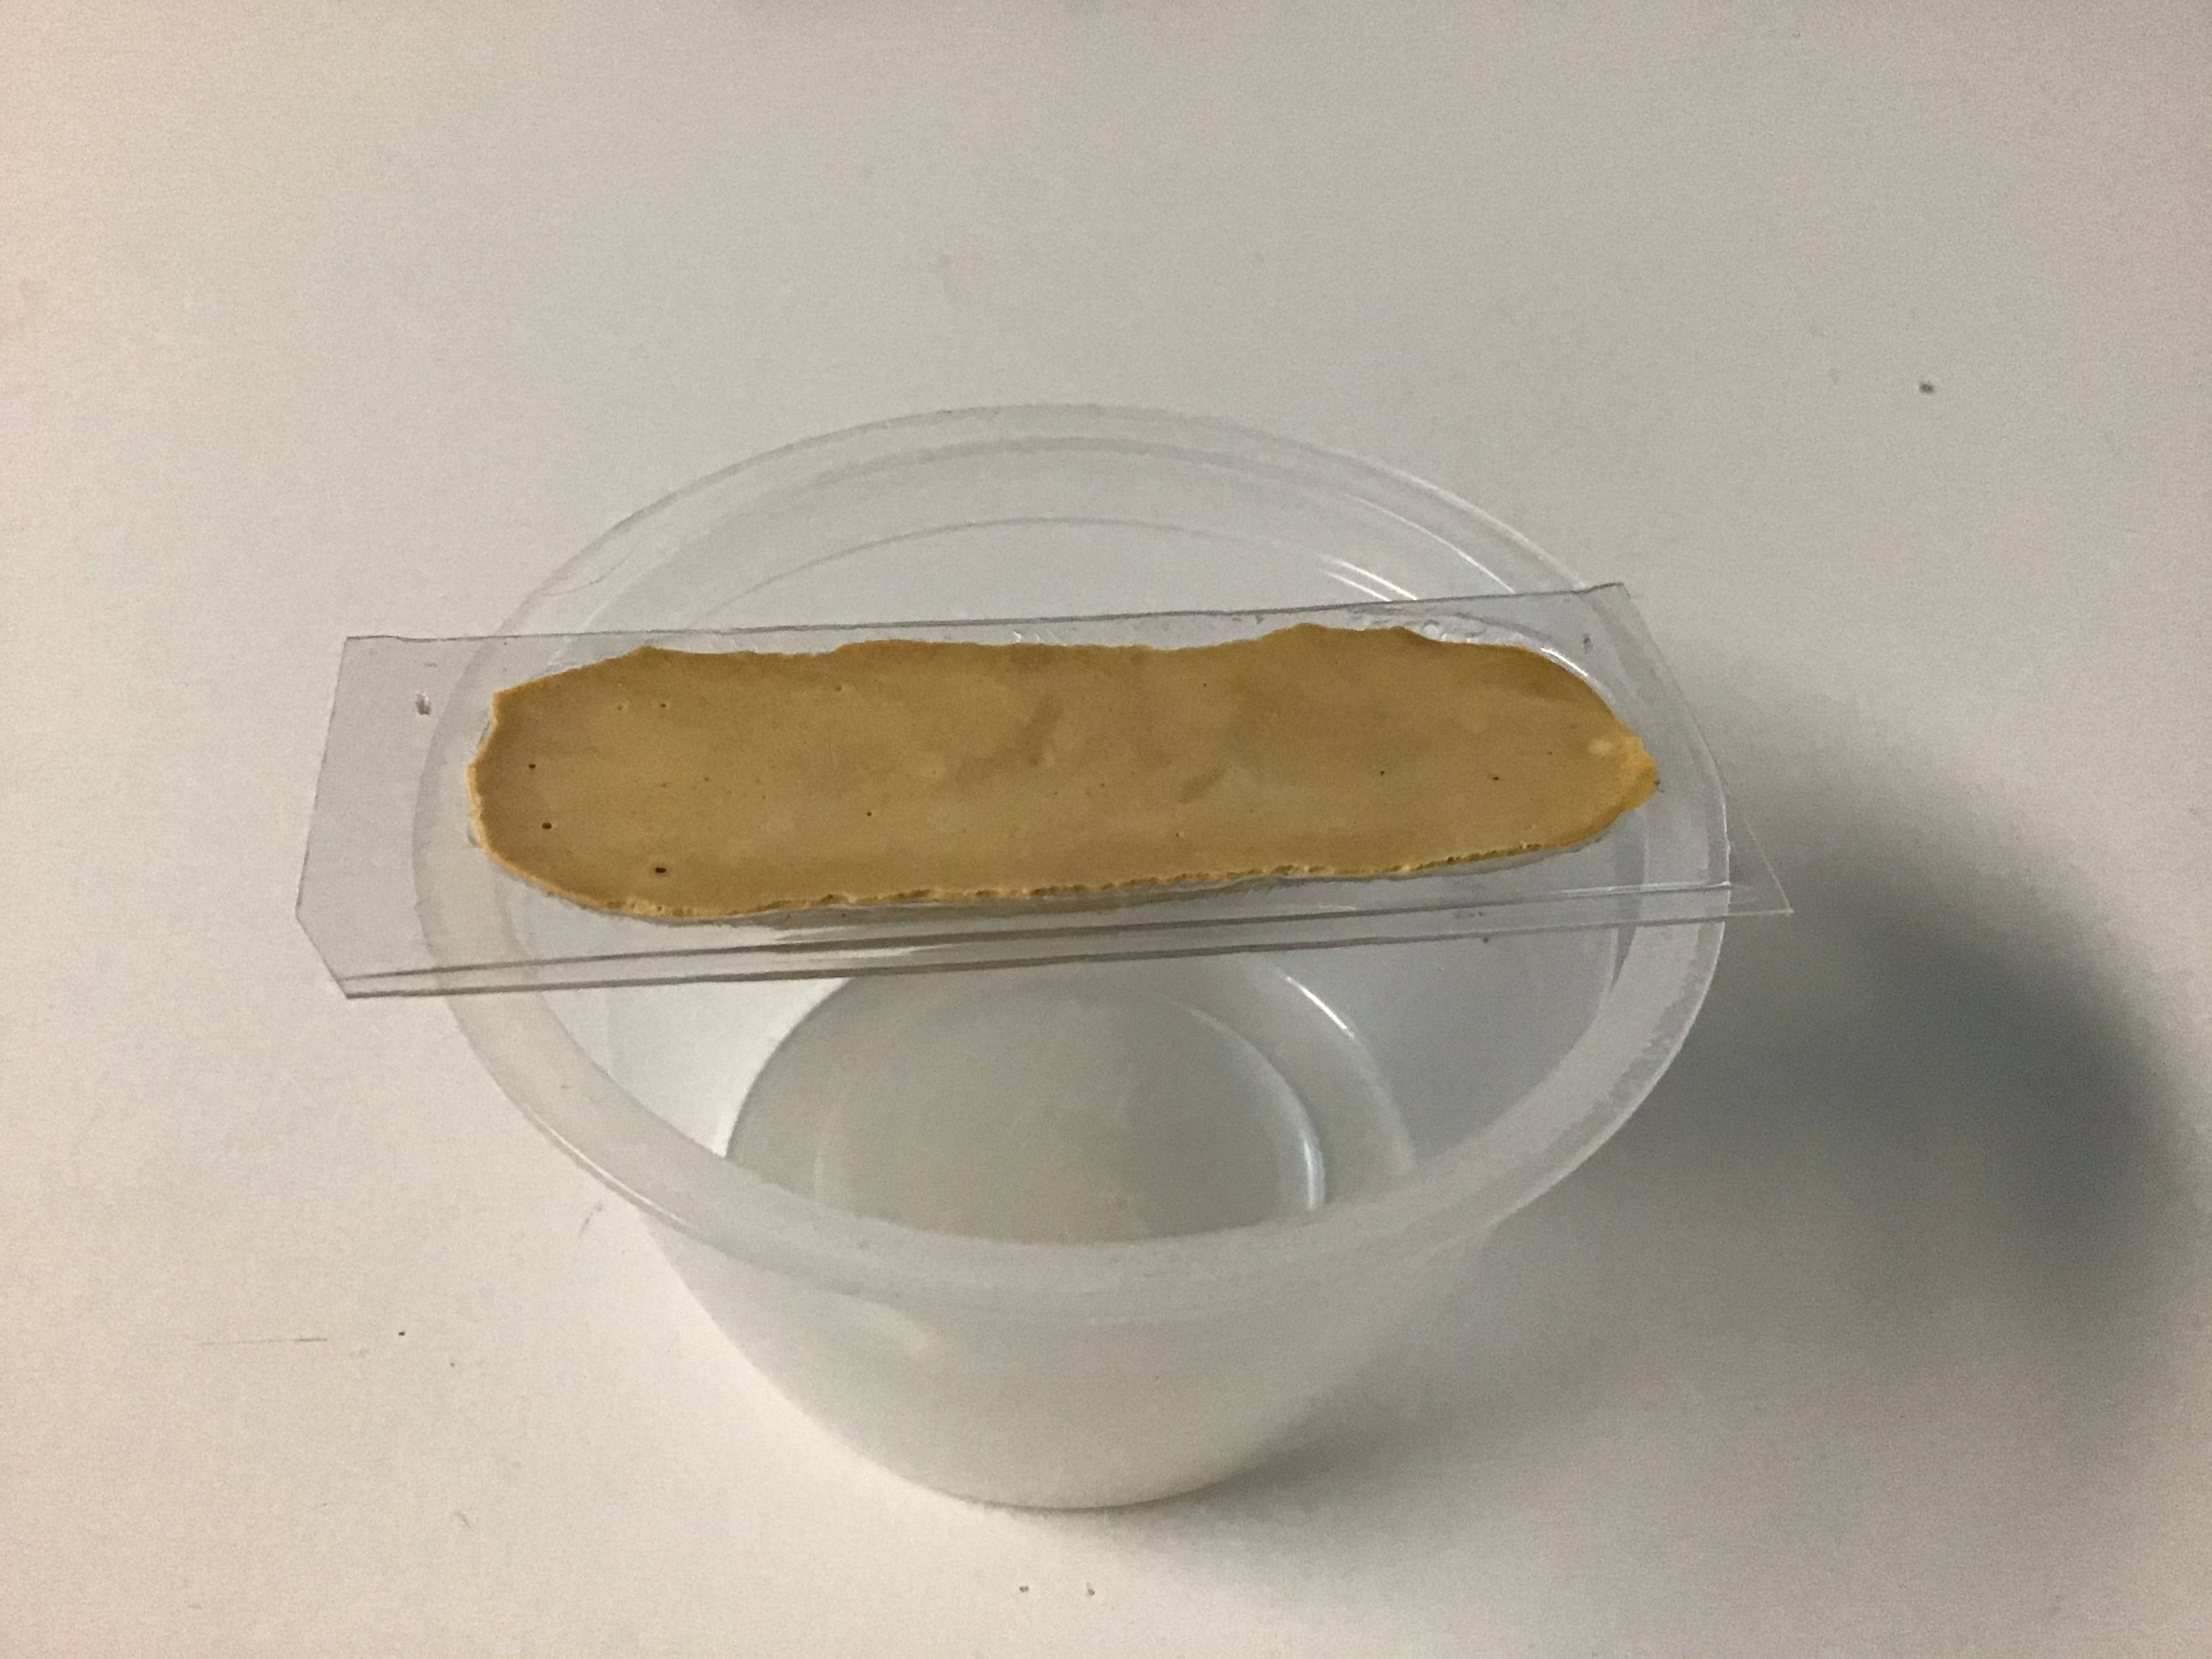
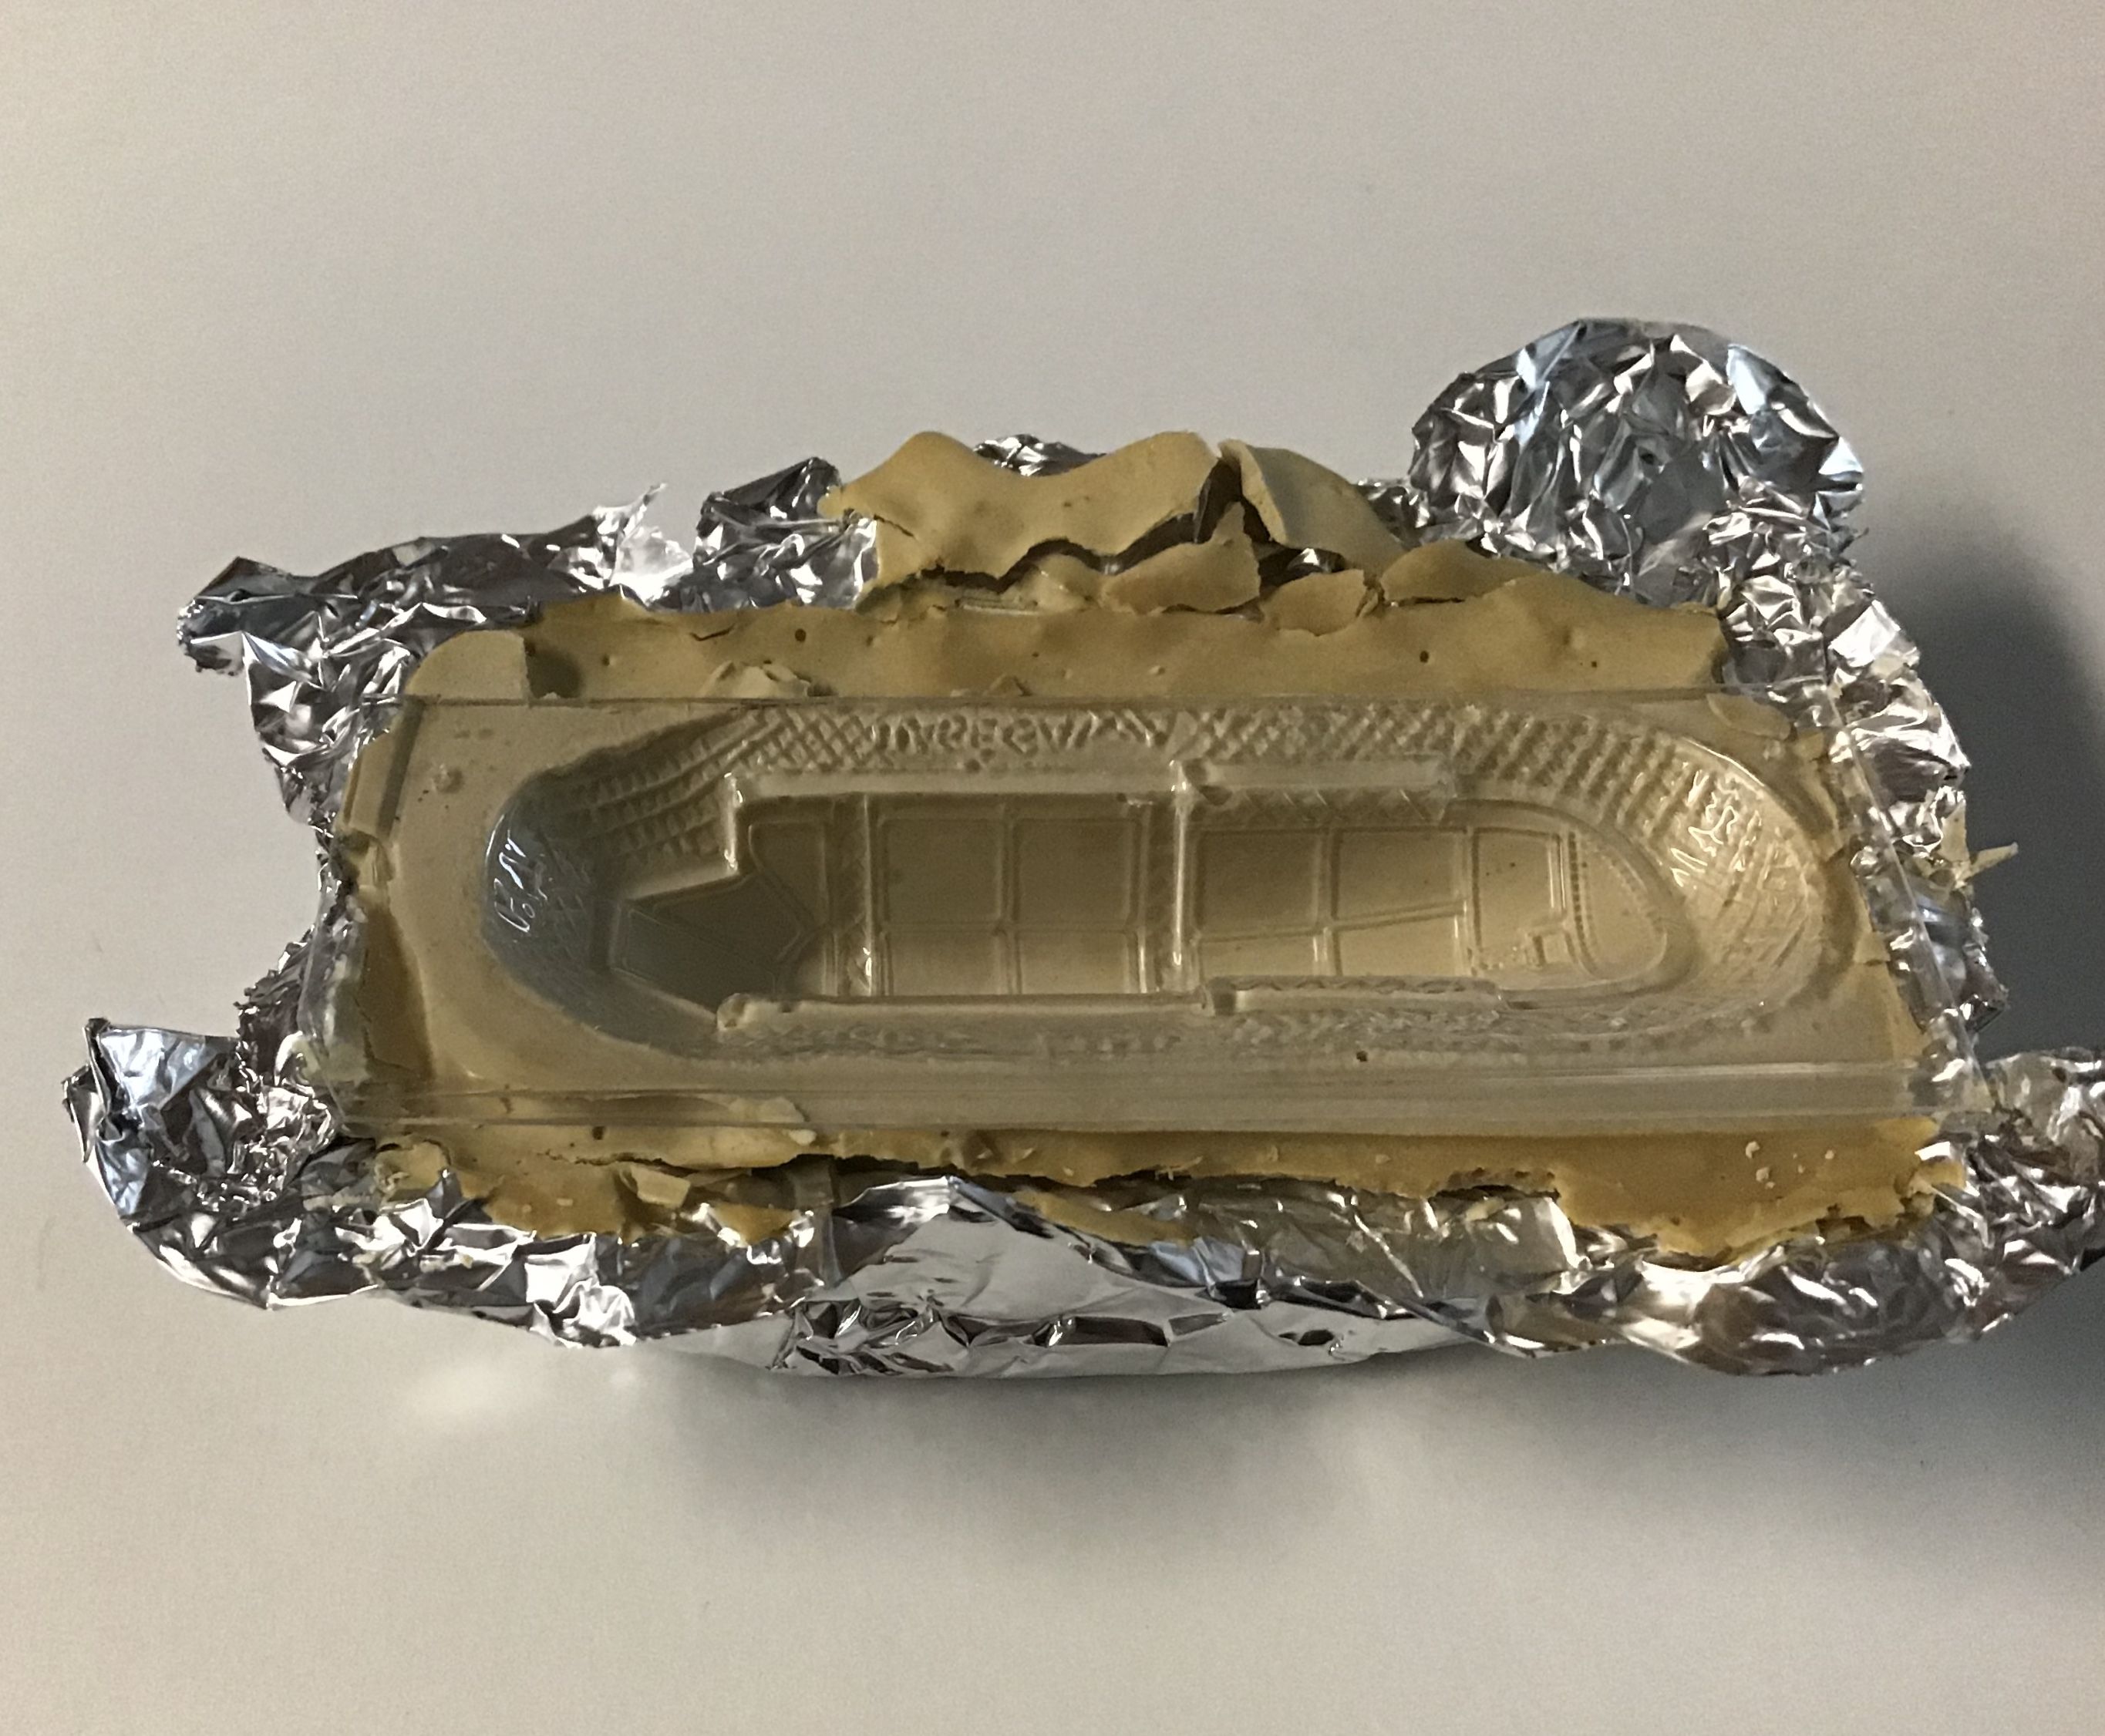
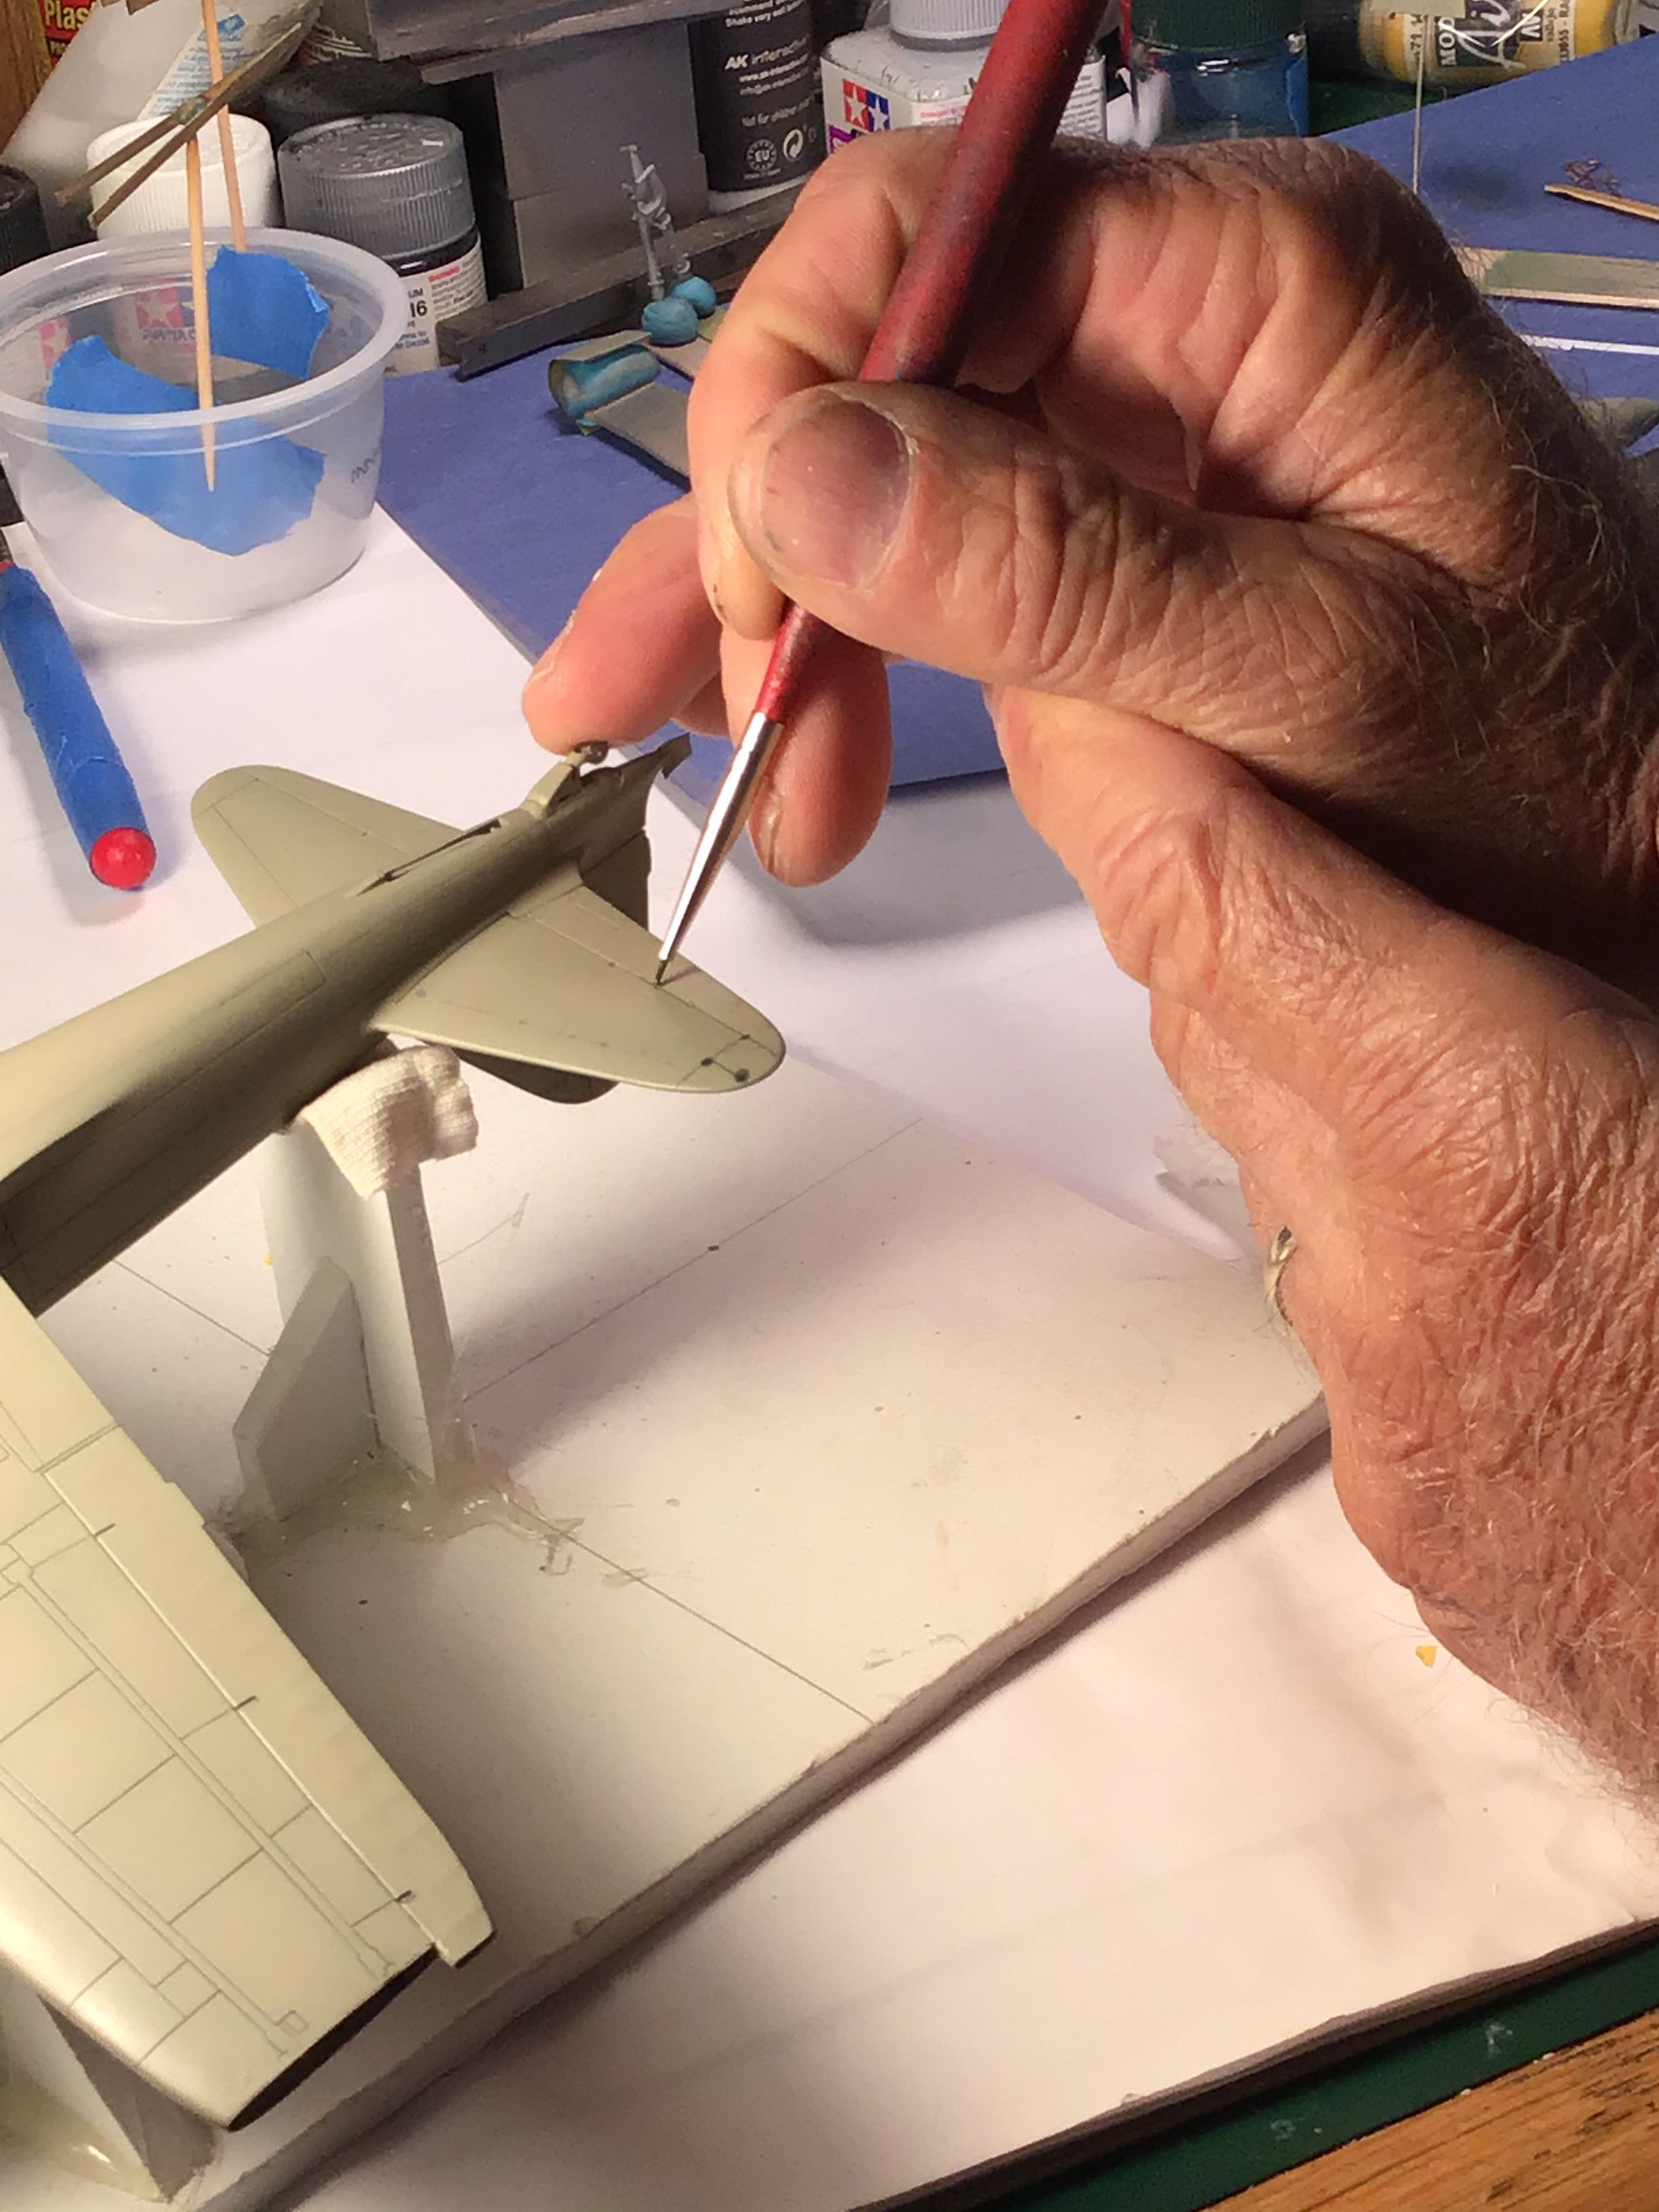
I meant to includes this in the previous post regarding the cast forms for the vac canopy. The female form should be carved away down to the line where the canopy meets the fuselage in order that the canopy's edges can be worked by filing, scraping , sanding etc. as needed . This is easiest to due when the plaster is still green - it will have a hard cheese like texture and can be easily worked with a utility knife.
The canopy has been installed and seams worked with Tamiya surfacer
and masked with Bare Metal Foil.


.. then shot in black for the interior frame color ...
.. and then more grey primer ...
Looks like it may need one more go around withe the primer then on to pre shading .
Thanks for looking - RT
I meant to includes this in the previous post regarding the cast forms for the vac canopy. The female form should be carved away down to the line where the canopy meets the fuselage in order that the canopy's edges can be worked by filing, scraping , sanding etc. as needed . This is easiest to due when the plaster is still green - it will have a hard cheese like texture and can be easily worked with a utility knife.
The canopy has been installed and seams worked with Tamiya surfacer
and masked with Bare Metal Foil.
.. then shot in black for the interior frame color ...
.. and then more grey primer ...
Looks like it may need one more go around withe the primer then on to pre shading .
Thanks for looking - RT
Joel_W
Joined: December 04, 2010
KitMaker: 11,666 posts
AeroScale: 7,410 posts
Posted: Saturday, July 18, 2020 - 01:03 AM UTC
Richard,
I've always struggled with Vac canopies, but the Durham's putty molds really seem to solve all the issues I had. Not much of a need for it now as I'm fully committed to cars these days.
The pictures with the canopy cut into sections and glued up really shows just how well the fit is.
Can't wait to see the camo go on.
Joel

Antilles

Joined: March 22, 2015
KitMaker: 671 posts
AeroScale: 614 posts
Posted: Saturday, July 18, 2020 - 10:28 AM UTC
Richard,
I just have found Your fantastic built thread. The zero looks great so far. And the working-method with moulds on the Vac-form canopy is brillant!
Oliver
I just have found Your fantastic built thread. The zero looks great so far. And the working-method with moulds on the Vac-form canopy is brillant!
Oliver
rdt1953
Joined: February 06, 2015
KitMaker: 1,098 posts
AeroScale: 900 posts
Posted: Sunday, July 19, 2020 - 05:19 AM UTC
Thanks Joel & Oliver for the kind words & interest .
I've received the reference I have been waiting on -our regular mailman is on vacation and his replacement real bolluxed things - besides missing our entire street two days in a row , this book was delivered to someone on the next block who kindly brought it to me this morning .

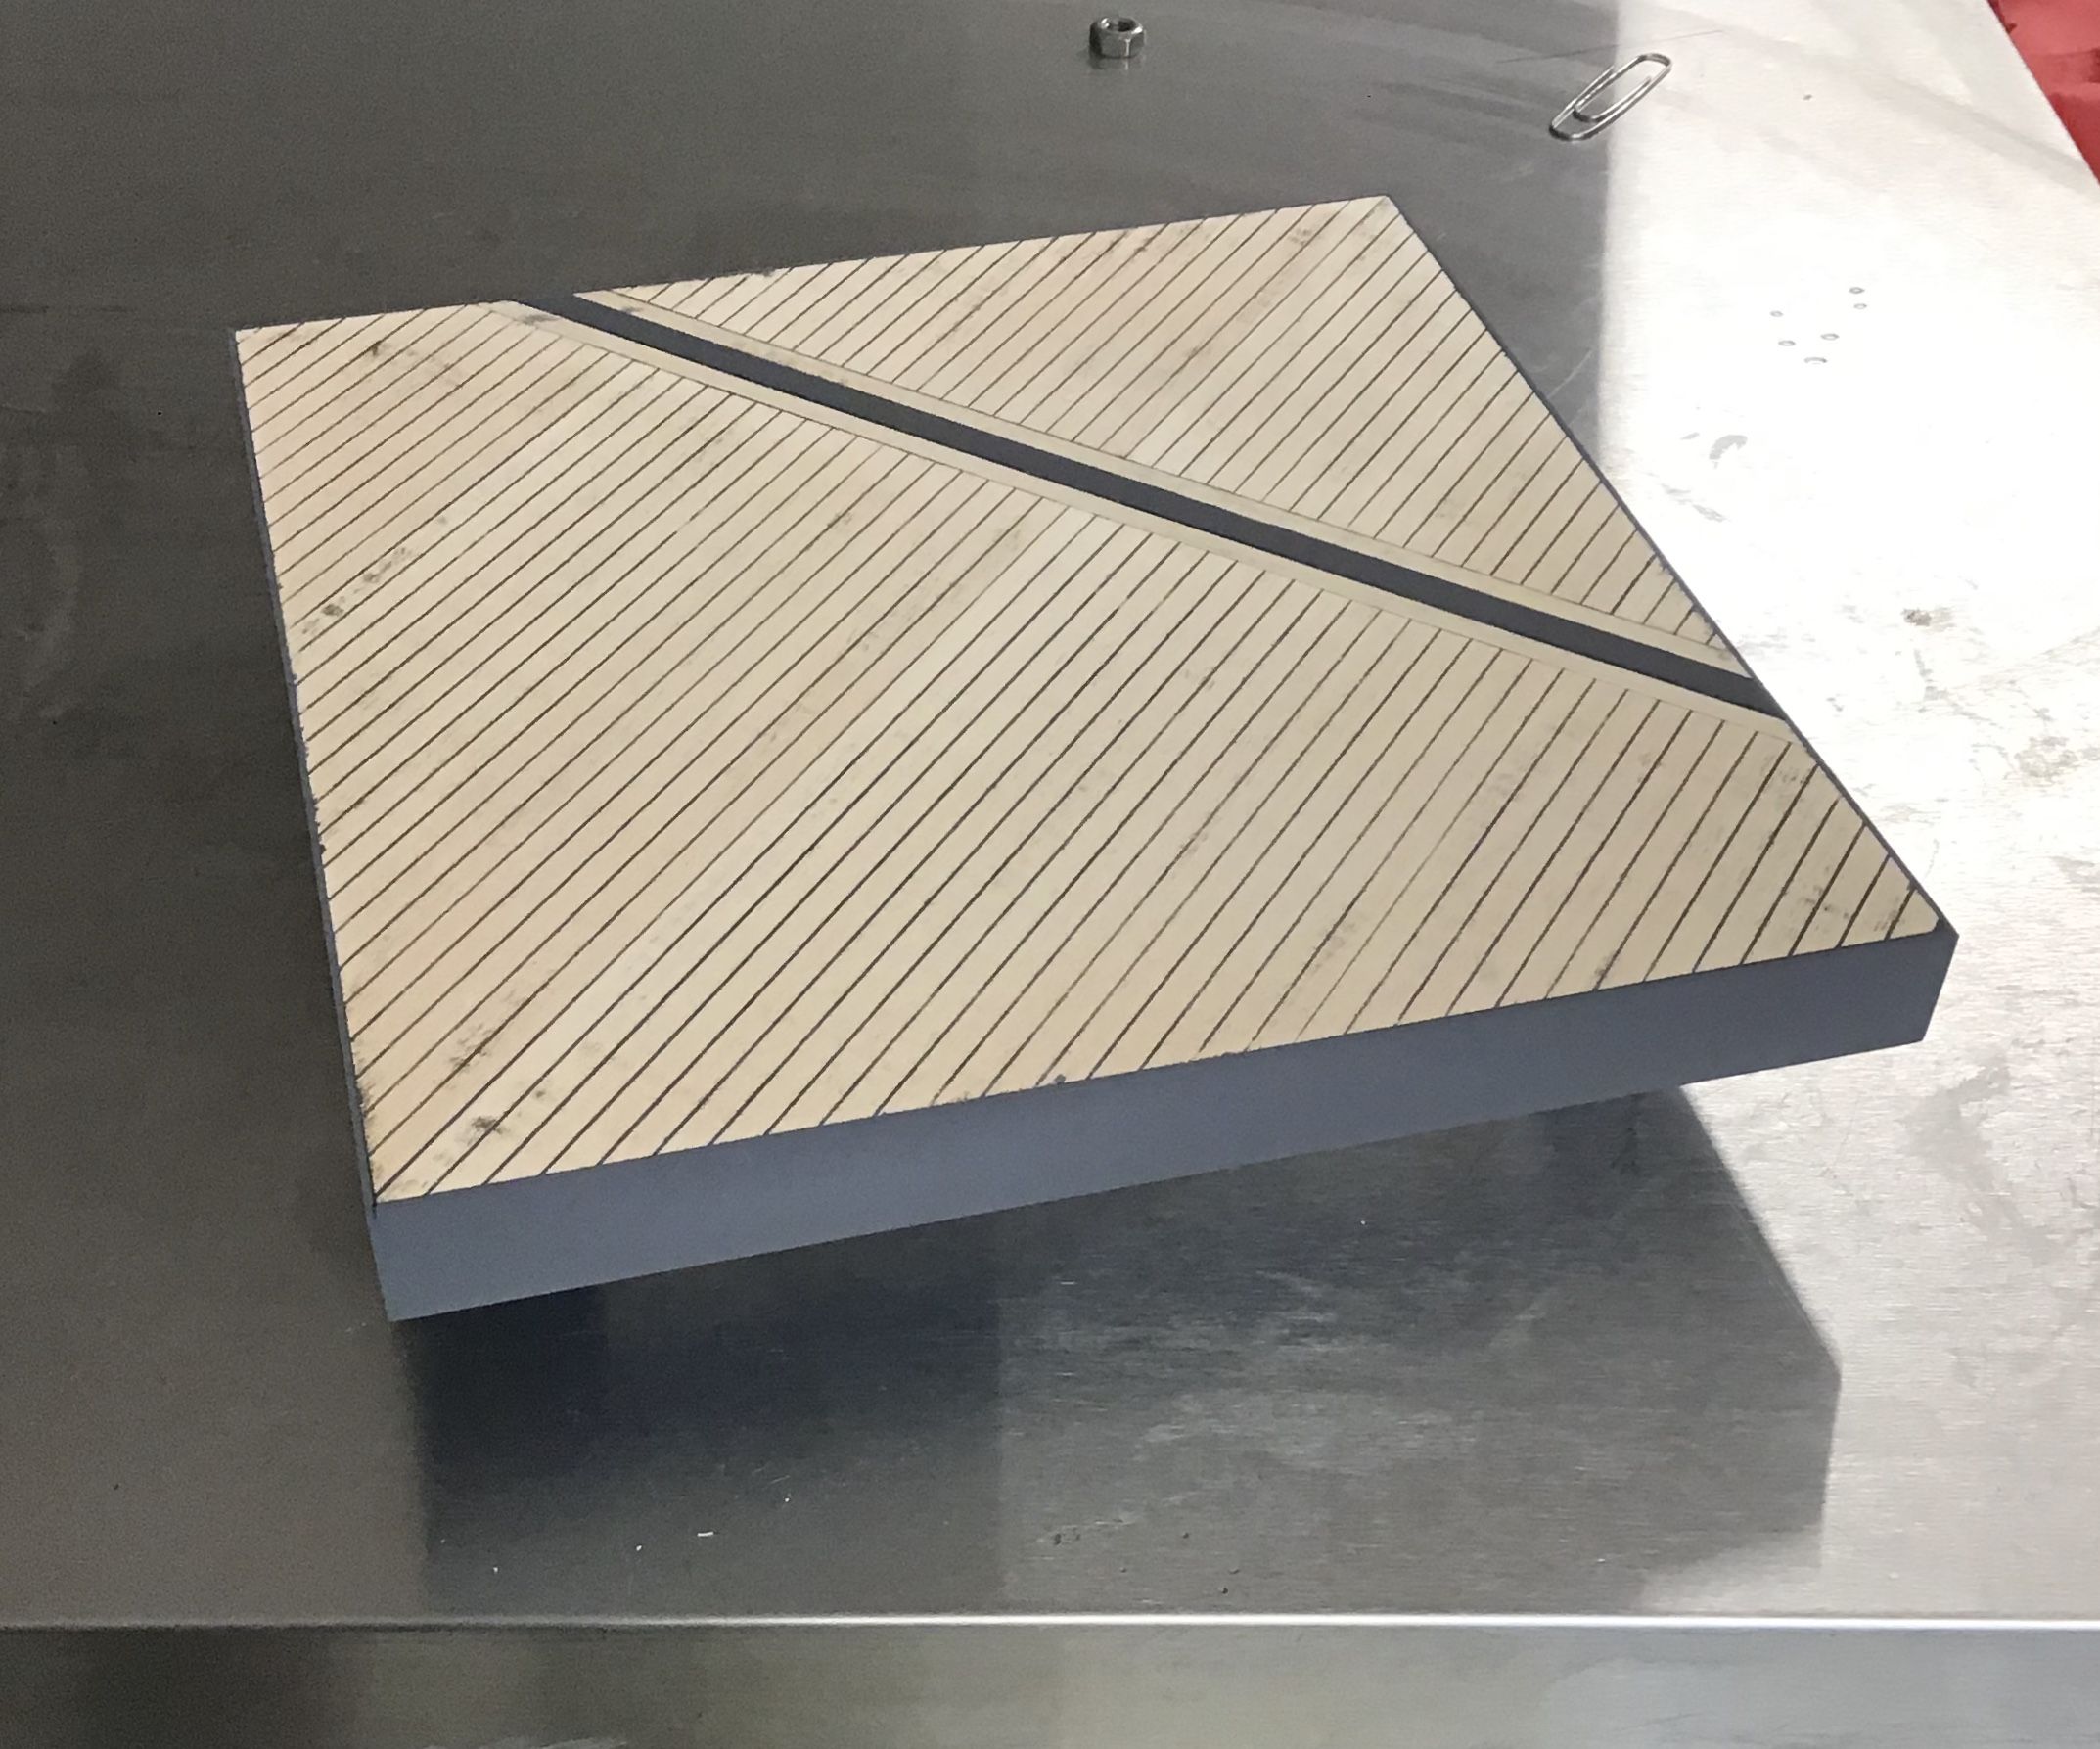
I have completed the plan on paper and have roughed out the basswood decking to be glued up to the MDF base block.
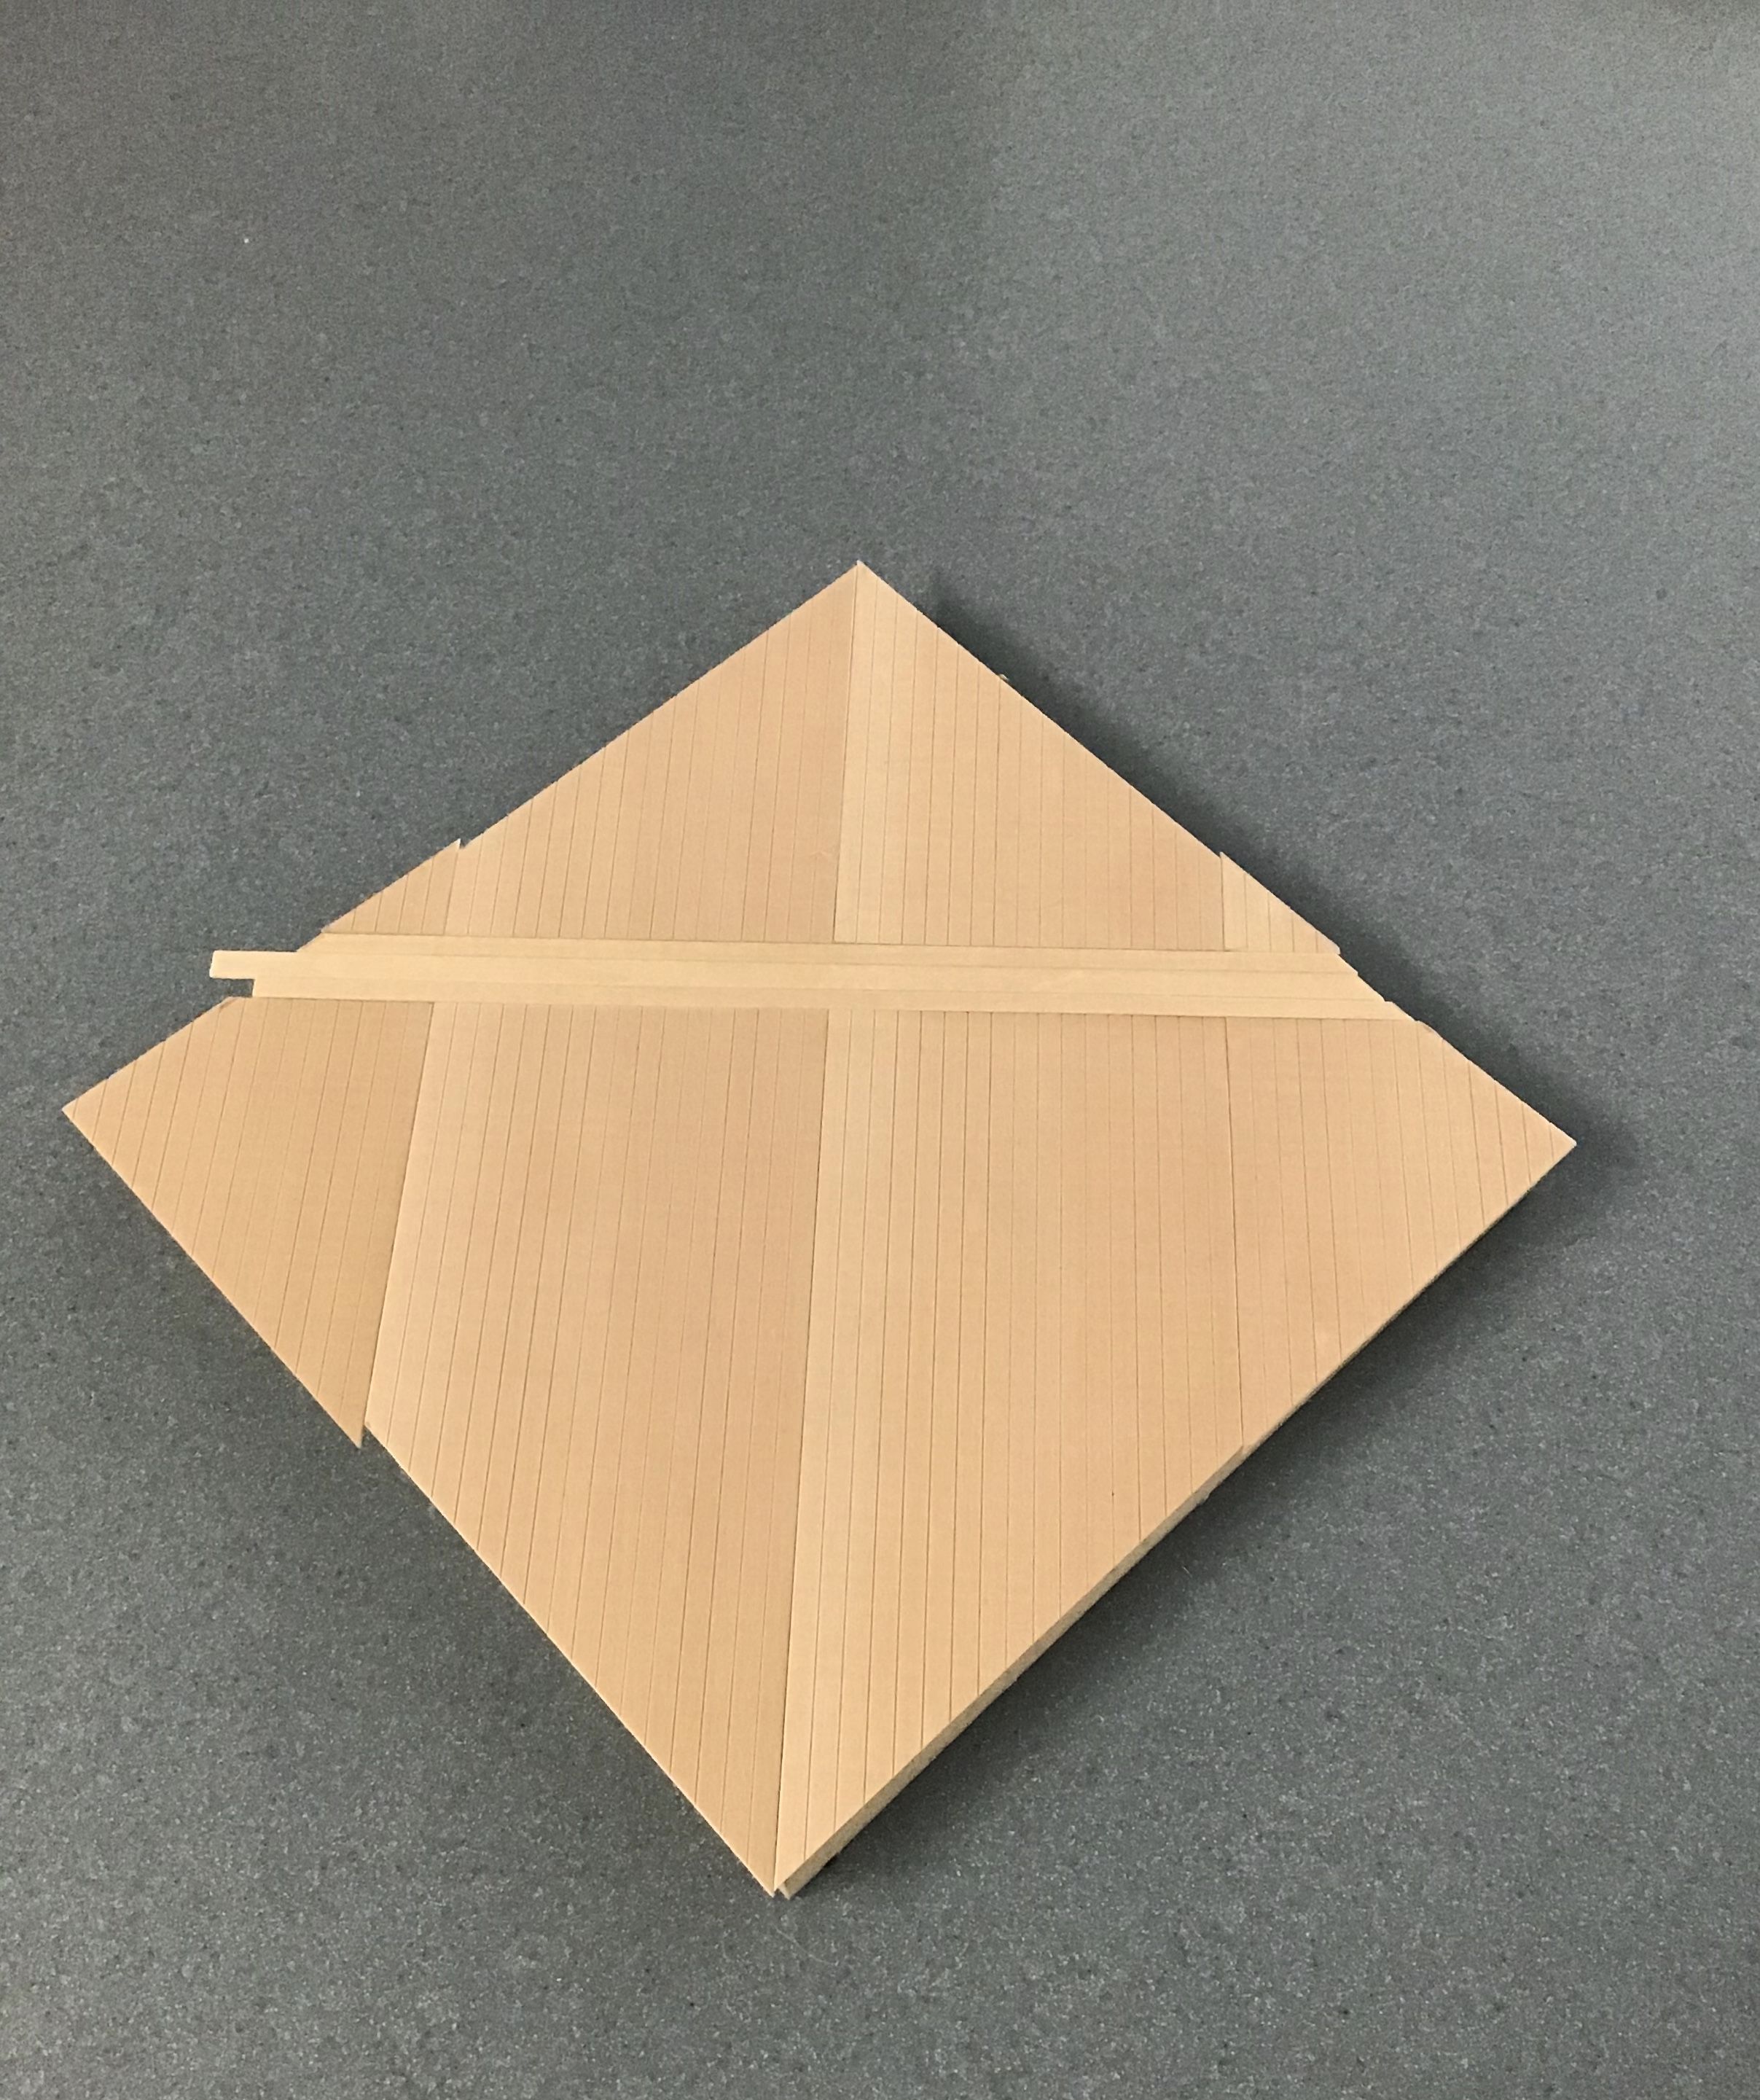
Decking will be natural although I will have to do some staining to make it look like individual planks - yet to be worked out.
next up pre shading on the Zero.
Thanks for looking in- RT
I've received the reference I have been waiting on -our regular mailman is on vacation and his replacement real bolluxed things - besides missing our entire street two days in a row , this book was delivered to someone on the next block who kindly brought it to me this morning .
I have completed the plan on paper and have roughed out the basswood decking to be glued up to the MDF base block.
Decking will be natural although I will have to do some staining to make it look like individual planks - yet to be worked out.
next up pre shading on the Zero.
Thanks for looking in- RT
Joel_W
Joined: December 04, 2010
KitMaker: 11,666 posts
AeroScale: 7,410 posts
Posted: Sunday, July 19, 2020 - 05:39 AM UTC
Richard,
So we have the same substitute mail person.
the decking is beyond just looking the part, it looks about as real as a replica can get.
Joel
So we have the same substitute mail person.
the decking is beyond just looking the part, it looks about as real as a replica can get.
Joel
rdt1953
Joined: February 06, 2015
KitMaker: 1,098 posts
AeroScale: 900 posts
Posted: Sunday, July 26, 2020 - 07:45 AM UTC
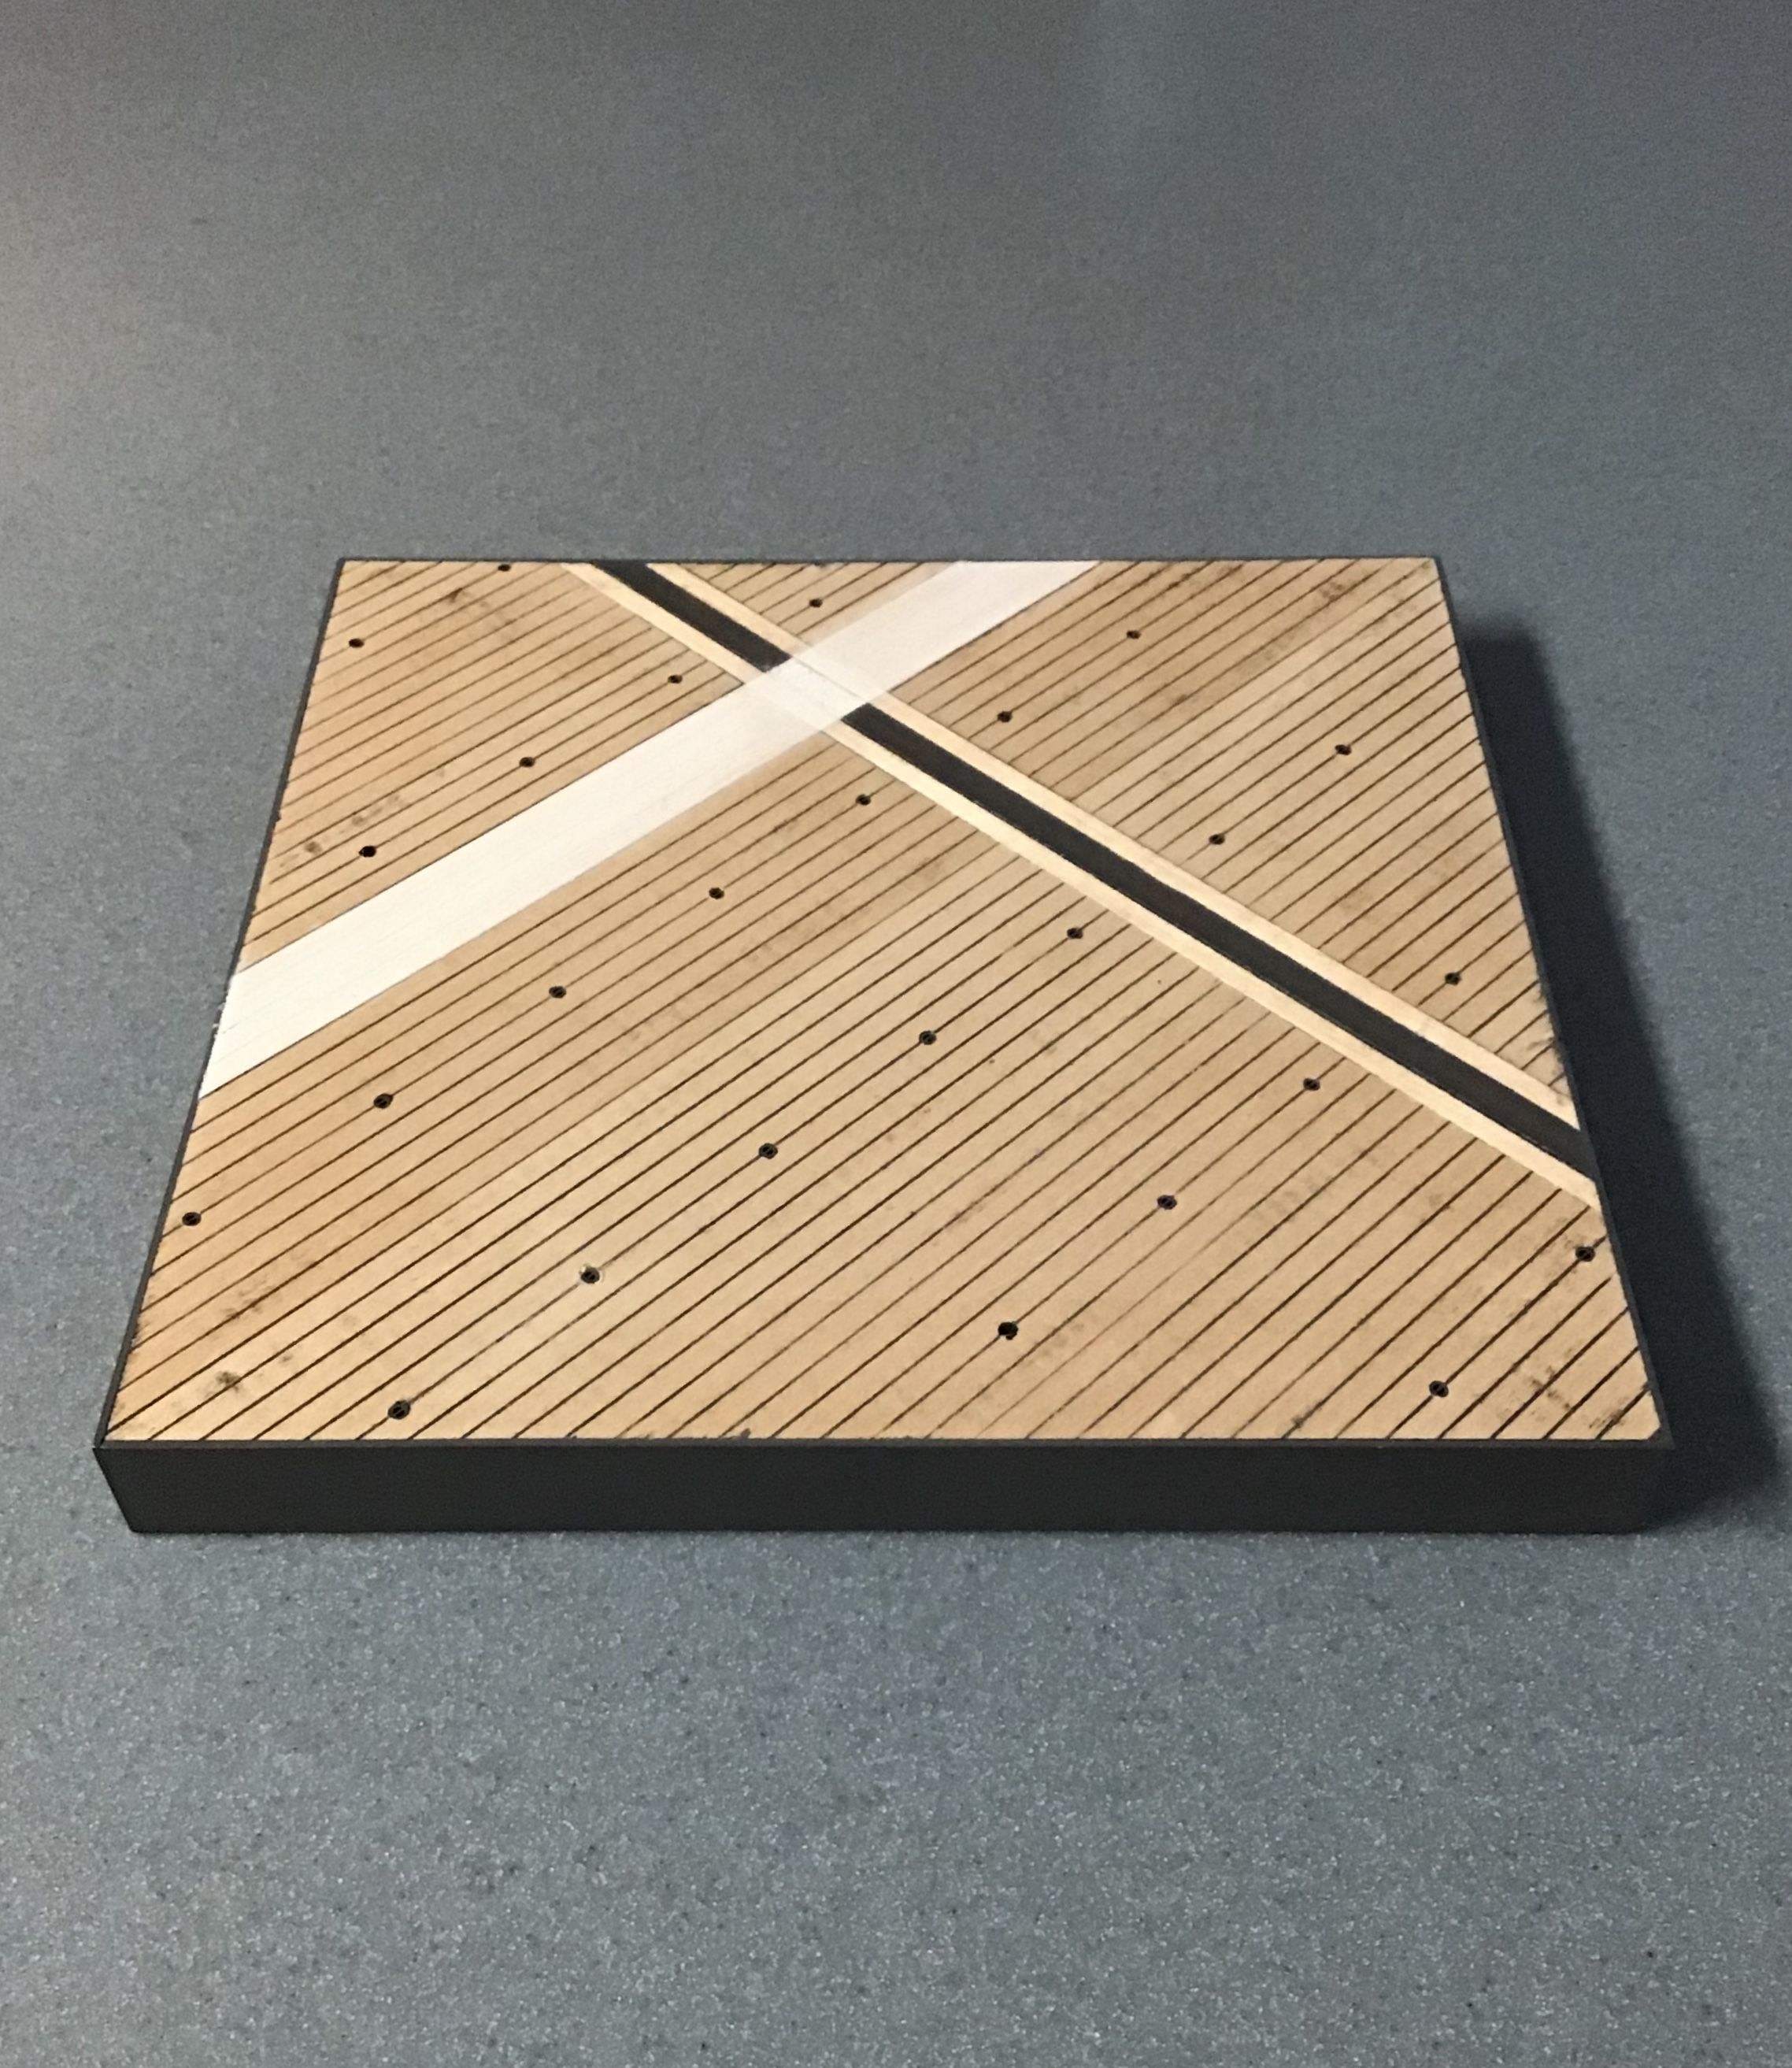
Decking glued up , edges dressed and lined with white styrene -
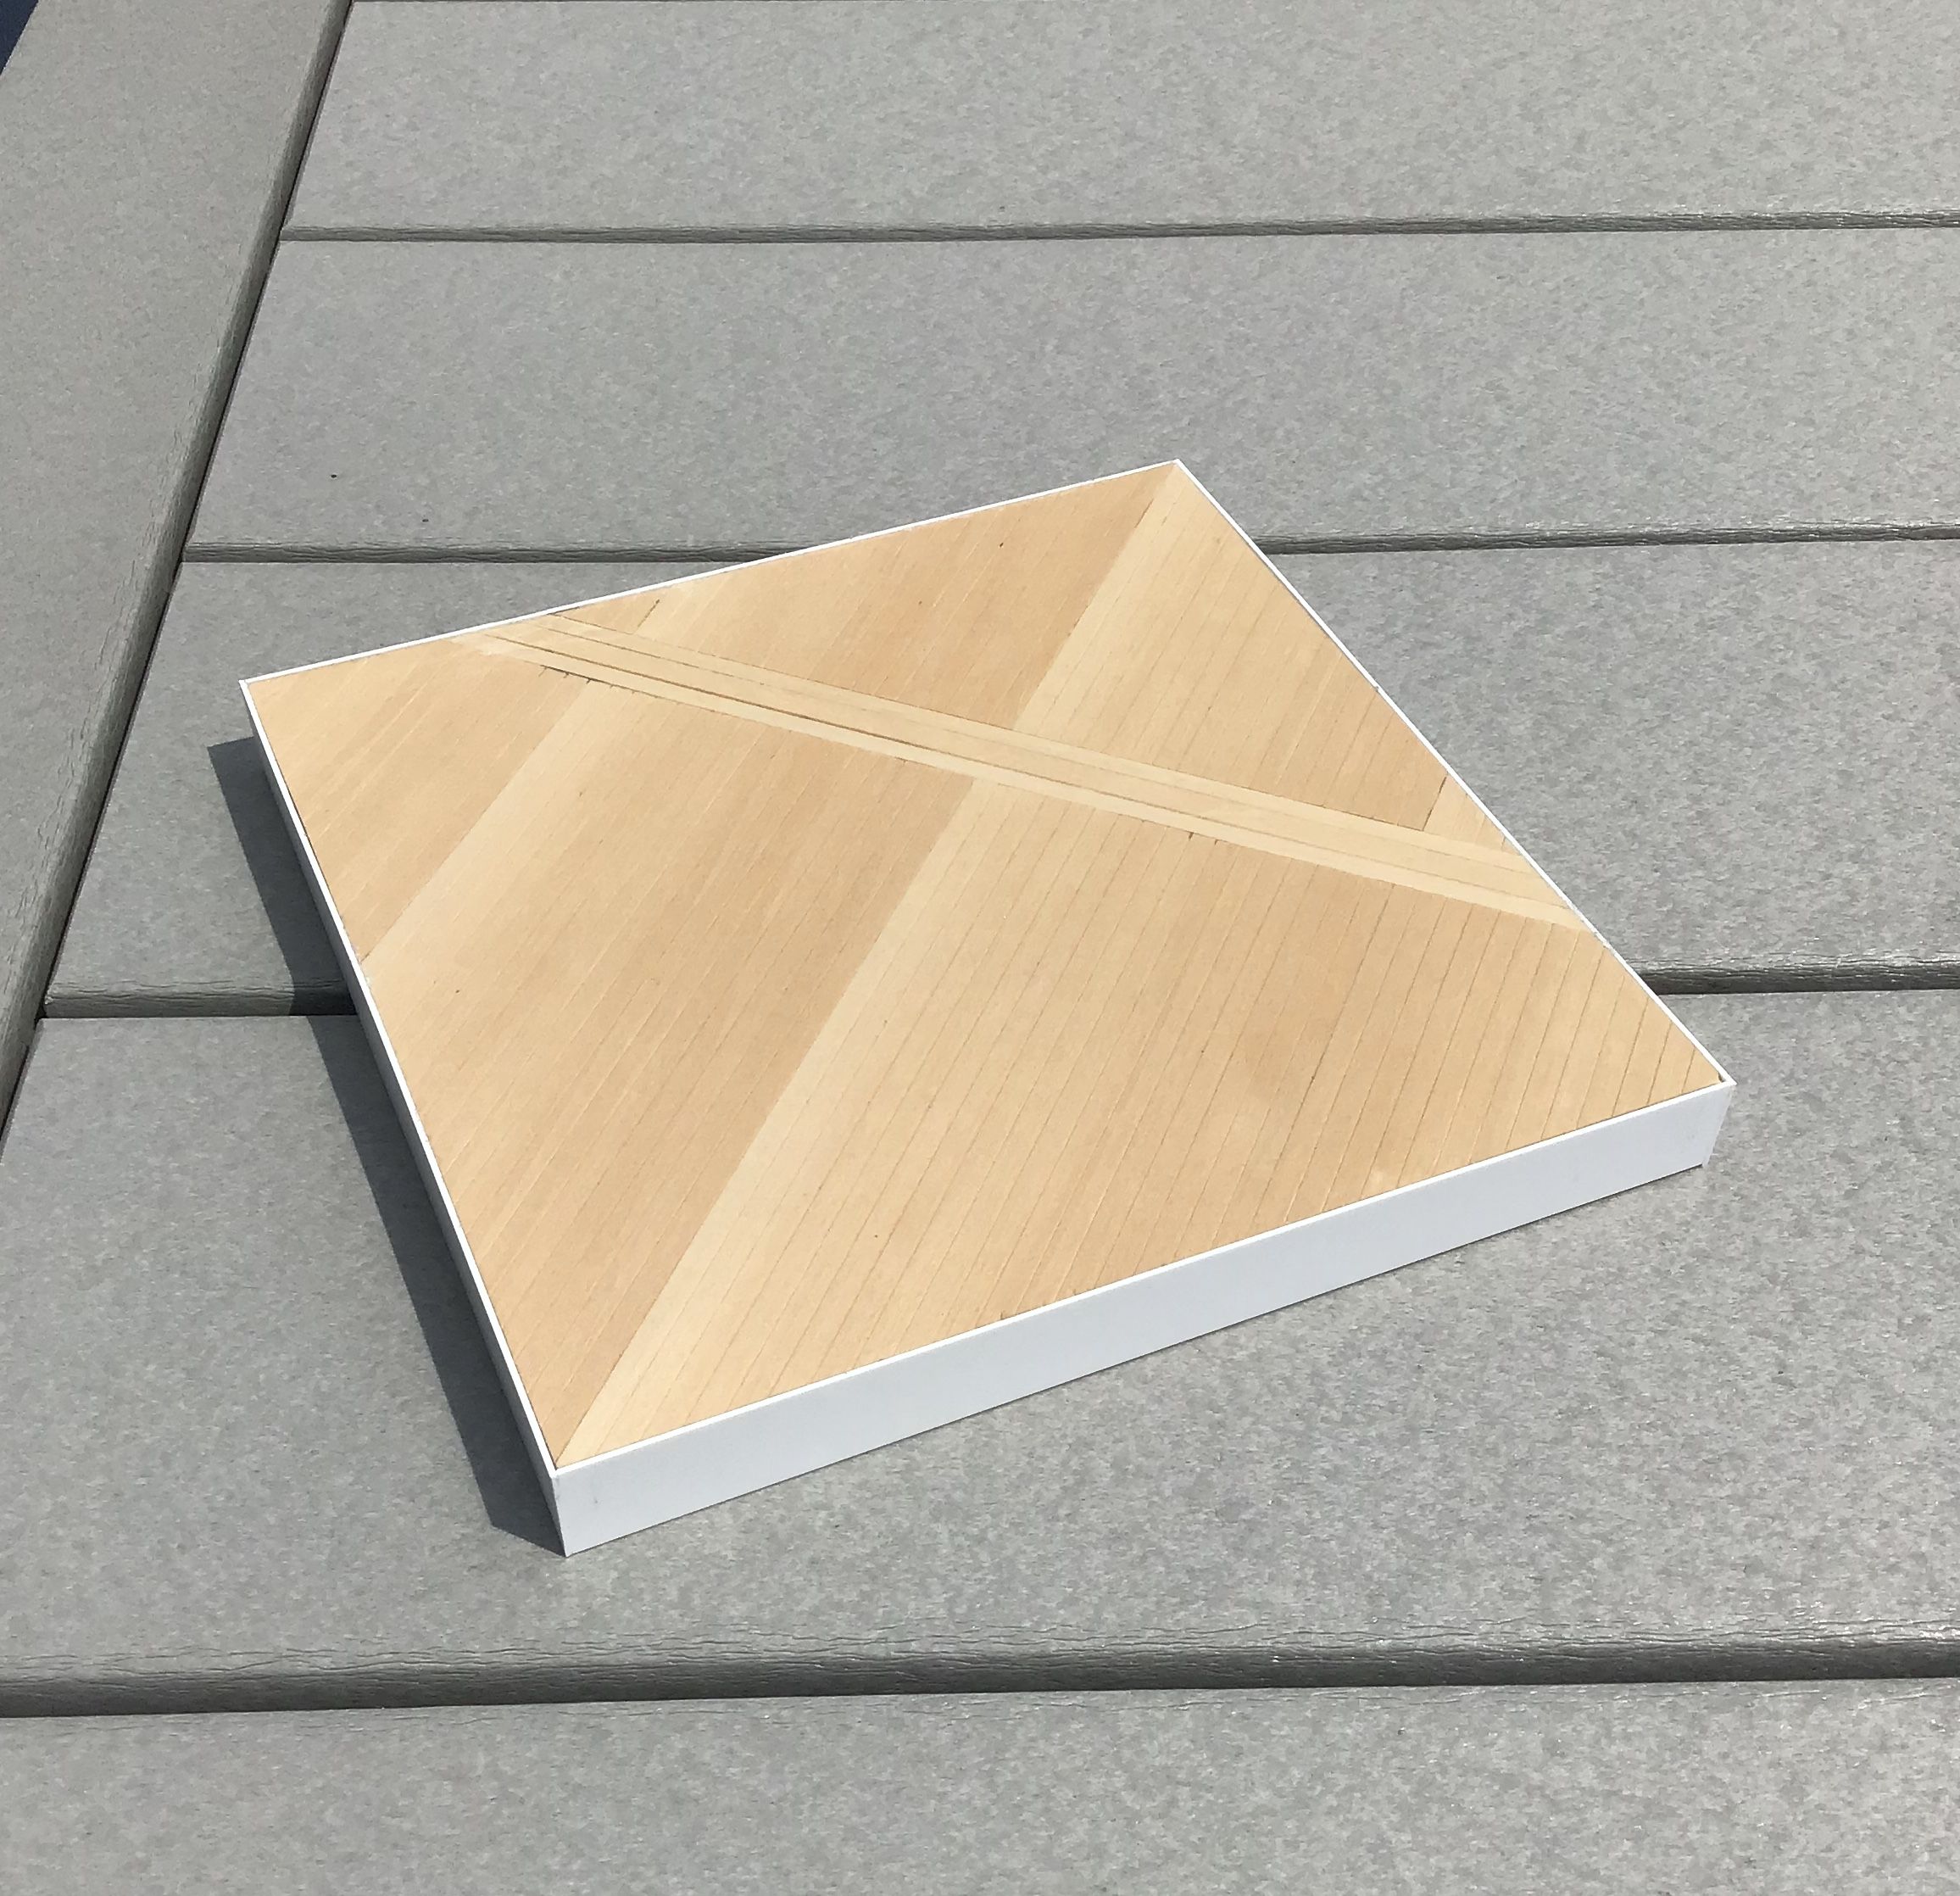
Paste mixed up of Durhams , water and Stynylrez black primer for tarred seams in deck -
Paste screeded into seams with utility knife blade -

Finished surface will look like test sample on right - bare decking given 2 coats of acrylic satin polyurethane , paste worked in and then scraped down when dry -

Thanks for looking ! - RT
Paste mixed up of Durhams , water and Stynylrez black primer for tarred seams in deck -
Paste screeded into seams with utility knife blade -
Finished surface will look like test sample on right - bare decking given 2 coats of acrylic satin polyurethane , paste worked in and then scraped down when dry -
Thanks for looking ! - RT
Redhand
#522
Joined: January 20, 2013
KitMaker: 1,460 posts
AeroScale: 1,443 posts
Posted: Sunday, July 26, 2020 - 02:40 PM UTC
Everything you do is a work of art, not just "a model."

GazzaS
#424

Joined: April 23, 2015
KitMaker: 4,648 posts
AeroScale: 1,938 posts

Posted: Sunday, July 26, 2020 - 09:36 PM UTC
Very nice work, Richard! The cockpit interior looks excellent.
Joel_W
Joined: December 04, 2010
KitMaker: 11,666 posts
AeroScale: 7,410 posts
Posted: Monday, July 27, 2020 - 12:30 AM UTC
Richard,
Oh Wow!!! I'm just blown away at your Deck Base. Your few years away while restoring your bike just seems to have sharpened your modeling skills more then just a few notches. Without any doubt, you sir are modeling on IPMS National Winner's level for sure.
joel
Oh Wow!!! I'm just blown away at your Deck Base. Your few years away while restoring your bike just seems to have sharpened your modeling skills more then just a few notches. Without any doubt, you sir are modeling on IPMS National Winner's level for sure.
joel
rdt1953
Joined: February 06, 2015
KitMaker: 1,098 posts
AeroScale: 900 posts
Posted: Tuesday, August 11, 2020 - 06:07 AM UTC
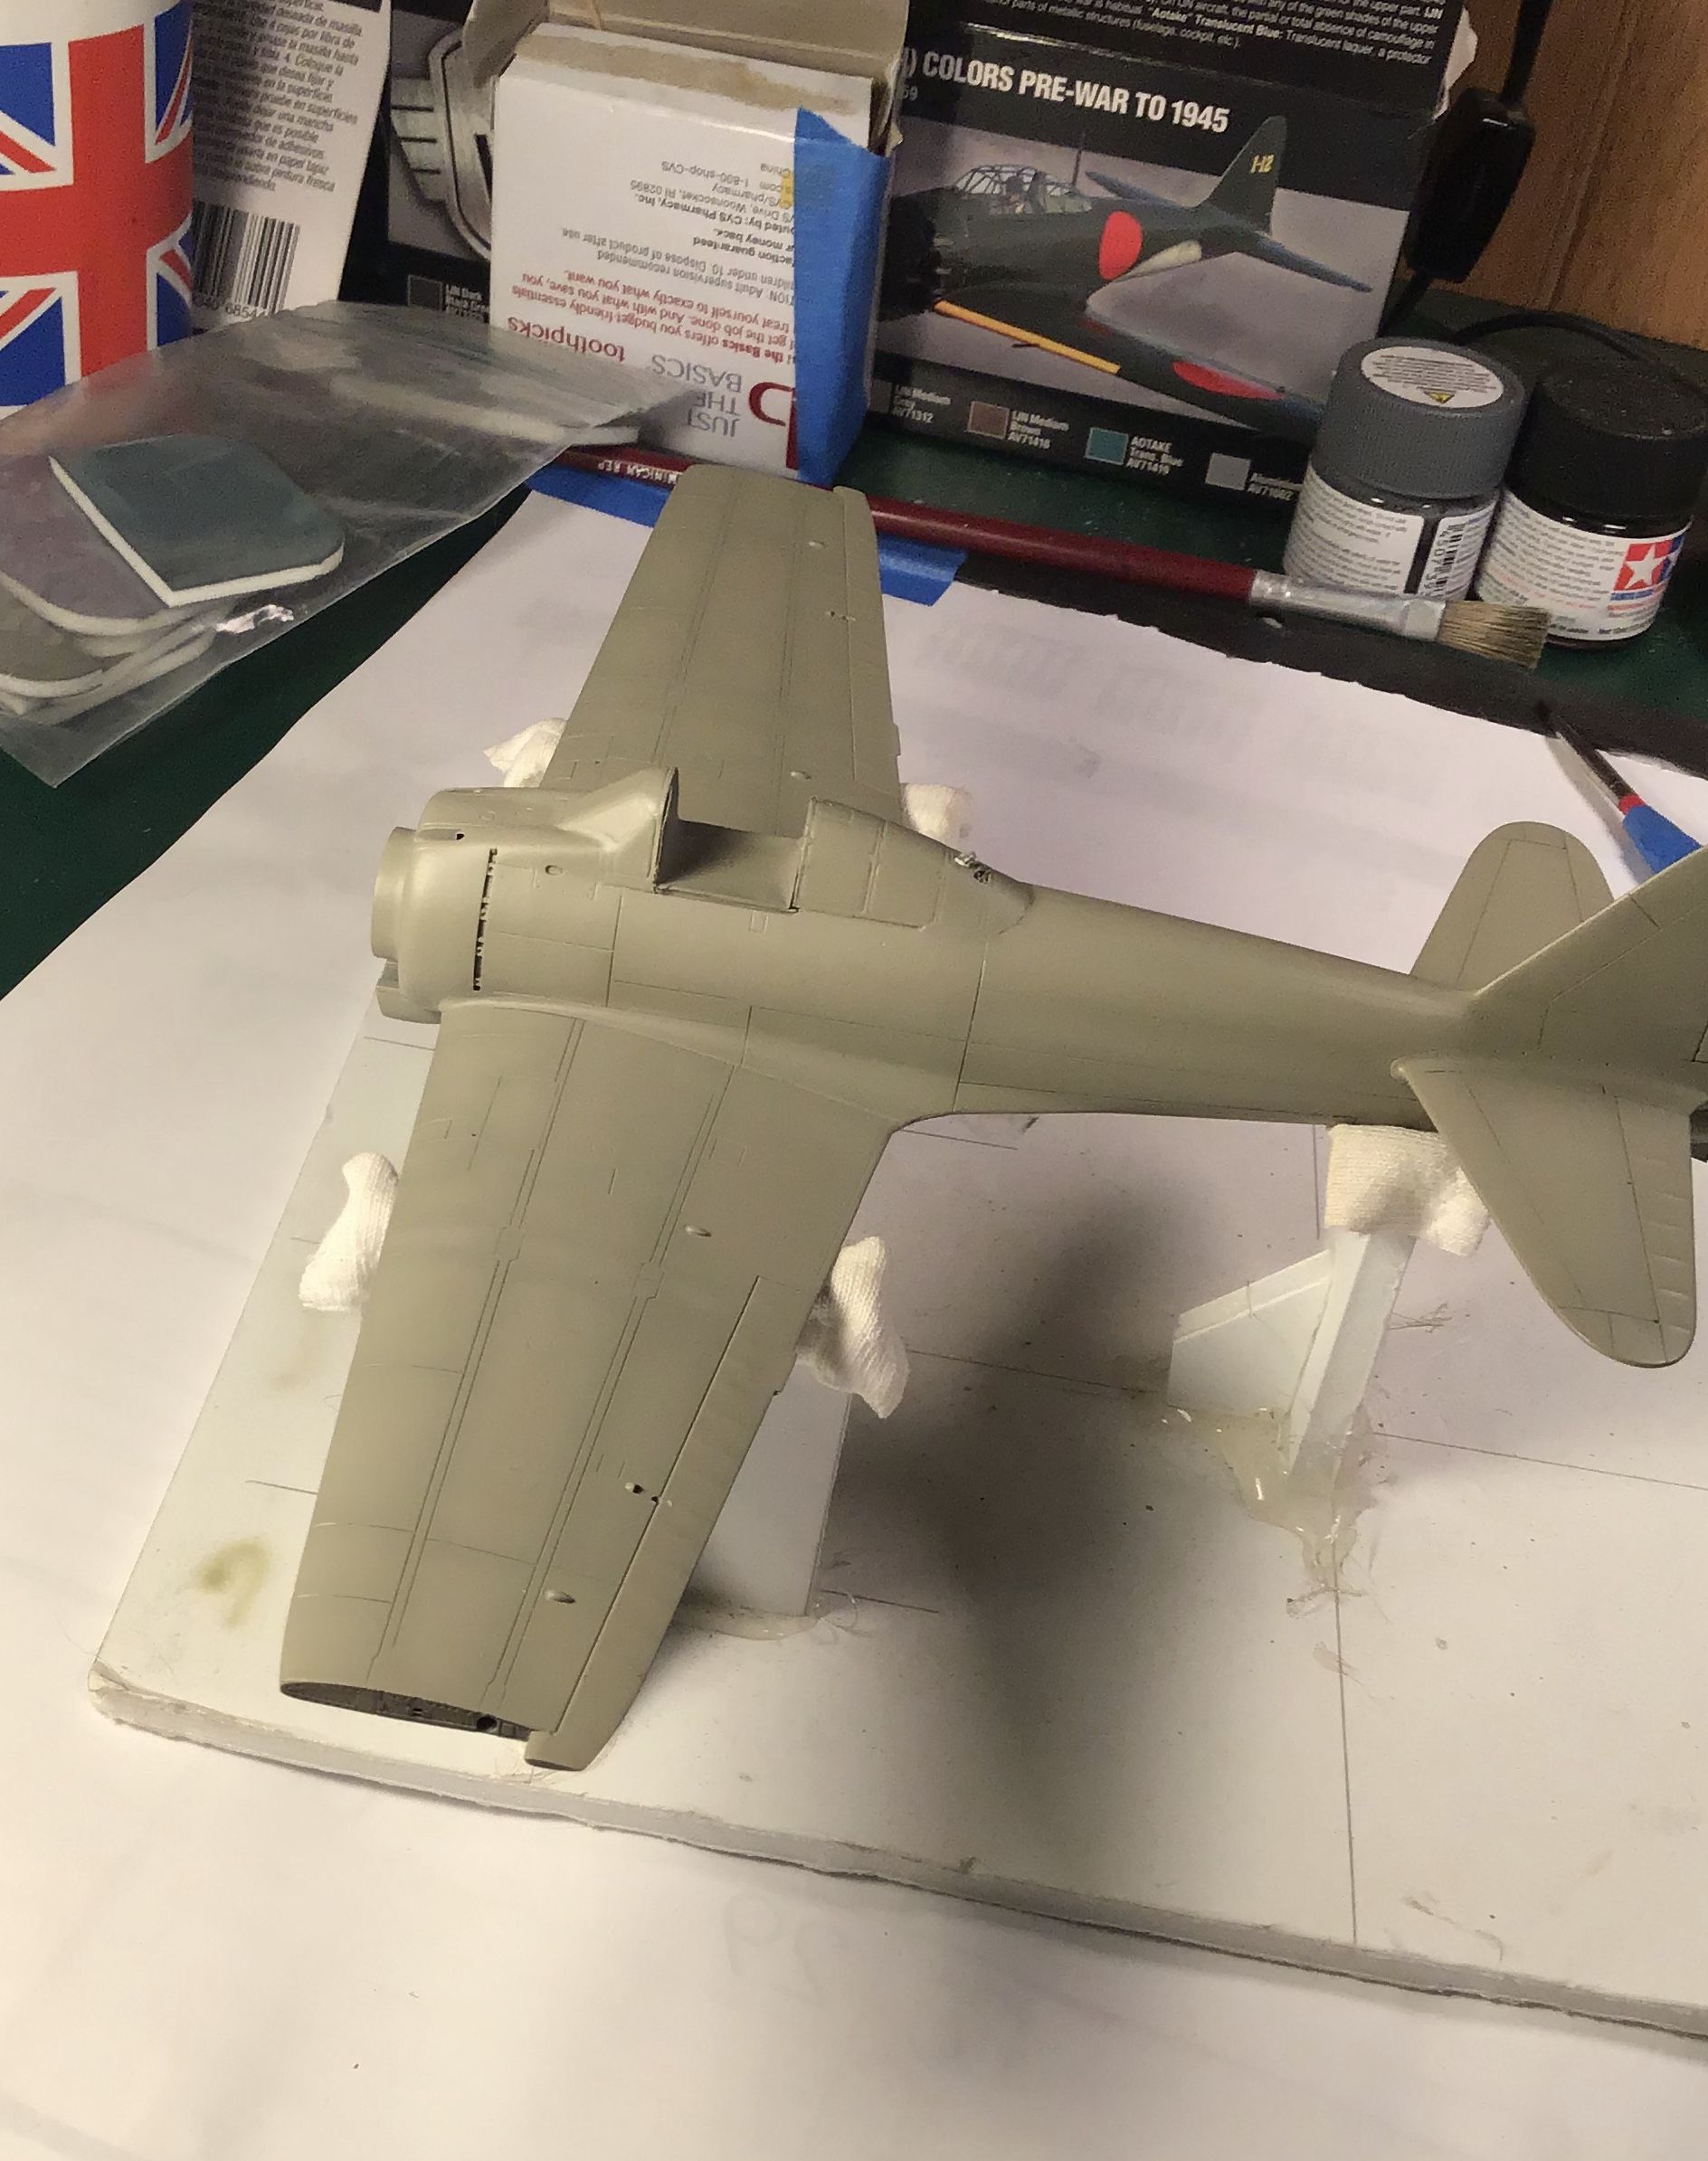
A little more progress -
The carrier deck base has been scraped down , masked and primed in Stynylrez gray -
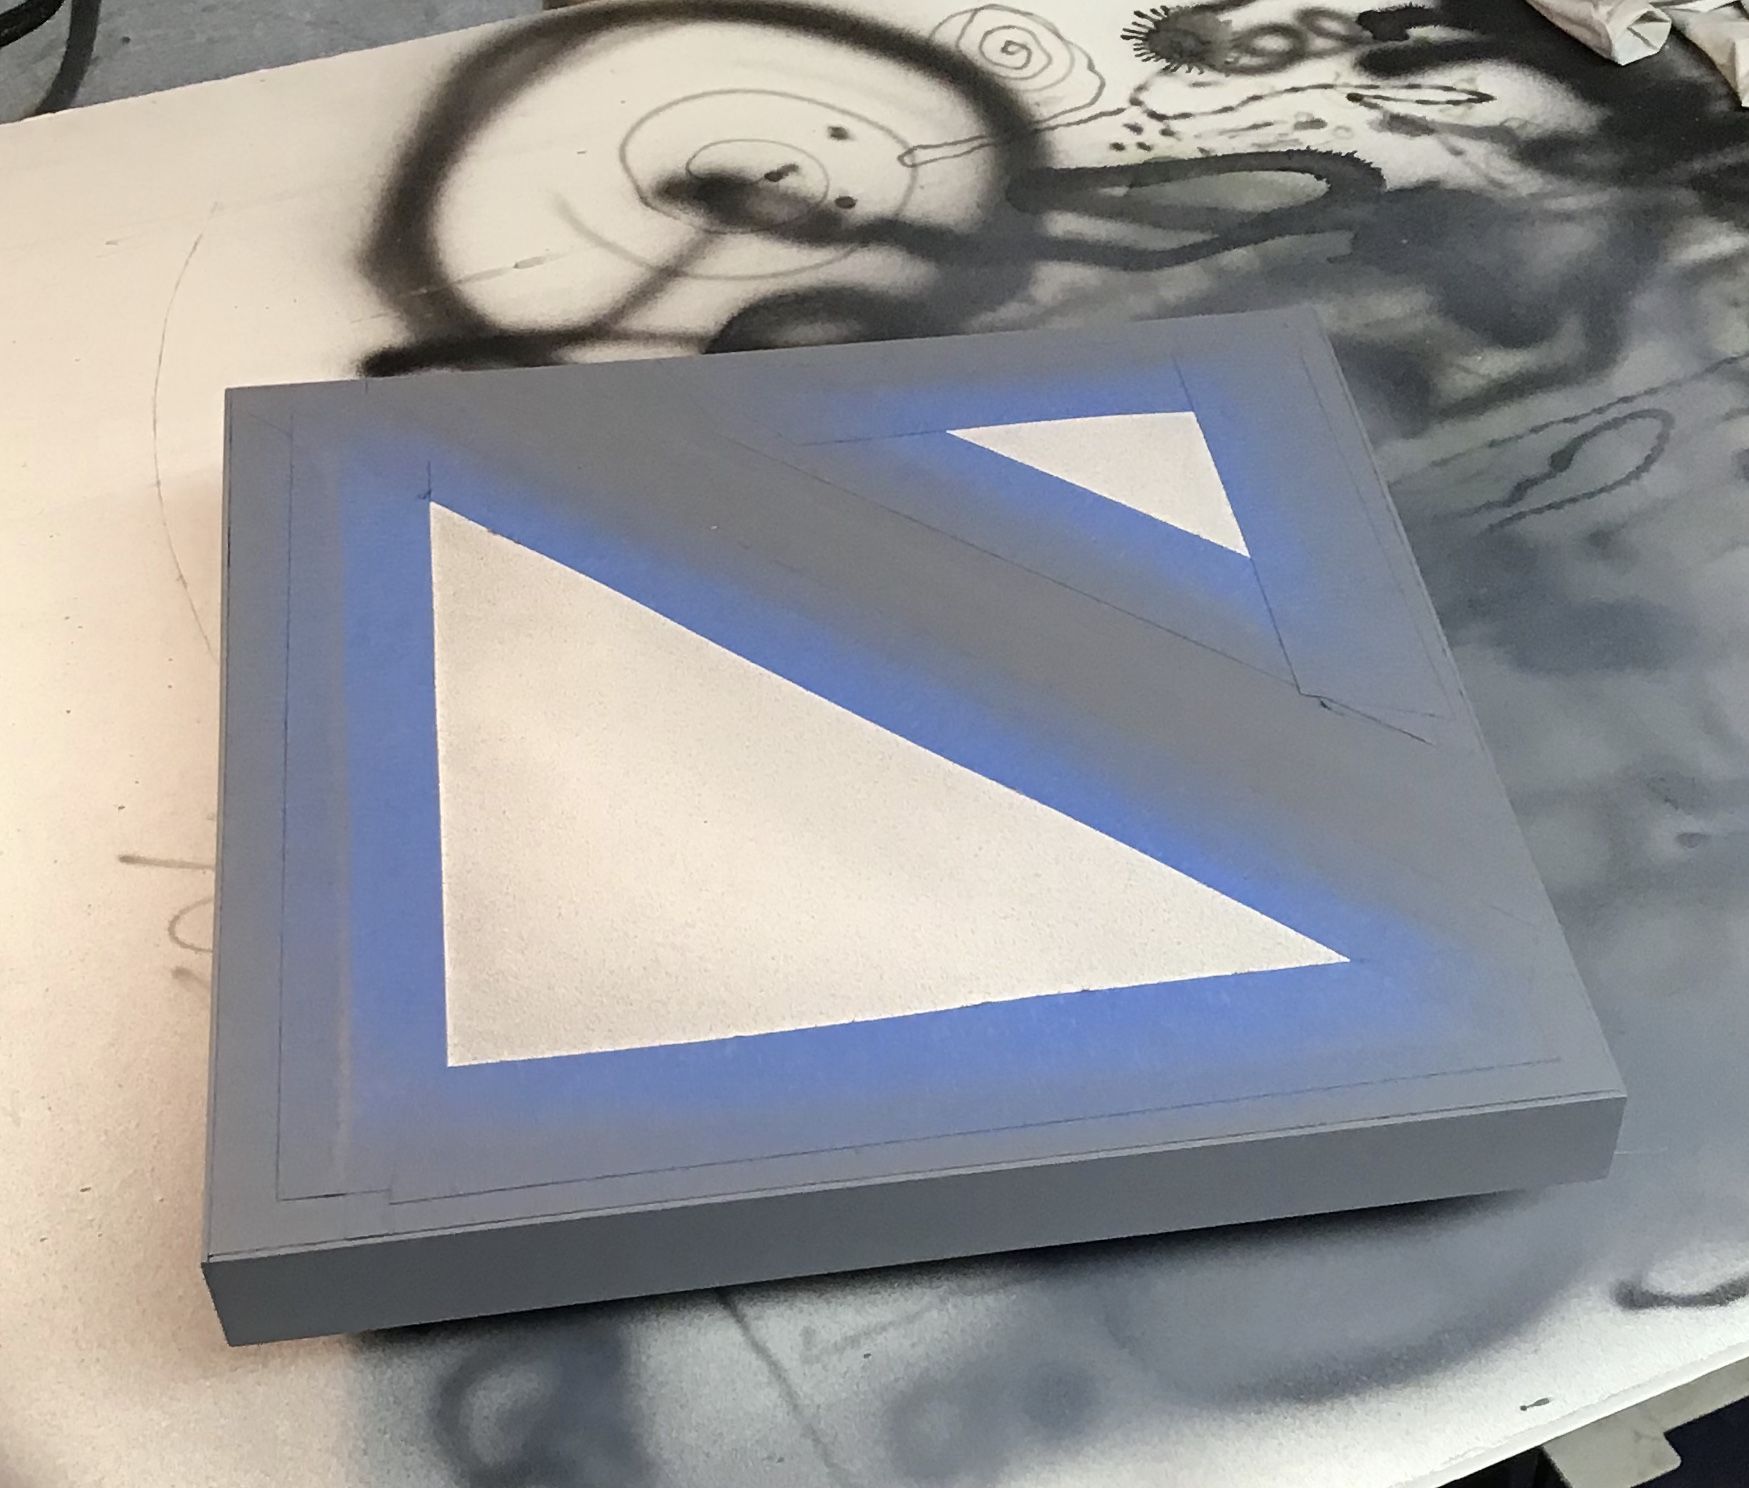
Steel section running athwartship underpainted in red brown-
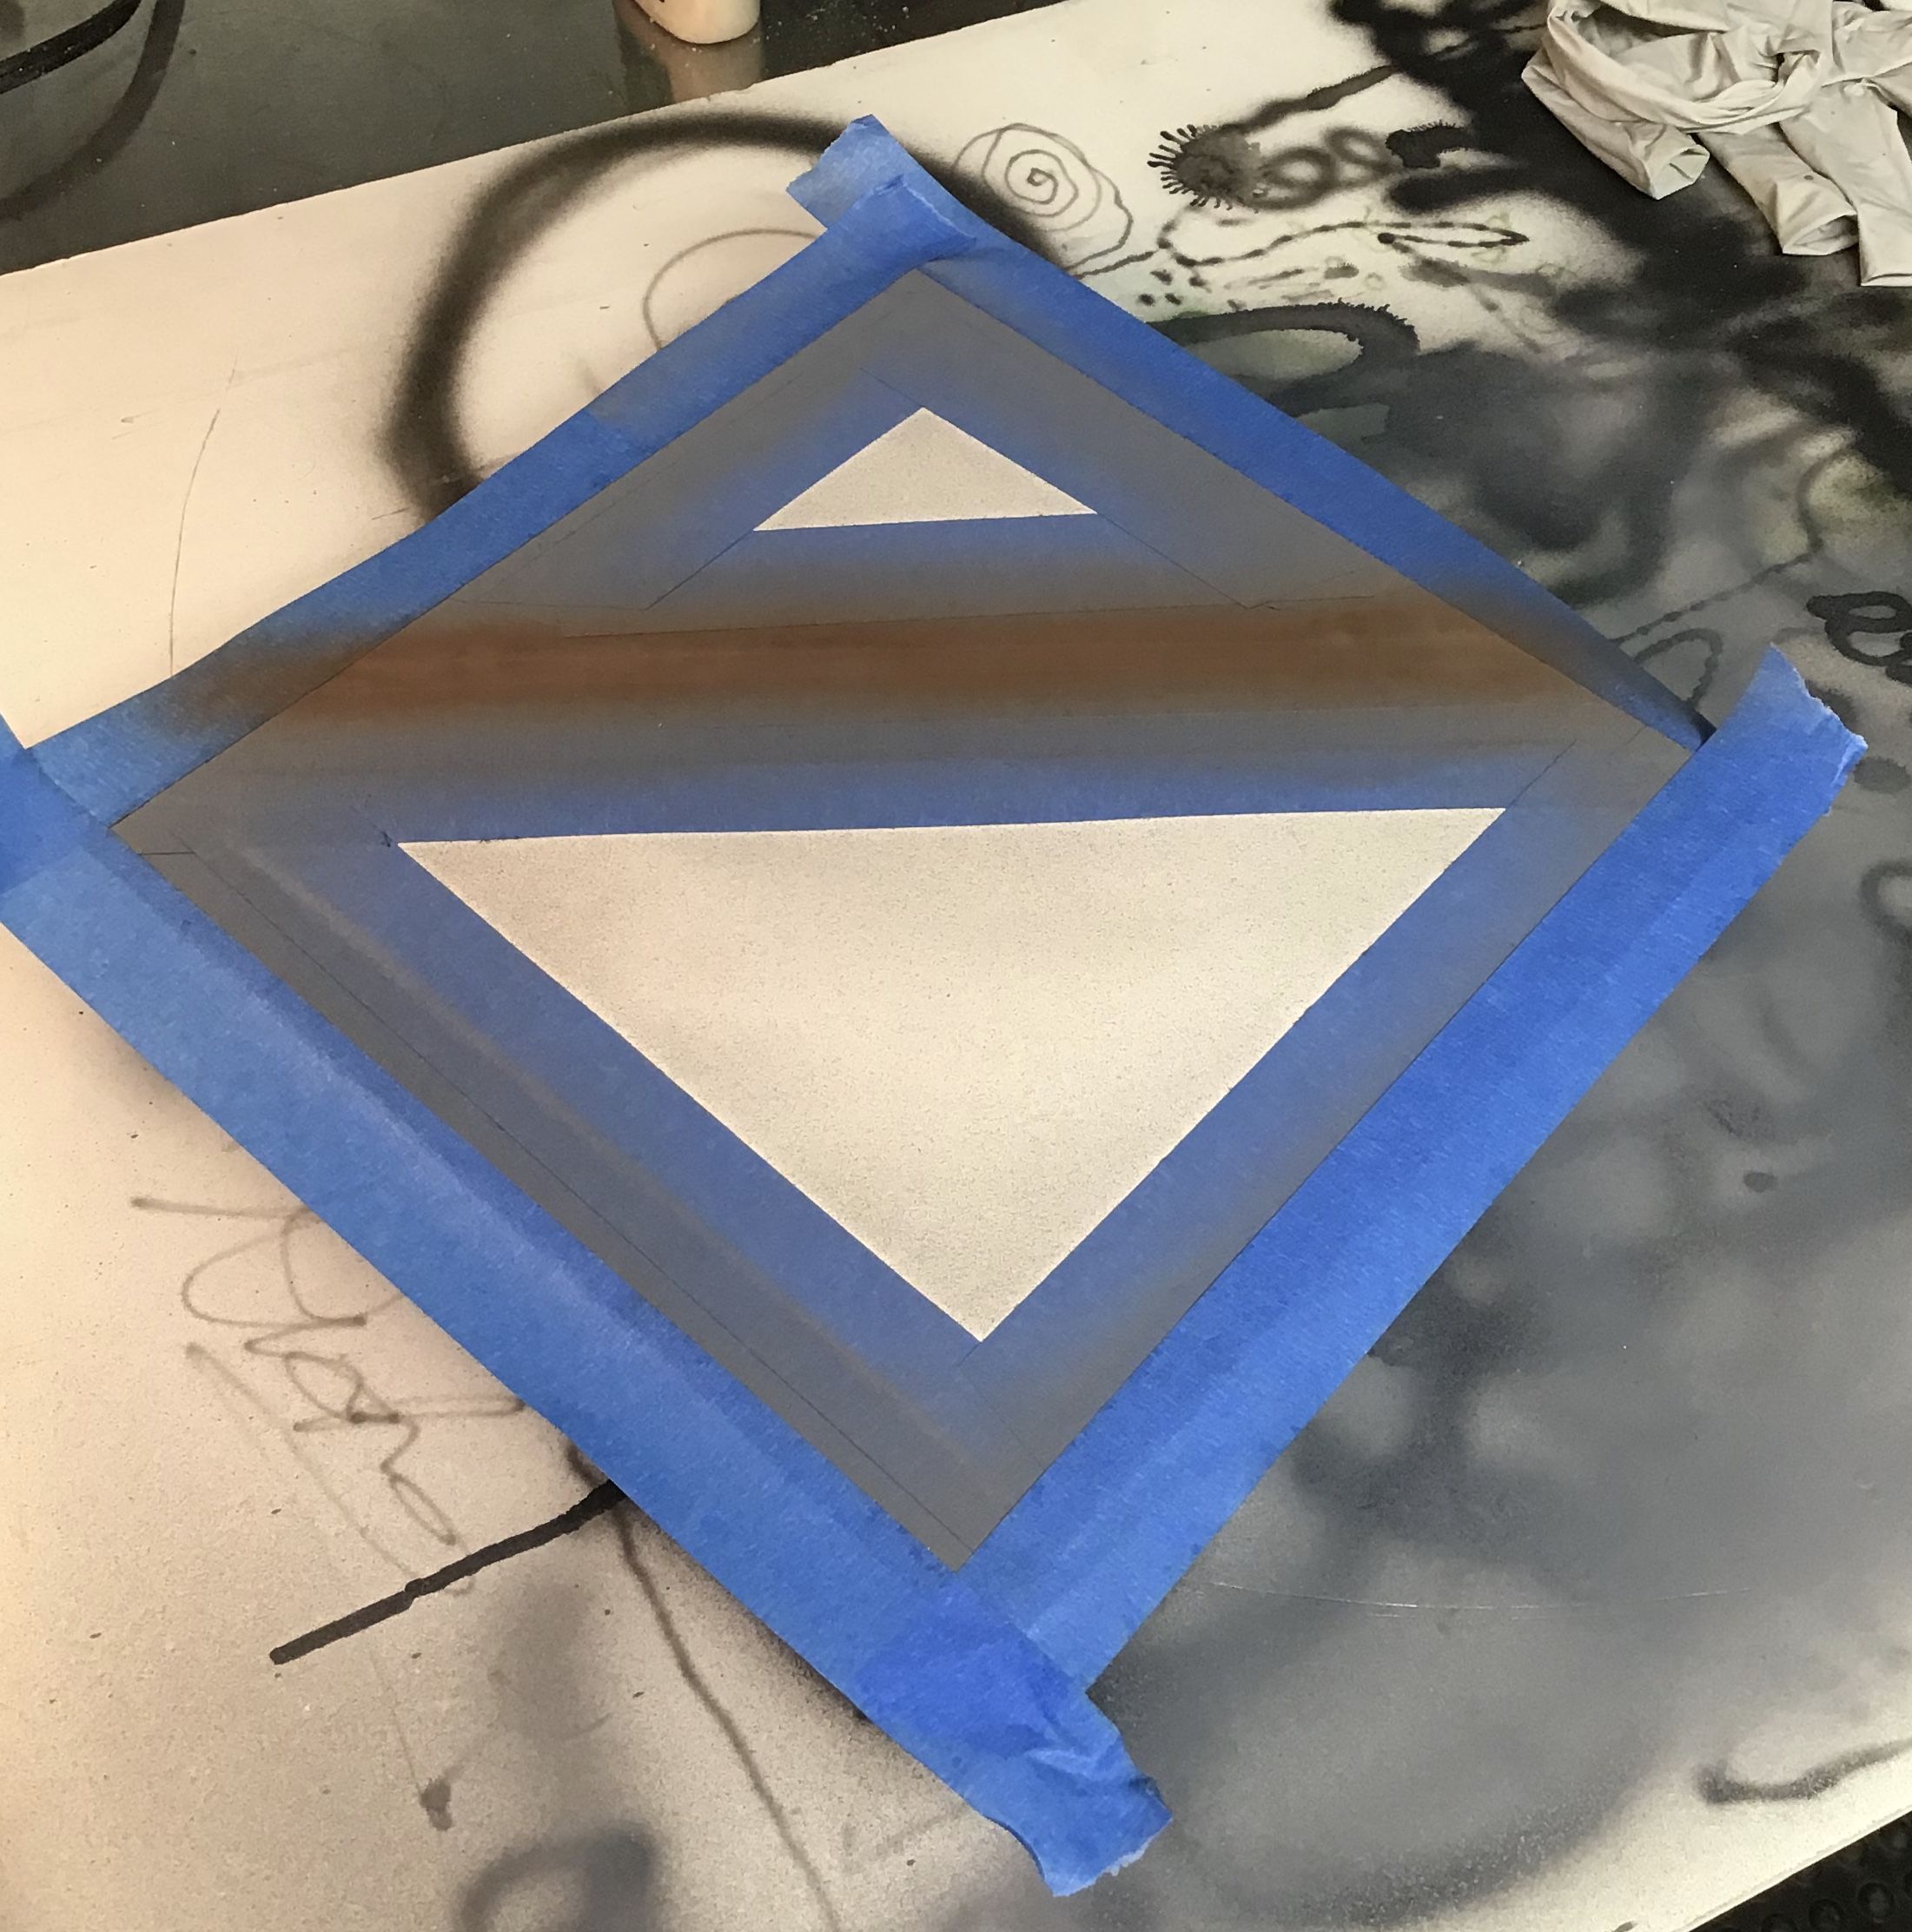
Steel section shot with hairspray as resist -

All overpainted with Tamiya Sasebo Arsenal Gray and unmasked -
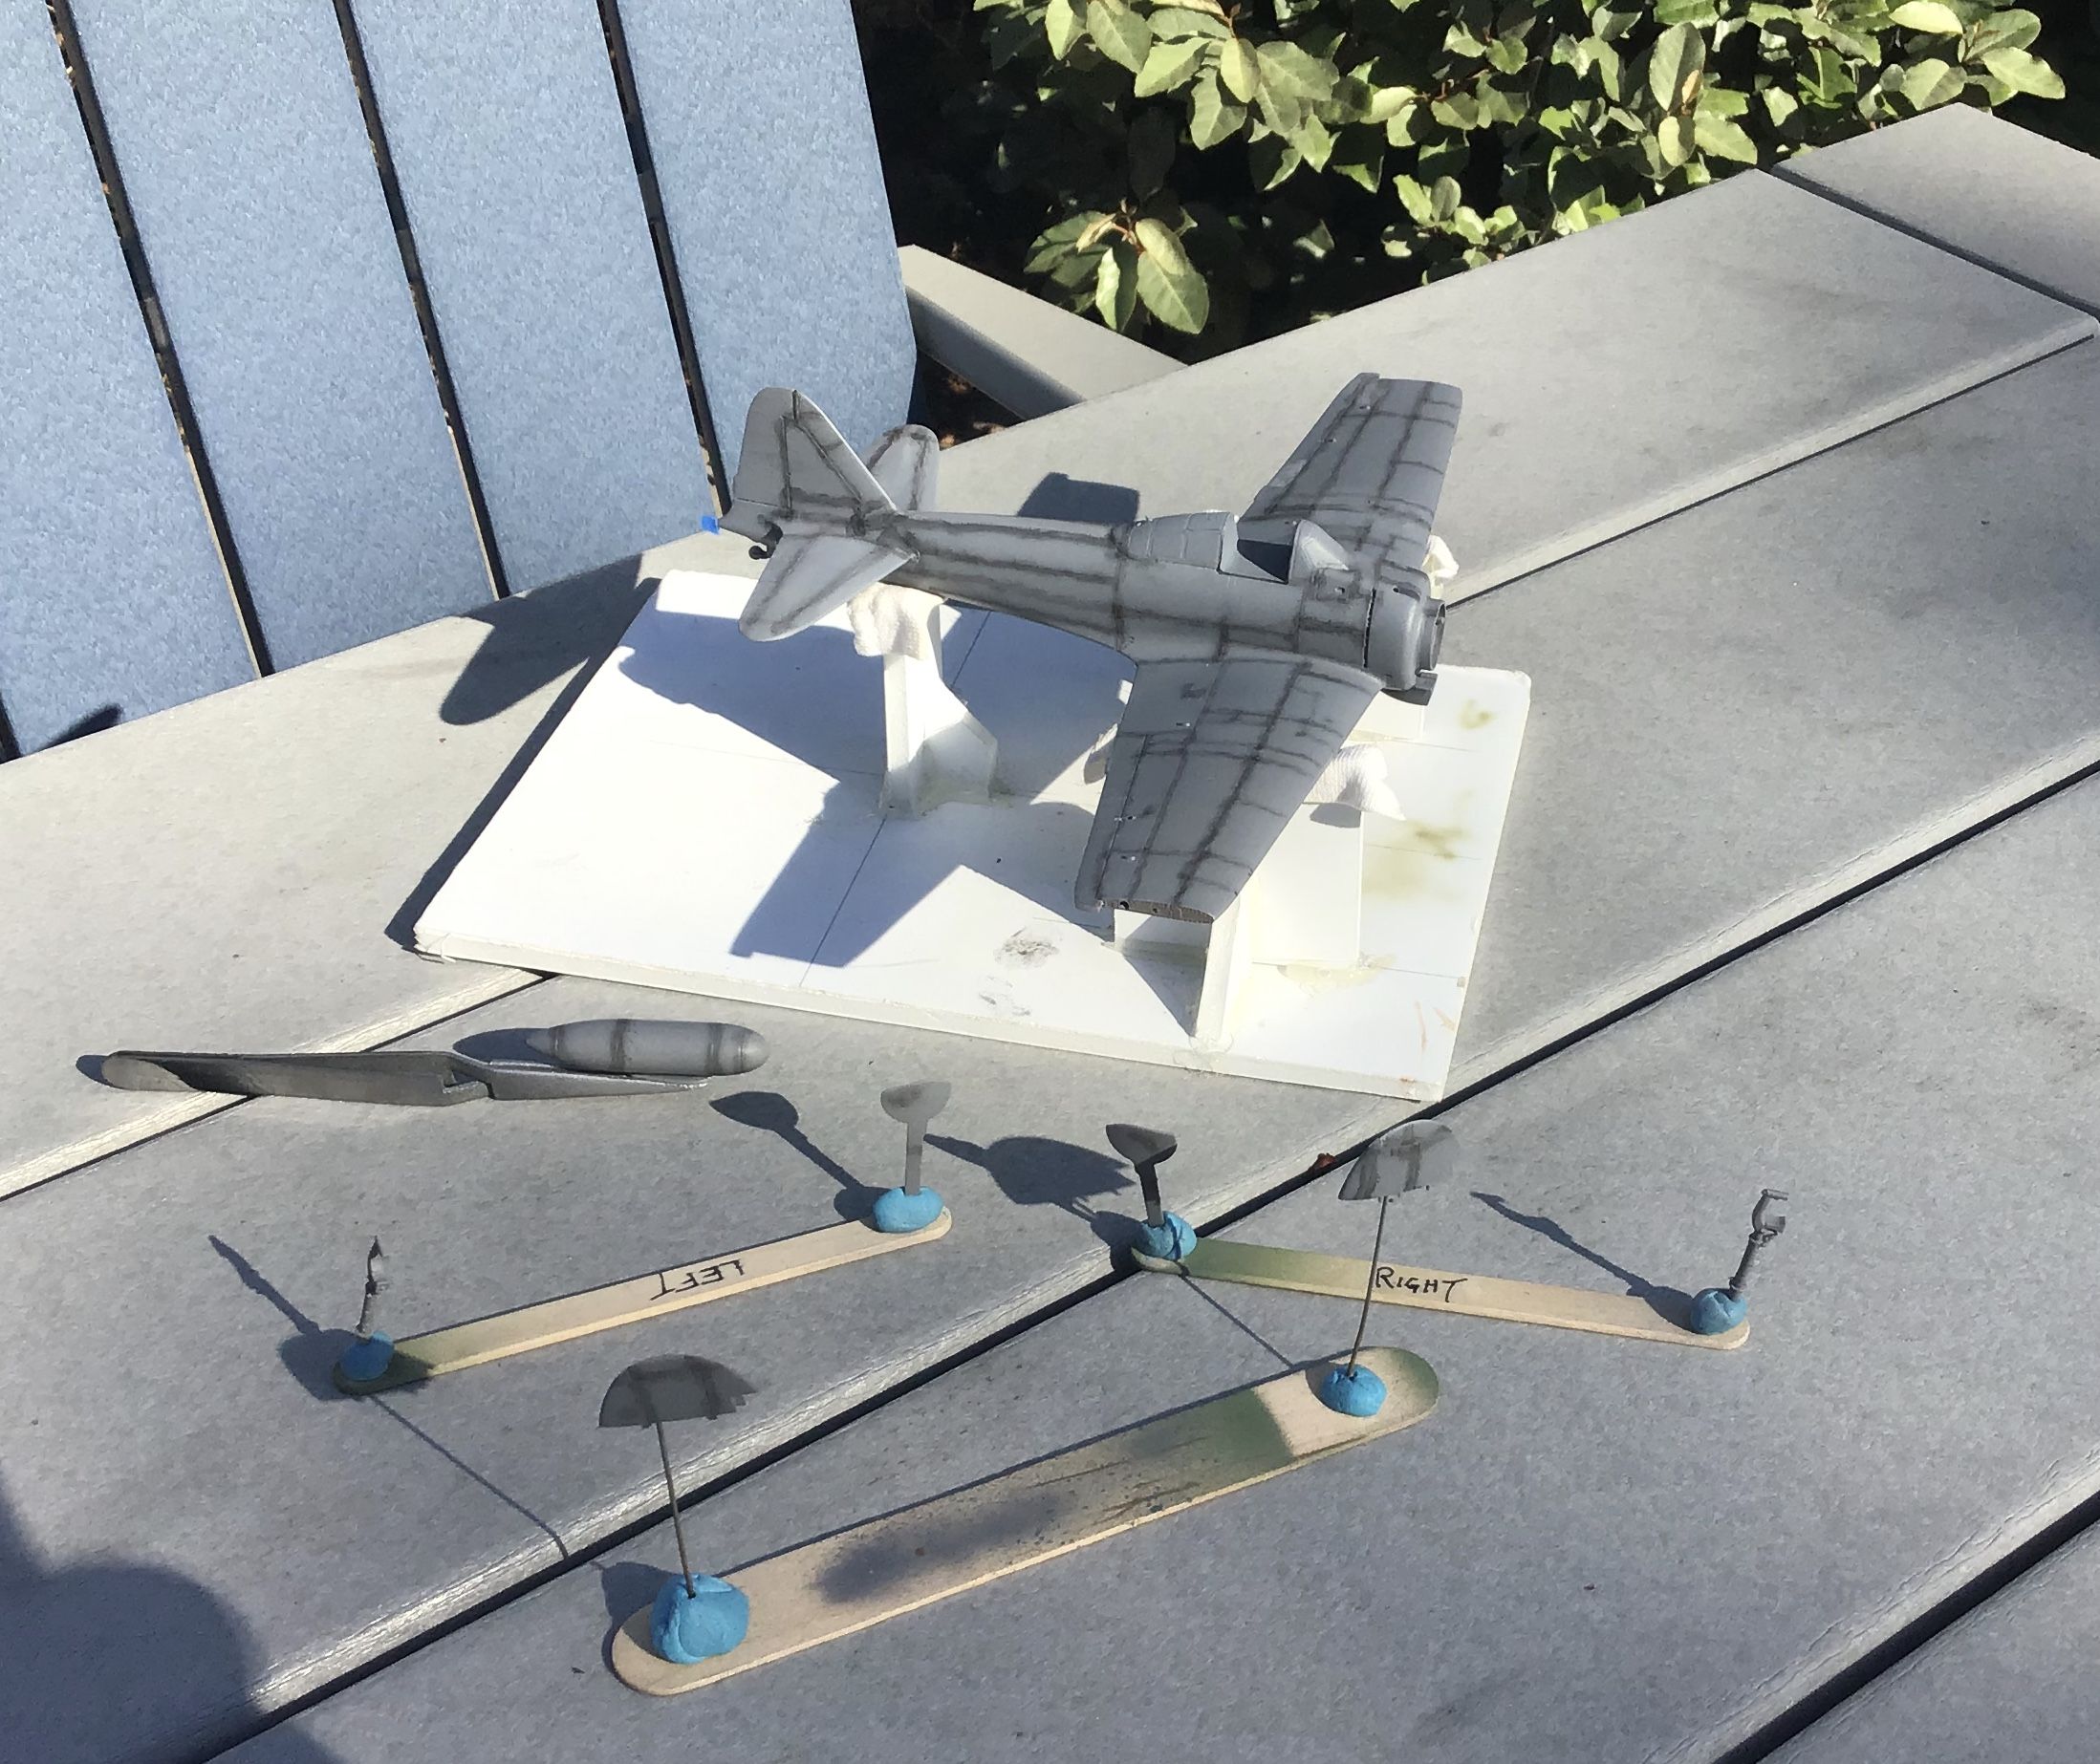
I've begun work on gust locks for the control surfaces as can be seen in the accompanying photo - photo credit Squadron/Signal Publications


Next up - drilling out base for photo etch tie downs and pre shading the Zero
Thanks for looking - Richard
The carrier deck base has been scraped down , masked and primed in Stynylrez gray -
Steel section running athwartship underpainted in red brown-
Steel section shot with hairspray as resist -
All overpainted with Tamiya Sasebo Arsenal Gray and unmasked -
I've begun work on gust locks for the control surfaces as can be seen in the accompanying photo - photo credit Squadron/Signal Publications
Next up - drilling out base for photo etch tie downs and pre shading the Zero
Thanks for looking - Richard
Joel_W
Joined: December 04, 2010
KitMaker: 11,666 posts
AeroScale: 7,410 posts
Posted: Tuesday, August 11, 2020 - 06:40 AM UTC
Richard,
And I thought that the desk was just perfect before this latest paint detailing. I can't even imagine the realistic weathering you'll be adding.
As for those flying surfaces tie downs, they sure do look like those in that photo.
Joel
And I thought that the desk was just perfect before this latest paint detailing. I can't even imagine the realistic weathering you'll be adding.
As for those flying surfaces tie downs, they sure do look like those in that photo.
Joel
rdt1953
Joined: February 06, 2015
KitMaker: 1,098 posts
AeroScale: 900 posts
Posted: Wednesday, August 12, 2020 - 10:53 AM UTC
Thanks Joel - as always I appreciate your comments .
The base is now done except for touch up and two tie downs that need to be installed at the time I mount the Zero to the base .
Here are a few shots of the base with a Hasegawa Val I built a few years back -
also from the Kaga.


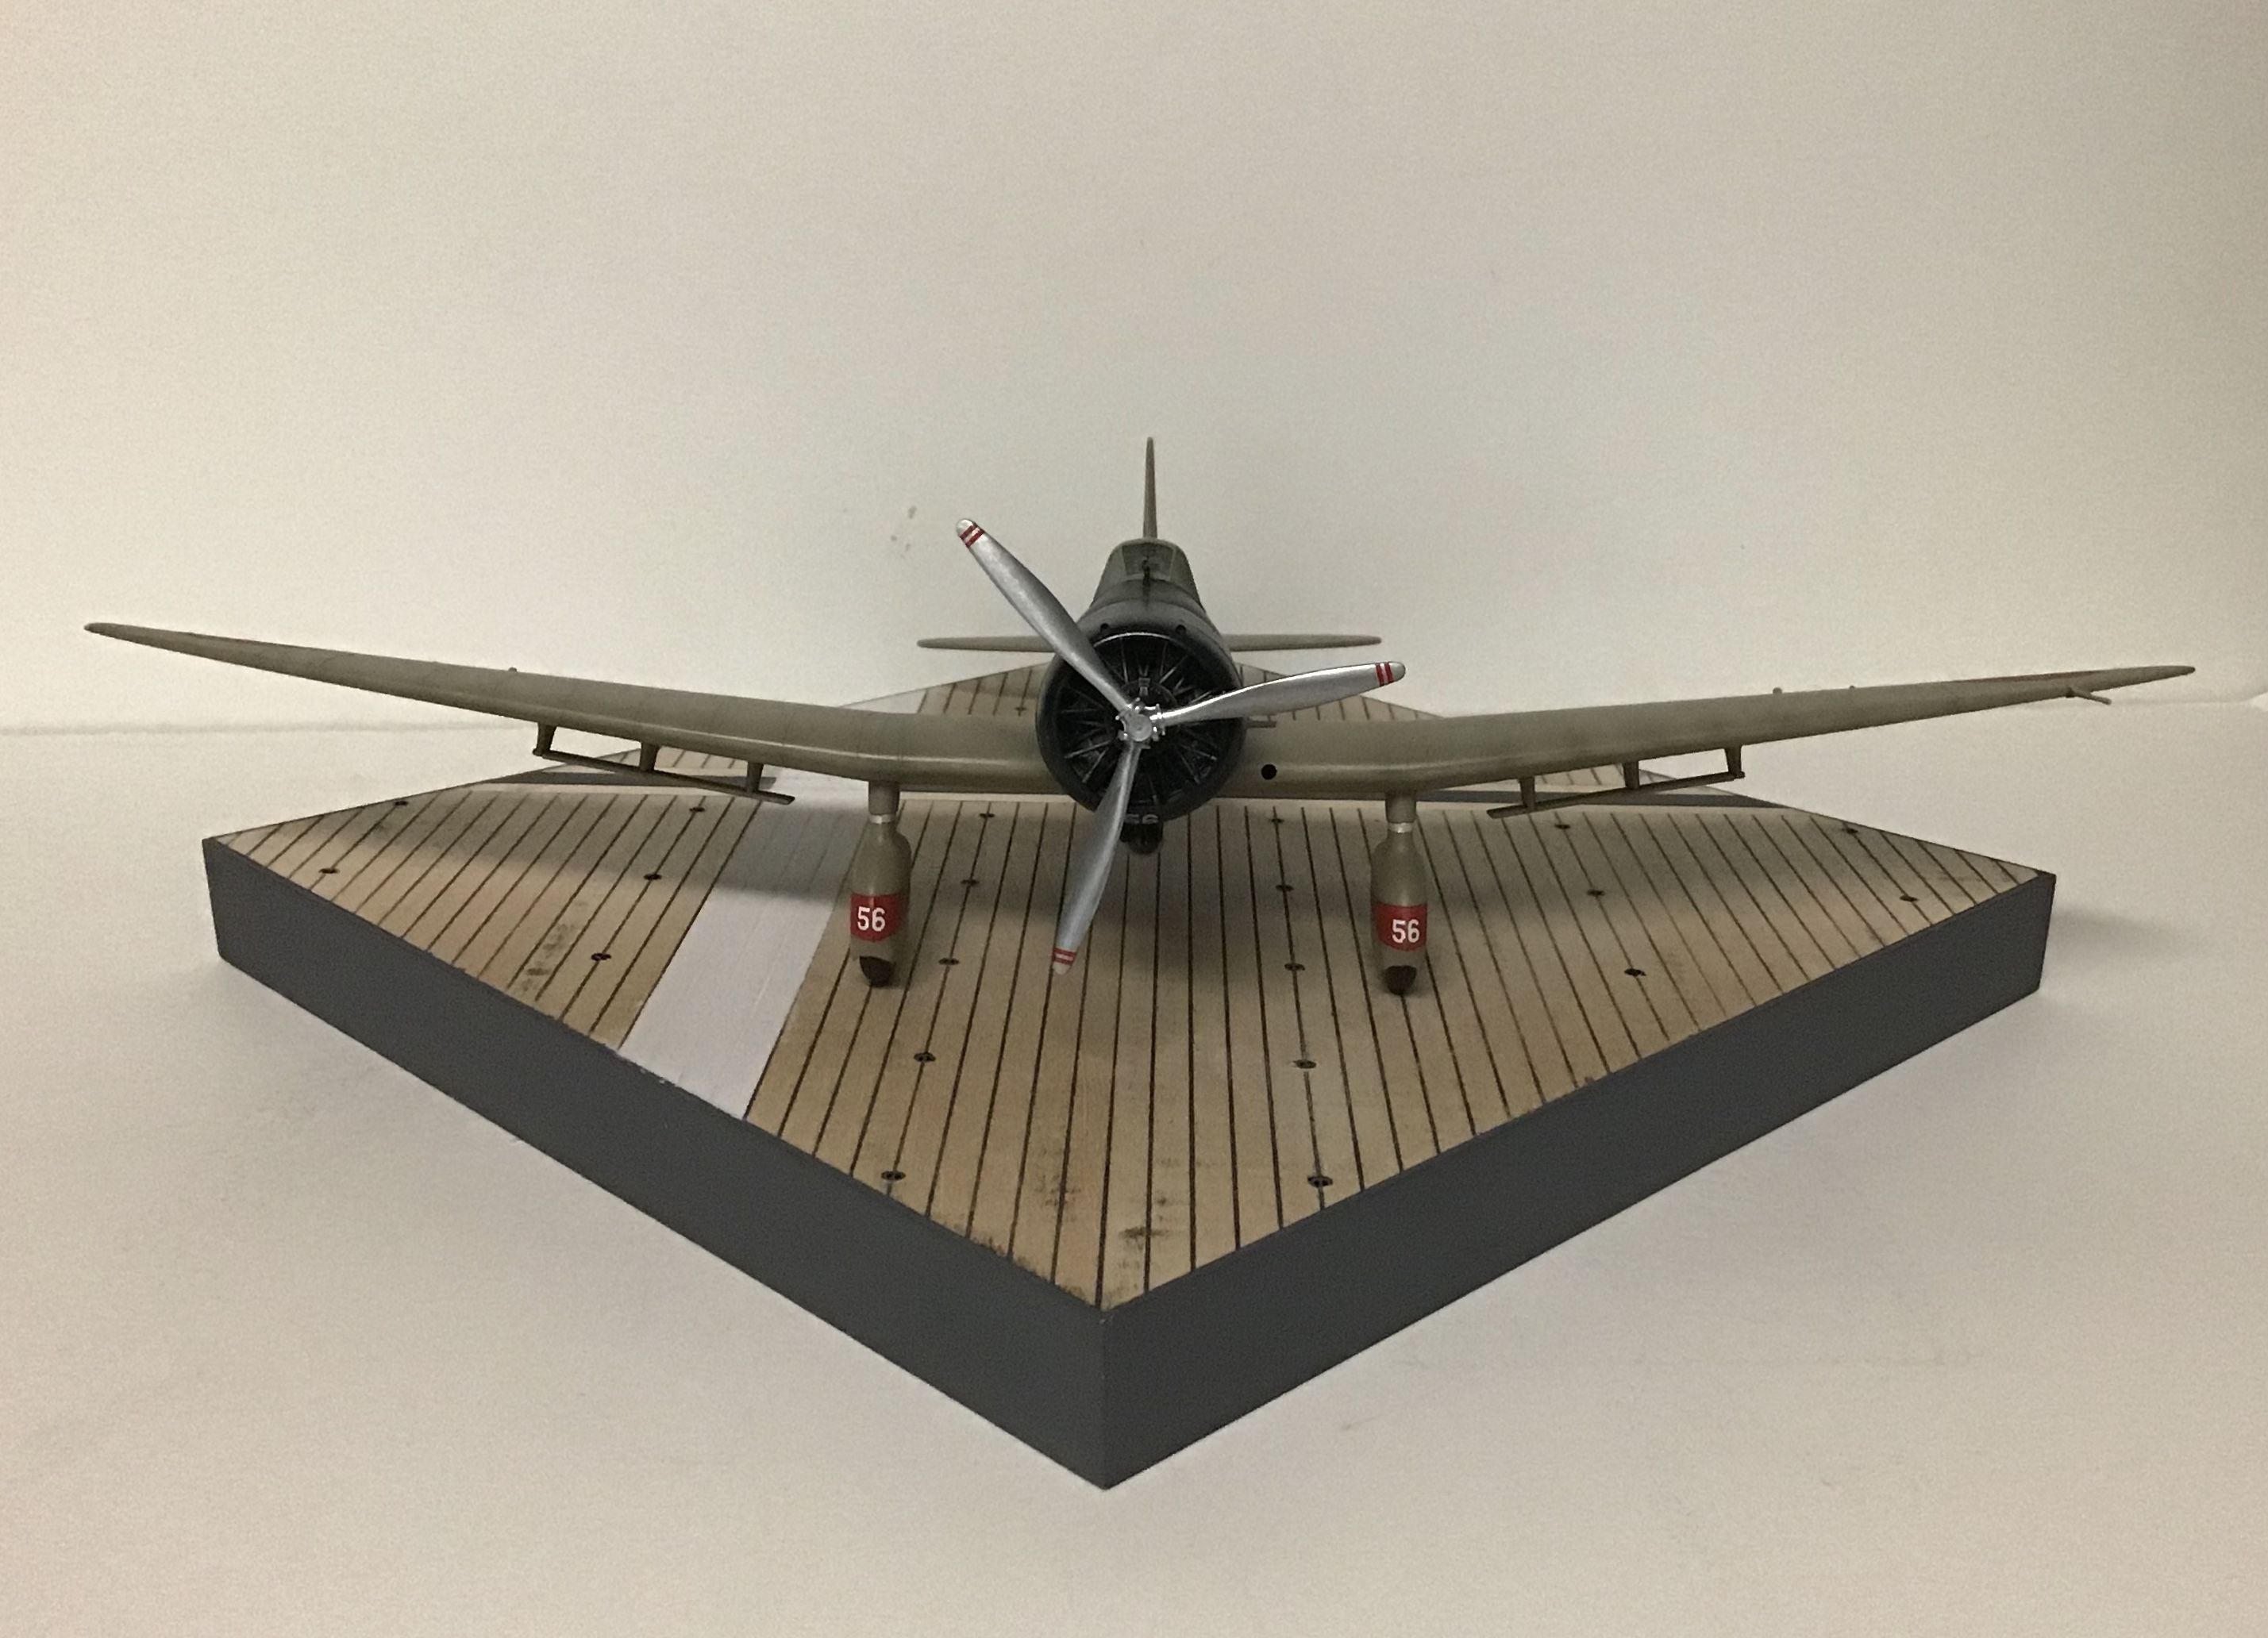
Thanks for looking ! Richard
The base is now done except for touch up and two tie downs that need to be installed at the time I mount the Zero to the base .
Here are a few shots of the base with a Hasegawa Val I built a few years back -
also from the Kaga.
Thanks for looking ! Richard
Joel_W
Joined: December 04, 2010
KitMaker: 11,666 posts
AeroScale: 7,410 posts
Posted: Thursday, August 13, 2020 - 02:09 AM UTC
Richard,
The base is a model in itself. You sir are truly a Class A, IPMS National Standard builder.
Joel
The base is a model in itself. You sir are truly a Class A, IPMS National Standard builder.
Joel
rdt1953
Joined: February 06, 2015
KitMaker: 1,098 posts
AeroScale: 900 posts
Posted: Thursday, August 27, 2020 - 10:08 AM UTC
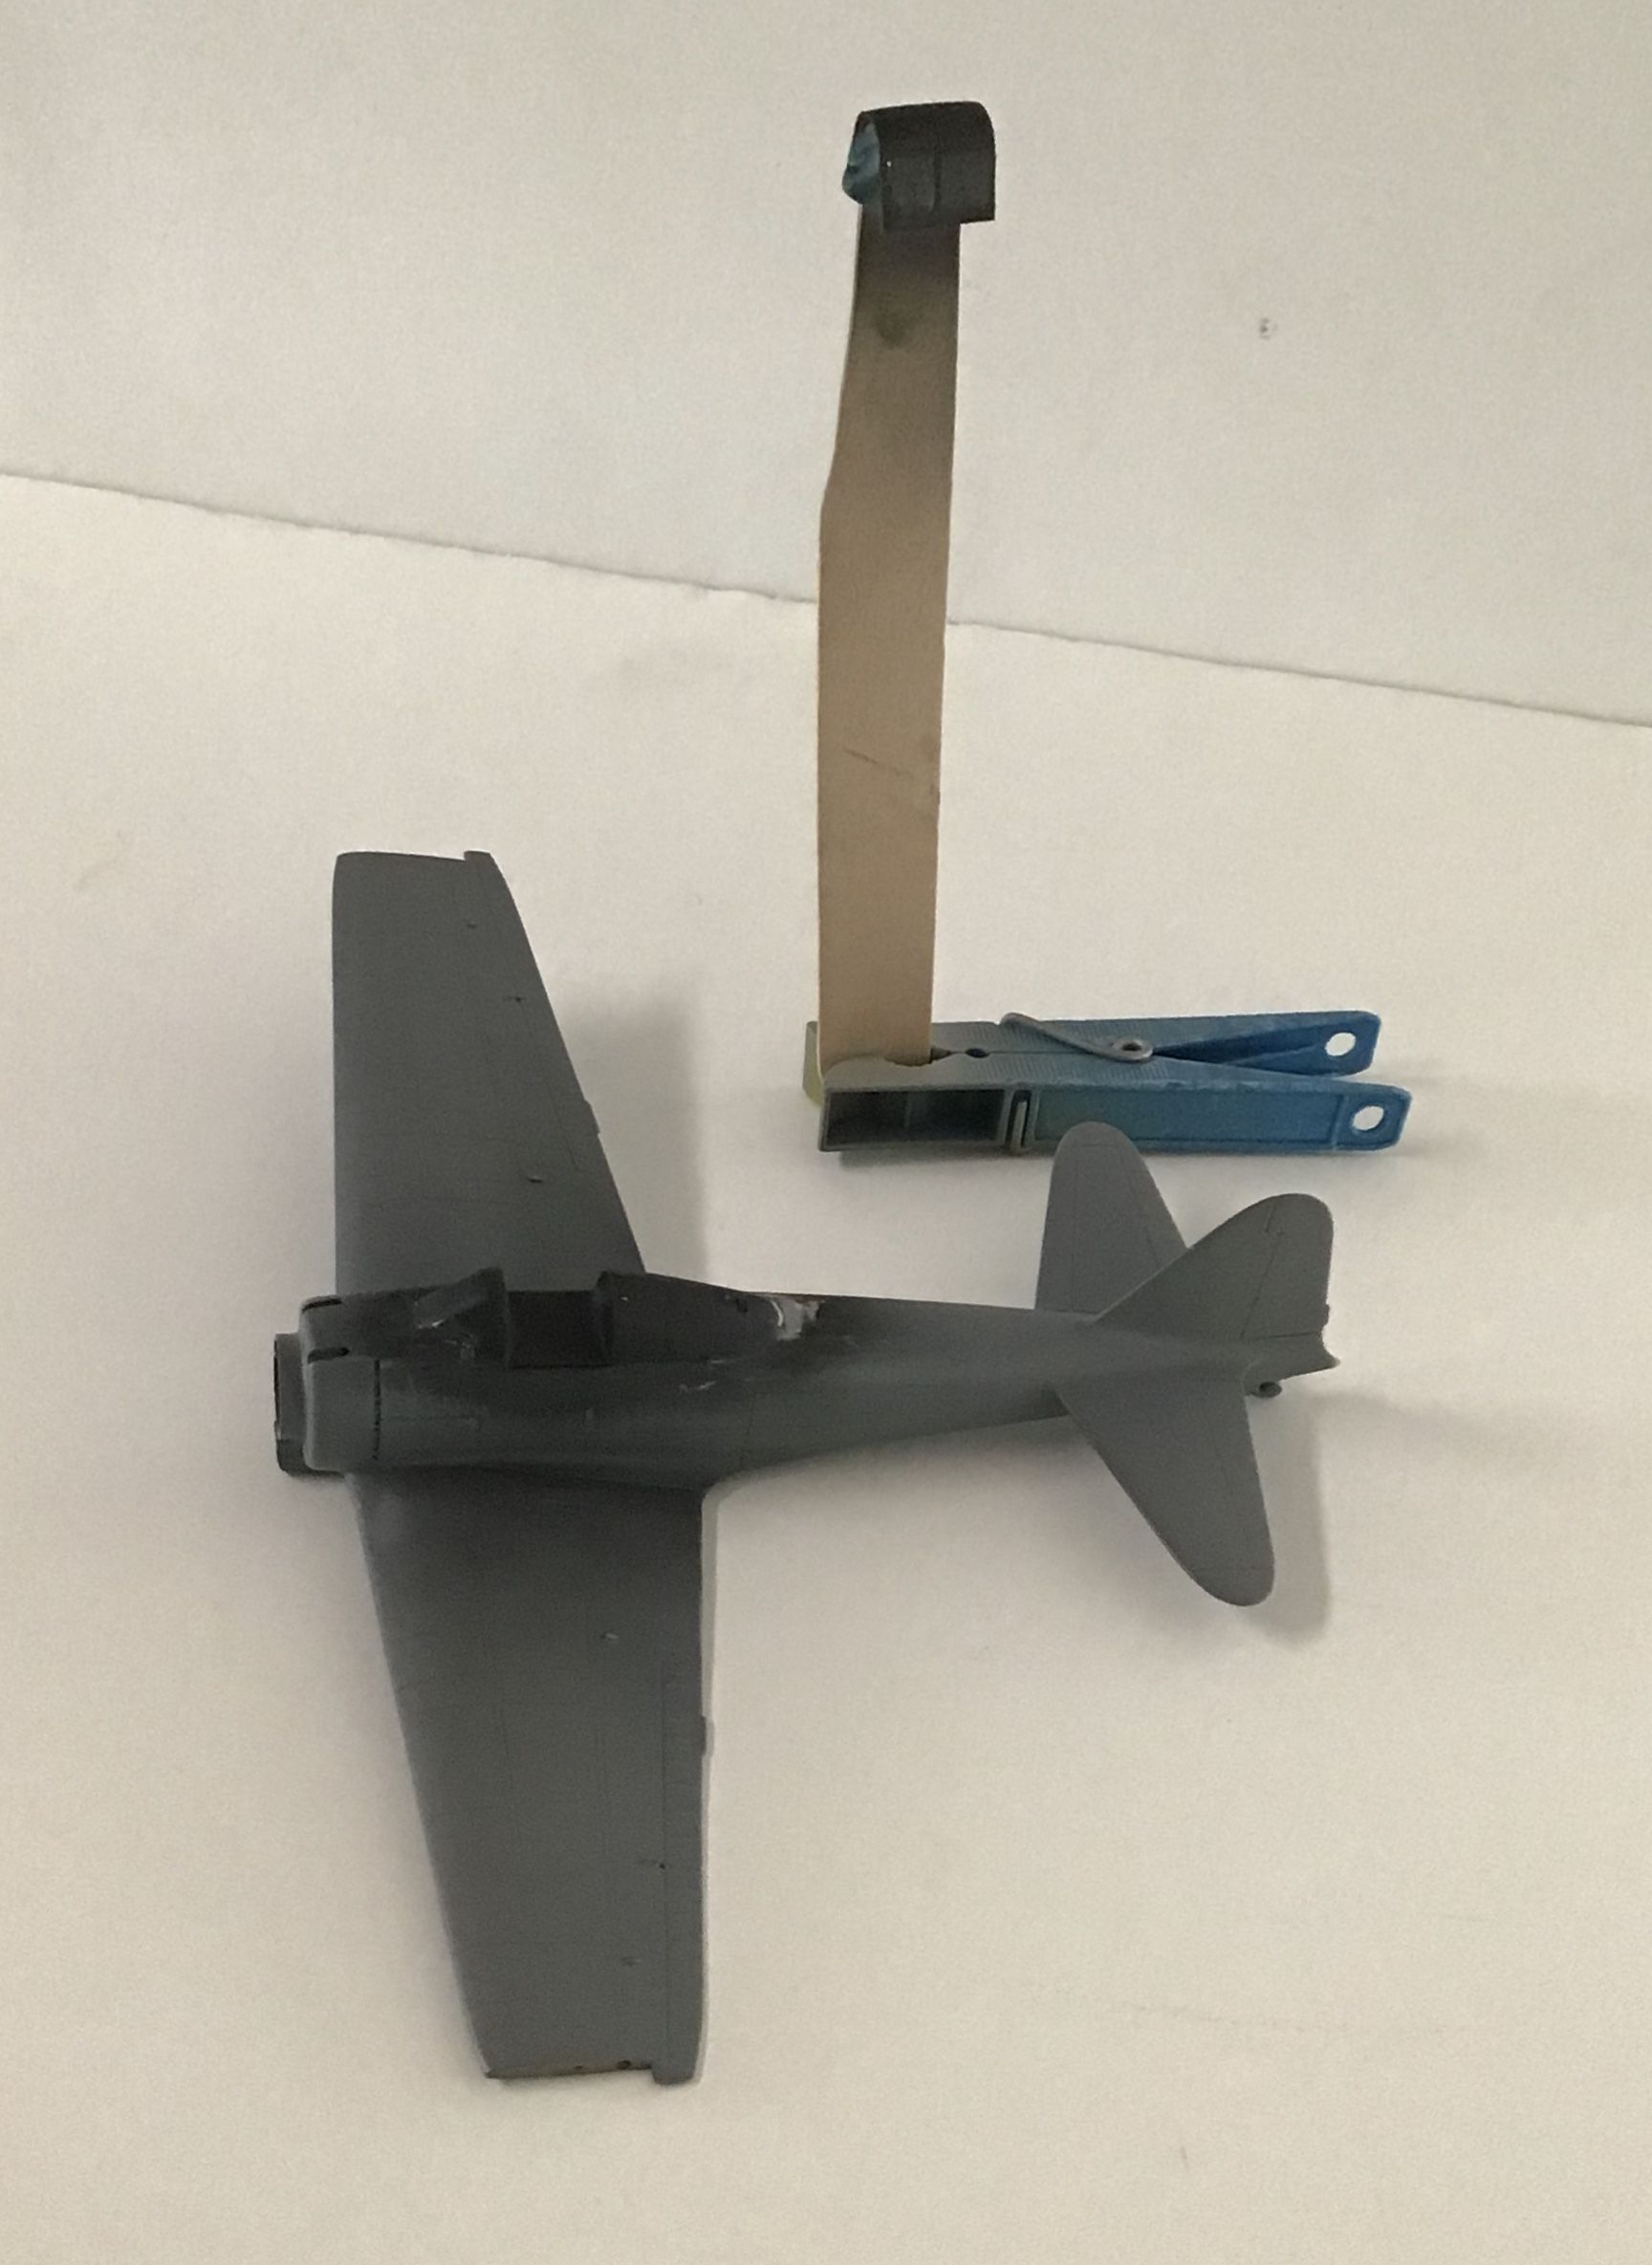
The gust locks for the control surfaces are now done and ready for paint - dark yellow /sand base coat in acrylic then brownish grey woodgraining in oils.
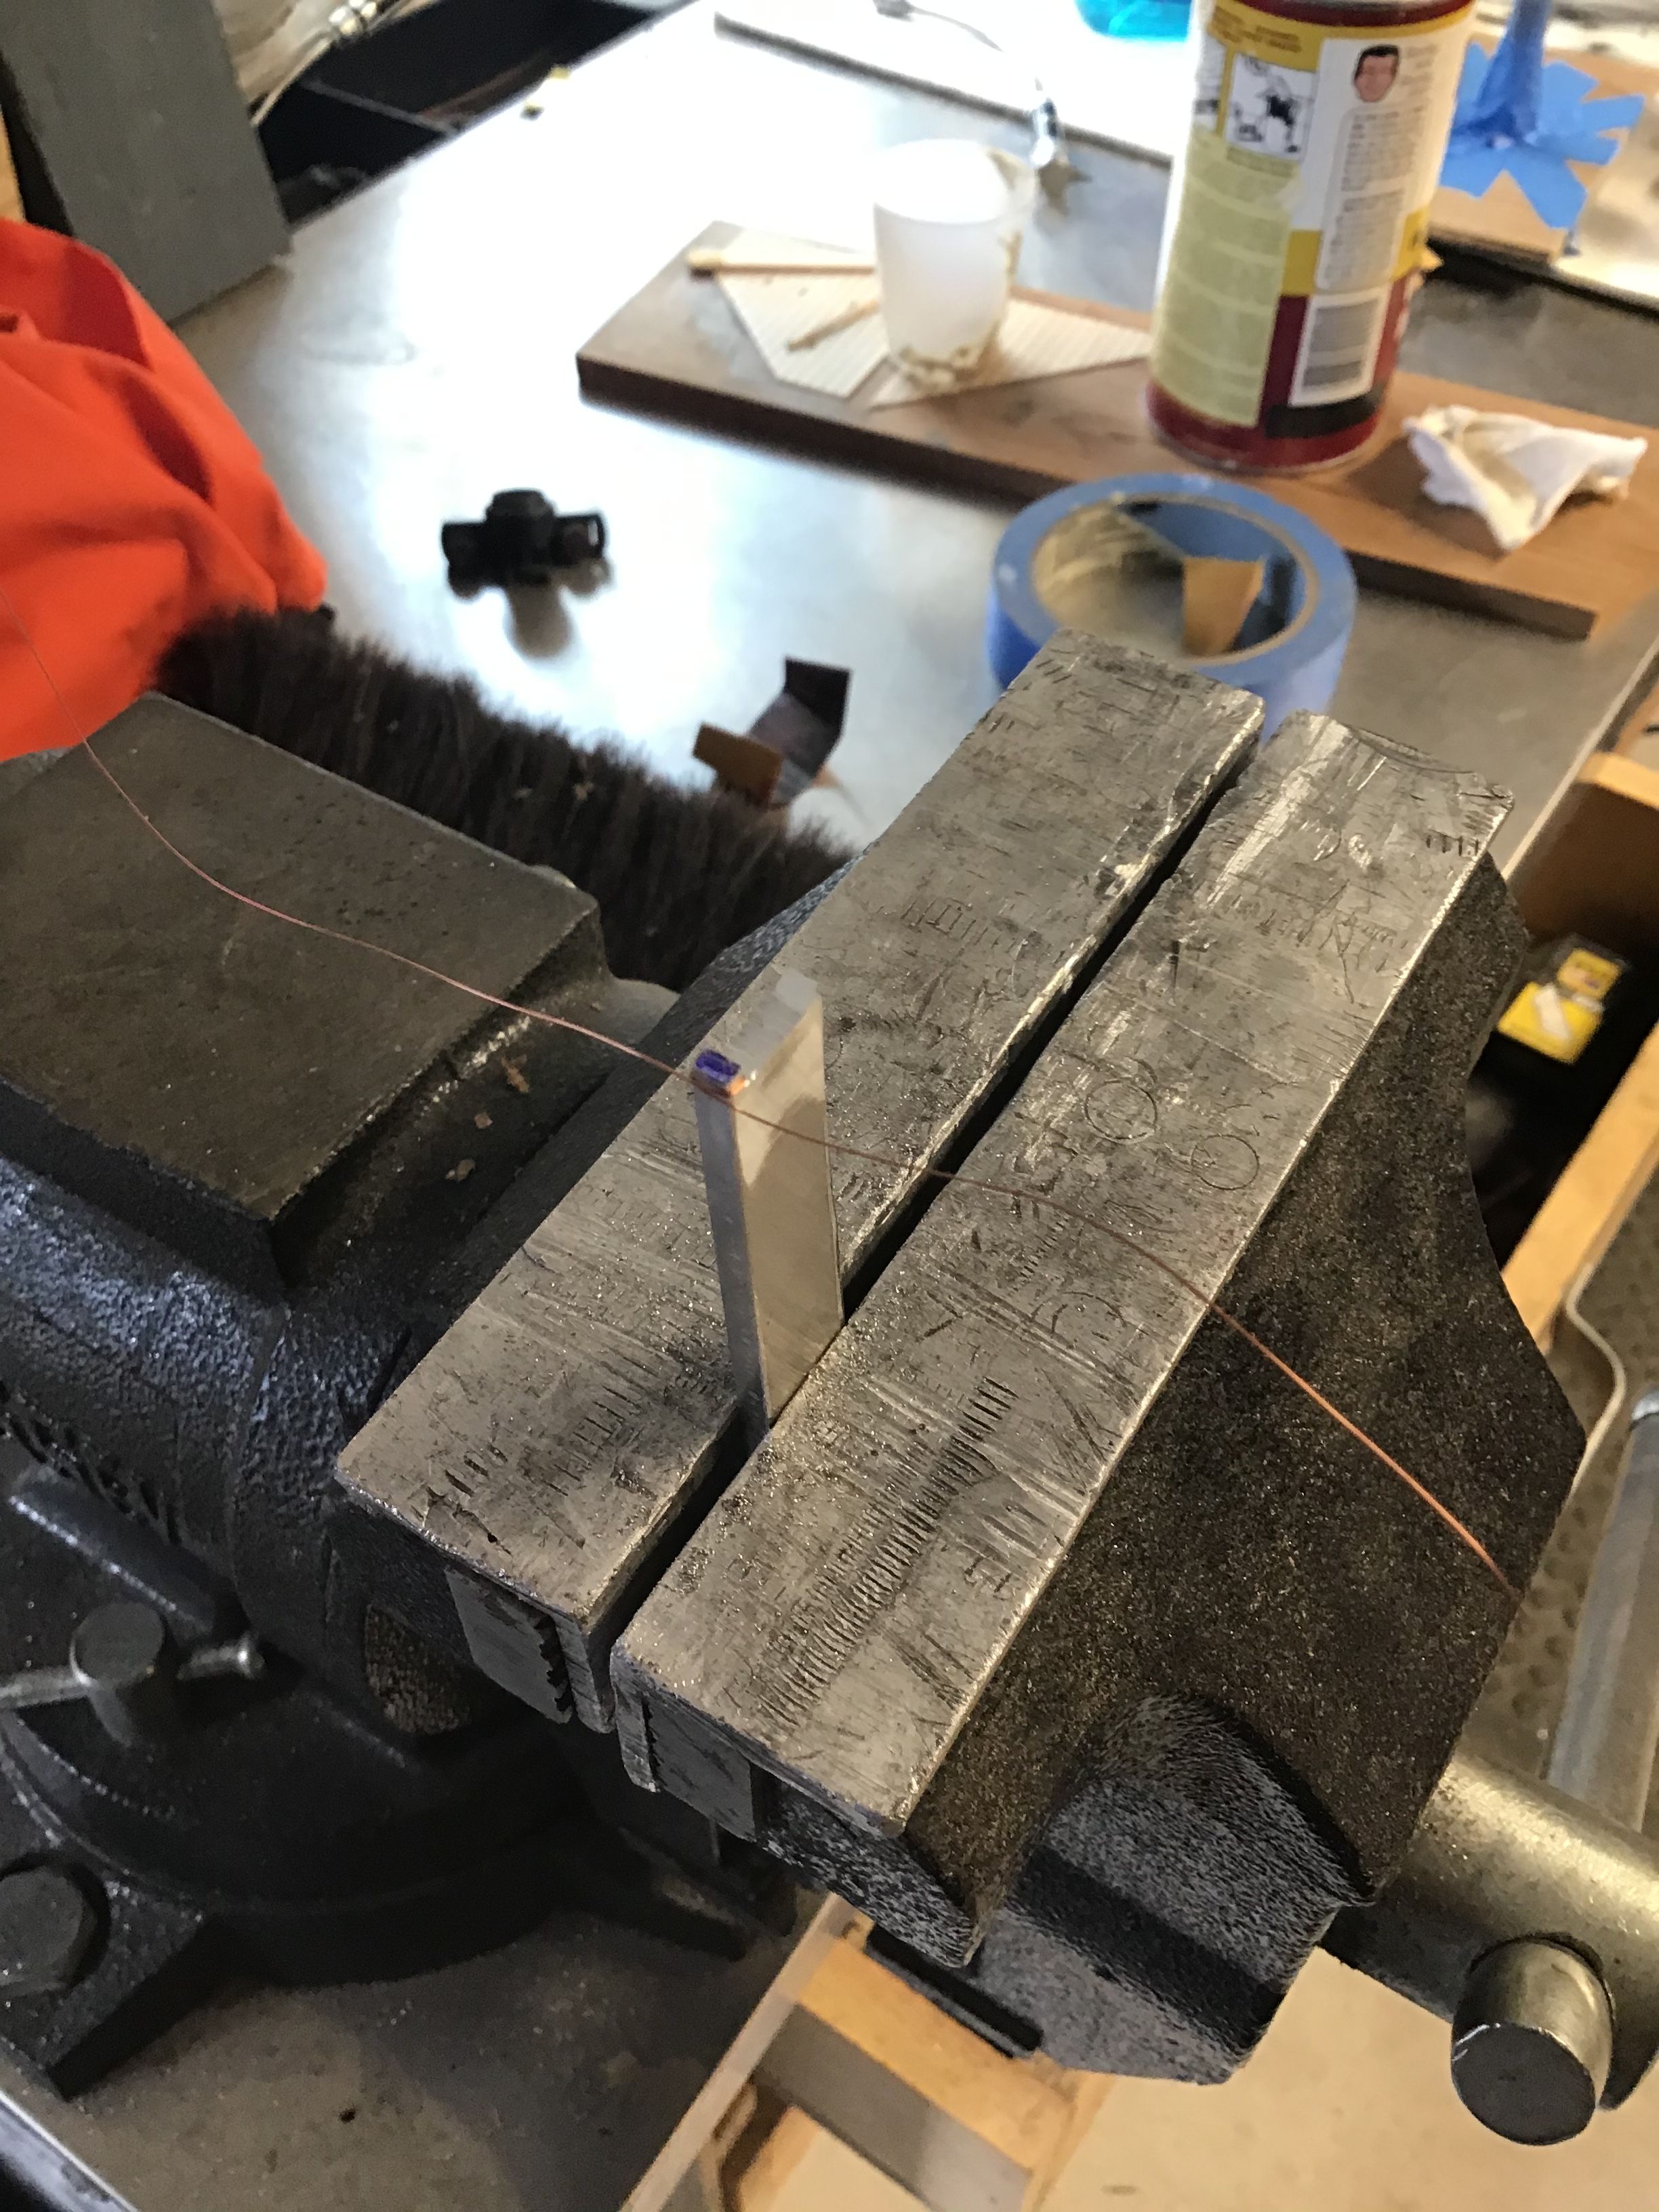
I made wire bails for the open ends out of fine copper wire bent around a rectangular form filed on the end of a piece of aluminum bar stock.
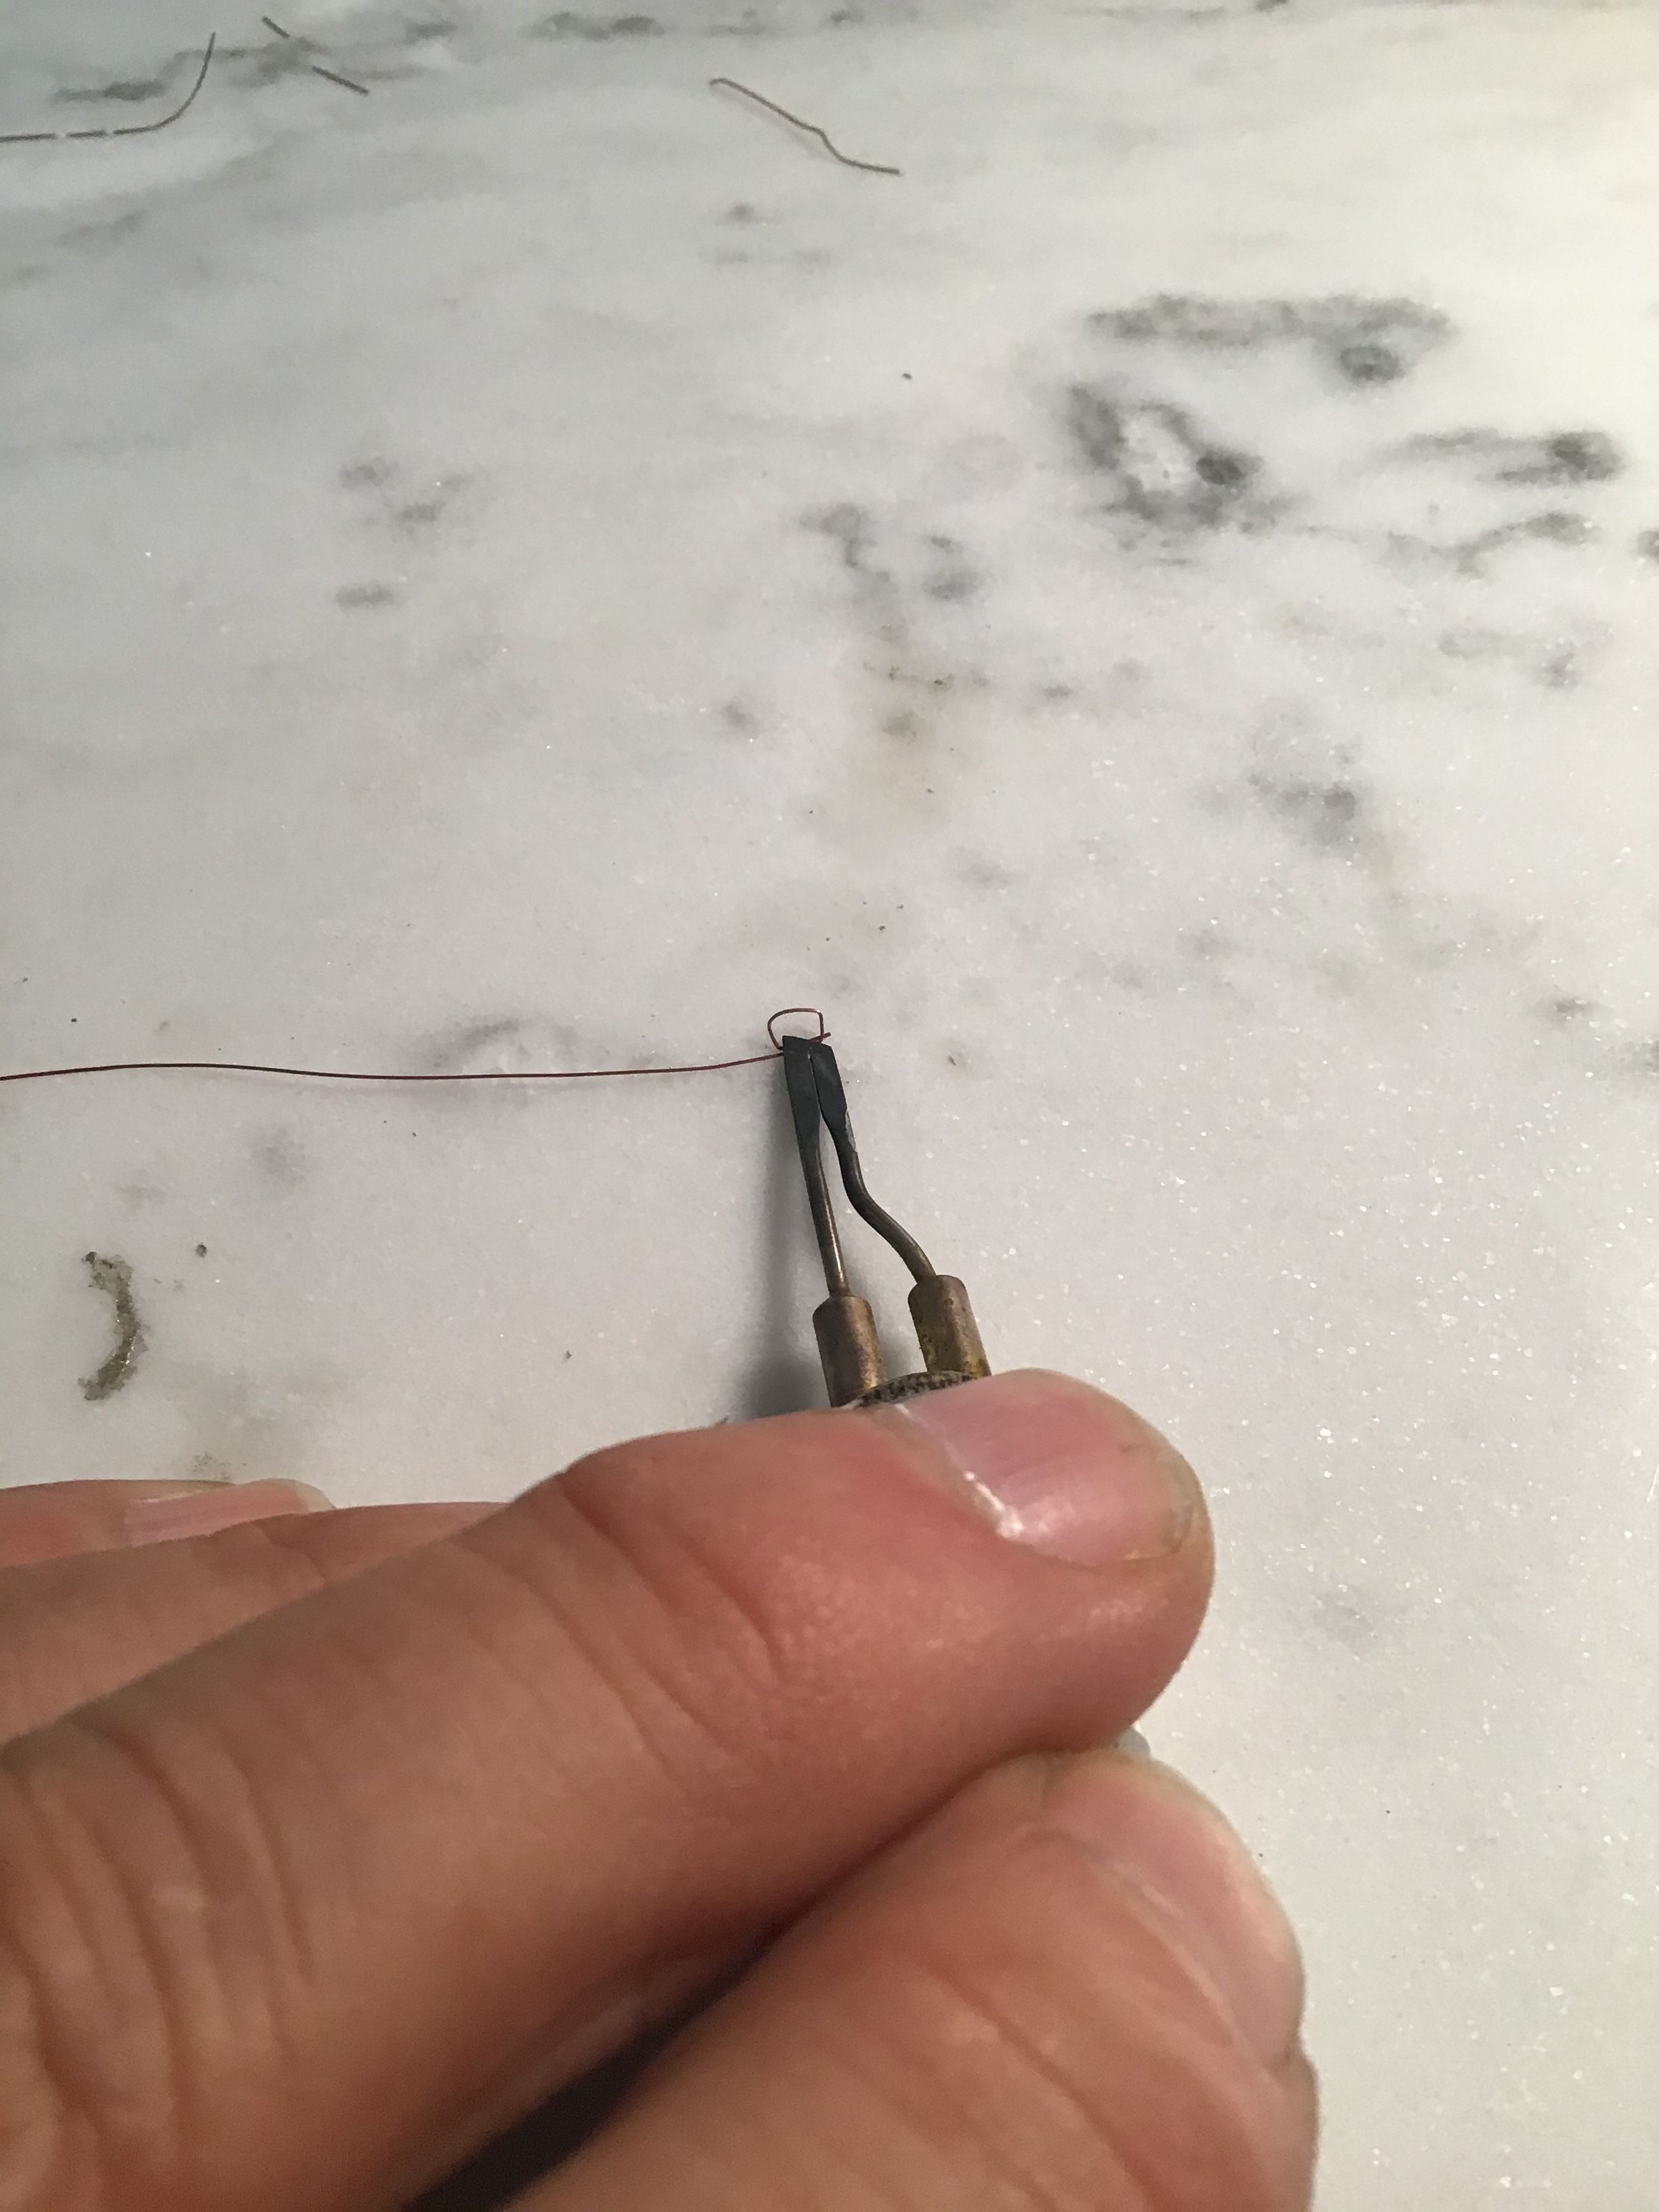
The overlap was soldered together by applying a tiny dab of flux to the joint and dipping in solder dust made by rubbing a piece of solder on sandpaper and then heating with a variable temp wood burning tool.
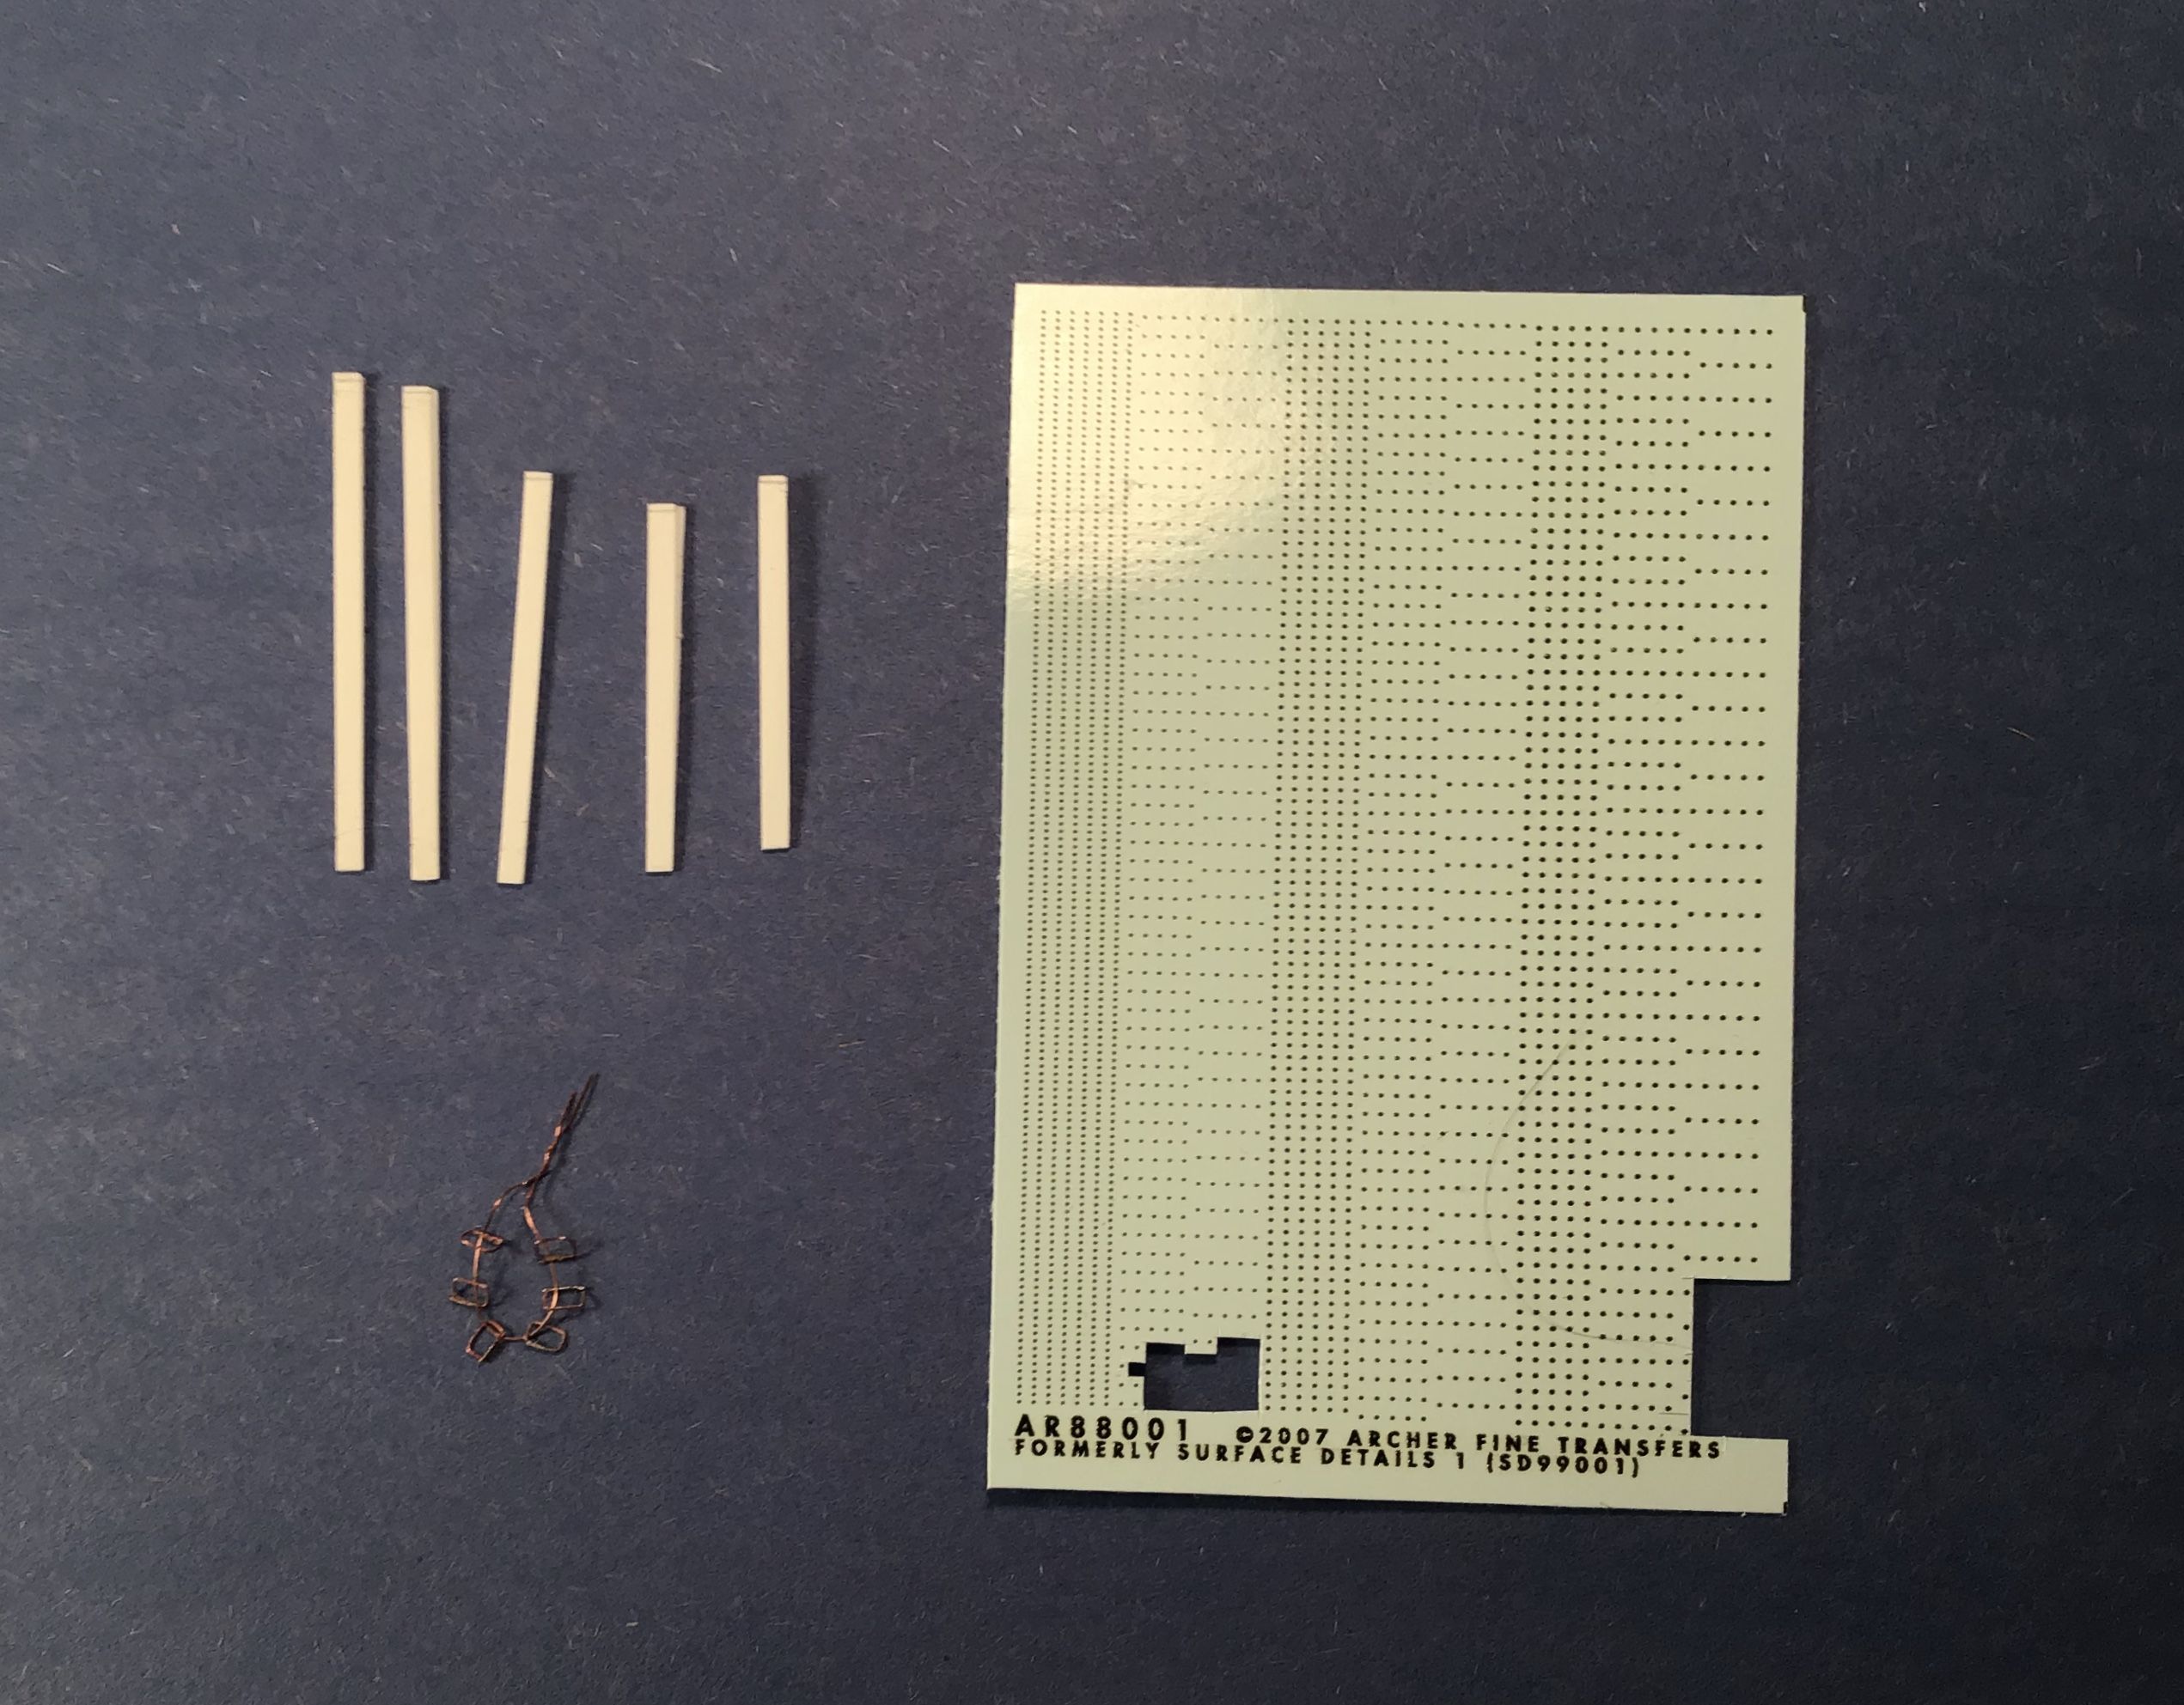
The open ends had small cleats cemented on to retain the bails and the closed ends were treated to Archer resin rivet decals.
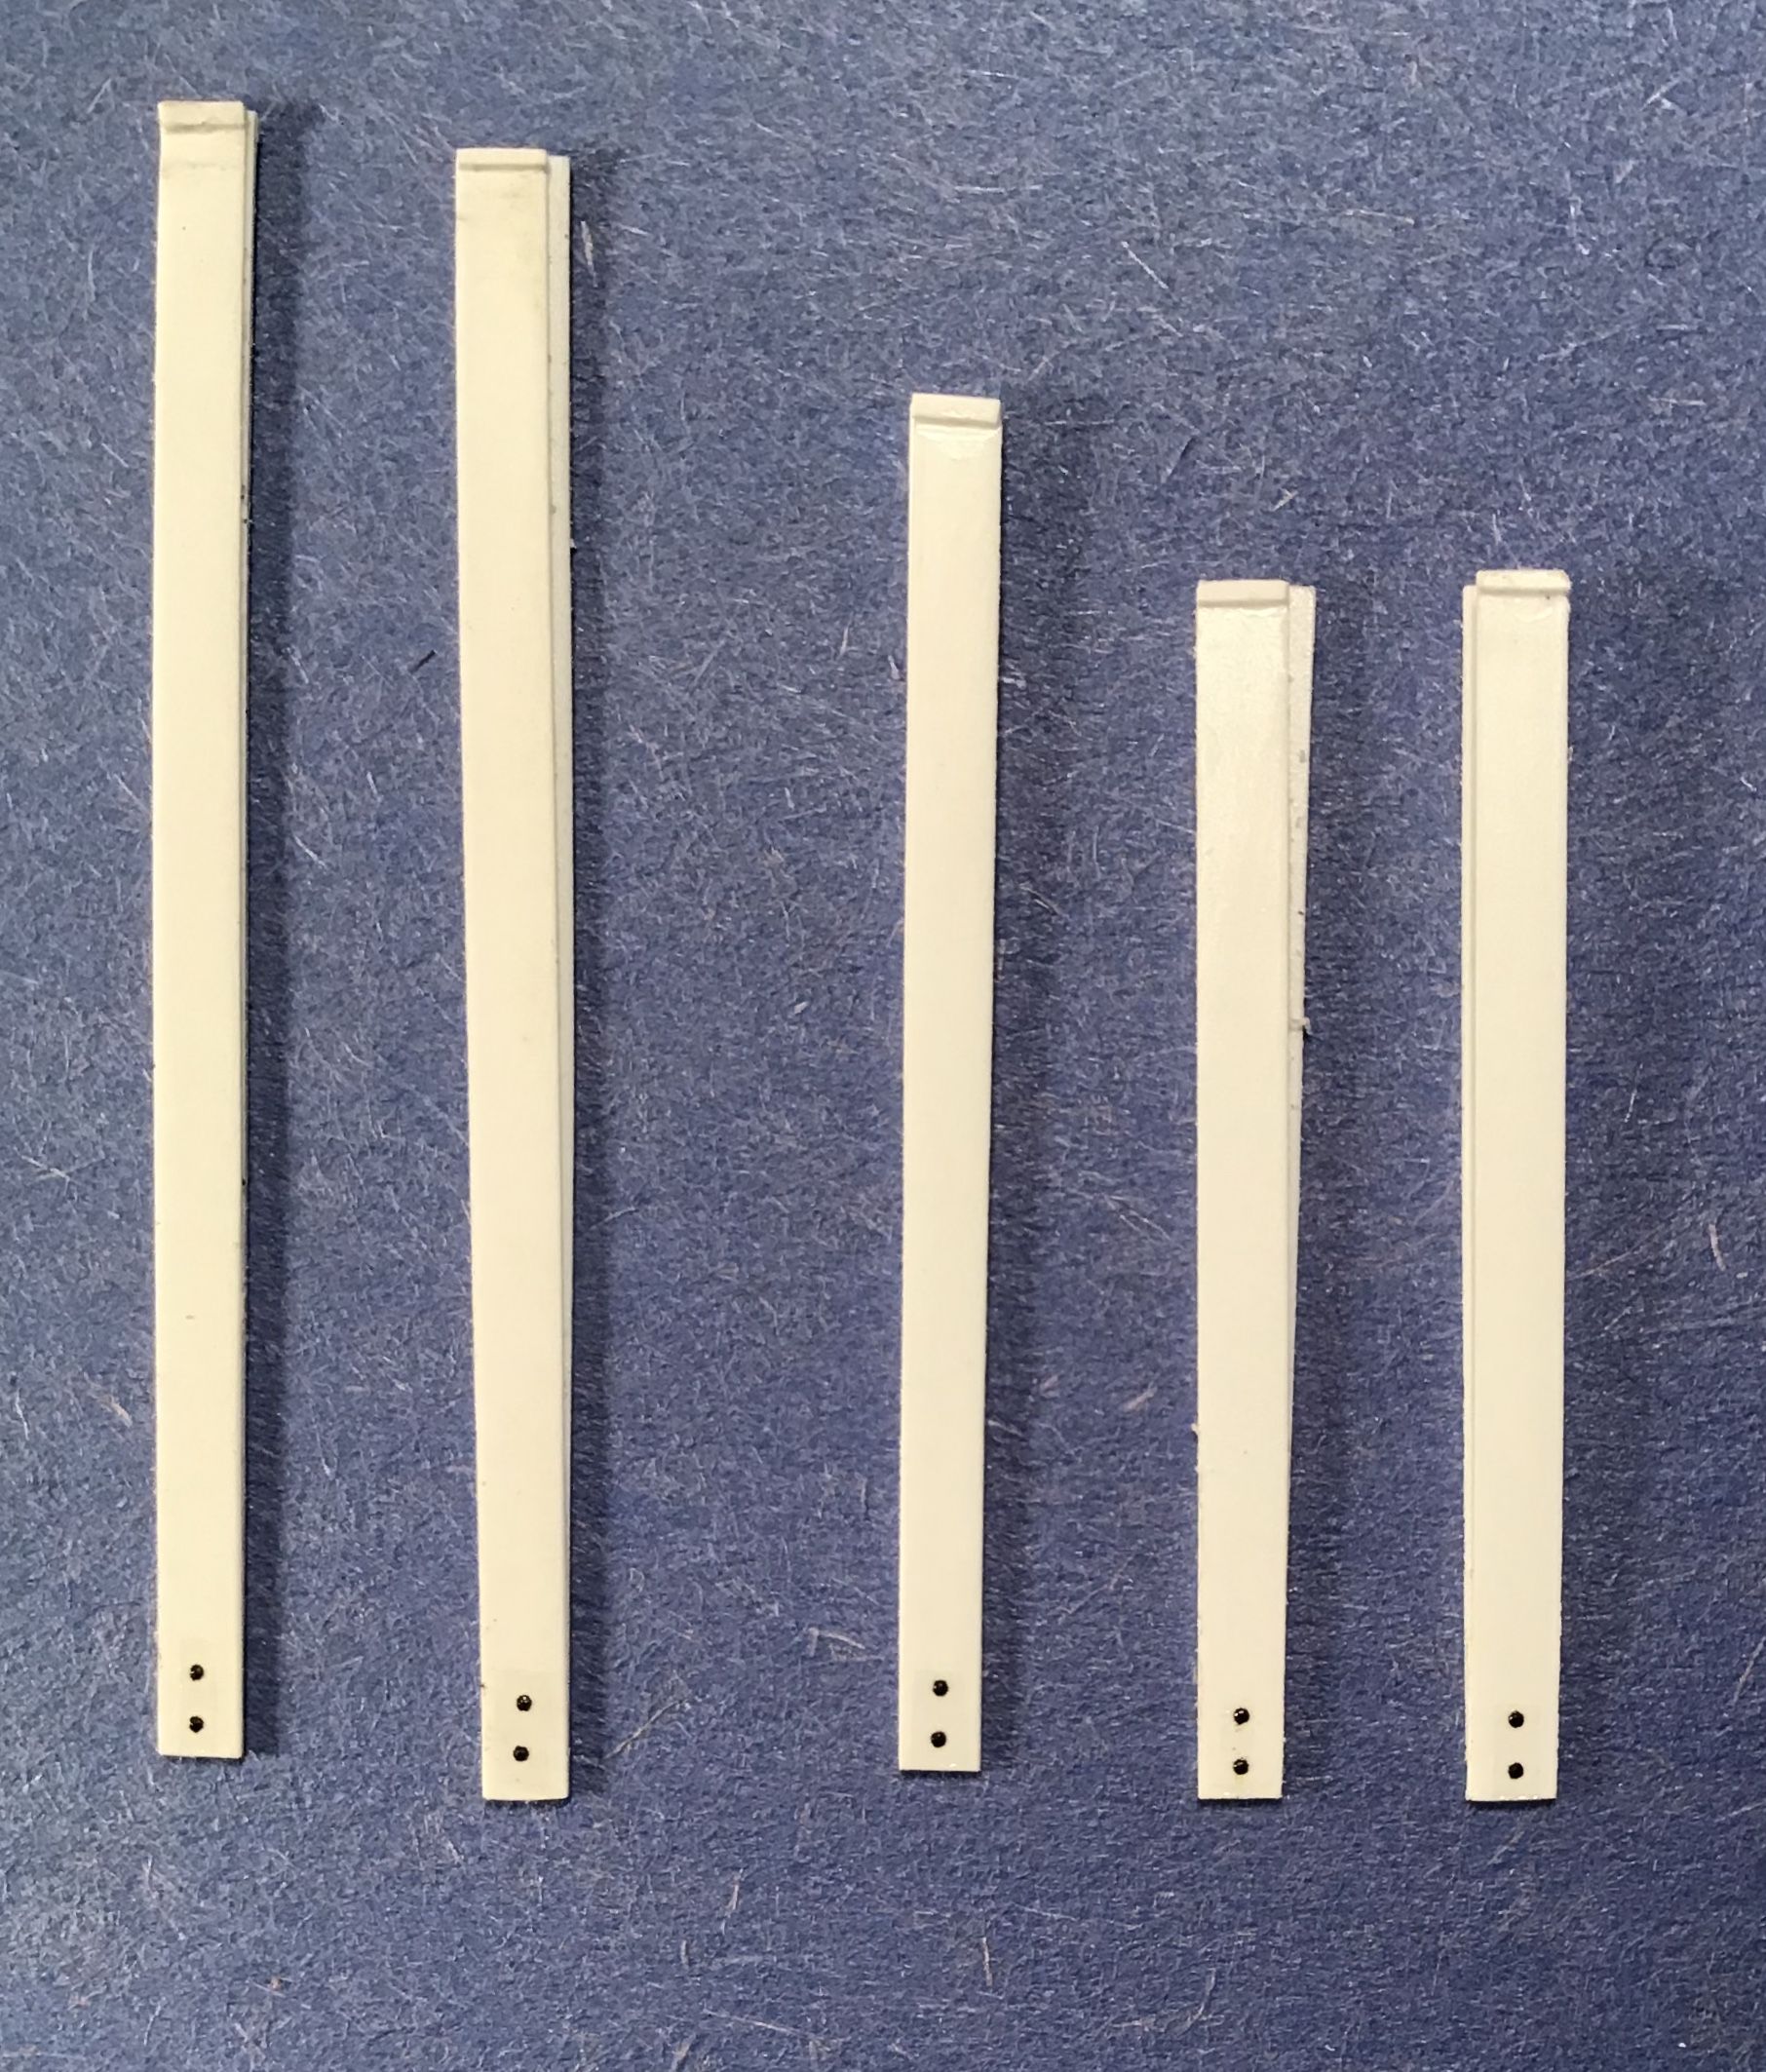
Completed gust locks dry fitted before paint .
And now painting of the aircraft can begin ...
Thanks for looking - RT
I made wire bails for the open ends out of fine copper wire bent around a rectangular form filed on the end of a piece of aluminum bar stock.
The overlap was soldered together by applying a tiny dab of flux to the joint and dipping in solder dust made by rubbing a piece of solder on sandpaper and then heating with a variable temp wood burning tool.
The open ends had small cleats cemented on to retain the bails and the closed ends were treated to Archer resin rivet decals.
Completed gust locks dry fitted before paint .
And now painting of the aircraft can begin ...
Thanks for looking - RT

Chocolatte2
Joined: December 31, 2018
KitMaker: 10 posts
AeroScale: 5 posts
Posted: Thursday, August 27, 2020 - 01:53 PM UTC
Agree fully on quality of SR primers, however, note that it comes in two sizes of bottles, and I have seen wide color differences between the two sizes even though the stock numbers were the same except for the number specifying bottle size.
My experience is that SR from the bottle does better with a larger nozzle size than I use for general spraying, so I thin ~25-30% with Vallejo, Testors, or Mission Models acrylic thinner to use a smaller nozzle size, add a couple of drops of Vallejo flow improver, and have found no problem doing so.
I use Vallejo for most finishing coats, and it is much less fussy with SR under it. SR has so many colors in this primer line that it's possible to mix some suitable camouflage colors, and these SR mixes make for a very nice top coat as well.
Joel_W
Joined: December 04, 2010
KitMaker: 11,666 posts
AeroScale: 7,410 posts
Posted: Friday, August 28, 2020 - 03:49 AM UTC
Richard,
Those gust locks really turned out as perfect scaled replicas. Your skill set is just heads above mine. One thing that you proved to me is that the Archer rivets are well worth the time and effort. Going to order some and see for myself.
Joel
Mr. Magoo II
Those gust locks really turned out as perfect scaled replicas. Your skill set is just heads above mine. One thing that you proved to me is that the Archer rivets are well worth the time and effort. Going to order some and see for myself.
Joel
Mr. Magoo II
rdt1953
Joined: February 06, 2015
KitMaker: 1,098 posts
AeroScale: 900 posts
Posted: Friday, August 28, 2020 - 07:52 AM UTC
[quote
Joel
Mr. Magoo II[/quote]
Tears in my eyes from laughing at this ... Im glad you can keep your sense of humor after all youve been through!
Keep your chin up buddy !
Joel
Mr. Magoo II[/quote]
Tears in my eyes from laughing at this ... Im glad you can keep your sense of humor after all youve been through!
Keep your chin up buddy !
Joel_W
Joined: December 04, 2010
KitMaker: 11,666 posts
AeroScale: 7,410 posts
Posted: Friday, August 28, 2020 - 08:24 AM UTC
Richard,
Will do my NJ friend.
Joel
Mr. Magoo II
Will do my NJ friend.
Joel
Mr. Magoo II
rdt1953
Joined: February 06, 2015
KitMaker: 1,098 posts
AeroScale: 900 posts
Posted: Tuesday, September 15, 2020 - 10:22 AM UTC
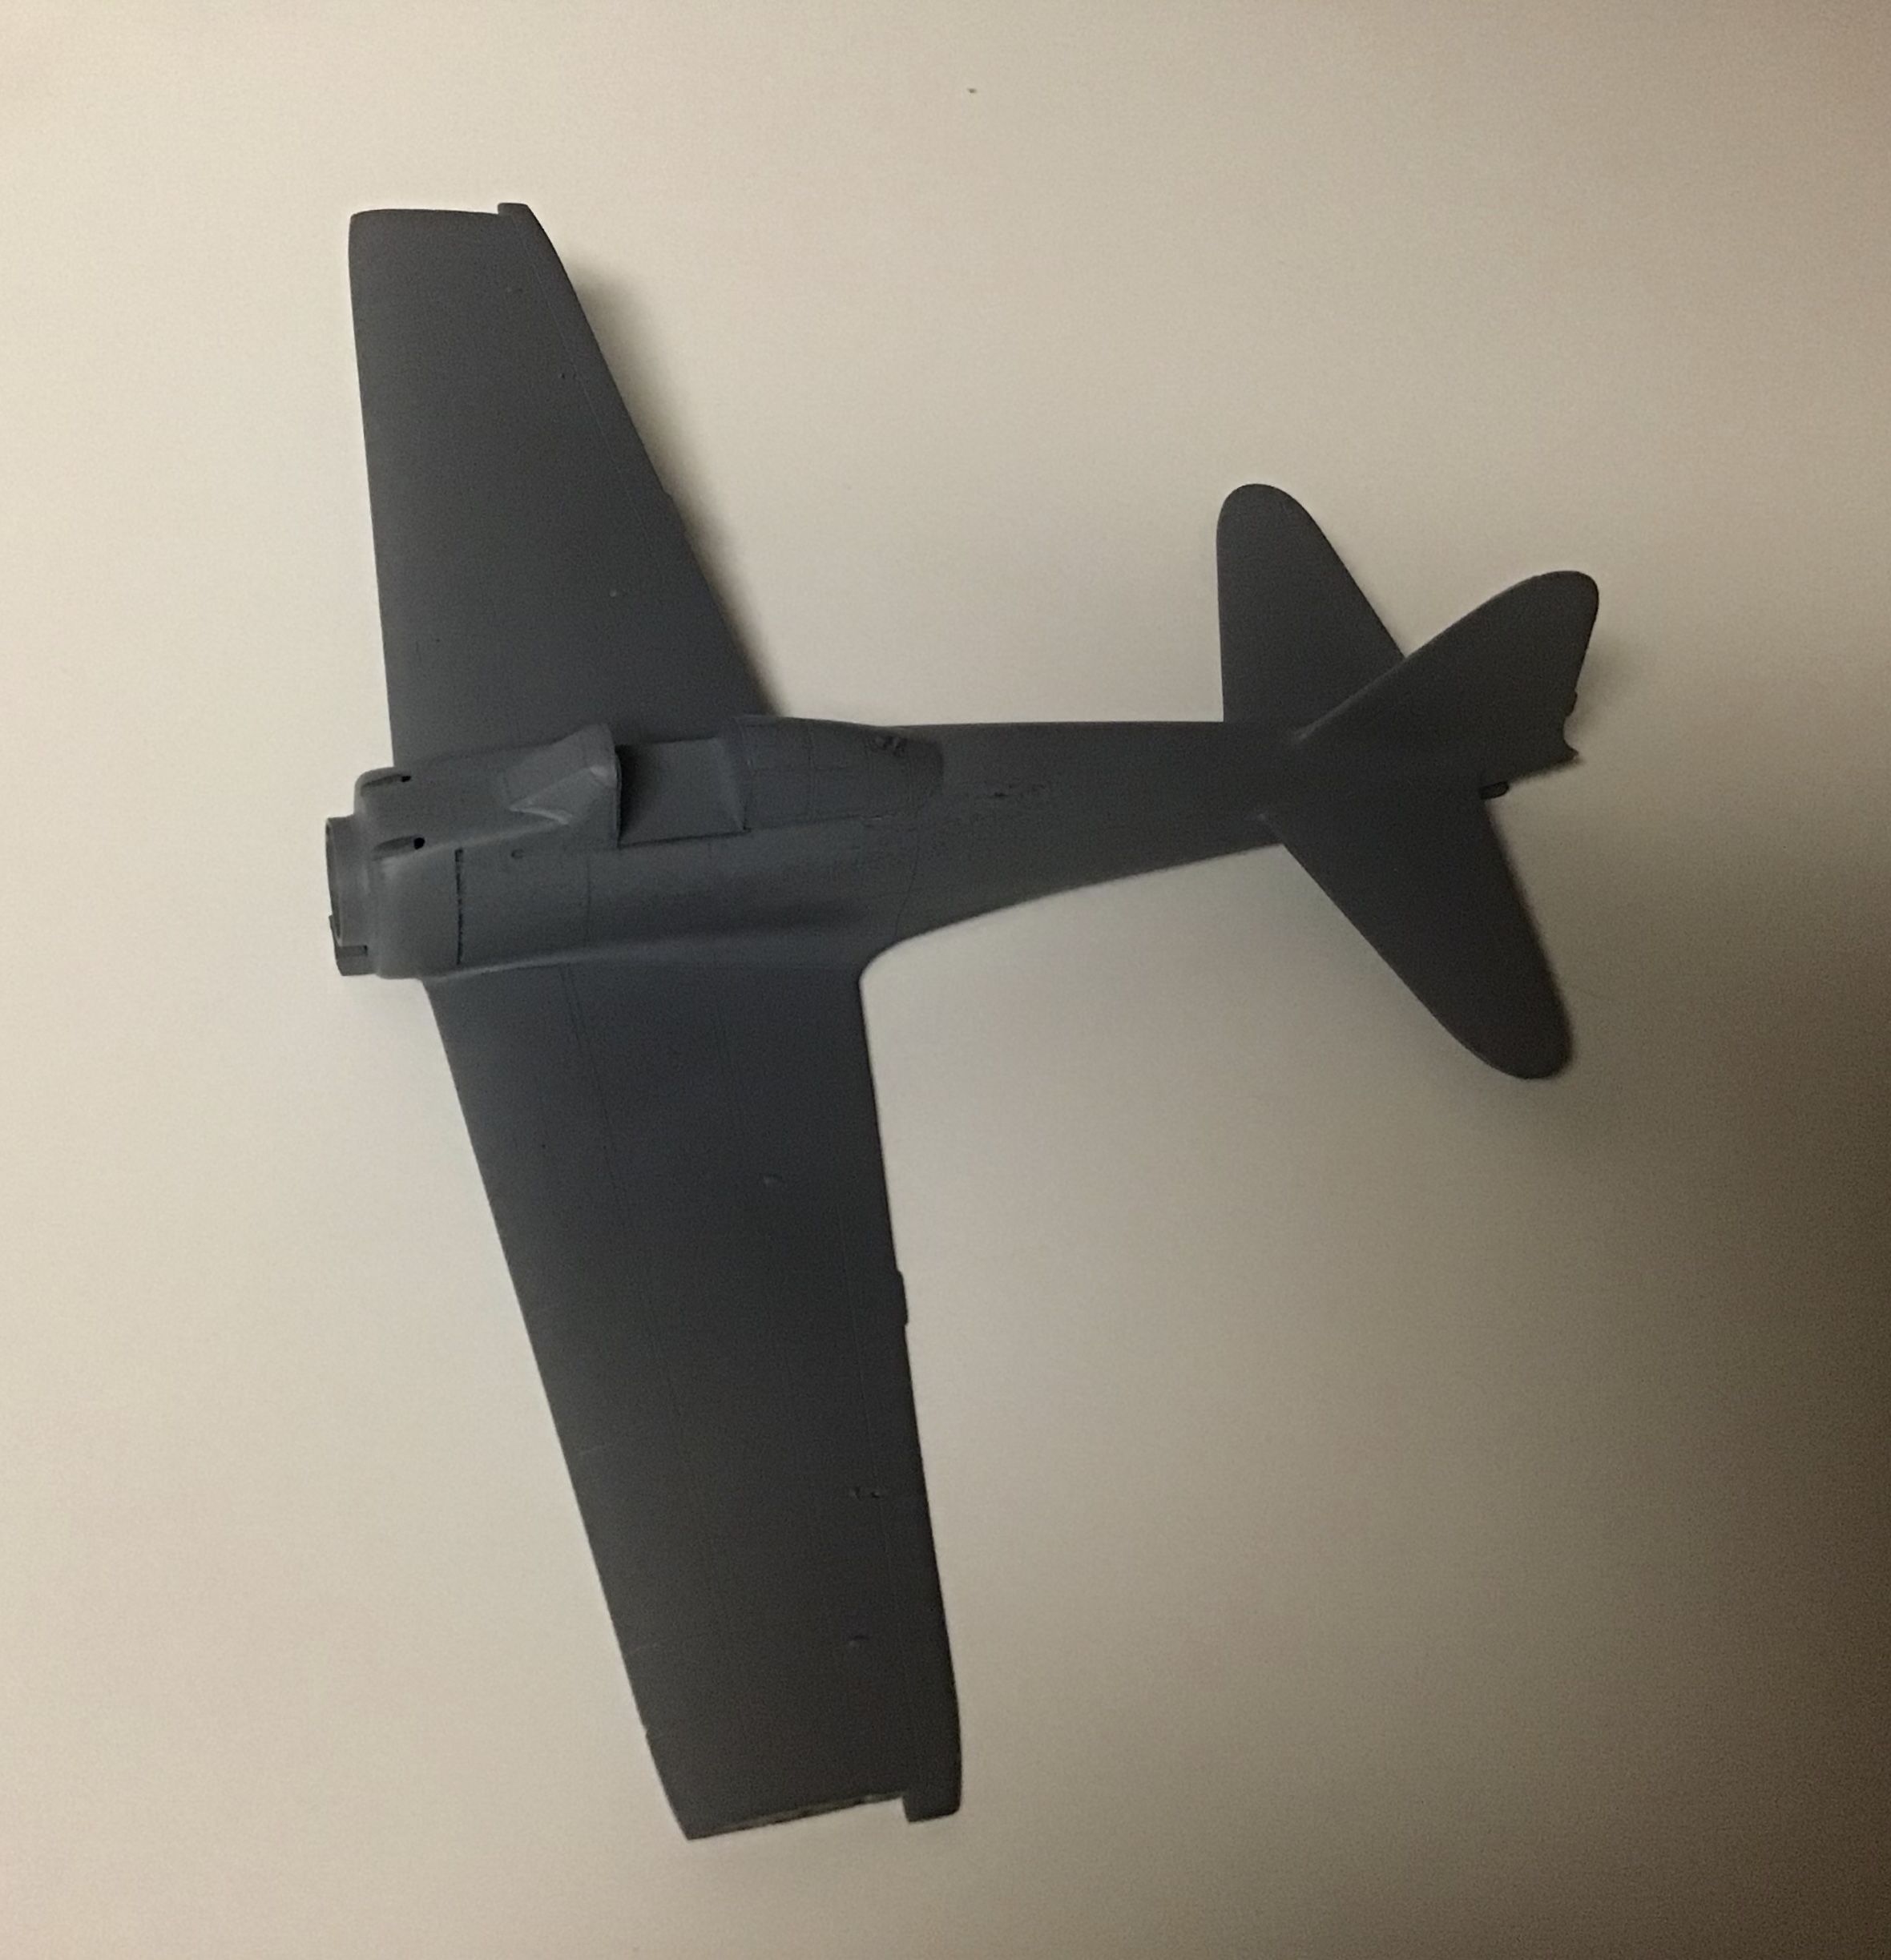
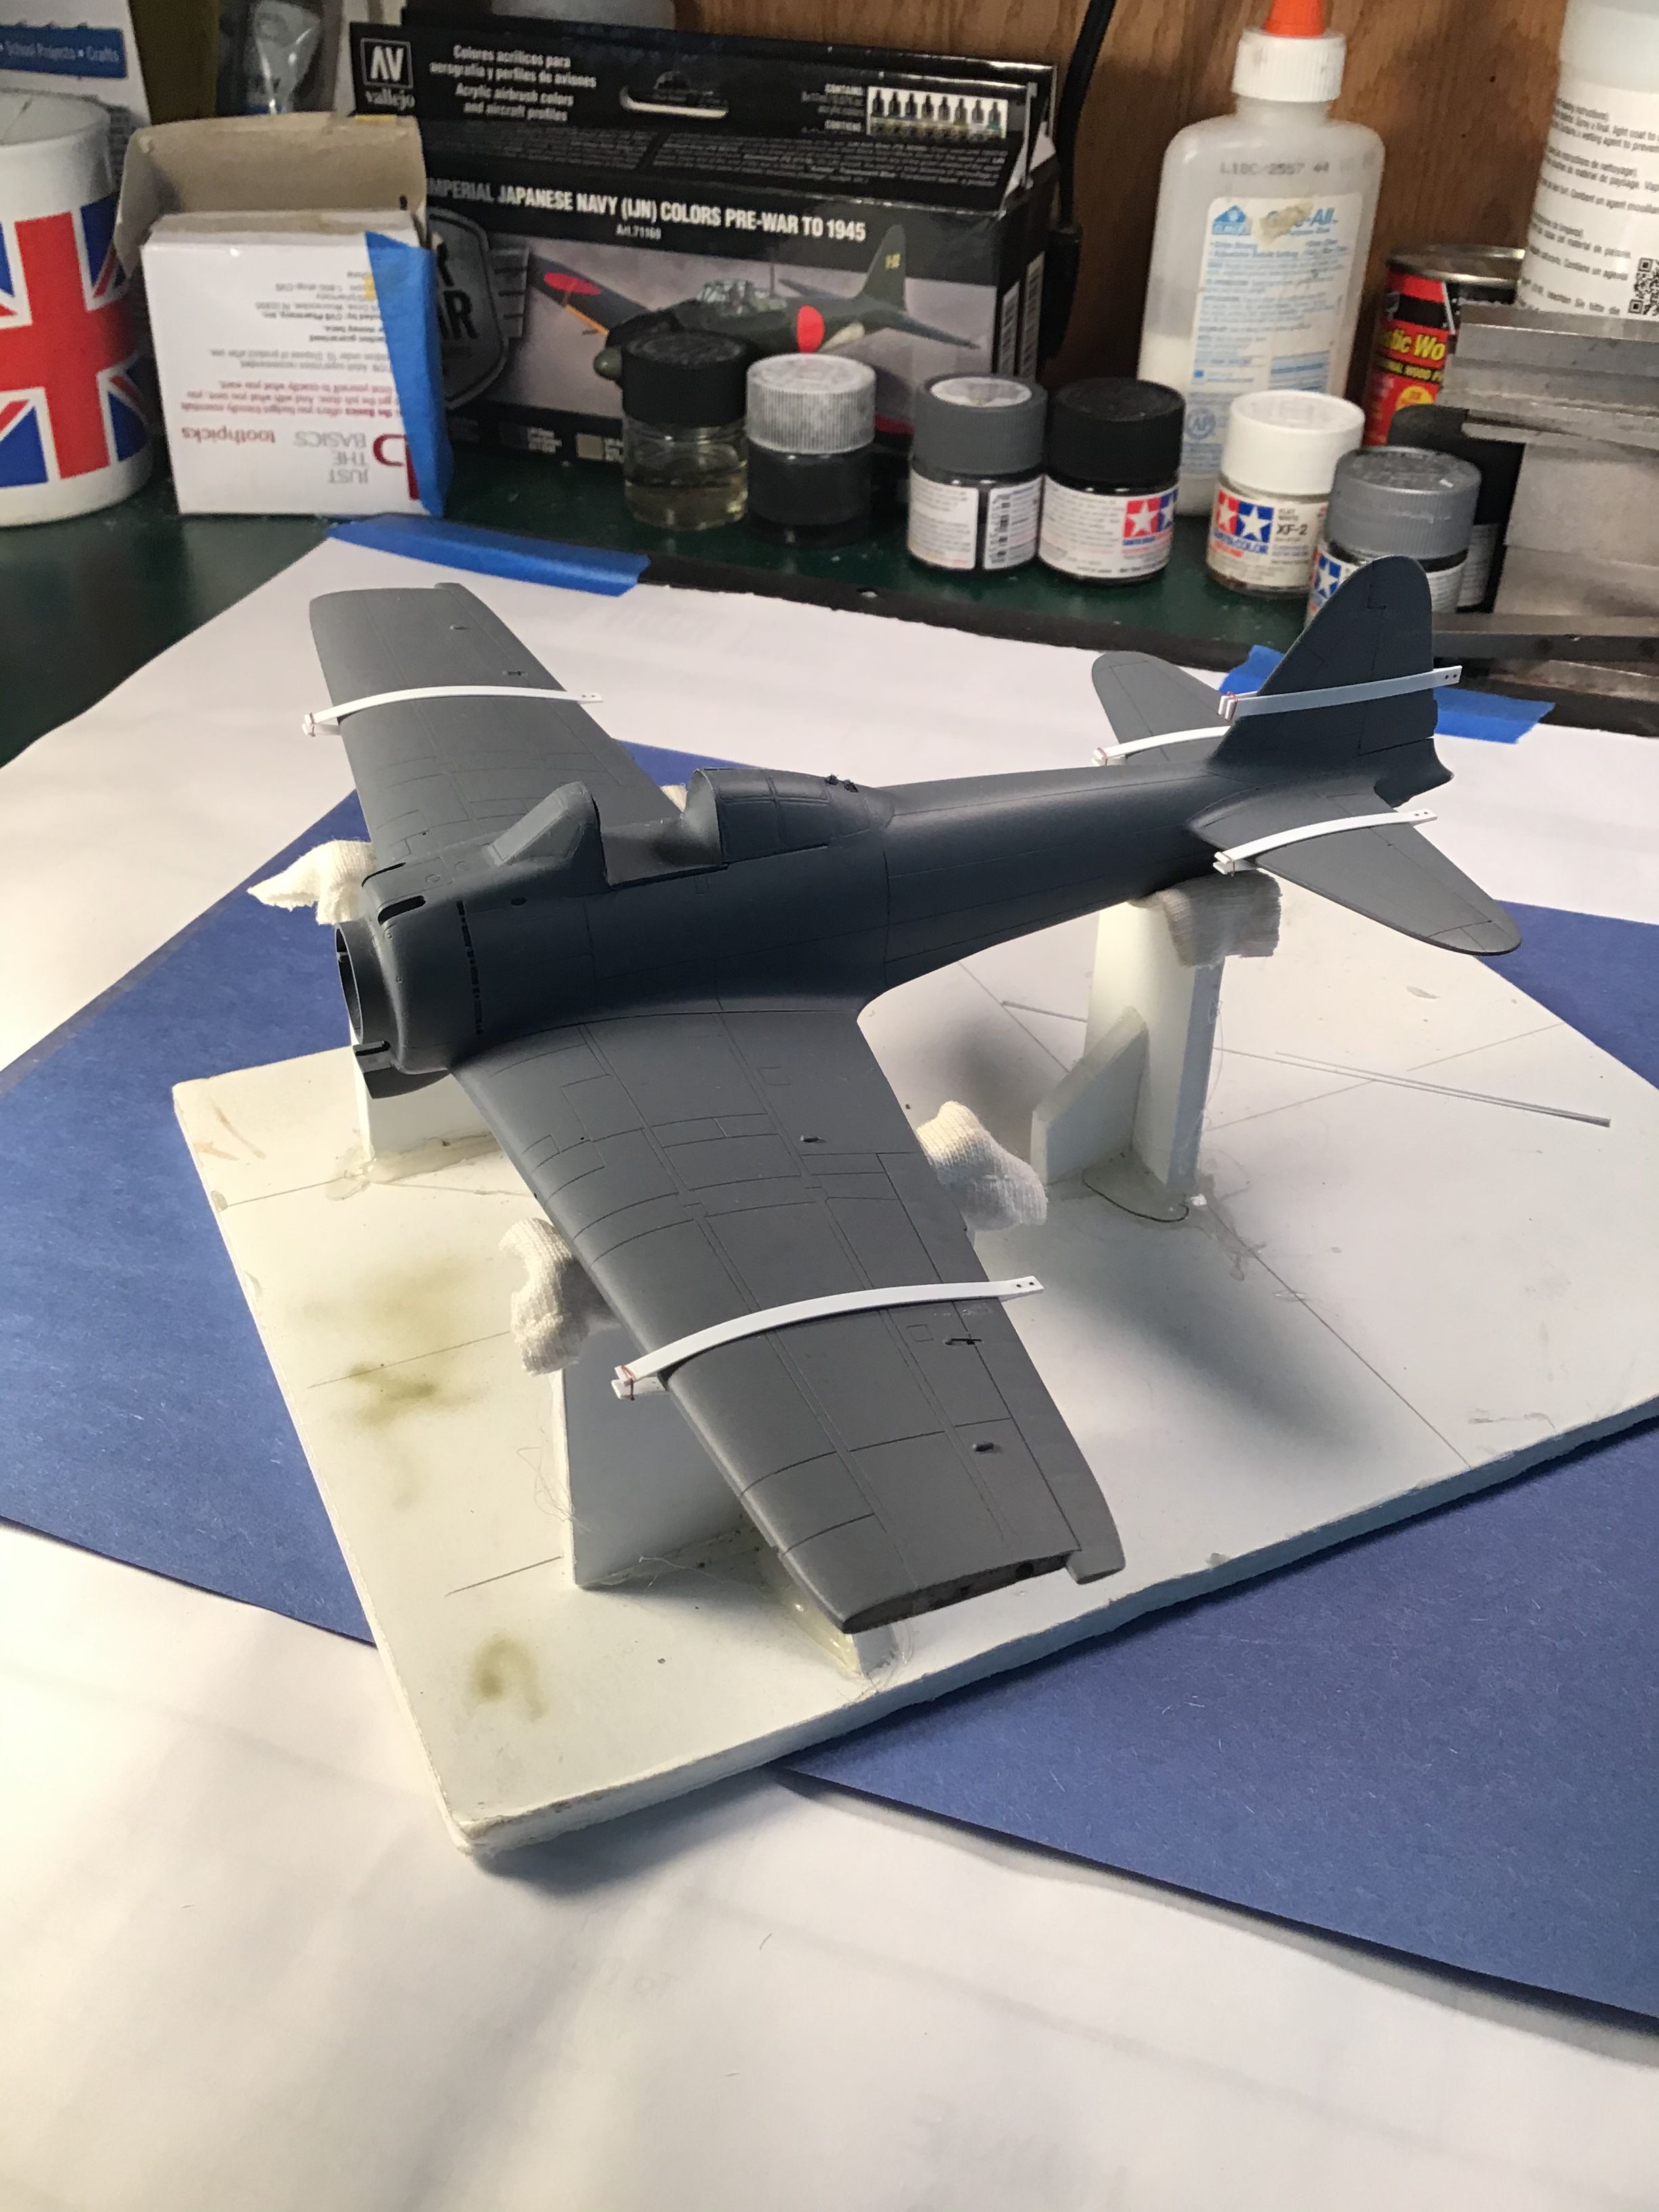
The painting has begun -
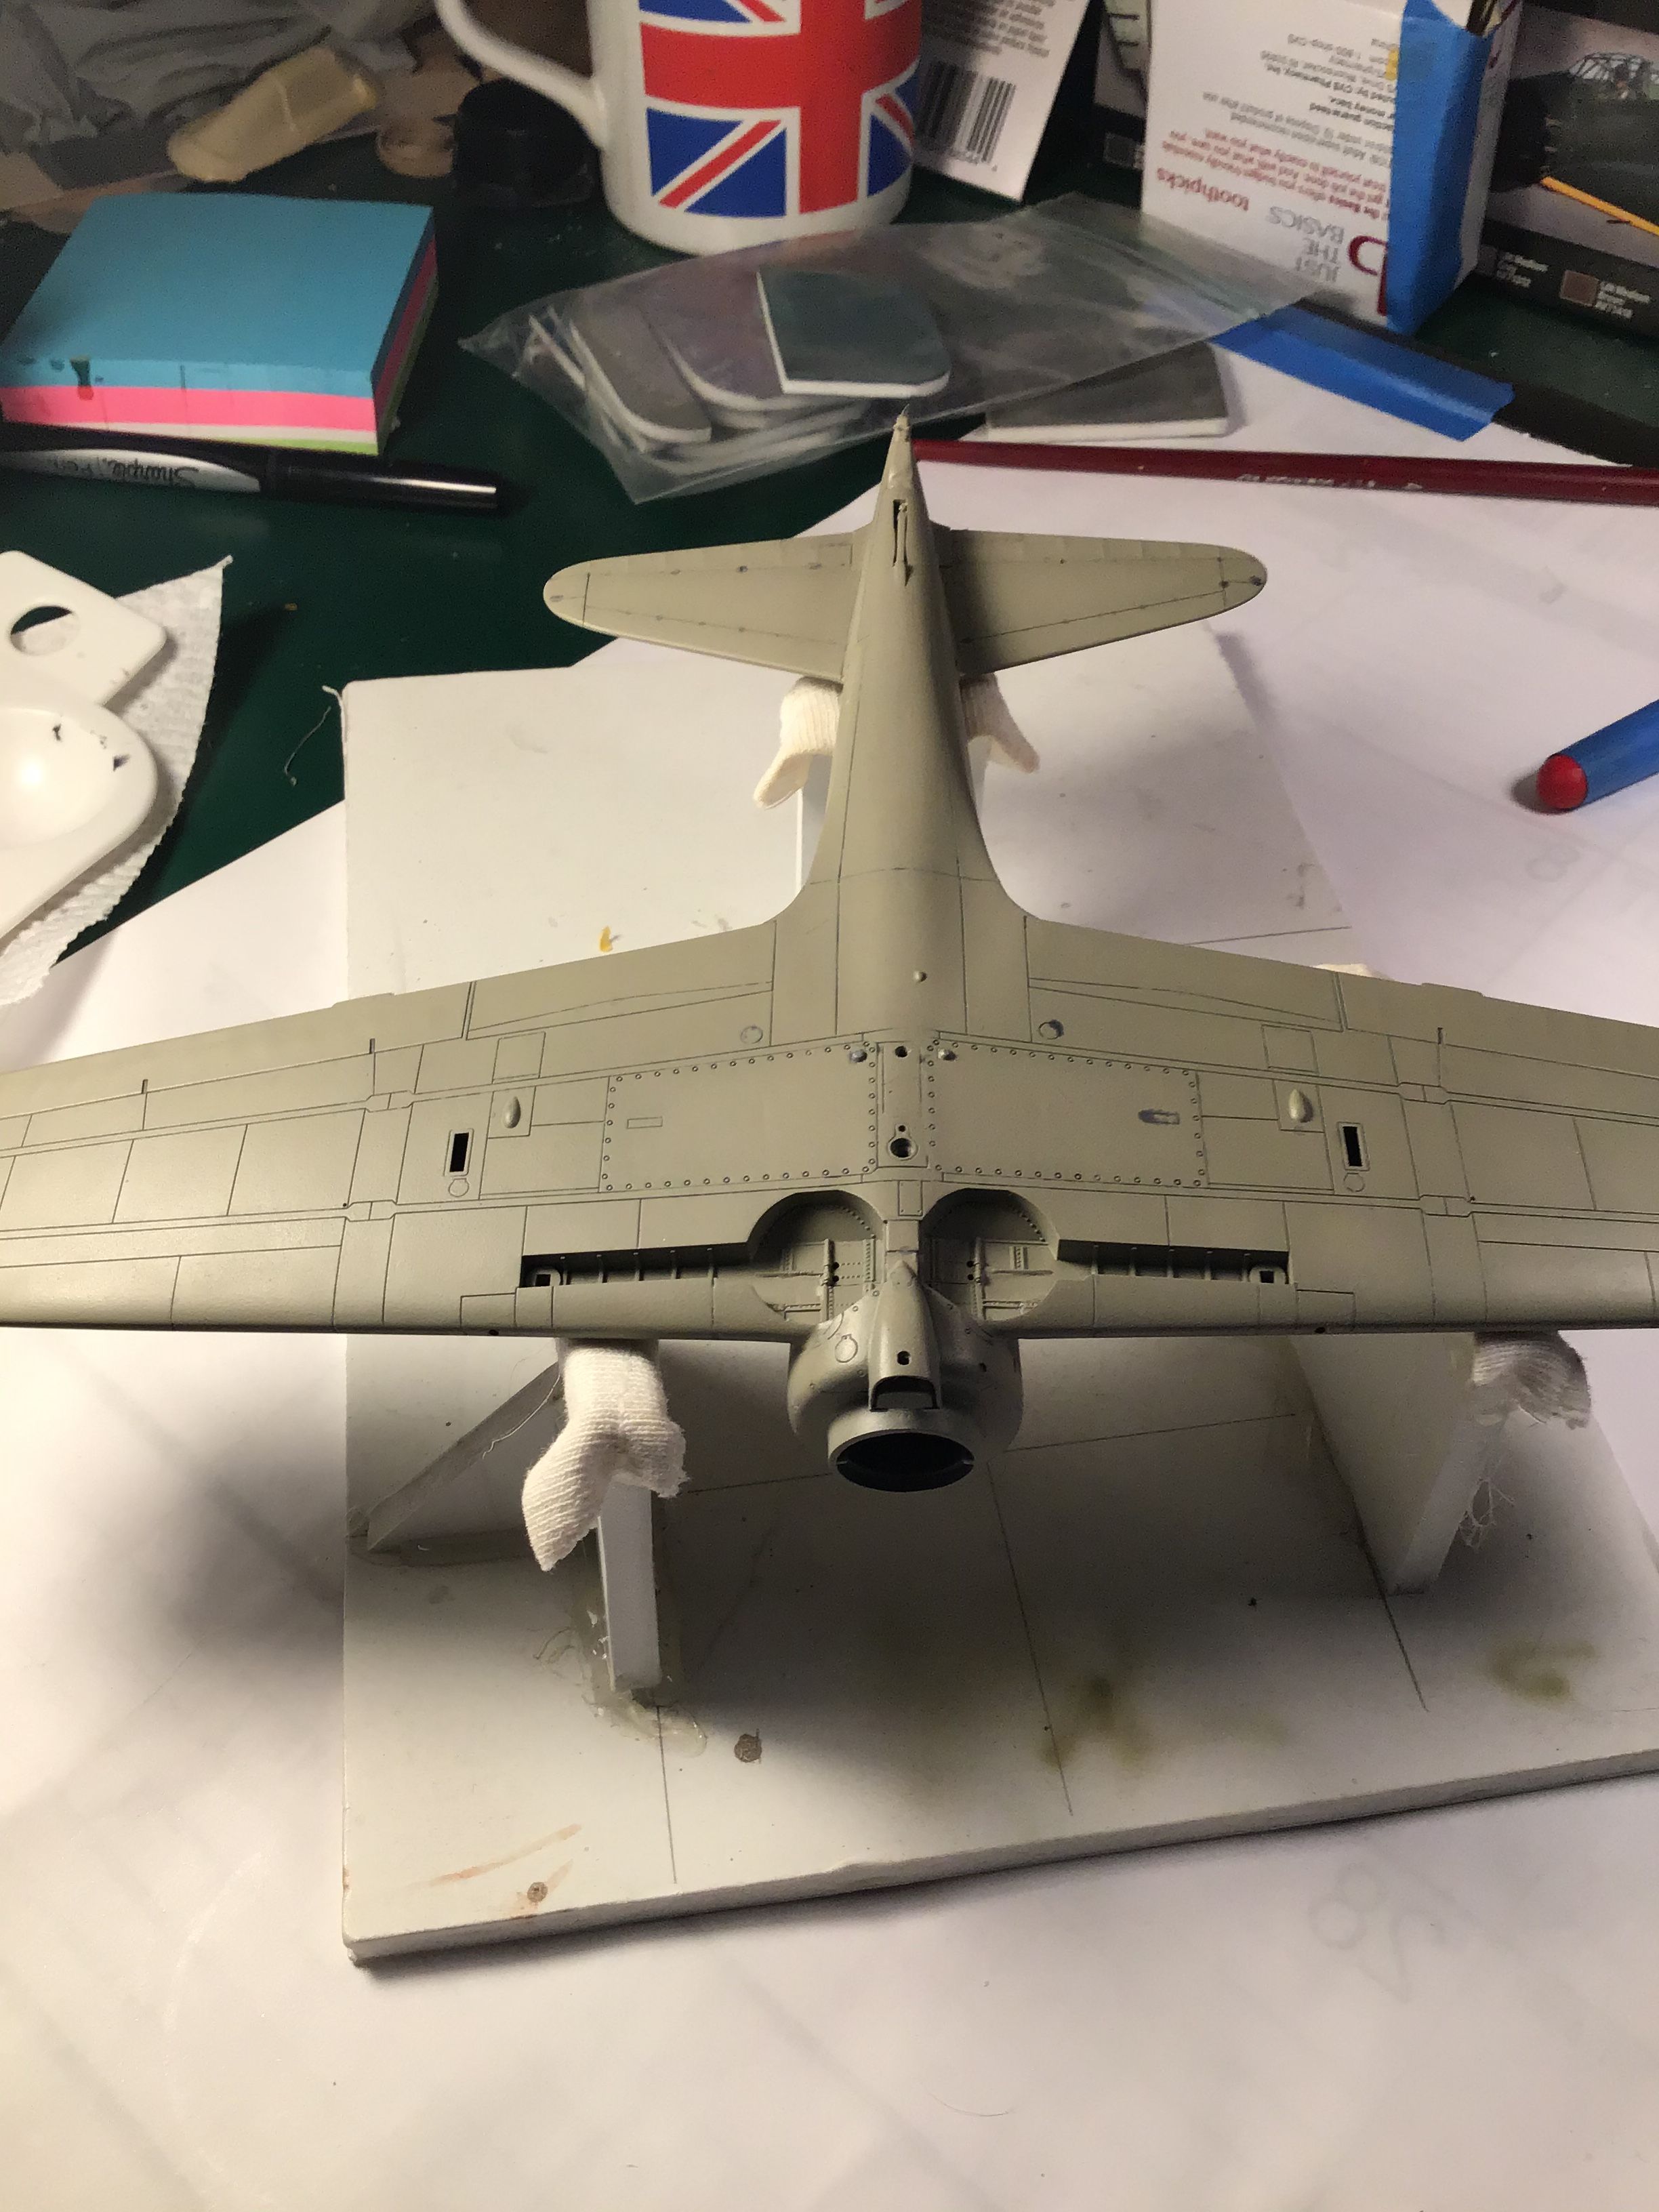
Components pre shaded along panel lines with highly thinned Stynylrez black primer shot at 4-5 lbs pressure to minimize scatter
all painted with straight Vallejo IJN Ash Grey then panels post shaded with lightened Ash Grey - 12 parts Ash Grey / 1 part White.
Panel lines pin washed with highly thinned Payne's Grey oils . " stich " marks from brush vary with the amount of line covered by capillary action. I allow the model to sit undisturbed for a few hours then come back and buff off
"stich"marks with a piece of blue paper shop towl taped to a popsicle stick with double sided tape.
Underside of wing done-
Gust locks painted in Sand Yellow then wood grained with Payne's Grey oils.

Sorry about the poor lighting on the last one - I'll get some better shots outdoors when I can .
Thanks for looking - RT
Components pre shaded along panel lines with highly thinned Stynylrez black primer shot at 4-5 lbs pressure to minimize scatter
all painted with straight Vallejo IJN Ash Grey then panels post shaded with lightened Ash Grey - 12 parts Ash Grey / 1 part White.
Panel lines pin washed with highly thinned Payne's Grey oils . " stich " marks from brush vary with the amount of line covered by capillary action. I allow the model to sit undisturbed for a few hours then come back and buff off
"stich"marks with a piece of blue paper shop towl taped to a popsicle stick with double sided tape.
Underside of wing done-
Gust locks painted in Sand Yellow then wood grained with Payne's Grey oils.
Sorry about the poor lighting on the last one - I'll get some better shots outdoors when I can .
Thanks for looking - RT

AussieReg

#007
Joined: June 09, 2009
KitMaker: 8,156 posts
AeroScale: 3,756 posts
Posted: Tuesday, September 15, 2020 - 11:40 AM UTC
I've been following along quietly here Richard, loving the level of detail that you're putting in, and the base looks amazing! Great to see some colour going down on the airframe as well, a big step forward when you hit this stage.
Cheers, D
Cheers, D

 |

WEB HOSTING BY


Copyright ©2021 AeroScale and Kitmaker Network, a subsidiary of Silver Star Enterprises
All Rights Reserved. Please read our Conditions of Use and Privacy Policy.
All Rights Reserved. Please read our Conditions of Use and Privacy Policy.