_GOTOBOTTOM
World War II: Italy
Italian aircraft of WWII
Hosted by Rowan Baylis
1:48 Re 2005 Sagittario
Merlin
Staff MemberSenior Editor
AEROSCALE
#017
_VISITCOMMUNITY
United Kingdom
Joined: June 11, 2003
KitMaker: 17,582 posts
AeroScale: 12,795 posts
Posted: Friday, October 09, 2020 - 06:16 AM UTC
Hi there

My next project to follow the Spitfire Mk I arrived today:


Special Hobby have very kindly sent their recent 1:48 Reggiane Re 2005 along with the CMK upgrades designed for it.

The elegant Sagittario has long been a a favourite of mine - ever since I built the excellent Falcon vacuform kit back in the late 1980s (I can't believe it's 30+ years ago! ).

I've got the kit and accessories to review before making a start, so don't expect any instant updates - but I'm really looking forward to this build because, based on first inspection, the kit typifies everything I've admired in Special Hobby kits since their short-run days in terms of pattern-making for the airframe - but brought bang up to present day standards in terms of production and boosted with metal-mould detail parts.

All the best

Rowan
chrism
_VISITCOMMUNITY
United States
Joined: January 05, 2012
KitMaker: 160 posts
AeroScale: 156 posts
Posted: Friday, October 09, 2020 - 09:39 AM UTC
I am looking forward to your build Rowan as I have this kit in my stash!
brentwal
_VISITCOMMUNITY
Washington, United States
Joined: February 06, 2010
KitMaker: 100 posts
AeroScale: 21 posts
Posted: Friday, October 09, 2020 - 11:55 AM UTC

Quoted Text

I am looking forward to your build Rowan as I have this kit in my stash!


Same here
magnusf
_VISITCOMMUNITY
Stockholm, Sweden
Joined: May 02, 2006
KitMaker: 1,953 posts
AeroScale: 1,902 posts
Posted: Friday, October 09, 2020 - 07:11 PM UTC
Rowan! I was once very close to buying Sword's "Reggiane-box" in 1/72 with six different kits ranging from the 2000 to the 2005. I didn't so I look forward to following your build instead !


Magnus
BlackWidow
_VISITCOMMUNITY
European Union
Joined: August 09, 2009
KitMaker: 1,732 posts
AeroScale: 1,336 posts
Posted: Friday, October 09, 2020 - 11:39 PM UTC
At least it will be an easier paint job than on a Folgore or Veltro with their "smoke rings", Rowan. Will follow your build as well.

Torsten
Merlin
Staff MemberSenior Editor
AEROSCALE
#017
_VISITCOMMUNITY
United Kingdom
Joined: June 11, 2003
KitMaker: 17,582 posts
AeroScale: 12,795 posts
Posted: Saturday, October 10, 2020 - 07:30 AM UTC
Hi everyone

Thanks straight away for your interest in this build. I love stuff that's a step removed from "mainsteam" as a reminder why I ever got into this hobby. I'm already brainstorming how to tackle the unique Italian seat harness without resorting to aftermarket sets.

All the best

Rowan
Merlin
Staff MemberSenior Editor
AEROSCALE
#017
_VISITCOMMUNITY
United Kingdom
Joined: June 11, 2003
KitMaker: 17,582 posts
AeroScale: 12,795 posts
Posted: Thursday, November 26, 2020 - 08:29 AM UTC
Hi again

Wow! I can't believe how time has flown by! Sorry for the delay in getting started!

Anyway... I finally got underway today, making a start on the basic cockpit parts:


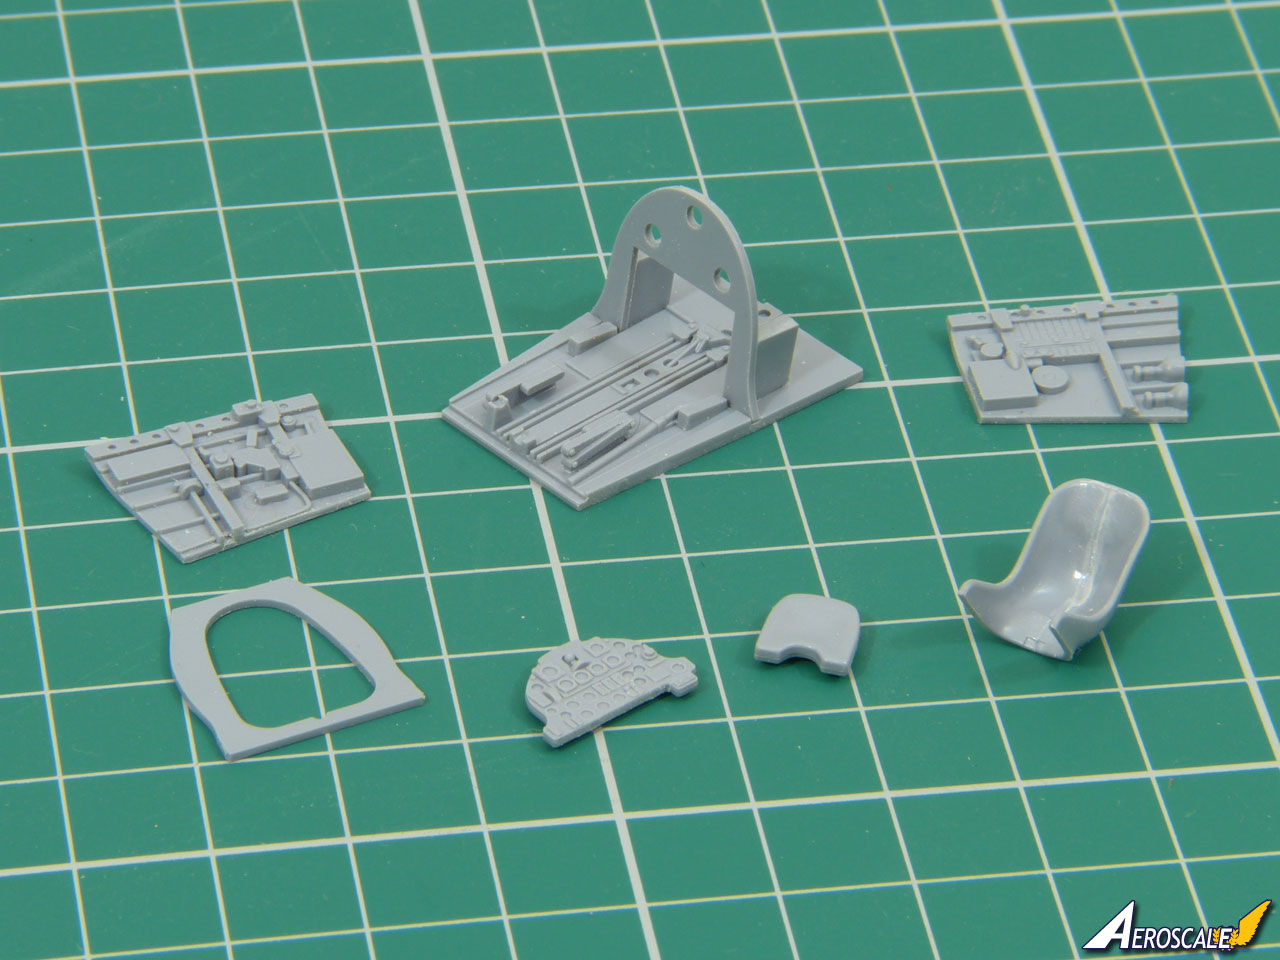
As I predicted in the review, there's an awkward seam on the pilot's seat, but the encouraging thing is that the cockpit tub looks set to be a good fit in the fuselage.

I also did a bit of work on the mainwheel wells, because I was concerned about whether they'd fit inside the wings without some heavy sanding (that's my experience with limited run kits of old still haunting me! ).

It's quite a complex sub-assembly, and there's not really any easy way of completing the wings without the gear legs in place (not my favourite way of doing things).


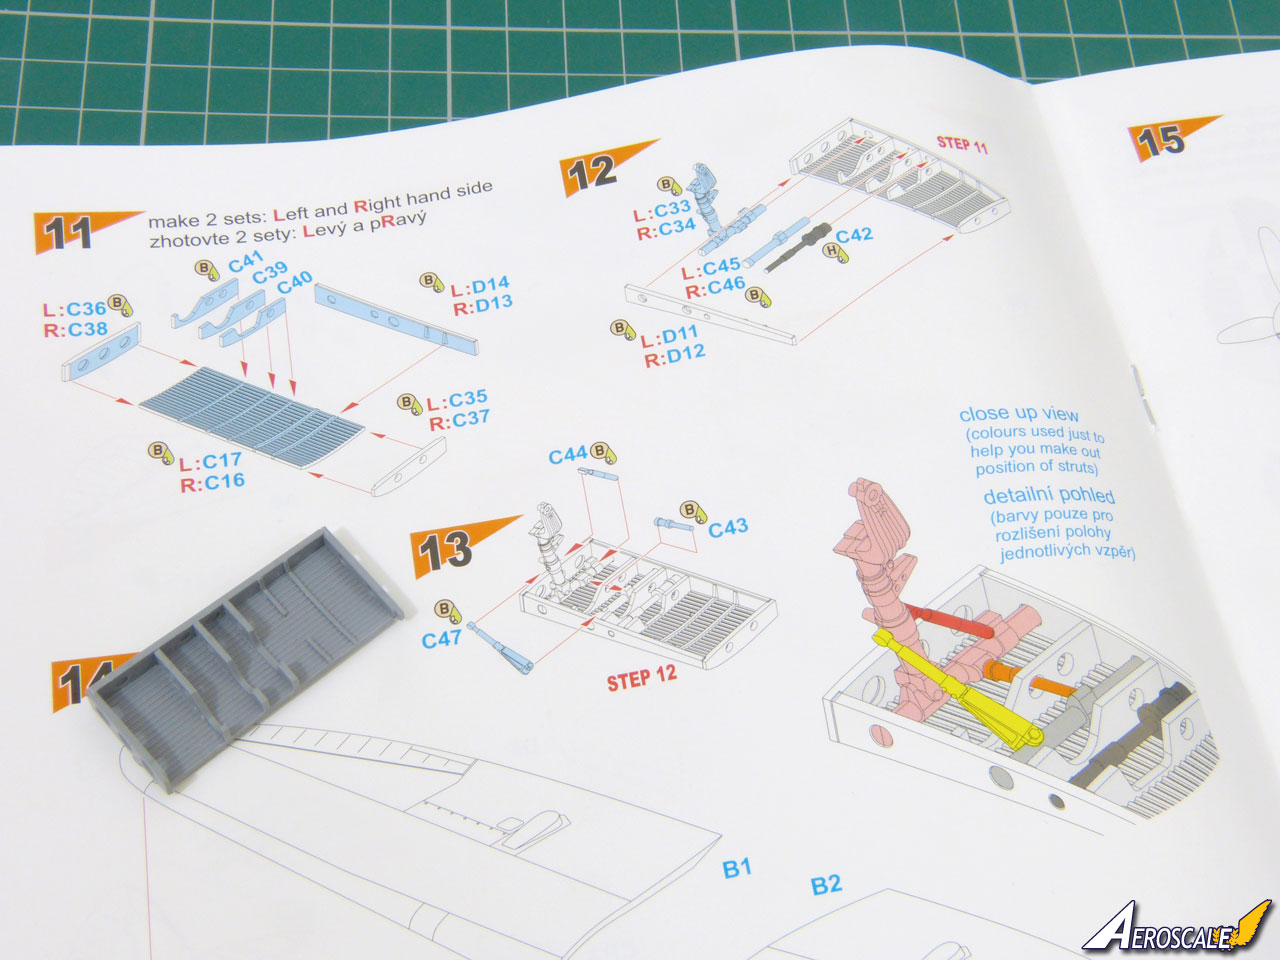
It seemed a bit of a leap of faith to assemble the whole thing on the assumption that it would fit - so I built the basic wheel well, minus the gear leg, to see if it would interfere with closing the wings - especially as I've thinned down the trailing edges a fair bit.

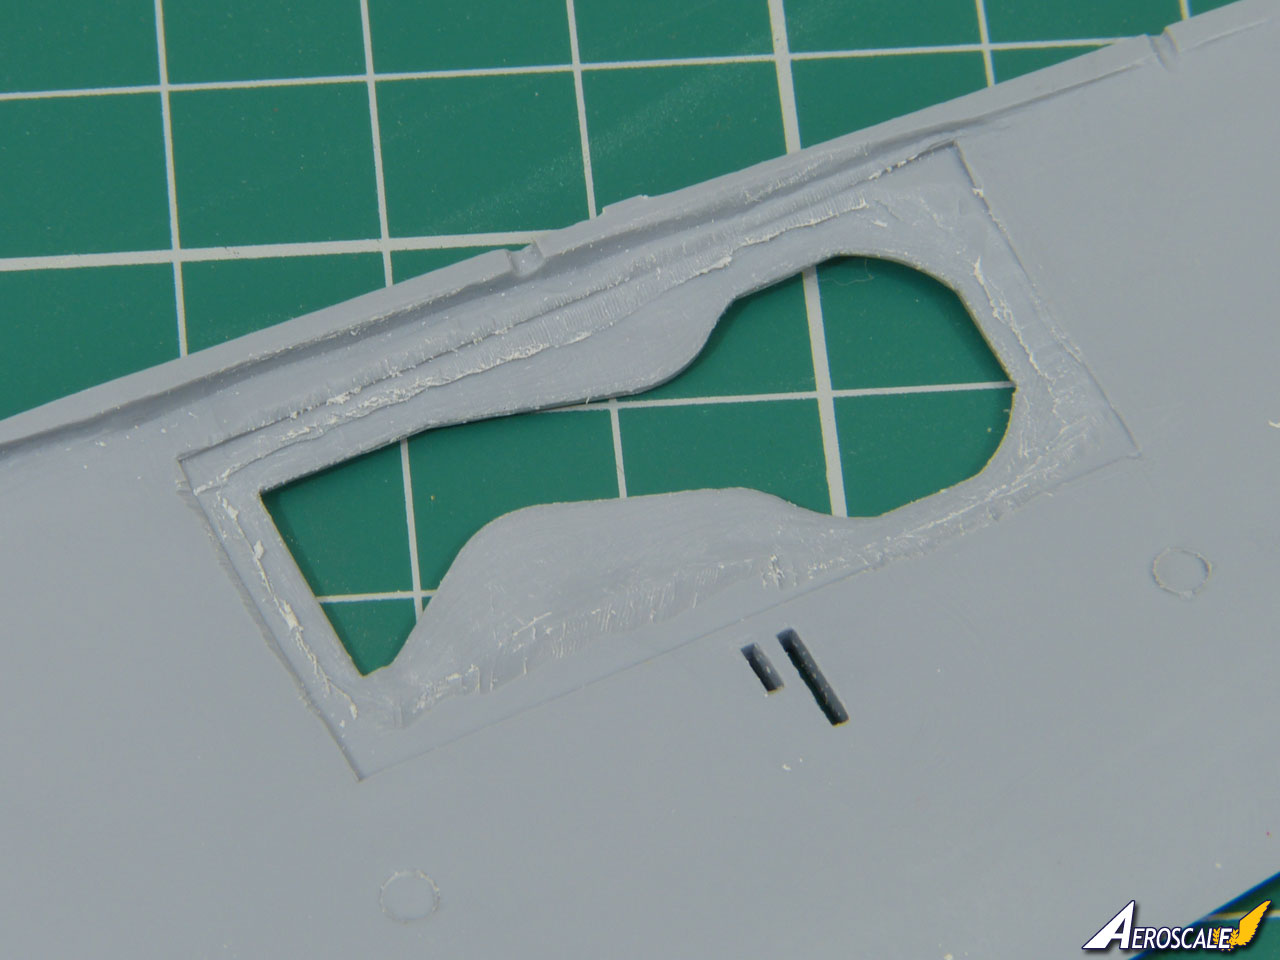
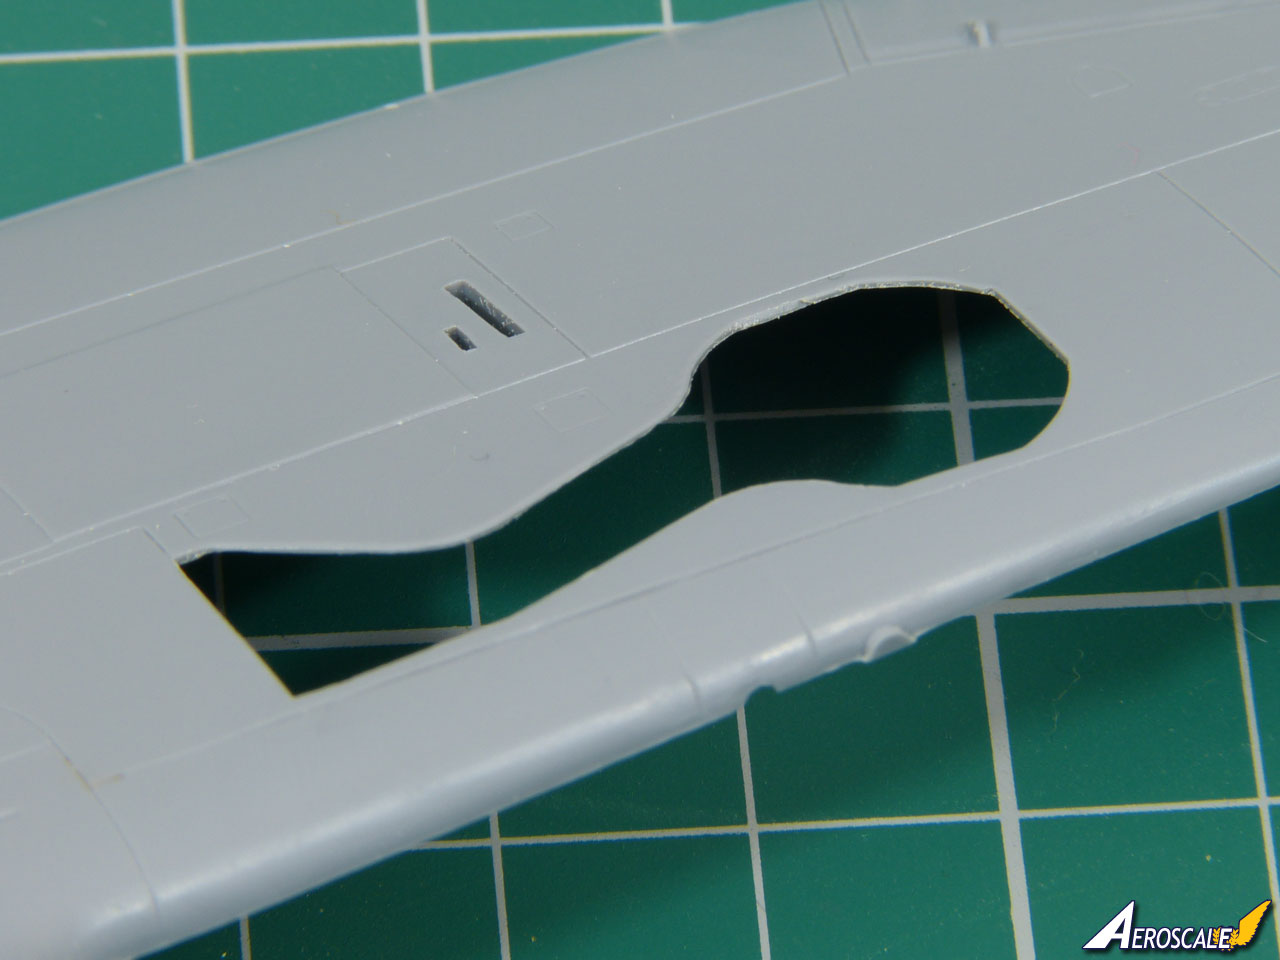
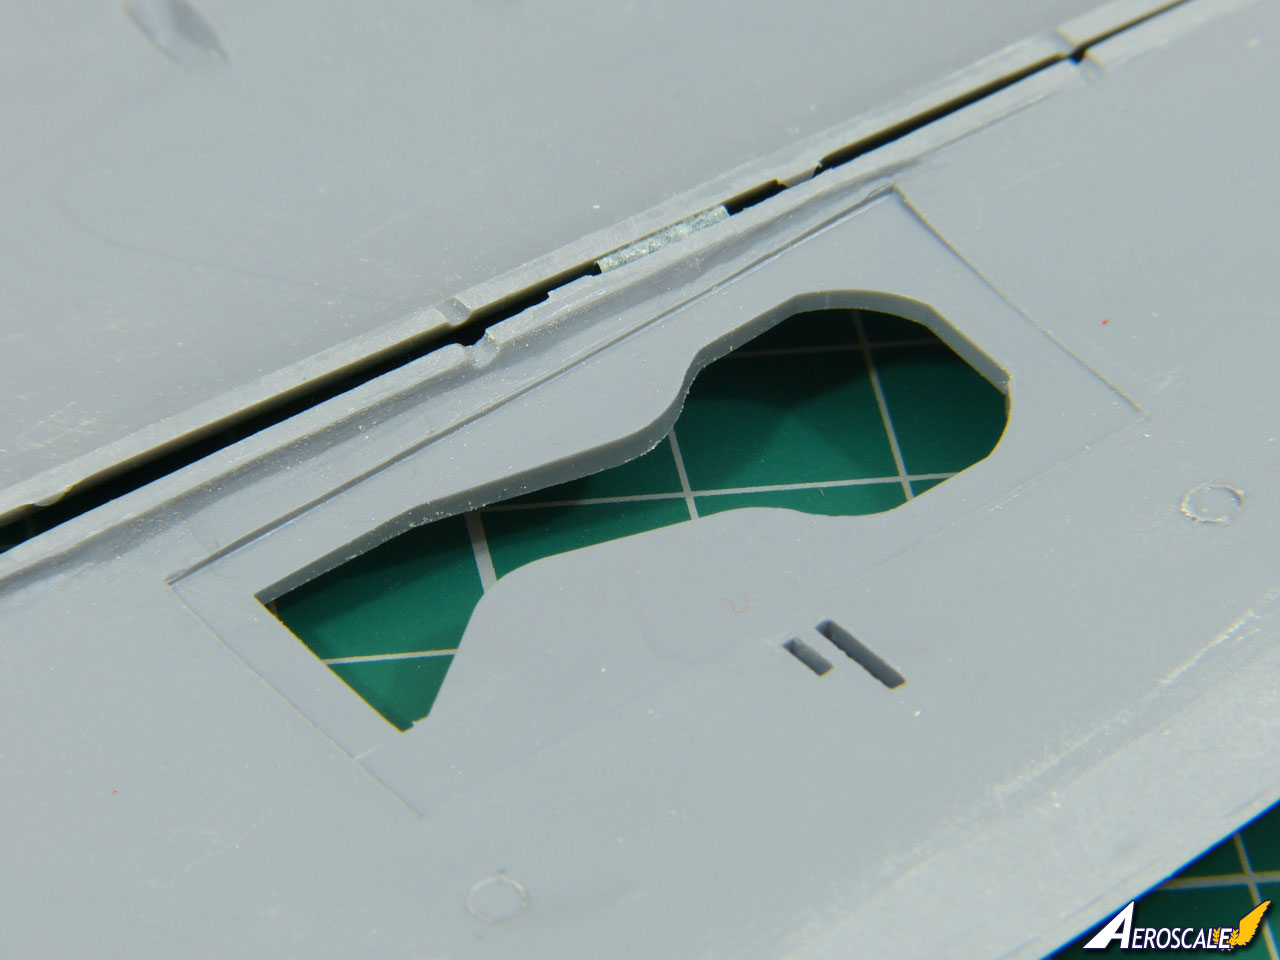
The wells fit into recesses in the full span lower wing. The first thing to say is that the edges of the opening need thinning down massively to give a truer-to-scale appearance:


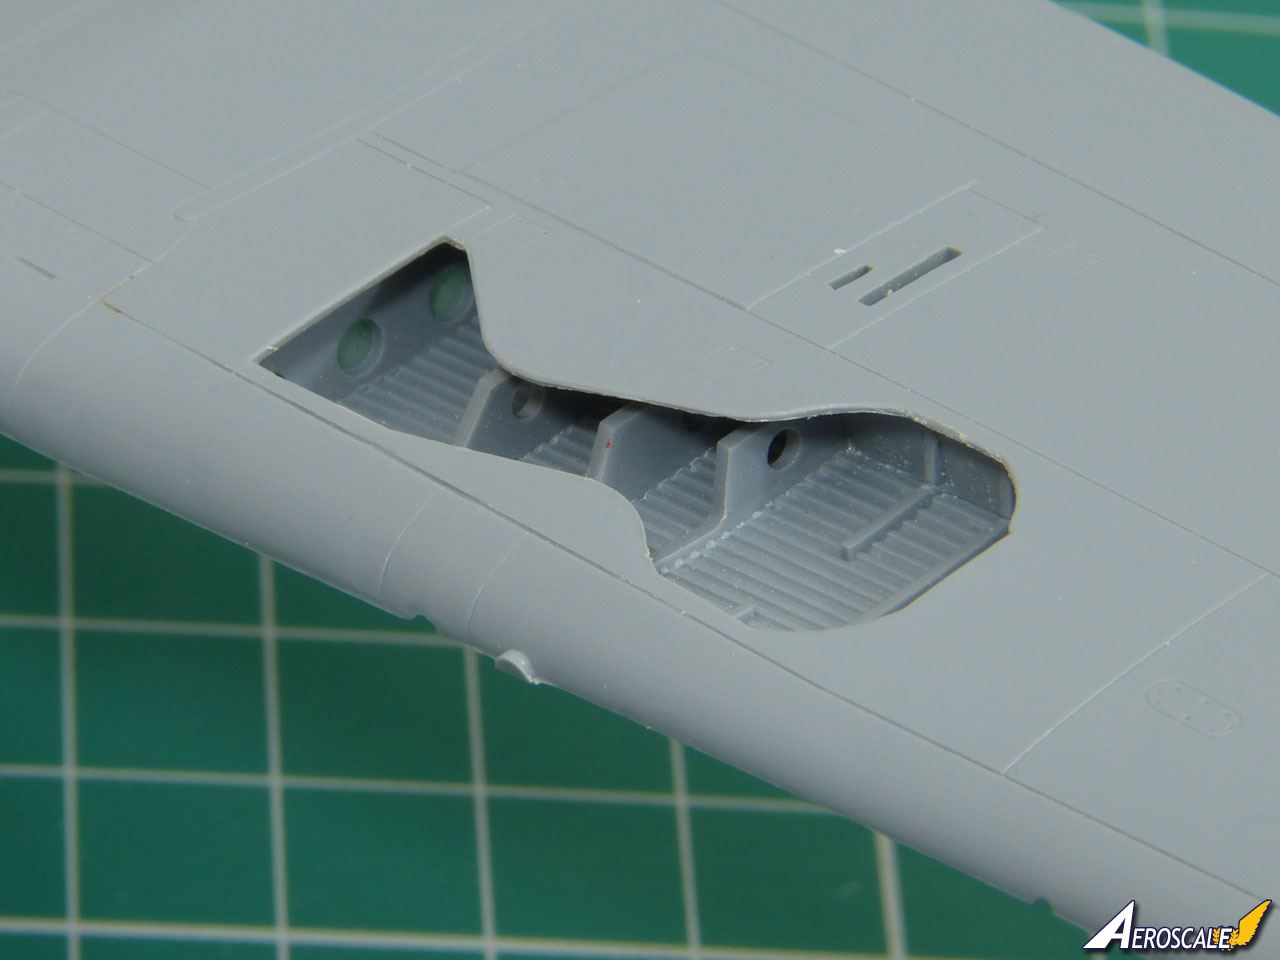
But the wheel well fits in very neatly (but tightly - there's not a lot of leigh way):


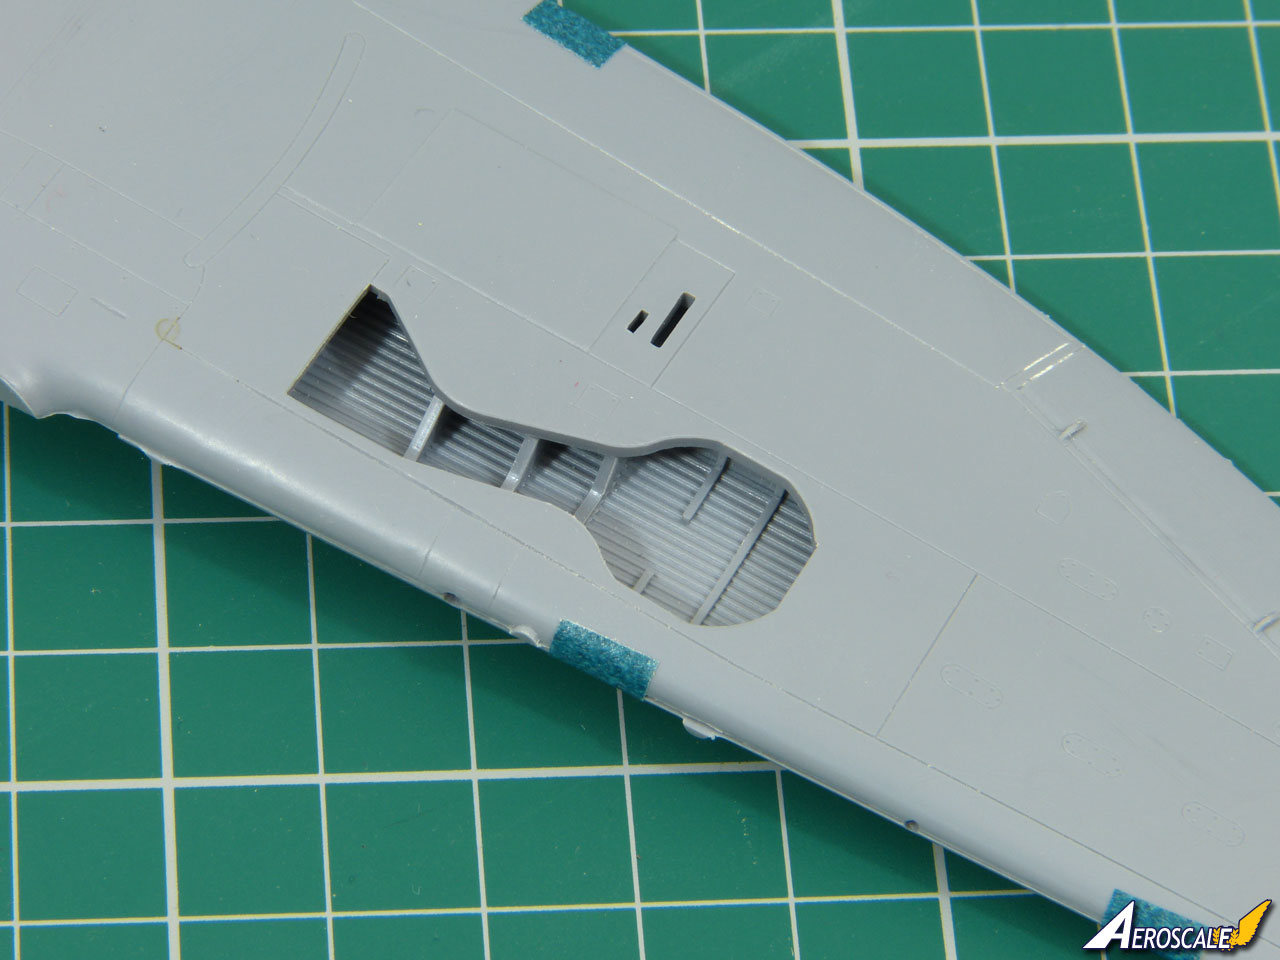
You can actually sand a lot of material off the roof of the well quite safely if you're concerned about the fit, but I have to say Special Hobby have done a good job squeezing it all in.

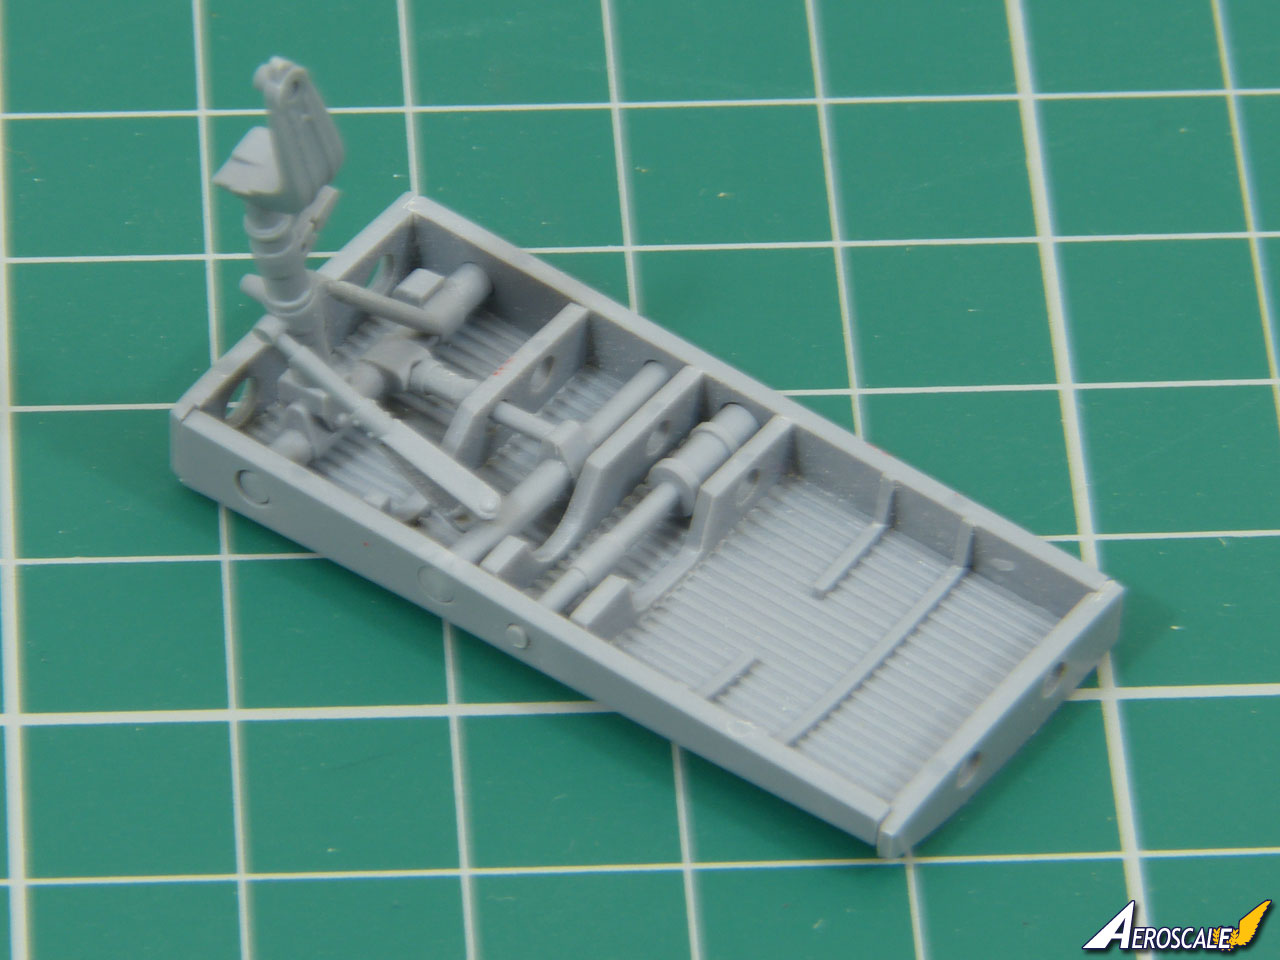
That becomes more apparent when you see the completed wheel well (only dry-fitted in the photo) - with the gear leg and actuators, plus the cannon fitted, it's a nicely "busy" sub-assembly:


More as soon as I can.

All the best

Rowan
Merlin
Staff MemberSenior Editor
AEROSCALE
#017
_VISITCOMMUNITY
United Kingdom
Joined: June 11, 2003
KitMaker: 17,582 posts
AeroScale: 12,795 posts
Posted: Saturday, November 28, 2020 - 07:08 AM UTC
Hi again

I couldn't resist having a tinker with the wheel wells today.

Thinning the inside of the lower wing makes a massive improvement to the look of the openings (still at the roughed-out stage here):


CAUTION: Before you dive in and start thinning the wing interior; obviously, if you take material away from one place, you'll have to replace it elsewhere. In this case it means building up the height of the wing ribs:


An unexpected bonus, though, is that it makes the wheel well look deeper, even though the walls are sitting at exactly the same height they did originally.

I've added strip styrene to the ribs and will let the cement cure thoroughly overnight before contouring them to match the the thinned-down edges to the wells.

More soon.

All the best

Rowan
 _GOTOTOP