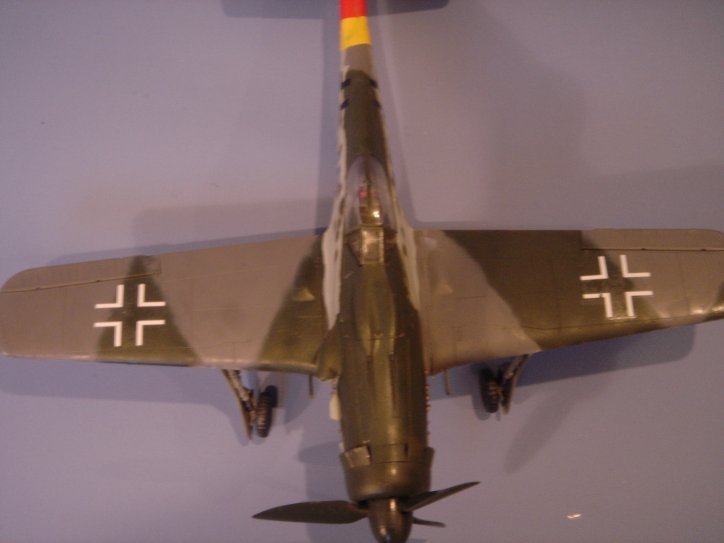
OK Philip, first a few things that you will be able to improve the next time round: Chuck is right about the wheel alignment, the main wheels seem to be towing out and the legs aren't at the same forward rake. The FW 190 series had a particularly prominent and unusual undercarriage, which looks odd if not captured. I would imagine that the Tamiya kit has pretty positive location points but care is still required to get them aligned correctly. Here's a way to avoid this problem. Test fit the legs, retraction jacks and wheels first, just to highlight any potential problems. The retraction jacks will set the angle of the legs, the square pin at the top of the leg should align the legs but unless it is a tight fit there will be some play. The same goes for the wheels and the instructions give you a diagram with their angle. However if you follow the instructions you have to be pretty lucky for everything to line up. So the first thing is to get the legs in the correct position. Temporarily glue the wheels on, using white glue, don't worry about the angle just make sure that they are aligned front to back. With the model upside down locate one of the legs and attach the retraction jack, get this in position then run liquid cement into the socket for the leg, do the other leg in the same way. Now you have time to adjust the alignment of the legs and therefor the wheels before the glue hardens. Use the wheels as a reference and eyeball them in, checking from every angle that they are the same. If the glue is get hardened before you are finished add a drop more glue to soften it. You can use tube cement (sparingly) which will give you more time. When you are satisfied support the model off it's wheels and let the glue dry overnight. Next day remove the wheels, (they should twist of quite easily but use caution), clean them of any white glue and re-attach using Polly cement, adjusting the angle so everything lines up as per the instructions and front to rear. Again support the model off it's wheels overnight. Lastly attach the main gear doors. I use CA for attaching the undercarriage, so I don't have to wait over night but you have very little time to get it right.
I have explained about Micro Set/Sol and decals via PM, did you have a look at my article? I think Chuck is right about the fuselage crosses, the starboard one looks to be higher on the fuselage than the port. There also appears to be a little "silvering on the wing crosses.
Did you use RLM 76 for the underside and lower fuselage?
I explained what you need to be able to achieve mottle camo, but I can see that basically you have to much paint and to high a pressure.
I think what you have achieved so far is actually quite remarkable, so well done Philip. You have a great enthusiasm and I don't want to affect that in any way, but if you could slow down, just a little :-) who am I kidding :-) and plan your build to take into account how you are painting and finishing, and not be a slave to the kit instructions you will go far.
Not at all bad for a 12 year old using an airbrush for the first time, well done and keep it up Mal