Post your entries for the MOM for November here.
Please read the following.
1. Do not forget to add information about the model, voters will be encouraged to check this out before voting and it may influence thier vote
2. Only post 3 pics, no composits
3. change, please read The first picture that you post will be used in the voting thread. (This will save me alot of time checking out your favourite) The first picture that you post will be the one used in the voting thread
Please try and keep your pictures to a maximum width of 650 pixels, and the file size small
Lets see if we can get an even better turn out this month. Best of luck to all.
Mal
Hosted by Jim Starkweather
Model of the Month (MOM) November.
Posted: Tuesday, November 01, 2005 - 09:25 AM UTC
Blade26
Kozani, Greece / Ελλάδα
Joined: October 06, 2005
KitMaker: 364 posts
AeroScale: 54 posts
Joined: October 06, 2005
KitMaker: 364 posts
AeroScale: 54 posts
Posted: Thursday, November 03, 2005 - 01:40 AM UTC
Here's my entry for November MOM.
It's Italleri's 1/48 Huey Cunship!
No improvents were made to the kit!
Just used what the kit provided!
It's Italleri's 1/48 Huey Cunship!
No improvents were made to the kit!
Just used what the kit provided!
smithery
Ontario, Canada
Joined: March 30, 2004
KitMaker: 289 posts
AeroScale: 78 posts
Joined: March 30, 2004
KitMaker: 289 posts
AeroScale: 78 posts
Posted: Thursday, November 03, 2005 - 06:41 AM UTC
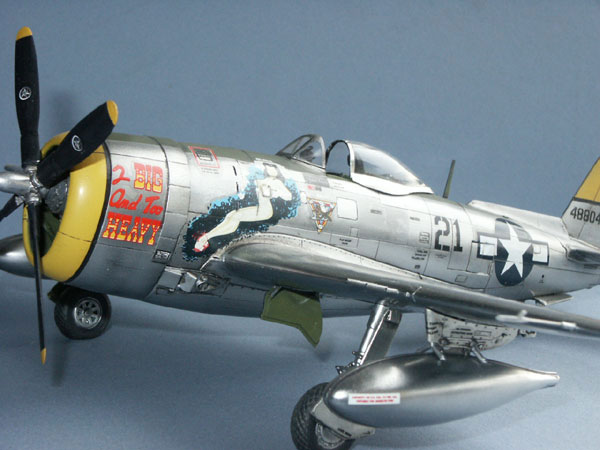
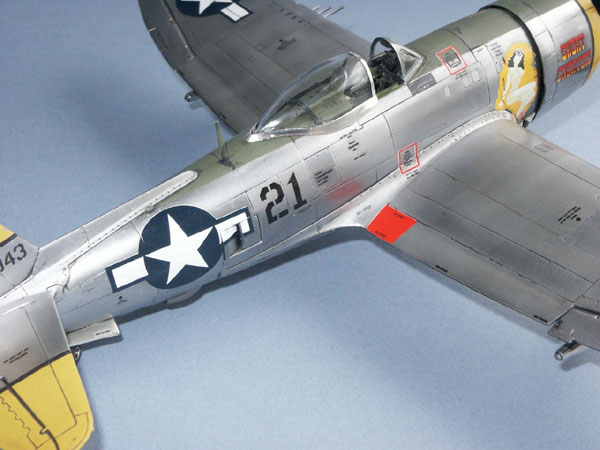
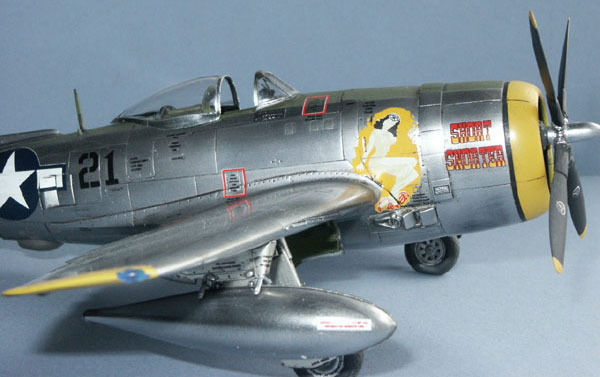
Here's my entry for November MOM.
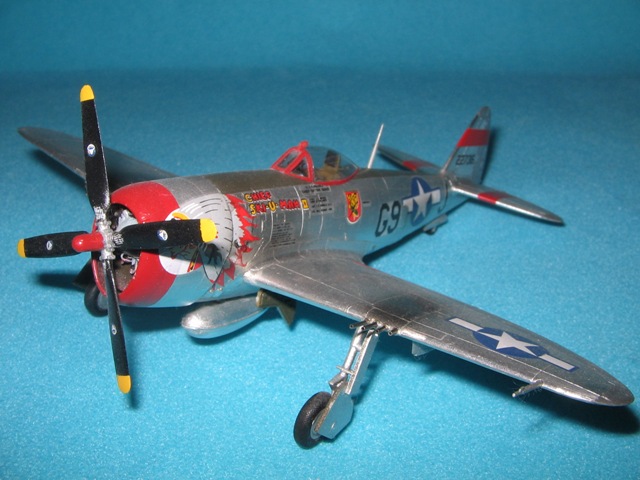
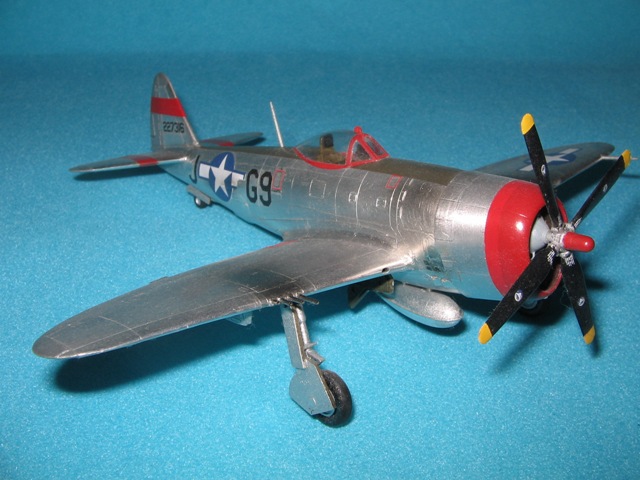
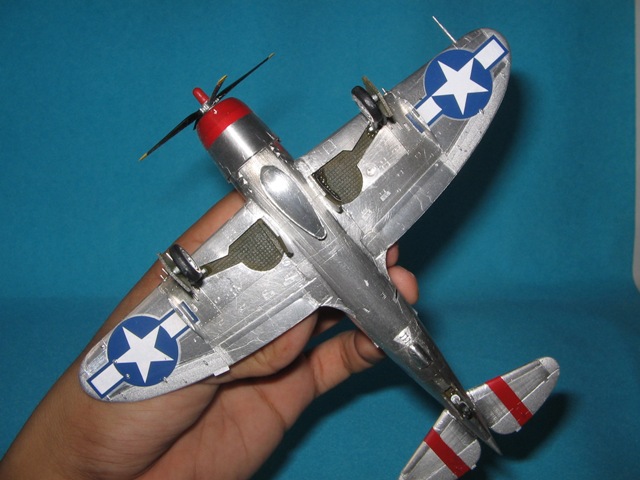
Kit is the 1/48 Academy P-47N, to which I added Aeromaster decals for the Hawaii National Guard, and Ultracast wheels. Model was painted with Model Master Chrome Silver. I'm ashamed to say the tail was painted RLM04, as I was too lazy to go out and get the yellow paint I needed (mea culpa). I chose to leave this one as a clean build, so it sits unweathered.
Enjoy the pics.
brandydoguk
England - North, United Kingdom
Joined: October 04, 2002
KitMaker: 1,495 posts
AeroScale: 643 posts
Joined: October 04, 2002
KitMaker: 1,495 posts
AeroScale: 643 posts
Posted: Thursday, November 03, 2005 - 06:42 AM UTC
Revell 1/48 Bf109E. Built OOB and airbrushed with Xtracrylics. I found a camo scheme (used by JG53 in the Battle of Britain) that didn't need swastikas as none are included in the kit.
wolfik
Nordrhein-Westfalen, Germany
Joined: April 05, 2005
KitMaker: 50 posts
AeroScale: 0 posts
Joined: April 05, 2005
KitMaker: 50 posts
AeroScale: 0 posts
Posted: Thursday, November 03, 2005 - 11:09 AM UTC
wow!!!!! thats the one scheme I was looking for since some months!!!!please let me now more about it!!!!
I know the later generalinspecteur of the bundesluftwaffe J.steinhoff flew such a machine during the first stages of 1940 war....and it was marked with white front and tail and tips of the wings....
email me please where is to find such a scheme
regards and thanks in advance for any response
peter
I know the later generalinspecteur of the bundesluftwaffe J.steinhoff flew such a machine during the first stages of 1940 war....and it was marked with white front and tail and tips of the wings....
email me please where is to find such a scheme
regards and thanks in advance for any response
peter
matrixone
Oregon, United States
Joined: February 07, 2004
KitMaker: 869 posts
AeroScale: 862 posts
Joined: February 07, 2004
KitMaker: 869 posts
AeroScale: 862 posts
Posted: Friday, November 04, 2005 - 10:25 AM UTC
Here is my entry for the November MOM.
This is the Hasegawa 1/32 scale Bf 109K-4, this model was built OOB except for the decals which are from EagleCals.
I used Model Master II enamel paints and my Badger 150 with the fine needle and head assembly.
Weathering was done by dry-brushing and post shading with my airbrush.
Matrixone
This is the Hasegawa 1/32 scale Bf 109K-4, this model was built OOB except for the decals which are from EagleCals.
I used Model Master II enamel paints and my Badger 150 with the fine needle and head assembly.
Weathering was done by dry-brushing and post shading with my airbrush.
Matrixone
Rhinosd
California, United States
Joined: June 23, 2005
KitMaker: 56 posts
AeroScale: 16 posts
Joined: June 23, 2005
KitMaker: 56 posts
AeroScale: 16 posts
Posted: Sunday, November 06, 2005 - 07:37 PM UTC
Here is my entry for November MOM:
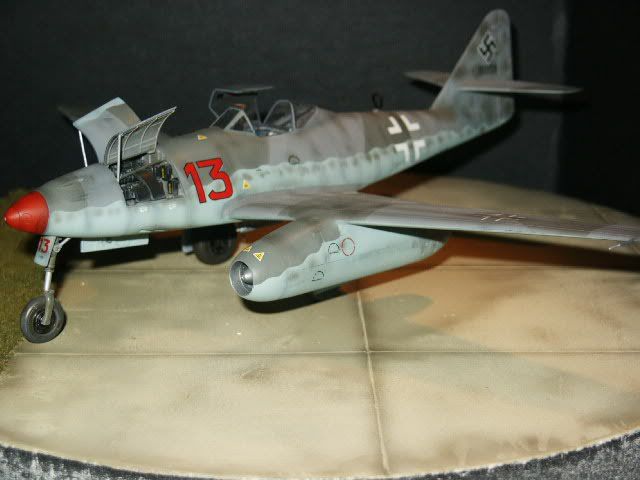
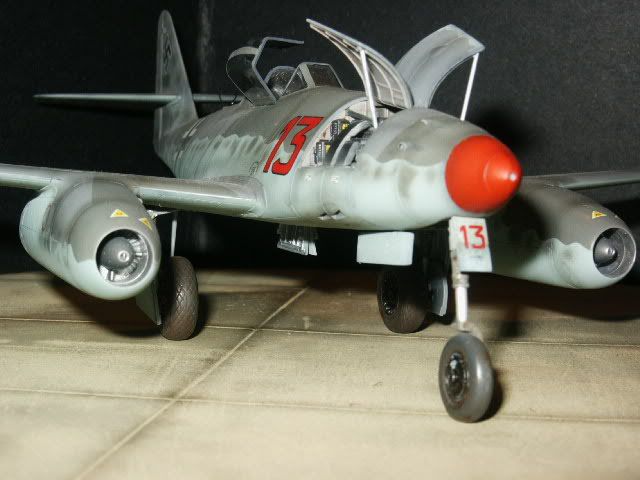
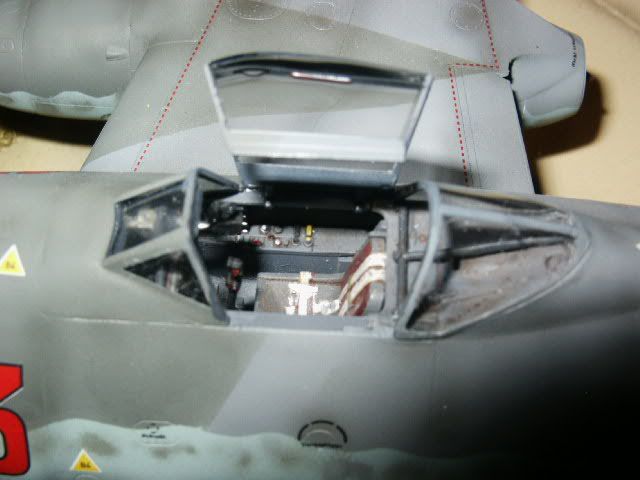
Tamiya 1/48 scale Me 262 built to IPMS OOB rules.
Painted with Aircraftcolours acrylics. Kit decals.
Tamiya 1/48 scale Me 262 built to IPMS OOB rules.
Painted with Aircraftcolours acrylics. Kit decals.
PolarBear
Västra Götaland, Sweden
Joined: February 23, 2005
KitMaker: 820 posts
AeroScale: 629 posts
Joined: February 23, 2005
KitMaker: 820 posts
AeroScale: 629 posts
Posted: Thursday, November 10, 2005 - 05:12 AM UTC
Hi all! I thought I'd join the competition since I actually managed to finish a model this month!
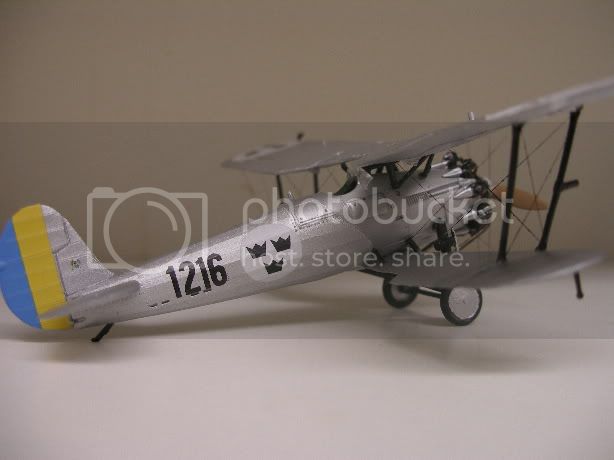
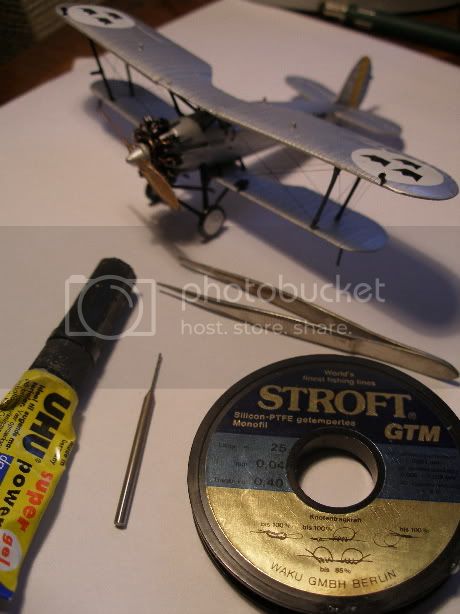
This is the Airfix 1/72 J 7 Bristol Bulldog Mk IIa in Swedish markings sometime during the mid 1930's. The model is my entry to the "Two wings and a prayer" campaign. It is my ninth model, and my first bi-plane ever. I must say that I really enjoyed the rigging! 0,04 mm fly-fishing wire was used.
Due to the campaign deadline, I had to finish the model in less than 48 hours! Given the short time, I'm quite happy with the results!
The model looks pretty big on the pictures, but it is actually very tiny!
Cheers!
demodelbouwer
Noord-Holland, Netherlands
Joined: April 13, 2002
KitMaker: 792 posts
AeroScale: 0 posts
Joined: April 13, 2002
KitMaker: 792 posts
AeroScale: 0 posts
Posted: Thursday, November 10, 2005 - 08:21 AM UTC
Ok it took a while to finish this plane ( over a year )
it is a Revell model in 1:48.
Painted and airbrushed with acryllics.
Washes with oils, thinned with Zippo fluids
Antenna's are scratch aswell.
Airial wire is very thin fishing wire
Added are Eduard Etch sets and another set of decals by Techmod.
Supplies are from Revell , Dragon and Tamiya.
Palmtrees are scratch build as the diorama plate. ( made from Styrofoam )
but i'm gonna enter it for the month November..
cheers
eric
For the Dutch modellers :
Model is on a permanent display at www.Plasticmodelbouw.nl's shop
mother
New York, United States
Joined: January 29, 2004
KitMaker: 3,836 posts
AeroScale: 1,036 posts
Joined: January 29, 2004
KitMaker: 3,836 posts
AeroScale: 1,036 posts
Posted: Friday, November 11, 2005 - 05:41 PM UTC
My entry for Novembers MOM,
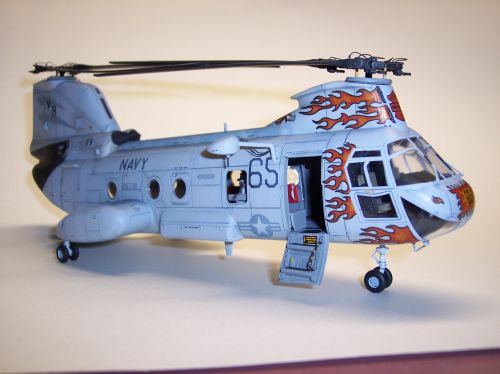
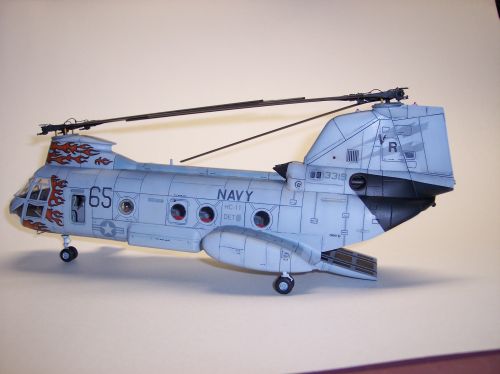
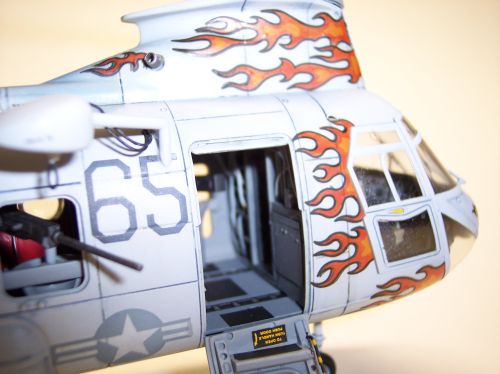
Academy's 1/48th CH-46. I detailed the interior and the decals were printed on a laser printer. I saw a photo of the real helicopter on the internet and thought it be a super cool addition to my collection. Here is a link to the build pics,
https://armorama.kitmaker.net/forums/62799&page=1#525350
Hope you enjoy as much as I did building this one, now onto the photos
More photos in my helicopter gallery
Posted: Sunday, November 13, 2005 - 07:52 AM UTC
Hasegawa's 1/48 P-40E. This is the mount of Gen. Claire Chennault's son Maj John S. Chennault, first commander of 343rd Fighter Group (three fighter squadrons, the 11th, 18th, and the 54th; later the 344th arrived in October) 11 Sept 1942 until 16 Nov 1942, in the Aleutians. I have an affinity for Gen. Chennault's history and the AVG, and especially for the P-40. This is my ongoing effort to honor him, them, and it.
Maj. Chennault, to honor his dad and the AVG, came up with the remarkable "Aleutian Tiger" nose art, displayed on several P-40s. I believe Revell's 1/32 P-40 of this plane was one of my first 5 models I ever built. The decals are Super Scale. To make the tiger more vivid, I wish I'd done my first plan--apply the decals over the silver primer, mask, and paint the OD. But I figure the yellow paint over OD camouflage would not be todays's airshow-vivid. The antenna is painted copper. Why? Because my photos of the P-40E at Wright-Patterson's museum has copper antenna wires and the big white ceramic insulators. The pix are here on-site somewhere.
I built it almost OOB except for Super Scale decals. I lightly preshaded, drilled out the exhausts, carved away the nav lights and replaced them with clear plastic, and--what was I thinking???--drilled out the ring gunsight and made crosshairs with...hair! Oh, and added brake lines. The fuselage ID bands were painted, the wing's are decals.
This model was not what I expected from Hasegawa, though I do understand why they engineered it as they have. Wingman and others have built it and figured out better ways to do it, and with our experience, I do not think anyone with average building skills should have any trouble with this, or the follow-on, kits. Some of my trials and tribulations:
Critique one
More Critique
Trials
Tribulations
Murphy Strikes!
Life Goes On
P-40E Gallery
CPTKelley
Pennsylvania, United States
Joined: January 15, 2005
KitMaker: 206 posts
AeroScale: 115 posts
Joined: January 15, 2005
KitMaker: 206 posts
AeroScale: 115 posts
Posted: Sunday, November 13, 2005 - 12:48 PM UTC
Here's mine for November:
Tamiya 1:48 Messerschmitt Bf 109E-3 "Emil"built OOB as a Swiss "Emil"
Schweizer Flugwaffe
All markings masked and painted.Tamiya acrylics used.
Tamiya 1:48 Messerschmitt Bf 109E-3 "Emil"built OOB as a Swiss "Emil"
Schweizer Flugwaffe
All markings masked and painted.Tamiya acrylics used.
Defcon1
Illinois, United States
Joined: May 03, 2005
KitMaker: 174 posts
AeroScale: 132 posts
Joined: May 03, 2005
KitMaker: 174 posts
AeroScale: 132 posts
Posted: Sunday, November 13, 2005 - 08:34 PM UTC
Here's my entry for MoM November. It's a 1:72 Academy Tempest Mk.V built OOB.
Posted: Monday, November 14, 2005 - 08:15 AM UTC
Sorry for this late entry but I actually nearly forgot, I've been working on the IPMS ArmoramaUK branch stand for the Telford show this week-end
This The 1/48 Revell Republic P-47N Thunderbolt.
1. Built OOB with the only addition being the seat belts. I also replaced the pito tube with Stainless tube.
2. Kit decals have been used.
3. The NMF was achieved using Allclad II. I used only one shade but used SNJ powder to polish it to varying degrees on different panels.
4. I used a wash of artist oils and white spirit to give a used look and to tone down the brightness of the NMF.
Mal
Posted: Monday, November 14, 2005 - 10:06 AM UTC
heres my airfix 1/72 P40, built oob, pre shaded, each colour was then sprayed separately to keep the pre shaded lines, and thats about it really, a nice uncomplicated build!
CPTKelley
Pennsylvania, United States
Joined: January 15, 2005
KitMaker: 206 posts
AeroScale: 115 posts
Joined: January 15, 2005
KitMaker: 206 posts
AeroScale: 115 posts
Posted: Monday, November 14, 2005 - 01:40 PM UTC
Quoted Text
Sorry for this late entry but I actually nearly forgot, I've been working on the IPMS ArmoramaUK branch stand for the Telford show this week-end
This The 1/48 Revell Republic P-47N Thunderbolt.
1. Built OOB with the only addition being the seat belts. I also replaced the pito tube with Stainless tube.
2. Kit decals have been used.
3. The NMF was achieved using Allclad II. I used only one shade but used SNJ powder to polish it to varying degrees on different panels.
4. I used a wash of artist oils and white spirit to give a used look and to tone down the brightness of the NMF.
Mal
Hey Mal,
This month I had a difficult time deciding what to post...Bf 109, or a P-47. Guess what P-47 I was gonna use? The EXACT same plane as yours! I used the Academy kit and Cutting Edge decals though. Nice job on your 2B/2H..! maybe I'll toss mine in for December.....
Posted: Monday, November 14, 2005 - 07:36 PM UTC
Nice one james, I'm glad you didn't enter yours, phew The decals look better than the kit supplied ones.
My appologies again guys, I'm not sure if I will be able to open the voting thread for a couple of days (working for the big IPMS show this week-end) I'll do it as soon as I can. In the meantime entry is still open.
demodelbouwer Please check your PM's or PM me Ta.
Mal
My appologies again guys, I'm not sure if I will be able to open the voting thread for a couple of days (working for the big IPMS show this week-end) I'll do it as soon as I can. In the meantime entry is still open.
demodelbouwer Please check your PM's or PM me Ta.
Mal
13b
Oklahoma, United States
Joined: October 12, 2005
KitMaker: 76 posts
AeroScale: 0 posts
Joined: October 12, 2005
KitMaker: 76 posts
AeroScale: 0 posts
Posted: Wednesday, November 16, 2005 - 04:01 AM UTC
what is the deadline for entry?
Posted: Wednesday, November 16, 2005 - 04:59 AM UTC
Hi all!
Here is my entry for MOM November... sorry I'm late but I had to reinstall OSX on my Mac due to a BIG system problem...
Anyway, here is my 1/48 Tamiya Mitsubishi A6M2 "Zero" build OOB except for some panel lines that I rescribed. I build this model a few month ago with the ambition to bring a little bit of life in the monochromatic grey paintscheme. I used pastels to give different shades of grey to the various panels on the plane.
The kit is old but very nice and easy to build...
Jean-Luc
Here is my entry for MOM November... sorry I'm late but I had to reinstall OSX on my Mac due to a BIG system problem...
Anyway, here is my 1/48 Tamiya Mitsubishi A6M2 "Zero" build OOB except for some panel lines that I rescribed. I build this model a few month ago with the ambition to bring a little bit of life in the monochromatic grey paintscheme. I used pastels to give different shades of grey to the various panels on the plane.
The kit is old but very nice and easy to build...
Jean-Luc
Posted: Wednesday, November 16, 2005 - 10:13 AM UTC
Quoted Text
what is the deadline for entry?
pavel,
The deadline is normally the middle of the month, (15th), but I am tied up until Monday 21st at the earliest, so I won't be able to do the necessary, to get the voting together. So The deadline is Monday 21st November.
Mal
13b
Oklahoma, United States
Joined: October 12, 2005
KitMaker: 76 posts
AeroScale: 0 posts
Joined: October 12, 2005
KitMaker: 76 posts
AeroScale: 0 posts
Posted: Thursday, November 17, 2005 - 03:01 AM UTC
thanks, i still have time.
13b
Oklahoma, United States
Joined: October 12, 2005
KitMaker: 76 posts
AeroScale: 0 posts
Joined: October 12, 2005
KitMaker: 76 posts
AeroScale: 0 posts
Posted: Thursday, November 17, 2005 - 10:34 AM UTC
late but here it is
1/48 MH 60G
out of the box but i added some minor details: opened vents, added lines on rotors and refuling rod, straps for internal fuel tank and cousyom marker lights.
1/48 MH 60G
out of the box but i added some minor details: opened vents, added lines on rotors and refuling rod, straps for internal fuel tank and cousyom marker lights.
archerwin
Luzon, Philippines
Joined: January 05, 2004
KitMaker: 106 posts
AeroScale: 0 posts
Joined: January 05, 2004
KitMaker: 106 posts
AeroScale: 0 posts
Posted: Thursday, November 17, 2005 - 06:52 PM UTC
This is my 1/72 Academy P-47D Thunderbolt.
The model was fully foiled using normal kitchen foil and microscale foil adhesive. The paints were brushed applied. This model was a pre-airbrush era build. Decals were from the kit. The kit supplied guns were replaced with hypothermic needles.
CPTKelley
Pennsylvania, United States
Joined: January 15, 2005
KitMaker: 206 posts
AeroScale: 115 posts
Joined: January 15, 2005
KitMaker: 206 posts
AeroScale: 115 posts
Posted: Sunday, November 20, 2005 - 08:45 AM UTC
Hi All,
You may have noticed all of my photos are gone. I switched ScaleWarbirds.com to a new Domain Name Server (DNS) about 3 days ago, and it still hasn't caught up with all of the world's servers yet. If it's not up by morning (U.S. time) I'll re-post them on photobucket so that they're accessable. Sorry Mal ,not trying to be difficult!
James