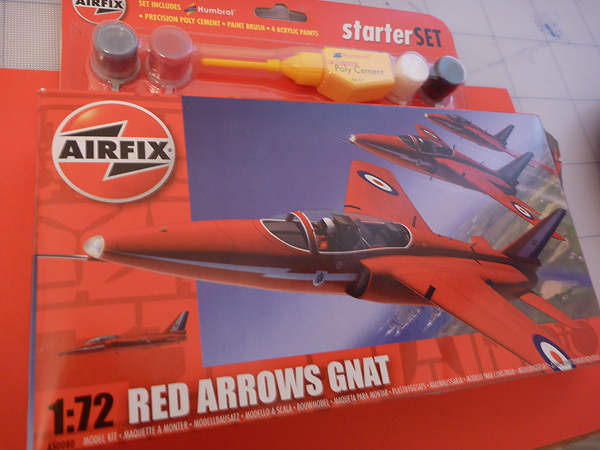
Background
The Gnat was the Red Arrows' original aircraft, which they flew from 1964 until 1979. This kit, released in 2009, is a re-boxing of a 1974 re-tool of the 1964 Folland Gnat (that came with fuel tanks, two pilots, and had featureless wheels). It is one of the Starter Set range, and includes four colours of acrylic paint, a no.2 brush, and precision poly cement glue.
In the Box
The box is a reasonable sturdy end-opener, featuring computer rendered box art (which looks pretty good to me). The grey plastic sprues are contained in a sealed bag, that also contains a second bag for the clear parts. Disappointingly, the transfers were rolled up and squashed at one end of the box.
The instructions are printed on a folded A3 sheet- one side of A4's of background on the Gnat, in 5 languages; two sides of A4 of of safety disclaimers in 24 languages; and one side of A4 illustrating the four construction stages. The main painting and transfer guide is on the back of the box.
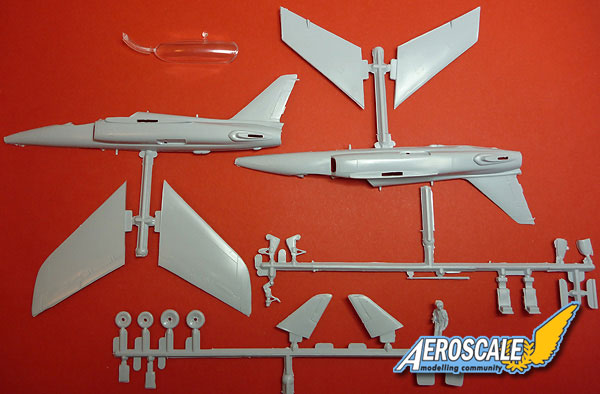
The plastic parts consist of 27 grey styrene pieces (3 are the undercarriage doors for the in-flight configuration, which are not used if you build it with gear down) and 2 clear parts.
In Detail
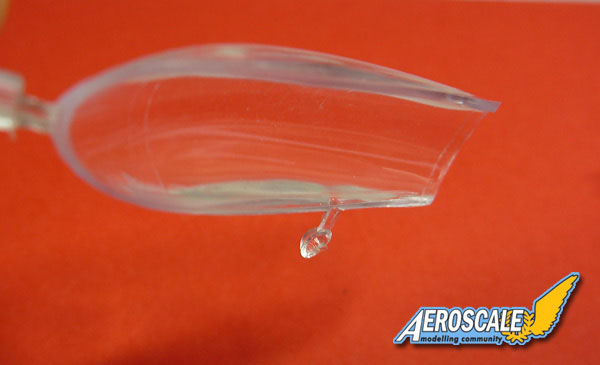
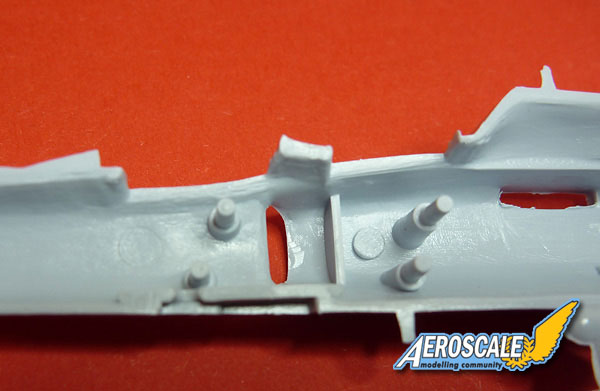
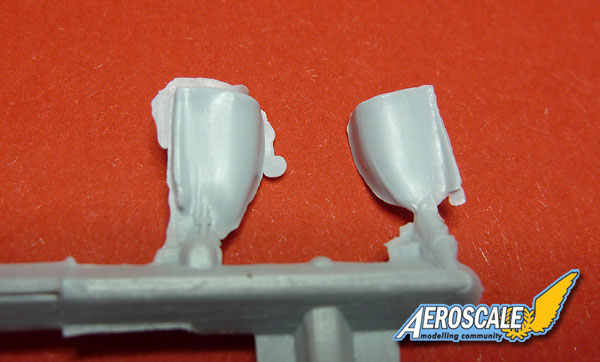
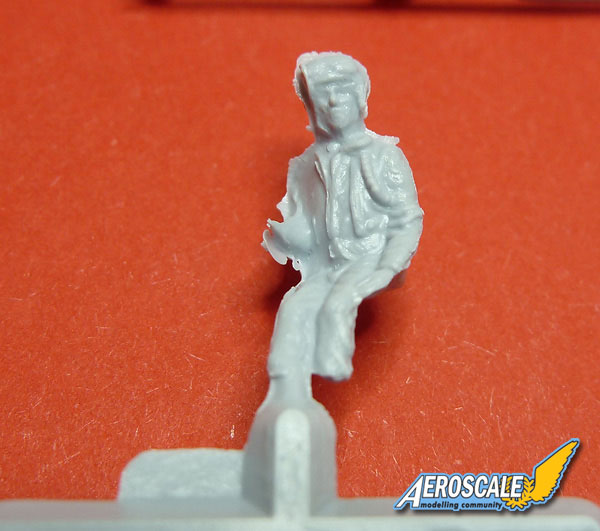
The mould is obviously very worn after so many years of use- the pilot is in a very bad shape. I found it funny that the only painting instructions for the pilot, other than red all over, was to paint his feet black. Unfortunately, his feet have not survived the 45 years, and are missing. The lower part of the port wing becomes very thick and distorted at the tip. The undercarriage doors have a lot of flash- some of which is so thick it is hard to tell were the flash ends and the part begins. Some of the parts show moulded scratches. The canopy is very thick, but surprisingly clear.
The build
I was given this kit by someone who wouldn't have built it themselves, who had in turn received it as a gift. Instead of leaving it to gather dust, I decided to complete the build within one day. I had tried building an old Airfix kit quickly before, and ended up correcting it, and taking three weeks to complete it. I knew I had to work fast, and compromise on the finish. It was at this point that I decided it would be insightful to build the kit as it was intended- using the paints, glue and brush supplied. I also used side cutters, a modelling knife, a scrap of sandpaper, Micro Set and Sol (transfer settling solutions), and some clothes pegs. With the exception of the Micro Set and Sol, I think this is a realistic set of equipment for a complete novice tackling this kit.
The build started with the cockpit being painted black. The instructions don't indicate a colour for the deck under the canopy, so I painted this black as well. The two ejector seats sit on two pegs coming form only the starboard side. At first I placed them right up against the fuselage side, as the pegs had a step at this point, and it seemed like the right thing to do. It wasn't. This places the seats totally off-centre in the cockpit. Placement of the seats has to be done with the fuselage halves dry-fitted together. The high points of the black areas of the cockpit and seats were highlighted with a few shades of grey that was mixed from the black and white paints. The highlighting was done by wet painting and blending instead of dry-brushing, as I only had the one brush, and didn't want to damage it.
The pilot was painted next, in a red flying suit and helmet, with his visor, straps, mask and oxygen tube in black. I used some grey to highlight these areas. I mixed a bit of red into the grey to make a skin colour (or near enough) for his face.
With some dry-fits and minimal scraping, the fuselage halves went together well. The glue was surprisingly good- able to fill small gaps, but basically being a welding type glue. The thin metal applicator is very good, bit a little too thick for real detail work. I also managed to pull the metal part out when wiping it.
The port lower wing part, as already mentioned, was distorted and required a lot of sanding to lie flush in the upper part. Both wings left a large gap on the underside of the join to the fuselage. The stabilisers fitted quite well, especially when the glue was applied quite thickly, then sanded back after it had dried.
The canopy fit was OK, there was a little gap on either side, but nothing the 5 or 6 coats of paint didn't fill. The second clear part is the light in the nose, and this was not added until the model was painted.
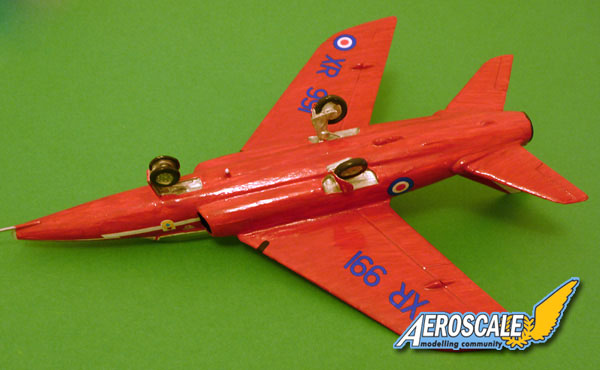
The undercarriage parts had a lot of flash, and the location holes were very vague, especially as they had to be opened up for the parts to fit. There was no indication in the instructions as to what angle the legs should be at, so I guessed. It would be easier to paint the parts separately, especially with the large brush, but I chose to assemble first to save time.
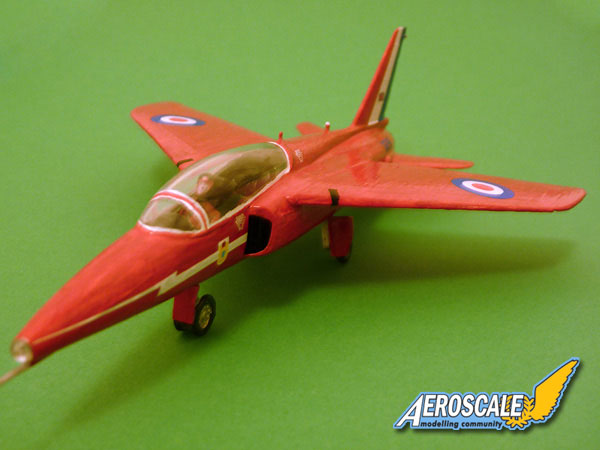
I decided (after experiencing the poor covering power of the red paint on the pilot) to paint the whole aircraft white, as there was a whole pot of white supplied, and it was only to be used for the rim of the canopy. I feared I might not have enough red to give enough coats to cover the model well enough! The white paint, especially when thinned a little, is very prone to bubbling. It had to be brushed on very slowly because of this.
After a second coat of white was applied to the upper surface only, I started with the red. The red is a high-gloss (as was the white), and has very poor covering properties. I have never used an acrylic paint that is so bad. The paint pots are also a hazard- not only is it certain the hinge will fail (even after only a few times opening and closing it), but the design ensures that a lot of paint sits around the rim, which sprays out when it is closed. I ended up covering the pots in tissue every time I had to close them.
In the end, the model had three, and in some places four, coats of red before it looked even enough to call it a day. By then, most of the surface detail was lost- I didn't care that the panel lines were raised any more.
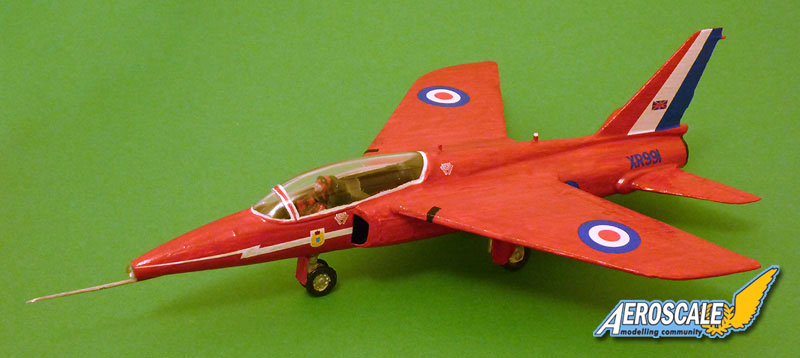
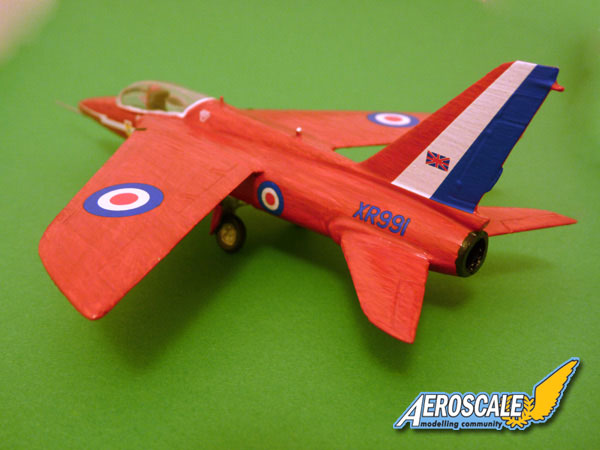
The transfers are quite numerous, and represent a Red Arrows aircraft from RAF Little Rissington in the 1960's. The large fin transfers, and the lightning bolt super-fine nose markings, are tricky to apply, as is centring the separate roundel red centres.
Watch the build in time-lapse on
You-Tube.
Conclusions
I wish Airfix would stop selling its old kits as starter sets, they must put off hundreds of children by giving them the wrong impression of the current state of the plastic modelling industry. Some of the moulds, like this one, are simply too old to be used any more. Others are not accurate. I would be happy for them to be re-released every decade or so under a limited edition 'classic' range, but not targeted at beginners. They should be packaging their latest kits as starter sets, not their oldest.
The extras that come with the kit are obviously there for the complete beginner. The brush was surprisingly good, but the single size could not perform the task of spreading paint over the large areas of the kit, and was too big for detail work. The paint was the lowest point- they cannot cover at all, and the pots were a poor design. The glue applicator is very good, and I would consider using it for other kits.
Please remember, when contacting retailers or manufacturers, to mention that you saw their products highlighted here - on
AEROSCALE.


Comments