This kit is announced as a re-boxing of an old Kopro Su-7 kit. So, even before the review sample landed on my doorstep I had already checked on the net what other modellers thought of the original Kopro kit. It was a sobering experience. Reviews emphasised the need for buckets of putty, poor fit, Frankenstein ejection seat, empty cockpit... The only positive note was that the overall dimensions of the kit were fairly accurate so if one could deal with all the flash and the many ejector marks then the result could be good... from a distance.
Why on earth would Eduard jeopardise its good reputation by releasing something like that on the market? I dipped my keyboard in venom and prepared to write a highly critical review.
But I was mistaken (again) and it turned out completely different.
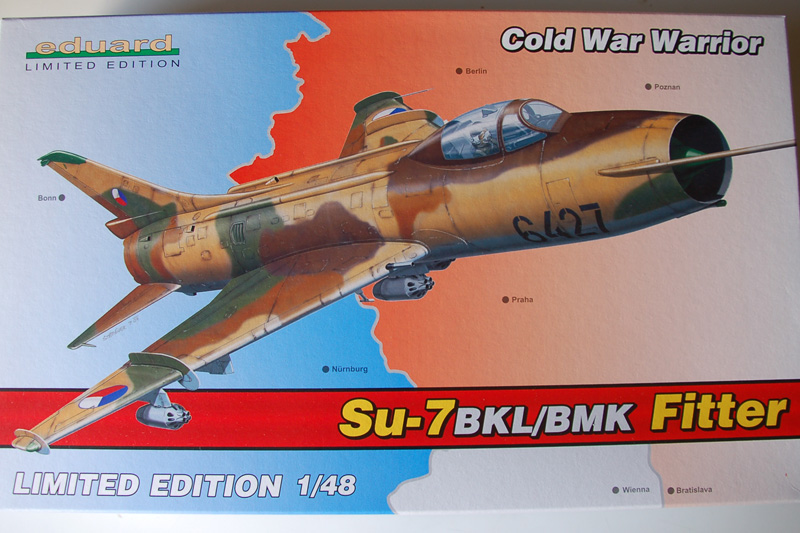
The box
The box is quite small and shows a Su-7 against a backdrop of a red map of the western part of the old Soviet block. It is also very informative indicating 6 different color schemes, and promising a highly detailed ejection seat.
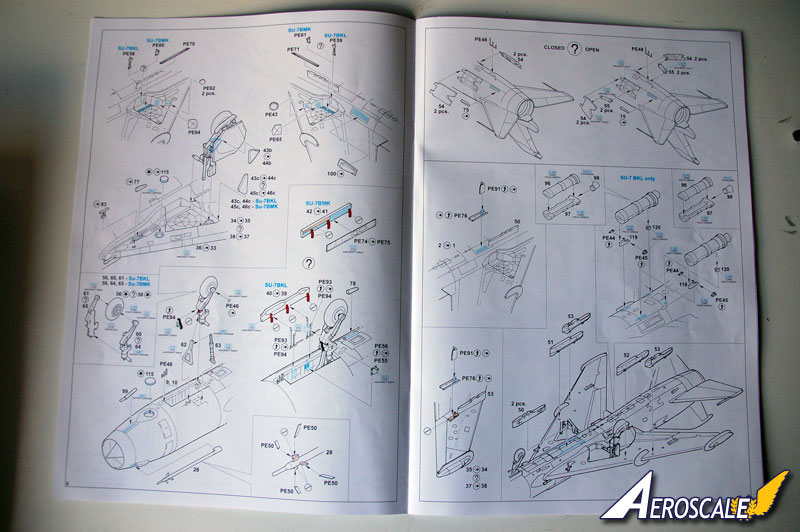
The instruction sheet
Opening it revealed a beautiful instruction sheet, or should I say 16 pages booklet on high quality glossy paper. The 6 different color schemes are documented on 6 x A4 color printed pages with an additional page for all the stencil data. Very nice, but I regret that there is no mention of Federal Standard color numbers. I will have to work with comparison tables again to translate the Gunze numbering to whatever paint I have in my toolbox.
This aside, this instruction sheet is very informative and promises lots of goodies to be found in the box.
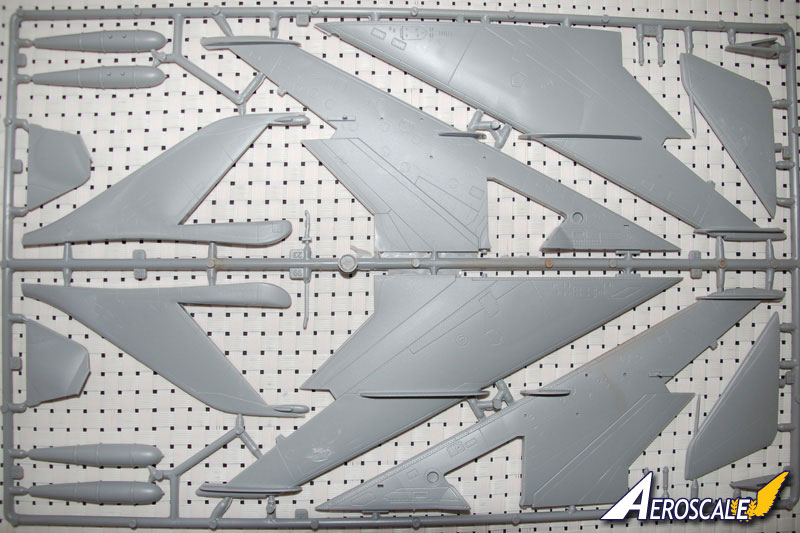
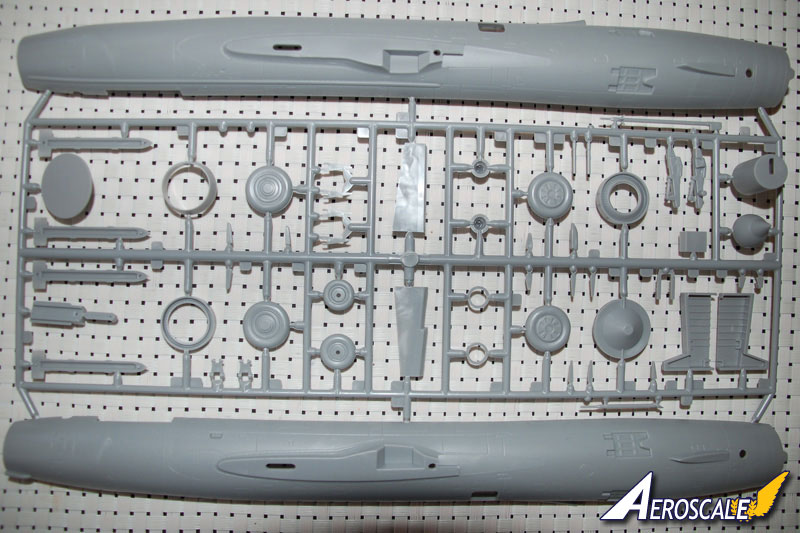
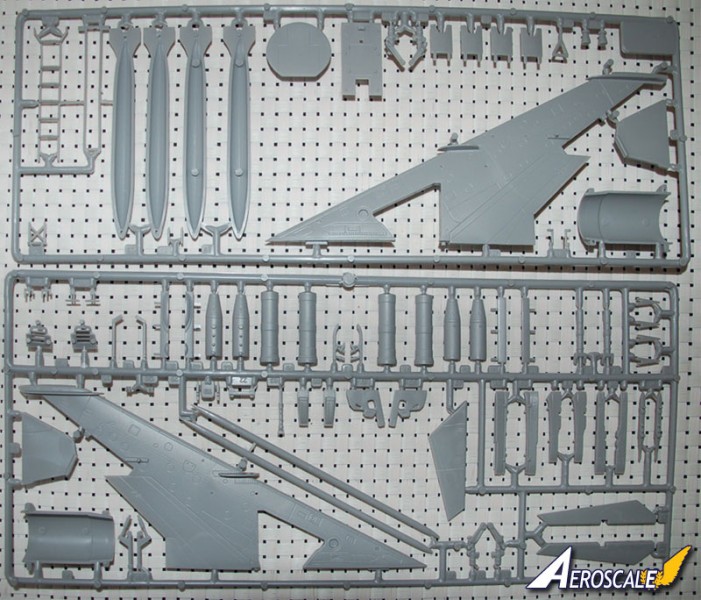
The plastic parts
Under the instruction sheet I found a plastic bag with 4 sprues. I studied each one of these in search of flash, ejector pins... and found... none. OK, the parts don't look as crisp and smooth as some other modern offerings but are still very acceptable. The panel lines are deep, maybe a bit too large, but won't compromise the finish of the model.
Overall the plastic gives a bit of a mixed feeling; you've got everything you need but it does not excite too much.
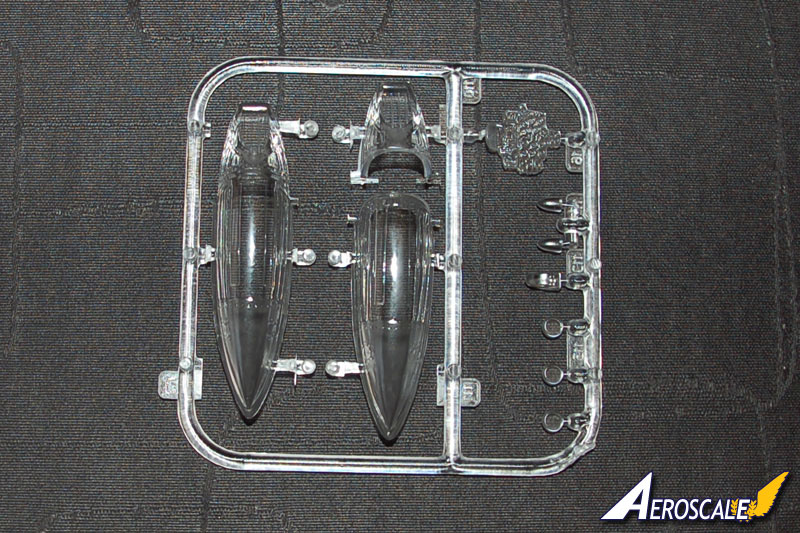
There is also an additional small bag with the transparent parts. These include the main instrument panel for the cockpit and two different canopies, one in closed position and one in open position. This is a very good idea considering the many cries for "help, I ruined my canopy" on the Aeroscale forum. These clear parts have the Eduard signature all over them. Crisp and precise, the way it should be.
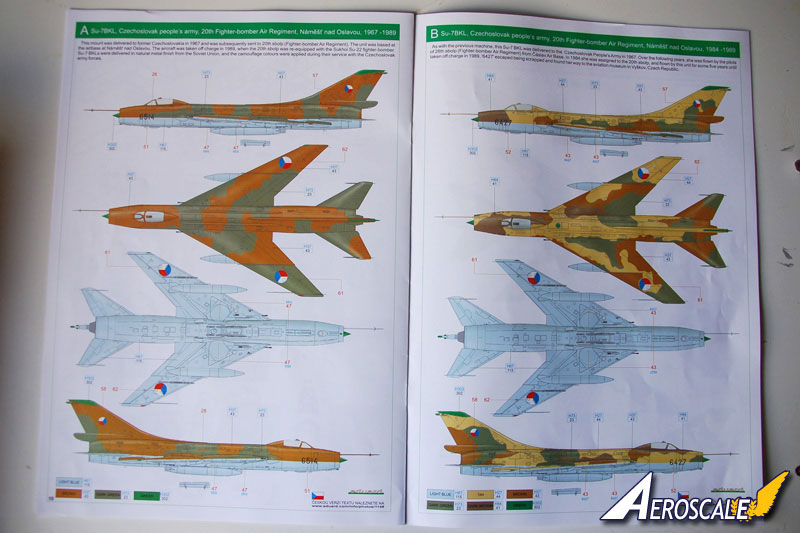
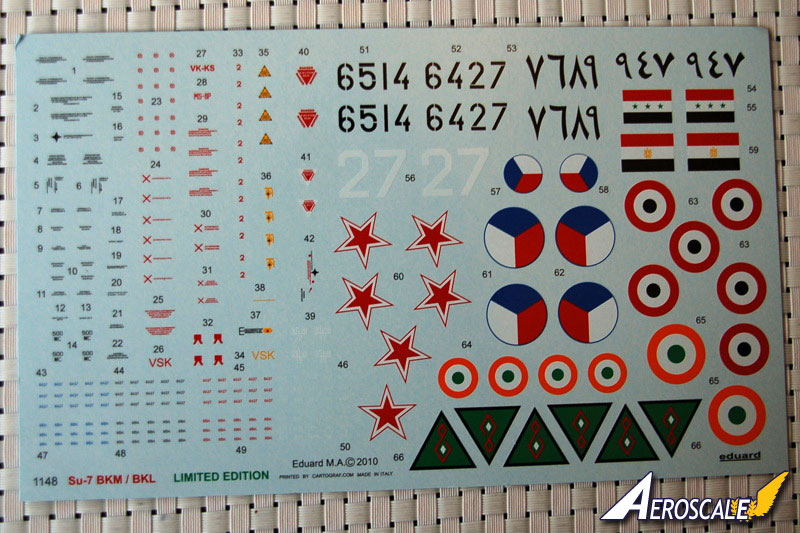
The decals
The decals look very nice and are available for the 6 different finishes proposed by Eduard. These look really good which should not be too much of a surprise considering that they are made by Cartograf.
And now for the real goodies
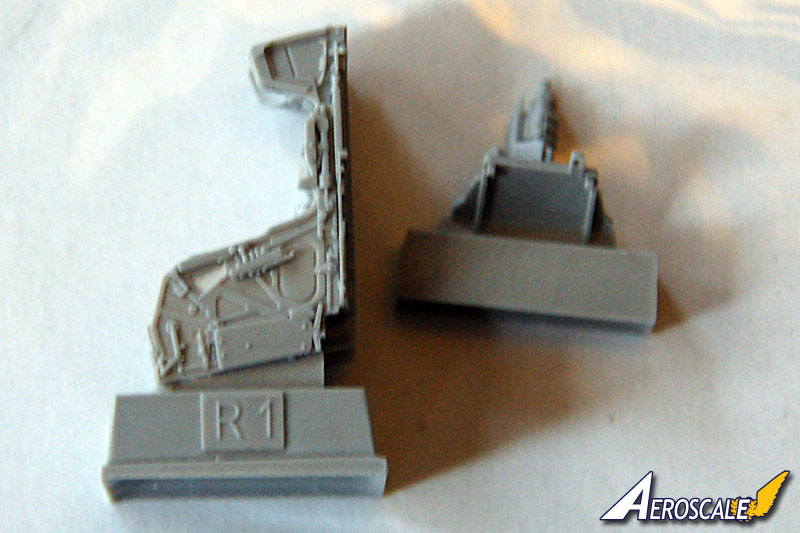
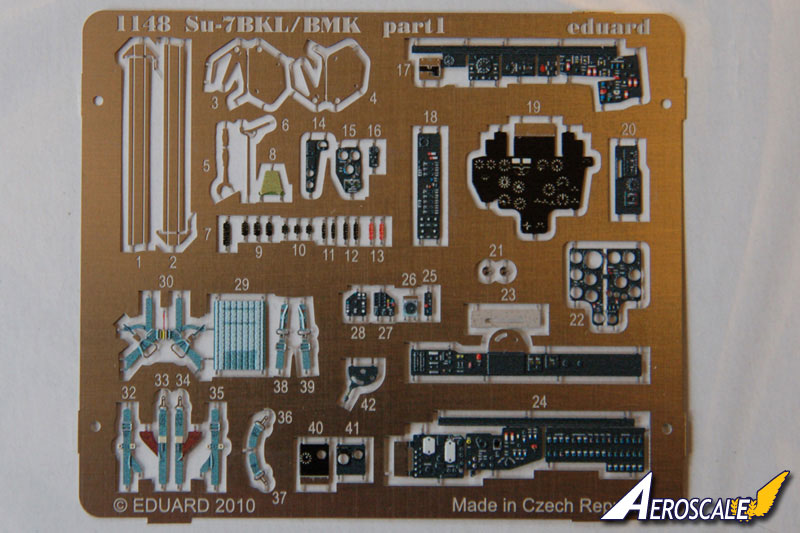
Eduard dealt very efficiently with the criticisms related to cockpit of the original Kopro kit. The "Frankenstein" ejection seat is simply replaced by an ultramodern Brassin seat. It is the first time that I've laid eyes on this new Eduard line of ejection seats combining resin with photo-etch parts... and believe me, its stunning.
The side panels of the cockpit, the pilot's harness, and the instrument panels are all available in photo-etch, pre-painted and nicely detailed. This should give an eye catching cockpit all together but it does not look like a beginners job to me.
Actually, this seat and the cockpit photo-etch parts that come with it could deserve a review on their own. I promise that I will pay a lot of attention to this when building this plane.
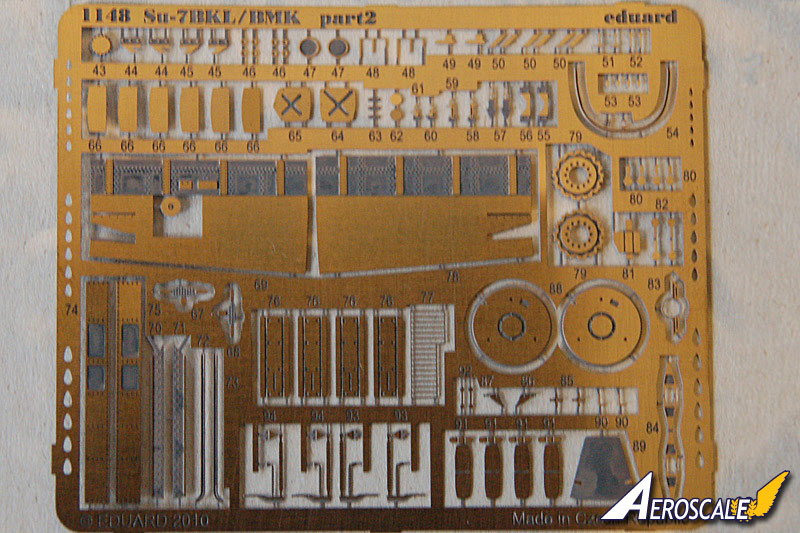
Even better, there is another sheet of around 95 photo etched parts adding further detail to canopy, wheel bays and fuselage. The downside is that some of these parts are tiny and/or look very fragile. In some cases the instructions ask for the removal of part of the plastic pieces to replace these with, much better, photo-etch items. For someone not used to dealing with photo-etch, or modifying plastic pieces, this might become a challenge.
The final item is a mask sheet which should deal efficiently with that boring job of masking canopy and wheels before painting.
but there is still that creeping doubt
The original Kopro kit was also criticised for bad fit. So how would this kit do? It will take me quite some time to build this thing completely, but I wanted to give a sneak preview of the fit by dry fitting a few parts and see if any deficiencies would show up.
Again this experiment turned out for the best. OK, it isnt a Tamiya fit and it will require some care. However, there is no question of needing huge quantities of putty, at least not with the fuselage, or the wings, or the tail which constitute the main parts of the plane.
I was surprised with the size of the Su-7 fuselage. While in reality only a meter longer than the MiG-21 it feels a lot bigger than what I remember from the MIG fuselage. It will be interesting to see how it compares to my MiG 21 model when finished.
It also struck me, working with the plastic, that is very soft. This could give problems as I have the experience that soft plastic can overreact to the Revell Glue that I am using. A little bit too much glue can lead to softening up the plastic leading to dents in the surface and annoying repair work.
I suspect that using softer plastic allows working with much lower temperatures and pressures during molding. This may be a good method to avoid flash with old molds.
All in all, this test convinced me that the plastic is of sufficient quality and will not ruin the show.
Conclusion
On the Eduard site, this kit is priced at 60 dollar. This seems, compared to competition, and taking into account the generous use of resin, photo-etch and decals, to be worth every penny.
Where the original plastic parts take care of the bare shape of the model, the resin and photo-etch will, in combination with very good modelling skills, lead to an eye catching model of a unique plane.
The only problem that I currently see is that the kit is presented as "re-boxed", suggesting that it is nothing more than old junk in a new wrapping. This may be very negatively perceived by the modelling community considering the harsh criticism towards the Kopro offering available on the net.
Only for this reason it may be better to change terminology to "re-engineered" kit. This would in this case be much closer to reality, give Eduard the credit it deserves and ensure a good future for this model.
Now, let's start building and prepare a full build review. Lets hope that I have what it takes to finish this one successfully.
Please remember, when contacting retailers or manufacturers, to mention that you saw their products highlighted here - on AEROSCALE.
SUMMARY
Highs: An unique subject with lots of goodies.It shows clearly that re-engineering old kits has great potential. A potential eye-catcher on model shows.Lows: The quality of plastic parts is much lower than the new parts. Beginners may suffer with modifying the plastic for the photo-etch parts.Verdict: A kit difficult to objectively rate as it combines very high quality photo-etch and resin with poorer original plastic. Still a very recommendable kit for more experienced builders.
Our Thanks to Eduard! This item was provided by them for the purpose of having it reviewed on this KitMaker Network site. If you would like your kit, book, or product reviewed, please contact us.
I made my first airplane models when I was about 11, a Mistubishi Zero, a Messerschmidt BF 109 and of course, a Spitfire. They were all Airfix and all 1/72. Sounds familiar? I remember I could not even pronounce Mitsubishi, I used to call it Mutsibutsi.
I continued building mostly airplanes until...


Comments