OFFICAL: Camm-paign, Sir Sydney Camm Campaign
Texas, United States
Joined: February 22, 2008
KitMaker: 5,026 posts
AeroScale: 2,811 posts
Posted: Friday, July 15, 2011 - 11:49 AM UTC
@ Damian: DITTO what Chris said.
@ JP: I am enjoying your build. Regarding Mals masks let me know how they come out. I may need to get an address to aquire some myself.
@ Philip: your Hunter is coming along nicely, great a/c I still remember the first time that I had the opportunity to see one back in the 1960's.
@ Nick: it is nice to see someone who has the time (passion) to build (2) a/c.
@ Samantha: I let the rodents earn their keep by giving them house chores so that I can do some building

BTW how is that Trumpeter Sea Fury?
Bob
If it aint broke dont fix it.
Scotland, United Kingdom
Joined: February 07, 2008
KitMaker: 1,699 posts
AeroScale: 1,384 posts
Posted: Friday, July 15, 2011 - 01:37 PM UTC
Can whole heartedly recommend Mals Masks. Look what he did for me with my sunderland.
http://www.flickr.com/photos/jaypee_/4895102375/Compared to that, roundels are a cinch.
link to his article on aeroscale
https://aeroscale.kitmaker.net/forums/110021&page=1Just PM Holdfast on here they are one and the same person.
Texas, United States
Joined: February 22, 2008
KitMaker: 5,026 posts
AeroScale: 2,811 posts
Posted: Friday, July 15, 2011 - 03:16 PM UTC
JP,
Thanks for the link and information, the markings on your Sunderland looked really good. I will give Mal's Masks a try.
Bob
If it aint broke dont fix it.
Wisconsin, United States
Joined: March 30, 2011
KitMaker: 199 posts
AeroScale: 150 posts
Posted: Wednesday, July 20, 2011 - 09:40 AM UTC
I know I am a bit late on the start, but xbox is boring, so I started working on a 1/48 AV8-B by Hasegawa. I have a few pics that I took, but kinda neglected to get a few before priming it this morning. I will have more though!!! The cockpit decals didn't thrill me, so I drybrushed those, and used tamiya clear green on the glass cockpit screens. This is the first Hasegawa kit that I needed to break out the putty on. For those that have built this one, the wing assembly is the usual wing (top and bottom halves) and there is another 2 piece assembly in the front of that. Well, it did not want to sit nicely on the fuselage, so I had to work the putty a bit. But, no biggie. As far as size goes, it is rare that I build modern 1/48, so it took some getting used to seeing the thing darn near as long as my 1/48 Mitchell.


On the Bench: 1/72 Italeri Tornado Pinup Campaign
On Deck: ?
Scotland, United Kingdom
Joined: February 07, 2008
KitMaker: 1,699 posts
AeroScale: 1,384 posts
Posted: Thursday, July 21, 2011 - 02:24 AM UTC
Welcome flyboy, That's the spirit! Paint it black and a bit of dry brush to create interest in there. That is enough. Too many builds unfinished with cockpits started. I'm looking at you JP!!
Keep her lit flyboy.
Mal's masks arrived and look really good and easy to use.
Will see how fool proof they are tonight when I spray em.

#041
Kobenhavn, Denmark
Joined: July 20, 2006
KitMaker: 10,069 posts
AeroScale: 3,788 posts
Posted: Thursday, July 21, 2011 - 04:51 AM UTC
Quoted Text
As far as size goes, it is rare that I build modern 1/48, so it took some getting used to seeing the thing darn near as long as my 1/48 Mitchell.
Nice start, Flyboy. The cockpit looks good.
I know what you mean about size. Just started a Tomcat for another campaign and the size is astonishing compared to a Bf 109 in same scale.
I have not yet started my entry, but I am planning on the small Matchbox Harrier is US markings. Should be a quick build.
Campaign'oholic - 252+ campaigns completed
Wisconsin, United States
Joined: March 30, 2011
KitMaker: 199 posts
AeroScale: 150 posts
Posted: Thursday, July 21, 2011 - 07:05 AM UTC
Which tomcat kit? I am thinking of building one for my older brother. Him and his girlfriend were in the last operational squadron, and there for the final operational flight. He did ordinance, she serviced avionics. I want to find a good kit, and have been disappointed by the revell kits I have purchased over the past few months, so I am attempting to avoid them, unless their tomcat is solid of course.
On the Bench: 1/72 Italeri Tornado Pinup Campaign
On Deck: ?
#042
England - North East, United Kingdom
Joined: November 18, 2006
KitMaker: 2,828 posts
AeroScale: 1,720 posts
Posted: Thursday, July 21, 2011 - 09:59 AM UTC
Quoted Text
Which tomcat kit? I am thinking of building one for my older brother. Him and his girlfriend were in the last operational squadron, and there for the final operational flight. He did ordinance, she serviced avionics. I want to find a good kit, and have been disappointed by the revell kits I have purchased over the past few months, so I am attempting to avoid them, unless their tomcat is solid of course.
A bit

but personally I would go for the Hasegawa kit, it has it's flaws and can be a sod to build in places but it's a nice kit if you take your time with it. Just check out the
Cats out of the Bag Campaign that's currently running for some inspiration or look at the previous
Tomcat campaign that was run a couple of years ago. There was also a discussion about the Hasegawa kit a while back
F-14 QuestionModellers Creed: This is my toolbox. There are many like it, but this one is mine. My toolbox is my best friend. It is my life. I must master it as I must master my life. My toolbox, without me, is useless. Without my toolbox, I am useless.
Bayern, Germany
Joined: January 02, 2011
KitMaker: 279 posts
AeroScale: 239 posts
Posted: Friday, July 22, 2011 - 08:42 AM UTC
Hi

!
Whoa, a lot has happened since my last visit! Nice to see the entries here!
@ Flyboy: I absolutely agree with Jaypee. Your way of handling the cockpit is absolutely right to speed things up. I have done the same with my Camm-Paign Hunter, just detailing the bang seat a little bit with self made seat belts and eject triggers:

I think the overall impression counts in the end, the cokpit makes only a small part of it. But everybody can of course decide oneself how much effort he puts into that.
@ Nick: Just looking forward to seeing those 2 being finished...

@ Philip: Very nice camo on that Hunter! I have heard that the Xtracrylics dry very fast. Which ones did you use for your model?
Servus,
Sebastian
LtCol Henry Blake: "Radar, whatever it is: sign it, cancel it or order five more!"
Wisconsin, United States
Joined: March 30, 2011
KitMaker: 199 posts
AeroScale: 150 posts
Posted: Friday, July 22, 2011 - 12:21 PM UTC
@Allen Thanks for the suggestion, I got the 1/72 low vis hasegawa kit. I am kinda pumped. I am going to toy with some weathering/griming on this harrier for the carrier environment. I preshaded, and light ghosted the bottom, tomorrow I will mask for starting the top coats. Luckily I caught part of "Greatest Ever" on the military channel, and they were profiling the harrier. And, they had the exact aircraft that I am modeling. That, and I will be at Air Venture next weekend, so I will get some close ups. Always a beautiful aircraft in an ugly kind of way.
On the Bench: 1/72 Italeri Tornado Pinup Campaign
On Deck: ?
#041
Kobenhavn, Denmark
Joined: July 20, 2006
KitMaker: 10,069 posts
AeroScale: 3,788 posts
Posted: Friday, July 22, 2011 - 11:22 PM UTC
Flyboy, I am building the Monogram F-14A tomcat in 1/48 scale. It is a decent kit although the details could be better. Some filler is needed - especially around the intakes and front fuselage.
More will follow in the tomcat campaign tread as my build progresses, but so far I definitely consider the kit value for money. Especially as it includes a full load of ordnance. 2 sparrows, 2 sidewinders, 4 phoenix, fuel tank.
Campaign'oholic - 252+ campaigns completed
Wisconsin, United States
Joined: March 30, 2011
KitMaker: 199 posts
AeroScale: 150 posts
Posted: Saturday, July 23, 2011 - 05:38 AM UTC
@Sebastian: That hunter looks good, did you rescribe the panels? I like the sharpness of them. Ill get some hunter pics next weekend to post on here.
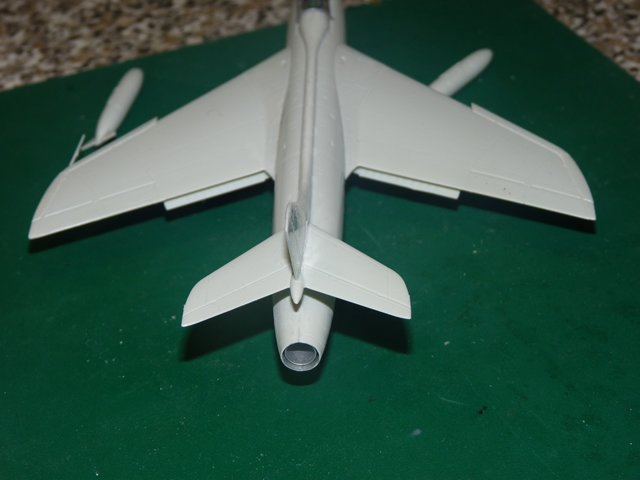
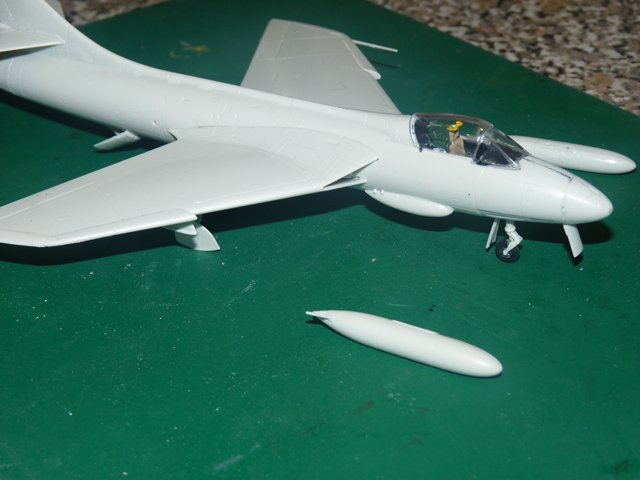
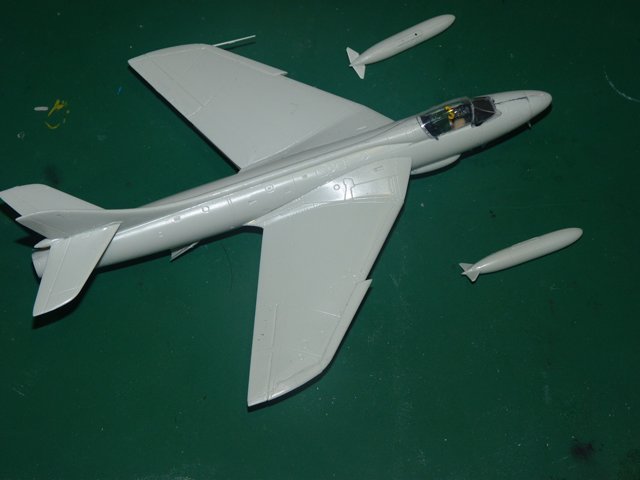
So, I know this isn't much, but here is a progress pic. The aircraft is assembled, minus the landing gear. I thought to leave the vertical stabilizer off, to aid in the large decal placement. The bottom is masked, so once I finish work today it is on to the topside! I need to track down some armament details, as I want this thing ready for a strike, and all that is in the box are AIM-9s and drop tanks.

On the Bench: 1/72 Italeri Tornado Pinup Campaign
On Deck: ?
Bayern, Germany
Joined: January 02, 2011
KitMaker: 279 posts
AeroScale: 239 posts
Posted: Saturday, July 23, 2011 - 07:48 AM UTC
@ Flyboy: I only rescribed those lines which had disappeared during sanding. The recessed panel lines of this Kit (Revell 1:72 Hunter FGA. 9) are really crisp and sharp. I just highlighted them with a wash of diluted oil paint.
Nice progress pic of your "jump jet"

Servus,
Sebastian
LtCol Henry Blake: "Radar, whatever it is: sign it, cancel it or order five more!"
#041
Kobenhavn, Denmark
Joined: July 20, 2006
KitMaker: 10,069 posts
AeroScale: 3,788 posts
Posted: Saturday, July 23, 2011 - 08:36 AM UTC
Nice progress, Flyboy. It looks good so far. What ordnance will you hang under the wings?
Looking forward to see more.
Campaign'oholic - 252+ campaigns completed
England - North East, United Kingdom
Joined: May 22, 2008
KitMaker: 649 posts
AeroScale: 434 posts
Posted: Sunday, July 24, 2011 - 04:31 AM UTC
If anyone fancies doing a Hurricane Mk IID - we have the latest 3D kits Hurricane Mk IID conversion set in stock.
http://www.mjwmodels.co.uk/homehttp://stores.ebay.co.uk/MJW-Modelsthanks
Mike
Wisconsin, United States
Joined: March 30, 2011
KitMaker: 199 posts
AeroScale: 150 posts
Posted: Sunday, July 24, 2011 - 05:22 AM UTC
@Jesper: I have to check the numers boxes of goodies I have. I read that they have carried jdams, so I think I have a few of those, otherwise I have a 1/48 Revell A-10 that drove me to insanity, so I just put it down, and there is a good stash of weapons in there. I will see if I either have some rocket pods, or some 500 pounders.
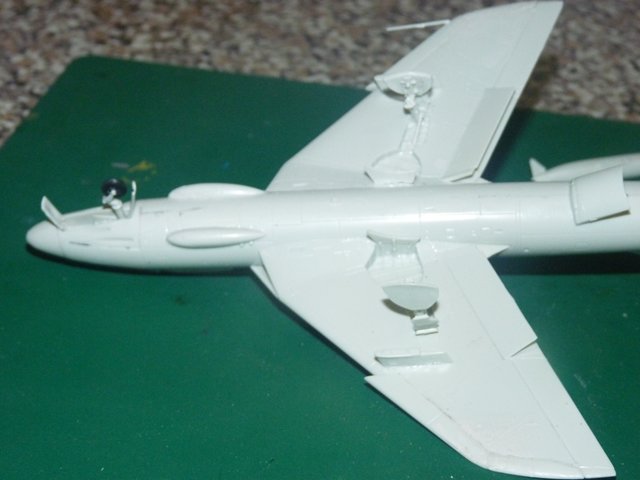
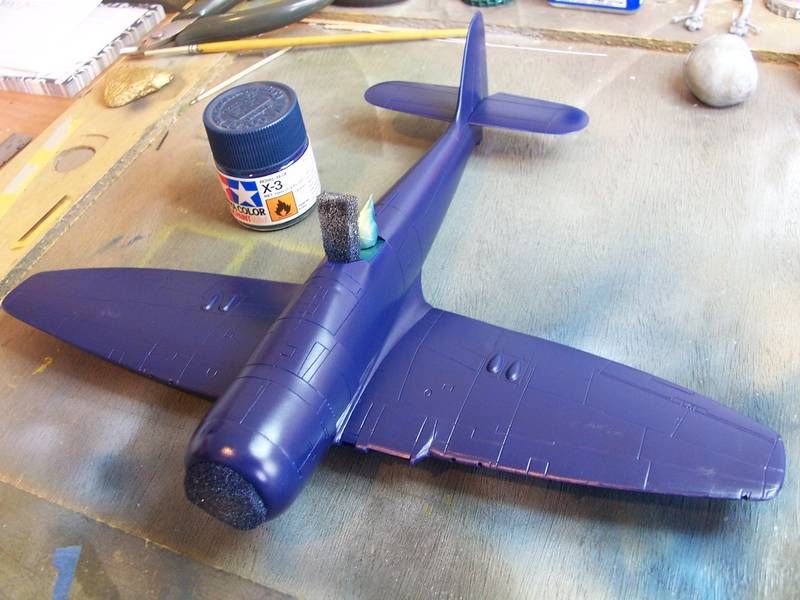
As promised I did get some more work done, as saturday shifts are short, and sunday shifts start late. I usually only use tamiya paints, but I had some trouble color matching, so I went with the Model Master Acrylics (dont like to stink the condo up!) I never really got into the habit of priming models, and about 90% of this one did get primed. But with tamiya, I have never had an issue with paint lifting with the mask... Can't say the same here. The 10% that did not get primed before coating lifted, so I'll have to touch that up tonight. Luckily I do not need to mask much more on the thing. But, I dark Ghosted the top, Gunship Greyed wing, and Blue Greyed the nose. So, hopefully tonight I can put in some work on the gear and gear doors.


On the Bench: 1/72 Italeri Tornado Pinup Campaign
On Deck: ?
Wisconsin, United States
Joined: March 30, 2011
KitMaker: 199 posts
AeroScale: 150 posts
Posted: Wednesday, July 27, 2011 - 05:25 AM UTC
On the Bench: 1/72 Italeri Tornado Pinup Campaign
On Deck: ?
Bayern, Germany
Joined: January 02, 2011
KitMaker: 279 posts
AeroScale: 239 posts
Posted: Wednesday, July 27, 2011 - 08:23 AM UTC
@ Michael aka Flyboy: Very promising pix! Nice!!!
LtCol Henry Blake: "Radar, whatever it is: sign it, cancel it or order five more!"
AussieReg
 Associate Editor
#007
Victoria, Australia
Joined: June 09, 2009
KitMaker: 8,156 posts
AeroScale: 3,756 posts
Posted: Saturday, July 30, 2011 - 01:07 AM UTC
Hi guys. I've been spending what precious little bench time I have mainly on an old Monogram 1/48 Voodoo for the Century Series Campaign, but I have managed to sneak a little time on the Sea Fury.
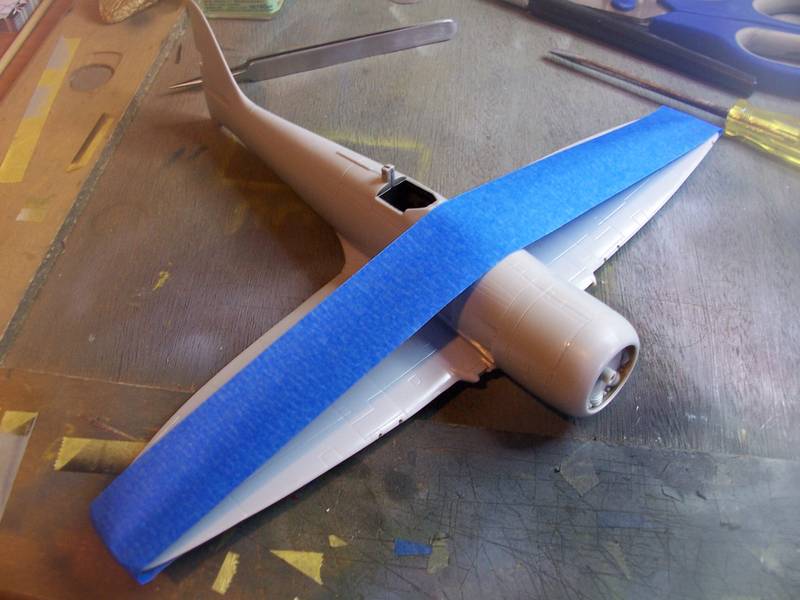
Basic assembly is complete, and the fit is quite good. Taping the wings up to get a bit of dihedral has eliminated any gap at the wing roots, and there is only a small spot to fill on the underside where the wing assembly meets the rear fuselage.
More pics soon.
Cheers, D
ON the bench
Revell 1/24 '53 Corvette (building as '54)
Revell 1/24 BMW 507 Coupe and Cabrio
Italeri 1/48 Me262 B-1a/U1 Nightfighter
Monogram 1/24 '57 Chevy Nomad
Dragon 1/350 USS Frank Knox DD-742
#041
Kobenhavn, Denmark
Joined: July 20, 2006
KitMaker: 10,069 posts
AeroScale: 3,788 posts
Posted: Saturday, July 30, 2011 - 08:06 AM UTC
Nice progress, Flyboy. This one is nearing the finish line fast. Looks great so far.
Looking forward to see more
Campaign'oholic - 252+ campaigns completed
Wisconsin, United States
Joined: March 30, 2011
KitMaker: 199 posts
AeroScale: 150 posts
Posted: Monday, August 01, 2011 - 08:41 AM UTC
On the Bench: 1/72 Italeri Tornado Pinup Campaign
On Deck: ?
#243
England - North East, United Kingdom
Joined: March 21, 2008
KitMaker: 996 posts
AeroScale: 915 posts
Posted: Monday, August 01, 2011 - 12:20 PM UTC
Andrew
Pfalz DIIIa, Eduard 1/48 Uffz Max Hitschler Jasta 18 Late 1917
AussieReg
Associate Editor #007
Victoria, Australia
Joined: June 09, 2009
KitMaker: 8,156 posts
AeroScale: 3,756 posts
Posted: Friday, August 05, 2011 - 04:59 PM UTC
ON the bench
Revell 1/24 '53 Corvette (building as '54)
Revell 1/24 BMW 507 Coupe and Cabrio
Italeri 1/48 Me262 B-1a/U1 Nightfighter
Monogram 1/24 '57 Chevy Nomad
Dragon 1/350 USS Frank Knox DD-742
#305
Christchurch, New Zealand
Joined: February 01, 2006
KitMaker: 1,673 posts
AeroScale: 1,517 posts
Posted: Friday, August 05, 2011 - 08:05 PM UTC
@Aussie: Damn fella that's looking good! The kit looks like it's a winner despite what all the pundits have said. You've done a fine job! Now if I could just get my hands on that large scale Sea Fury I want ...... Hunny!!??? Can I get that sea Fury NOW??? LOL okay my evil toy witch says NO! For now at least ..... but i'm sure one will materialise in my stash .... somehow

AussieReg
Associate Editor #007
Victoria, Australia
Joined: June 09, 2009
KitMaker: 8,156 posts
AeroScale: 3,756 posts
Posted: Friday, August 05, 2011 - 10:13 PM UTC
Thanks Chris. I've had no problems with putting this kit together, as long as I test fitted and took my time, and I barely used any putty as well. I found with this kit, as with a few of the old Monogram kits I do as well, one of the biggest problem areas is the locating pins. There tends to be a raised section of the edge of the part either side of the pin, and when you cut the pin off and sand down the raised section the gaps mostly disappear.
Clear gloss then decals next.
Cheers, D
ON the bench
Revell 1/24 '53 Corvette (building as '54)
Revell 1/24 BMW 507 Coupe and Cabrio
Italeri 1/48 Me262 B-1a/U1 Nightfighter
Monogram 1/24 '57 Chevy Nomad
Dragon 1/350 USS Frank Knox DD-742