OFFICIAL: British Aerospace Campaign Thread
United States
Joined: February 01, 2009
KitMaker: 1,233 posts
AeroScale: 663 posts
Posted: Friday, July 06, 2012 - 03:22 AM UTC
Jessie C.------------beautiful model. I am sure you had your hands full with that decal job but the end result is outstanding.
Regards, Ian

It is a fact that under equal conditions, large-scale battles and whole wars are won by troops which have a strong will for victory, clear goals before them, high moral standards, and devotion to the banner under which they go into battle.
-Georgy Zhukov
United States
Joined: December 26, 2008
KitMaker: 288 posts
AeroScale: 195 posts
Posted: Saturday, July 07, 2012 - 03:31 AM UTC
Jessie
Fantastic A300! That scheme looks great on your build.
Have fun modeling!
Mike

Western Australia, Australia
Joined: May 04, 2012
KitMaker: 60 posts
AeroScale: 43 posts
Posted: Thursday, July 12, 2012 - 04:13 PM UTC
Ok here it was two weeks ago before i went off tow work ready for the paint shop
and now i am back form work, stright into it with the start of the painting
with some light shading
United Kingdom
Joined: June 08, 2012
KitMaker: 49 posts
AeroScale: 26 posts
Posted: Saturday, July 14, 2012 - 08:45 AM UTC
Hi all I'm sorry about the lack of progress on the Italeri harrier gr3 but I have had a lot to deal with lately in the shape of a problem ridden F 86 Sabre for the fighters campaign. Also because there simply has not been any progress on the Harrier because I cant find the clear parts for the canopy anywhere so I may have to send off to Italeri for some new parts or if I really can't get my hands on any then I may have to drop out of the build which would be a real downer for me
Anyway all your builds are looking great so far and I am really looking forward to seeing the end products!
Victoria, Australia
Joined: September 19, 2003
KitMaker: 708 posts
AeroScale: 674 posts
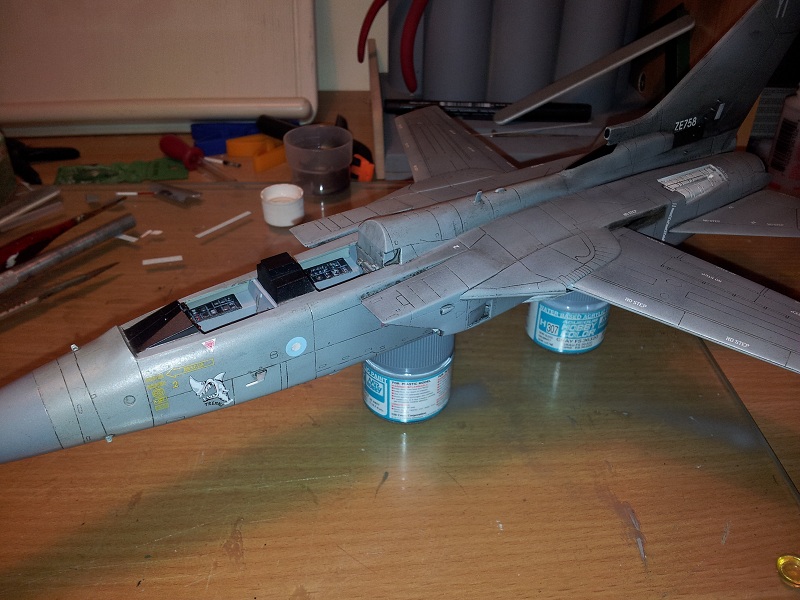
Posted: Thursday, July 19, 2012 - 10:17 AM UTC
Hi All,
I've done a little more progress on my Hawk and have a few touch ups too sort out, before the application of the cammo scheme.
I'm yet to finish the resin seats and add the cockpit detail and have added a turned brass pitot tube.
Stewart,
Great progress on your Tornado.
President:- Southern Model Club.
Those who never learn from history will always repeat it.
"When you go home tell them of us and say.
For your tomorrow we gave our today."
Western Australia, Australia
Joined: February 11, 2012
KitMaker: 56 posts
AeroScale: 50 posts
Posted: Friday, July 20, 2012 - 02:17 AM UTC
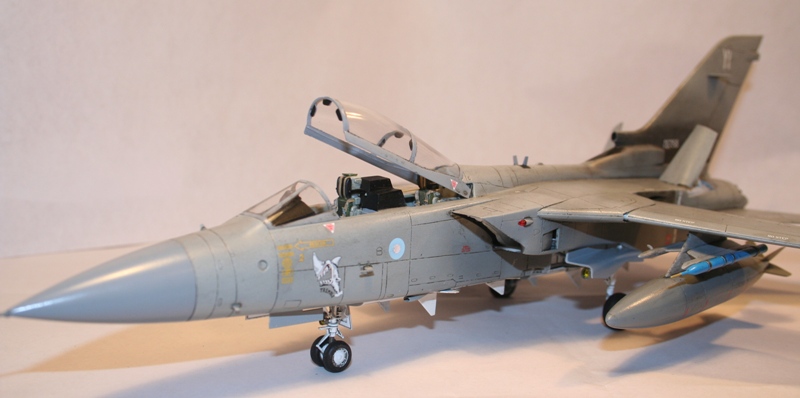
Now the gear is on and the weapons are attached. My research indicated NATO weapons were olive drab, but it looks a bit light on the GBU-16s.

United States
Joined: December 26, 2008
KitMaker: 288 posts
AeroScale: 195 posts
Posted: Saturday, July 21, 2012 - 01:04 PM UTC
Here's an update on my progress with the 1/72 Italeri Hawk. I now have the cockpit painted and ready for the fuselage to be assembled. It looks a lot better in gray than it did in the red plastic!.

I am now moving on to the wings as I want to do a little work on them before they get joined to the fuselage.
Have fun modeling!
Mike
Western Australia, Australia
Joined: May 04, 2012
KitMaker: 60 posts
AeroScale: 43 posts
Posted: Monday, July 23, 2012 - 01:52 AM UTC
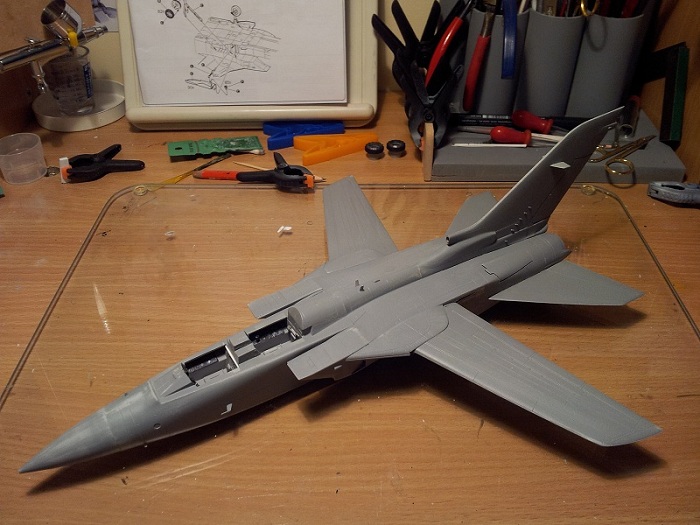
Here are two more photos of the progress so far on my F3.
I wanted to go for the dirty weathered look on this one.
Western Australia, Australia
Joined: February 11, 2012
KitMaker: 56 posts
AeroScale: 50 posts
Posted: Saturday, July 28, 2012 - 11:05 PM UTC
Changed focus from my Harrier GR.3 to my RAAF Hawk 128. Got the base coat sprayed, then masked up for the darker top colour:
Masked:

Sprayed:

...and Revealed!

It needs a re-mask and respray around the nose, but the rest is OK.
Western Australia, Australia
Joined: February 11, 2012
KitMaker: 56 posts
AeroScale: 50 posts
Posted: Saturday, August 04, 2012 - 03:33 AM UTC
The Harrier GR.3 is getting close. Half the decals are done and the canopy frames are mostly painted. I hate canopies. I have bought some Maskol but I'm not game to try it yet. Masking and brush painting one frame section at a time...

Tennessee, United States
Joined: September 20, 2005
KitMaker: 1,747 posts
AeroScale: 1,673 posts
Posted: Saturday, August 04, 2012 - 09:12 AM UTC
Jessica, your Airbus looks great! Always enjoy seeing the civil side of things on here. Harry, your Harrier looks quite good as well. You both should be proud to add these to your collections. Russell

P.S. Stewart, I really like the job you are doing on your Tornado too!
To Thine Own Self Be True
Siderius
A.K.A., RTA
Ontario, Canada
Joined: November 14, 2009
KitMaker: 270 posts
AeroScale: 264 posts
Posted: Sunday, August 05, 2012 - 01:49 PM UTC
Getting somewhere slowly with the Harrier
 Airfix Harrier GR7a/GR9a 1/72
 by
mawz_models, on Flickr

#226
British Columbia, Canada
Joined: February 20, 2012
KitMaker: 1,909 posts
AeroScale: 508 posts
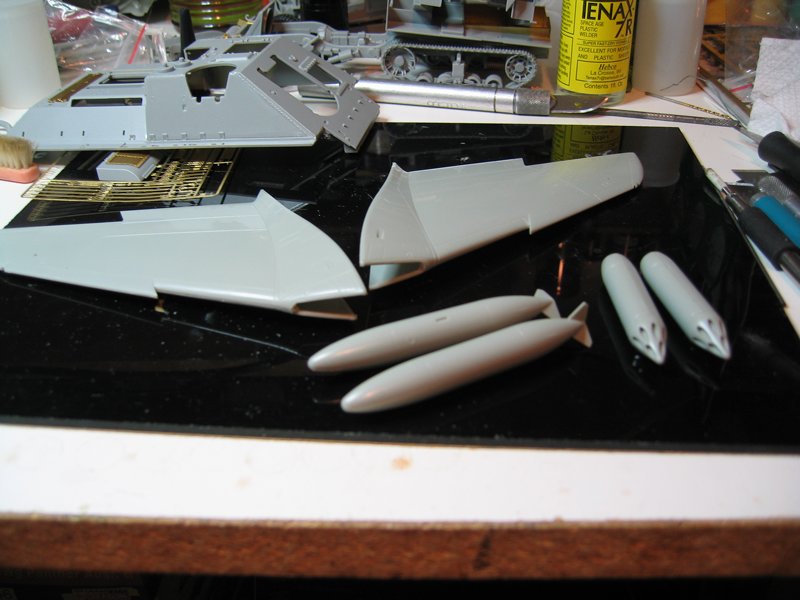
Posted: Monday, August 06, 2012 - 03:29 PM UTC
Cockpit and intakes ready for paint.

Cheers Rob.
Anything without guns is a target!
27 completed campaigns and counting :)
Western Australia, Australia
Joined: February 11, 2012
KitMaker: 56 posts
AeroScale: 50 posts
Posted: Wednesday, August 08, 2012 - 03:38 PM UTC
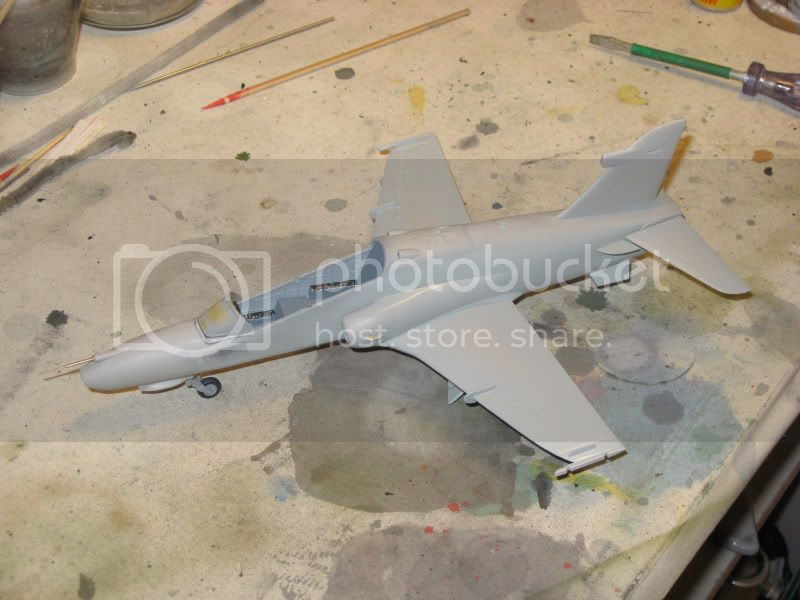
OK. So the painting is finished and I will finish the decals next week. I have never varnished an aircraft before, but I have bought some Humbrol Matt Cote. Now I need some advice: brush? spray? Will it blend in the "shiny" of the decals to match the kit paint? What should I look out for? The instructions say thin with white spirit, does anyone have any experience with this?
My Harrier has been a lot of firsts for me: first spray camouflage, first use of blu-tack masking, first varnish. It doesn't match the level of skills I see demonstrated here, but I am pretty happy with it. Unfortunately I am a bit of a perfectionist and seeing others superior results is what got me out of the hobby 30 years ago. I am just trying to enjoy it now.
Western Australia, Australia
Joined: May 04, 2012
KitMaker: 60 posts
AeroScale: 43 posts
Posted: Thursday, August 09, 2012 - 02:23 PM UTC
Hi Harry first of all what you have done so far looks great, I really like the way you have approach this campaign with firsts. I too am a perfectionist and look in ore with some of the work produced on this site.my way of applying the clear coat, I spray my on I do it this way to achieve an even layer over the model, if you have an old kit have a go on that first. If you are using humbrol clear then use a Humbrol thinner as some thinners dont mix to well with other brands IE can take the shine out of some pigments in the paint
I clear coat all my kits with a semi gloss then apply the decals and then wash in the panel lines, do any weathering and then seal it all with another semi Gloss. I am sure other builders have there way of doing thing, but this seams to get the result I am looking for.
Enjoy your build and I look forward to seeing more.
Western Australia, Australia
Joined: February 11, 2012
KitMaker: 56 posts
AeroScale: 50 posts
Posted: Sunday, August 12, 2012 - 09:25 PM UTC
Thanks for the tips, Stewart. I am away for a few weeks, but when I get back I will varnish a "Hangar Queen" F6F-5 Hellcat as a test, then try it on the Harrier. She has turned out quite well for so many firsts, so I don't want to stuff it up right at the last!
Removed by original poster on 08/14/12 - 13:27:45 (GMT).
Western Australia, Australia
Joined: May 04, 2012
KitMaker: 60 posts
AeroScale: 43 posts
Posted: Tuesday, August 14, 2012 - 01:36 AM UTC
British Columbia, Canada
Joined: September 03, 2009
KitMaker: 6,965 posts
AeroScale: 6,247 posts
Posted: Tuesday, August 14, 2012 - 02:25 AM UTC
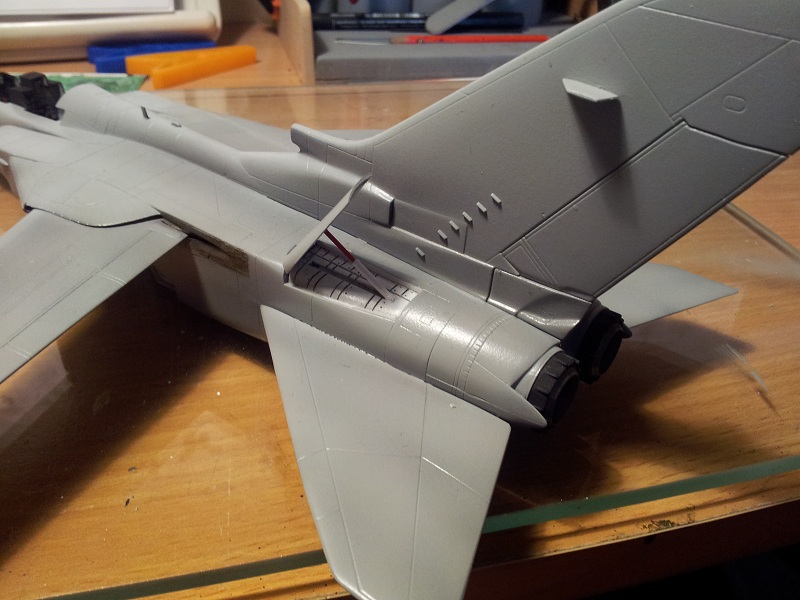
That's pretty
Just the right amount of soot from the thrust reversers.
When once you have tasted flight you will walk the Earth with your eyes turned skyward.
For there you have been, and there you will always long to return.
-Leonardo Da Vinci
United States
Joined: February 01, 2009
KitMaker: 1,233 posts
AeroScale: 663 posts
Posted: Tuesday, August 14, 2012 - 03:13 AM UTC
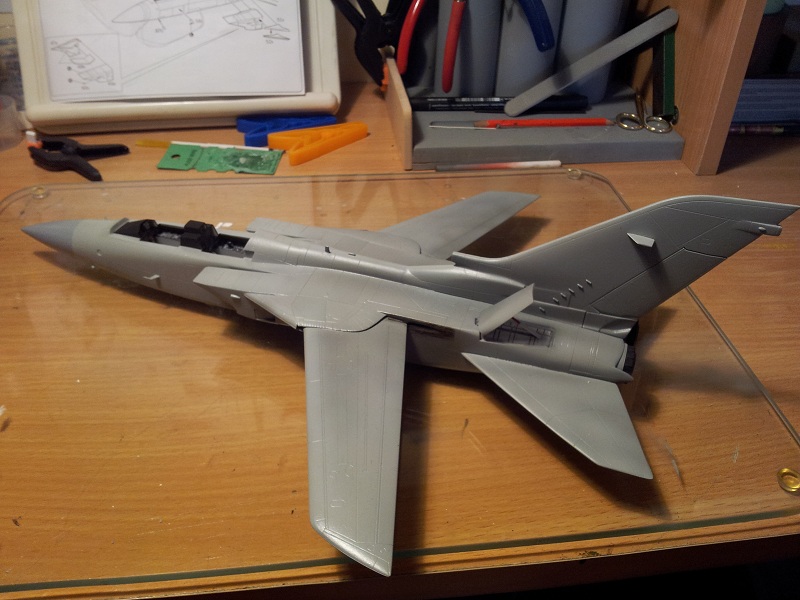
Beeatiful F.3 Stewart.................looks every inch a combat jet.
Best wishes, Ian
It is a fact that under equal conditions, large-scale battles and whole wars are won by troops which have a strong will for victory, clear goals before them, high moral standards, and devotion to the banner under which they go into battle.
-Georgy Zhukov
New South Wales, Australia
Joined: March 18, 2008
KitMaker: 347 posts
AeroScale: 223 posts
Posted: Tuesday, August 14, 2012 - 02:53 PM UTC
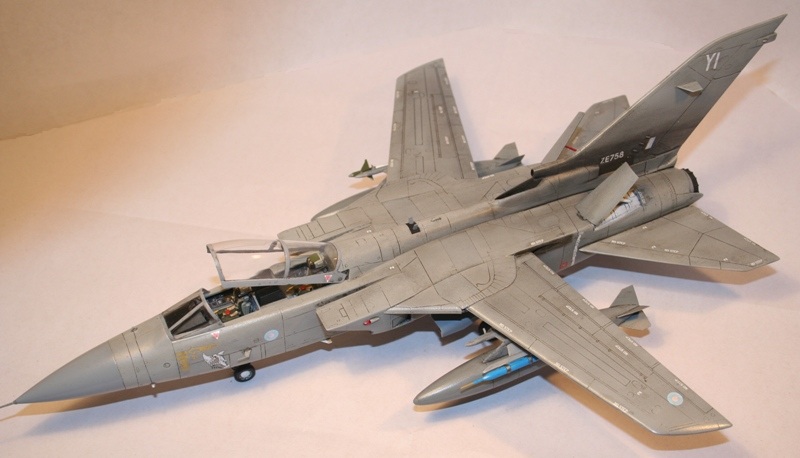
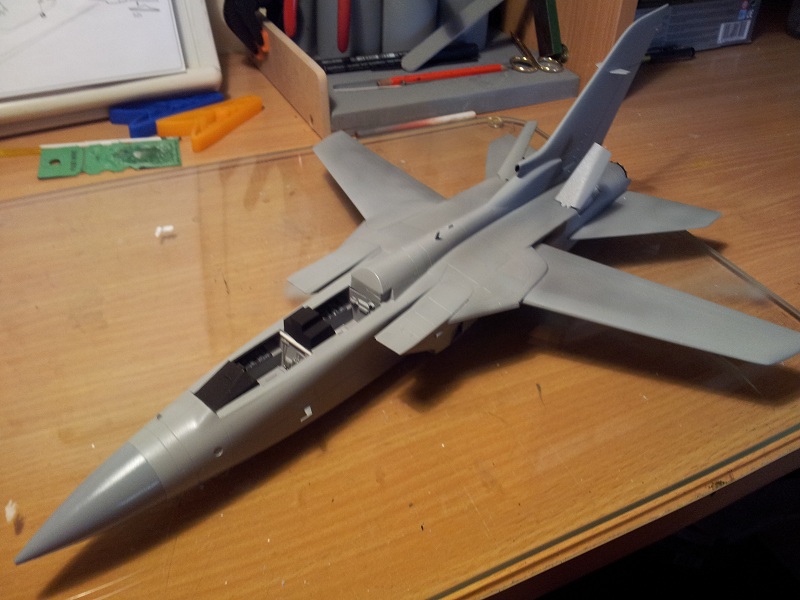
Great Tornado Stewart, especially the weathering.
Assumption is the mother of all f*#k ups.
Western Australia, Australia
Joined: February 11, 2012
KitMaker: 56 posts
AeroScale: 50 posts
Posted: Tuesday, August 14, 2012 - 03:48 PM UTC
Lovely work, Stewart! The panel lines and weathering really make it work!
United States
Joined: December 26, 2008
KitMaker: 288 posts
AeroScale: 195 posts
Posted: Saturday, August 18, 2012 - 03:29 AM UTC
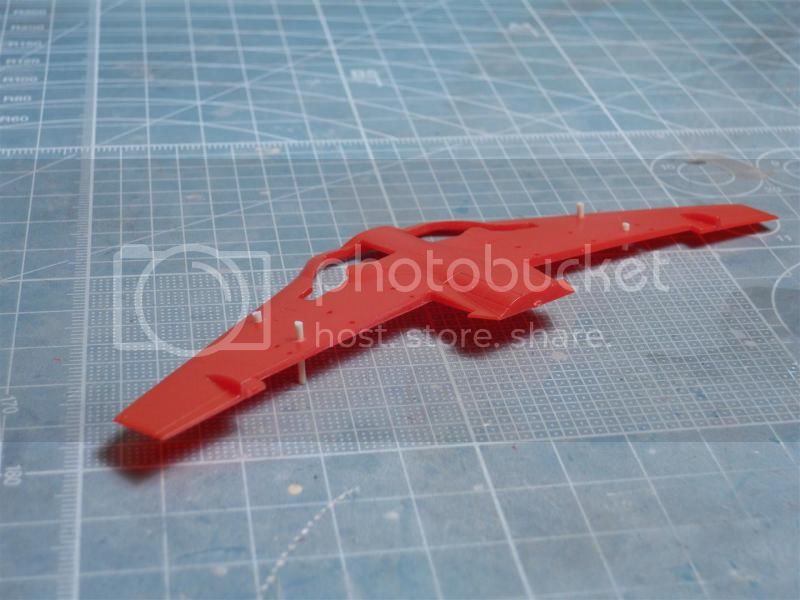
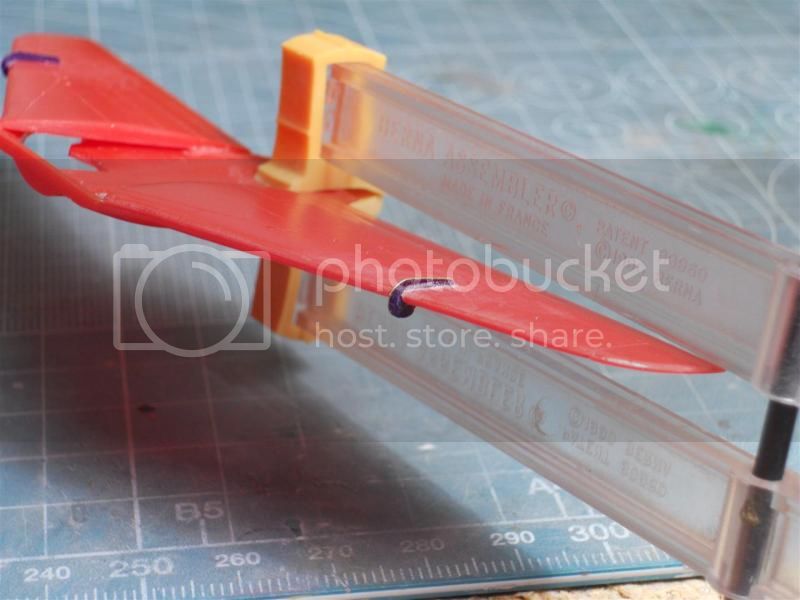
Hi fellow modelers! Things have been really slow on my end this summer and not as much building going on as I would have liked. I am just about finished up with a model for another GB, and have started back on my Hawk for this Campaign. While I was working on the cockpit, I also started working on the wings with my plan to assemble the main parts in the near future. First thing to do is to fill the unwanted open holes for the (not needed) pylons. I used the tried and true method of glueing in some stretched sprue into the excess holes in the wings. This is a lot easier for me than filling in the holes later with putty.
The next step with the wings is to add the PE wing fences from the Airways detail set. These look a lot better than the thick plastic ones in the kit.
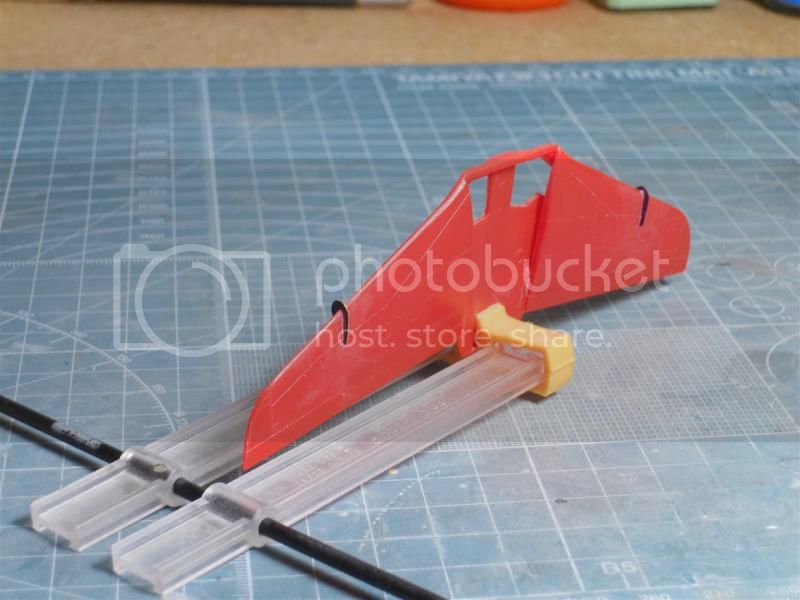
Next up will be to pull all of this together in an assembled airframe.
Have fun modeling!
Mike
United States
Joined: February 01, 2009
KitMaker: 1,233 posts
AeroScale: 663 posts
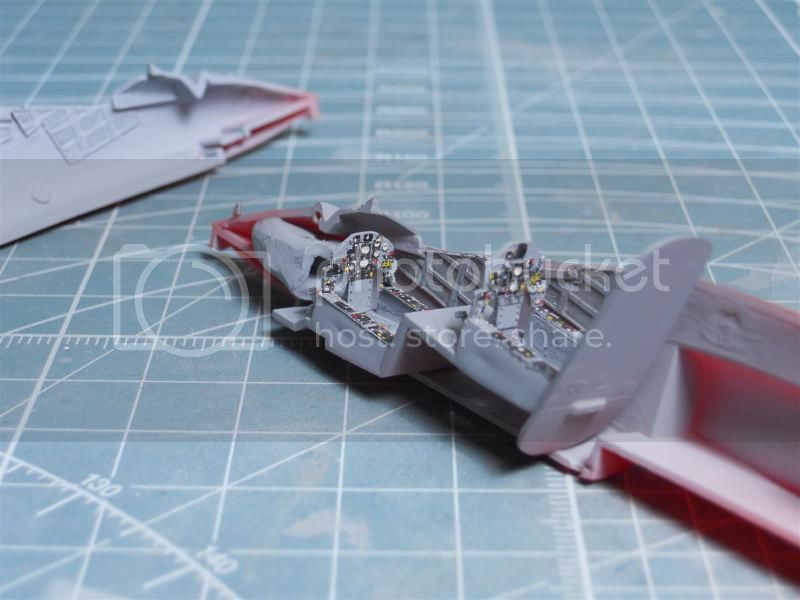
Posted: Sunday, August 19, 2012 - 07:04 AM UTC
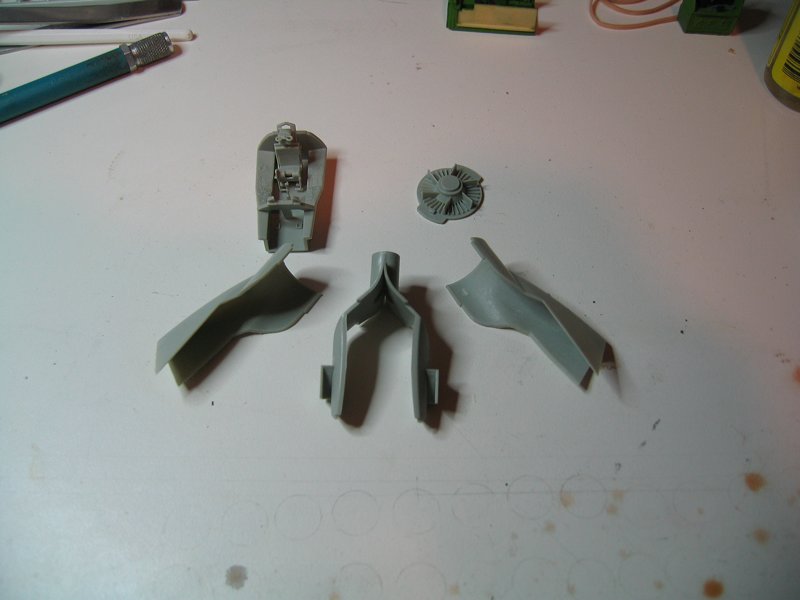
I did some more work on the 1/48th Sea Harrier. Completed the cockpit tub and closed up the fuselage this weekend.
Regards, Ian


It is a fact that under equal conditions, large-scale battles and whole wars are won by troops which have a strong will for victory, clear goals before them, high moral standards, and devotion to the banner under which they go into battle.
-Georgy Zhukov
#226
British Columbia, Canada
Joined: February 20, 2012
KitMaker: 1,909 posts
AeroScale: 508 posts
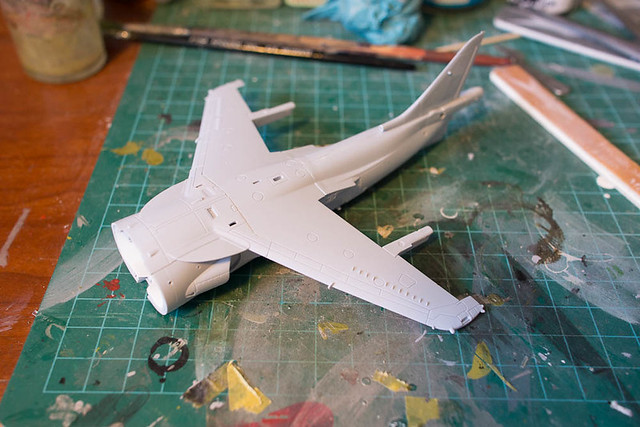
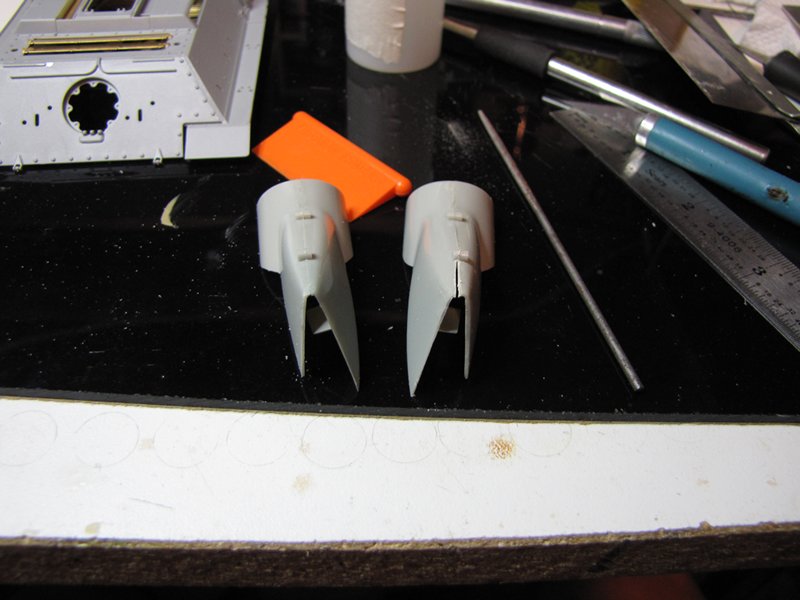
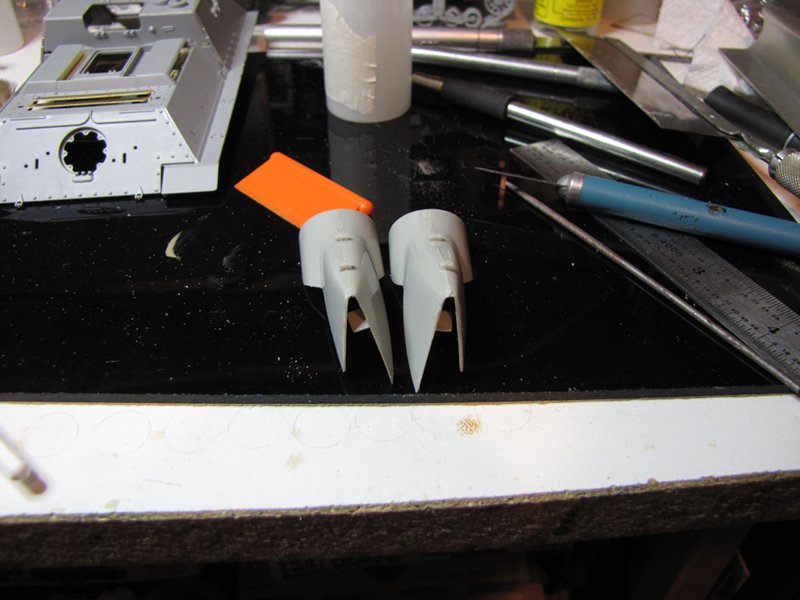
Posted: Sunday, August 19, 2012 - 02:17 PM UTC
Little more done.
After getting a coat of paint on the intakes they needed some clean up and I found that one had too wide a radius on the outside, so I cut a slot in it and glued it back together and that fixed the problem.
Also got the wings glued up and some ordnance.
Cheers Rob.
Anything without guns is a target!
27 completed campaigns and counting :)