


Air Campaigns
Want to start or join a group build? This is where to start.
Want to start or join a group build? This is where to start.
Hosted by Frederick Boucher, Michael Satin
OFFICIAL: British Aerospace Campaign Thread
fireresq1

Joined: May 04, 2012
KitMaker: 60 posts
AeroScale: 43 posts

Posted: Sunday, August 19, 2012 - 04:34 PM UTC
Thanks for the comments guys. I look forward to seeing all of the completed builds.

29Foxtrot
Joined: September 19, 2003
KitMaker: 708 posts
AeroScale: 674 posts

Posted: Tuesday, August 21, 2012 - 03:12 AM UTC
Hi All,
Some great builds progressing here.
I've done a little more on my Hawk, have to clean up the demarcation line across the fuselage spine, also finish the two seats before finishing the cockpit.

More to follow later.
Some great builds progressing here.
I've done a little more on my Hawk, have to clean up the demarcation line across the fuselage spine, also finish the two seats before finishing the cockpit.
More to follow later.

Dragon164

#226

Joined: February 20, 2012
KitMaker: 1,909 posts
AeroScale: 508 posts

Posted: Thursday, August 23, 2012 - 01:53 PM UTC
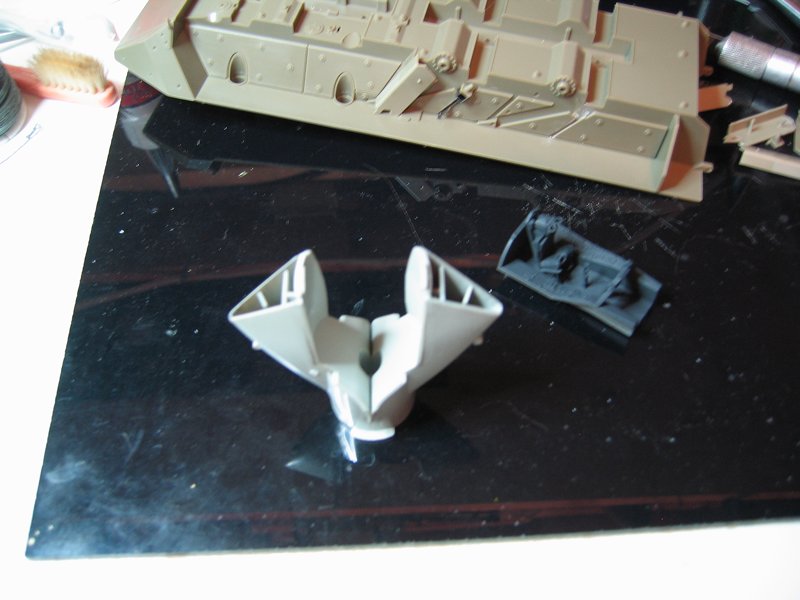
Got the intakes put together and painted the cockpit black, then joined the fuse halves.  Still have some seam cleaning and will have to re-scribe some lines, I left the front unglued for now as I am debating getting an AM cockpit.
Cheers Rob.
Still have some seam cleaning and will have to re-scribe some lines, I left the front unglued for now as I am debating getting an AM cockpit.Cheers Rob.


SaxonTheShiba

Joined: February 01, 2009
KitMaker: 1,233 posts
AeroScale: 663 posts

Posted: Saturday, August 25, 2012 - 10:12 AM UTC
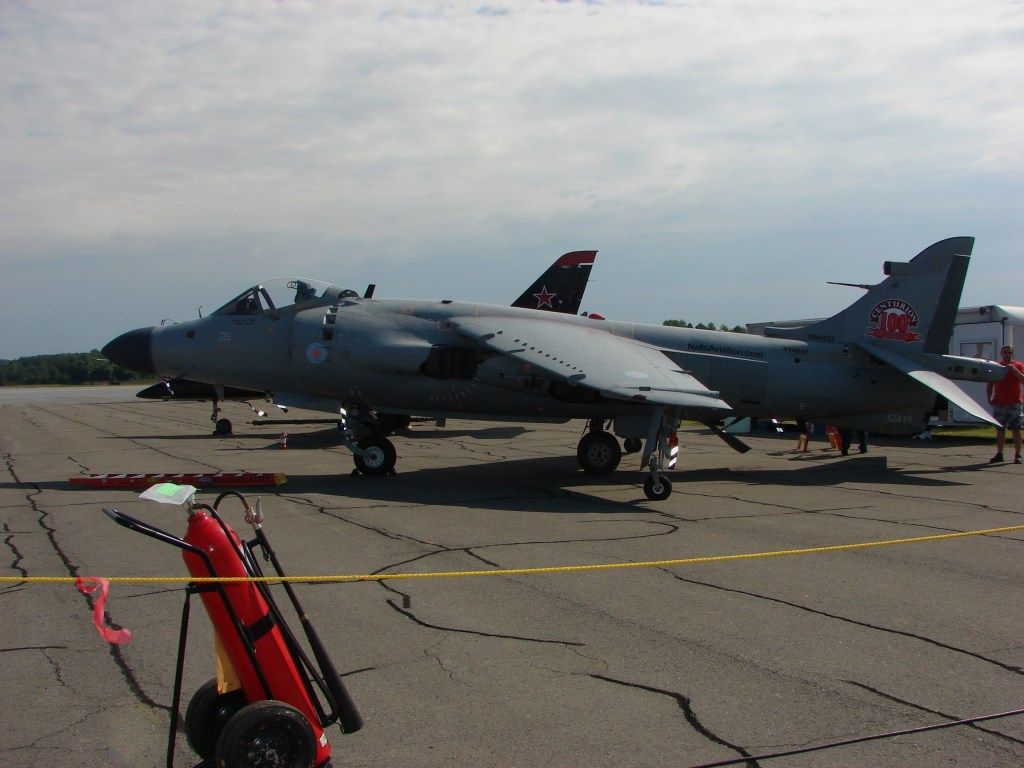
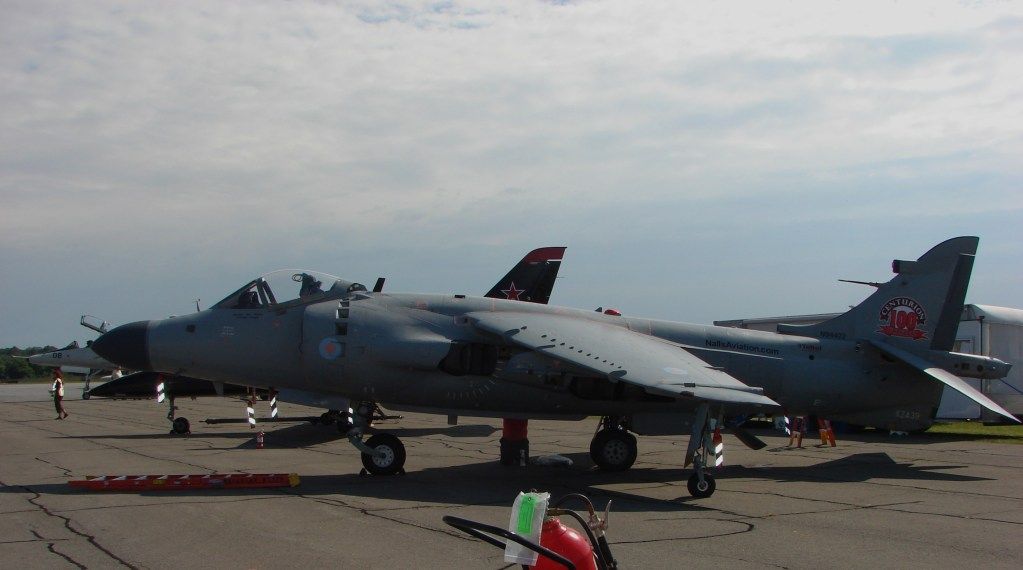
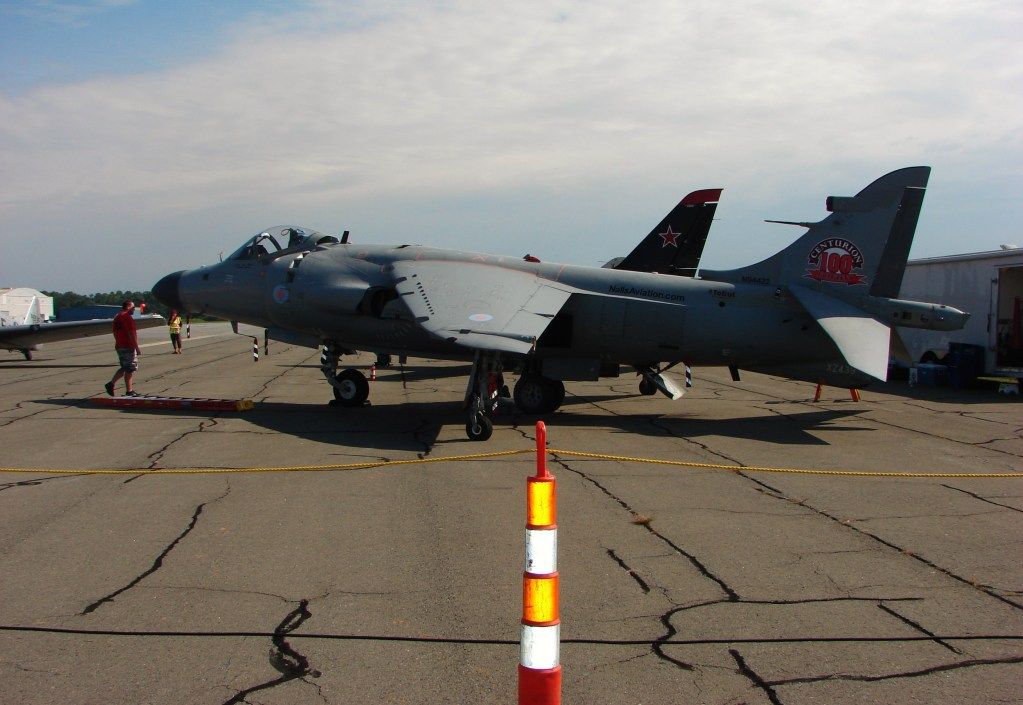
I went to a local airshow this weekend and a privately owned Sea Harrier was there and put on an absolutely awesome demo. Figured I would share the pictures since this is a BAe campaign and I have a Sea Harrier in progress for this build. Anyway, enjoy the pics and I am going to work on my own Sea Harrier now.
Best wishes, Ian

Best wishes, Ian
SaxonTheShiba
Joined: February 01, 2009
KitMaker: 1,233 posts
AeroScale: 663 posts
Posted: Sunday, August 26, 2012 - 10:04 AM UTC
Did some more work on the "SHAR". I drilled out the upper set of vents on the intakes and made new doors out of sheet stock and showed them retracted as if the plane was in a powered down state. I also applied the first coat of Medium Sea Gray which will double as a primer coat. I have a little more filling to do on the wing roots.
Best wishes, Ian

Best wishes, Ian
fireresq1
Joined: May 04, 2012
KitMaker: 60 posts
AeroScale: 43 posts
Posted: Tuesday, August 28, 2012 - 11:48 PM UTC
Looking good, I also like the idea you made with the vents, staying tuned for the next instalment.
SaxonTheShiba
Joined: February 01, 2009
KitMaker: 1,233 posts
AeroScale: 663 posts
Posted: Saturday, September 01, 2012 - 02:55 AM UTC
Continued work on the "SHAR". The Medium Sea Gray and the Barley Gray have been applied and the panel lines are drawn. Working on the sub-assemblies now. I changed my mind and I am going to build "Black 99" instead of "Black 77" so this airframe has the Extra Dark Sea Gray rudder.
Best wishes, Ian


Best wishes, Ian
Dragon164
#226
Joined: February 20, 2012
KitMaker: 1,909 posts
AeroScale: 508 posts
Posted: Saturday, September 01, 2012 - 07:06 PM UTC
Lots of great builds!
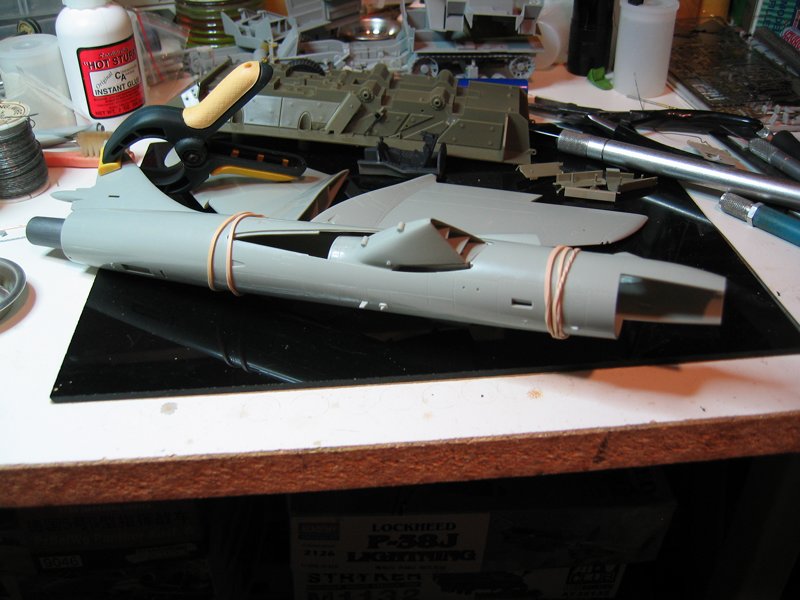
Got the tail-cone and wings on about to order a cockpit kit to replace the small one that comes with it. 
Cheers Rob.
Got the tail-cone and wings on
about to order a cockpit kit to replace the small one that comes with it. Cheers Rob.
SaxonTheShiba
Joined: February 01, 2009
KitMaker: 1,233 posts
AeroScale: 663 posts
Posted: Sunday, September 02, 2012 - 02:15 AM UTC
Rob----The Hunter looks great! You are right though, Academy really bombed the ejection seat in that one......the seat size is no where near 1/48th. Other than that a really nice kit to build.
Worked on the Sea Harrier last night and got all the sub-assemblies built and then put on the model except for the under wing goodies. Also scratch-built intake covers for the aircraft. I will be using Eduard Brassin Niner-Lima Sidewinders, which are really beautifully cast missiles. Anyway, onwards and upwards.


Worked on the Sea Harrier last night and got all the sub-assemblies built and then put on the model except for the under wing goodies. Also scratch-built intake covers for the aircraft. I will be using Eduard Brassin Niner-Lima Sidewinders, which are really beautifully cast missiles. Anyway, onwards and upwards.
Dragon164
#226
Joined: February 20, 2012
KitMaker: 1,909 posts
AeroScale: 508 posts
Posted: Sunday, September 02, 2012 - 10:57 AM UTC
Thanks Ian!
Your Harrier is coming together nicely.
Cheers Rob.
Your Harrier is coming together nicely.
Cheers Rob.

V2Phantom
Joined: December 26, 2008
KitMaker: 288 posts
AeroScale: 195 posts
Posted: Monday, September 03, 2012 - 03:42 AM UTC
Hi everyone!
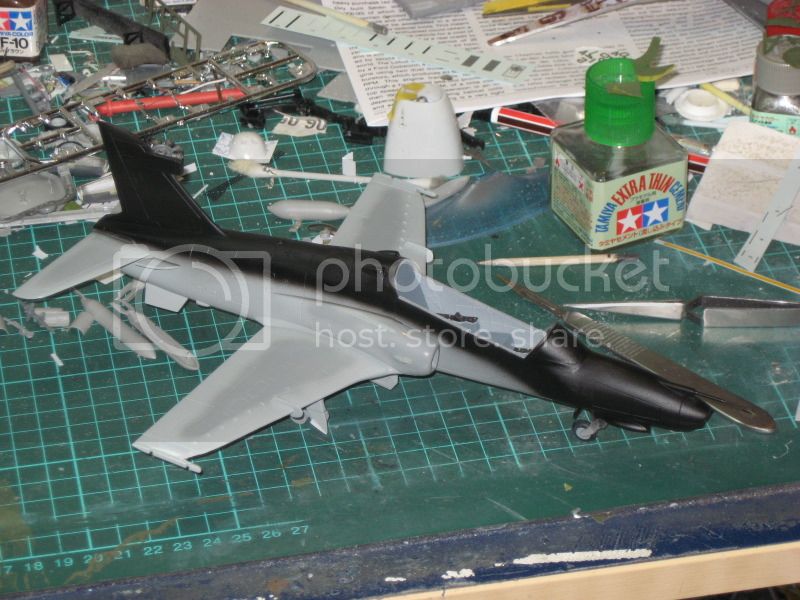
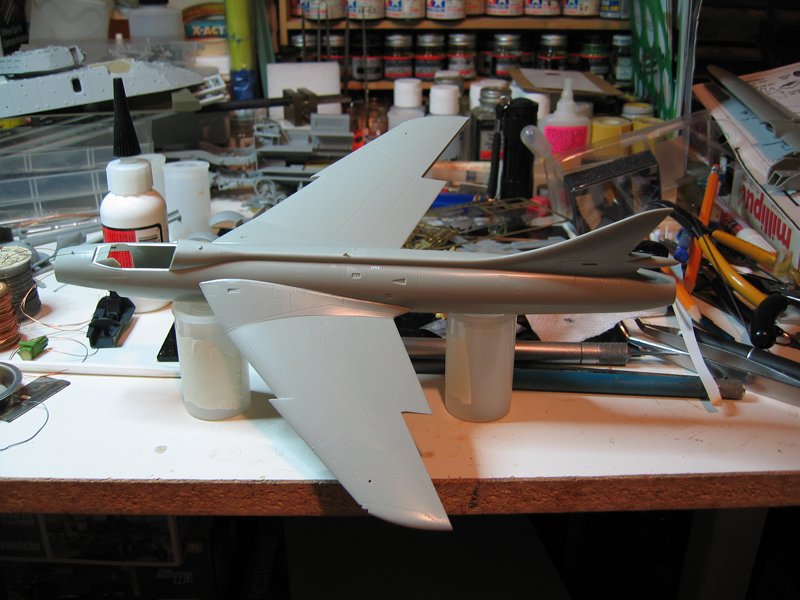
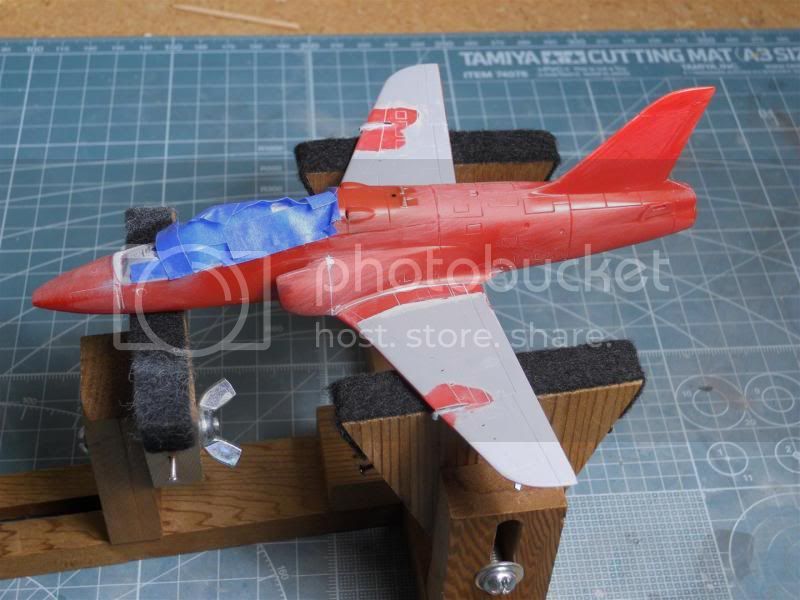
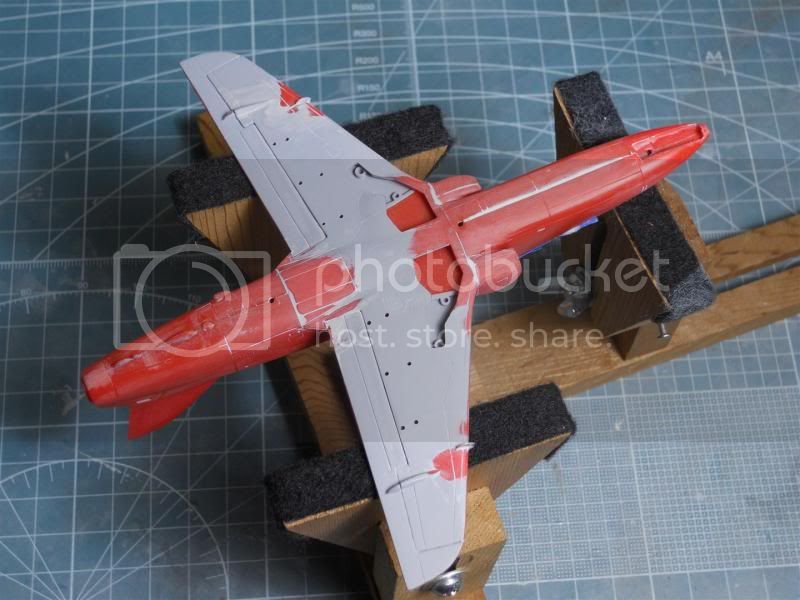
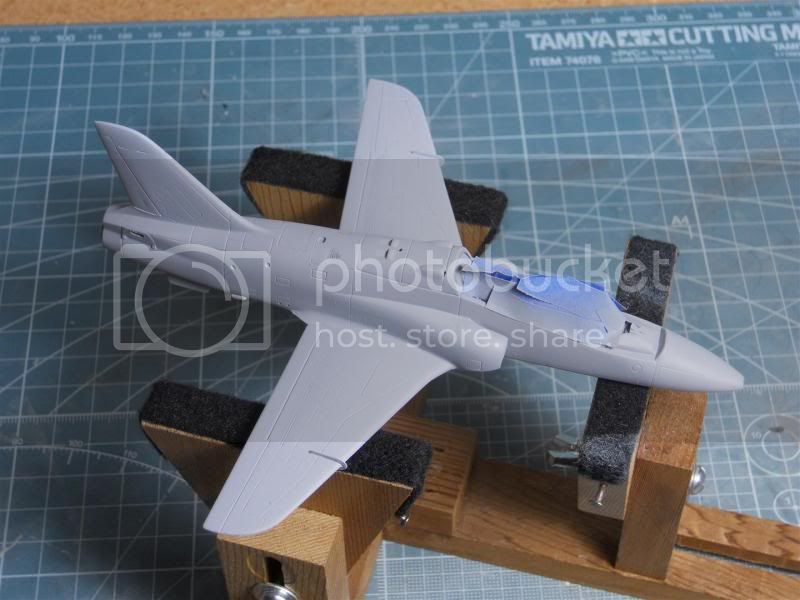
I have a little more progress on my Hawk to report. It now looks like a Hawk! I assembled all the major bits and am about to start the steps to overall prime, fill,sand, repeat. I will definitely ba happy when the red plastic is covered! Here's how it now looks:

Have fun modeling!
Mike

I have a little more progress on my Hawk to report. It now looks like a Hawk! I assembled all the major bits and am about to start the steps to overall prime, fill,sand, repeat. I will definitely ba happy when the red plastic is covered! Here's how it now looks:
Have fun modeling!
Mike
RedwingNev

Joined: February 07, 2004
KitMaker: 911 posts
AeroScale: 415 posts

Posted: Wednesday, September 12, 2012 - 05:48 PM UTC
Littlest Hawk has been progressing slowly but surely. Mask the canopy up tonight and hopefully get a coat of primer over the weekend

SaxonTheShiba
Joined: February 01, 2009
KitMaker: 1,233 posts
AeroScale: 663 posts
Posted: Saturday, September 15, 2012 - 04:14 AM UTC
Mike and Neil------great looking Hawks. I will look forward to seeing them completed.
The 1/48th scale Airfix Sea Harrier is done. Although the build did have some construction "speed bumps", the kit still builds up into a great representation the Sea Harrier. I added a Neomega resin Martin Baker seat, Eduard Brassin AIM-9L Sidewinders, scratchbuilt intake covers and sheet stock blade antennae. I drilled out the cannon pod barrels and the upper set of vents on the intakes as well. The decals depict a "LA MUERTA NEGRA" Sea Harrier from 809 Sqdn., HMS HERMES, Falklands War, '82. The plane depicted is "Black 99" and the decals are a mix of Airfix, Aeromaster, Hasegawa and dry transfers. This plane is credited with a A-4B kill on 06.08.1982, although the kill marking that was applied mistakenly on the actual aircraft was for a Mirage/Nesher kill. I also added lead foil BDR plates on the stabs and fuselage to show a couple of flak hits. All in all a fun build and I enjoyed this campaign. (Also posted in the gallery).
Regards, Ian
Dragon164
#226
Joined: February 20, 2012
KitMaker: 1,909 posts
AeroScale: 508 posts
Posted: Saturday, September 15, 2012 - 12:03 PM UTC
Ian,
That Harrier looks Fantastic!
Cheers Rob.
That Harrier looks Fantastic!
Cheers Rob.
SaxonTheShiba
Joined: February 01, 2009
KitMaker: 1,233 posts
AeroScale: 663 posts
Posted: Saturday, September 15, 2012 - 12:30 PM UTC
Thanks for the kind words Rob. I really enjoyed building it and there was a great historical aspect to this particular jet too. Thanks again Rob.
RAM ON!!!!!!!!!!!!
Ian
RAM ON!!!!!!!!!!!!
Ian

Hawkeye65
Joined: February 11, 2012
KitMaker: 56 posts
AeroScale: 50 posts
Posted: Thursday, September 20, 2012 - 04:39 AM UTC
Ian,
Beautiful Harrier. Guess where I was today and what I saw there...

Harrier FA2 on the apron at RNAS Yeovilton.
Beautiful Harrier. Guess where I was today and what I saw there...
Harrier FA2 on the apron at RNAS Yeovilton.
SaxonTheShiba
Joined: February 01, 2009
KitMaker: 1,233 posts
AeroScale: 663 posts
Posted: Thursday, September 20, 2012 - 11:07 AM UTC
Harry, thanks for the compliment on my Sea Harrier. Also, thanks for sharing the photo of #001. Great picture!!!!
Best wishes, Ian
Best wishes, Ian
RedwingNev
Joined: February 07, 2004
KitMaker: 911 posts
AeroScale: 415 posts
Posted: Thursday, September 20, 2012 - 07:18 PM UTC
Can I just say "Stencils, ARRRRGHGHGHHGHGHGHG!!!!!!!!!!!!!!!!"
There. I feel better now

There. I feel better now
fireresq1
Joined: May 04, 2012
KitMaker: 60 posts
AeroScale: 43 posts
Posted: Thursday, September 20, 2012 - 08:16 PM UTC
Ian thats a great job done on the Harrier, realy like the work.
fireresq1
Joined: May 04, 2012
KitMaker: 60 posts
AeroScale: 43 posts
Posted: Thursday, September 20, 2012 - 08:19 PM UTC
Neil I to have felt this pain LOL
SaxonTheShiba
Joined: February 01, 2009
KitMaker: 1,233 posts
AeroScale: 663 posts
Posted: Friday, September 21, 2012 - 06:29 PM UTC
Neil, that's a fine looking Hawk! Although stencils can be tedious they really add to the finish. I love the paint scheme you chose.
Stewart, thanks for the kind words regarding my Sea Harrier.
Best wishes, Ian
Stewart, thanks for the kind words regarding my Sea Harrier.
Best wishes, Ian
V2Phantom
Joined: December 26, 2008
KitMaker: 288 posts
AeroScale: 195 posts
Posted: Saturday, September 22, 2012 - 03:37 AM UTC
Ian
That is one fantastic Harrier!! Your finish is great, very realistic!
Have fun modeling!
Mike
That is one fantastic Harrier!! Your finish is great, very realistic!
Have fun modeling!
Mike
V2Phantom
Joined: December 26, 2008
KitMaker: 288 posts
AeroScale: 195 posts
Posted: Saturday, September 22, 2012 - 03:43 AM UTC
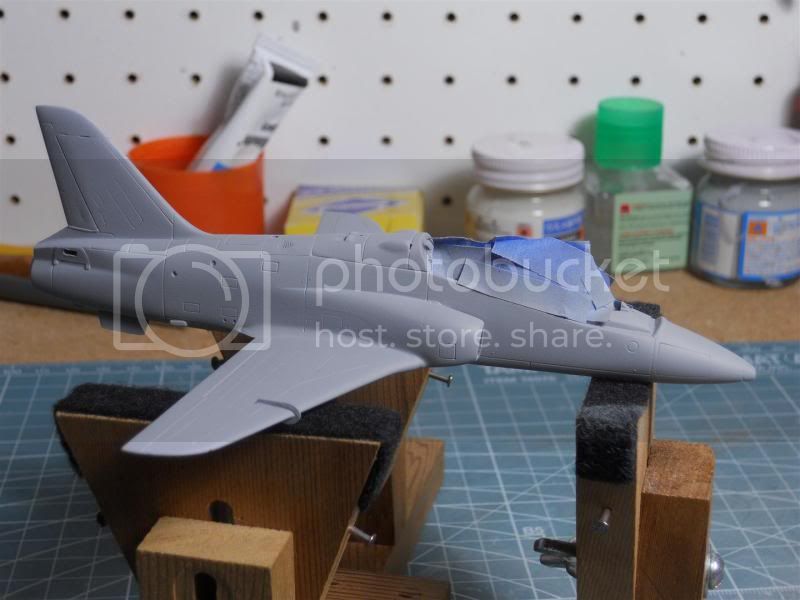
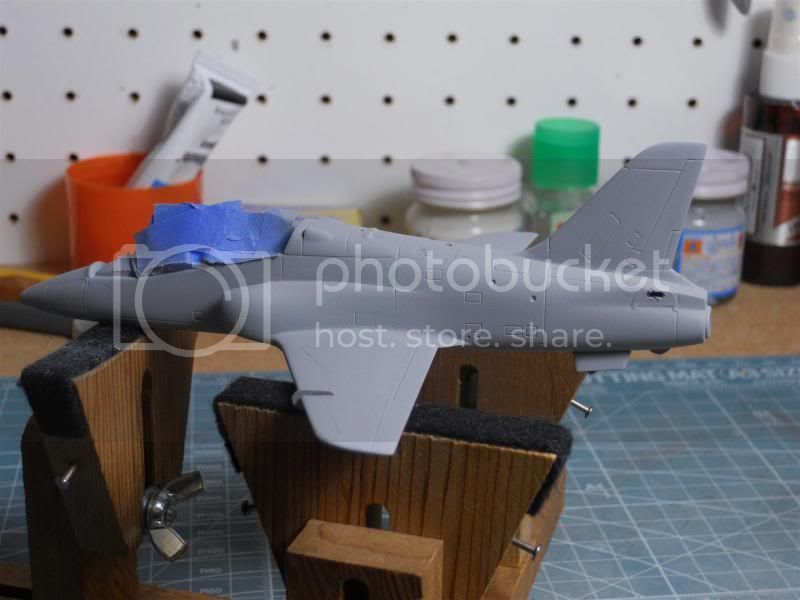
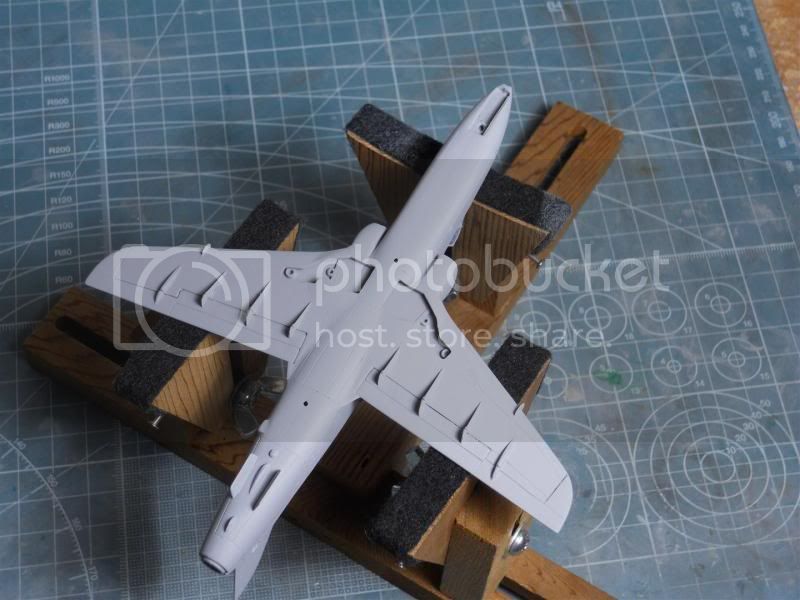
Here's a bit more on my Hawk build. Right now it is all primed up and almost ready for the color coats (and no red plastic!). I'll do a close inspection to make sure I have taken care of the seams and add any small fragile bits as needed (like antennas). As this will require a gloss black paint job, I will also carefully polish the gray primer coat (Mr Surfacer) to get as smooth a base as possible. Hopefully, I will not need to do another round of sanding & scribing before then!
Have fun modeling!
Mike
Have fun modeling!
Mike
SaxonTheShiba
Joined: February 01, 2009
KitMaker: 1,233 posts
AeroScale: 663 posts
Posted: Saturday, September 22, 2012 - 05:39 AM UTC
Thanks Mike! Your Hawk is really coming along well.. I bet it took a little primer to hide that red plastic. Can't wait to see the completed airplane.
Best wishes , Ian
Best wishes , Ian
RedwingNev
Joined: February 07, 2004
KitMaker: 911 posts
AeroScale: 415 posts
Posted: Wednesday, October 03, 2012 - 04:22 AM UTC
OK, finished my Hawk, the new tool Airfix 1/72 model. Decals are from a 20 year old Modeldecal sheet and went on very well I must say.
I couldn't decide which markings to go for. My daughter said the blue tail with the yellow snake (92 squadron).
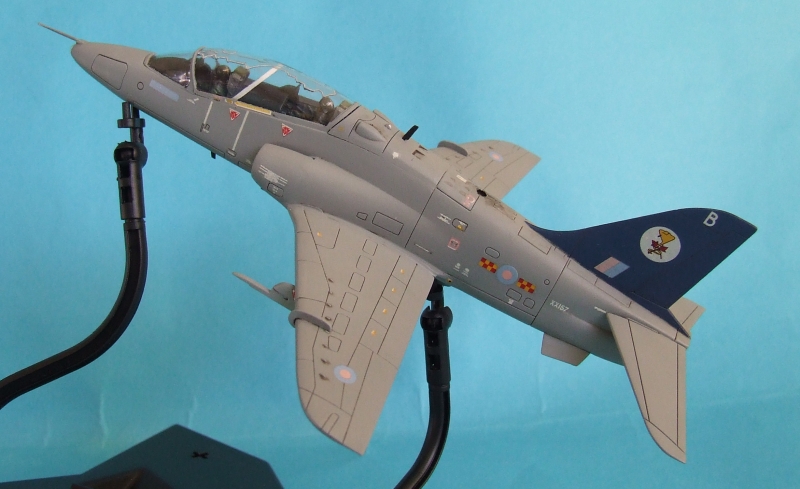
My son said the black tail with a red dragon (actually a salamander, but he won't know the difference).
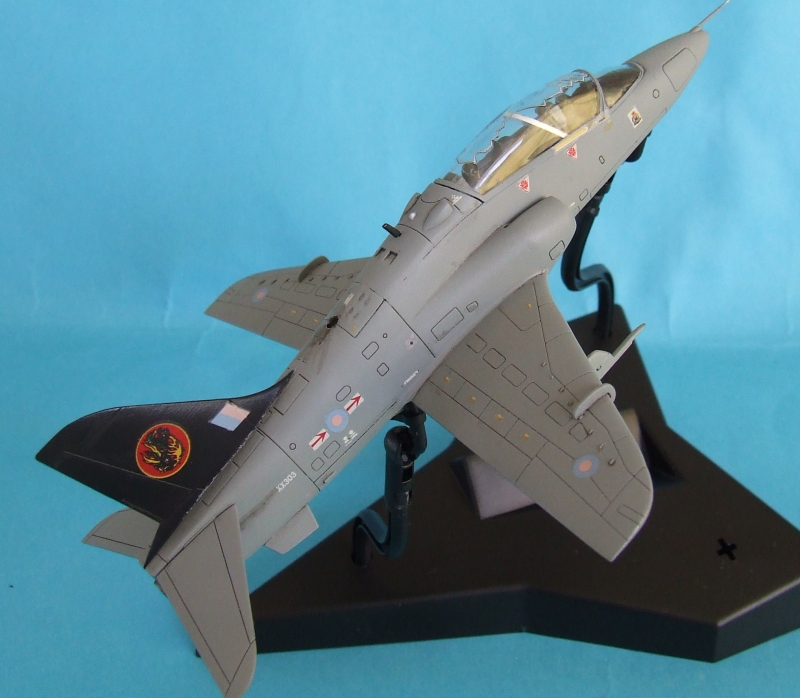
How else to please your kids but to do both, one each side!

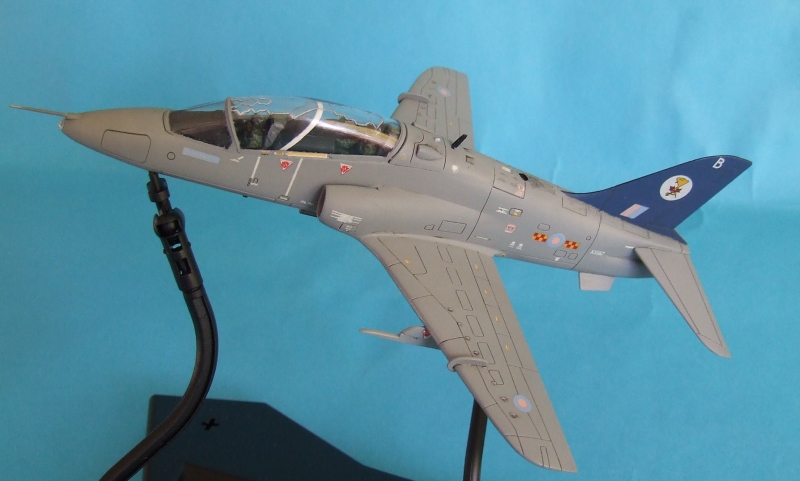
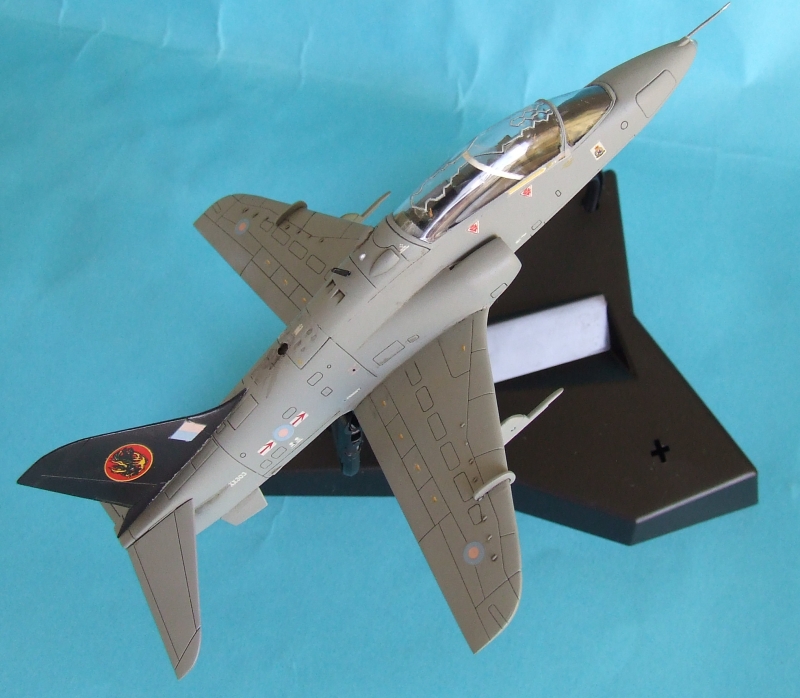
You know how sometimes even though you know it isn't perfect, sometimes you finish a model that you're really happy with - this is one of those models I just wish I'd airbrushed the tails instead of brush painting them...
I couldn't decide which markings to go for. My daughter said the blue tail with the yellow snake (92 squadron).
My son said the black tail with a red dragon (actually a salamander, but he won't know the difference).
How else to please your kids but to do both, one each side!
You know how sometimes even though you know it isn't perfect, sometimes you finish a model that you're really happy with - this is one of those models
I just wish I'd airbrushed the tails instead of brush painting them... |

WEB HOSTING BY


Copyright ©2021 AeroScale and Kitmaker Network, a subsidiary of Silver Star Enterprises
All Rights Reserved. Please read our Conditions of Use and Privacy Policy.
All Rights Reserved. Please read our Conditions of Use and Privacy Policy.