

Air Campaigns
Want to start or join a group build? This is where to start.
Want to start or join a group build? This is where to start.
Hosted by Frederick Boucher, Michael Satin
OFFICIAL: Birds of Prey Campaign

c4willy

#305

Joined: February 01, 2006
KitMaker: 1,673 posts
AeroScale: 1,517 posts

Posted: Tuesday, August 13, 2013 - 07:58 PM UTC
hey that's great Jess! really neat not something I had considered but now that I've seen it it's something i'll definitely try with the net jet I build.... LOL actually I'm in the midst of Academy's 1/48 scale Mig29A soooooooooo........

noddy927

Joined: February 15, 2013
KitMaker: 1,273 posts
AeroScale: 200 posts
Posted: Tuesday, August 13, 2013 - 10:54 PM UTC
Cool idea Jess, see what I mean about 1/32 and being able to play with upgrading. A bit more difficult in 1/48 or near imposs. at 1/72, good job
Pete
Pete
epshifty

Joined: August 05, 2011
KitMaker: 376 posts
AeroScale: 348 posts

Posted: Wednesday, August 14, 2013 - 07:40 AM UTC
Winston WOW what a fantastic build you have there im very impressed  !!!
!!!
Peter i love the the hawk its turnd out great thos decals really pack a punch well done sir
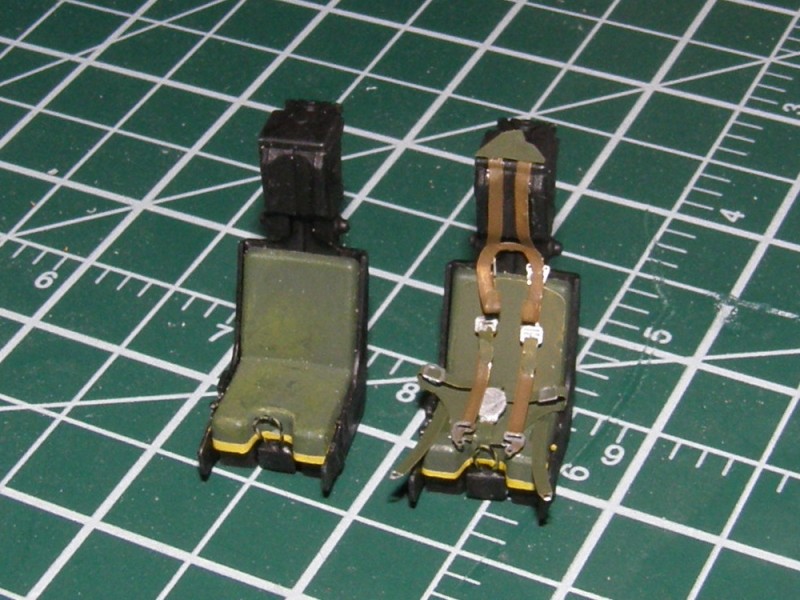
Jess the Hawk is looking great iv never seen a 1/32 Hawk so im looking forward to this one neat trick with the ejection handles too
My E-2 is coming along iv just started pre shading and got the glass on .. im spending some time thinking about how im going to paint the color scheme on as i dont want to screw it up .....
!!!Peter i love the the hawk its turnd out great thos decals really pack a punch well done sir
Jess the Hawk is looking great iv never seen a 1/32 Hawk so im looking forward to this one neat trick with the ejection handles too
My E-2 is coming along iv just started pre shading and got the glass on .. im spending some time thinking about how im going to paint the color scheme on as i dont want to screw it up .....


Jessie_C


Joined: September 03, 2009
KitMaker: 6,965 posts
AeroScale: 6,247 posts

Posted: Wednesday, August 14, 2013 - 08:20 AM UTC
Quoted Text
hey that's great Jess! really neat not something I had considered but now that I've seen it it's something i'll definitely try with the net jet I build.... LOL actually I'm in the midst of Academy's 1/48 scale Mig29A soooooooooo........
The Mig 29's seat is the K-36, which has red handles

Jessie_C
Joined: September 03, 2009
KitMaker: 6,965 posts
AeroScale: 6,247 posts
Posted: Wednesday, August 14, 2013 - 06:02 PM UTC
The seat looks much better with seat belts on it
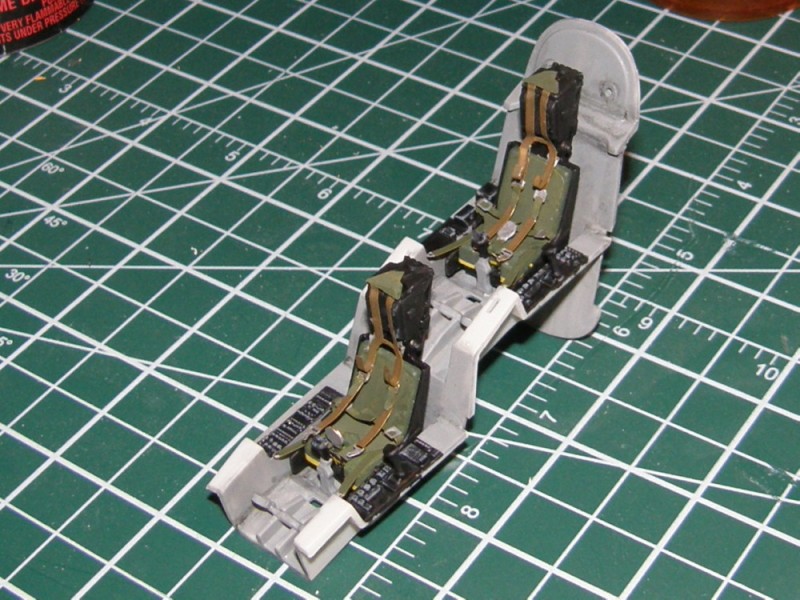
And a quick test fit in the cockpit to see how they look
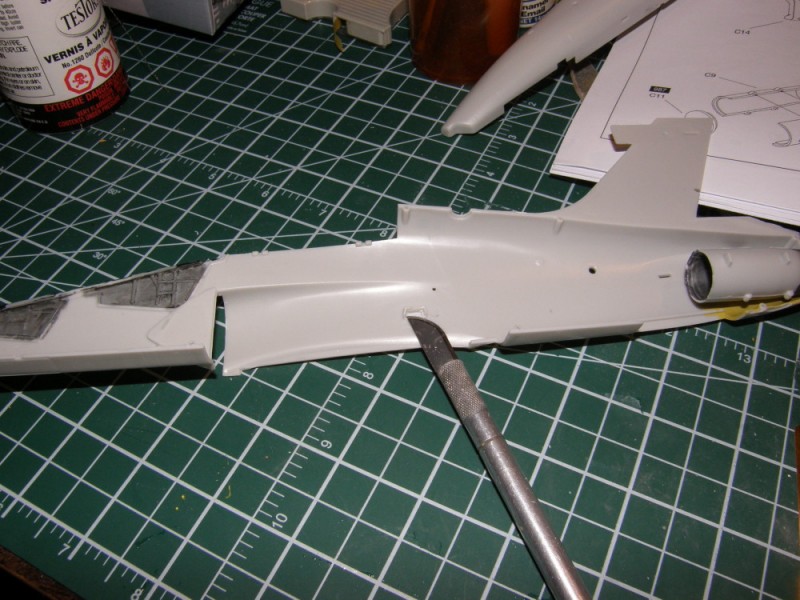
I mentioned a cunning plan to deal with the intakes. Here it is.
First, chisel out the bottom of the rear intake mounts on the fuselage sides
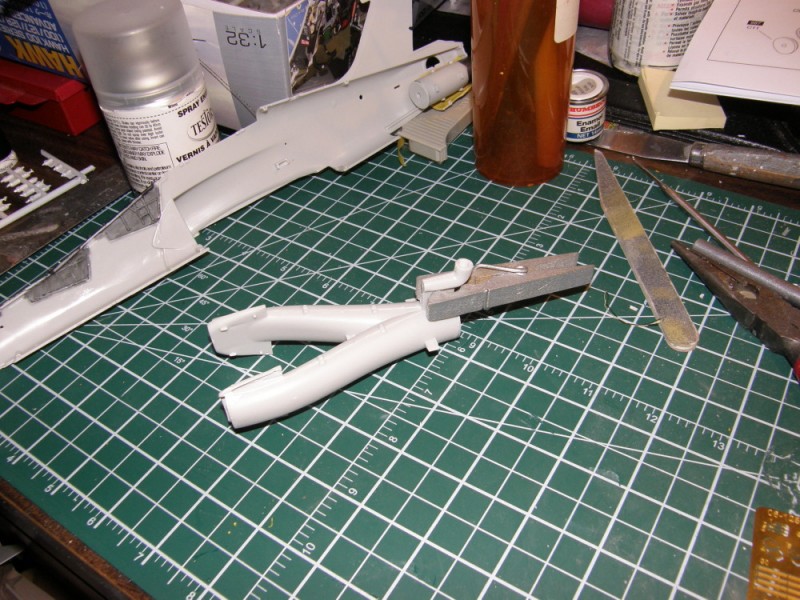
Glue the intake halves together, making sure to remember to glue on the intake fan, then deal with the seam inside the upper exhaust vent
Now a quick digression to make sure all the other things which have to go inside the fuselage are all glued in. Add 21 g of nose weight, just because
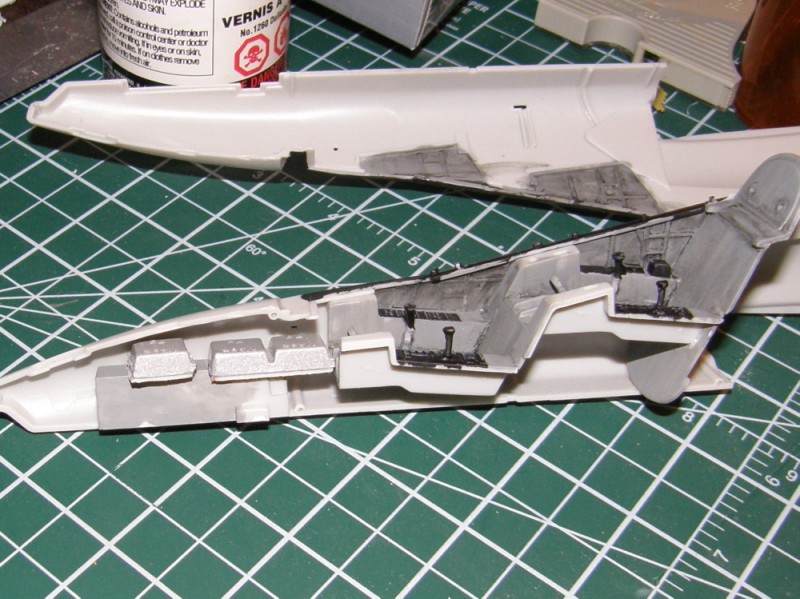
Then once the fuselage is nicely buttoned up, it's time to deal with those intakes. Drop the rear inside the fuselage
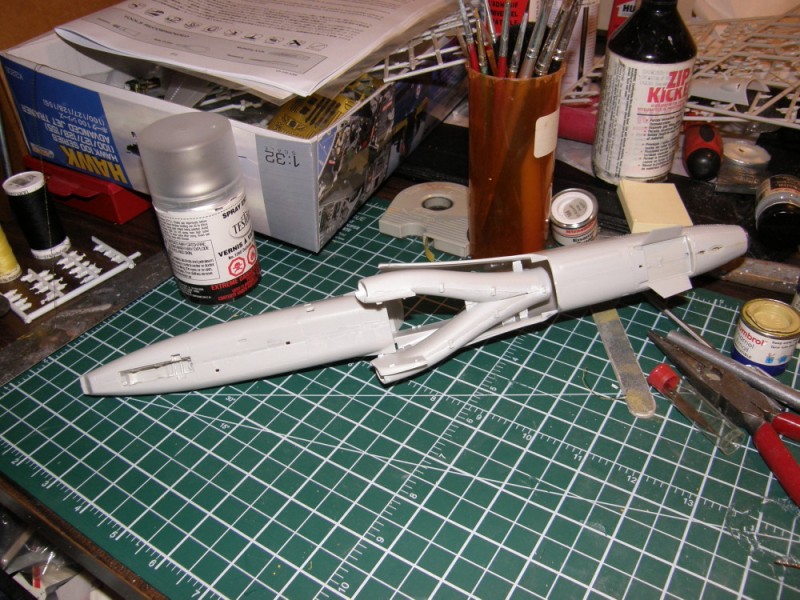
Then carefully shoehorn the intakes into their mounting holes on the fuselage sides. They'll snap into position with a little persuasion
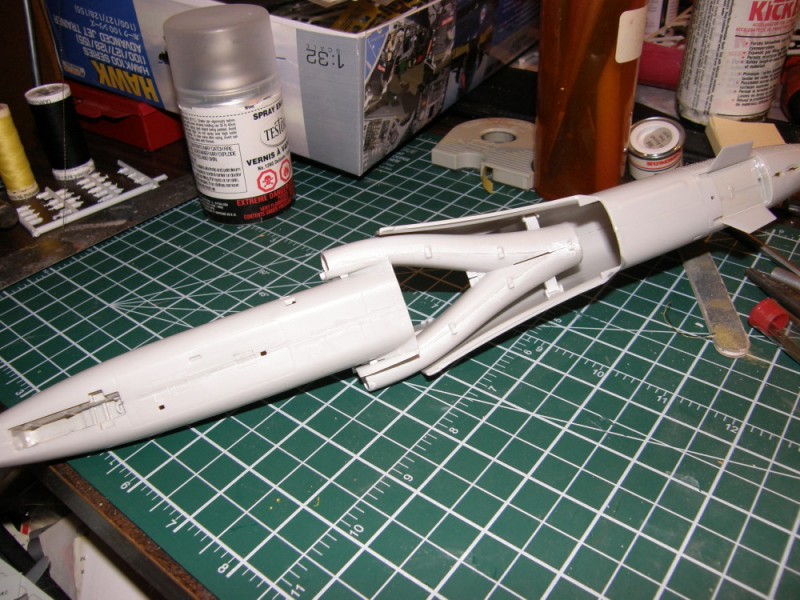
Now we almost have an airplane!

And a quick test fit in the cockpit to see how they look
I mentioned a cunning plan to deal with the intakes. Here it is.
First, chisel out the bottom of the rear intake mounts on the fuselage sides
Glue the intake halves together, making sure to remember to glue on the intake fan, then deal with the seam inside the upper exhaust vent
Now a quick digression to make sure all the other things which have to go inside the fuselage are all glued in. Add 21 g of nose weight, just because
Then once the fuselage is nicely buttoned up, it's time to deal with those intakes. Drop the rear inside the fuselage
Then carefully shoehorn the intakes into their mounting holes on the fuselage sides. They'll snap into position with a little persuasion
Now we almost have an airplane!
c4willy
#305
Joined: February 01, 2006
KitMaker: 1,673 posts
AeroScale: 1,517 posts
Posted: Wednesday, August 14, 2013 - 06:19 PM UTC
hi Jess yes duly noted and they seem to sit between the pilots legs if I'm not mistaken? So that kind of renders that idea redundant for this build at least but there are others .... LOL many others.....
epshifty
Joined: August 05, 2011
KitMaker: 376 posts
AeroScale: 348 posts
Posted: Thursday, August 15, 2013 - 09:08 AM UTC
Hi all .. Quick update with the E-2 got most of the filling and sanding done and got the glass on . I put 100 grams of nose weight in as iv had plenty of warnings about tail sitting , that might sound a lot but to be honest its about right .. Also iv started some pre shading on the upper wing surfaces ...


Jessie_C
Joined: September 03, 2009
KitMaker: 6,965 posts
AeroScale: 6,247 posts
Posted: Thursday, August 15, 2013 - 09:41 AM UTC
That looks really impressive when it's all together.
epshifty
Joined: August 05, 2011
KitMaker: 376 posts
AeroScale: 348 posts
Posted: Friday, August 16, 2013 - 06:24 AM UTC
Thanks Jess yeah it is rather cool , i wanted to build it with the wings extended as most of the ones you see have them folded... Its got quite a span i can tell you and also its quite heavy now too
noddy927
Joined: February 15, 2013
KitMaker: 1,273 posts
AeroScale: 200 posts
Posted: Friday, August 16, 2013 - 06:28 AM UTC
Hey Dave nice work buddy, what do you use for shading in the panel lines?
Pete
Pete
epshifty
Joined: August 05, 2011
KitMaker: 376 posts
AeroScale: 348 posts
Posted: Friday, August 16, 2013 - 10:54 AM UTC
Cheers Pete .. its very simple just a very soft artists pencil i use a 6B it works quite well giving you nice dark lines that you can see after you have painted. For older aircraft like ww2 you can smudge the lines afterwards with your fingers to give you a more dirty looking panel line, and also if you make a mistake you can use a wet cotton bud to wipe it off and start again , the trick is to keep the pencil sharp so it dosnt slip out of the panel lines while you doing it ..
noddy927
Joined: February 15, 2013
KitMaker: 1,273 posts
AeroScale: 200 posts
Posted: Saturday, August 17, 2013 - 03:23 AM UTC
Neat idea Dave.
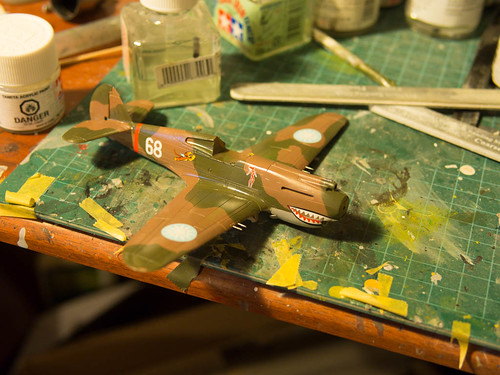
Been busy with the Hawk T1 and I am calling this finito.
Pics ...yeah it is meant to be that shiny.


Will upload to campaign asap.
Cheers Pete
Been busy with the Hawk T1 and I am calling this finito.
Pics ...yeah it is meant to be that shiny.


Will upload to campaign asap.
Cheers Pete
epshifty
Joined: August 05, 2011
KitMaker: 376 posts
AeroScale: 348 posts
Posted: Saturday, August 17, 2013 - 06:22 AM UTC
Great looking Hawk Pete i really like that paint scheme well done finishing sir
noddy927
Joined: February 15, 2013
KitMaker: 1,273 posts
AeroScale: 200 posts
Posted: Sunday, August 18, 2013 - 01:36 AM UTC
Thanks Dave Hope to enter it into Glasgow show later in the year, never had a wingy in the east of scotland show.
Hows the E-2 coming along?
Pete
Hows the E-2 coming along?
Pete
epshifty
Joined: August 05, 2011
KitMaker: 376 posts
AeroScale: 348 posts
Posted: Sunday, August 18, 2013 - 05:29 AM UTC
Thats great yull have to let us know how you get on .. The E-2 is coming along iv nearly finished the pre shading now , im about to go out to the workshop now actually haha

mykroft
Joined: November 14, 2009
KitMaker: 270 posts
AeroScale: 264 posts

Posted: Sunday, August 18, 2013 - 06:05 AM UTC
noddy927
Joined: February 15, 2013
KitMaker: 1,273 posts
AeroScale: 200 posts
Posted: Sunday, August 18, 2013 - 06:30 AM UTC
Nice work Adam. I have a cutting mat that looks just like that one lol.
Cheers Pete
Cheers Pete

Lakota
#123

Joined: November 17, 2008
KitMaker: 1,202 posts
AeroScale: 292 posts
Posted: Sunday, August 18, 2013 - 11:33 AM UTC
Howdy Y'all 
@Peter-Sweet Hawk
@Adam-Nice, it's coming along great.
I'm way behind. I got to put a little work on the cockpit today. I'm sweating out the deadline cuz I'm a slow builder.
Don "Lakota"

@Peter-Sweet Hawk
@Adam-Nice, it's coming along great.
I'm way behind. I got to put a little work on the cockpit today. I'm sweating out the deadline cuz I'm a slow builder.
Don "Lakota"
epshifty
Joined: August 05, 2011
KitMaker: 376 posts
AeroScale: 348 posts
Posted: Monday, August 19, 2013 - 04:55 AM UTC
Hi Don  dont worry you can do it !! looking good so far
dont worry you can do it !! looking good so far 
warreni

Joined: August 14, 2007
KitMaker: 5,926 posts
AeroScale: 2,201 posts
Posted: Monday, August 19, 2013 - 07:09 PM UTC
Well I started on the most unlikely fighter ever and got everything trimmed up and test fitted fuselage and wing wise and all was well.
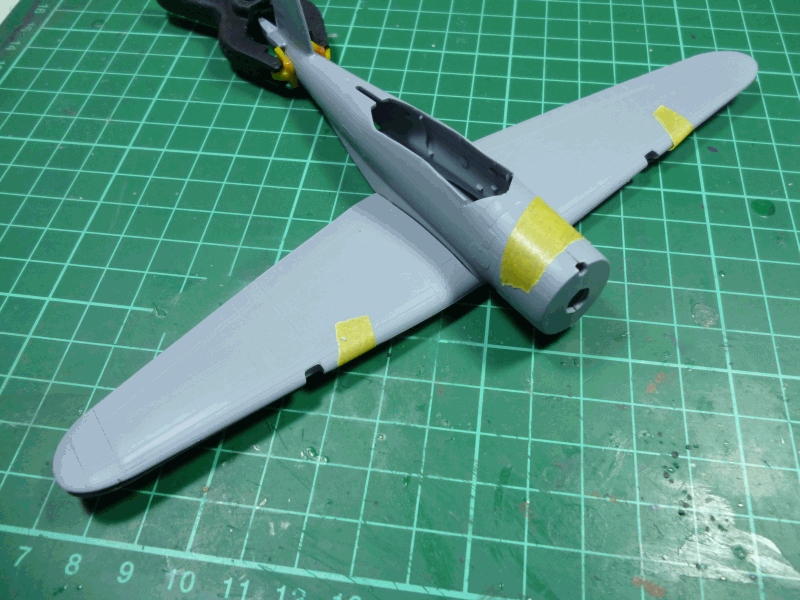
Fuselage/wing gap might even disappear with a little manipulation..
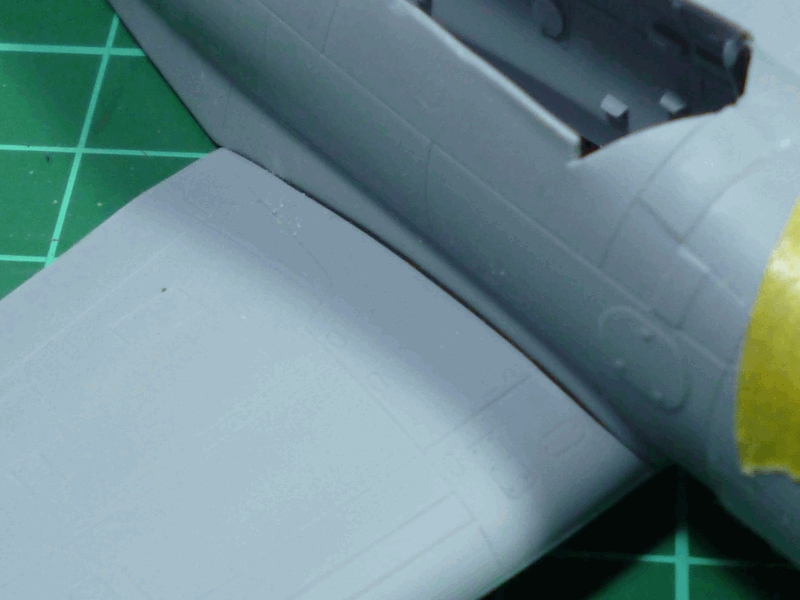
Once the fuselage is buttoned up I can install a spacer to spread the fuselage a little to close that gap.
The holes in the bottom of the wings were all flashed over to varying degrees..

Then I started on the cockpit and found the first colour I needed for painting is Cockpit Green which I don't have.. I ordered some from the Xtracylic range which hopefully will get here before the campaign ends..
Anyone know the correct colour in Gunze or Tamiya??
Cheers for now
Warren
Fuselage/wing gap might even disappear with a little manipulation..
Once the fuselage is buttoned up I can install a spacer to spread the fuselage a little to close that gap.
The holes in the bottom of the wings were all flashed over to varying degrees..
Then I started on the cockpit and found the first colour I needed for painting is Cockpit Green which I don't have.. I ordered some from the Xtracylic range which hopefully will get here before the campaign ends..
Anyone know the correct colour in Gunze or Tamiya??
Cheers for now
Warren
noddy927
Joined: February 15, 2013
KitMaker: 1,273 posts
AeroScale: 200 posts
Posted: Tuesday, August 20, 2013 - 03:47 AM UTC
Nice work Warren....that is some gap to close up between the wing root and fuse. What scale is it?
Pete
Pete
Jessie_C
Joined: September 03, 2009
KitMaker: 6,965 posts
AeroScale: 6,247 posts
Posted: Tuesday, August 20, 2013 - 04:01 AM UTC
Quoted Text
Anyone know the correct colour in Gunze or Tamiya??
Cheers for now
Warren
Tamiya's Mitsubishi interior green is very close. Apply a little shading, sludge wash and drybrushing and nobody would be able to tell even if they wanted to.
noddy927
Joined: February 15, 2013
KitMaker: 1,273 posts
AeroScale: 200 posts
Posted: Tuesday, August 20, 2013 - 04:06 AM UTC
Hey Jess how is the Hawk coming along?
Pete
Pete
warreni
Joined: August 14, 2007
KitMaker: 5,926 posts
AeroScale: 2,201 posts
Posted: Tuesday, August 20, 2013 - 06:52 AM UTC
Quoted Text
Nice work Warren....that is some gap to close up between the wing root and fuse. What scale is it?
Pete
Hi there Peter.
It is the 1/72 Special Hobby kit. A bit of resin in it, not too much, and the surface detailing is marvellous. If you have a look back in the thread I uploaded a few pictures of the kit.
Cheers
Warren
warreni
Joined: August 14, 2007
KitMaker: 5,926 posts
AeroScale: 2,201 posts
Posted: Tuesday, August 20, 2013 - 06:53 AM UTC
Quoted Text
Quoted TextAnyone know the correct colour in Gunze or Tamiya??
Cheers for now
Warren
Tamiya's Mitsubishi interior green is very close. Apply a little shading, sludge wash and drybrushing and nobody would be able to tell even if they wanted to.
Do you know I could not find ANYWHERE that has a cross reference for that colour... And then the Queen of Aeroscale comes along and gives me the exact information I need. All hail Queen Jessica! That means I'll be using XF-71 then which I just happen to have a jar of..
I am amazed at hopw long Tamiya paint lasts, I have some I bought back in the mid 1990s and it is still good.
I could have just oredered it from WEM in their Colourcoats range (which is excellent for enamels) but some idiot has decided that it is too dangerous to ship little tiny cans of paint in parcels from the UK and customs are seizing the parcels. Someone justifying thei job by inconveniencing everyone.
Cheers
Warren
 |

WEB HOSTING BY


Copyright ©2021 AeroScale and Kitmaker Network, a subsidiary of Silver Star Enterprises
All Rights Reserved. Please read our Conditions of Use and Privacy Policy.
All Rights Reserved. Please read our Conditions of Use and Privacy Policy.