

Chris,
Glad to see you got your mojo back! Your build is coming along nicely.
Gaz
Air Campaigns
Want to start or join a group build? This is where to start.
Want to start or join a group build? This is where to start.
Hosted by Frederick Boucher, Michael Satin
OFFICIAL: Dive Bomber Campaign

GazzaS

#424

Joined: April 23, 2015
KitMaker: 4,648 posts
AeroScale: 1,938 posts

Posted: Friday, September 02, 2016 - 02:28 PM UTC

c4willy
#305

Joined: February 01, 2006
KitMaker: 1,673 posts
AeroScale: 1,517 posts

Posted: Saturday, September 03, 2016 - 04:32 AM UTC
Cheers Gaz! It's been rather a long dry spell so to speak glad to be back.

Emeritus

Joined: March 30, 2004
KitMaker: 2,845 posts
AeroScale: 1,564 posts

Posted: Saturday, September 03, 2016 - 08:01 PM UTC
Yes, finally! 
While far from perfect with some very slight ridges from the tightly masked primer imperfections especially on the last small chipping which I just filled with Surfacer, I'll call this good enough so I can get on with the build.
Next: making some stencils for airbrushing the overpainted German markings, then decals.
Emeritus
Joined: March 30, 2004
KitMaker: 2,845 posts
AeroScale: 1,564 posts
Posted: Sunday, September 04, 2016 - 04:20 AM UTC
Using measurements from the decals, I cut Post-it note masks for the overpaints of the original fuselage and tail markings.
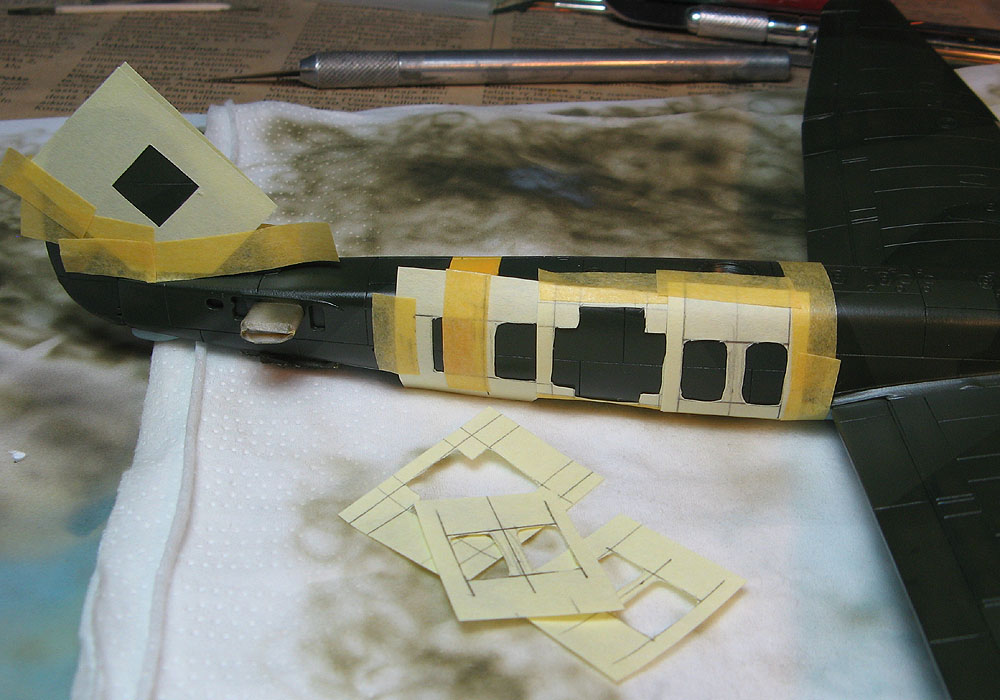
To get a bit of variation to the paint job, I used Vallejo's take on RLM 71: olive grey (#888).

Then to the overpainted balkenkreuz on the wings.
To get a bit of variation to the paint job, I used Vallejo's take on RLM 71: olive grey (#888).
Then to the overpainted balkenkreuz on the wings.

Kilo_Uniform

Joined: July 03, 2015
KitMaker: 280 posts
AeroScale: 141 posts
Posted: Sunday, September 04, 2016 - 09:34 PM UTC
Hi Eetu,
Awesome save there! Looking good sir.
Regards,
Kobus
Awesome save there! Looking good sir.
Regards,
Kobus
BoiseBlade

#523

Joined: February 28, 2014
KitMaker: 342 posts
AeroScale: 250 posts

Posted: Wednesday, September 07, 2016 - 08:00 PM UTC
Michael - ALL
Thanks for extending the Build some excellent stuff going on and being completed.
This is why I like this site! I learn a lot to help make my modeling better.
Eetu,
Outstanding Build. Thank you for thoroughly covering your build in this campaign. I have this Ju88 kit as well and can not wait to adopt some of your excellent updates to it.
Chris,
Yes welcome back. Glad to see your build coming along nicely. I know how it is. I will not get back from Biz trip till next week, puts crimp in modeling.
I have a Sub build that has got me so down I shelved it for the last few months.
Also you still planning to finish the Italia Stuka?
YES! one month before Regia Aeronautica, So Many choices to due.... Not sure what I will pick......
c4willy
#305
Joined: February 01, 2006
KitMaker: 1,673 posts
AeroScale: 1,517 posts
Posted: Thursday, September 08, 2016 - 01:47 PM UTC
Hi Jeff yup I do plan on finishing the Stuka I just need to mask the canopy and send it to the paint shop. It's stuck behind the SB2C-4 and I'm just about done with her.
Yeah it's not good when one of the things that gives me the most joy in life just doesn't hold the attention like it should. But the funk doesn't usually last to long fortunately!
Yeah it's not good when one of the things that gives me the most joy in life just doesn't hold the attention like it should. But the funk doesn't usually last to long fortunately!
Emeritus
Joined: March 30, 2004
KitMaker: 2,845 posts
AeroScale: 1,564 posts
Posted: Saturday, September 10, 2016 - 08:19 PM UTC
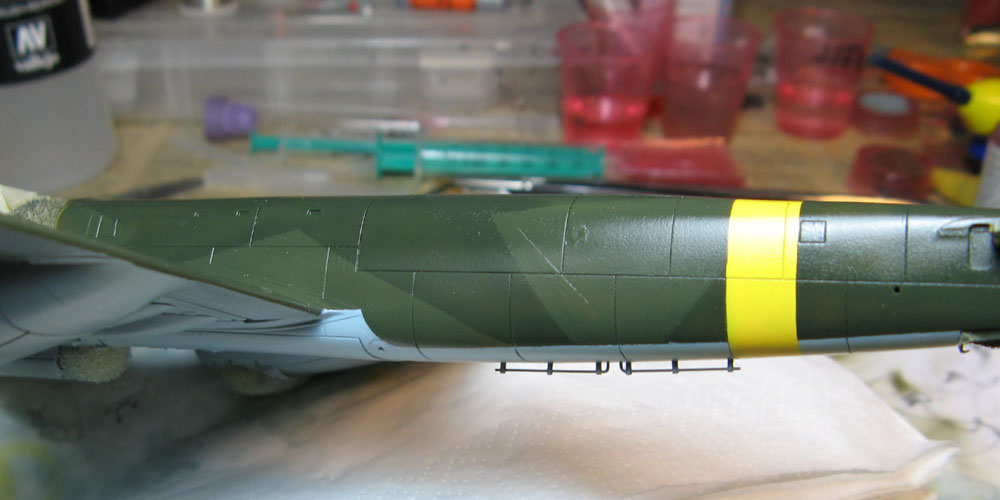
Thanks! I'm happy I got this one on track again.
Applying stencils now.
Techmod did the wing walks as separate straight segments (as did Revell on the kit sheet, except for 2 pieces), which I think is the best way to go, despite being more fiddly to apply than either single large pieces or several complex pieces with tightly croppepd carrier film.
I'm applying them a few at a time to ensure already applied pieces don't start drifting off place when putting another piece next to it, I think I might even play it safe and give them a coat of Future before laying down the next segments.
Emeritus
Joined: March 30, 2004
KitMaker: 2,845 posts
AeroScale: 1,564 posts
Posted: Sunday, September 11, 2016 - 08:54 PM UTC
...and with the wing walks done as individual straight pieces (added with the need to modify a couple to fit, which carries the risk of mistakes) comes the chances of messing things up. I done goofed...
As nothing's wonky or sticking right in your eye, I think I'm going to just live with that, considering I don't really have time to source some replacement stencils from elsewhere, and that removing the misplaced pieces could be risky (there's that primer under there...). Of course, Revell's decal sheet has the wing walks as well, but they're different enough from Techmod's that I'd have to replace all of the wing walks to keep the look consistent. And more decals to remove = more risk of that primer failing.
As nothing's wonky or sticking right in your eye, I think I'm going to just live with that, considering I don't really have time to source some replacement stencils from elsewhere, and that removing the misplaced pieces could be risky (there's that primer under there...). Of course, Revell's decal sheet has the wing walks as well, but they're different enough from Techmod's that I'd have to replace all of the wing walks to keep the look consistent. And more decals to remove = more risk of that primer failing.
Emeritus
Joined: March 30, 2004
KitMaker: 2,845 posts
AeroScale: 1,564 posts
Posted: Wednesday, September 14, 2016 - 10:29 PM UTC
Decals are on.
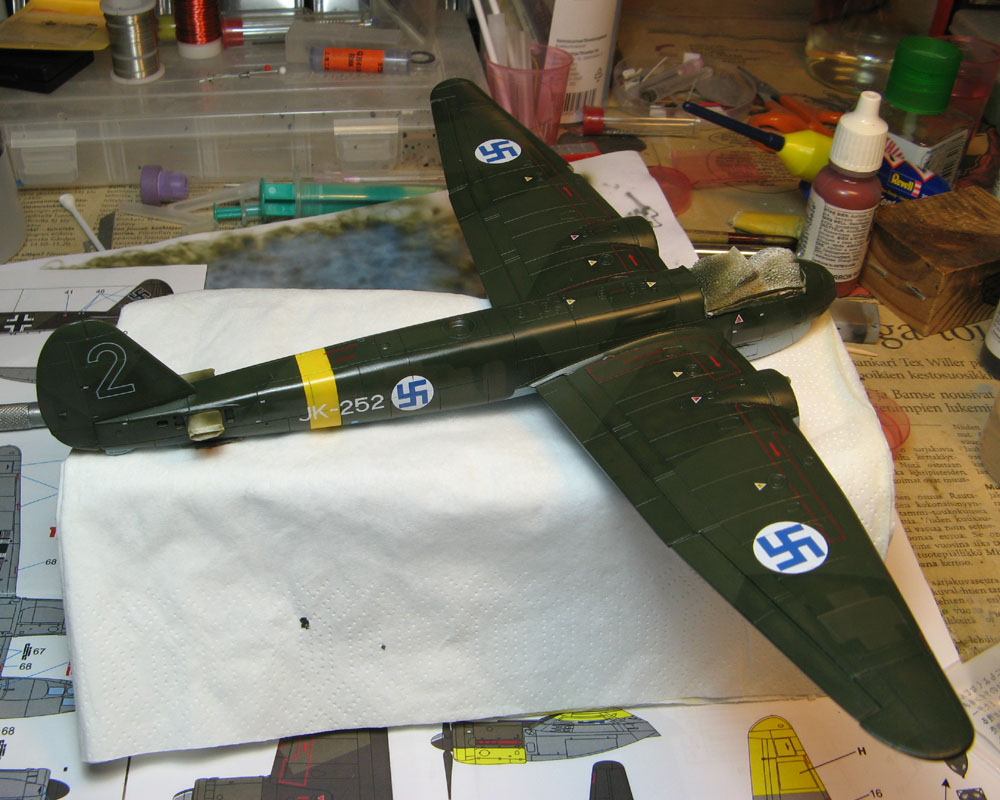
While applying them, I often kept thinking that I remembered Techmod's decals being a bit on the fragile side because of thinness of their carrier film, but this JU 88 sheet seemed much more prone to tearing and breaking. They also felt noticably more brittle than the Finnish Air Force insignia & registry number sheets I've been using for quite a while already. I feel this JU 88 might be of a different manufacturing period or something, as these Junkers decals also seemed to react to Micro Sol much less than the insignia sheets.
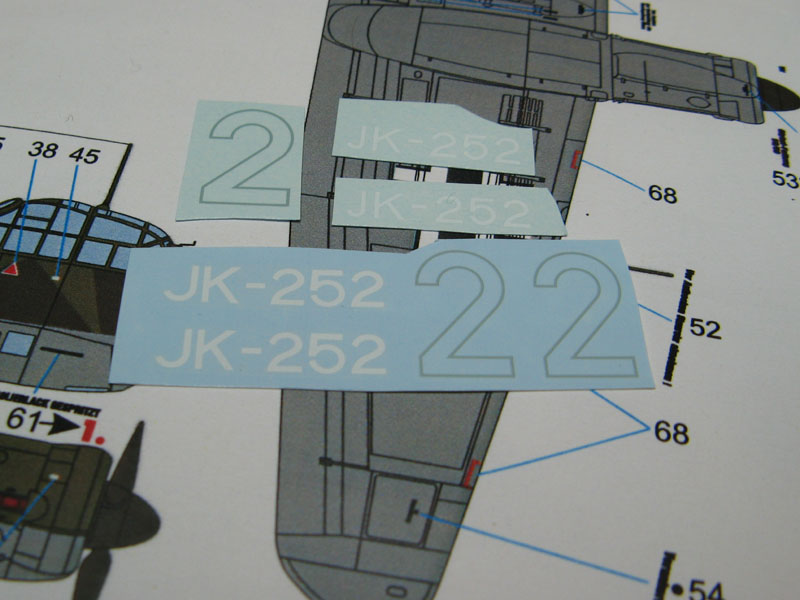
After I had a mishap with the right side tail number (it moved sligtly out of place when pressing it down and broke on my attempt to move it again), I used both the registry codes and tail numbers from the Hasegawa kit's decal sheet. Slightly thicker, but SO much more forgiving to use! (Techmod on top, Hasegawa below)
Next it's time for some weathering and finishing all the separately painted parts.

While applying them, I often kept thinking that I remembered Techmod's decals being a bit on the fragile side because of thinness of their carrier film, but this JU 88 sheet seemed much more prone to tearing and breaking. They also felt noticably more brittle than the Finnish Air Force insignia & registry number sheets I've been using for quite a while already. I feel this JU 88 might be of a different manufacturing period or something, as these Junkers decals also seemed to react to Micro Sol much less than the insignia sheets.
After I had a mishap with the right side tail number (it moved sligtly out of place when pressing it down and broke on my attempt to move it again), I used both the registry codes and tail numbers from the Hasegawa kit's decal sheet. Slightly thicker, but SO much more forgiving to use! (Techmod on top, Hasegawa below)
Next it's time for some weathering and finishing all the separately painted parts.
GazzaS
#424
Joined: April 23, 2015
KitMaker: 4,648 posts
AeroScale: 1,938 posts
Posted: Thursday, September 15, 2016 - 01:42 AM UTC
Eetu,
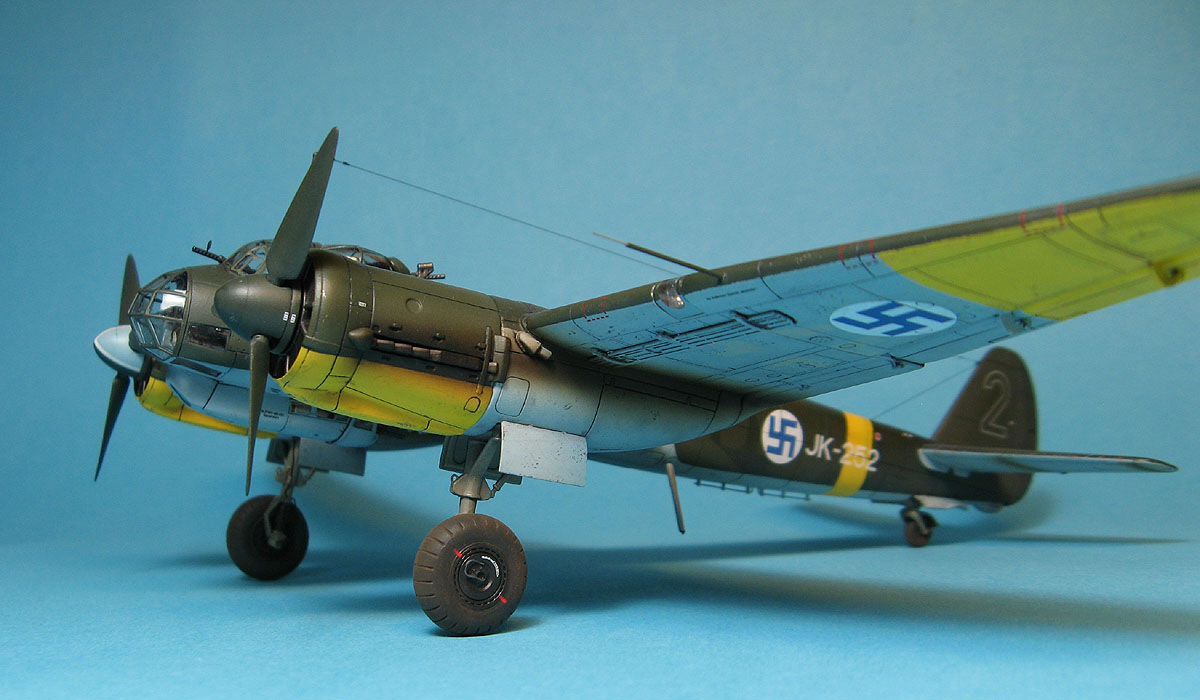
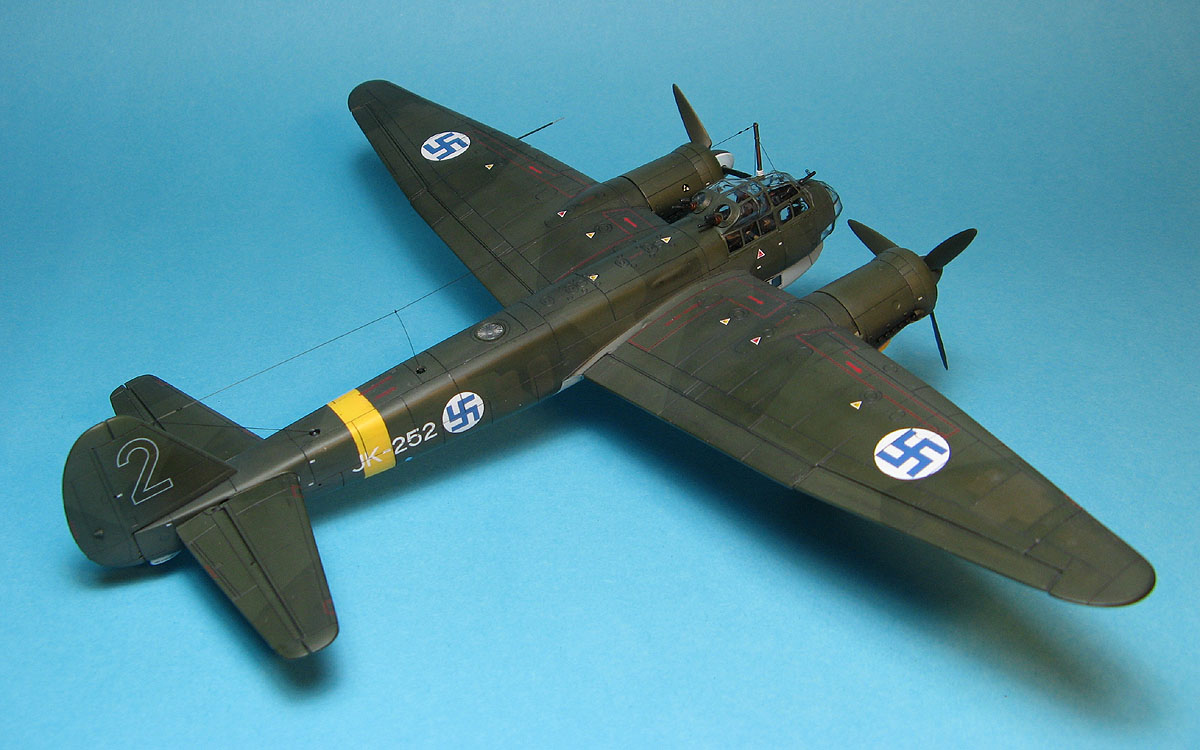
I didn't realize you were doing a Finnish Ju. I like! Paint job is primo!
Gaz
I didn't realize you were doing a Finnish Ju. I like! Paint job is primo!
Gaz
Emeritus
Joined: March 30, 2004
KitMaker: 2,845 posts
AeroScale: 1,564 posts
Posted: Saturday, September 17, 2016 - 03:45 AM UTC
Oh, I tought I had mentioned about building it as an FAF plane. Guess I didn't after all.
And thanks!
And thanks!
c4willy
#305
Joined: February 01, 2006
KitMaker: 1,673 posts
AeroScale: 1,517 posts
Posted: Monday, September 19, 2016 - 12:22 PM UTC
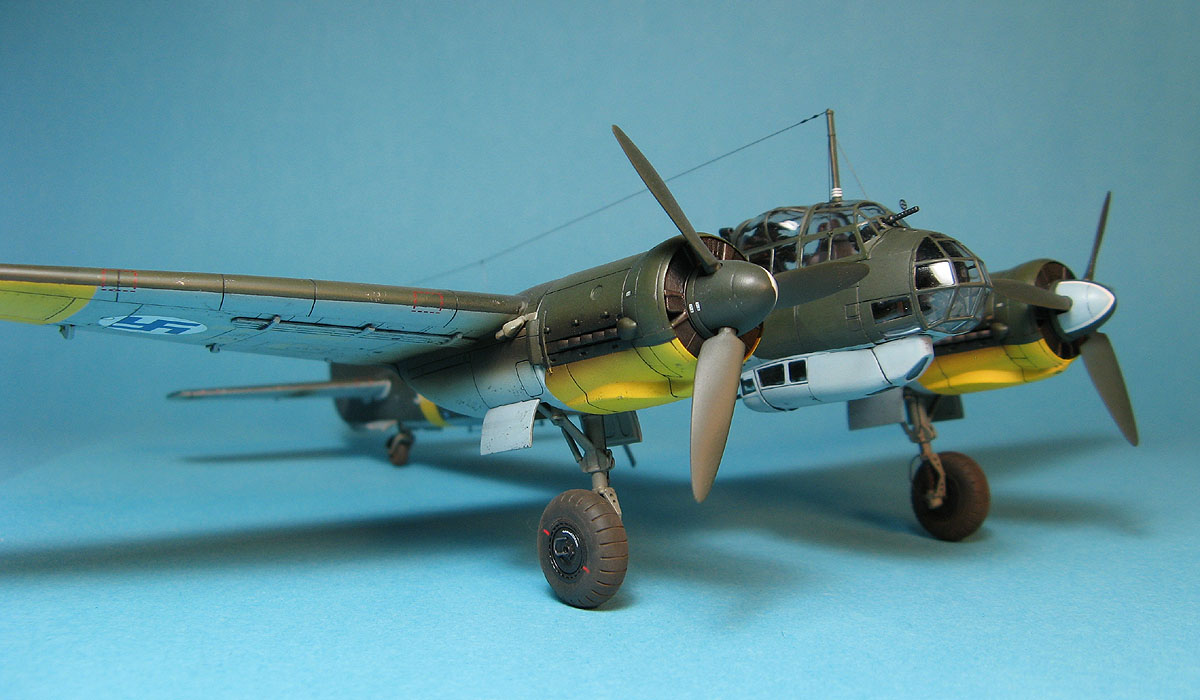
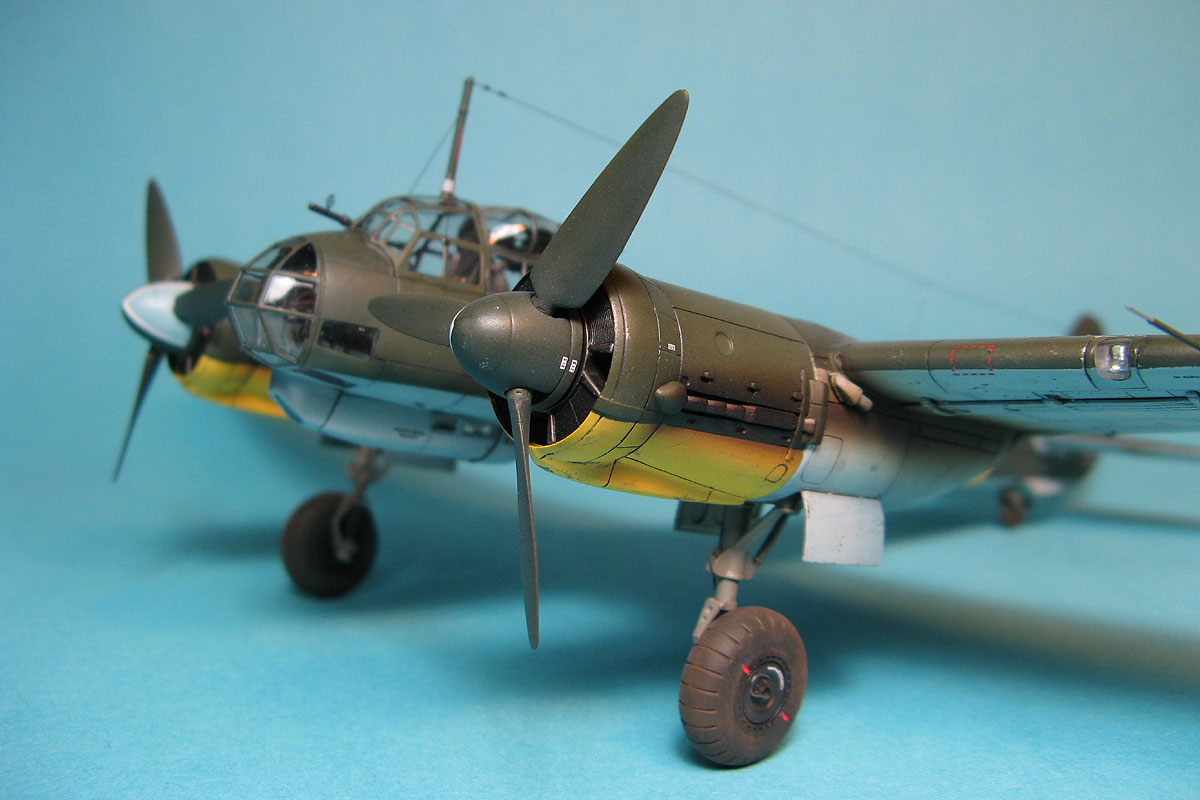
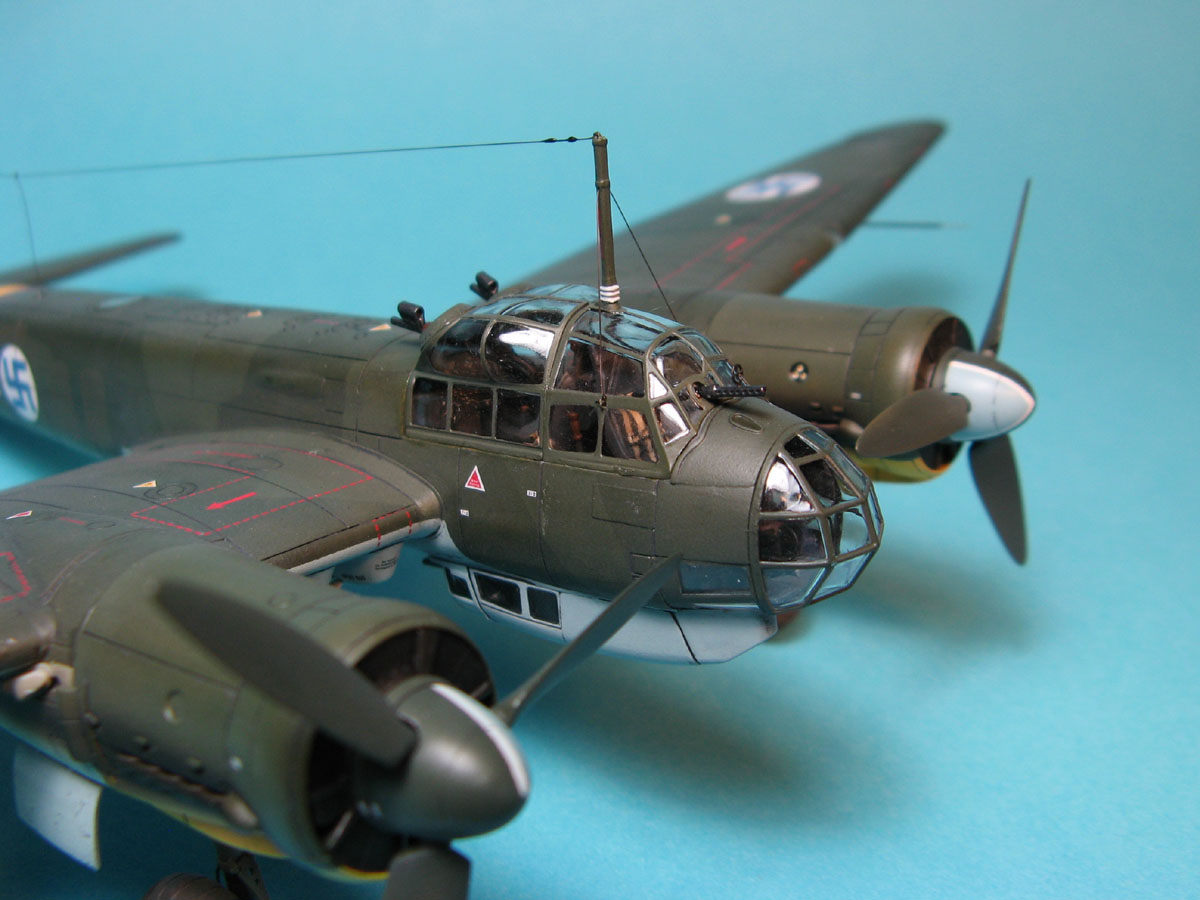
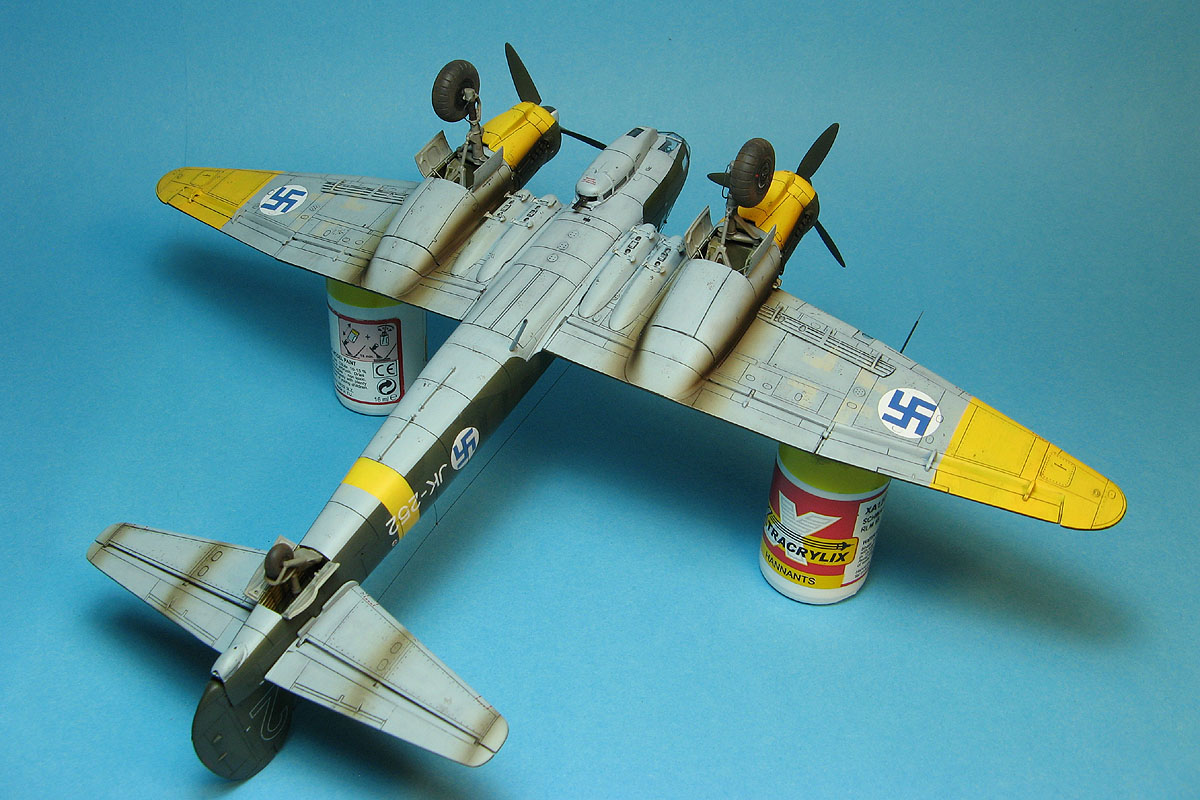
Gentlemen it is with pleasure (and a small amount of relief) that I'm calling this "Big Tailed Beast" done! I had a major mishap with the pitot tube and managed to break it off and lose it altogether. I have constructed a new one from brass rod and a little waste photo etch
which while looking a little anaemic perhaps, doesn't look to bad. So here are some pics to tide you over till I get some up in the gallery.


which while looking a little anaemic perhaps, doesn't look to bad. So here are some pics to tide you over till I get some up in the gallery.
GazzaS
#424
Joined: April 23, 2015
KitMaker: 4,648 posts
AeroScale: 1,938 posts
Posted: Monday, September 19, 2016 - 01:30 PM UTC
Chris,
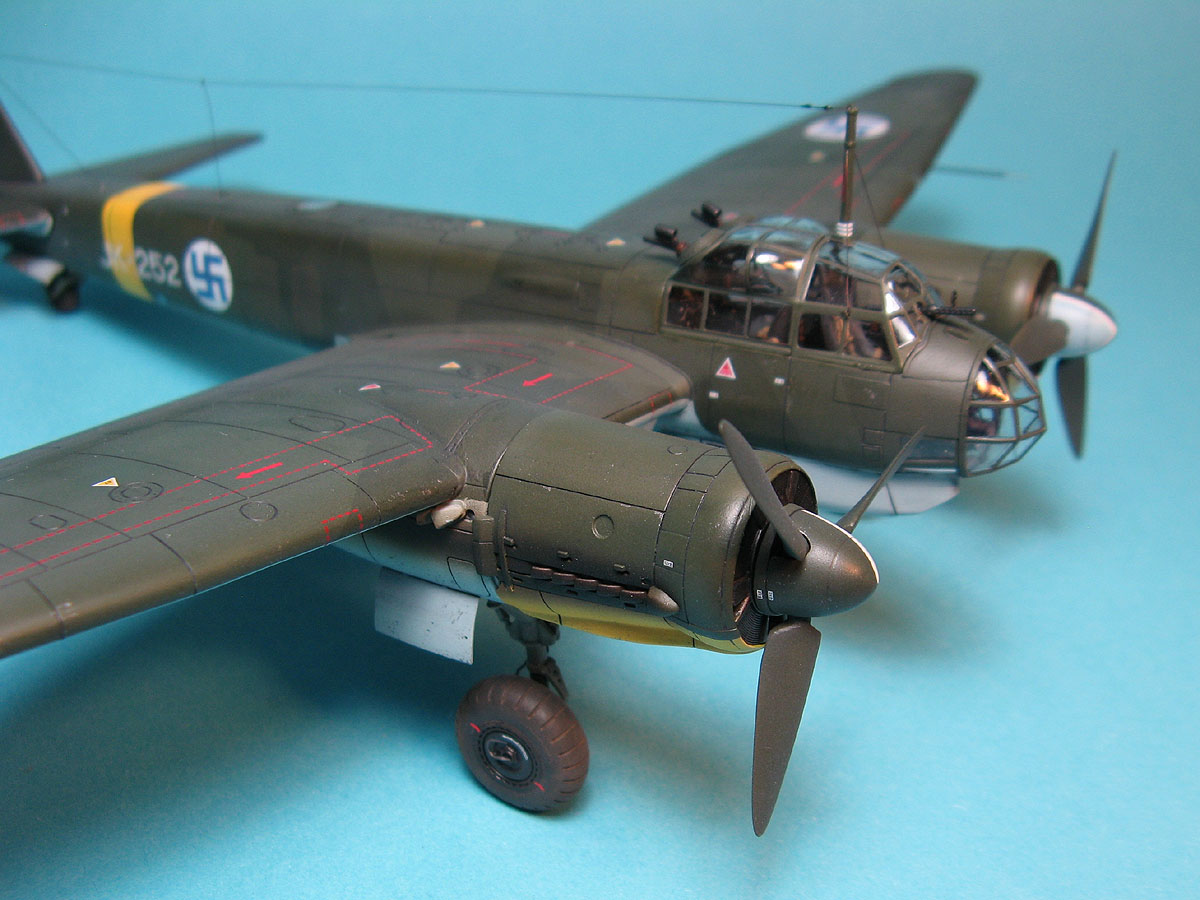
Congratulations on finishing! She looks great! Your wheel well detailing really brings out the details and depth.
Gaz
Congratulations on finishing! She looks great! Your wheel well detailing really brings out the details and depth.
Gaz
c4willy
#305
Joined: February 01, 2006
KitMaker: 1,673 posts
AeroScale: 1,517 posts
Posted: Monday, September 19, 2016 - 02:57 PM UTC
Thanks Gaz there's certainly a lot going on in those wheels wells. The detail is simplified but still rather good. I was going to paint the tubing to make it pop but the actual aircraft wells were all painted so that put paid to that idea. LOL
BoiseBlade
#523
Joined: February 28, 2014
KitMaker: 342 posts
AeroScale: 250 posts
Posted: Tuesday, September 20, 2016 - 06:27 PM UTC
Chris,
Nicely done! The paint scheme and weathering look really good.
Nicely done! The paint scheme and weathering look really good.
c4willy
#305
Joined: February 01, 2006
KitMaker: 1,673 posts
AeroScale: 1,517 posts
Posted: Wednesday, September 21, 2016 - 03:01 AM UTC
Thanks Jeff! Just got to get some pics up in the galley and work on the Regia Aeronautica Stuka this weekend.
Emeritus
Joined: March 30, 2004
KitMaker: 2,845 posts
AeroScale: 1,564 posts
Posted: Saturday, September 24, 2016 - 08:00 PM UTC
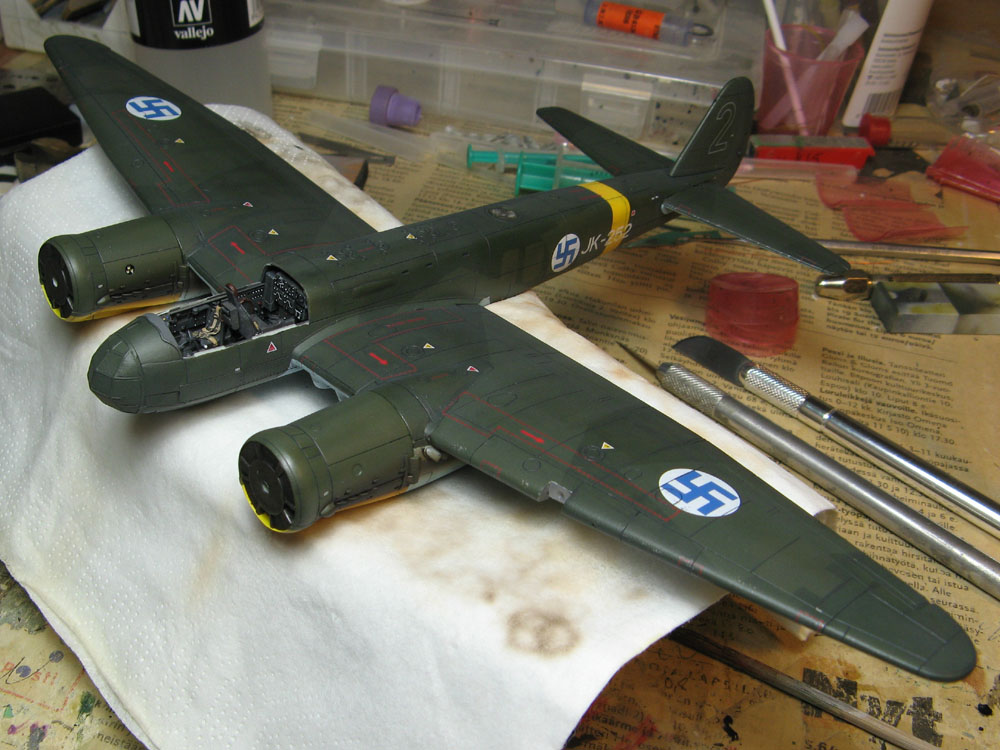
Getting there...
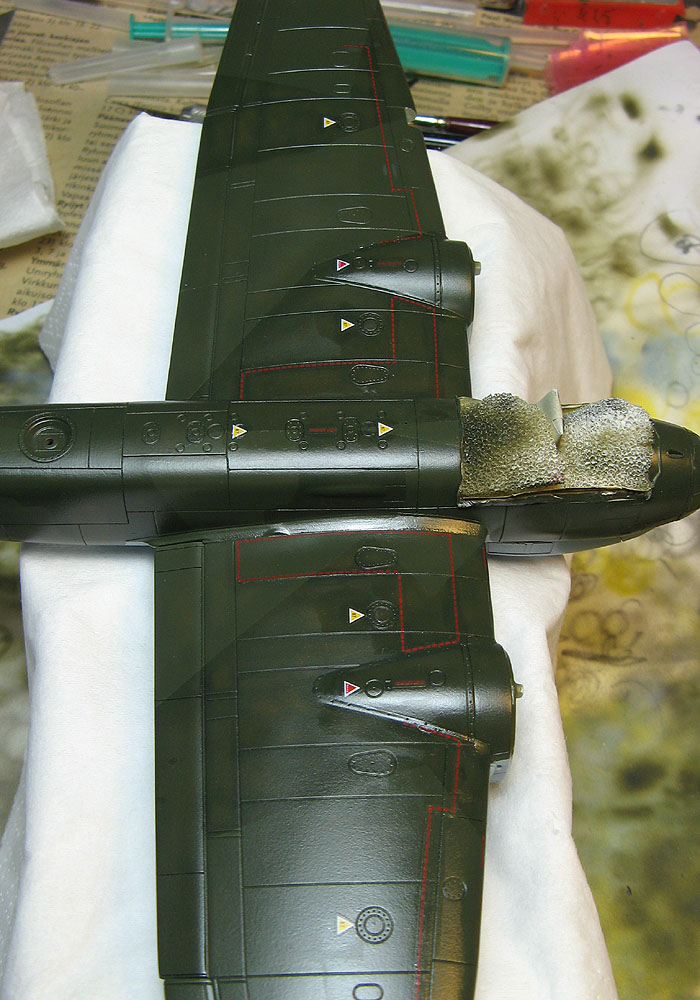
Some chipping applied here and there.
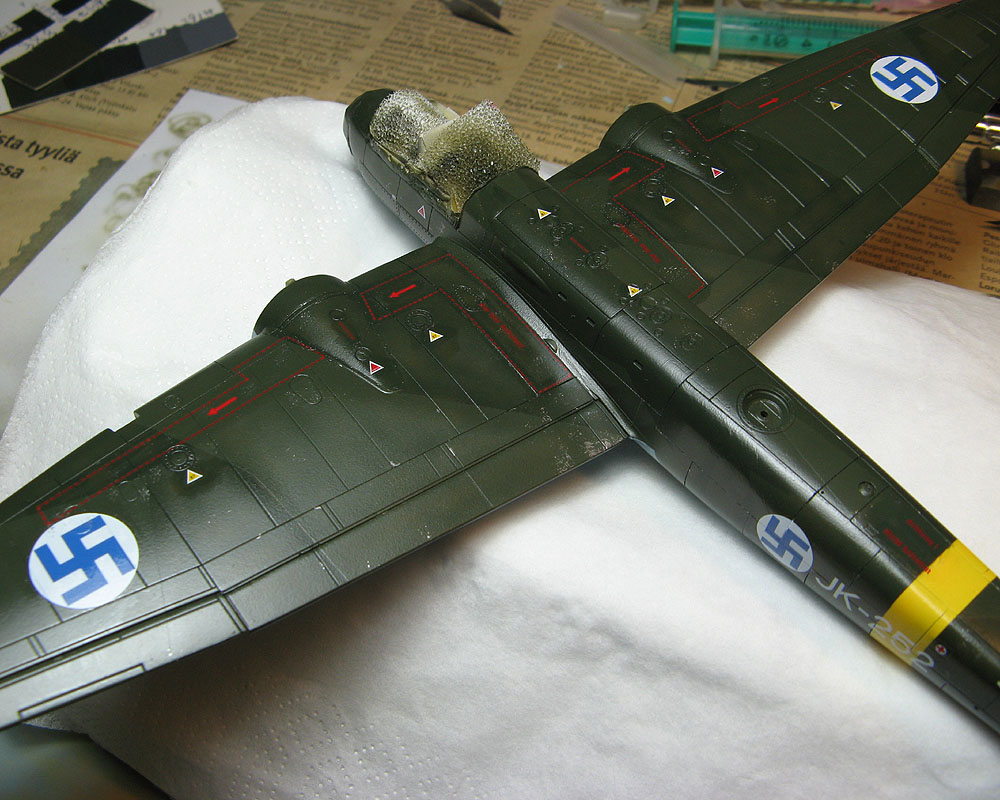
Panel lines treated with ProModeller (nowadays Flory Models) wash, 50/50 mix of black and dark dirt colors to avoid a too stark appearance. (probably should have used a lighter mix for undersides, as it looks pretty dark over the yellow and light blue...)
Final flat(ish) coat applied. That's a mixture of 2 part Tamiya Flat Base and 10 parts Future. As seen in the picture, it very easily makes a slightly hazy effect. Thinking about, I probably should have went to the 1:10 mixture instead, which dries to a slightly shinier finish and doesn't haze up. But oh, it's not too bad I think, it mutes down the contrast and does a bit of a scale effect. (and it looks worse in this picture than in reality)
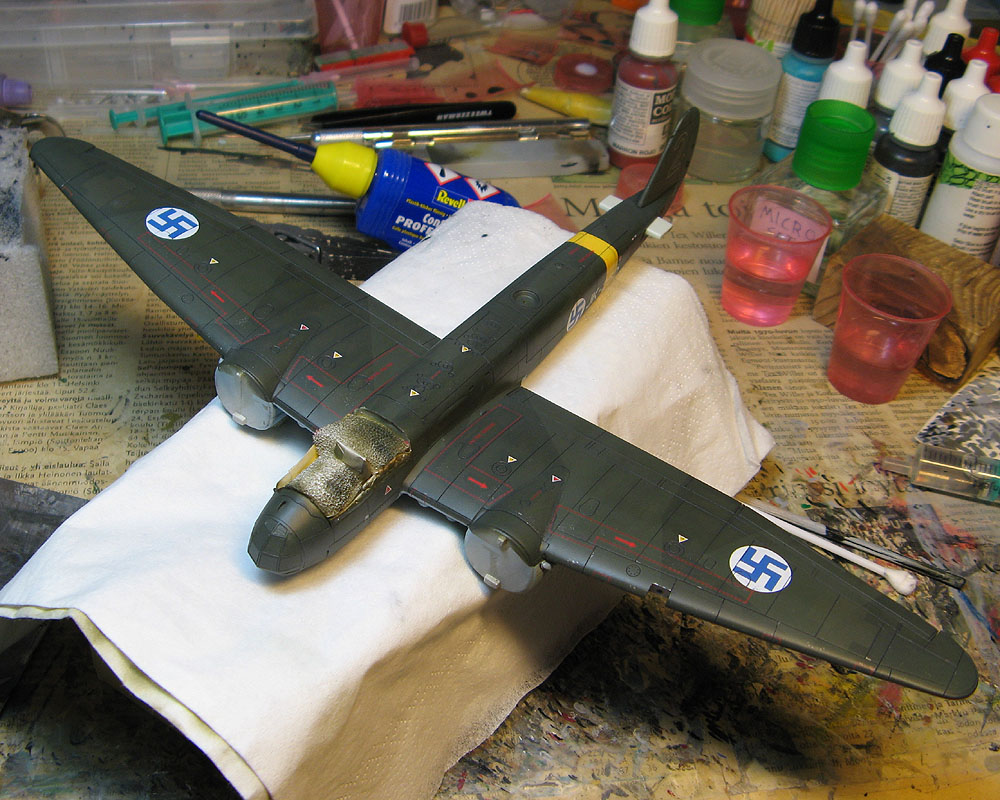
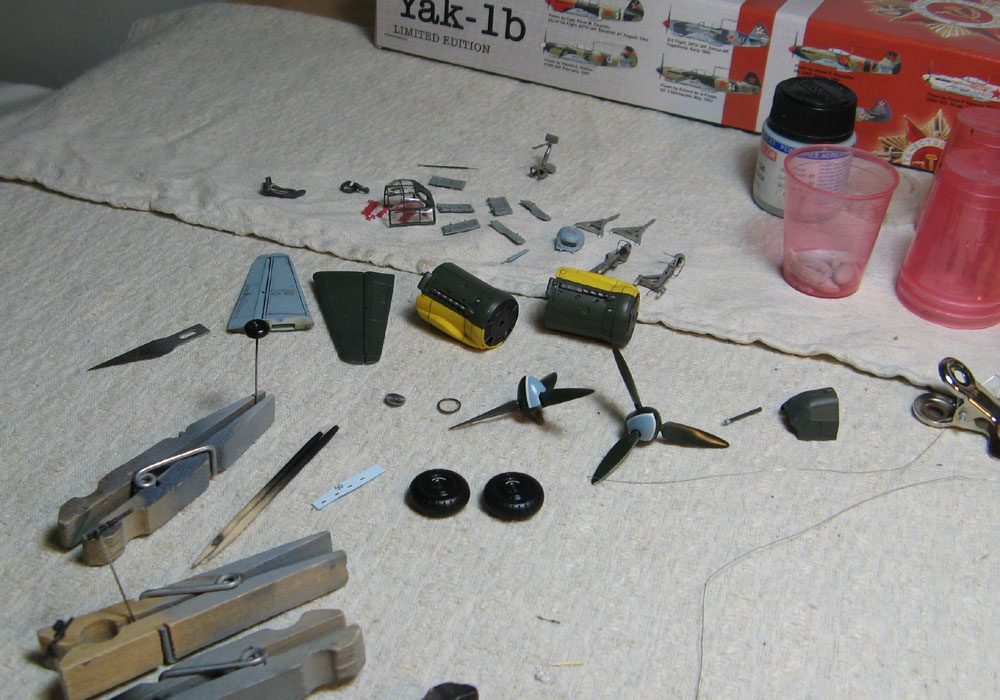
Smaller parts are coming along nicely. Only wheels left to paint & finish and then it's onto final assembly.
Some chipping applied here and there.
Panel lines treated with ProModeller (nowadays Flory Models) wash, 50/50 mix of black and dark dirt colors to avoid a too stark appearance. (probably should have used a lighter mix for undersides, as it looks pretty dark over the yellow and light blue...)
Final flat(ish) coat applied. That's a mixture of 2 part Tamiya Flat Base and 10 parts Future. As seen in the picture, it very easily makes a slightly hazy effect. Thinking about, I probably should have went to the 1:10 mixture instead, which dries to a slightly shinier finish and doesn't haze up. But oh, it's not too bad I think, it mutes down the contrast and does a bit of a scale effect. (and it looks worse in this picture than in reality)
Smaller parts are coming along nicely. Only wheels left to paint & finish and then it's onto final assembly.
Emeritus
Joined: March 30, 2004
KitMaker: 2,845 posts
AeroScale: 1,564 posts
Posted: Monday, September 26, 2016 - 05:48 PM UTC
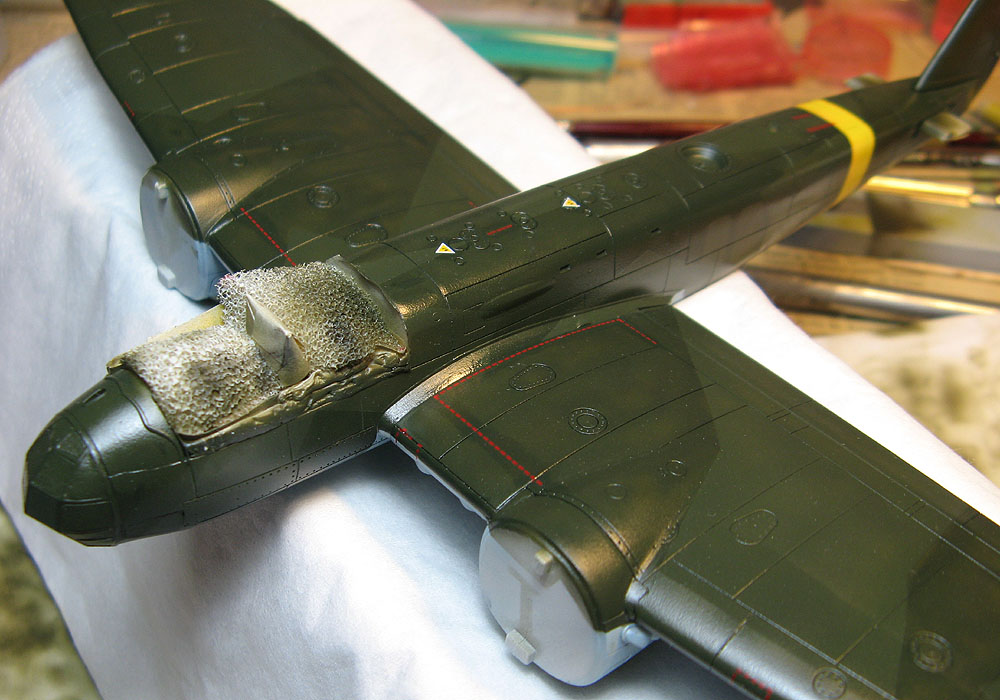
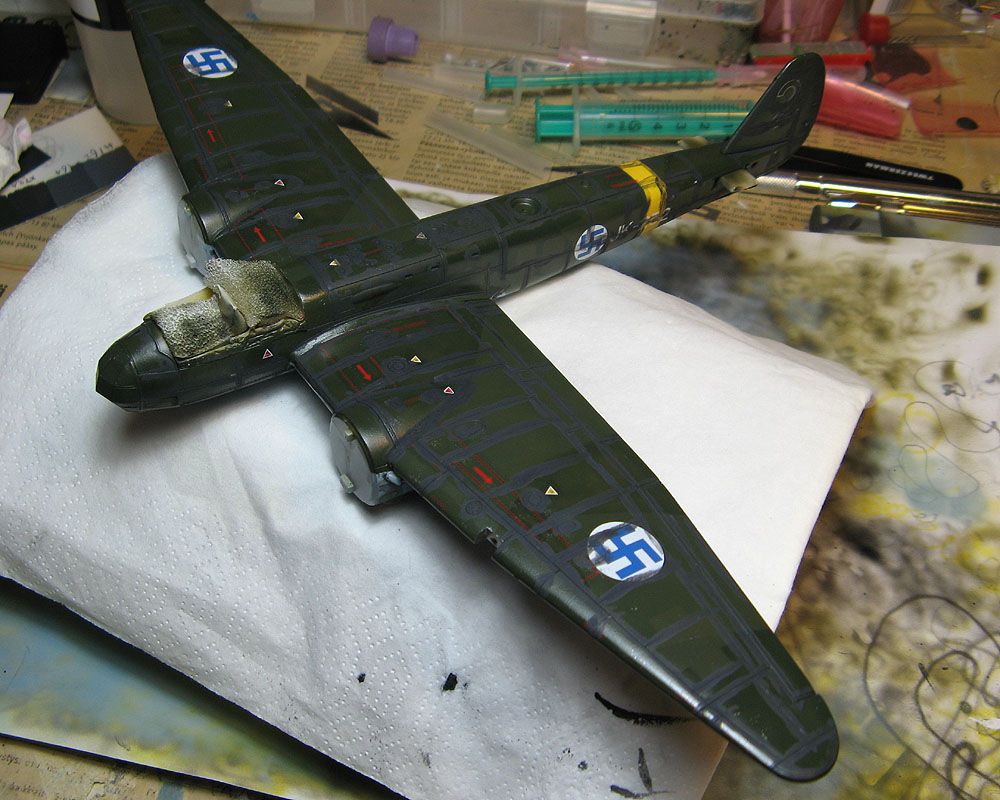
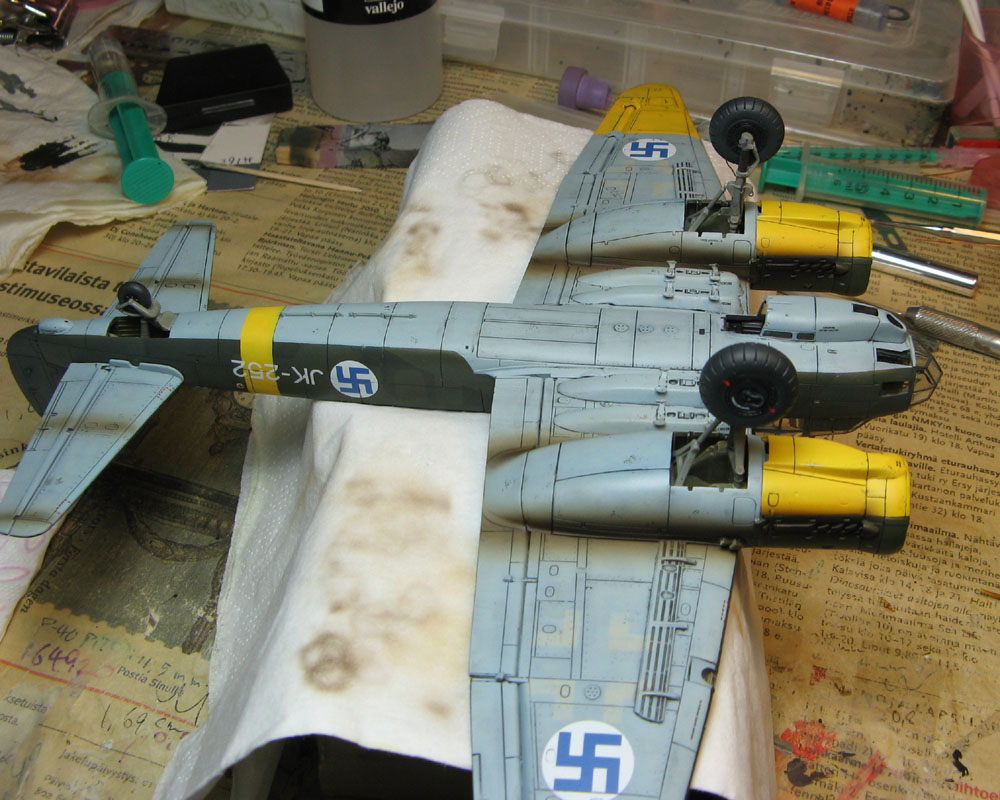
Exhaust stains airbrushed. Nacelle side engine gauges are from the kit decal sheet, as they're in color and the right size to fit in the recesses, whereas the gauge decals in Techmod's sheet are black & white and appear a bit too big (probably due to being designed for the Hasegawa kit).
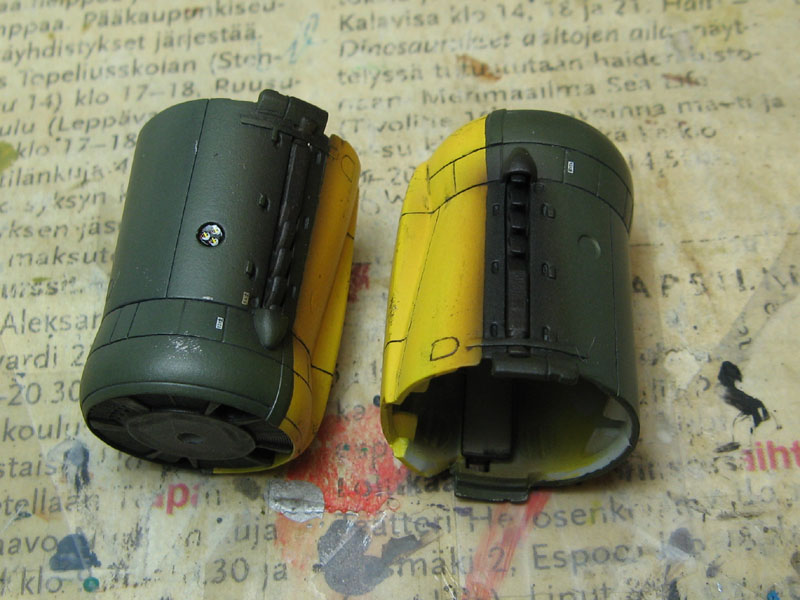
Starting to look like a bomber.
It's a bomber, it's a bomber!
Starting to look like a bomber.
It's a bomber, it's a bomber!
GazzaS
#424
Joined: April 23, 2015
KitMaker: 4,648 posts
AeroScale: 1,938 posts
Posted: Monday, September 26, 2016 - 11:12 PM UTC
Looks sweet Eetu!
BoiseBlade
#523
Joined: February 28, 2014
KitMaker: 342 posts
AeroScale: 250 posts
Posted: Wednesday, September 28, 2016 - 07:21 PM UTC
Eetu
Wow, Excellent work. The weather and painting is really good. I like the engine covers.
Wow, Excellent work. The weather and painting is really good. I like the engine covers.
Emeritus
Joined: March 30, 2004
KitMaker: 2,845 posts
AeroScale: 1,564 posts
Posted: Thursday, September 29, 2016 - 04:59 AM UTC
Thanks!
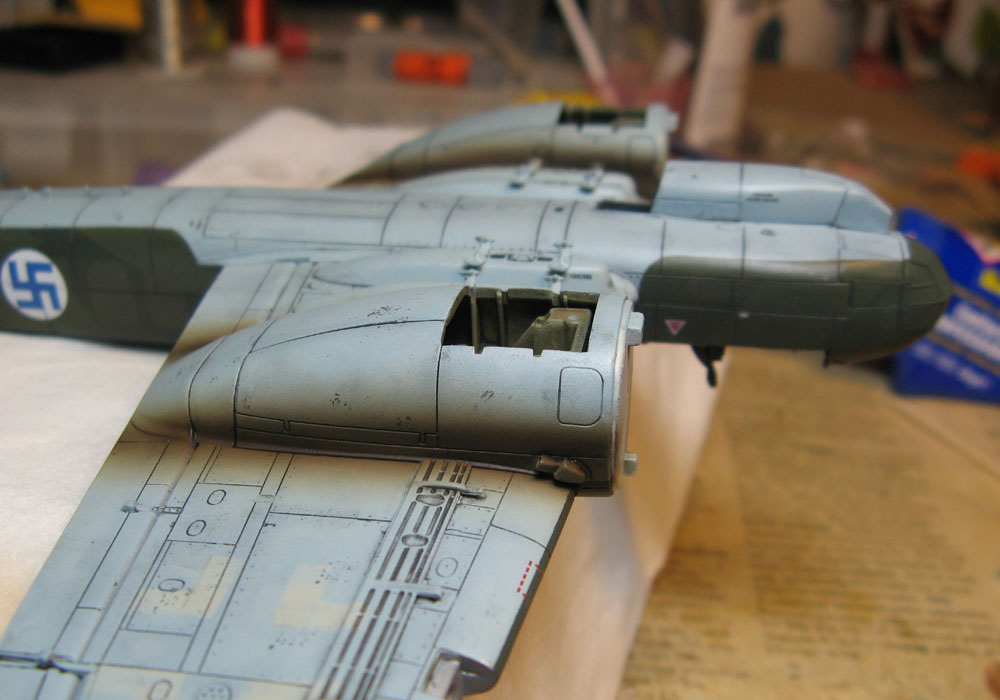
Main canopies glued in place. Yep, there's NO way I'm using tape of any kind at this poin and risk lifting another square millimeter of paint thanks to that horrid primer I used. (lower windows masks are still left in place until I'm done with touch-ups along that edge)

And yea, I remembered to reattach the pilot's seat and glue the nose MG in place prior to attaching the canopies! Good for me.
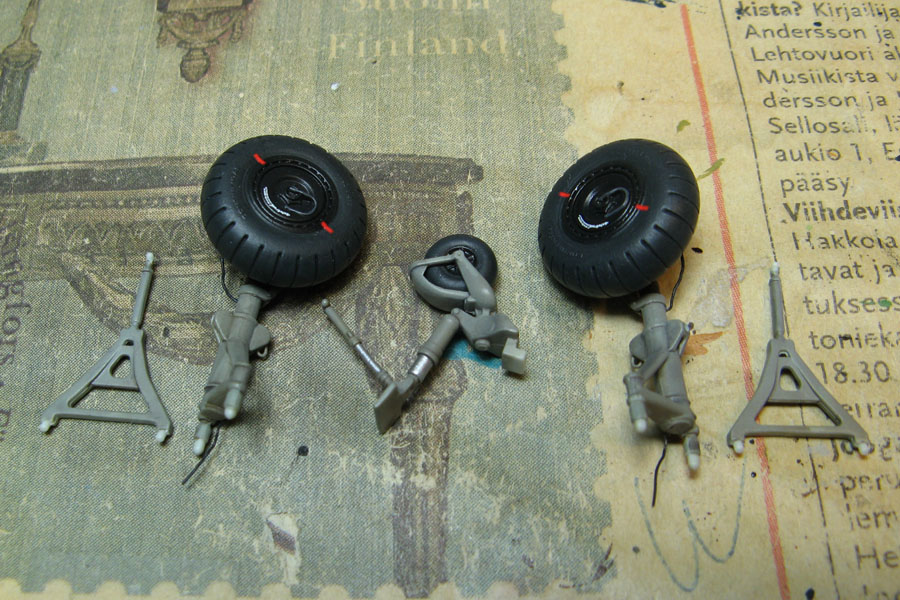
Undercarriage done, minus the dusting which I'll do after they're attached, to avoid smudging the weathering powders.
...and undercarriage in place.
Now it's just down to gluing in the rest of the detail parts and installing the antenna wires.

Main canopies glued in place. Yep, there's NO way I'm using tape of any kind at this poin and risk lifting another square millimeter of paint thanks to that horrid primer I used. (lower windows masks are still left in place until I'm done with touch-ups along that edge)
And yea, I remembered to reattach the pilot's seat and glue the nose MG in place prior to attaching the canopies! Good for me.
Undercarriage done, minus the dusting which I'll do after they're attached, to avoid smudging the weathering powders.
...and undercarriage in place.
Now it's just down to gluing in the rest of the detail parts and installing the antenna wires.
GazzaS
#424
Joined: April 23, 2015
KitMaker: 4,648 posts
AeroScale: 1,938 posts
Posted: Thursday, September 29, 2016 - 05:57 AM UTC
Eetu,
Just remember to cut the rubberband. Trying to save the rubberband usually ruins the paint.
Gaz
Just remember to cut the rubberband. Trying to save the rubberband usually ruins the paint.
Gaz
Emeritus
Joined: March 30, 2004
KitMaker: 2,845 posts
AeroScale: 1,564 posts
Posted: Thursday, September 29, 2016 - 04:54 PM UTC
Quoted Text
Eetu,
Just remember to cut the rubberband. Trying to save the rubberband usually ruins the paint.
Gaz
Precisely what I did.
Emeritus
Joined: March 30, 2004
KitMaker: 2,845 posts
AeroScale: 1,564 posts
Posted: Friday, September 30, 2016 - 03:16 AM UTC
Phew, done!
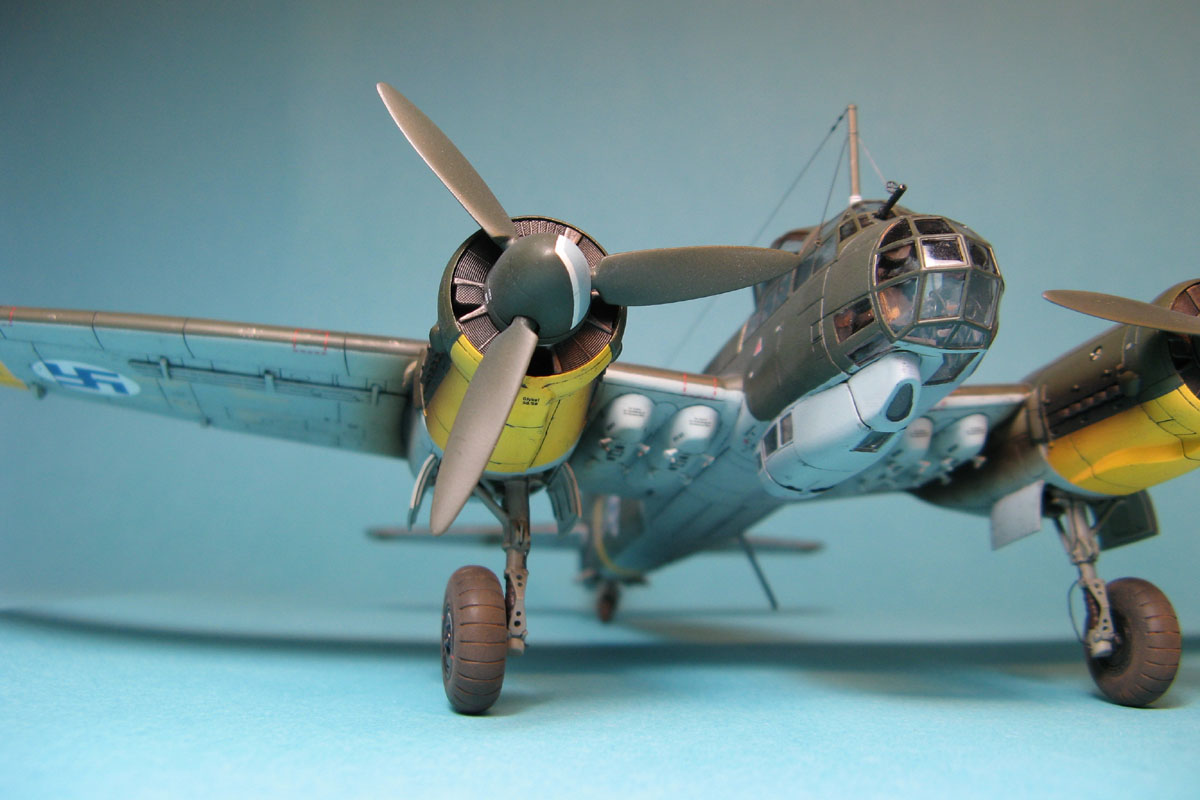
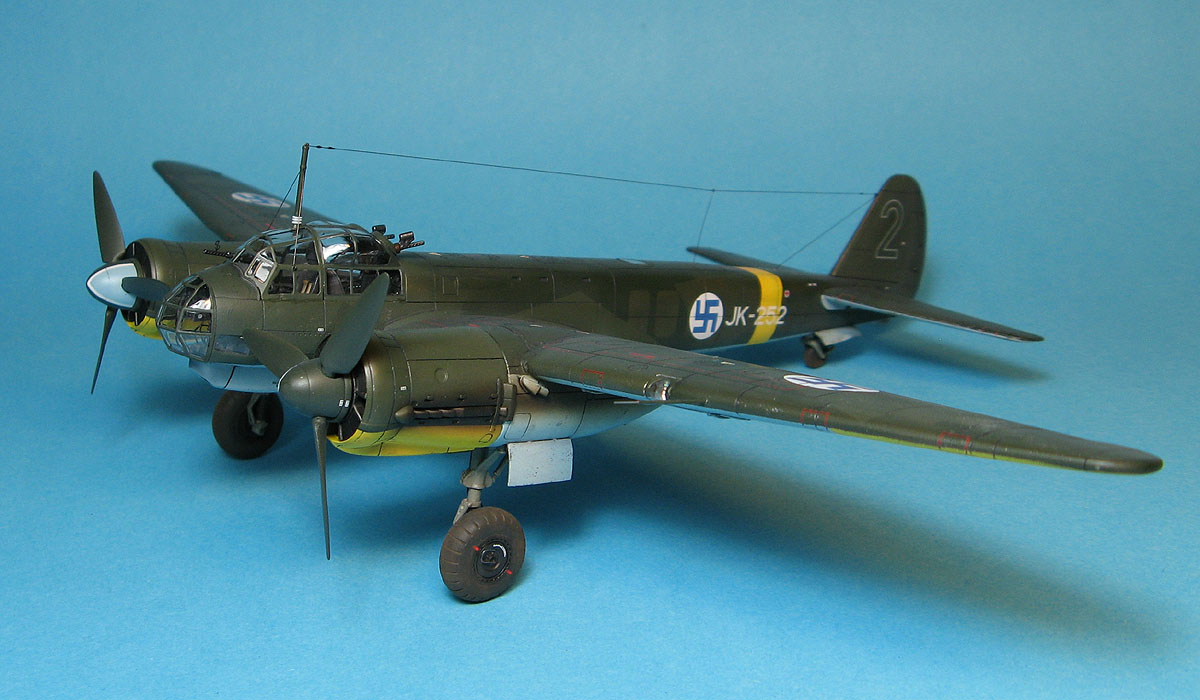
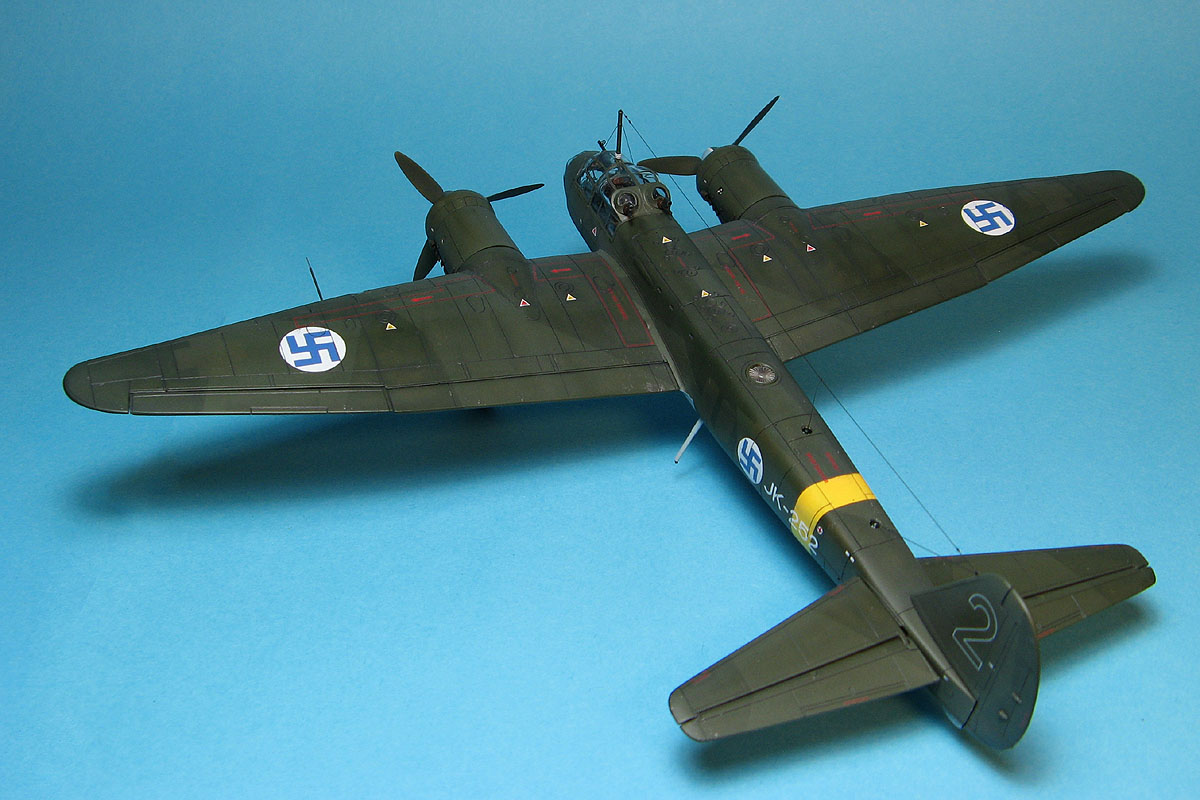
Hope you like it!
Hope you like it!
 |

WEB HOSTING BY


Copyright ©2021 AeroScale and Kitmaker Network, a subsidiary of Silver Star Enterprises
All Rights Reserved. Please read our Conditions of Use and Privacy Policy.
All Rights Reserved. Please read our Conditions of Use and Privacy Policy.