

1⁄35Spitfire Mk.I
6
Comments
painting
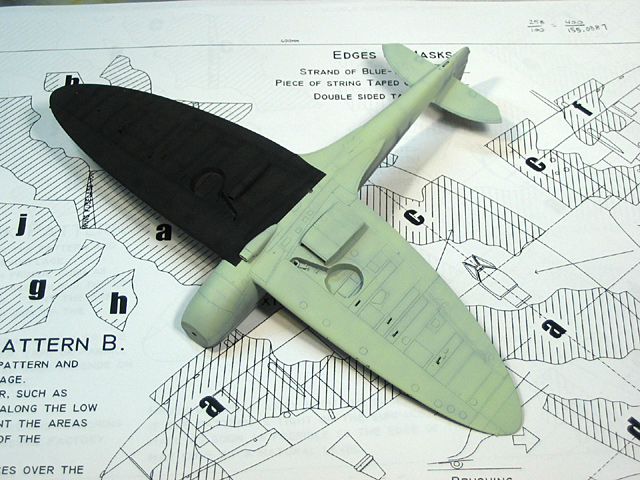
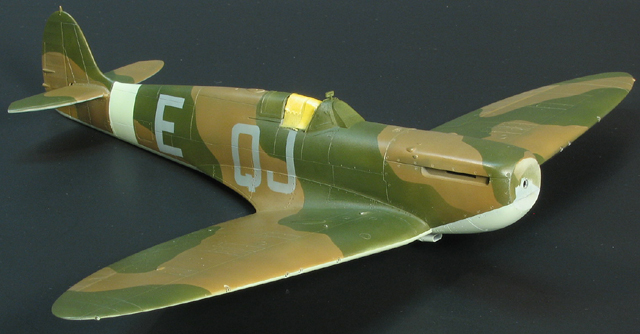
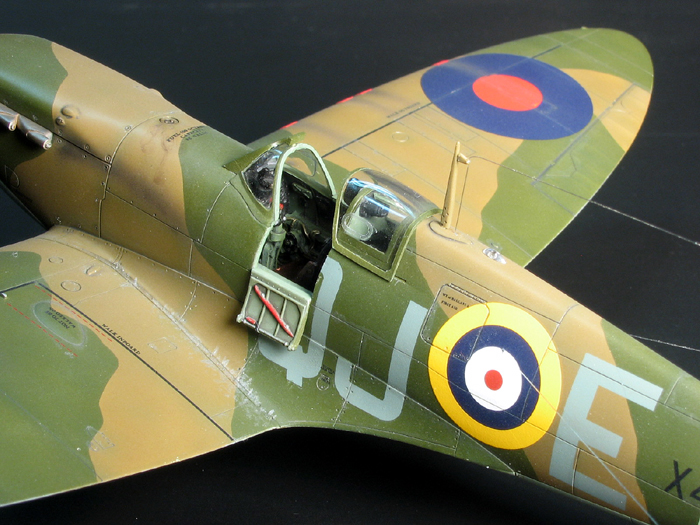
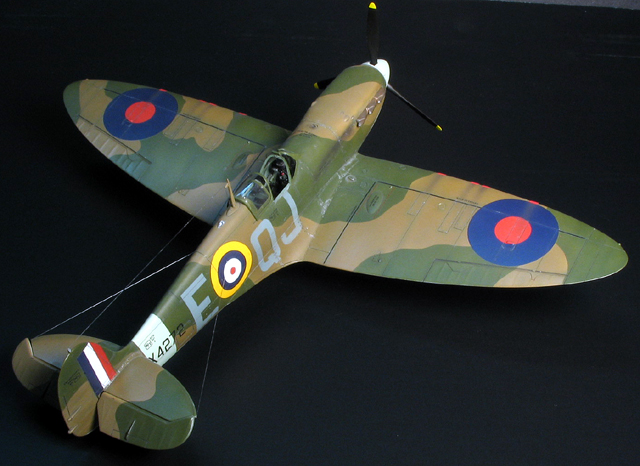
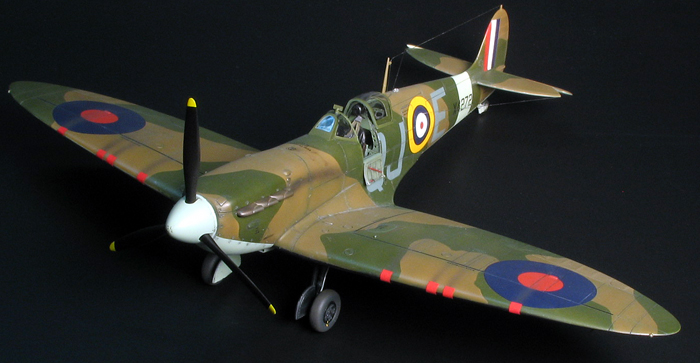
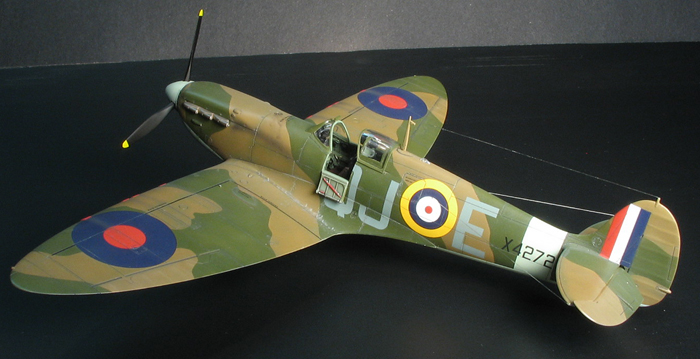
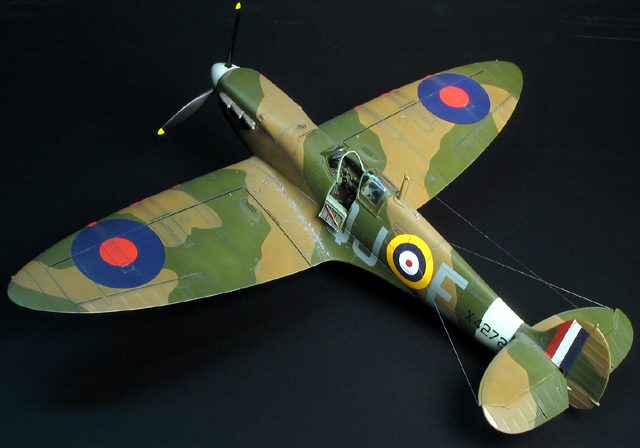
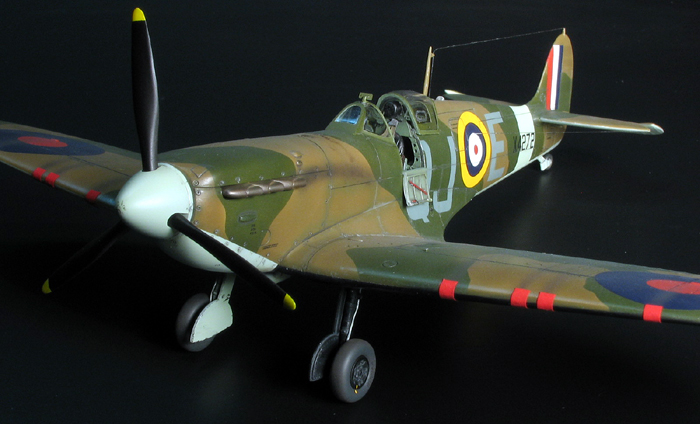
After this the elevators were cut out to allow for a more animated positioning and pre-shading was applied with Tamiya Flat Black. The camouflage painting was then applied using Tamiya tape for masking where necessary. Underside painting was done with Polly Scale Sky and a "Night" color which is actually a mix of Tamiya red brown (about 4 parts) and Tamiya flat black (about 15 parts); this allowed me to have some preshading show through the very dark color. The upper colors were Polly Scale RAF Dark Earth and Polly Scale Dark Green. Im still trying to learn to use Polly Scales paint, which tends to clog my airbrush and in the process lost a lot of the preshading due to my difficulties with it. However, that being said, I do really like the paint and will continue to work with it and figure it out.Then I decided to be really brave and to try painting on the codes. These pictures are actually my second attempt; the first was really bad, had to be removed, the camouflage in that area repainted, and then codes tried again. The left side came out pretty good, but on the right side the QJ slipped / tilted slightly without my realizing it until the masks were removed. I just couldnt bring myself to go through the whole process for a third time, so I decided it was 'good enough' and actually, the angle of the picture makes it appear much worse than it appears when looking at the model. In fact the people I have pointed it out to say they wouldnt have noticed if I hadnt had pointed it out. Hopefully this is true
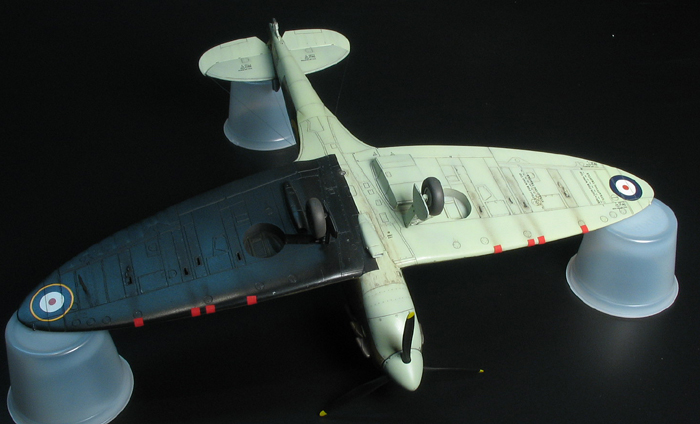
After that it was fairly smooth sailing. I gloss coated with future, applied Aeromaster decals, a Polly Scale Grimy Black wash, and a Polly Scale flat coat. Further weathering was done with pastel chalk, airbrush, silver pencil, etc. Another first on this model was the use of dry transfers for the stencils. Wow! I really liked those. I got mine from Hobby Decal (www.hobbydecal.com) and they worked very well. I would recommend trying them for at least one build just to see how nice they are.
Conclusion
Throughout this build, not only did I pester him many times asking questions, but I relied heavily on Mals great spitfire online build. If you are going to be building a spitfire, I would definitely encourage you to check that out multiple times as it helped me add many small details I otherwise wouldnt have (like creep marks on the wheels). In summary, the Tamiya spitfire kit is excellent, was easy enough to allow me to try new things and still end up with a pretty nice finished model. I highly recommended to any level of modeler. It was so enjoyable, in fact, that I figure Ill try another one in the future


About the Author


Comments
That is a great looking Spitfire build there Leon and a nice feature article.
You are really turning out some quality work on your models such as this and your Frank for the duel campaign. etc.. etc...
Keep up the great work !!
Wayne
DEC 08, 2006 - 05:30 AM

Thanks Wayne. I really appreciate it. The spit was an incredibly enjoyable build.
Leon
DEC 08, 2006 - 06:18 AM
Nice build feature. Well done, Leon.
QQ: Those red jobs that are over the gun ports (which I assume are there to ascertain whether they were fired or not?)... are those decals or they painted on?
Then... I'm sure I read somewhere that some of the early Mk.I's used a twin blade wooden prop? Is this correct? And if so when did they change to the three blade variable pitch prop?
Sorry about all the ignorant questions... all these great models are piquing (sp?) my interest in wingy things :-)
Rudi
DEC 08, 2006 - 12:47 PM

The first 77 Spitfires had two-blade props, but, if they survived, would have been re-fitted with three-bladed. There are a few points, for anyone contemplating the Tamiya Mk.I, "as is." The crowbar, on the door, did not exist, during 1940, and, at least, part of 1941; it was introduced on the Mk.V production line, and could be black, green, silver, but not red (that seems to have been a post-war innovation.) There should be IFF aerials, running from just aft of the radio hatch (but both sides) out to the tip of each tailplane; these were introduced in 1939. Ditch part no. A17, allegedly the radio. We suspect that Tamiya measured a Mk.I, which lives near here, and didn't realise that the radio, being a modern 7/20 channel set, isn't right for a Battle of Britain machine. The control box sat in the front left-hand corner, just under the front-left quadrant of the windscreen. Part no A19 is not the oxygen bottles, but the compressed air bottles; the oxygen bottle was set on the opposite side, just under the fixed glass. Both of these seem to have been corrected, on the detail set, but the oxygen bottle should be black. Very early seats, being metal, were green, but, later, they were made of a compressed resin mixture, and were a brick-red. Two-bar rudder pedals did not exist, before, at least, August, 1940. They were tested, then, and retro-fitted, on recommendation from, I believe, Bob Stanford-Tuck. Only late Mk.Is had the "automatic" retraction system; early a/c had the pump-handle fitting. The Tamiya kit is missing the armour plate, behind the seat; early fittings were unpainted steel, later they were cockpit green. Early Spitfires, built by Supermarine had a different shade, of green, from the normal shade, in the cockpit; it was a rather sickly shade, not very different from the Sky, used underneath. The red patches, over the gun muzzles, served a dual purpose; they kept dirt, and the cold out, as well as indicating that the guns were loaded, and cocked. Some groundcrew would dope pieces of newspaper over the shell ejection ports, as well.
All of this is not meant to be a criticism of this superb build, please understand that; I hope that you'll treat it as additional information.
Edgar
DEC 08, 2006 - 02:32 PM

After W.W.II international agreements stipulated that safety equipment be painted red. As the crowbar was there to help the pilot to extricate himself if trapped or if the canopy jammed when jettisoned it was considered to be an item of safety equipment. Therefore it had to be painted red. Museum exhibits and restorations often have red crowbars and it may well be still a legal requirement on flying examples.
 Black stencilling is also frequently seen and non authentic. During W.W.II the crowbar was either natural metal or painted the same colour as the door and the stencilling invariably red.

 Door on a Mk II Spitfire. No crowbar.

DEC 08, 2006 - 06:59 PM
Wow Antoni and Edgar. Thanks for the extra info. Definitely received as good extra info and not criticism. I will store the info given for future builds. Thanks!
Rudi, My red pieces are actually red painted pieces of tamiya tape.
Thanks again guys. I really appreciate the comments and extra info.
Leon
DEC 08, 2006 - 08:51 PM
Copyright ©2021 by Leon Storla. Images also by copyright holder unless otherwise noted. The views and opinions expressed herein are solely the views and opinions of the authors and/or contributors to this Web site and do not necessarily represent the views and/or opinions of AeroScale, KitMaker Network, or Silver Star Enterrpises. Images also by copyright holder unless otherwise noted. Opinions expressed are those of the author(s) and not necessarily those of AeroScale. All rights reserved. Originally published on: 2006-12-08 00:00:00. Unique Reads: 8592

WEB HOSTING BY


Copyright ©2021 AeroScale and Kitmaker Network, a subsidiary of Silver Star Enterprises
All Rights Reserved. Please read our Conditions of Use and Privacy Policy.
All Rights Reserved. Please read our Conditions of Use and Privacy Policy.