

1⁄72Lockheed Constellation
7
Comments
The Build
Did I mention that I like the Connie? Well if I didnt, I do! The subject of my build is the Heller kit in 1/72. When I first took an interest in the plane, I began to purchase kits of this great plane as fast as I could. All told I have close to 20 of them sitting on my shelves. Although the kit is molded in 1/72 it is a large plane. Even in this scale it takes up some room, and this is one of the short bodied ones! The EC-121, 1049, and 1649 will required even more room. To my knowledge the Heller kit is the only injected molded kit of this subject. ID Models, and Combat Models did vac kits of the Connie and another manufacturer, who I cant think of at the moment, even did a 1/48 Vac kit of this subject although all you got were the basic shapes, but it was1/48 and that is huge for this plane. Ive also been told there was a 1/32 kit at some point. That, I would like to see.The Heller kits are older molds and the kit shows the dated technology, but they can be built into a great looking model with some time and forethought. I was building mine as a TWA livery due to the attractive and colorful markings. Construction began with the filling in of the window openings as the window openings are too large, the kit supplied plastic window inserts looks hokey, and dont fit too well to boot. I placed clear packing tape over the window openings on the outside of the fuselage then filled the window openings from the inside with resin and let that cure for upwards of an hour as I didnt want any foul ups here. Once cured, I removed the tape. Even so, I still had to fill some minor air holes with putty, but the openings filled in nicely.
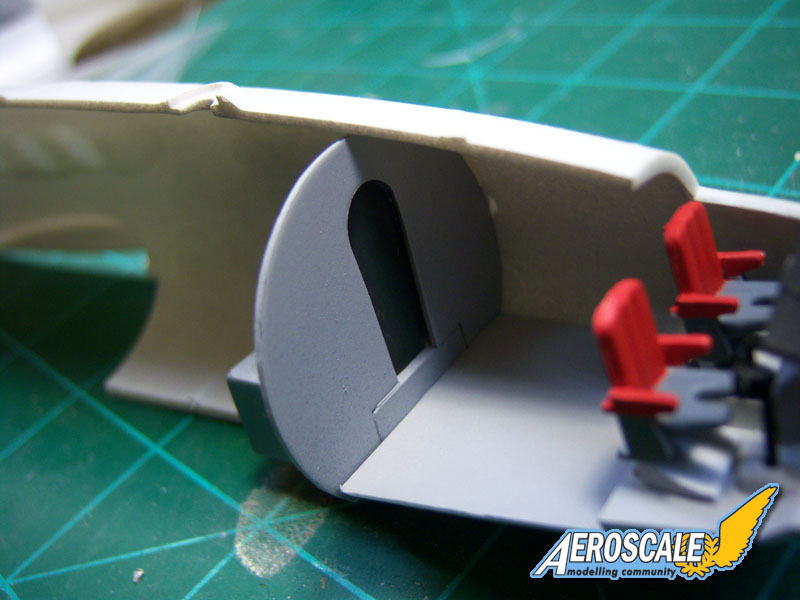
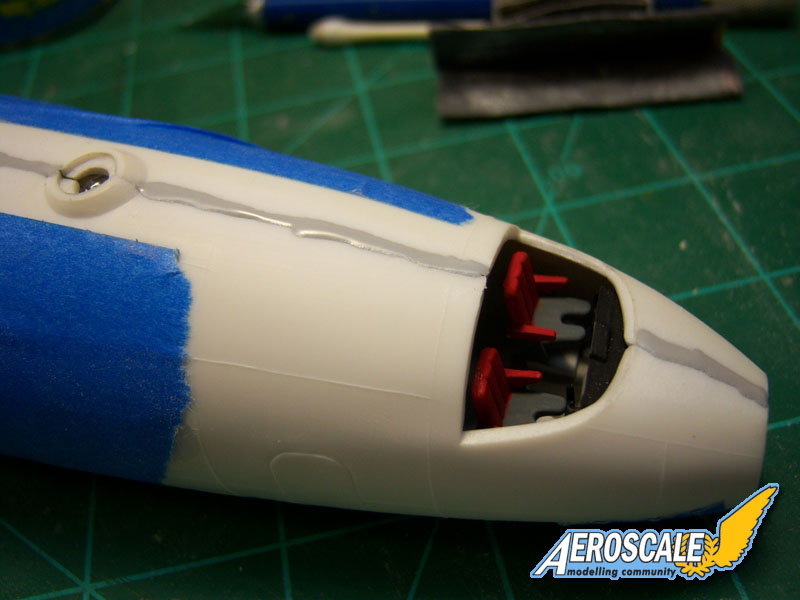
What followed was the removal of all the raised panel lines and de-icer boot demarcations. The latter are very heavy handed and took a fair amount of time even using a Dremel tool. Once all were removed, I polished out the fuselage and wings with progressively finer grades of automotive wet/dry sandpaper. As big of a kit as this thing is, there are relatively few parts. I assembled and painted the cockpit, and then test fit it between the fuselage halves. There were no problems other than there wouldnt be much to see in the cockpit once I closed things up. I painted the pilots/co-plots seats red to help make them at least a little visible. At this point I taped everything together to check for fit and alignment issues. I noticed some gaps at the wing roots, and along the leading and trailing edges, but nothing that was going to be a show stopper.
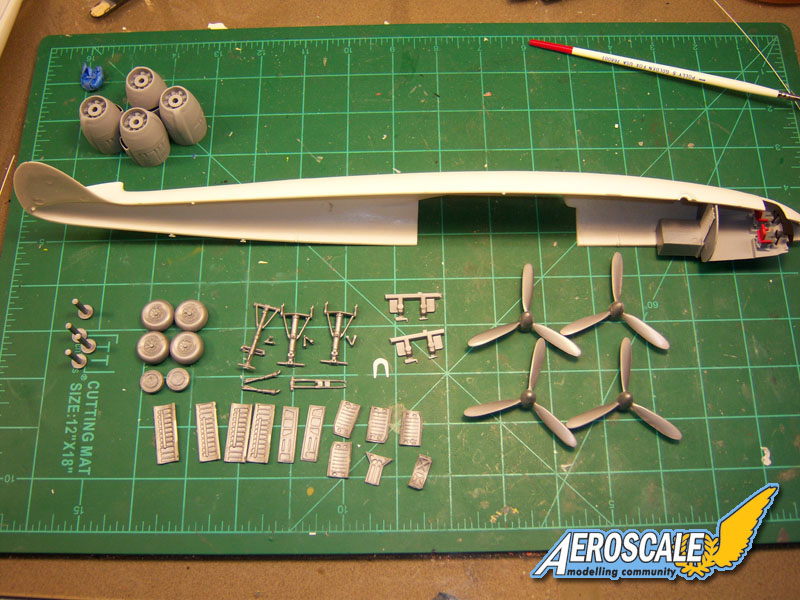
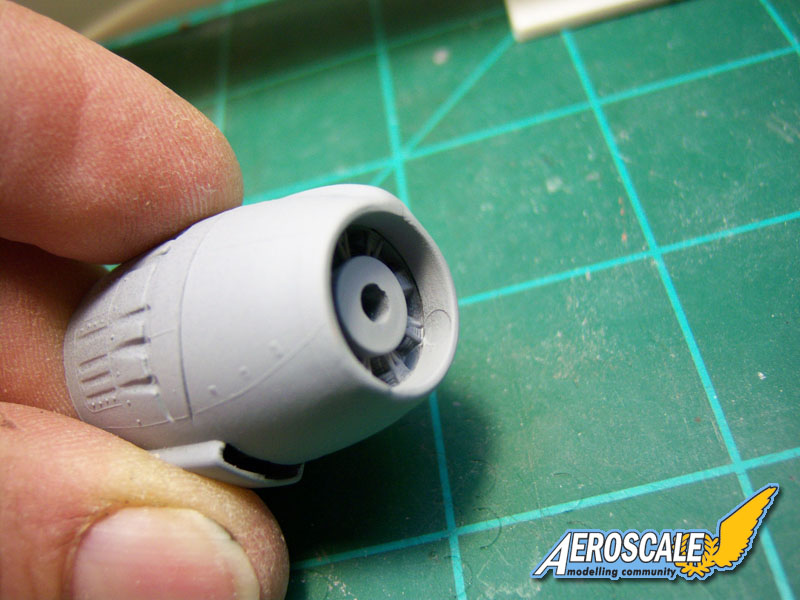
Some of the drawbacks that I identified early on with this kit are the engines and props. All of them have very delicate props and if you happen to have a kit where all four props are intact, consider yourself lucky. Engine types differed from one model to the next and the engines provided in the kits arent correct from one kit to the next so do a little research to determine what you have. There are aftermarket items available such as white metal props from Aeroclub and resin engines from Flightpath. The engines are designed for use on the EC-121 Warning Star kit and include white metal prop shafts as part of the set. While constructing my engines I found several knock out marks on the inside of the engine nacelles. These were dealt with using a small amount of putty and sanding. Once under some primer, everything looked fine. The engine faces are pretty plain and could be swapped out with some Quickboost engines, and the addition of some fine wire for the plugs wouldnt hurt either.
There is no detail in the landing gear wells, and it would be a major undertaking to scratch build, or one could fake the funk and just add some shapes and pieces inside to help them look the part. I left mine alone for this build. The landing gear is spindly, but strong enough to support the weight of the completed model. It could benefit from some extra detailing with wire brake lines etc. The front tires are oversized and can be replaced with ones from the Hasegawa 1/72 Bf-109E kit kit. There is an excellent article on the Connie in the February 1991 issue of FSM that details a lot of the short comings of the kit, and what can be done to correct them. This is where I got a lot of my information from.
I decided early on that I wanted the props on my Connie to stand out so I chromed them. I spent a lot of time carefully cleaning each prop and hub being careful not to break any of the blades free from the hub/spinner. Several hours later I was happy with my resulting clean up as all of them were in fine shape. I primed them with Duplicolor Automotive Filling Primer, (DAFP) to fill any scratches and let dry over night. They were then buffed to remove the texture left by the primer and sprayed with successive light coats of Tamiya gloss black from a rattle can. Once a uniform gloss coat was achieved, they were let dry for 24 hours, and followed by 3 light coats of Alclad II Chrome being built up to the final shine. The results speak for themselves. The engines were treated to the same careful cleaning as they needed some work to fit the wings properly. They were built and painted separately using Alclad II colors again and would be installed once the rest of the plane was complete to avoid damaging them.
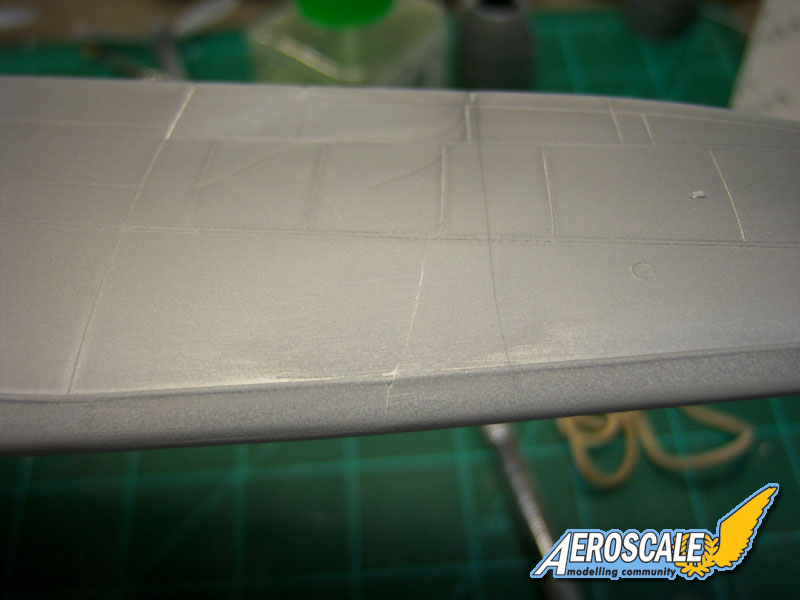
I moved onto the assembly of the wings. This is a sore spot for me as it is poorly engineered. The wing is broken down into three pieces on the bottom and two on top. The main piece for the bottom spans the fuselage out to just outboard of the outboard engine nacelle. The bottom outer wing tips are molded separately and do not fit well at all. I did my best to align them chord-wise, but there were some minor step issues and a hidden crack I didnt see before. I used a fair amount of putty leveling everything out, but it is still not as nice and smooth as I would like. I guess I will have to perfect the process on one of the other 20 or so kits I have here. I had some minor seams along the leading edges and these were treated to more of the DAFP. This stuff is great as it will fill small scratches and seams with just a couple of coats, and can then be polished out for a smooth finish and paint. I finished up the construction of the wing using a fair amount of putty and liberal amounts of sanding and re-shaping. The final steps were more coats of filling primer.
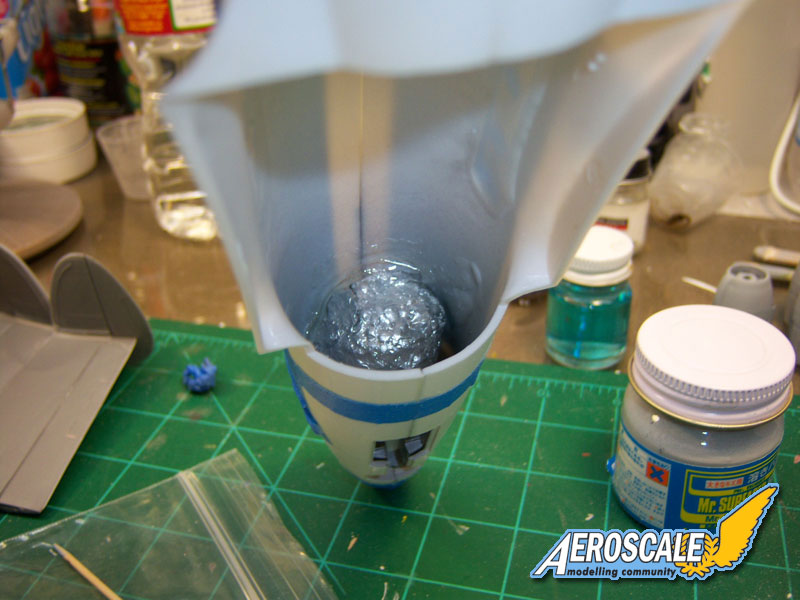
With that long fuselage and triple tail it was apparent that the Connie is a tail sitter. I added copious amounts of weight to the nose, or at least I thought I did. At one point I added fishing weights wrapped in foil, and epoxied them behind the rear bulkhead of the cockpit. I checked the balance point and everything appeared to be good to go. Keep this in mind as it will be revisited later.
Moving on to the horizontal stabilizers, (HS) I found more seams and putty work awaited me. Good times, good times. While building the HS I pre-drilled the holes for mounting the three antenna leads as it is a lot easier to do before hand. I attached the stabs and got them aligned to the main wing and secured. Once secured, I checked for seams and misalignment where I found a couple of areas I needed to address. Namely, at the root area where the stabs attached to the fuselage. A few applications of some Bondo Glazing Putty, a little sanding and we were back in business.
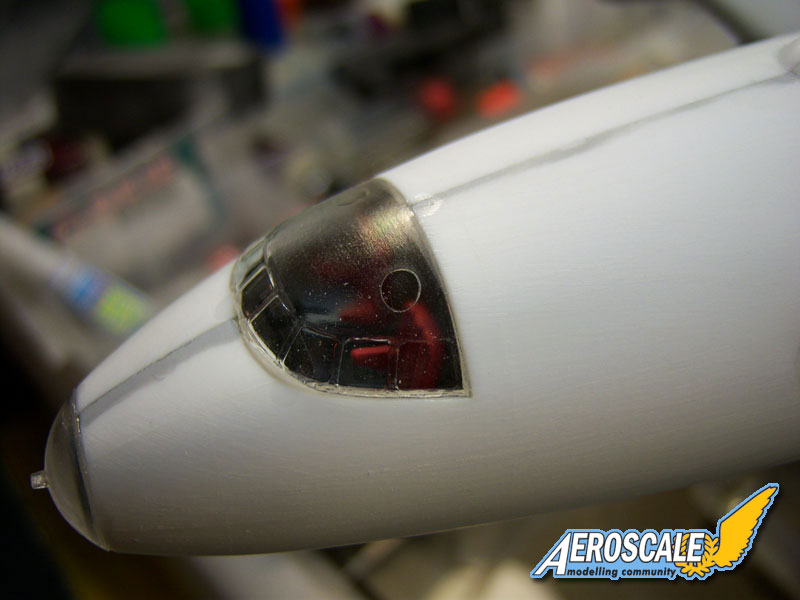
The canopy was now installed and since the windows are recessed slightly, it could be sanded to fit better without risking damage to the windows. I still taped over them to add that little bit of protection and began to work on fairing the piece in. The outer sides of the cockpit windows were a little off in shape and didnt fit too well. I attempted to bulk the area up with repeated applications of putty to match the fuselage shape, but in the end, it just didnt work out. It still came out looking ok for my first attempt though and gave me some insight in how to work this area better next time.
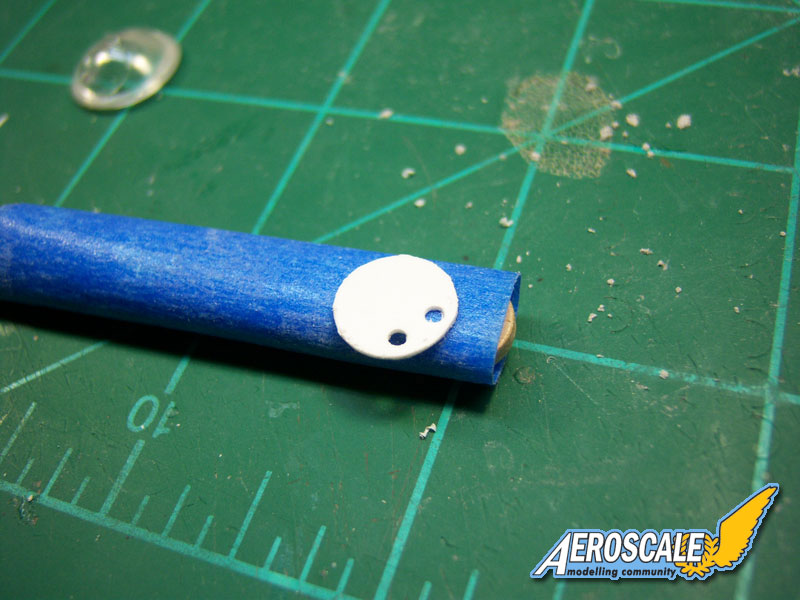
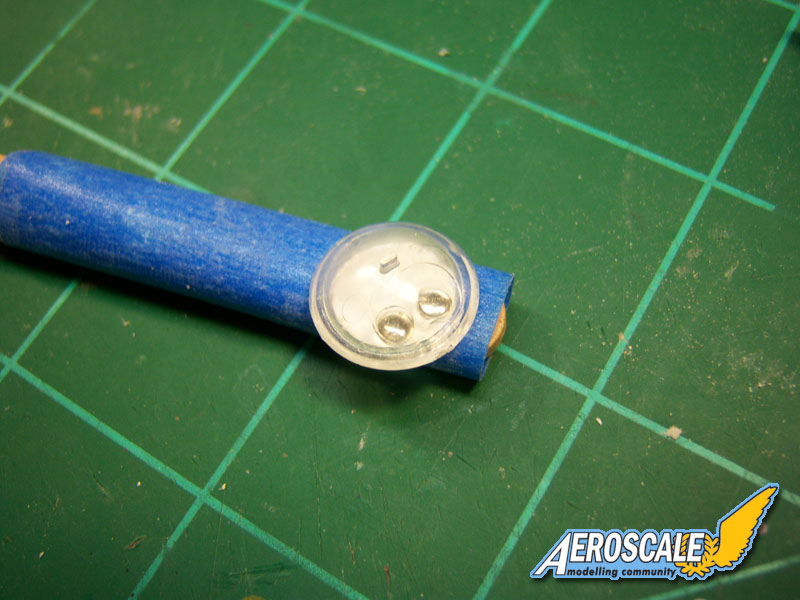
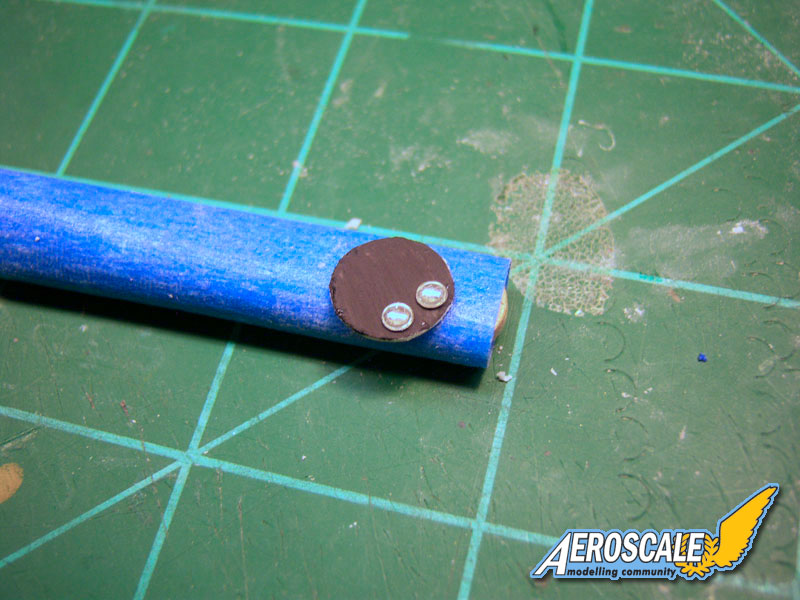
Continuing to work the nose area, I decided to scratch build the taxi and passing lights that were housed in the nose. I traced the shape of the clear nose piece onto a piece of .010 sheet and carefully cut this out. I then drilled two corresponding holes, one on either side of the centerline. The piece was then painted flat black and glued in place. Once secure I installed two appropriately sized MV lenses to replicate the two lights; Red for the port side and white for the starboard side. Once the clear dome was placed over the nose, it really looked the part. I continued to work on the joint to ensure it would be seamless once painted.


About the Author


FROM: CALIFORNIA, UNITED STATES
After a several year break from the hobby I have happily returned to it. Slowly, but surely getting my mojo back.
Comments
How cool. Just posted a week ago and already almost 1000 reads/views. Thanks all. "Q"
JUL 11, 2009 - 02:58 AM

I have never met anybody who did not like the Connie - and your build is superb as well.
JUL 11, 2009 - 04:25 AM

Hi Matthew
Apart from your Connie being a particularly fine build, the viewing total also shows there's a real interest and demand for civil subjects on Aeroscale. It's certainly an area I'd like to see get more coverage.
Keep 'em coming! All the best
Rowan
JUL 11, 2009 - 09:27 AM

Hey Matthew, just wanted to say great build. The Constellation is a beautiful bird and it is nice to see more civil stuff on here. I know I have said that before but just wanted to say it again. I have the same kit, it comes in Pan Am markings though I think. Great job. Russell
JUL 11, 2009 - 10:51 AM

Nice build Matthew, beautiful looking aircraft.
A short while ago I built the Super Connie in Qantas colours for a friend of mine, I am now in the process of building the L-749 Constellation, again in the Qantas Empire Airways scheme and also for the same friend (he worked on these aircraft way back in his younger days).
I'm very lucky to have access to a full size flying Super Connie only 15 minutes drive from my place. She has been fully restored back to the Qantas scheme and attends most of the airshows around the area. Looks absolutely beautiful in the air, especially when she comes in for a low high speed pass.
Thanks for the tips you have given during your build, they will be most helpful.
Cheers
Des.
Current projects;
Roden 1/32 de-Havilland DH-2
Wingnuts 1/32 Junkers J.1
Wingnuts 1/32 Bristol F.2b
and for my mate an L-749 Constellation from Heller
JUL 18, 2009 - 08:32 PM
Great build, Matthew! The finish is great especially on the metallic surfaces. Just the right shine and "feel" to it.
Thanks for sharing
JUL 30, 2009 - 01:02 AM

Copyright ©2021 by Matthew Quiroz. Images also by copyright holder unless otherwise noted. The views and opinions expressed herein are solely the views and opinions of the authors and/or contributors to this Web site and do not necessarily represent the views and/or opinions of AeroScale, KitMaker Network, or Silver Star Enterrpises. Images also by copyright holder unless otherwise noted. Opinions expressed are those of the author(s) and not necessarily those of AeroScale. All rights reserved. Originally published on: 2009-07-04 00:00:00. Unique Reads: 15284

WEB HOSTING BY


Copyright ©2021 AeroScale and Kitmaker Network, a subsidiary of Silver Star Enterprises
All Rights Reserved. Please read our Conditions of Use and Privacy Policy.
All Rights Reserved. Please read our Conditions of Use and Privacy Policy.