

1⁄72Lockheed Constellation
7
Comments
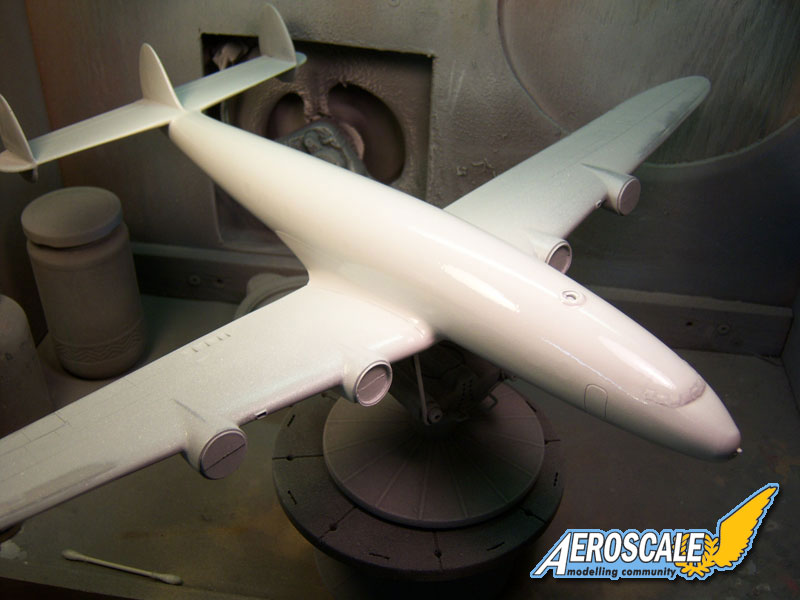
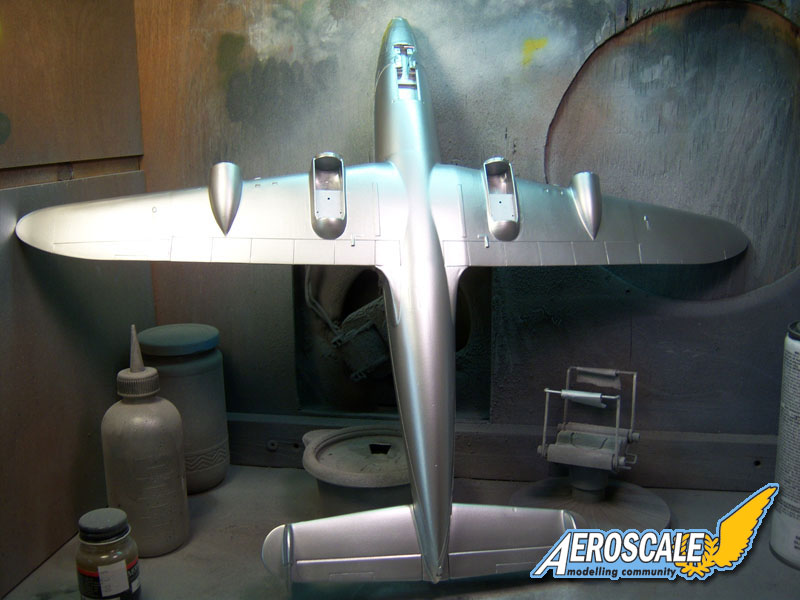
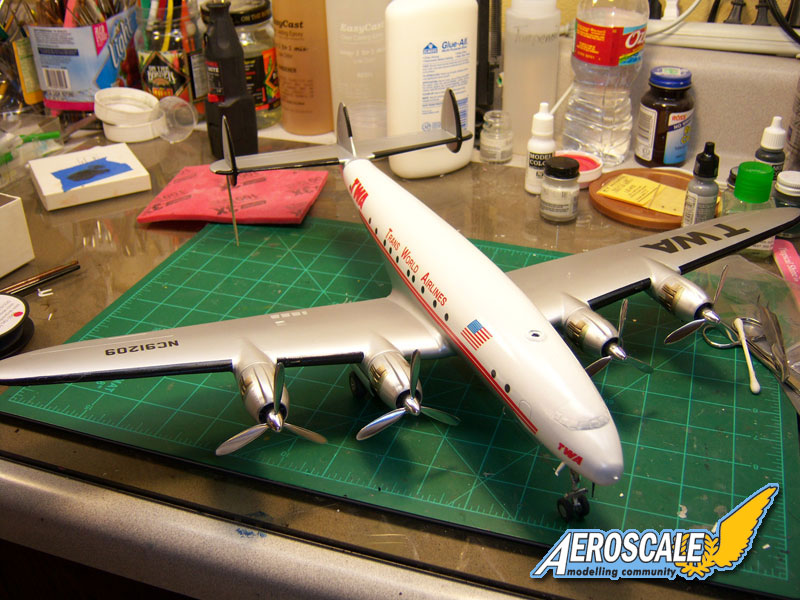
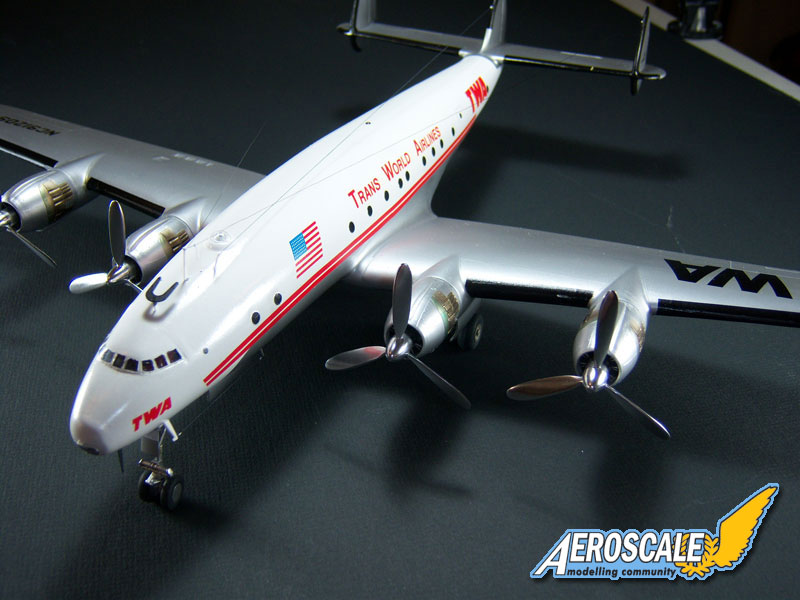
At this point the plane is about complete and ready for painting. Wanting to paint the TWA livery meant two of the most challenging colors were going to be used for painting; Gloss white, and silver. I masked the canopy windows again, and gave the overall model a good sanding and buffing to ensure I had a good canvas for the paint. I began by painting the upper portions of the fuselage with the gloss white. This is where I made a mistake that would come back to haunt me. Instead of using my usual Tamiya spray paints I used a large can of Valspar gloss white, an enamel. The paint was designed for use on outdoor furniture and there was a lot of it in the can for the price. I was thinking of future builds I could use it on and went ahead and decided to use it. It took several coats, but eventually it looked really good. I let this dry for 24 hours and then began masking for the silver.
My choice for the silver was my usual Tamiya TS-30 Silver Leaf and herein laid the problem. The Valspar paint is enamel, and the Tamiya is a lacquer. I couldnt figure out why I was seeing fingerprints in the silver when it was dry to the touch. Well duh, the lacquer based silver was eating and softening the underlying gloss white enamel. I let the entire thing set for a week before handling it again. I wasnt about to strip it and start over. I would live with the mistake and learn from it. I knew about the reaction between lacquers and enamels and totally spaced it. Lesson learned.
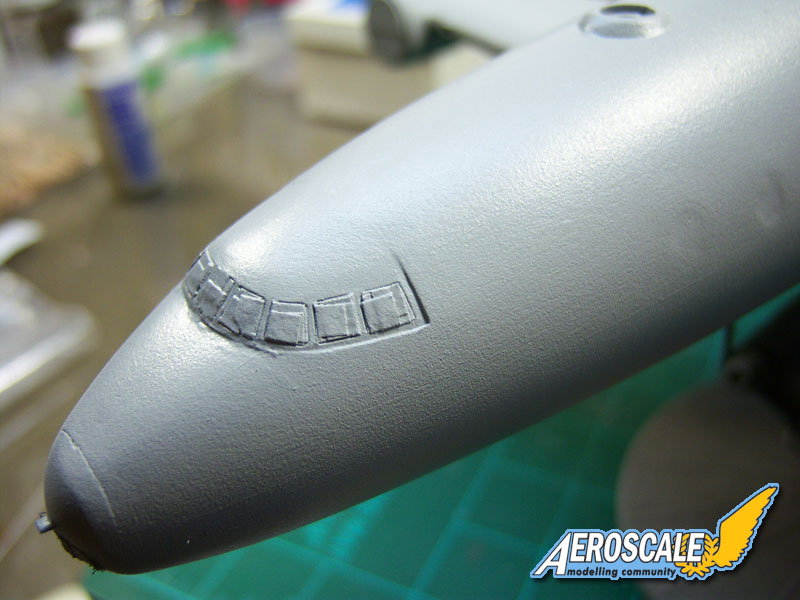
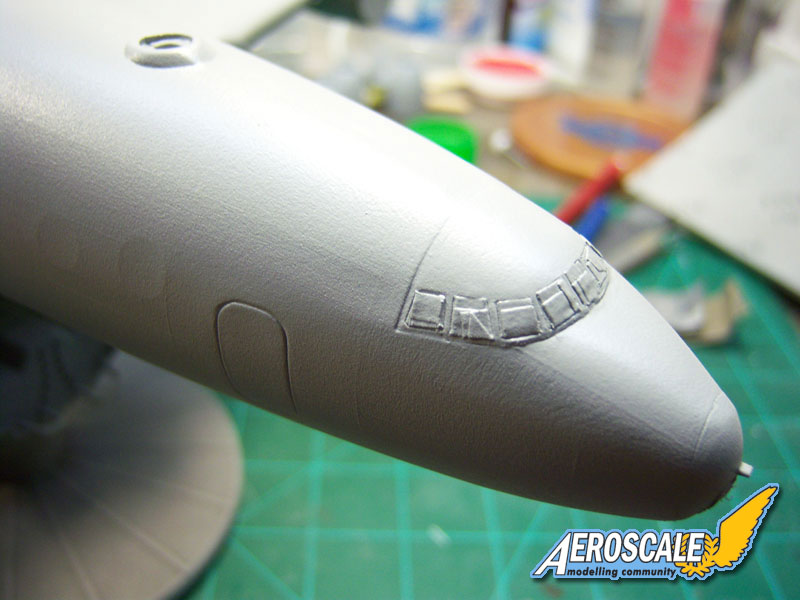
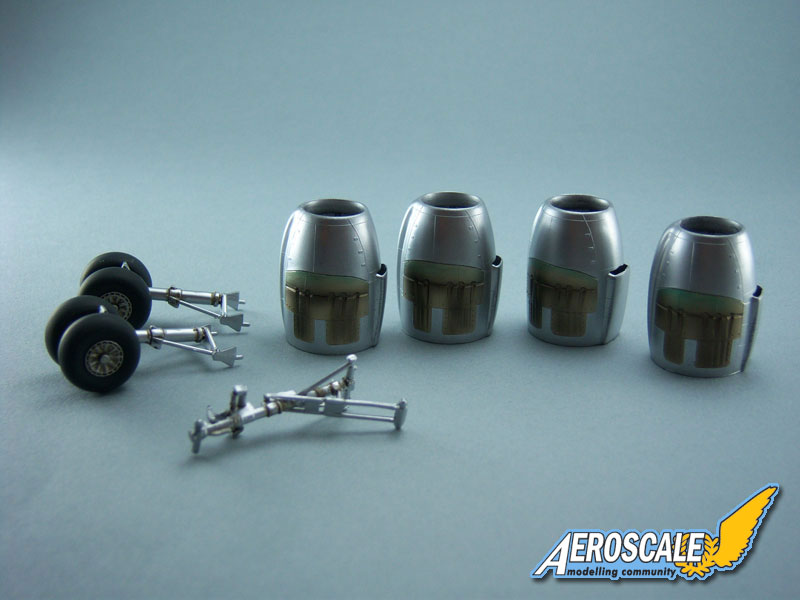
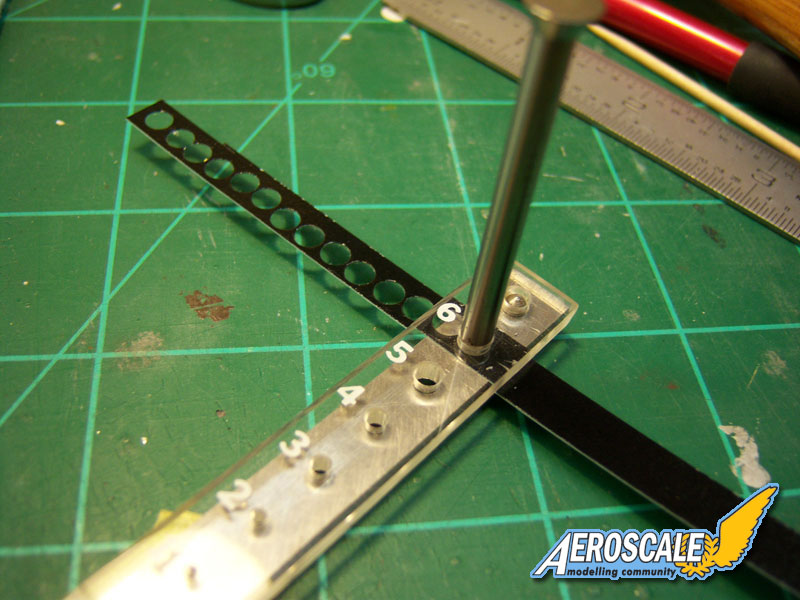
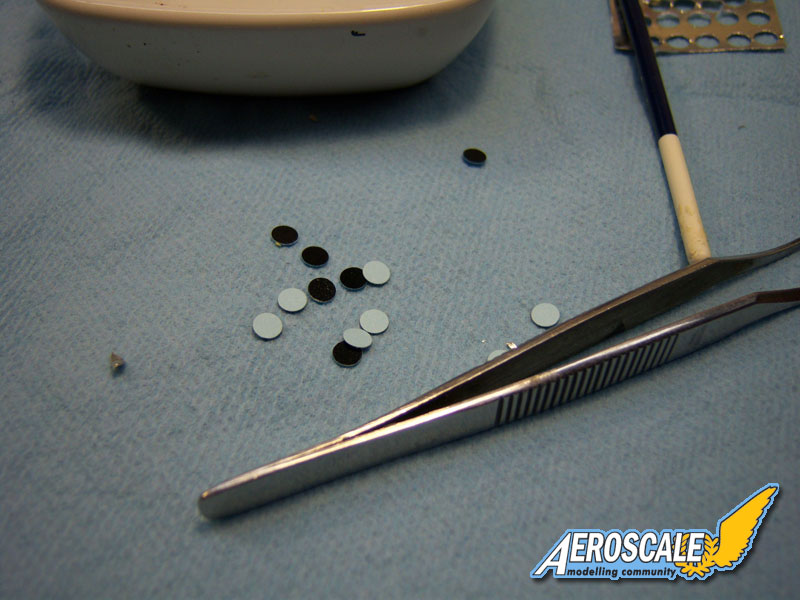
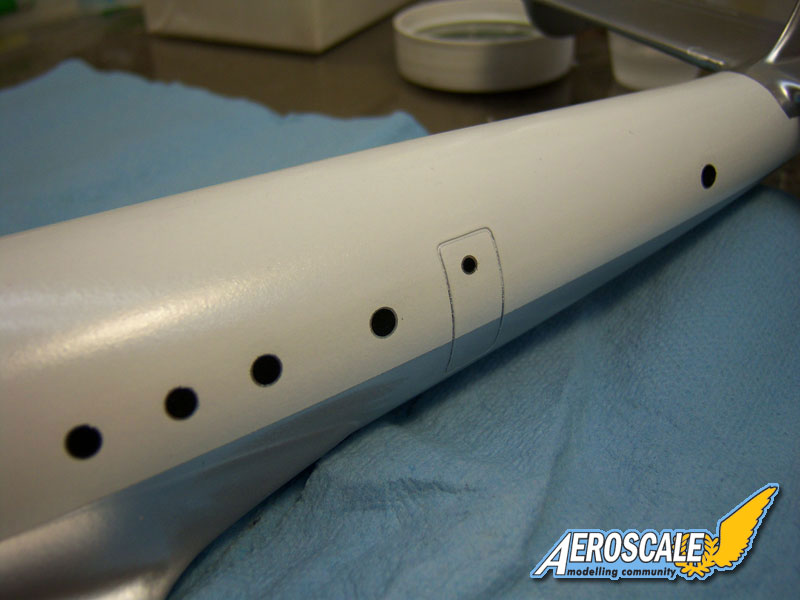
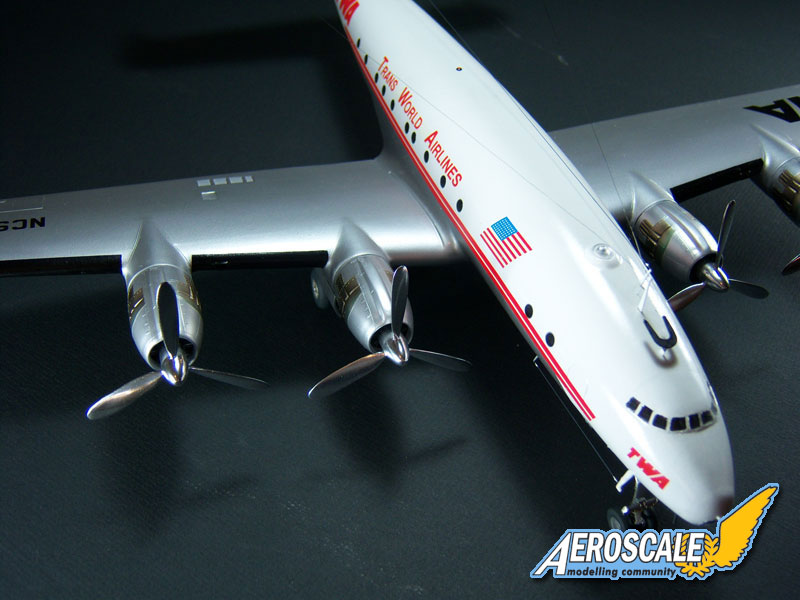
I applied the kit decals and had no problems. And there was much rejoicing For the windows I decided to use black and silver decal material. I used my Waldron Punch and made the twenty five frames from chrome Bare Metal Foil material and twenty five slightly smaller windows from black decal material. I applied all the frames first then added the windows over them. All the windows went down without any problems. I masked and painted the de-icer boots with model master flat black. Now that all the major cosmetics were complete it was time to add the landing gear and assorted goodies.
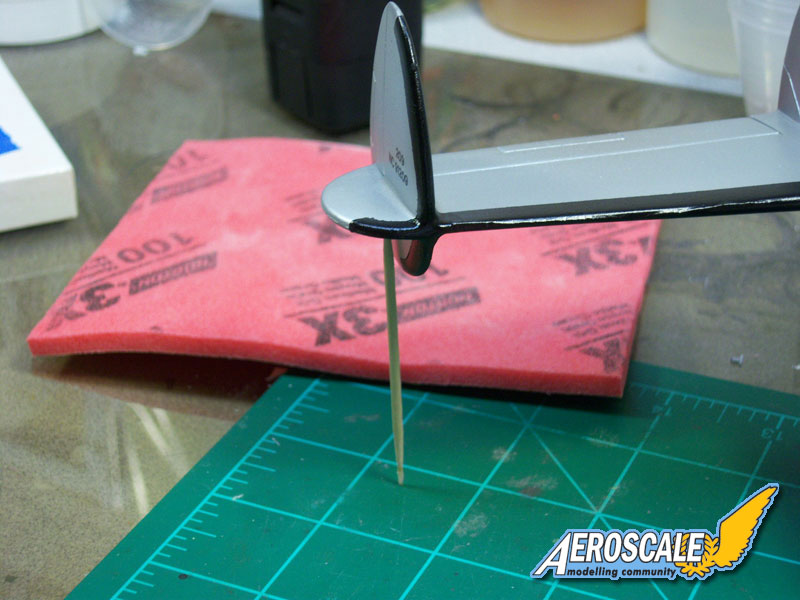
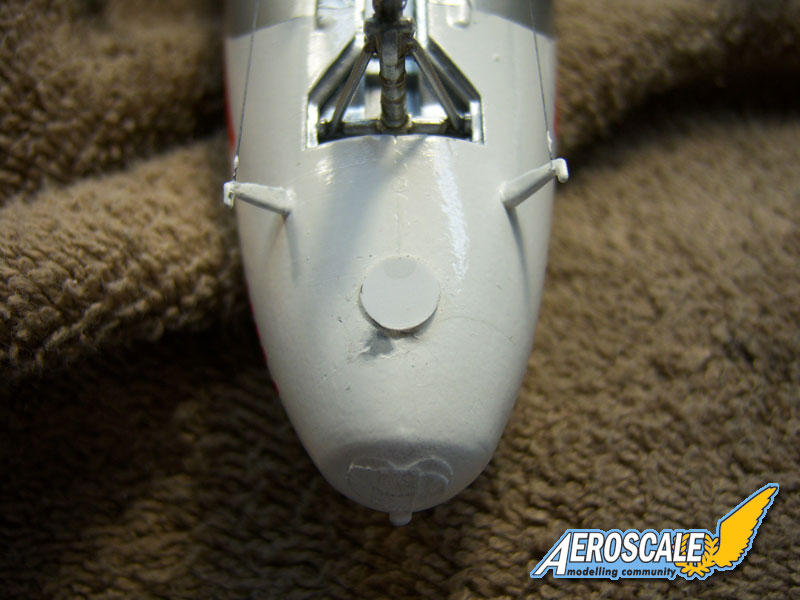
When I added the landing gear it almost made the Connie go through flight tests. I added the landing gear and set her down on the table, only to see her promptly set on her tail. How could this be? I thought. I added enough weight didnt I? Apparently not. The toothpick in the picture tells the story. Now, trying to figure out how I was going to remedy the problem proved to be a little un-nerving. Do I tear it apart? Do I try to add weight elsewhere? In the end I decided to drill a small hole on the bottom of the nose area just forward of the front wheel well, mix some 5 minute epoxy putty with some lead shot, and quickly add it to the nose. Luckily it worked and didnt create too much damage to the surrounding area. I cut a small disc of .010 to cover the hole and added a makeshift antenna to help make it look the part. Again, another lesson learned. Add more weight and check the balance point better!
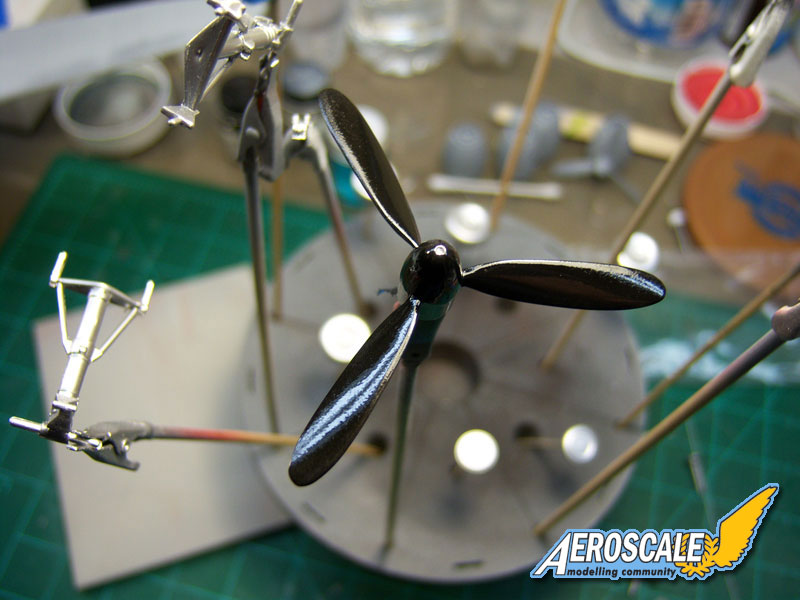
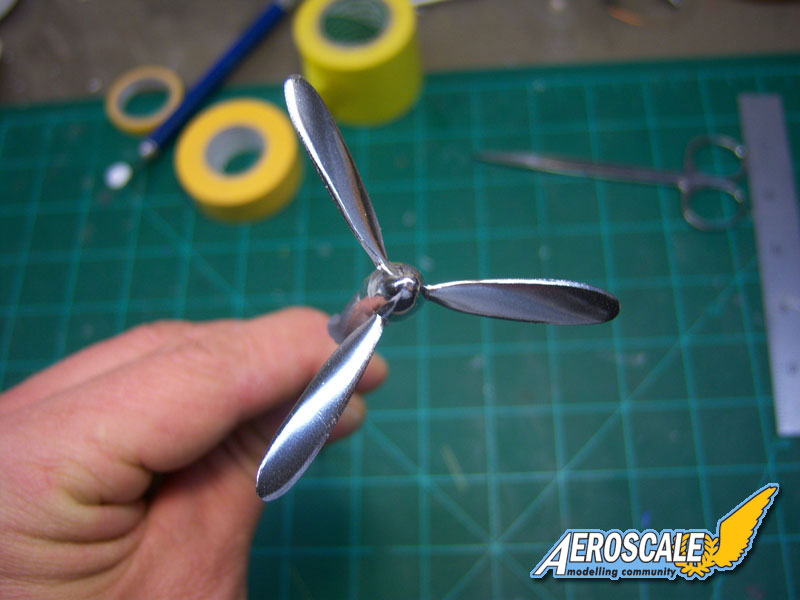
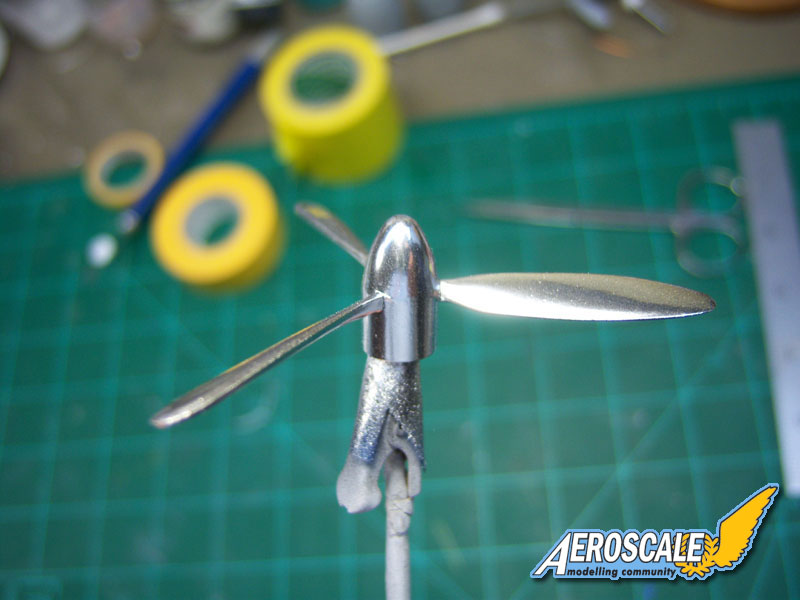
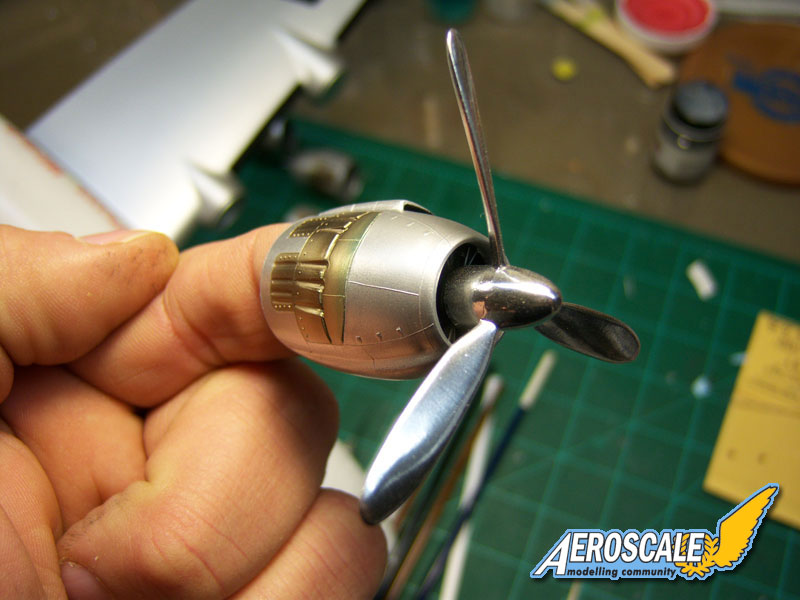
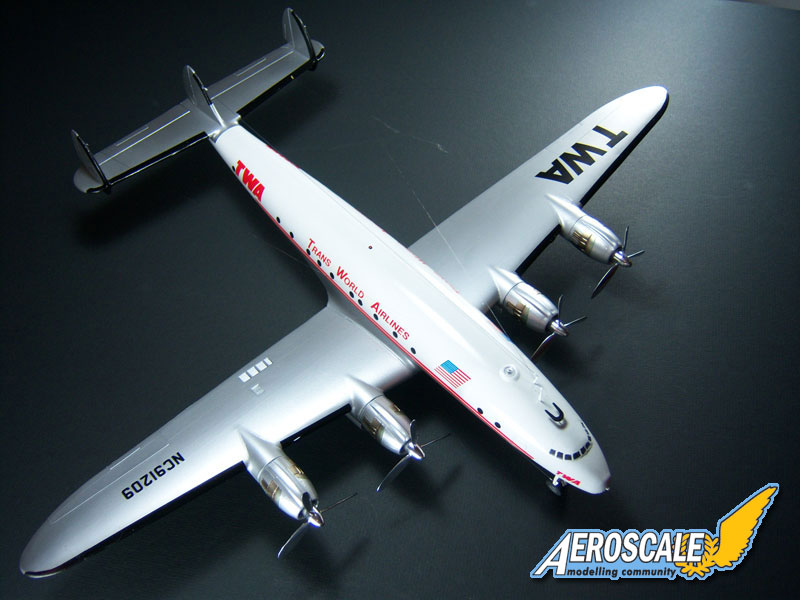
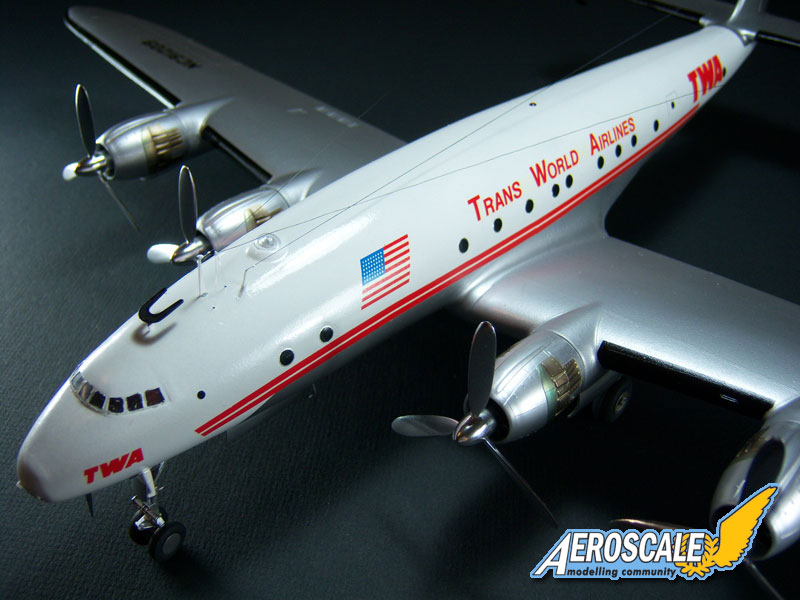
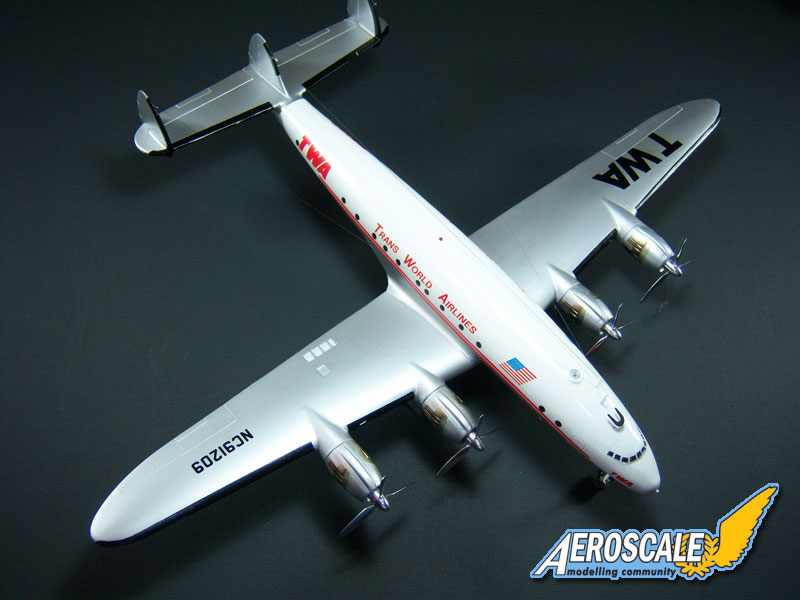
At this point the Connie is all but finished. All that was left to add were the antenna masts, antennas leads, engines and props. I added the engines using Elmers White glue. It helped blend the area where they attached to the wings and was more than strong enough. I also like using this as if the kit is bumped hard enough, the glue will fail and usually not take any paint with it. Clean up and re-attachment of the part is easy. I used EZ Line to rig the antennas and was happy for about 5 minutes. The tension was strong enough to pull the antenna mast free from the soft gloss white paint. I guess it still wasnt fully cured. Great I thought. I removed the EZ Line, cleaned up the area, re-attached the antenna mast and replaced the lead with stretched sprue that was heated to draw it tight and that worked well. I slipped the props on and sat back to admire my first completed Connie. Even with all of the hiccups, both in the kit and self induced, she photographs well at least something went right!
Whew! Im finally finished. There were plenty of hurdles to overcome, and a few setbacks, but nothing that couldnt be handled with a little pre-planning and forethought and by slowing down! I learned a lot during this build. Not only about the actual aircraft, but also about the kit and where I could improve it, and how to improve it. I hope those of you reading this can learn from my somewhat painful build, and werent scared off by it.
I plan on building several more of these kits and armed with what I experienced with the first one, some nice after-market pieces, good references, and the knowledge to slow the hell down, Im hoping to have some very nice and seldom seen additions to add to my display cases. Thanks for taking the time to read about my Connie build. It really can be built into a great looking model provided one takes their time and addresses those problem areas mentioned.
My choice for the silver was my usual Tamiya TS-30 Silver Leaf and herein laid the problem. The Valspar paint is enamel, and the Tamiya is a lacquer. I couldnt figure out why I was seeing fingerprints in the silver when it was dry to the touch. Well duh, the lacquer based silver was eating and softening the underlying gloss white enamel. I let the entire thing set for a week before handling it again. I wasnt about to strip it and start over. I would live with the mistake and learn from it. I knew about the reaction between lacquers and enamels and totally spaced it. Lesson learned.
I applied the kit decals and had no problems. And there was much rejoicing For the windows I decided to use black and silver decal material. I used my Waldron Punch and made the twenty five frames from chrome Bare Metal Foil material and twenty five slightly smaller windows from black decal material. I applied all the frames first then added the windows over them. All the windows went down without any problems. I masked and painted the de-icer boots with model master flat black. Now that all the major cosmetics were complete it was time to add the landing gear and assorted goodies.
When I added the landing gear it almost made the Connie go through flight tests. I added the landing gear and set her down on the table, only to see her promptly set on her tail. How could this be? I thought. I added enough weight didnt I? Apparently not. The toothpick in the picture tells the story. Now, trying to figure out how I was going to remedy the problem proved to be a little un-nerving. Do I tear it apart? Do I try to add weight elsewhere? In the end I decided to drill a small hole on the bottom of the nose area just forward of the front wheel well, mix some 5 minute epoxy putty with some lead shot, and quickly add it to the nose. Luckily it worked and didnt create too much damage to the surrounding area. I cut a small disc of .010 to cover the hole and added a makeshift antenna to help make it look the part. Again, another lesson learned. Add more weight and check the balance point better!
At this point the Connie is all but finished. All that was left to add were the antenna masts, antennas leads, engines and props. I added the engines using Elmers White glue. It helped blend the area where they attached to the wings and was more than strong enough. I also like using this as if the kit is bumped hard enough, the glue will fail and usually not take any paint with it. Clean up and re-attachment of the part is easy. I used EZ Line to rig the antennas and was happy for about 5 minutes. The tension was strong enough to pull the antenna mast free from the soft gloss white paint. I guess it still wasnt fully cured. Great I thought. I removed the EZ Line, cleaned up the area, re-attached the antenna mast and replaced the lead with stretched sprue that was heated to draw it tight and that worked well. I slipped the props on and sat back to admire my first completed Connie. Even with all of the hiccups, both in the kit and self induced, she photographs well at least something went right!
Whew! Im finally finished. There were plenty of hurdles to overcome, and a few setbacks, but nothing that couldnt be handled with a little pre-planning and forethought and by slowing down! I learned a lot during this build. Not only about the actual aircraft, but also about the kit and where I could improve it, and how to improve it. I hope those of you reading this can learn from my somewhat painful build, and werent scared off by it.
I plan on building several more of these kits and armed with what I experienced with the first one, some nice after-market pieces, good references, and the knowledge to slow the hell down, Im hoping to have some very nice and seldom seen additions to add to my display cases. Thanks for taking the time to read about my Connie build. It really can be built into a great looking model provided one takes their time and addresses those problem areas mentioned.


About the Author


FROM: CALIFORNIA, UNITED STATES
After a several year break from the hobby I have happily returned to it. Slowly, but surely getting my mojo back.
Comments
How cool. Just posted a week ago and already almost 1000 reads/views. Thanks all. "Q"
JUL 11, 2009 - 02:58 AM

I have never met anybody who did not like the Connie - and your build is superb as well.
JUL 11, 2009 - 04:25 AM

Hi Matthew
Apart from your Connie being a particularly fine build, the viewing total also shows there's a real interest and demand for civil subjects on Aeroscale. It's certainly an area I'd like to see get more coverage.
Keep 'em coming! All the best
Rowan
JUL 11, 2009 - 09:27 AM

Hey Matthew, just wanted to say great build. The Constellation is a beautiful bird and it is nice to see more civil stuff on here. I know I have said that before but just wanted to say it again. I have the same kit, it comes in Pan Am markings though I think. Great job. Russell
JUL 11, 2009 - 10:51 AM

Nice build Matthew, beautiful looking aircraft.
A short while ago I built the Super Connie in Qantas colours for a friend of mine, I am now in the process of building the L-749 Constellation, again in the Qantas Empire Airways scheme and also for the same friend (he worked on these aircraft way back in his younger days).
I'm very lucky to have access to a full size flying Super Connie only 15 minutes drive from my place. She has been fully restored back to the Qantas scheme and attends most of the airshows around the area. Looks absolutely beautiful in the air, especially when she comes in for a low high speed pass.
Thanks for the tips you have given during your build, they will be most helpful.
Cheers
Des.
Current projects;
Roden 1/32 de-Havilland DH-2
Wingnuts 1/32 Junkers J.1
Wingnuts 1/32 Bristol F.2b
and for my mate an L-749 Constellation from Heller
JUL 18, 2009 - 08:32 PM
Great build, Matthew! The finish is great especially on the metallic surfaces. Just the right shine and "feel" to it.
Thanks for sharing
JUL 30, 2009 - 01:02 AM

Copyright ©2021 by Matthew Quiroz. Images also by copyright holder unless otherwise noted. The views and opinions expressed herein are solely the views and opinions of the authors and/or contributors to this Web site and do not necessarily represent the views and/or opinions of AeroScale, KitMaker Network, or Silver Star Enterrpises. Images also by copyright holder unless otherwise noted. Opinions expressed are those of the author(s) and not necessarily those of AeroScale. All rights reserved. Originally published on: 2009-07-04 00:00:00. Unique Reads: 15284

WEB HOSTING BY


Copyright ©2021 AeroScale and Kitmaker Network, a subsidiary of Silver Star Enterprises
All Rights Reserved. Please read our Conditions of Use and Privacy Policy.
All Rights Reserved. Please read our Conditions of Use and Privacy Policy.