1⁄35Japan Airlines - Enomoto Special
...
Post a Comment
Construction
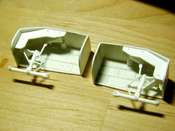
While I thought about the art, I put the model together. Construction started with the landing gear. I wanted this good and strong when I add the weight of the model to them. All the mold separation lines were sanded, shaved, and scraped off of the parts. Each main gear was made up of several parts, including all the brakes for each wheel. Cool! The only interior parts included in the kit are the main cockpit components. There are no main cabin parts whatsoever, but in 1/144th scale, thatís OK by me. My friend Don Hinton put a complete interior in his 1/144th scale 727, but Iím not as patient as he is, besides, the art on the outside is more important to me than the interior on this model. I painted the interior gloss black using Tamiya Spray Paint. The cockpit was installed after assembling and painting it the appropriate grays. The landing gear bays were also added as soon as they were ready. The interior of these bays was painted Model Master Acryl Light Ghost Gray. After cutting off all the alignment pins and cleaning all the paint off of the joining edges, the fuselage halves were joined. I tested the CG of the wingless fuselage to see if I needed weight in the nose. Without wings, no problem. The belly of the fuselage is a separate molding that is added after the main gear bays. This presents a problem, as the landing gear needs to be added to the bays before adding the bays to the fuselage. Adding the belly pan amongst all these protruding legs is tricky. Sanding the seams away is even trickier. Good luck on yours. On this kit this problem was aggravated by the fact that the belly pan part was too small. There was a 2mm gap at the front of the part where it meets the rest of the fuselage. I filled this with strip plastic, covered it in CA and sanded it smooth..At this point the wing and horizontal stabilizers halves were cut from the sprues. On the sprues, the parts looked curvy, but I thought that was washout molded into the parts. Oh boy was I wrong. I test fitted the root of the wing together and the tips were a good 2 inches apart (50mm give or take a mm). After dry fitting several ways (roots first then tip first then middle first) I couldnít figure out which way the wings washed out, in other words, which way the wing was supposed to twist from root to tip. After a lengthy search at Airliners.net and a whole bunch of photos, I figured out that the leading edge of the wing should be straight while the trailing edge of the wing twists up from root to tip. This is perhaps a bit misleading, the wing at the root looks like it has a few degrees of positive Angle of Attack (AoA) and zero AoA at the tip. I glued the root together first. Then using a flat surface and a straight edge, I slowly glued the leading edge together using Zap a Gap ensuring that the leading edge is absolutely straight. After I was satisfied with the leading edge, I glued together the trailing edge, again using the flat surface to keep the plane of the wing flat. This worked for the starboard wing.
The port wing was a tussle. I glued the root together first, but didnít notice a tiny misalignment. This misalignment turned into a 2mm misalignment at the wing tip. I tried gluing the port wing together the way I did the starboard wing but was left with a wing that curved up and down! I split this apart before the CA had set too hard and tried gluing the whole thing together at once while holding the wing straight with my fingers and keeping the wingtip aligned. Now I had a wing the curved down then up! OK this is getting ridiculous, I have got to get this wing together straight! I split the wing apart again and allowed the CA to dry on the wings before trying again. The next night I sanded off the glue from the mating surfaces, applied CA to the edges of the wing, placed it on a wooden flat surface, found the biggest heaviest book in my library and put on top of the wing to hold it flat. .After everything was cured hard, I pulled out the wing and viola, a straight wing with a gap in the front and tips. These I could fill and sand out later. I test fitted the wings to the fuselage, damn they looked good! The flap guide fairings were glued together, sanded smooth and added to the underside of the wings.
You get your choice of engines on this kit. I chose the Rolls Royce engines and assembled the engines as per the instructions. I painted the engines as I went along; Bunt Iron on the exhaust nozzles, Aluminum on the fan bypass nozzle, blue Steel on the exhaust cones (as per photos) and bright polished Magnesium on the intakes lip. The fan was painted Magnesium with a black cone and white spiral. The pylons were painted Titanium and IJN Gray. I held off adding the intake lips until after the main body of the engines were painted white. Star Jet decals from Platz were added to the side of all the engines and everything sealed with Tamiya Clear. The engine pods were added to the wings and any gaps were filled with white glue. At this point I test the CG of the aircraft again, this time adding the wings. No problem. Then I added the tailplanes and watched with horror as the nose gear hovered 1 mm in the air. ACK! I had already sealed up the fuselage! With my poor mind reeling in frustration, I noticed that there was a 5mm gap between the engine fan front and the fan back in the nacelle. I added a layer of BBís into this gap and the fuselage came back down with a solid thunk. Yokata! (Thank goodness!.
Copyright ©2021 by Valentin E. Bueno. Images also by copyright holder unless otherwise noted. The views and opinions expressed herein are solely the views and opinions of the authors and/or contributors to this Web site and do not necessarily represent the views and/or opinions of AeroScale, KitMaker Network, or Silver Star Enterrpises. Images also by copyright holder unless otherwise noted. Opinions expressed are those of the author(s) and not necessarily those of AeroScale. All rights reserved. Originally published on: 2004-08-13 00:00:00. Unique Reads: 5690


