

1⁄32Silver Wings Hawker Hart Review Build
8
Comments
Upper Wing
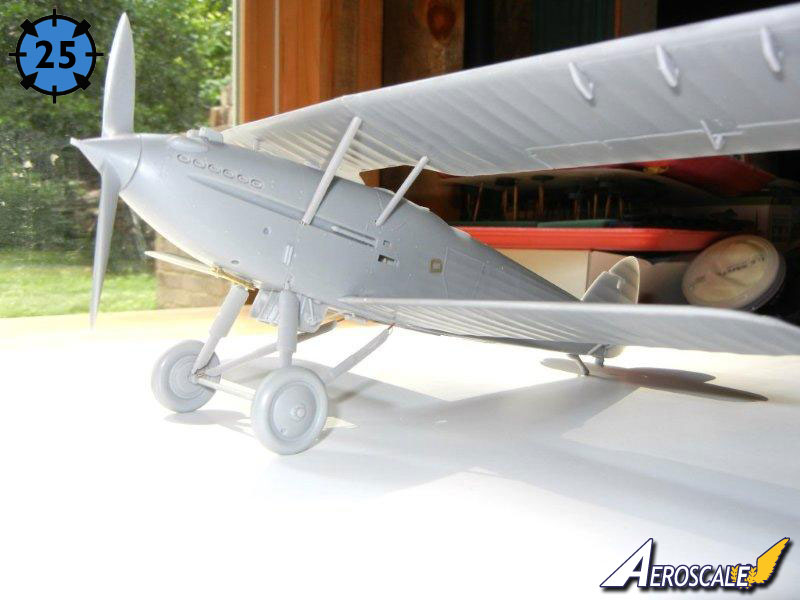
This seems to be the part that most modelers, in particular those who have not built a biplane, dread. It is really not that difficult to do, provided you plan ahead a bit. There are many different ways to go about attaching the upper wings, but I will just review the way I did it for this model.■ First, I drilled out the holes for the cabane (fuselage to wing center) struts in the wing center piece. Although the kit appears to be designed for you to remove the copper wire pins on the parts of the struts that attach to the fuselage, I wanted to keep a bit of the pin for added strength, so I drilled out holes in the attachment slots (photo 24). I then trimmed the pins on the cabane struts to fit. I then test fit the center wing and cabane struts to the fuselage. After a small amount of tweaking, the fit was good.
■ I then removed the center wing section (and cabane struts) and cleaned up the mating surfaces of the center and outer wing sections. I then used an angle template to drill the appropriate holes in the outer wing section for the interplane struts. This would also be a good time to drill the appropriate holes for the rigging method of your choice (dont forget the holes in the fuselage and bottom of the upper wing for the aileron control cables!). The instructions provide that there should be 3mm of dihedral at the tip, so, like with the lower wing, I made some cardboard strip templates and used them to ensure the proper position.
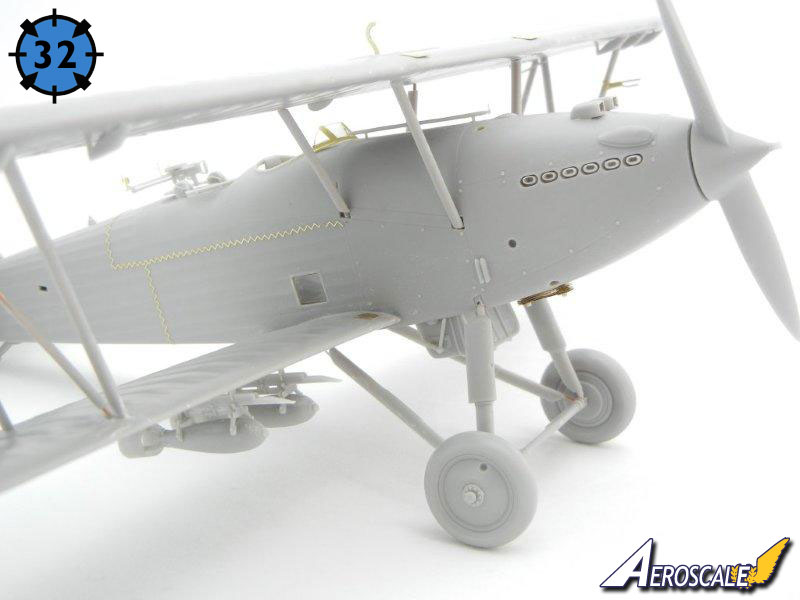
■ At this point, you can attach all the PE inspection panels to the top side of the upper wing (and the two on the lower wing) per the instructions.
■ Once dry, I again test fit the upper wing assembly to the fuselage using the cabane struts only. They are so strong that they easily support the very heavy (100 grams/almost ¼ lb) wing (photo 25).
■ I then removed the wing, installed the model in my wing jig* and using some slow-setting superglue gel (or epoxy) to give myself time to position them, attached the cabane struts to the upper wing, and then the wing and struts to the fuselage. I checked the alignment and then let the assembly dry overnight.
*you can use an actual jig; Legos; or cardboard, etc. to make your wing jig it does not need to be fancy, as its only purpose is to ensure the same distance on both sides between the upper and lower wings, and that the upper and lower wings are aligned with each other. ■ I then test fit the interplane struts and using the same slow-setting superglue gel, attached them to the upper and lower wings and once I was happy with their position, left everything to dry overnight.
■ Attach the 3 slat actuators to the port and starboard underside leading edge of the upper wing. The end with the post goes towards the rear, and fits in the hole provided.
■ I then attached the control rods to the ailerons and attached them to the upper wing (they fit snuggly in position with no glue needed).
Final Assembly
Now we just have to attach the remaining small bits, and the model should be done. I would recommend painting decaling and rigging your model (if you prefer to rig after painting/decaling) at this point (dont forget the control lines for the ailerons, elevators and rudder). Once completed, attach the final parts as follows:■ Attach the acetate window to the pilots windscreen using your favorite clear parts glue. If you have not yet attached the acetate side window, do so now.
■ You can now attach the Potts oil cooler, venturi tube and boarding step to the bottom of the fuselage.
■ Glue the radiator and its brackets into position.
■ Attach your bomb racks (and bombs if you wish) to the bottom of the wings.
■ If you have not already done so, attach your radio antennae posts if appropriate for the airframe you are modeling. Also attach the radio insulator to the upper fuselage.
■ The kit provides a PE pitot tube assembly, and you can attach this to the forward strut on the port side of the aircraft. I would recommend building up the shape of the flat tube sections to a round shape, or replace them with styrene or metal tubing.
■ Fold the PE gas tank vent (PE9) in half, or preferably create your own from metal or styrene tube/rod, and attach to the upper wing tank per the instructions.
■ Attach the gunners scarf ring assembly to the model.
■ Finally, attach your main wheels and propeller to the model.
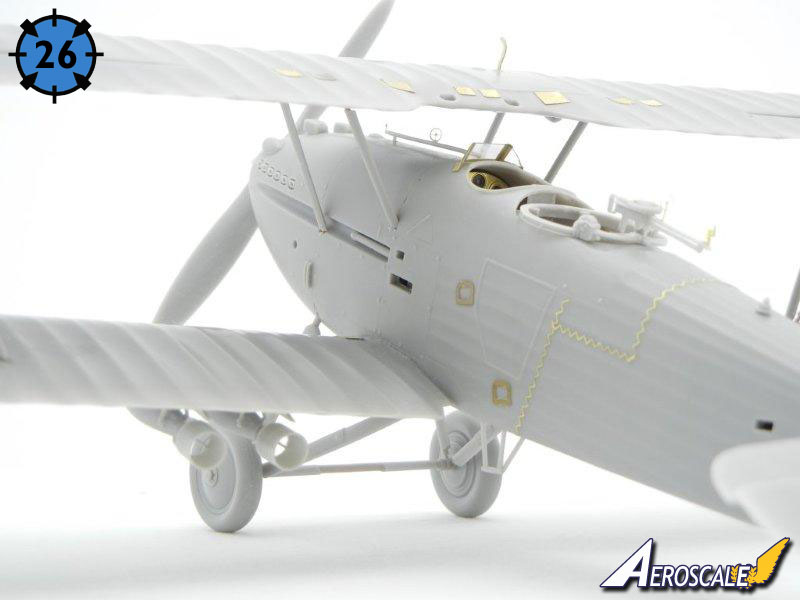
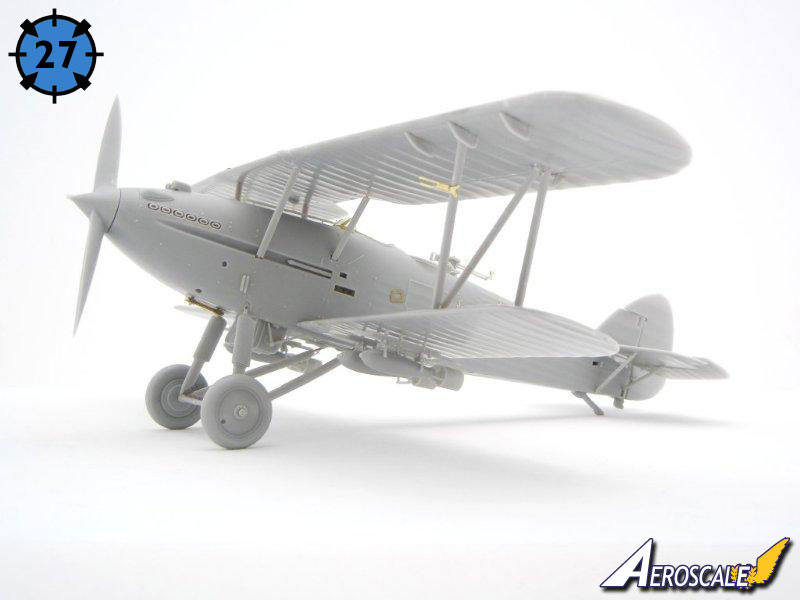
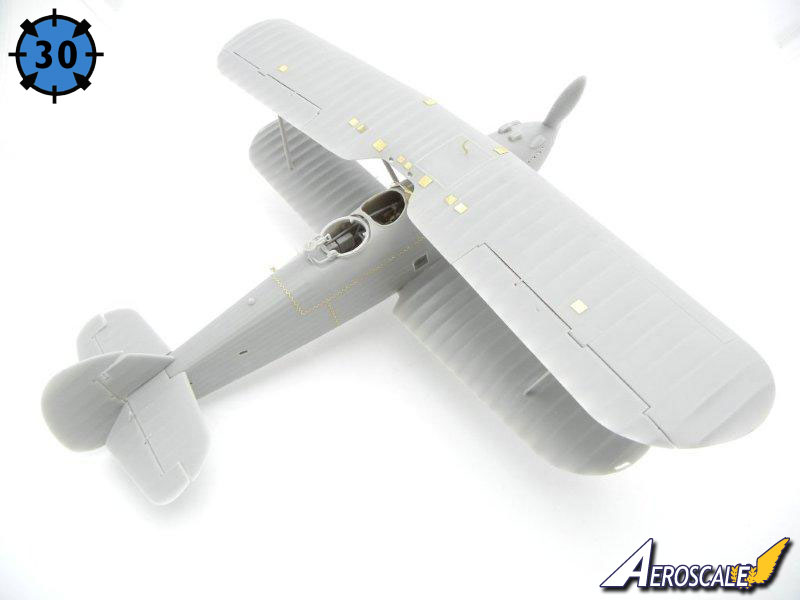
Photos 26 through 35 are of the completed model. I hope that you have found this review/build guide helpful. Look for a review/build guide on the Silver Wings 1/32 Gloster Gladiator I/II in the near future!


About the Author


FROM: GEORGIA, UNITED STATES
I've been modeling on and off for over 40 years. My primary interests are WW1, Interwar and WW2 aircraft, although I do build an occasional WW2 armour kit. I used to build 1/32 kits back in the 80's, but switched to 1/48 in the early 90's when all the nice new kits started showing up. I've sinc...
Comments


Nice to see some "Tweeners" being released. Nice too to see a two seater.
Do they do a Fury or a Demon?
Cheers,
Hugh
AUG 16, 2011 - 01:16 AM

Hi everyone. Thanks to Rowan for inviting me to post this "build guide"/review here.
I wanted to see if I could get some feedback on what your thoughts are on this type of review. Is it too long, too short, too detailed, not detailed enough etc. Is there any benefit to you, the reader, in seeing the build without paint, or would you prefer to see it painted?
This is the first review of this type I have done, so please let me know how I can improve it - don't be shy - I am a big boy and can take harsh criticism if necessary!
Thanks!
Doug
AUG 17, 2011 - 09:03 AM

Hi again
I always used to read Model Aircraft Preview, and found their "nothing to hide behind" style really useful in judging a kit - often more so than a finely finished model that often said more about the skills of the builder than the quality of the kit.
We've seriously considered running reviews in this style on Aeroscale in the past, so I'd also be very interested in seeing readers' feedback on it and whether it's something you'd like to see us do regularly for standard releases.
All the best
Rowan
AUG 17, 2011 - 10:41 AM

Doug and Rowan,
I found this review very informative and probably just a tad too long although for the subject in question it may be right. I think without seeing this done on another subject, never having seen the magazine in question, it is hard to judge.
The one question I have is what do you do with the made up kit now as you can not get inside to paint the interior? Myself I would not want to do this type of review but yes I did find it helpful.
AUG 17, 2011 - 11:47 AM
Hi Luciano
Probably the reason more people aren't prepared to do a review like this is that the kit truly is "sacrificed" for the sake of showing how well it fits together (or otherwise). It sort of goes against every modelling instinct - a really tough decision to make, especially with a limited edition resin kit like this one!
All the best
Rowan
AUG 17, 2011 - 11:59 AM

Building it with out painting and filling is helpful, and shows how the kit really is, and how much work is needed correcting seam lines and whatnot.
I have done the same type of review myself with a HobbyBoss F-16D Fighting Falcon , and although I did enjoy building it this way, it's not something I would like to do on a regular basis, unless I had two of the same kits and one could be "sacrificed" (but how often is that going to happen ).
Andy
AUG 18, 2011 - 02:56 AM
Nice review Andy!
@ Luciano - this kit will likely never see paint, as it has served its purpose as a review kit. I actually think it looks pretty good as is, but I just need to figure out where to put it
@ Hugh - Montex did a 1/32 Fury which was mastered by the owner of Silver Wings before he started his own company. Ali @ A2Zee Models is now is the vendor for this kit and sells it with upgraded metal struts and proper 43 squadron decals. No one does a Demon that I know of, so if you really want one, you'll need to convert the Hart to get one
Regarding reviews, I personally find it easiest to do the non-paint (and non-rigged for biplanes) reviews as I can get it done much faster when I don't need to plan painting/filling/decaling etc into the mix. And as some of you mentioned, the benefit is the reader gets to see how the kit is without anything "hidden" by filler and paint.
As I was given this kit to review, and I have my own copy in the stash, I thought this review would be a good way to get to learn about the kit, and provide a useful review at the same time. I think doing the review kit this way will help me do a better job building my own Hart kit
I'm currently working on the same type of review for the Silver Wings Gloster Gladiator, and I'll submit it for posting once it is complete.
Thanks for your comments (and for anyone else that wants to provide feedback!!) and to the emailed comments I received as well.
Cheers,
Doug
AUG 18, 2011 - 09:35 AM
Copyright ©2021 by Doug Nelson. Images also by copyright holder unless otherwise noted. The views and opinions expressed herein are solely the views and opinions of the authors and/or contributors to this Web site and do not necessarily represent the views and/or opinions of AeroScale, KitMaker Network, or Silver Star Enterrpises. Images also by copyright holder unless otherwise noted. Opinions expressed are those of the author(s) and not necessarily those of AeroScale. All rights reserved. Originally published on: 2011-08-11 00:00:00. Unique Reads: 11932

WEB HOSTING BY


Copyright ©2021 AeroScale and Kitmaker Network, a subsidiary of Silver Star Enterprises
All Rights Reserved. Please read our Conditions of Use and Privacy Policy.
All Rights Reserved. Please read our Conditions of Use and Privacy Policy.