1⁄48Kitty Hawk MiG-25PD Feature Review
SPOILER ALERT: The Accuracy Check
Okay, this is a GREAT kit of a really cool subject, and we’ve enumerated its bigger faults already. The lack of intake trunks, and the incorrect afterburner nozzles are updates that most any modeler would want to make to their projects. There has been a lot of negativity about this kit around the various web forums. In an attempt to put some specifics around the issues, this section addresses the kit against plans. When compared to plans the kit does have several inaccuracies. These are going to you matter to if you’re a shape-accuracy modeler.
To the majority of modelers this kit will MORE than pass for a good MiG-25. These issues to my eye only show up when directly compared to plans with the exception of ONE. However, in the interest of being complete, it’s important to dig a little further. So like on the movie news websites that post “spoiler alerts” do not read further if you want your build “spoiled” by worry over shape issues.
Still reading – okay – you were warned!
The plans published in the March 1998 issue of Mir Aviastii produced by Vasily Zolotov (who worked for his entire service career on MiG-25s) are widely regarded as the best MiG-25 plans “commonly” available. I am basing my evaluation of the kit on these plans. While the plans are 1:72 as published, a quick trip to the copy machine and they can be expanded to 1:48.
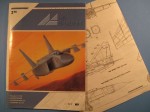
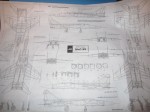
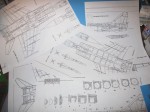
A couple of warnings:
- No plans are perfect and are subject to human error.
- Lining parts up over plans only works part way, as plans are flat projections of 3D objects. I provided outlines in areas of concern so that you could see where I perceived the shape error. Somebody else could go through the same exercise and come to different conclusions.
The good news is, for the most part, the parts match up very well to the plans, this is particularly true in planform and side profile view. There are some issues that are worth listing, but none of them are what I would consider even close to “deal breakers.” The hard core shape accuracy folks might disagree, but then they’re going to be into fixing the details anyway.
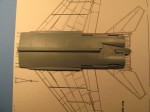
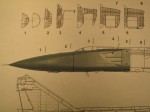
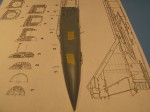
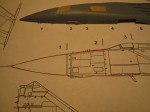
There are two major shape issues. Both are in the cross sectional shapes of the kit:
- The nose section is a too slab-sided. The curvature at the top and bottom of the nose section is too shallow, creating a too large flat surface on the side of the nose.
- The lower fuselage behind the main wheel wells is too flat. Both on the sides and along the bottom. I compared cross-sectional cutouts to the appropriate spots on the model parts. You should be able to see that the engine section should be more curved and almost round in cross-section the further back you go on the part.
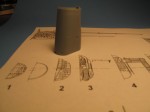
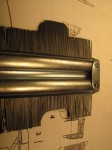
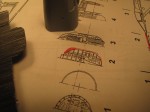
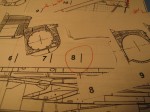
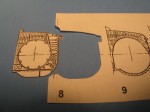
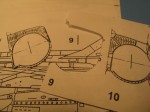
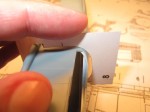
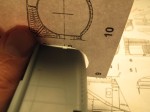
Both of these issues are pretty visible regardless of the comparison to plans. The nose is particularly problematic as it’s right out there on the front with nothing to cover it up. The rear section doesn’t “bother” me as much as in the end it’s going to be “hidden” by the wings, missiles, with the cross section broken up by gear doors and ventral fins. Plus, it’s not the way I’ll “look” at the model when it’s finished in a display case. And as a reminder, your alternative is the Revell kit which compared to this kit doesn’t even look like a MiG-25. The nose will probably be addressed by an aftermarket company – similar to how Komplekt Zip addressed the Trumpeter Su-24 nose.
There are a handful of additional shape issues, these are a little more minor. To my eye, these are much harder to see unless the parts are directly compared to plans. The issues should be fixable by most modelers, particularly those with a little skill at sanding and re-shaping.
- The lower profile of the outer intake leading edge is a bit off. See the attached diagram for the portion of the plastic that should be re-shaped. Hopefully when aftermarket intakes become available, they will be molded to adjusted outer intakes, and this issue will go away.
- The horizontal tail planes are about 1.5 mm to long at the tip, this is an even 1.5 mm across the outer tip, again, see the attached diagram for what needs to be removed and re-profiled.
- The vertical stabilizers are too tall. While the plans don’t represent flat cross sections, comparing the fin height to the plan height shows that they’re about 3mm too tall. Also on this part we can see that the rudder is a bit too short. This is one issue that one of my Russian Modeling buddies will swear is worse than what I see – so as always the issue is in the eye of the individual modeler.
- The wings are about 2mm long in span on each wingtip. Almost like the width of the anti-flutter weight was included in the span of the part, as the kit wingtips lined up perfectly with the outer dimension of the anti-flutter weight. This is against the planform projection of the wing, so the slight issue might be as much about the wing anhedral as an actual dimensional error. Additionally, the aileron appears to be a little short in span.
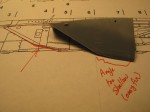
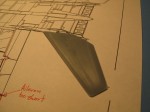
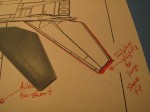
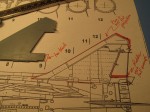
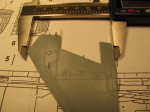
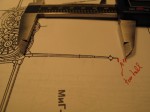
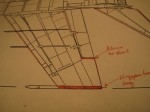
What should you correct? That’s entirely up to you. First look at the parts and ask yourself if YOU see the problem, if you do then you have to decide if you want to correct it, or pay for a corrected add-on part. It’s worth reminding you at this point that your alternative is the old Revell kit.
There are a host of additional "accurizing" steps that can be done to make this kit into a better representation of a MiG-25 interceptor. These issues relate to smaller details molded to the parts that are appropriate to other variants. This involves sanding and filling certain lumps and bumps around the airframe, all are easy for a modeler of even basic skills. These will be outlined in the builder’s guide. I don’t view these as faults, as I’d rather they were there for the other variants than ignored all together!
Gray NOT Green – Colors & Markings, Decal Options
Markings are included for:
MiG-25PD “Blue 75” – Soviet Union, 1979
MiG-25PD “Blue 56” – Ukrainian Air Force Guards Unit, features anniversary banner
MiG-25PD – Iraqi Air Force
Bonus markings are included for “Red 31” – which can be used for Lt. Viktor Beleko’s defection aircraft. Unfortunately these need to be saved for a future release, as Belenko defected in a MiG-25P, and thus to build that aircraft several additional parts will be required.
The only fault to note here is that the dielectric panels on MiG-25s are gray and NOT green. Despite what is shown in the color instructions as well as the box art, the radome, fin caps, and similar covers are a dark gray color (a color that is close to 36118 Gunship Gray). This is one of those things that is NOT Kitty Hawk’s fault. ALL of the main publications available on the MiG-25 (Aerofax and the Red Stars title) feature color profiles with green dielectric panels. These profiles can all be traced back to Yefim Gordon’s original publication on the MiG-25, a book published by Altair from Poland. So with all of these commonly available references showing green dielectrics, it’s no wonder Kitty Hawk included similar instructions in the kit. Fortunately this is a mistake easily avoided on your model!
Summary
What else is there to say? Despite what you may have read around the modeling forums this is a spectacular model of a MiG-25, and is a great start for a modeling project that should net some very pleasing (and large) results. With the addition of aftermarket intakes and intake trunks the primary issues with the kit are corrected. While many will take their projects much further, the average modeler with a little experience in modern kits should enjoy this project and will be rewarded with superior results.
I look forward to at LEAST two more MiG-25s from Kitty Hawk as they have already shown a MiG-25PU and MiG-25RB, I’m betting more will follow. I look forward to covering this line as they progress! Stay tuned for more details on this kit, including the building guide, MiG-25 Interceptor variant briefing and a progressive build of this kit once aftermarket details are available!


