1⁄35Storm Warning
16
Comments
Construction
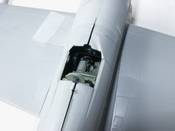
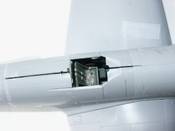
The cockpit out of the kit builds into a neat representation of the real item. As you can’t see much, once the fuselage halves are closed, I personally don’t think a resin cockpit to be worth the investment. The only detailing I carried out in the cockpit was to add Eduard’s colour etched seat belts, and highlight the details on the instrument panel and side consoles, by drybrushing.Just a word about drybrushing instrument panels. I first of all I paint them matt black and, when dry, drybrush with dark grey. The dials are drybrushed with white, to highlight the figures and pointers. The problem with doing this is that the bezels get highlighted as well, which looks wrong. I hand paint the bezels in semi gloss black. If there are coloured bezels paint them at this stage. If the colour gets out of hand, which it usually does, cut it back with thinned matt black. The interior is RAF cockpit green, all the interior parts were prepared and painted prior to assembly.
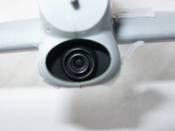
To allow for a “car door” version, the upper fuselage is a separate moulding for each fuselage half. These need to be attached prior to closing the halves. The chin radiator is trapped, in its faring, along with the cockpit assembly, when the fuselage halves are closed. The radiator, as moulded, has a hole down the centre. This is the main air intake for the carburettor. I filled it with a piece of sprue, sanded to fit, and set back inside the opening, to prevent seeing through it. The radiator is painted black and drybrushed with a little aluminium.
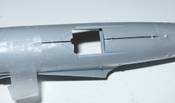
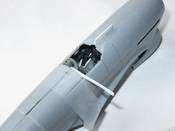
When the fuselage halves are joined you will see a massive gap. If you join the 2 upper decking pieces together and then try to add them, as one piece, to the fuselage, you will eliminate this gap. But you will transfer the problem to the fuselage sides, where it will be very much more difficult to eradicate. As it stands it is not that much of a problem, just a little annoying. If you dry fit the windscreen you will see that it’s position is the correct width, so I simply filled in the gap, by super gluing in a piece of card, then trimming and sanding it. Oddly the rear decking is too wide for the canopy. To rectify this I pulled the 2 halves together, using tape, and ran in some liquid cement. I gave it a couple of days, to make sure it was well cured, then filled and sanded the seam until it was smooth. The canopy runner was lost in the process, but using a length of square section rod easily restored this.
With care the rest of the model goes together without the need for any more filler. The wheel bays, inside of the gear doors and the undercarriage parts were painted Xtracolor steel. When dry they were given a wash of dark grey. Pistons on retraction jacks and oleos were painted with Humbrol chrome silver. The gear doors were Blu-Tacked into the closed position (for painting of the D-Day stripes) and Cocktail sticks were pushed into the gear leg sockets, to act as stands for painting. Be careful if you do this, I managed to split the sockets.
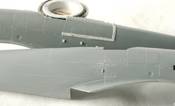
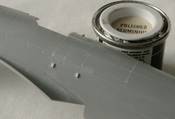
The landing light bays, in the wings, were painted interior green and the lenses given a coat of chrome silver. When dry the lenses were “glazed” with Krystel Kleer. The landing light clear covers were a reasonable fit, but could be better. So I glued them into position and sanded them to conform more accurately to the wing contour. The painted frame that runs down the centre of these glazing pieces was masked and painted in when the main camouflage was done. The Navigation lights, on the wing tips were treated in a similar way. Except that the red, port and green, starboard bulbs were drilled into the back of pieces of clear sprue, with a 0.3mm drill and paint of the appropriate colour added. These pieces of clear sprue are then super glued in position and sanded to shape. All dangly bits (anything that might get broken, or get in the way, during the painting, decalling or weathering processes, was left off for fitting during final assembly.
Comments
Thanks guys, I enjoyed doing it. Watch out for "Storm Bringers" as this article isn't complete without it. You will be amazed at how much I can write about 8 little plastic rockets :-)
Mal
JAN 31, 2005 - 09:34 AM
Nope, mine has the ID stripes under the wings, before D-Day. I'd say 1943ish...
I've got my bombs to paint (because everyone should know RCAF Typhies never carrier rockets) and some touch ups to make, but for that I need a new paintbrush, the one I normally use is KIA...
FEB 01, 2005 - 12:36 PM
That Typhoon is well cool! You should do a dio for it! the article also very good!
cheers
Philip
FEB 02, 2005 - 10:30 AM
Great article mal, realy good job, clear and that plane's a nice one!
Ollie, must agree, thats a nice typhoon!
Frank
FEB 02, 2005 - 10:49 AM
You know what's the best part of that Typhoon Frank?
It's going to be RCAF!
FEB 02, 2005 - 01:10 PM
Thanks Philip, I gave up on dioramas, they take far to much time I would never get any models built :-) I have been thinking of doing a few bases, for photographic purposes. I will actually be doing a small dio when I complete my N1K1 Kyofu float plane. I think that float planes should be shown on water, as land planes are shown on the ground. This will be fun because it will be the first time I have tried depicting water. I'm thinking a ground crewman or maybe a "sloppo" sitting on the wing and fishing :-)
Mal
FEB 03, 2005 - 08:03 AM
Mal, Great article of one of my favorite aircraft. It is especially apt as I am currently researching RAF tactical air power of the period. A wonderful subjects. Great work
Ross
FEB 04, 2005 - 12:17 AM
Copyright ©2021 by Mal Mayfield. Images also by copyright holder unless otherwise noted. The views and opinions expressed herein are solely the views and opinions of the authors and/or contributors to this Web site and do not necessarily represent the views and/or opinions of AeroScale, KitMaker Network, or Silver Star Enterrpises. Images also by copyright holder unless otherwise noted. Opinions expressed are those of the author(s) and not necessarily those of AeroScale. All rights reserved. Originally published on: 2005-01-30 00:00:00. Unique Reads: 16876


