1⁄35Storm Bringers - Painting & Detailing RAF 60lb RPs
3
Comments
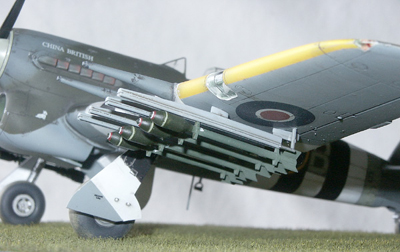
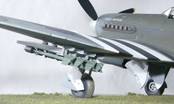
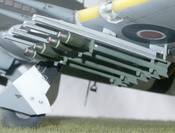
The rockets in the kit look pretty accurate, apart from the slabs that pretend to be the fins. I had pre-planned for this moment and had some etched fins from Airwaves. These are great, but they require that you cut a cruciform in the rocket body, or round section rod, from which to make the body from. As I was quite happy with the shape of the rockets and the fins were a separate moulding. I just needed to cut a cruciform into a short length of round section rod, add the fins, then attach this to the rocket body.
Sounds simple and I’m sure it can be done, and it would look fantastic. I tried round section rod and round section tube. I tried cutting with a scalpel, a single edged razor blade, a razor saw and even an etched saw. I found I could make the first cut accurately, but the second always veered off. I made a jig, to hold the rod/tube in the correct position for cutting and, although the results were better, they were never good enough. I managed one that was just about usable, but there are eight rockets. At the rate I seemed to be able to produce one good one I would be modelling rocket fins until my retirement.
To plan “B”, I also had a set of resin rockets from Paragon, they just needed the launch clips making. I didn’t know how I was going to make them, but I was sure I would find a solution. I opened the packet and was examining the rockets, waiting for the light bulb over the head, to indicate I had “sussed” it. Horror! - there were pinholes in the resin warheads, Aaaaargh! I thought about filling them, but rejected that idea. I thought about replacing them with the warheads from the kit rockets. If I did that I would still have to scratch build the launch clips, as there had been no blinding flash of inspiration in that department, I decided to use the resin fins on the kit bodies..
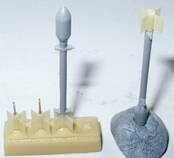
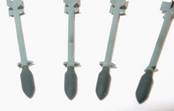
The resin bodies come 4 to a pour block with the very delicate fins at the block end. Lying them on a block of wood I used a razor saw to remove the bodies. Leaving the fins with just over the length of body required to replace the kit fins. The stub bodies were then filed to the correct length, ensuring they were square. 0.2mm holes were then drill into the centre of the stub bodies and lengths of copper wire super glued into them. 0.6mm holes were drilled into the kit bodies, after the positioning tab was removed. One at a time a kit body was offered up to a resin fin assembly and if necessary the wire was cut a little. When the 2 could be brought together, gel super glue was added into the hole in the kit body and it was positioned on one of the fins. There was, just, sufficient time to align the body, in all axes, with the fins, before the glue cured. The rocket was then cut away from the pour block, taking great care not to damage the fins. All eight were completed this way without any mishaps. Phew!...
Sounds simple and I’m sure it can be done, and it would look fantastic. I tried round section rod and round section tube. I tried cutting with a scalpel, a single edged razor blade, a razor saw and even an etched saw. I found I could make the first cut accurately, but the second always veered off. I made a jig, to hold the rod/tube in the correct position for cutting and, although the results were better, they were never good enough. I managed one that was just about usable, but there are eight rockets. At the rate I seemed to be able to produce one good one I would be modelling rocket fins until my retirement.
To plan “B”, I also had a set of resin rockets from Paragon, they just needed the launch clips making. I didn’t know how I was going to make them, but I was sure I would find a solution. I opened the packet and was examining the rockets, waiting for the light bulb over the head, to indicate I had “sussed” it. Horror! - there were pinholes in the resin warheads, Aaaaargh! I thought about filling them, but rejected that idea. I thought about replacing them with the warheads from the kit rockets. If I did that I would still have to scratch build the launch clips, as there had been no blinding flash of inspiration in that department, I decided to use the resin fins on the kit bodies..
Adding the resin fins.
OK, so I simply cut off the resin fins and stick them on the plastic bodies - well, yes and no. For some, most even, this approach will probably work. For me, I go through a process of assessing the likely problems and finding solutions. For me this is quite a quick process, I did it all the time in my past life as a super hero, err sorry, Combat Engineer, (combat engineers are in fact the military equivalent of super heroes, you just never see us in comics, UBIQUE). I won’t bore you with all the potential problems I saw with this process. Suffice to say that the way I did it was to alleviate the possibility of these problems occurring and it worked.The resin bodies come 4 to a pour block with the very delicate fins at the block end. Lying them on a block of wood I used a razor saw to remove the bodies. Leaving the fins with just over the length of body required to replace the kit fins. The stub bodies were then filed to the correct length, ensuring they were square. 0.2mm holes were then drill into the centre of the stub bodies and lengths of copper wire super glued into them. 0.6mm holes were drilled into the kit bodies, after the positioning tab was removed. One at a time a kit body was offered up to a resin fin assembly and if necessary the wire was cut a little. When the 2 could be brought together, gel super glue was added into the hole in the kit body and it was positioned on one of the fins. There was, just, sufficient time to align the body, in all axes, with the fins, before the glue cured. The rocket was then cut away from the pour block, taking great care not to damage the fins. All eight were completed this way without any mishaps. Phew!...
Comments
Thanks guys, I started this as part of the original Storm Warning article but as you can see it is a bit long to be part of that
Mal
MAR 07, 2005 - 07:42 AM
Copyright ©2021 by Mal Mayfield. Images also by copyright holder unless otherwise noted. The views and opinions expressed herein are solely the views and opinions of the authors and/or contributors to this Web site and do not necessarily represent the views and/or opinions of AeroScale, KitMaker Network, or Silver Star Enterrpises. Images also by copyright holder unless otherwise noted. Opinions expressed are those of the author(s) and not necessarily those of AeroScale. All rights reserved. Originally published on: 2005-03-06 00:00:00. Unique Reads: 16462


