

1⁄35MH-60S Knight Hawk
15
Comments
On to painting
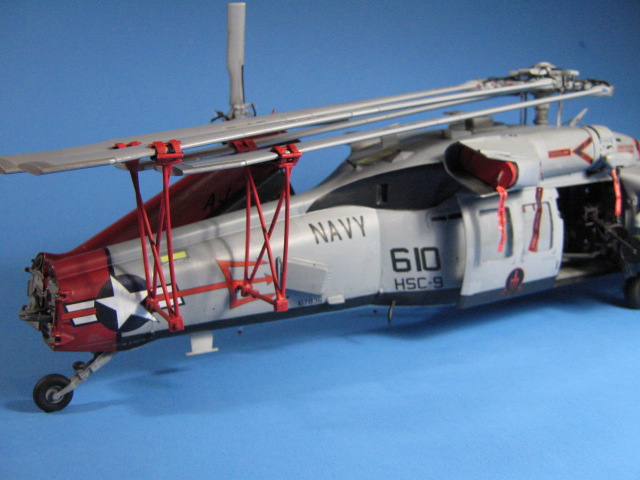
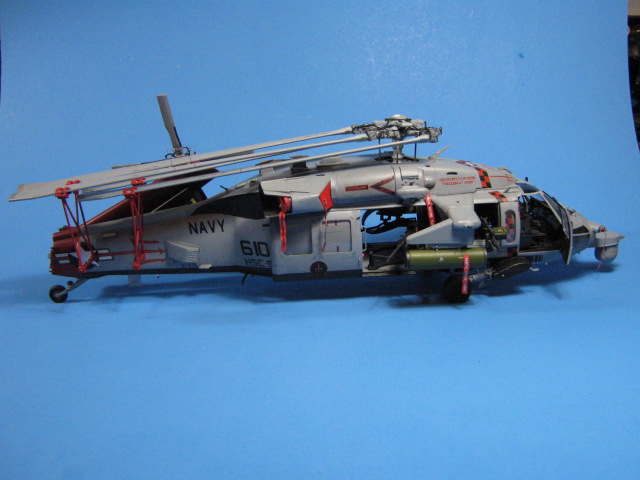
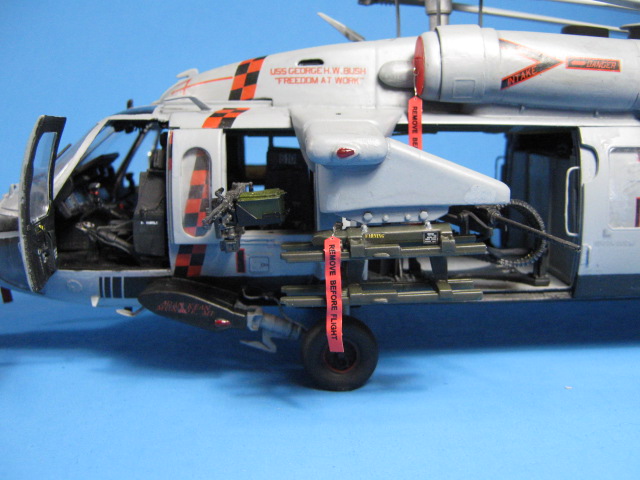
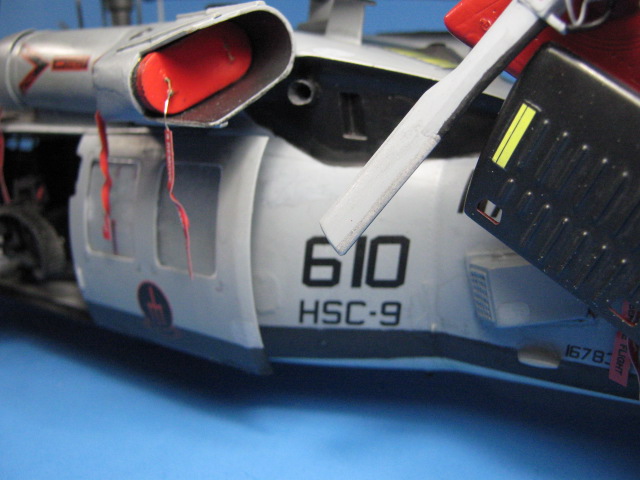
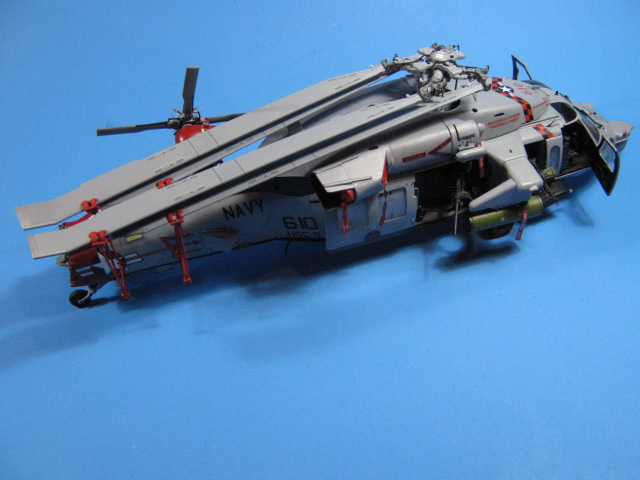
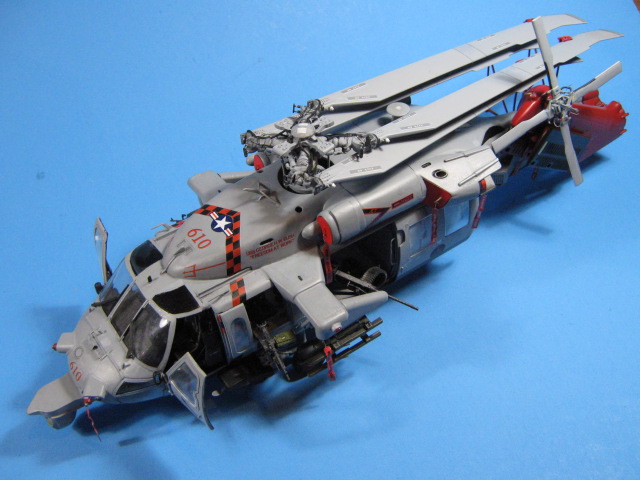
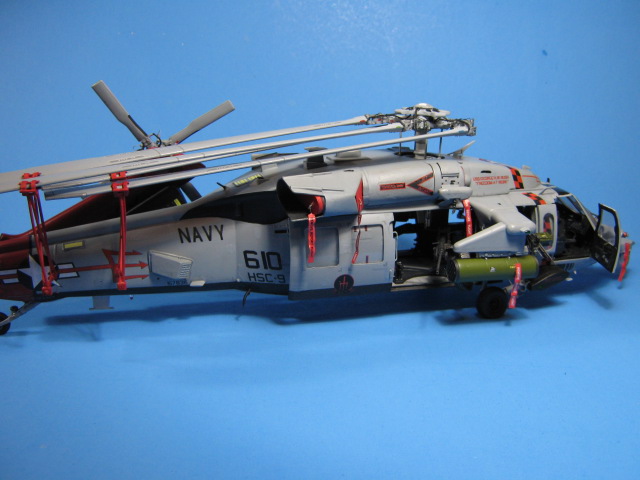
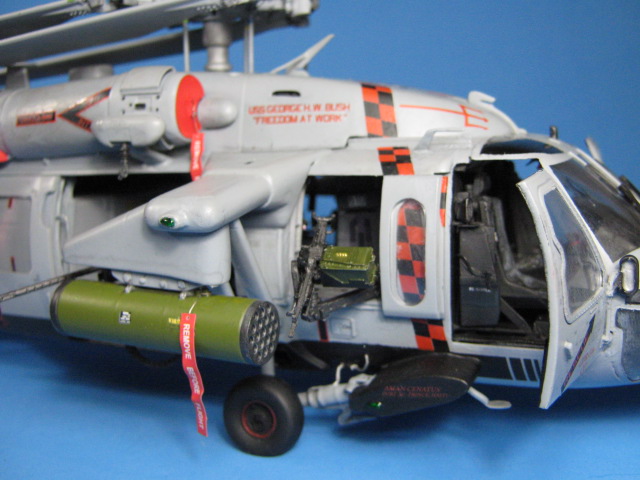
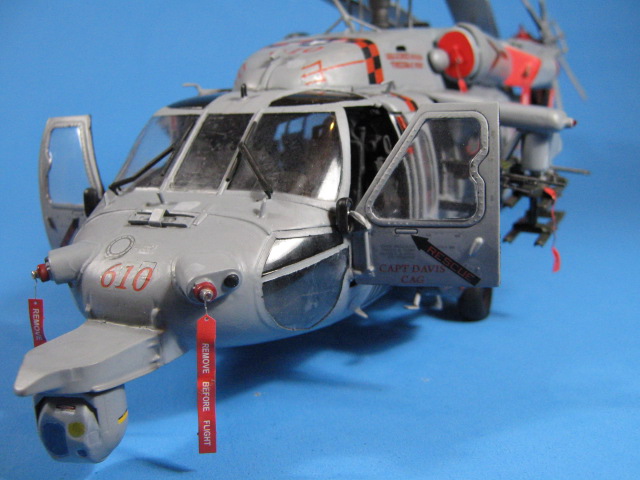
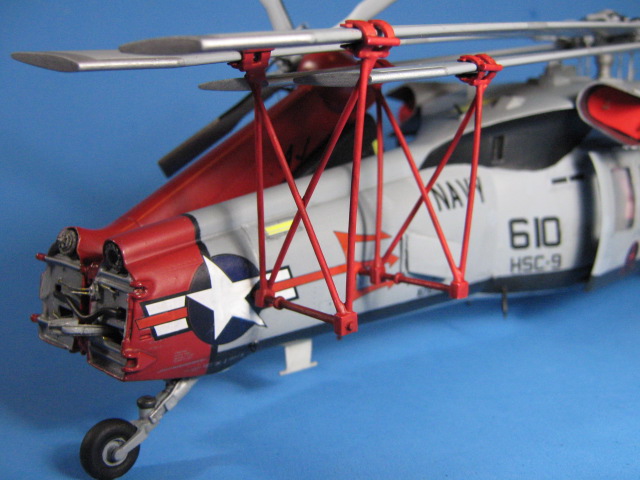
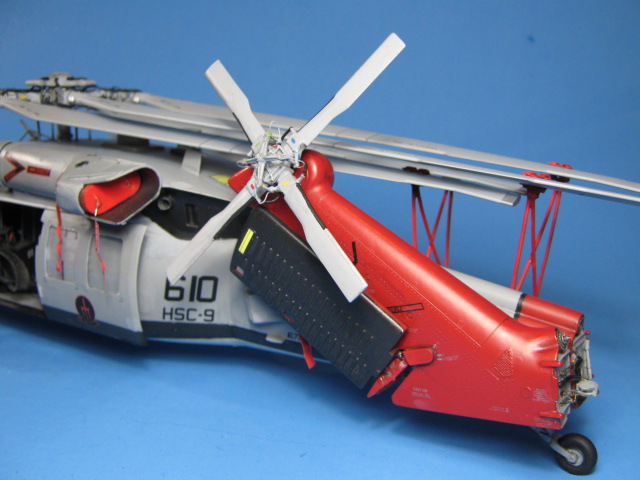
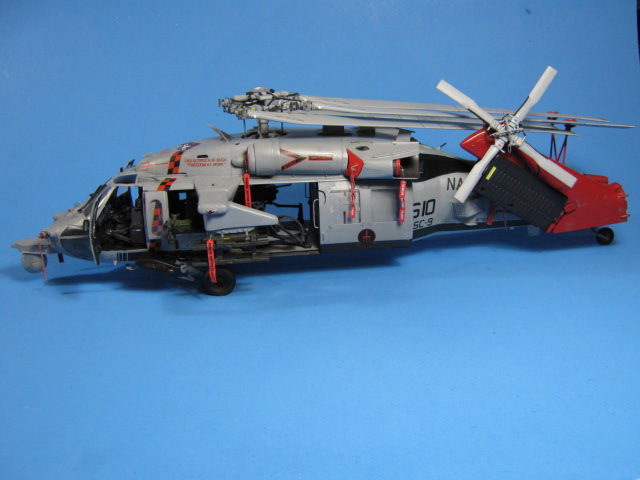
I painted the aircraft mainly using my preferred Testors Model Master enamel paints and a rattle can flat black spray for the stripe down the side. I first sprayed the black, then taped-off the stripe when dry. Next I painted the overall fuselage color of Dark Ghost Gray. Then I painted the Light Gray underside, blending the colors under the nose and using the black stripe as a dividing line down the fuselage. Lastly, the tail portions were painted Insignia Red. The stabitaltors were painted black on the underside and red on the topside as well.A note on painting: The instructions and USN painting guides call for the aircraft to be painted in a 3-color standard USN gray camo scheme of Medium Gray (FS35237) upper surfaces, Dark Ghost Gray (FS36320) for the main fuselage, and Light Gray (FS36495) for the underside. However, actual photos of this aircraft look to have a 2-color camo scheme of Dark Ghost Gray (FS36320) for the entire fuselage (including upper surfaces), and Light Gray (FS36495) for the underside. I am using the two colors as I cannot decide whether the upper color simply faded to blend with the main fuselage color, or if the upper color is not present. Either way, it looks only two-tone to me, so that is how I am doing it.
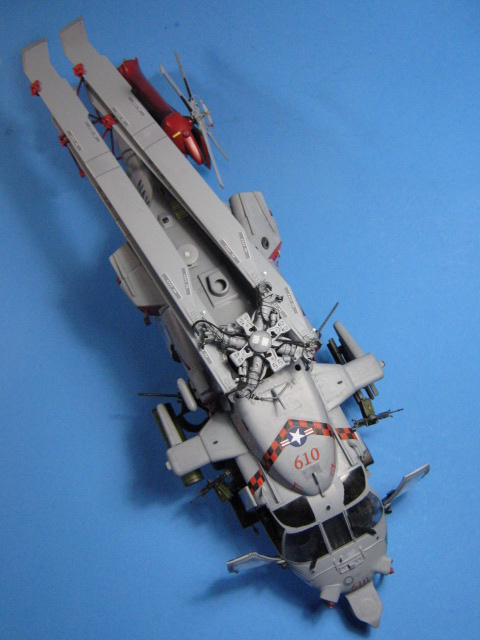
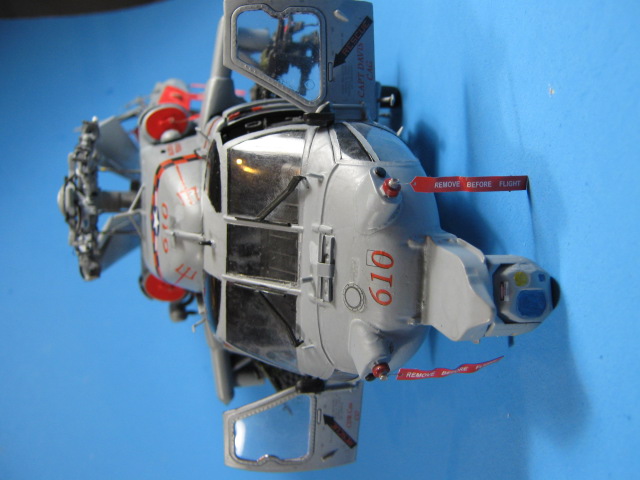
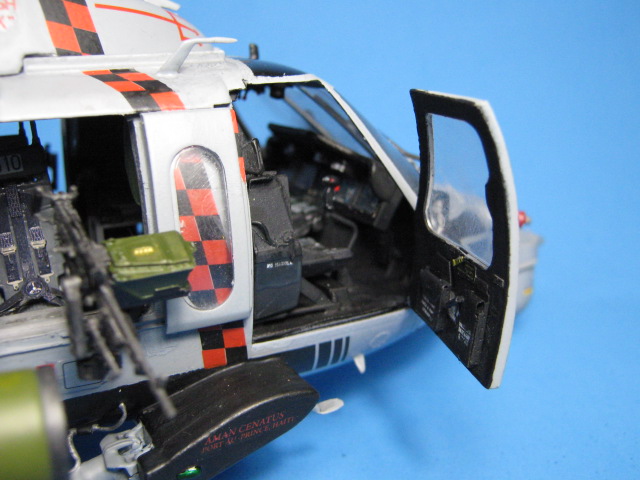
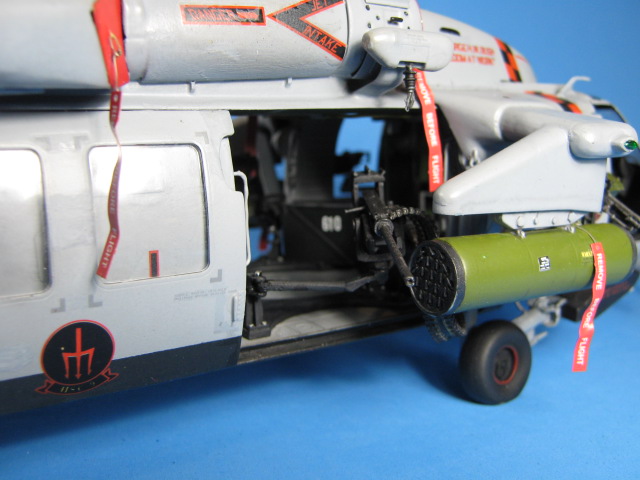
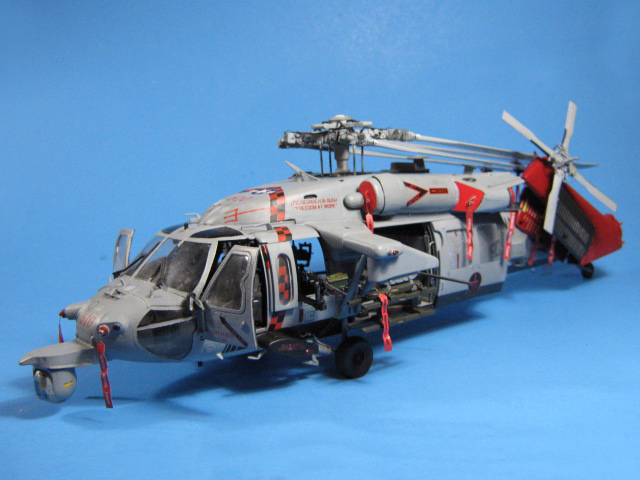
The multitude of decals were next after painting. I applied two coats of gloss in preparation for decaling. The decal sheet is very large and very nice. There are a lot of markings on this aircraft. Go slow and follow the decal diagram and you will have no issues. I found that the decals went on well with just a little solvent and setting solutions to get them to snug down around all the rivets and compound curves. The stripe that goes around the forward fuselage went on well and is divided into seven separate pieces which makes it easy to apply. I really like how they handled the gunners windows here with a two-part decal that wraps around the side of the window so it blends in as well. The addition of Hellfire decals is also nice. Additionally, you have all the decals from the other two versions to use on other helos if you wish to for future builds.
After the decals had set and dried, I applied another coat of gloss to blend them in, then applied two coats of flat to deaden the finish. Lastly, I applied a light wash of acrylic black to give the aircraft a used, yet well maintained look. I find that naval aircraft are kept pretty clean as they are washed frequently to combat corrosion from the salty conditions at sea. As such, they shouldnt be weathered very much and should not show any rust or corrosion.
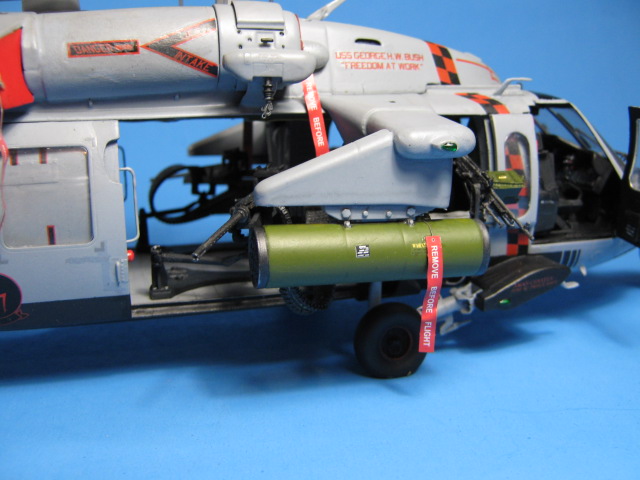
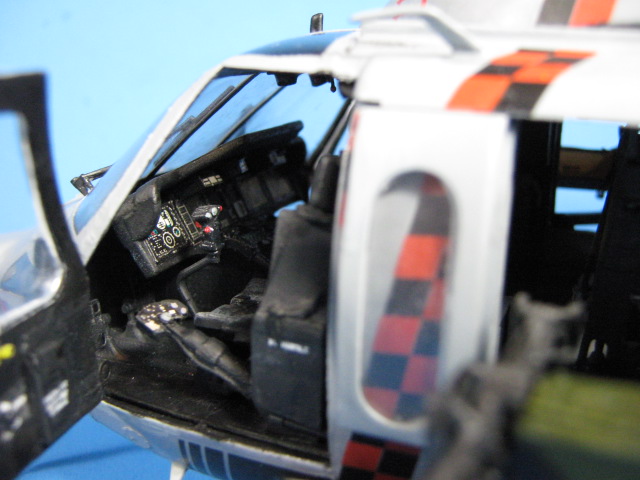
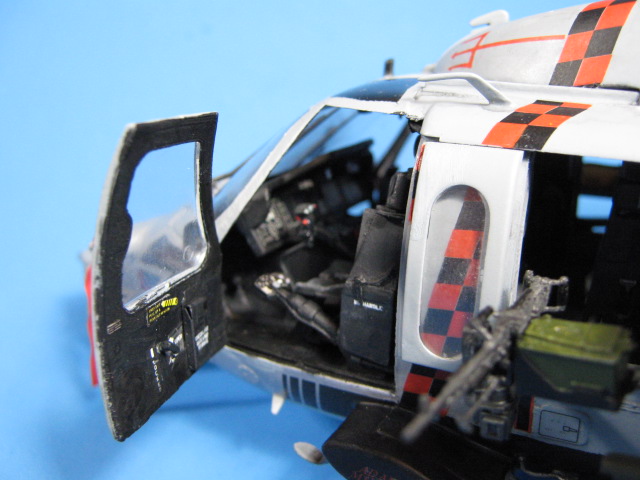
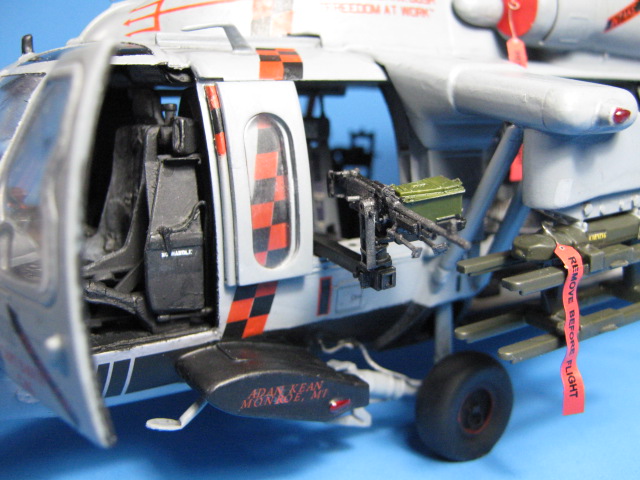
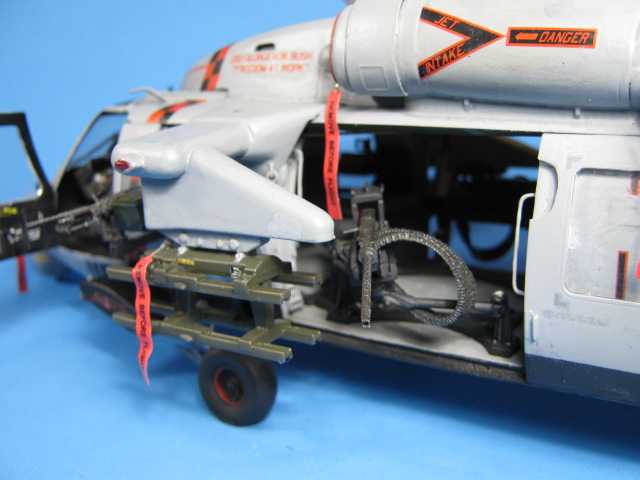
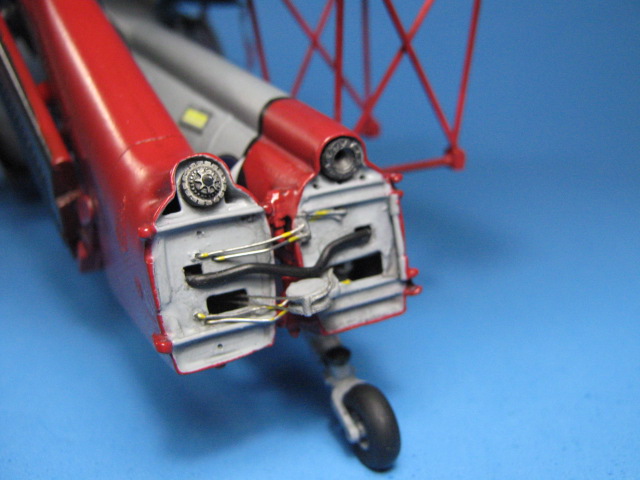
To finish it up, I did any detail and touchup painting and attached the weapons. I also propped all the doors open so the interior could be seen easily.
Conclusion
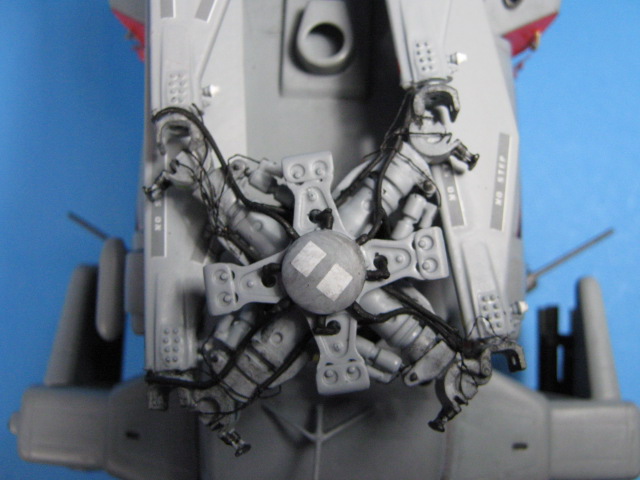
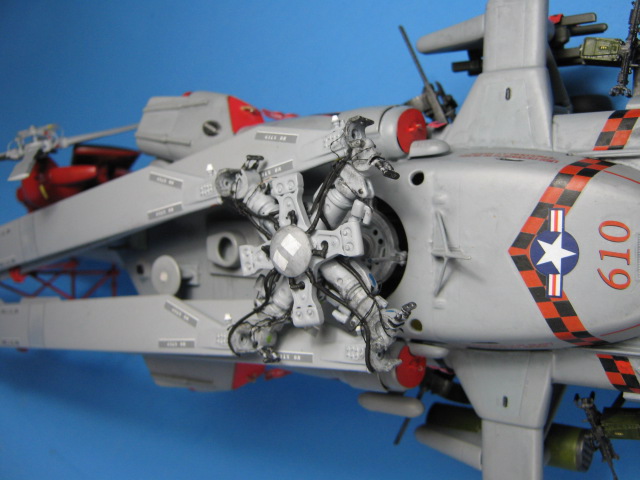
The kit went together very well with no major issues. I have built a bunch of the Academy 1/35 Black Hawk models, so they go together pretty easily for me. They do have a few issues, but I think I addressed them all here and hopefully they will make it easier for someone else to build them. Once complete, this can be a really impressive model. Academy has done a pretty good job of providing the basic parts you need to build a naval MH-60S. The really improved n their IP and cockpit parts, so kudos there. With the addition of PE and a few AM pieces, this kit really comes to life. If you are looking to just build a model that looks like an MH-60S, straight out of the box you will be close. If you want to really detail it out, this kit is a great base to start with. I hope I have provided enough info for both types of modelers to build a nice model of an MH-60S.Good luck and happy helo modeling.
About the Author


FROM: FLORIDA, UNITED STATES
Retired US Army Artillery Officer, currently a contractor at MacDill AFB in the Tampa, FL area. I have been modelling for the past 40+ years, really seriously on armor and large scale helos (1/32, 1/35) for the last 35 or so.
Comments
Great job and review Gino! I have this kit at home and have been adding a few more 1/35 scale helos. Looks like I will be giving Chris at CC another order soon!
NOV 11, 2015 - 11:27 PM

Thanks Jeff. I really enjoyed this one. Chris' products are great. You will really like them.
NOV 12, 2015 - 01:35 AM


Now that's a build story!!!
I hope that one day, I will reach this level (although doubting)
NOV 24, 2015 - 02:01 AM
Thanks Drabslab. I'm sure you could do a great job on one as well.
NOV 24, 2015 - 06:40 AM
I was reading this last week and then lo and behold, someone had it at a show Saturday for $35! Obviously had to grab it. With what I saved I guess I'll be picking up a few detail sets.
DEC 06, 2015 - 05:55 PM
Good luck on it. It can become a great model. I highly recommend the Shapeways printed rotor hinges, by our own Matt Leese. The folded rotors (and tail) really save on the space it can take up.
DEC 06, 2015 - 08:35 PM
Copyright ©2021 by Gino P. Quintiliani. Images also by copyright holder unless otherwise noted. The views and opinions expressed herein are solely the views and opinions of the authors and/or contributors to this Web site and do not necessarily represent the views and/or opinions of AeroScale, KitMaker Network, or Silver Star Enterrpises. Images also by copyright holder unless otherwise noted. Opinions expressed are those of the author(s) and not necessarily those of AeroScale. All rights reserved. Originally published on: 2015-11-11 01:20:51. Unique Reads: 16361

WEB HOSTING BY


Copyright ©2021 AeroScale and Kitmaker Network, a subsidiary of Silver Star Enterprises
All Rights Reserved. Please read our Conditions of Use and Privacy Policy.
All Rights Reserved. Please read our Conditions of Use and Privacy Policy.