1⁄35Snake Bite! - AH-1W Super Cobra
13
Comments
The Engine
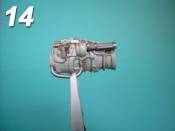
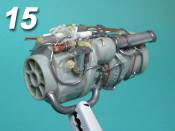
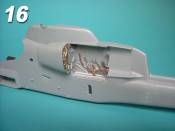
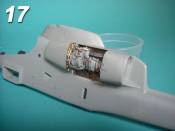
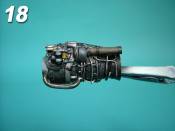
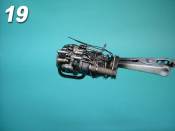
The Super Cobra has two 1690 shp General Electric T700-GE-401 engines. The kit gives the option to leave the left-side engine access doors open. The problem is that the main parts which form the engine in the kit (C23 and C24) are very approximate and lacking in details. So building it was the most laborious job in whole project: it needed many reference pictures.... and a lot of patience! I used every type of material I had: different thickness copper and tin wires, various diameter plastic and copper tubes, lead foil, plastic rods, different resin bolts and many other parts coming from my scrap-box (photo .14 and .15). Later, I detailed its compartment too (photo .16 and .17). Than I painted the engine using Testors Modelmaster metalizer colours: in my opinion they are ideal for airbrushing. Later I applied a diluted wash with oil paints (black and burnt umber). At last I airbrushed a thin coat of Tamiya acrylic colour XF19“Smoke” (photo .18 and .19).The Fuselage
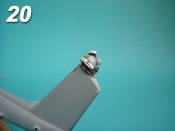
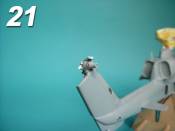
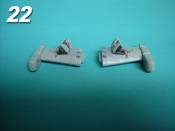
Externally, the model doesn’t need much superdetailing work, due to the good moulding of the kit which has fine engraved panel lines and embossed rivets. To join fuselage halves was quite simple, without much puttying. It was necessary to cut out the plastic grills and replace them with photoetched ones, after reducing plastic thickness. A little work was needed to detail the tail rotor gearbox (Evergreen plastic card and copper wire). The item on top is a Global Positioning System (GPS) antenna (photo .20 and .21). Under the wings I added electrical firing cables to the inboard pylon where I decided to place the seven-tube 2.75 inch LAU-68/A rocket pod (photo .22). Then I placed the photoetched parts from Eduard's exterior set on the fuselage and I added the mooring rings, scratch-built with metal wire and lead foil. Lastly, I replaced the engine exhausts (their plastic is too thick) with Eduard's photoetched parts.Comments
Hi guys,
thanks all for your appreciation.... I enjoy sharing my job!
but above all thanks to Rowan who helped me to edit the article!
Tom
FEB 13, 2006 - 01:30 AM
Hello Tommaso,
That is an excellent article you did, love the step by step detail work as with the photos. As for the detail…great eye, nicely done. Your paint and wreathing looks suburb. I like the look of well worked helicopters and you captured this one well. I have one just about half done and seeing yours has me inspired to bring mine back out. Thanks for the super article.
Joe
FEB 13, 2006 - 03:41 AM
Pretty darned nice execution and finish! This is one I'd love to see in person. Great job!
Gunnie
FEB 13, 2006 - 03:59 AM
Thanks Mother, too kind... and Gunnie, I loved your Shermans, now I'm building my first one for a dio... I'll show you when finished!
Tom
FEB 14, 2006 - 02:03 AM
I save these words for very few things in life... Absolutely Awe Inspiring Amazing! Extremely good job Tommaso. I'm in love with not only the cockpit detailing, but the engine and rotor work as well... The way you assembled the minigun is ingenious and the metallic blue heads of the missles in thier pods have my eyes popping out! The finish on the overall paintjob is fantastic as well! Now that's what I want my mods to look like!
MAR 04, 2006 - 09:59 AM
Thanks of appreciation Joseph
, I'm happy you enjoy my work!
practice + patience... and you'll get it!
Tom
MAR 04, 2006 - 05:14 PM
Copyright ©2021 by Tommaso Porro. Images also by copyright holder unless otherwise noted. The views and opinions expressed herein are solely the views and opinions of the authors and/or contributors to this Web site and do not necessarily represent the views and/or opinions of AeroScale, KitMaker Network, or Silver Star Enterrpises. Images also by copyright holder unless otherwise noted. Opinions expressed are those of the author(s) and not necessarily those of AeroScale. All rights reserved. Originally published on: 2006-02-12 00:00:00. Unique Reads: 38089


