1⁄35Snake Bite! - AH-1W Super Cobra
13
Comments
Introduction
I’ve never been a fan of aircraft models. My favourites subjects are 1/35 WW2 armour, figures and dioramas. But then Academy presented its first UH60 Black Hawk in 1/35 and when I saw it for real in my model shop I loved it... and I bought it!. An amazing kit. After that I decided to build the AH-1W Super Cobra too..... so here it is!Kits: n°2193 ACADEMY AH-1W “SUPER COBRA” 1:35 scale. Eduard photoetched AH-1 items: n°32090 Interior set and n°32087 Exterior set.
Documentation / references: Squadron/Signal publications Walk around n°29 “AH-1 Cobra”, Salamander book Aviation fact file “Modern fighting aircraft-AH-1” and many photos taken on web.
The Cockpit
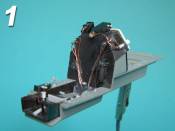
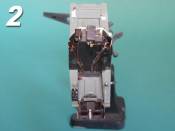
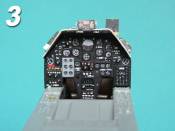
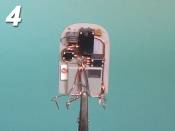
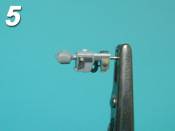
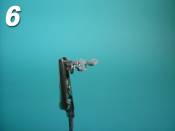
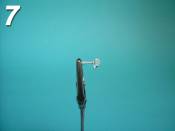
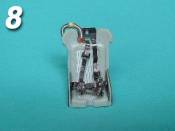
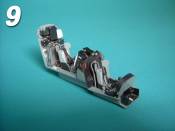
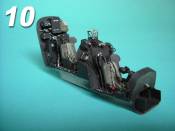
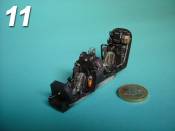
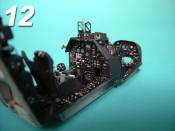
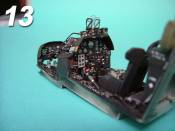
I started my job in the cockpit. Here I used part of Eduard's interior set which is very good, especially for instrument panels. After consulting my references, I detailed the instruments, adding buttons and triggers made with small section of different Evergreen plastic-rods: a very difficult task was gluing triggers on the cyclic stick control located at the right side of the gunner/copilot’s cockpit... I really risked losing my patience! Beside it I scratch-built the T-shaped handle for canopy emergency release with plastic rod and copper wire (photo .1).The pilot’s ejection handle was placed within the indentation in the center of the seat. The cables are various diameter metal wires, copper and tin (photo .2). The fire-extinguisher come from my scrap-box, I think it's from an old Italeri kit. For the instrument panels, as said, I used the Eduard photoetched set: once painted, they both look quite real. I also used some dry transfers to reproduce the small white stencils (photo .3). The aft bulkhead in the kit is very basic, so I detailed it with instrument box and many cables (photo .4). Also, the part reproducing the TOW telescopic sight unit (TSU), which dominates the gunner’s cockpit, lacks in details... so there was a lot of work to do. Its left grip is a piece of thick soldering wire, which I like very much because is very easy to bend in spite of its diameter. Triggers are made with plastic rod (photo .5 and .6). Very small buttons were also added to the pilot’s collective control lever (photo .7). The seats were quite simple to make. Belts come from the Eduard set. I just scratch-built the hoses which supply cooled or heated air to the pilots. I made them from a bass guitar-string... it needs imagination to be modeller! (photo .8). The finished cockpit was ready to paint (photo .9) .... and after painting with Humbrol enamels (photo .10 - .11 - .12 and .13). I was very satisfied with the result. You can see I added a first-aid bag on the aft bulkhead, coming from scrap-box.Comments
Hi guys,
thanks all for your appreciation.... I enjoy sharing my job!
but above all thanks to Rowan who helped me to edit the article!
Tom
FEB 13, 2006 - 01:30 AM
Hello Tommaso,
That is an excellent article you did, love the step by step detail work as with the photos. As for the detail…great eye, nicely done. Your paint and wreathing looks suburb. I like the look of well worked helicopters and you captured this one well. I have one just about half done and seeing yours has me inspired to bring mine back out. Thanks for the super article.
Joe
FEB 13, 2006 - 03:41 AM
Pretty darned nice execution and finish! This is one I'd love to see in person. Great job!
Gunnie
FEB 13, 2006 - 03:59 AM
Thanks Mother, too kind... and Gunnie, I loved your Shermans, now I'm building my first one for a dio... I'll show you when finished!
Tom
FEB 14, 2006 - 02:03 AM
I save these words for very few things in life... Absolutely Awe Inspiring Amazing! Extremely good job Tommaso. I'm in love with not only the cockpit detailing, but the engine and rotor work as well... The way you assembled the minigun is ingenious and the metallic blue heads of the missles in thier pods have my eyes popping out! The finish on the overall paintjob is fantastic as well! Now that's what I want my mods to look like!
MAR 04, 2006 - 09:59 AM
Thanks of appreciation Joseph
, I'm happy you enjoy my work!
practice + patience... and you'll get it!
Tom
MAR 04, 2006 - 05:14 PM
Copyright ©2021 by Tommaso Porro. Images also by copyright holder unless otherwise noted. The views and opinions expressed herein are solely the views and opinions of the authors and/or contributors to this Web site and do not necessarily represent the views and/or opinions of AeroScale, KitMaker Network, or Silver Star Enterrpises. Images also by copyright holder unless otherwise noted. Opinions expressed are those of the author(s) and not necessarily those of AeroScale. All rights reserved. Originally published on: 2006-02-12 00:00:00. Unique Reads: 38088


