1⁄35Snake Bite! - AH-1W Super Cobra
13
Comments
Painting/weathering
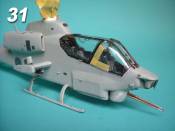
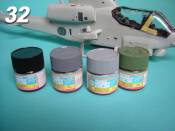
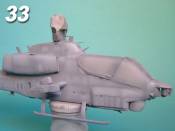
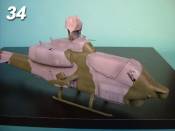
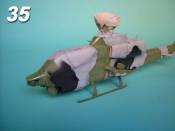
After masking the canopy the model was ready to paint (photo .31). I decided for the Land Camouflage Scheme used by US Marines, Field Green (FS 34095), Blue Gray (FS 35237) and Flat Black (FS37038), and I choose GUNZE SANGYO acrylic colours - my favourite paints for airbrush work (photo .32).First of all I gave one coat of Tamiya surface primer and I left to dry for 48 hours. Afterwards I airbrushed the model with the first camouflage colour (blue gray). Then, with a darker tone, I outlined the panel lines and added shadows, while with a lighter tone I brightened the center of panels and the lightest areas (photo .33). After applying masks (with TAMIYA tape), I painted the green and black areas (I didn’t use pure black, but I added a drop of white). Then I repeated the previous procedure (photo .34 and .35). After two days I gave two gloss varnish coats to facilitate applying decals and after that three matt coats.
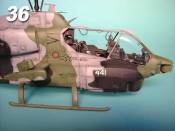
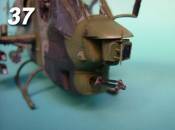
The model didn’t need a heavy weathering job. I only applied some very light washes to the whole model (I call them “filters”): 95% Humbrol thinners and 5% oil paint (black+burnt umber, Vandyke brown, etc..). Later, using a small point brush (nr° 0 or 00) I applied a selective wash with a less diluted mixture only on the panel lines and around engravings and rivets. After a couple of days I applied a light dry-brush to highlight details (projections, rivets, etc...) (photo .36). The gun and exhausts were airbrushed with MODEL MASTER metalizer (nr°1405 gunmetal and 1406 exhaust), than lightly drybrushed with Chrome Silver, only over the details (photo .37). I also applied a black mix wash to the exhausts.
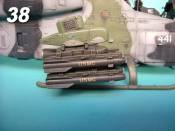
I painted the AGM 114 Hellfire missiles and their pods in Helo drab FS 34031, which I re-created mixing GUNZO SANGYO Olive drab FS 34087 + Flat Black FS 37038 (photo .38).
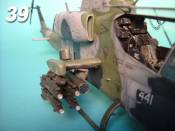
Finally, to re-create the Blue-metal finishing of the 2.75 inch rockets I used the following technique: a base of HUMBROL matt aluminium than a thin coat of TAMIYA “clear blue” (photo .39).
Comments
Hi guys,
thanks all for your appreciation.... I enjoy sharing my job!
but above all thanks to Rowan who helped me to edit the article!
Tom
FEB 13, 2006 - 01:30 AM
Hello Tommaso,
That is an excellent article you did, love the step by step detail work as with the photos. As for the detail…great eye, nicely done. Your paint and wreathing looks suburb. I like the look of well worked helicopters and you captured this one well. I have one just about half done and seeing yours has me inspired to bring mine back out. Thanks for the super article.
Joe
FEB 13, 2006 - 03:41 AM
Pretty darned nice execution and finish! This is one I'd love to see in person. Great job!
Gunnie
FEB 13, 2006 - 03:59 AM
Thanks Mother, too kind... and Gunnie, I loved your Shermans, now I'm building my first one for a dio... I'll show you when finished!
Tom
FEB 14, 2006 - 02:03 AM
I save these words for very few things in life... Absolutely Awe Inspiring Amazing! Extremely good job Tommaso. I'm in love with not only the cockpit detailing, but the engine and rotor work as well... The way you assembled the minigun is ingenious and the metallic blue heads of the missles in thier pods have my eyes popping out! The finish on the overall paintjob is fantastic as well! Now that's what I want my mods to look like!
MAR 04, 2006 - 09:59 AM
Thanks of appreciation Joseph
, I'm happy you enjoy my work!
practice + patience... and you'll get it!
Tom
MAR 04, 2006 - 05:14 PM
Copyright ©2021 by Tommaso Porro. Images also by copyright holder unless otherwise noted. The views and opinions expressed herein are solely the views and opinions of the authors and/or contributors to this Web site and do not necessarily represent the views and/or opinions of AeroScale, KitMaker Network, or Silver Star Enterrpises. Images also by copyright holder unless otherwise noted. Opinions expressed are those of the author(s) and not necessarily those of AeroScale. All rights reserved. Originally published on: 2006-02-12 00:00:00. Unique Reads: 38089


