Early Aviation
Discuss World War I and the early years of aviation thru 1934.
Hosted by Jim Starkweather
1:32 Roden GB 2008 Se5a - Stephen
JackFlash
Colorado, United States
Joined: January 25, 2004
KitMaker: 11,669 posts
AeroScale: 11,011 posts
Joined: January 25, 2004
KitMaker: 11,669 posts
AeroScale: 11,011 posts
Posted: Saturday, February 16, 2008 - 07:37 AM UTC
The brain child of H. P. Folland and Major Frank Widenham Goodden, the SE 5 airframe was modified after the initial batch of 24 (A4845 - A4868.) It was in the middle of the second production batch (A8898 - A8947) that design alterations created the new designation SE 5a. Essentially shortened wings and revised aileron controls were incorporated. In the matter of aircraft nomenclature it is of interest to note that the annotation of the Royal Aircraft Factory drawings states that it was modifications to the mainplane that distinguished the SE 5a from the SE 5. But in the Air Board technical notes are headed; (I) SE 5a, 200hp Hispano - Suiza (II) SE 5, 150hp Hispano - Suiza. The first production SE 5a was A8923.
As a model, it has been a favorite subject for many years. The basic kits that were available were the venerable Aurora and the ‘Lindberg’ kits. Roden’s contributions began arriving and all that we knew changed.
In October 2003. 1/72, 49 piece version was issued.
In late Sept. 2004 the 1/48 kit 416 (depicting the Wolseley Viper version) with 91 piece version arrived.
Then in late June. 2005, 1/48 kit #419 (depicting the Hispano - Suiza version) also with 91 piece version arrived.
Finally in May 2007 the 1/32 kit #607 was delivered to the world’s local hobby shops. It also has decals and profiles for the late version airframe with the Wolseley Viper engine. Yet this kit differs from the other ‘Roden’ SE 5a kits in that it does have the full engine present. The subtle detail contributes greatly to the over-all look. First if you want to rig this kit, you should plot all the rigging lines and strut locator holes you will need to work with. Planning ahead using references and plan views will ensure your success. Pre-drill all pilot holes for each end of the struts and the rigging wires. Don’t be afraid to take notes. There should be two holes for each wire and each strut. Drill the strut locator and rigging holes.
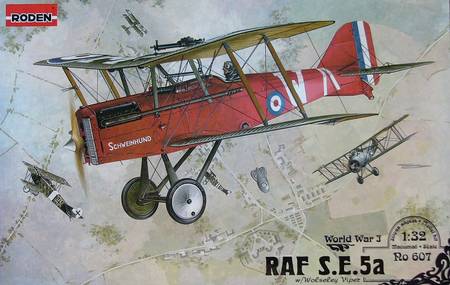
The instructions begin with assembling parts for Roden’s 200hp Wolseley W.4a “Viper”. Note parts for the 200 - 220hp Hispano- Suiza engine are on the same parts tree.
CaptainA
Indiana, United States
Joined: May 14, 2007
KitMaker: 3,117 posts
AeroScale: 2,270 posts
Joined: May 14, 2007
KitMaker: 3,117 posts
AeroScale: 2,270 posts
Posted: Sunday, March 02, 2008 - 11:12 AM UTC
I am anxiously awaiting this build. I have it in my closet, and it is calling me. Bally Hi
As a side note. The first time I ever saw my wife, she was playing the part of Liat in South Pacific
JackFlash
Colorado, United States
Joined: January 25, 2004
KitMaker: 11,669 posts
AeroScale: 11,011 posts
Joined: January 25, 2004
KitMaker: 11,669 posts
AeroScale: 11,011 posts
Posted: Wednesday, March 19, 2008 - 10:13 PM UTC
Finally here we go on the engine.
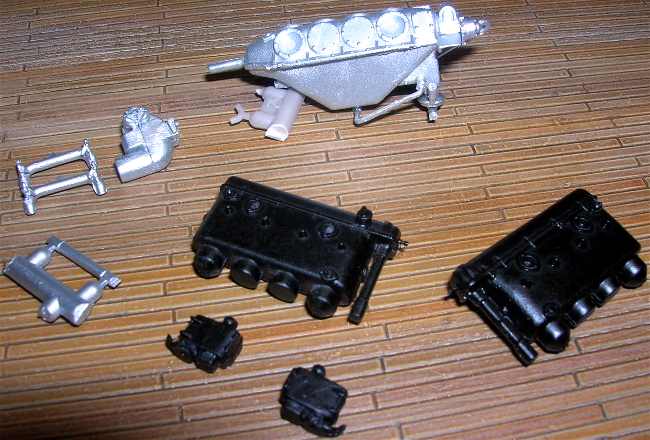
The instructions begin with assembling parts for Roden’s 200hp Wolseley W.4a “Viper”. Note the parts map shows parts for the 200 - 220hp Hispano- Suiza engine are on the same tree. But in truth they were gated out. To explain, molds have small gates that allow for certain parts to not be filled with styrene when poured.
Step 1.) Following the instructions, the two cylinder banks (12 & 13 E ) & ( 17 & 18 E ) have the camshaft drive housings attached to the rear of each bank of four cylinders. The valve covers are represented well and the modeler only needs to erase the union seams of the halves. The camshaft drive needs to be cut down slihtly some mating halves join correctly.
Step 2.) The carburetor assembly has the water/ / condensation drains ( 7 E X 4), these could benefit from some PE pieces if someone were to make them. The intake manifold arms (11 E X 2) go from the cylinder bank inner faces to the carburetor and intake manifold base (15, 18, 20 & 21 E ). The whole assembly will hang in the open area between the finished cylinder banks.
Step 3.) The twin magneto assemblies ( 14, 19, 22, & 23 E X 2 ) will attach to the rear of the crankcase on horizontal flanges.
Step 4.) Unites steps 1-3 with crankcase assembly (1, 2, 3, 4, 10, 24, 27, 28, 29 E) and crank shaft end ( 40 C ). The magnetos from step 3 have a conduit (24 E )filled with wiring that runs between them. The wiring leads are represented by 14 E on the magnetos. The oil scavenging pump (28 E ) mounts to the rear and the water pump (29 E ) mounts to the underside respectively of the completed crankcase ( 2 & 3 E). Spark plug wiring needs to be duplicated to further detail this fine mold. The air pump (10 E ) and the oil filler tube (27 E ) are added to their locations.
Step 5.) Attaches plumbing to the underside of the crankcase for oil lines (5 & 9 E ) & water lines (8 E X 2 and 25 E X 2). Note there are two nipples one each on the rear of the cylinder banks valve covers. On the pilot’s left is the tachometer gauge connection. On the right is the Vickers machine gun synchronization connection.
The instructions begin with assembling parts for Roden’s 200hp Wolseley W.4a “Viper”. Note the parts map shows parts for the 200 - 220hp Hispano- Suiza engine are on the same tree. But in truth they were gated out. To explain, molds have small gates that allow for certain parts to not be filled with styrene when poured.
Step 1.) Following the instructions, the two cylinder banks (12 & 13 E ) & ( 17 & 18 E ) have the camshaft drive housings attached to the rear of each bank of four cylinders. The valve covers are represented well and the modeler only needs to erase the union seams of the halves. The camshaft drive needs to be cut down slihtly some mating halves join correctly.
Step 2.) The carburetor assembly has the water/ / condensation drains ( 7 E X 4), these could benefit from some PE pieces if someone were to make them. The intake manifold arms (11 E X 2) go from the cylinder bank inner faces to the carburetor and intake manifold base (15, 18, 20 & 21 E ). The whole assembly will hang in the open area between the finished cylinder banks.
Step 3.) The twin magneto assemblies ( 14, 19, 22, & 23 E X 2 ) will attach to the rear of the crankcase on horizontal flanges.
Step 4.) Unites steps 1-3 with crankcase assembly (1, 2, 3, 4, 10, 24, 27, 28, 29 E) and crank shaft end ( 40 C ). The magnetos from step 3 have a conduit (24 E )filled with wiring that runs between them. The wiring leads are represented by 14 E on the magnetos. The oil scavenging pump (28 E ) mounts to the rear and the water pump (29 E ) mounts to the underside respectively of the completed crankcase ( 2 & 3 E). Spark plug wiring needs to be duplicated to further detail this fine mold. The air pump (10 E ) and the oil filler tube (27 E ) are added to their locations.
Step 5.) Attaches plumbing to the underside of the crankcase for oil lines (5 & 9 E ) & water lines (8 E X 2 and 25 E X 2). Note there are two nipples one each on the rear of the cylinder banks valve covers. On the pilot’s left is the tachometer gauge connection. On the right is the Vickers machine gun synchronization connection.
JackFlash
Colorado, United States
Joined: January 25, 2004
KitMaker: 11,669 posts
AeroScale: 11,011 posts
Joined: January 25, 2004
KitMaker: 11,669 posts
AeroScale: 11,011 posts
Posted: Friday, March 21, 2008 - 12:39 PM UTC
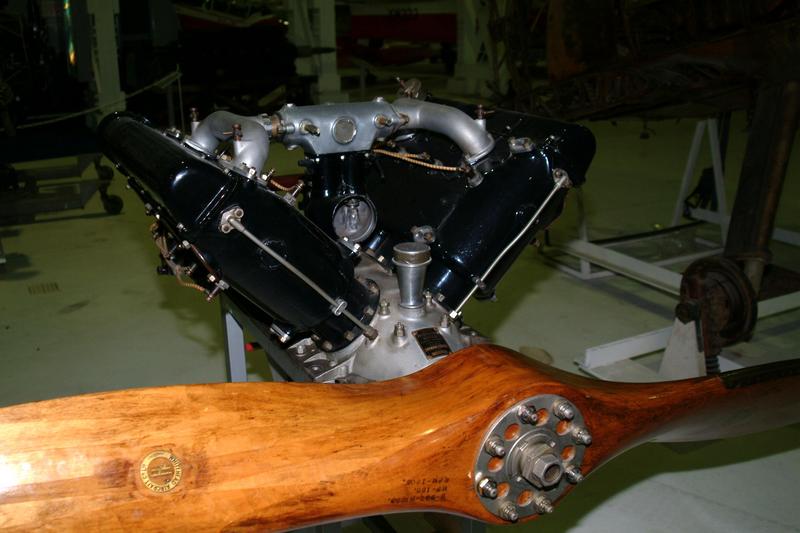
The Se 5a as mentioned used the Hispano- Suiza (Hisso) and the Wolseley W.4 (Viper). These two motors were nearly identical except at the front of the motor. the 200 Hp Hisso was a geared drive for the propeller. This raise the thrust line about 2- 3 inches higher than the lower powered direct drive 150hp Hisso.
Here is a diagram of the 200hp Hisso. Note the raised prop shaft because of the gearing.
The kit includes an example of the Woseley W.4 Viper return to the direct drive and the thrust line is lowered back to a center the fuselage. Noted for its 220hp the Wolseley became the late war standard. See below.
Just a note here. The Wolseley Viper 200hp and the Hispano - Suiza 200hp motors were manufactured by two different companies. The Wolseley Viper was a bit of a quirk in that it took the design characteristics of the direct drive Hispano Suiza 150hp and improved them. The original contract had implied the more powerful geared 200hp Hisso but Wolseley was supplied the direct drive 150hp as a technical reference.
CaptainA
Indiana, United States
Joined: May 14, 2007
KitMaker: 3,117 posts
AeroScale: 2,270 posts
Joined: May 14, 2007
KitMaker: 3,117 posts
AeroScale: 2,270 posts
Posted: Saturday, March 22, 2008 - 04:47 AM UTC
Nice pic. Do you have more pics of that engine from other angles?
JackFlash
Colorado, United States
Joined: January 25, 2004
KitMaker: 11,669 posts
AeroScale: 11,011 posts
Joined: January 25, 2004
KitMaker: 11,669 posts
AeroScale: 11,011 posts
Posted: Saturday, March 22, 2008 - 10:36 AM UTC
Greetings Carl;
The above image was from the RAF display at Hendon. Merlin might have some images from his trip. I'll check.
Here is an excellent source in Hisso (Hispano - Suiza) details. The Viper requires a bit more hunting.
Click here.
". . .One of the things many of us fail to realize is that Wolseley had previously made six V-8s of a much smaller piston displace two of 558 c.i. and 1,100 c.i and this was done in 1910 and 1911. Altho these engines weren’t used to any great extant they must of gave Wolseley Engineers some appreciation of the V-8 engine and its problems, particularly of vibration! Previously, in 1907 Archibald Sharp had published his book. “ Balancing of Engines” and its formulas for this on pages 117 & 118. This is my belief just why Wolseley was so far ahead of Hispano-Suiza and many others in the aspect of engine balance.
According to Airplane Encyclopedia there were several others engines built also of 441 c.i., 485 c.i. Some of these engines are not listed in Lumsden’s book. Some engines were side valve and some pushrod O.H.V. configuration. So it would seem that they had some engineers working on V-8 engines before they started on the Hispano-Suiza. . ."
And later on.
". . .it was design failure in the copper feed pipe that brought oil to the reduction gears, the wall of the copper tubing was too thin and it failed under pressure, thus depriving the reduction gears of the necessary lubrication. Hispano-Suiza did not want it known that it was a design error, so they put out the story of the improper heat treating of the reduction gears. . ."
JackFlash
Colorado, United States
Joined: January 25, 2004
KitMaker: 11,669 posts
AeroScale: 11,011 posts
Joined: January 25, 2004
KitMaker: 11,669 posts
AeroScale: 11,011 posts
Posted: Thursday, March 27, 2008 - 02:34 PM UTC
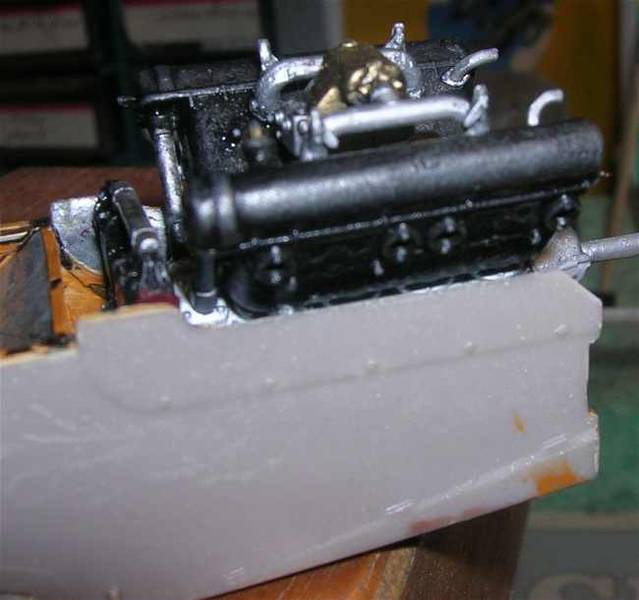
Here is the basic engine OOB.
The first two are views from the rear pilot's left quarter.
Next two are from the pilot's right rear quarter.
Next a view of the top.
I will replace the oil pipe on the pilot's right rear that travels from the scavaging pump to the crank case. Its the only one I am not happy with. The aluminum is too bright so I'll tone that down too. Touch up the black around the twin magnetos and add the spark plug wires. For this engine I was going for a worn look. The gloss black has been toned down to look as if heat has deteriorated it.
Cazzie
Virginia, United States
Joined: March 25, 2008
KitMaker: 25 posts
AeroScale: 19 posts
Joined: March 25, 2008
KitMaker: 25 posts
AeroScale: 19 posts
Posted: Friday, March 28, 2008 - 04:51 AM UTC
Thanks for the pic of the engine Stephen, I have that kit/ Bit out of my scale by a long shot, but how could I resist when it was my ticket on it from a raffle. Now if I could only get the new 1/32 SPAD VII from Roden when it's released. Bit out of my unemployed house-daddy price range I am afraid.
Nice pix of your engine in the WIP. Duly noted.
Caz
Nice pix of your engine in the WIP. Duly noted.
Caz
CaptainA
Indiana, United States
Joined: May 14, 2007
KitMaker: 3,117 posts
AeroScale: 2,270 posts
Joined: May 14, 2007
KitMaker: 3,117 posts
AeroScale: 2,270 posts
Posted: Sunday, March 30, 2008 - 01:04 PM UTC
Good looking engine Stephen. It is too bad those darned English Engines just don't have the character of a well engineered German engine though. I think the head covers do look a bit heated up.
Cazzie, Welcome to Aeroscale.
RAGIII
North Carolina, United States
Joined: June 19, 2007
KitMaker: 604 posts
AeroScale: 600 posts
Joined: June 19, 2007
KitMaker: 604 posts
AeroScale: 600 posts
Posted: Sunday, March 30, 2008 - 03:49 PM UTC
Stephen,
The engine is looking great! Having built this kit almost to completion my hat is off to you for getting all of those little valves on top of the pipes! I lost 2 out of three during construction
RAGIII
The engine is looking great! Having built this kit almost to completion my hat is off to you for getting all of those little valves on top of the pipes! I lost 2 out of three during construction
RAGIII
MerlinV
Victoria, Australia
Joined: November 26, 2006
KitMaker: 608 posts
AeroScale: 602 posts
Joined: November 26, 2006
KitMaker: 608 posts
AeroScale: 602 posts
Posted: Monday, March 31, 2008 - 10:29 AM UTC
Now, why have I always thought that these stop cocks were,
A) Coolant bleed valves
B) Attached to stems independant of the induction pipes.
Good thing I noticed that they aren't!
Cheers,
Hugh
A) Coolant bleed valves
B) Attached to stems independant of the induction pipes.
Good thing I noticed that they aren't!
Cheers,
Hugh
JackFlash
Colorado, United States
Joined: January 25, 2004
KitMaker: 11,669 posts
AeroScale: 11,011 posts
Joined: January 25, 2004
KitMaker: 11,669 posts
AeroScale: 11,011 posts
Posted: Tuesday, April 01, 2008 - 10:07 PM UTC
Since I am using the Part of Poland set for this kit I will present my build with the brass and Aeroscale member and GB participant "RAGIII" has provided some shots of his previous build with the kit parts only.
First here are some of mine.
JackFlash
Colorado, United States
Joined: January 25, 2004
KitMaker: 11,669 posts
AeroScale: 11,011 posts
Joined: January 25, 2004
KitMaker: 11,669 posts
AeroScale: 11,011 posts
Posted: Wednesday, April 02, 2008 - 11:03 AM UTC
Looks like I need to bring the plywood back one more bay..
JackFlash
Colorado, United States
Joined: January 25, 2004
KitMaker: 11,669 posts
AeroScale: 11,011 posts
Joined: January 25, 2004
KitMaker: 11,669 posts
AeroScale: 11,011 posts
Posted: Wednesday, April 02, 2008 - 09:35 PM UTC
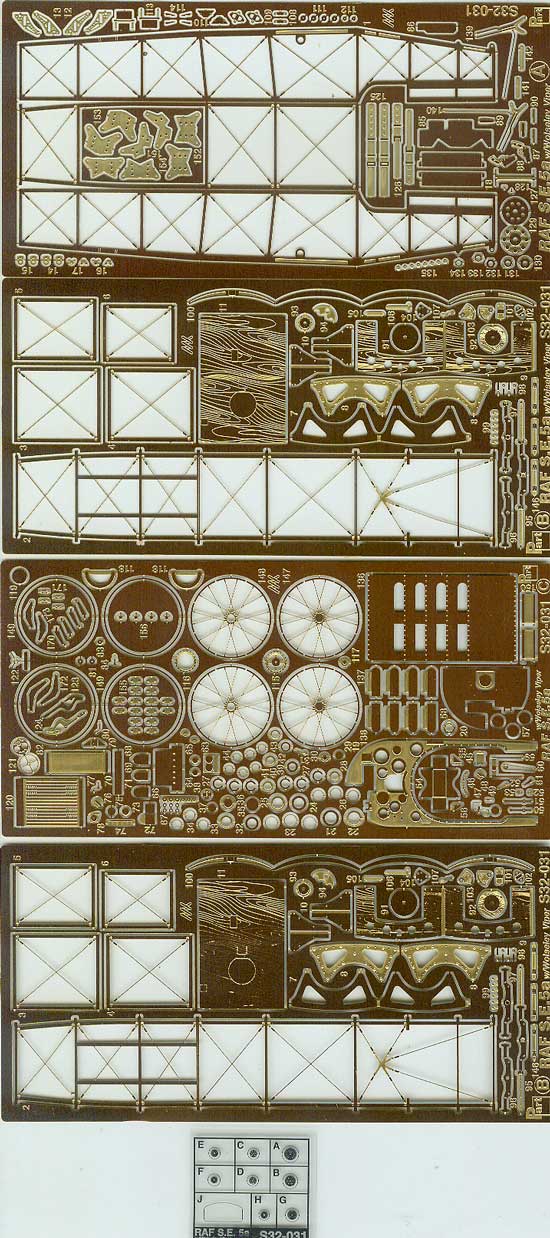
I had one fellow ask what PE set I was using. Here is a bit of fun from Part of Poland.
http://www.jadarhobby.waw.pl/part-s32031-se5a-wwolseley-viper-p-14118.html
http://www.misterkitusa.com/850f13c2-edd3-464a-8b11-d7f779fe2431-9.html
http://www.jadarhobby.waw.pl/part-s32031-se5a-wwolseley-viper-p-14118.html
http://www.misterkitusa.com/850f13c2-edd3-464a-8b11-d7f779fe2431-9.html
CaptainA
Indiana, United States
Joined: May 14, 2007
KitMaker: 3,117 posts
AeroScale: 2,270 posts
Joined: May 14, 2007
KitMaker: 3,117 posts
AeroScale: 2,270 posts
Posted: Tuesday, April 08, 2008 - 09:45 AM UTC
PoP really puts out unique and interesting sets. They really enhance a build. I don't think I will start my SE5a until I get this set. Good build going on there fearless leader.
JackFlash
Colorado, United States
Joined: January 25, 2004
KitMaker: 11,669 posts
AeroScale: 11,011 posts
Joined: January 25, 2004
KitMaker: 11,669 posts
AeroScale: 11,011 posts
Posted: Thursday, April 17, 2008 - 03:38 AM UTC
This build continues with me separating, forming and painting some interior parts for the cockpit.
JackFlash
Colorado, United States
Joined: January 25, 2004
KitMaker: 11,669 posts
AeroScale: 11,011 posts
Joined: January 25, 2004
KitMaker: 11,669 posts
AeroScale: 11,011 posts
Posted: Thursday, April 17, 2008 - 06:06 PM UTC
As with any modification the modeler can expect to make small compromises to make the whole affair fit. The Part of Poland PE is very close to being exact but the thickness of the plastic can get exaggerated when you fine tune the kit parts to fit well with the PE. I have a need to work on the kit radiator shell (PP 4 F). As it is a bit wide by about .040 thou. This may be due to my work and should not be seen as a kit problem.
Also I recommend only using the PE parts when it comes to the engine compartment structures. If you use the additional plastic parts as well there is a great deal of time lost on modifying these items.
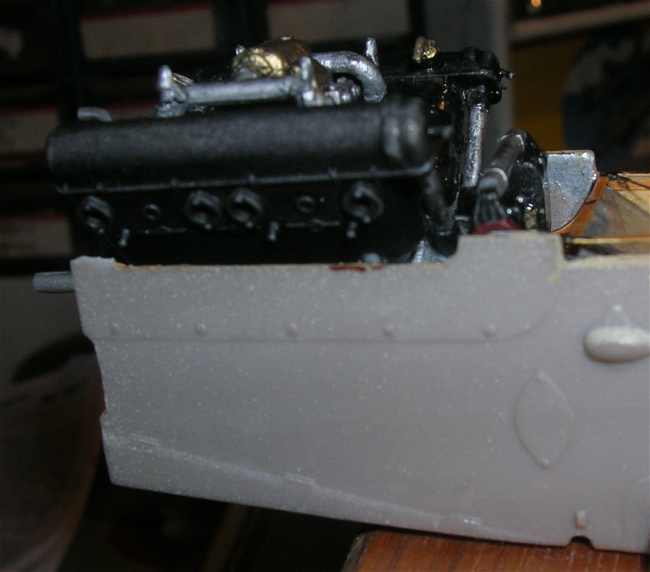
The deformed piece at the bottom of this image will be carved down. The placement of the engine is a bit of a compromise as I wanted the red magneto caps to be visible as on the original but the engine is aboiut 1/8 of an inch too long.
JackFlash
Colorado, United States
Joined: January 25, 2004
KitMaker: 11,669 posts
AeroScale: 11,011 posts
Joined: January 25, 2004
KitMaker: 11,669 posts
AeroScale: 11,011 posts
Posted: Thursday, April 17, 2008 - 07:48 PM UTC
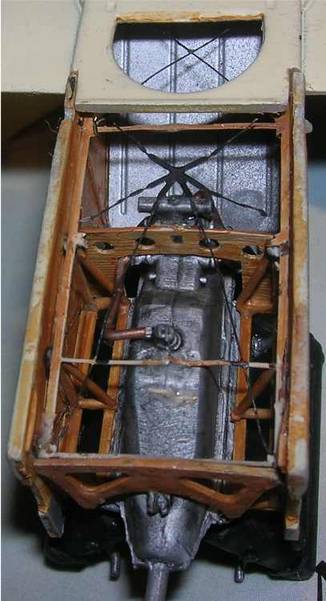
Plotting the lay of the PE and getting the engine thrust line correct the unknown factor was the depth of the engine that seems to be about 1/8 an inch too large from side to side and from top to bottom. This is not really a problem but the attachment of the PE sides should be dropped 1/8 of and inch as well. In other worrds the top edge of the PE should be 1/8 an inch from the top of the kit fuselage inside face. My original concern was the clearance at the bottom for the lower wing attachment and the reason I set the PE flush with the top edge of thee kit fuselage side.
JackFlash
Colorado, United States
Joined: January 25, 2004
KitMaker: 11,669 posts
AeroScale: 11,011 posts
Joined: January 25, 2004
KitMaker: 11,669 posts
AeroScale: 11,011 posts
Posted: Thursday, April 17, 2008 - 08:03 PM UTC
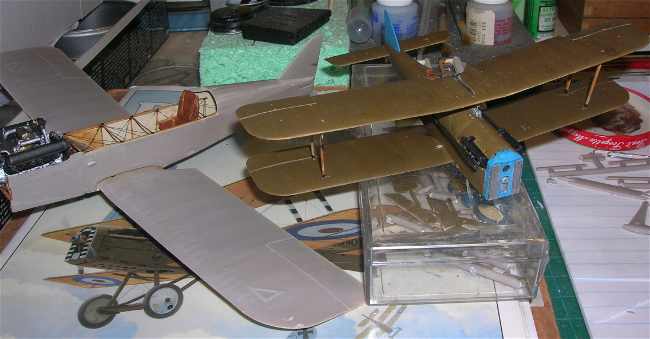
Here the 1/32 Roden scale build sits next to the 1/48 Roden scale build.
The first hint I had that the PE should be dropped was the PE lower faming / wire bracing harness did not clear the lowest portion of the engine.
RAGIII
North Carolina, United States
Joined: June 19, 2007
KitMaker: 604 posts
AeroScale: 600 posts
Joined: June 19, 2007
KitMaker: 604 posts
AeroScale: 600 posts
Posted: Saturday, April 19, 2008 - 03:46 AM UTC
Stephen,
The pe sure does add a great deal to the look of the kit! Are you planning on leaving the engine exposed?
RAGIII
The pe sure does add a great deal to the look of the kit! Are you planning on leaving the engine exposed?
RAGIII
JackFlash
Colorado, United States
Joined: January 25, 2004
KitMaker: 11,669 posts
AeroScale: 11,011 posts
Joined: January 25, 2004
KitMaker: 11,669 posts
AeroScale: 11,011 posts
Posted: Saturday, April 19, 2008 - 09:21 AM UTC
Quoted Text
Stephen, The PE sure does add a great deal to the look of the kit! Are you planning on leaving the engine exposed? RAGIII
Definately yes Rick.
MerlinV
Victoria, Australia
Joined: November 26, 2006
KitMaker: 608 posts
AeroScale: 602 posts
Joined: November 26, 2006
KitMaker: 608 posts
AeroScale: 602 posts
Posted: Saturday, April 26, 2008 - 11:04 PM UTC
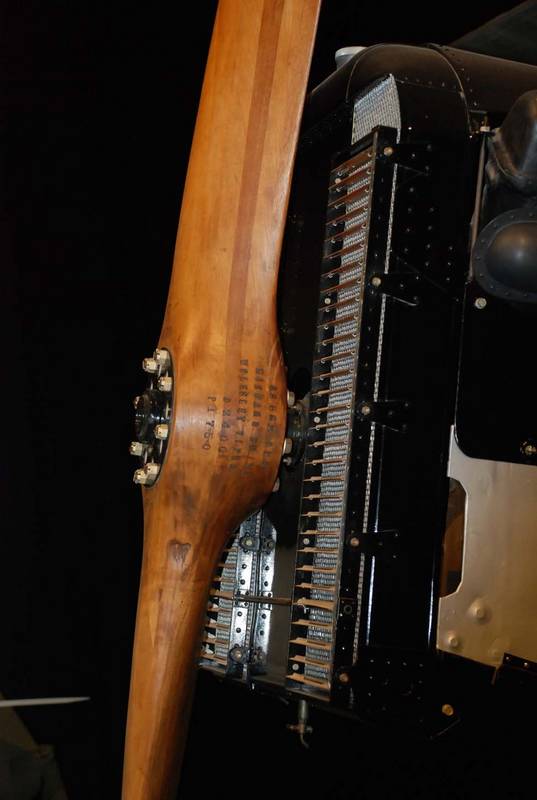
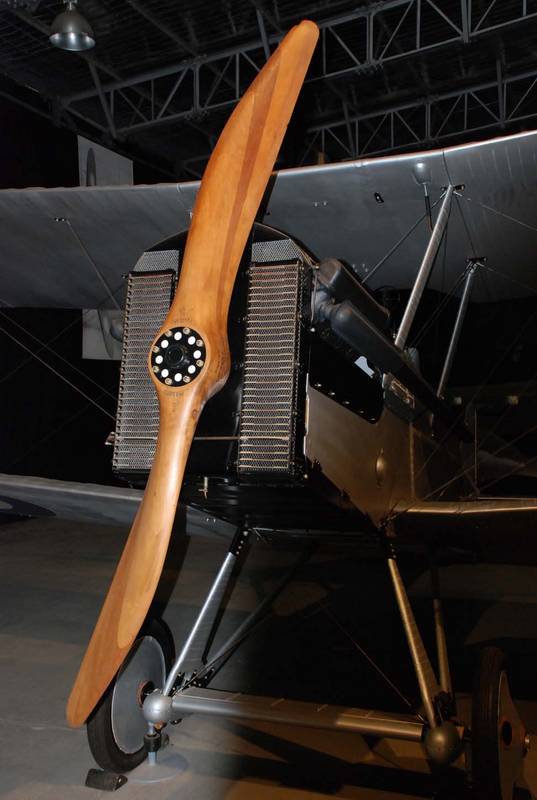
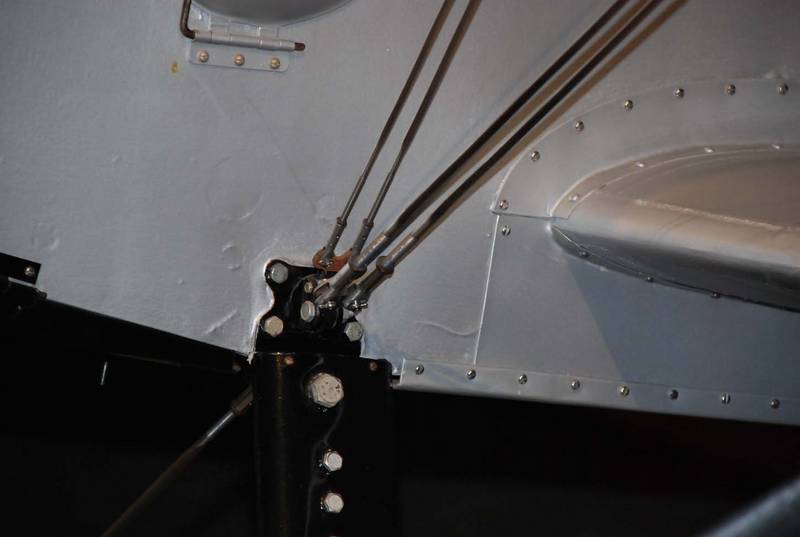
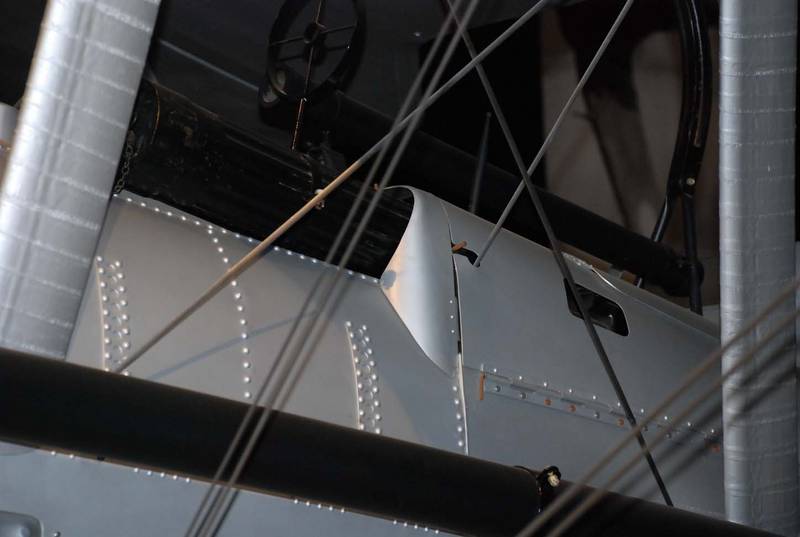
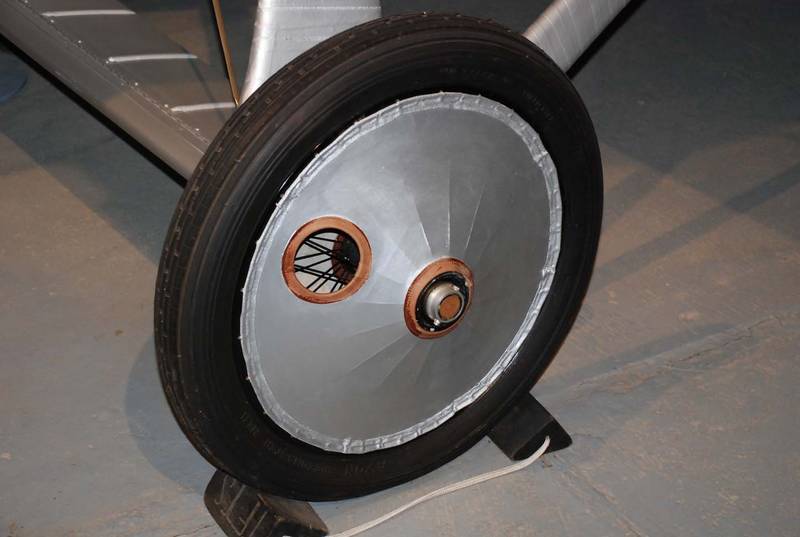
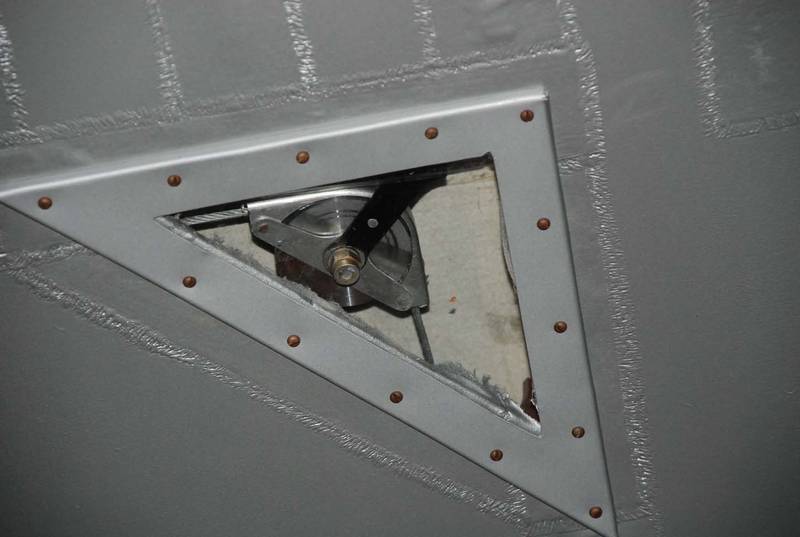
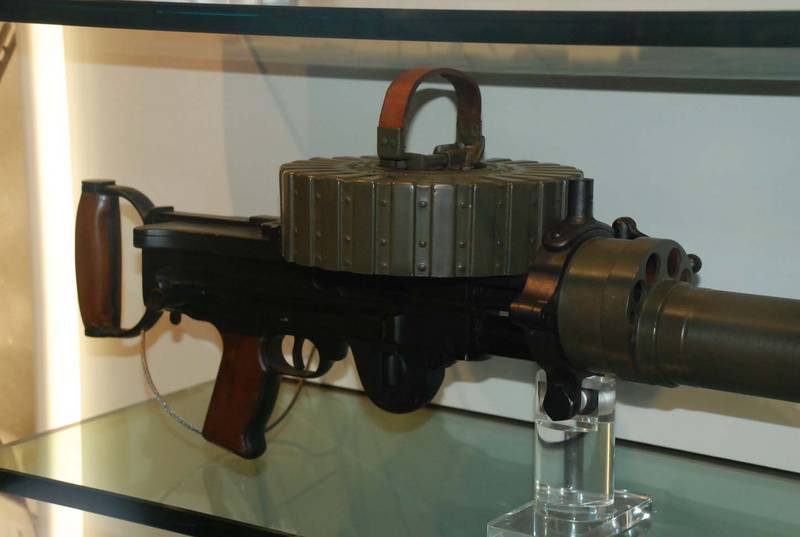
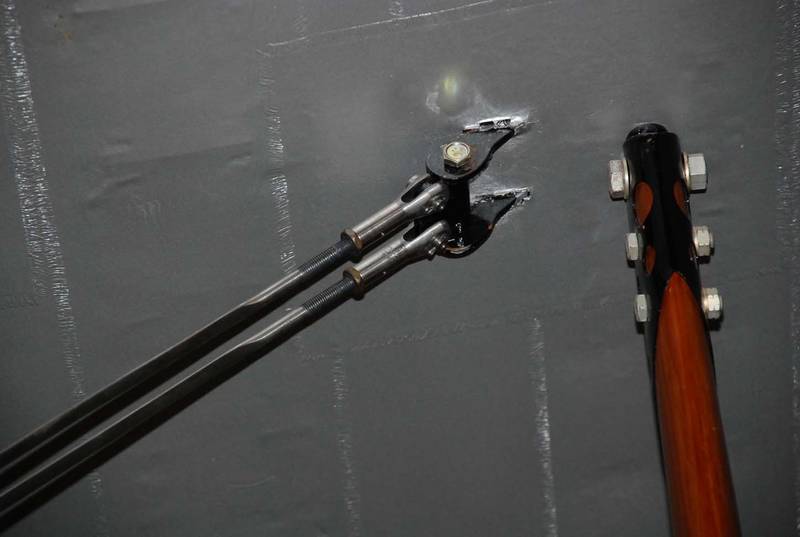
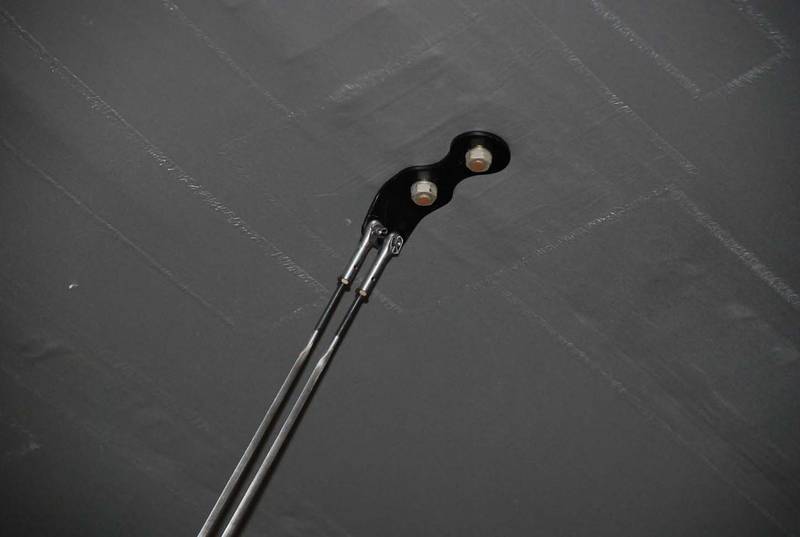
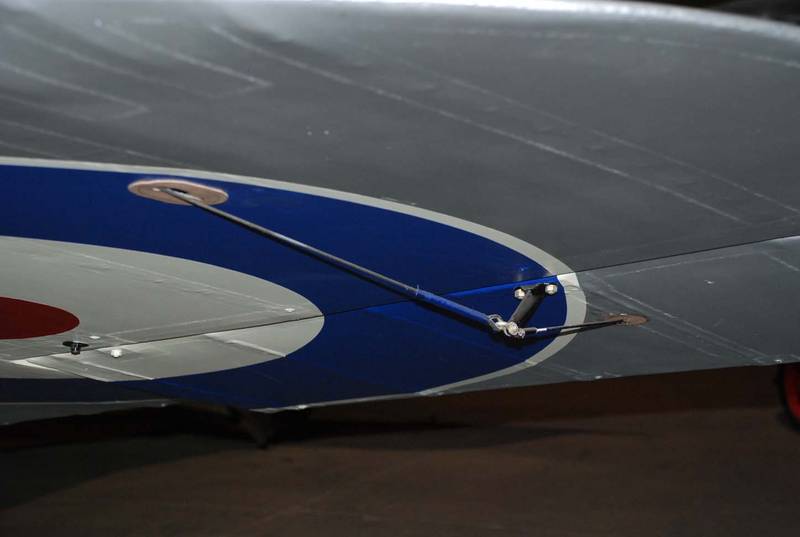
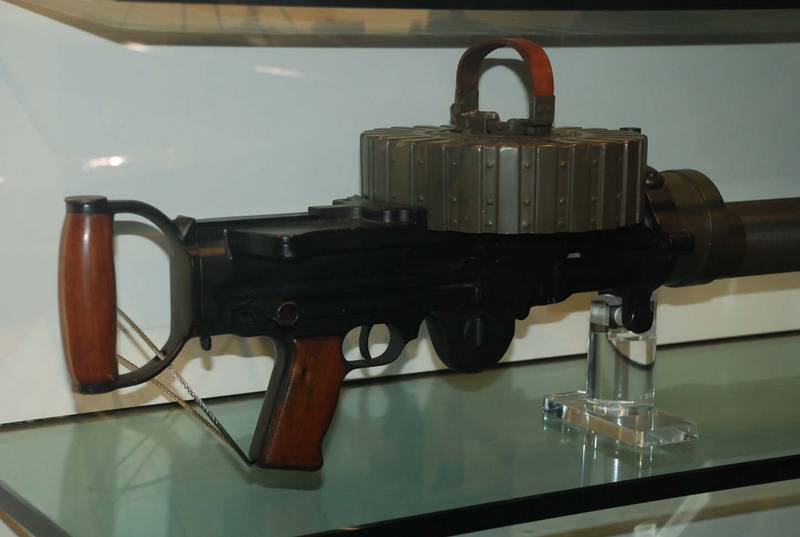
Today, my wife and I visited the RAAF Museum at Point Cook, here in Melbourne.
Point Cook is the longest continuous operating Airfield in the world, having been established in Feb 1914, and the Museum sports many examples of early aircraft operated by the Fledgling RAAF, Among which was the SE5a.
I thought I could not pass up the opportunity of taking a few reference shots for Jackflash's use...
MerlinV
Victoria, Australia
Joined: November 26, 2006
KitMaker: 608 posts
AeroScale: 602 posts
Joined: November 26, 2006
KitMaker: 608 posts
AeroScale: 602 posts
Posted: Saturday, April 26, 2008 - 11:07 PM UTC
MerlinV
Victoria, Australia
Joined: November 26, 2006
KitMaker: 608 posts
AeroScale: 602 posts
Joined: November 26, 2006
KitMaker: 608 posts
AeroScale: 602 posts
Posted: Saturday, April 26, 2008 - 11:10 PM UTC
I hope that these will be of some use to our beloved leader... I know they will be to me when I finally get around to building this kit.
Cheers,
Hugh
JackFlash
Colorado, United States
Joined: January 25, 2004
KitMaker: 11,669 posts
AeroScale: 11,011 posts
Joined: January 25, 2004
KitMaker: 11,669 posts
AeroScale: 11,011 posts
Posted: Sunday, April 27, 2008 - 03:14 PM UTC
Wow! Great images Hugh.Thanks everso!