_GOTOBOTTOM
World War II
Discuss WWII and the era directly before and after the war from 1935-1949.
Hosted by Rowan Baylis
Eduard's Grumman F6F-3 Hellcat
Merlin
Staff MemberSenior Editor
AEROSCALE
#017
_VISITCOMMUNITY
United Kingdom
Joined: June 11, 2003
KitMaker: 17,582 posts
AeroScale: 12,795 posts
Posted: Saturday, February 16, 2008 - 06:37 PM UTC
Hi there

Following on from the Review and to get things started, here a couple of shots of the unpainted cockpit and engine. The cockpit has the injected instrument panel at the moment, but I'll actually use the etched version for the build, along with adding a few small "extras" not included in the kit.


All being well, I'll start to throw some paint at the beast this afternoon...

All the best

Rowan
glamdring
Joined: May 21, 2007
KitMaker: 77 posts
AeroScale: 76 posts
Posted: Saturday, February 16, 2008 - 08:50 PM UTC
Wow Rowan, Those pictures and the recent review look pretty good. I am excited to watch you work your way through this one. I love the hellcat and have multiple versions & paint schemes I would like to do. Will you go cat mouth on this?

Allen
Merlin
Staff MemberSenior Editor
AEROSCALE
#017
_VISITCOMMUNITY
United Kingdom
Joined: June 11, 2003
KitMaker: 17,582 posts
AeroScale: 12,795 posts
Posted: Saturday, February 16, 2008 - 10:01 PM UTC

Quoted Text

Will you go cat mouth on this? Allen


Hi Allen

I don't know - I can't decide between Richard Stambook's "cat mouth" or Alexander Vraciu's "#19":


Either way, I'm committed to one or the other of them, because I've assembled the cowling and the version I've chose (3 are provided in the kit) is only appropriate for these two aircraft:


It was a little bit more fiddly than I'd expected - the cowling ring was a tight fit with a tendency to force the cowl sides apart. Now it's on, I definitely won't feel like prising it off again to go for one of the other decal options!

All the best

Rowan

wingman
_VISITCOMMUNITY
Pennsylvania, United States
Joined: December 09, 2003
KitMaker: 880 posts
AeroScale: 654 posts
Posted: Saturday, February 16, 2008 - 11:53 PM UTC
Hi Rowan. Looking forward to following your build. Nice photography, what type of camera are you using? Thanks for posting.
Merlin
Staff MemberSenior Editor
AEROSCALE
#017
_VISITCOMMUNITY
United Kingdom
Joined: June 11, 2003
KitMaker: 17,582 posts
AeroScale: 12,795 posts
Posted: Sunday, February 17, 2008 - 01:14 AM UTC

Quoted Text

...what type of camera are you using?.


Hi Mike

I'm still using my trusty old Canon G3. It's uncanny - every time I think about upgrading it, I can almost guarantee some kind soul like yourself will compliment me on the results I'm already getting. I guess I should stick with it as long as it keeps going - i.e. if something aint broke, don't try to fix it.

All the best

Rowan
Holdfast
Staff MemberPresident
IPMS-UK KITMAKER BRANCH
#056
_VISITCOMMUNITY
England - South West, United Kingdom
Joined: September 30, 2002
KitMaker: 8,581 posts
AeroScale: 4,913 posts
Posted: Monday, February 18, 2008 - 12:55 AM UTC
I picked one of these up for £17.99 at the Huddersfield show on Sunday. I will definately be doing the "Cat's mouth" version, as I have been wanting to do it for years. I will be using this to launch Star and Bar Masks for my "Miracle Paint Masks" range. I also plan on attempting making masks for the mouth and eyes.

This is a stunning kit, get one

PM on route Rowan


Mal
f1matt
_VISITCOMMUNITY
Manitoba, Canada
Joined: August 13, 2006
KitMaker: 1,021 posts
AeroScale: 184 posts
Posted: Monday, February 18, 2008 - 08:51 AM UTC
The cooling fins on the cylinders look real sharp. Should look great after a wash. I'll be watching this one close. Love those navy fighters.

-Matt
thehannaman
_VISITCOMMUNITY
New York, United States
Joined: April 04, 2006
KitMaker: 279 posts
AeroScale: 194 posts
Posted: Tuesday, February 19, 2008 - 05:14 AM UTC
Everything that Eduard has put out in terms of the 1/48th WWII stuff has been aces in my books. This one looks like it will not disappoint.

However, (and I may be wrong) but the rudder pedals look awfully close to the seat. Maybe they're correct. But to me, it looks like the pilot is going to have to have very short legs to fit in there comfortably.
Merlin
Staff MemberSenior Editor
AEROSCALE
#017
_VISITCOMMUNITY
United Kingdom
Joined: June 11, 2003
KitMaker: 17,582 posts
AeroScale: 12,795 posts
Posted: Sunday, February 24, 2008 - 04:42 AM UTC
Hi all

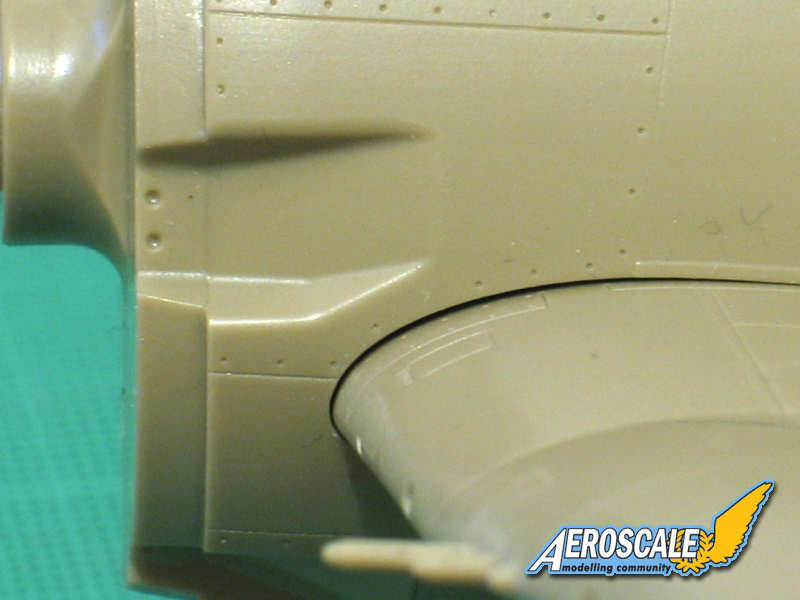
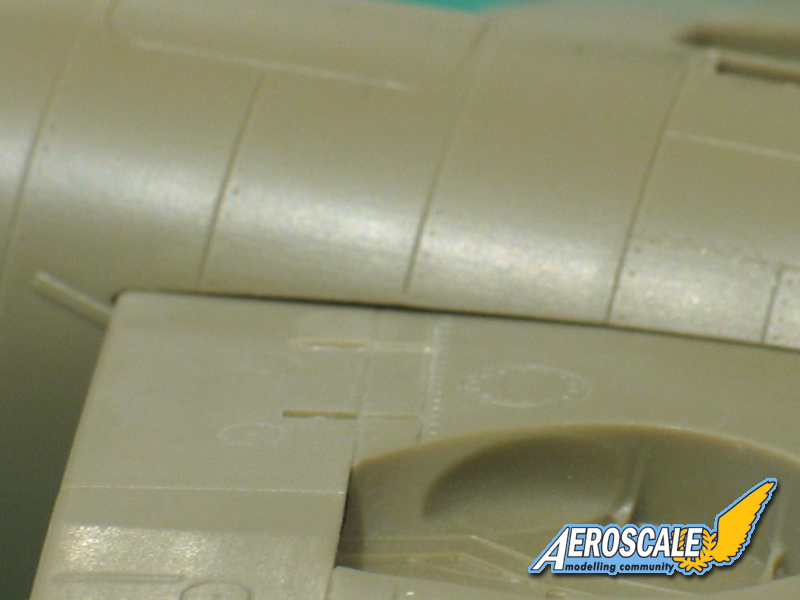
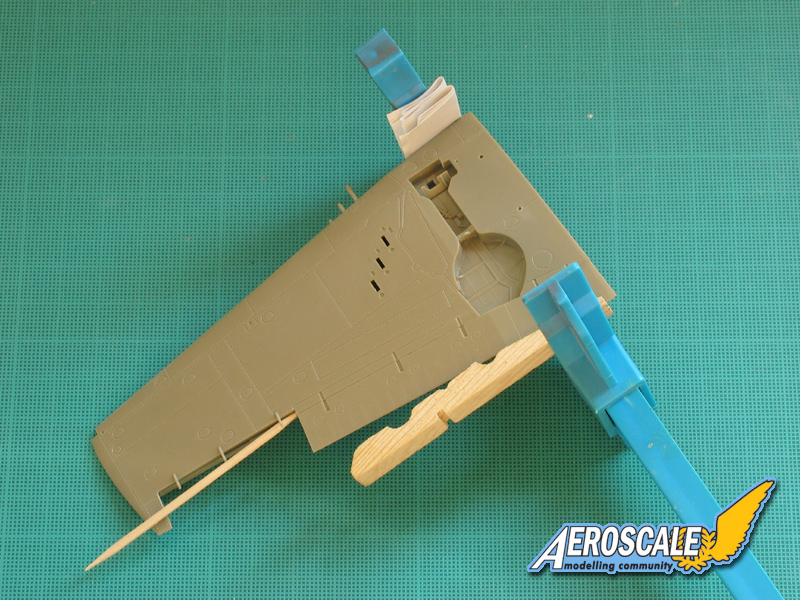
A bit more progress. The wing halves don't join at the trailing edge, rather along a line on the flaps. The fit's good, but it's still worth clamping them them to keep everything tight and to ensure neither surface stands proud:


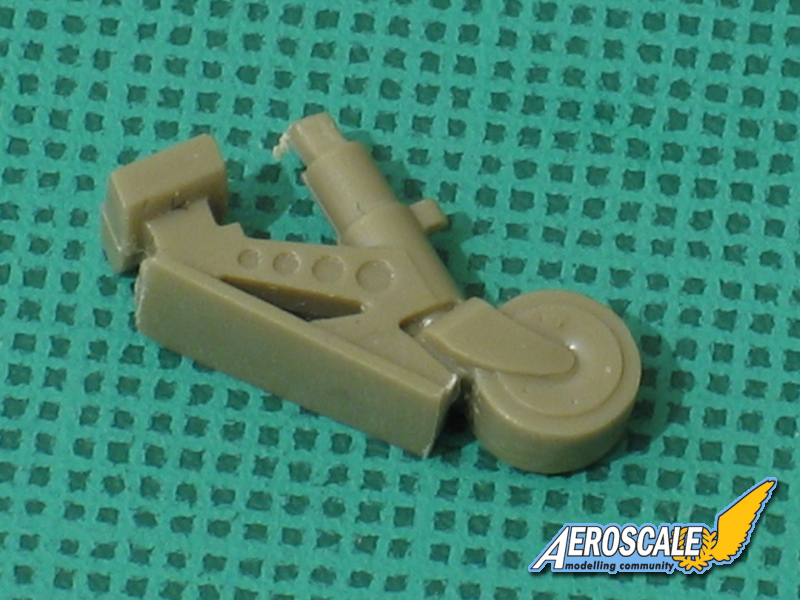
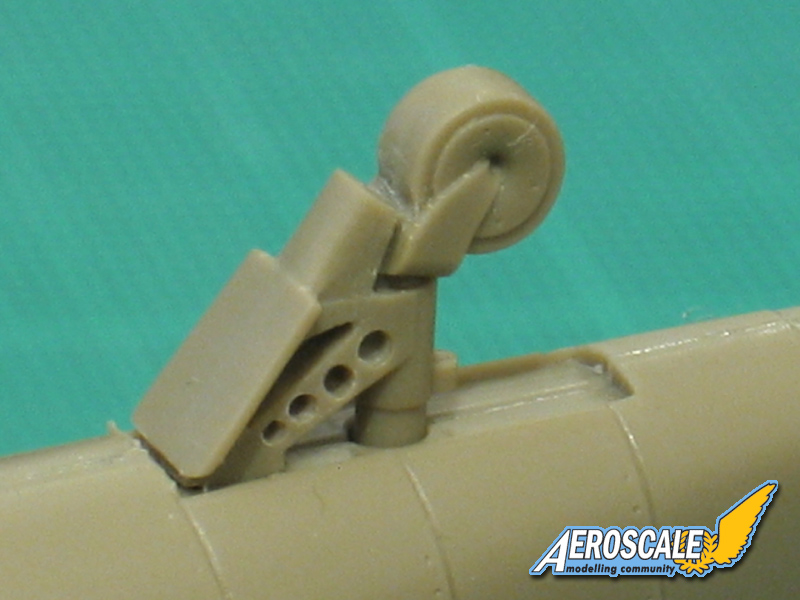
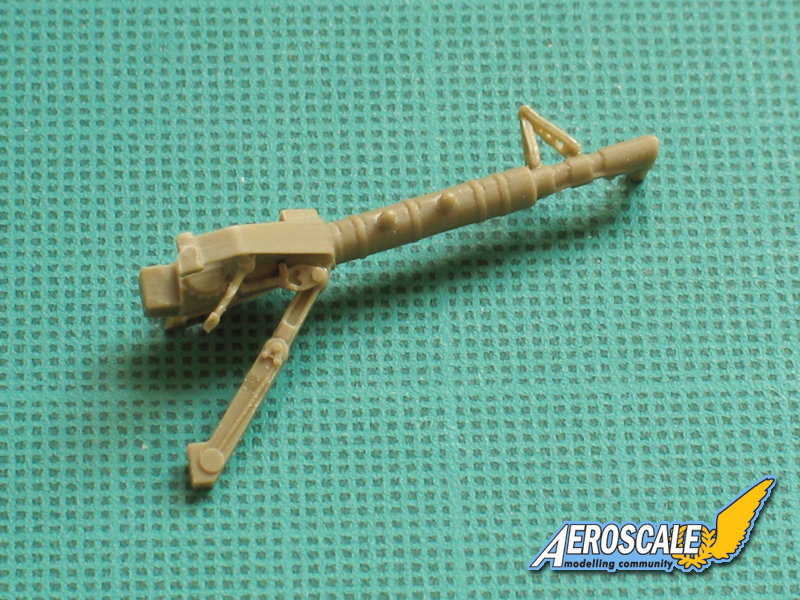
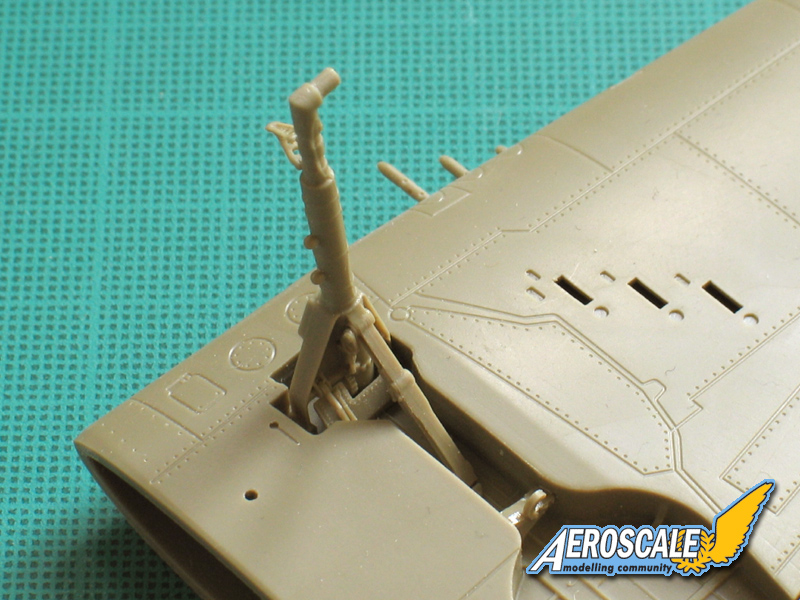
The main landing gear is nicely detailed (some small etched parts are still to be added here) and looks suitably busy when test-installed:


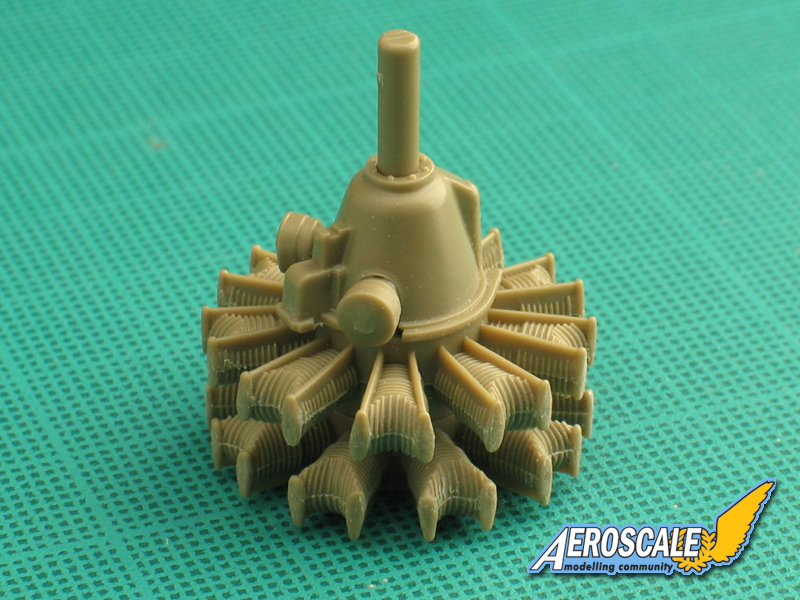
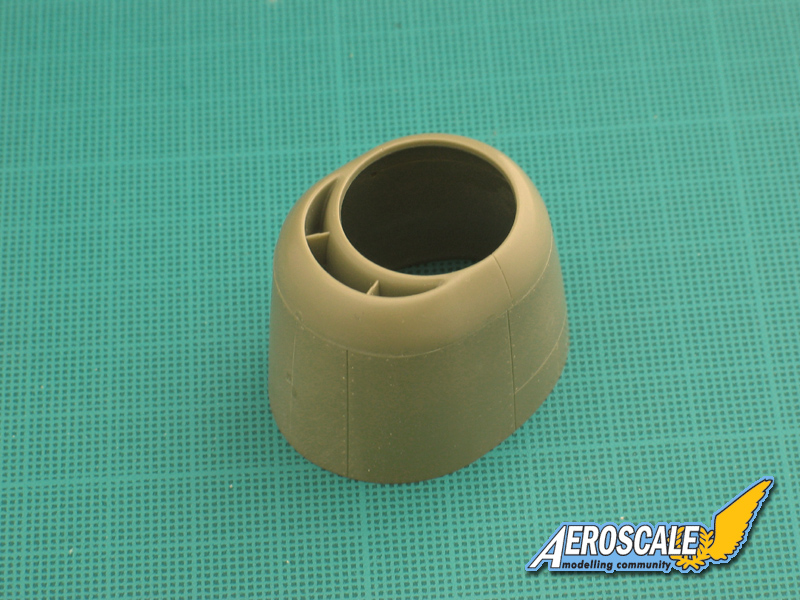
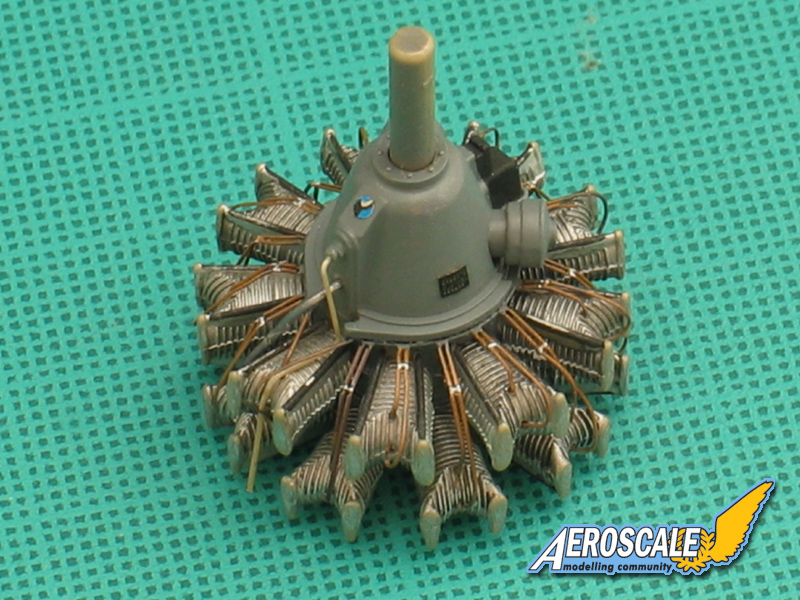
Going back to the engine, here's the etched wiring harness:


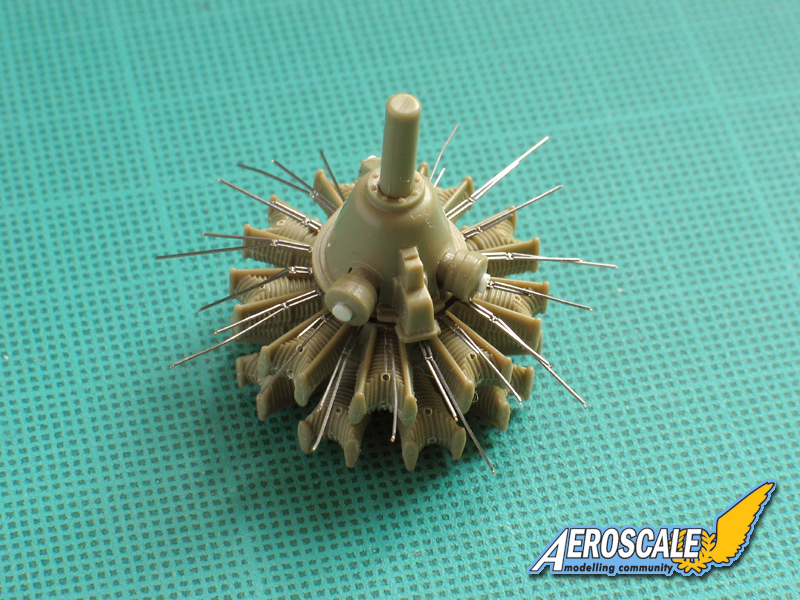
One point to watch out for is where the magnetos attach to the sprue. I assumed the stubs were just that, i.e. stubs, and sanded them smooth. But when I checked refs I realised that there should be raised covers on the ends, so I replaced them with disks of plastic card punched out with a die.

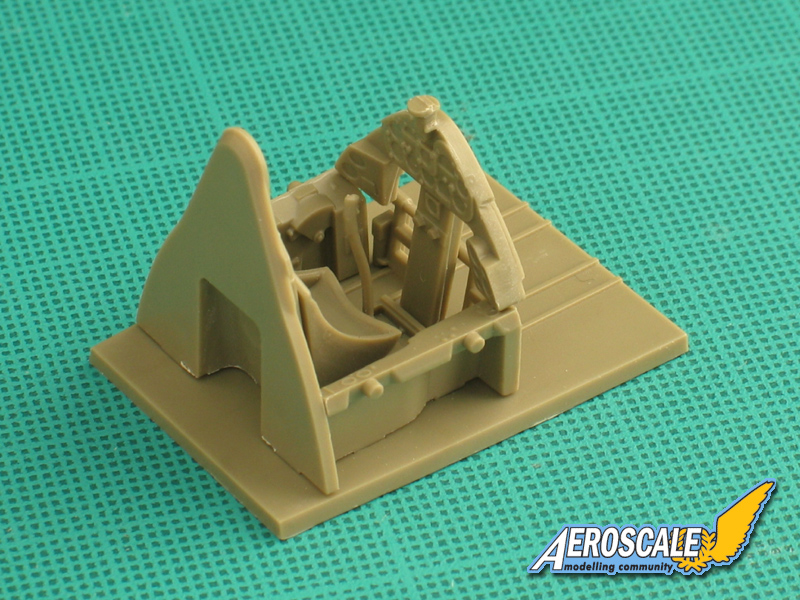
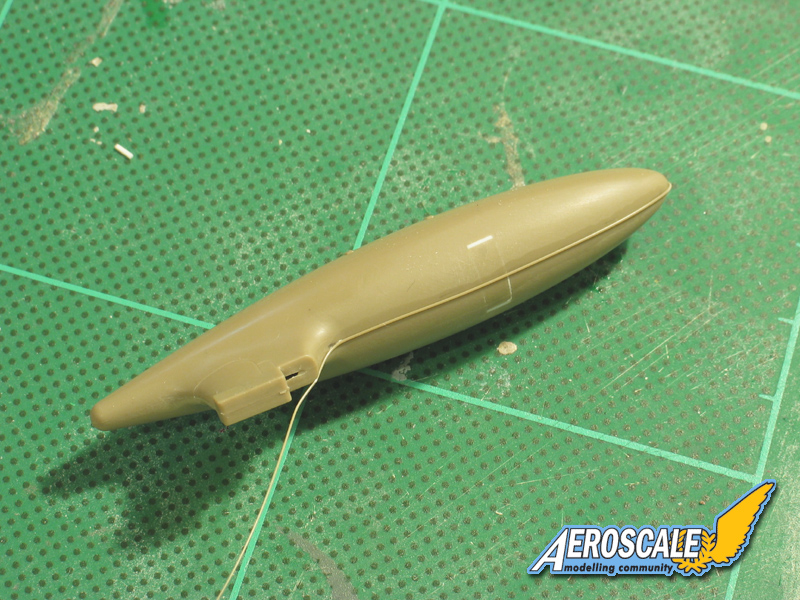
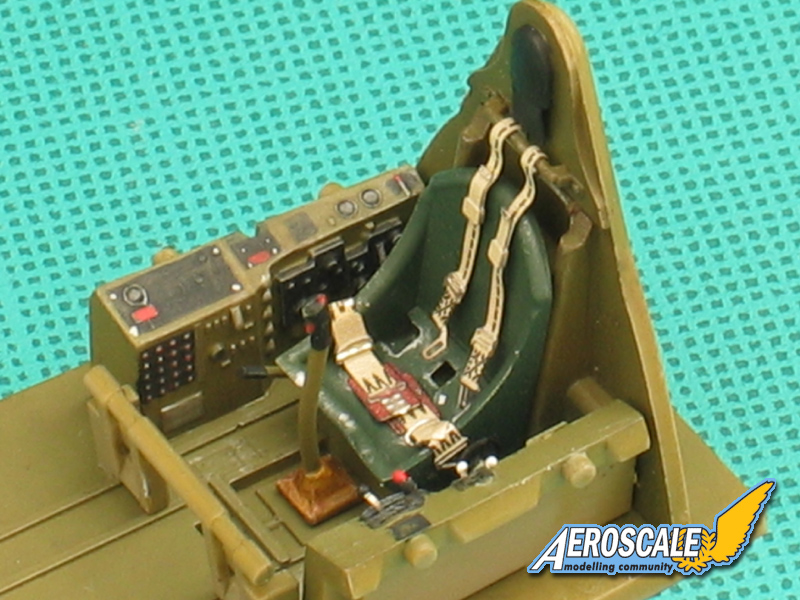
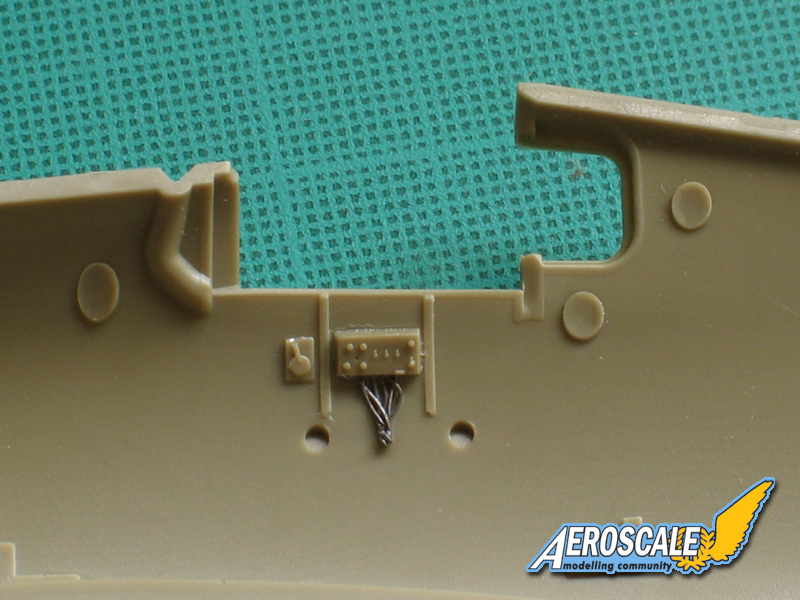
Back to the office. There are prominent ejector pin marks behind the rear bulkhead, but they are all but invisible when the fuselage is closed up, so I've left them. I did add some wiring from the console inside the starboard fuselage half though:
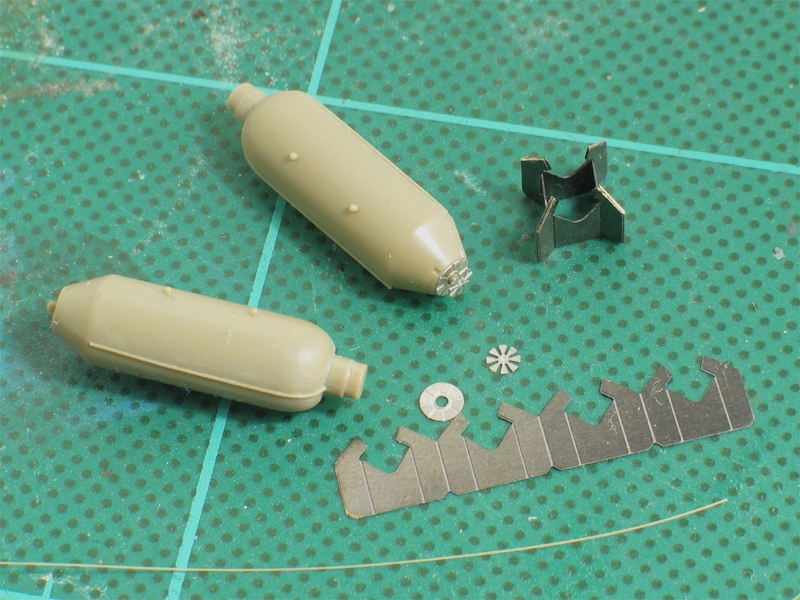


A few more extras:

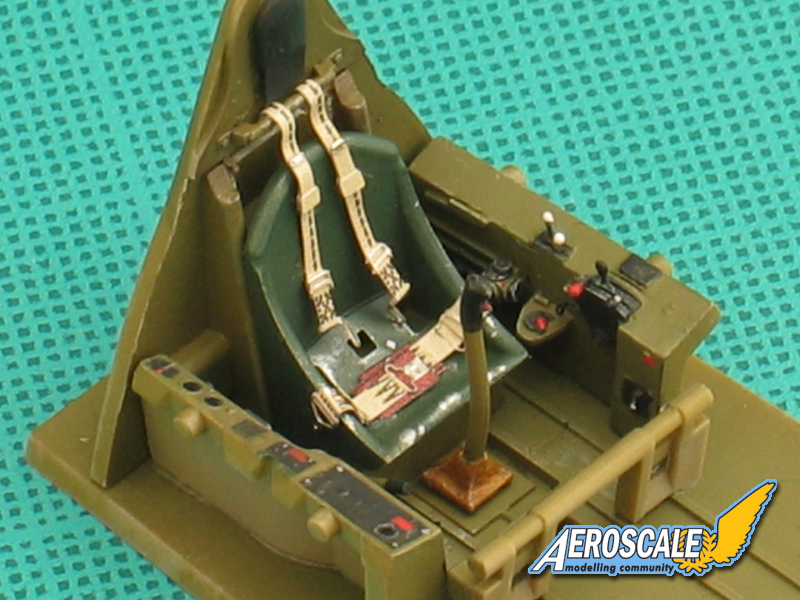
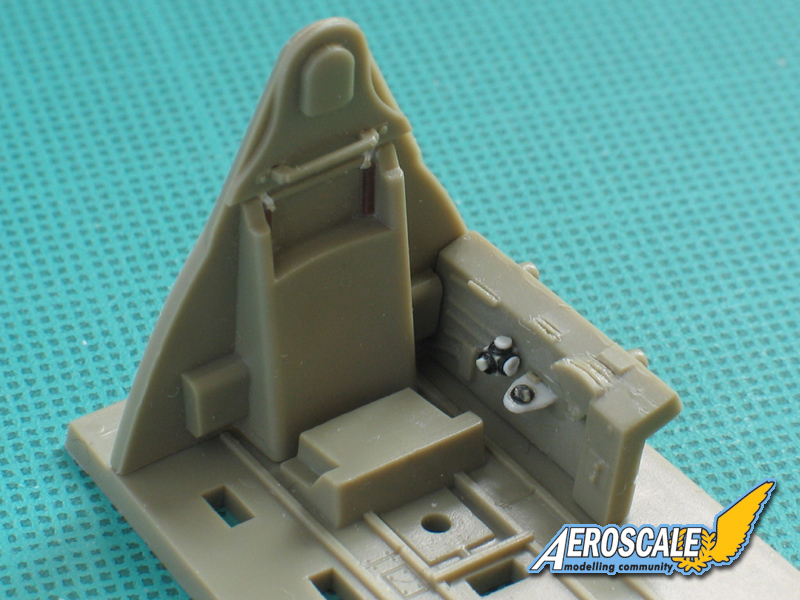
I replaced the small console and the trim controls on the port side console - these were rather shallow due to moulding limitations - and opened up the various throttles etc. ready for levers. I also added a seat adjustment cord on the rear bulkhead and will add an adjustment handle on the seat pedestal - this is the only major item in the cockpit that seems to be missing compared with my photo refs:


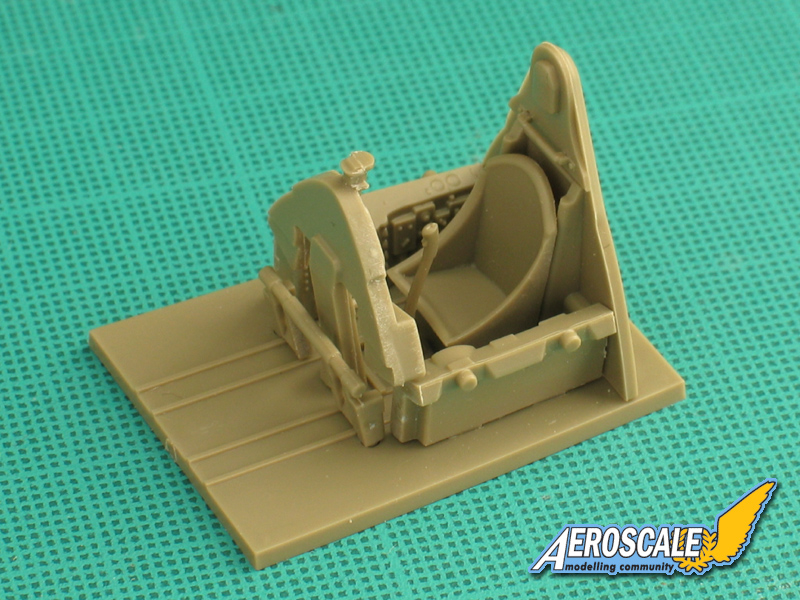
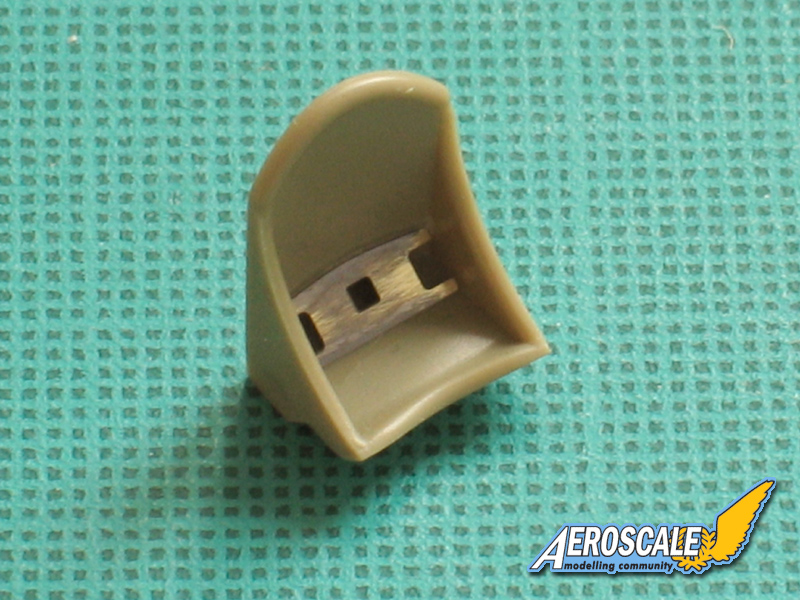
The seat itself is a little on the heavy side, but quite neat and includes an etched drop-in for the pan:


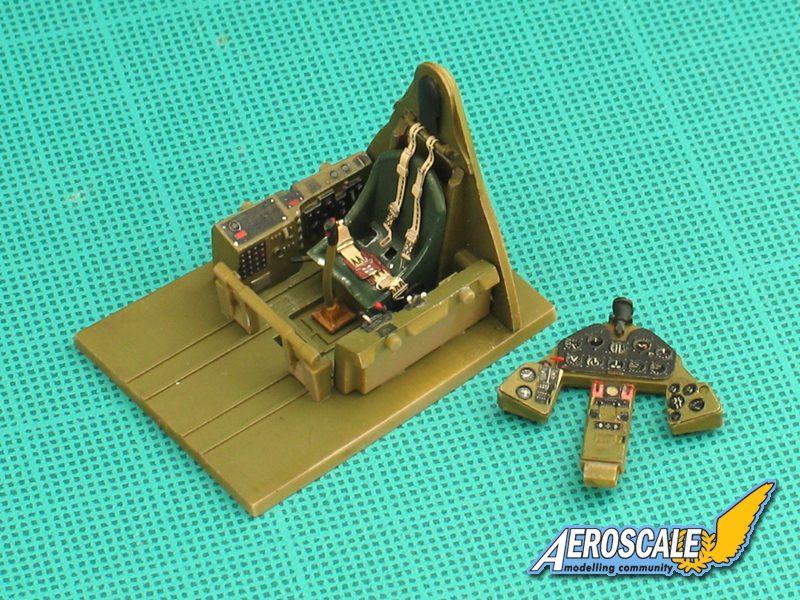
Finally for now, here are the main panel and the side consoles almost finished. The panel is the etched version, repainted to match the Interior Green I've used (Xtracrylix):


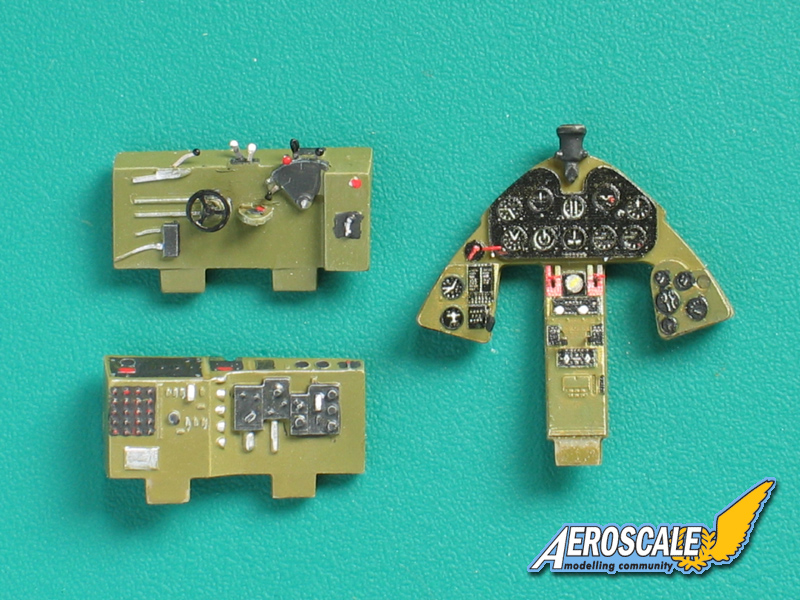
As I stated above, I've added throttle levers etc. to the side console to match those that Eduard have supplied the main panel and I scrounged a trim wheel from a spare Eduard fret. The next step will be a flat coat to even everything up a bit, before adding a little pastel shading and then "glazing" for the instrument bezels.

The way Eduard have tackled the main panel is a bit of a compromise - in reality, the panel itself was separate from the pedestal beneath it, not all joined as a single unit but, to be honest, when it's installed and given the limited view into the cockpit, I think the kit version will look fine.

All the best

Rowan
Merlin
Staff MemberSenior Editor
AEROSCALE
#017
_VISITCOMMUNITY
United Kingdom
Joined: June 11, 2003
KitMaker: 17,582 posts
AeroScale: 12,795 posts
Posted: Sunday, February 24, 2008 - 09:37 AM UTC
Hi again

One more pic for the pot:


The way Eduard have tackled the drop tank involves two halves and a plug (part G29) that includes the sway braces. The fit of the plug wasn't very good - it was loose and sat far too low - and it had a touch of sinkage, so I trimmed off the braces and attached it with a couple of shims of plastic card to bring it level with the rest of the tank. After the remaining gaps were filled and smoothed, I stretched some sprue and ran it around the tank to give an impression of the prominent vertical seam of the early-style Hellcat drop tanks (part-way done in the pic). An easy fix that improves the look of things.

Looking ahead to the incendiary fragmentation bombs, reference shots show seams on their bodies too, so I'll add them the same way.

All the best

Rowan
Roxter
_VISITCOMMUNITY
Rigas, Latvia
Joined: July 04, 2007
KitMaker: 268 posts
AeroScale: 245 posts
Posted: Saturday, March 01, 2008 - 09:42 AM UTC
Rowan, I really enjoy wacthing those in-progress pics of your Hellcat.

Actually I wasn't big Hellcat fan until today after I saw Eduard's box art for their upcoming Royal Forces Hellcat Mk.I/Mk.II (I like RAF camouflage more than USAF navy blue )

I had a small note of Eduard's Hellcat on my blog today and now I see in-progress pics. That's something very mystical I've also found a very cool youtube video on Hellcat with a very funky 40's jazz. It's here. For your inspiration Here it is
drizzt73
_VISITCOMMUNITY
New South Wales, Australia
Joined: April 15, 2006
KitMaker: 158 posts
AeroScale: 70 posts
Posted: Saturday, March 01, 2008 - 10:27 AM UTC
Your build looks excellent so far Rowan and your pictures are really clear. What reference material are you using?
I received mine along with a BF110 E from Eduard last week.

I'm looking forward to following your progress on this one

cheers
Anthony
CMOT70
_VISITCOMMUNITY
Victoria, Australia
Joined: August 23, 2007
KitMaker: 629 posts
AeroScale: 539 posts
Posted: Saturday, March 01, 2008 - 12:11 PM UTC

Quoted Text

Actually I wasn't big Hellcat fan until today after I saw Eduard's box art for their upcoming Royal Forces Hellcat Mk.I/Mk.II (I like RAF camouflage more than USAF navy blue )


I agree, i'll probably only get one of Eduards Hellcat series and i've been debating as to whether to just wait for the MkI/II kit as i also prefer the Royal navy schemes.

Andrew
Merlin
Staff MemberSenior Editor
AEROSCALE
#017
_VISITCOMMUNITY
United Kingdom
Joined: June 11, 2003
KitMaker: 17,582 posts
AeroScale: 12,795 posts
Posted: Sunday, March 02, 2008 - 12:50 AM UTC
Hi Arseny

That's a great video clip! It's Alex Vraciu's machine restored to its original colours - the colour scheme I'm planning to go for.

I've made a bit more progress. The cockpit is pretty much finished (I've just spotted in the pics that a lever's come adrift! Dohh! LOL!) and I'll install it this afternoon:


I've added a thick stap under the headrest that's apparent in a lot of photos. I'm not sure of its purpose, but I wonder if it was to prevent the pilot's parachute pack getting ensnared on the headrest in a bail-out. Does anybody know?

I painted the seat in a darker green (maybe a bit too dark) than the rest of the cockpit. Some machines show this, others don't, but it helps add a bit of extra life to the model.

The engine is just about done too, with Eduard's etched harness fitted into holes drilled in the cylinders. The etched parts include a maker's badge and data-plate. I've added a couple of pipes under the crackcase to busy it up - otherwise it's as supplied:


As I mentioned last time, I've tackled the bombs the same way as the drop tank and added a seam from stretched sprue. The kit features etched arming propellers tail fins which must be folded concertina-fashion. The latter are the only etched parts in the kit which aren't optional - there are no plastic alternatives provided. Luckily, they are pretty straightforward to fold and provide a good introduction if anyone hasn't tried using etched parts before :


All being well, I'll get the fuselage assembled this afternoon and the wings on, so it should begin to look like an aeroplane by the end of the weekend...

All the best

Rowan
Merlin
Staff MemberSenior Editor
AEROSCALE
#017
_VISITCOMMUNITY
United Kingdom
Joined: June 11, 2003
KitMaker: 17,582 posts
AeroScale: 12,795 posts
Posted: Sunday, March 02, 2008 - 02:47 AM UTC

Quoted Text

What reference material are you using?... cheers Anthony


Hi Anthony,

I'm relying on Squadron's "Detail & Scale Vol. 49" and "Hellcat Walkaround", and AJ Press's "Aircraft Monograph #20". They've all proved very useful at different stages, complementing each other well:


All the best

Rowan
WingTzun
_VISITCOMMUNITY
Illinois, United States
Joined: February 01, 2006
KitMaker: 853 posts
AeroScale: 137 posts
Posted: Sunday, March 02, 2008 - 02:51 AM UTC
Very Nice Rowan, I really like the work you did on the engine.
TedMamere
_VISITCOMMUNITY
Moselle, France
Joined: May 15, 2005
KitMaker: 5,653 posts
AeroScale: 4,347 posts
Posted: Sunday, March 02, 2008 - 04:01 AM UTC
Hi Rowan,

It looks good so far! The engine is very nice. Did you really use the PE parts for the wiring harness? It doesn't look flat at all. Did you do something else than the painting?

Jean-Luc
Merlin
Staff MemberSenior Editor
AEROSCALE
#017
_VISITCOMMUNITY
United Kingdom
Joined: June 11, 2003
KitMaker: 17,582 posts
AeroScale: 12,795 posts
Posted: Sunday, March 02, 2008 - 04:13 AM UTC

Quoted Text

Did you really use the PE parts for the wiring harness? It doesn't look flat at all. Did you do something else than the painting? Jean-Luc


Hi Jean-Luc

It's the kit's etched wiring harness. It's got a couple of coats of paint on it, but no other treatment. I'm always wary of etched wiring looking too flat but, like you, I'm surprised how effectively it's turned out. The way it joins the crankcase is a compromise, but the wires themselves look quite 3-dimensional and are definitely a lot quicker than adding individual wires.

All the best

Rowan
Roxter
_VISITCOMMUNITY
Rigas, Latvia
Joined: July 04, 2007
KitMaker: 268 posts
AeroScale: 245 posts
Posted: Monday, March 03, 2008 - 12:01 AM UTC
Rowan, little bit offtopic question, but what camera do you use? I bet it's one of those DSLR cameras because Images are so clear and crisp.

PS. You might be interested to see these pictures here:

http://warbirdinformationexchange.org/phpBB2/viewtopic.php?t=13327&postdays=0&postorder=asc&start=105
Merlin
Staff MemberSenior Editor
AEROSCALE
#017
_VISITCOMMUNITY
United Kingdom
Joined: June 11, 2003
KitMaker: 17,582 posts
AeroScale: 12,795 posts
Posted: Monday, March 03, 2008 - 04:05 AM UTC
Hi Arseny

That's a great link - not just for the Hellcat, but also the Grumman "Fifi". I'll definitely save those pics ready for building the RVHP kit.

As regards my camera - I wish it was a fancy new digital SLR. In fact, it's just my trusty old 4 megapixel Canon G3. You're not the only person to comment on the good results it's giving - I reckon I should send the quotes to Canon... they might sponsor us!

All the best

Rowan
Roxter
_VISITCOMMUNITY
Rigas, Latvia
Joined: July 04, 2007
KitMaker: 268 posts
AeroScale: 245 posts
Posted: Monday, March 03, 2008 - 05:34 AM UTC
Hi Rowan,

Here's also a whole thread on all sorts of Grumman WW2 a/c - http://warbirdinformationexchange.org/phpBB2/viewtopic.php?t=13327&postdays=0&postorder=asc&start=0&sid=c8cb5f81c7e6fcd1041edfd25a1a8864

It's a great idea to try Canon
glamdring
Joined: May 21, 2007
KitMaker: 77 posts
AeroScale: 76 posts
Posted: Monday, March 03, 2008 - 04:08 PM UTC
Hi Rowan,
The build is looking great! I can't wait to get my hands on one.

Sorry I am a little slow in getting comments in, but I am wondering about an earlier picture - in the wing clamp one, what does the toothpick do? Was it necessary for some reason or just something that you like to do to help with perfect alignment? Sorry if this is incredibly obvious and I incredibly thick, but I love to see / learn the little tricks that people do.

Also, are the wing guns part of one of the wing halves? If so is it difficult to get in between them to fix the seam? Any tricks of the trade you can give me for that task?

Finally, did you just brush paint when you repainted the prepainted parts? If so were you just careful or did you try to mask the black parts at all?

Again, I hope you don't mind answering these probably very basic questions, but since I can't be there to watch you build, I thought I'd ask

Thanks,
Allen
Merlin
Staff MemberSenior Editor
AEROSCALE
#017
_VISITCOMMUNITY
United Kingdom
Joined: June 11, 2003
KitMaker: 17,582 posts
AeroScale: 12,795 posts
Posted: Monday, March 03, 2008 - 07:50 PM UTC
[quote]... in the wing clamp one, what does the toothpick do? Was it necessary for some reason or just something that you like to do to help with perfect alignment? ...

Also, are the wing guns part of one of the wing halves? If so is it difficult to get in between them to fix the seam? Any tricks of the trade you can give me for that task?/quote]


Hi Allen

The wing top and bottom halves join some way back from the trailing edge, partway across the flaps. This means nice thin trailing edges, but the joint is unsupported and I found there's a tendency for a slight step where the parts meet. I clamped the wing to make sure everything lined up flat at the root and used the toothpick as a lever to keep things level at the end of the flaps while the cement dried.

The guns are a separate part and must be inserted before assembling the wing, so I taped the wings halves together and sanded the leading edge in that area before fitting the barrels. This should mean less awkward clean-up is needed later, but I haven't sprayed a primer coat yet, which might highlight more work needed here and there...


Quoted Text

...did you just brush paint when you repainted the prepainted parts? If so were you just careful or did you try to mask the black parts at all?


Yep, I just used a fine brush and Xtracrylix Interior Green to repaint the etched panel to match the rest of the cockpit. Spraying a matt-coat evened out the finish and then I used drops of gloss varnish to "glaze" the instrument bezels.

Hope this helps - all the best

Rowan
Holdfast
Staff MemberPresident
IPMS-UK KITMAKER BRANCH
#056
_VISITCOMMUNITY
England - South West, United Kingdom
Joined: September 30, 2002
KitMaker: 8,581 posts
AeroScale: 4,913 posts
Posted: Tuesday, March 04, 2008 - 08:29 AM UTC
Hi Rowan,
Wonderful work as always (that is when you actually do some sorry I mean when you actually find the time to do some )
I have started building mine but have only glued the cowling together at the moment, as I have also started several others (you know how it is when you have something new to try ) I had intended not to use the etched wiring harness but it looks so good in your pic that I will do now. I must admit to being surprised at how good it actually looks.

Mal
Merlin
Staff MemberSenior Editor
AEROSCALE
#017
_VISITCOMMUNITY
United Kingdom
Joined: June 11, 2003
KitMaker: 17,582 posts
AeroScale: 12,795 posts
Posted: Tuesday, March 04, 2008 - 09:36 AM UTC

Quoted Text

Hi Rowan,
Wonderful work as always (that is when you actually do some sorry I mean when you actually find the time to do some )... Mal


Hi Mal

And cheers for that hasty correction!

After a compliment like that, I'd better carry on trying to live up to my New Year's Resolution to build more kits and post another update!

In my last post I commented on how the wing construction ensures nice thin trailing edges. Well, the bad news is that (in my sample, at least) there a few gaps at the root, both at the leading edge and at the rear where the recess in the fuselage is somewhat thicker than the wing's trailing edge:


The zoomed-in photos risk making the problem look worse than it is; I think white-glue, correction fluid or Mr Surfacer run into the joint should fill the gap.

Continuing my theme of tinkering slightly with what I intended to be a totally OOB build, I've modified the tailwheel slightly:


As supplied, the door continues right down the leg and the lightening holes are a bit shallow. It's an easy fix to carve away the base of the door to represent the castoring base and deepen the holes:


I also need to add a seam down the door.

More soon

Rowan
 _GOTOTOP