_GOTOBOTTOM
World War II: USA
Aircraft of the United States in WWII.
Hosted by Rowan Baylis
P-47M "Ugly Ducking" ?
lampie
#029
_VISITCOMMUNITY
England - East Midlands, United Kingdom
Joined: December 23, 2005
KitMaker: 6,249 posts
AeroScale: 3,270 posts
Posted: Monday, April 28, 2008 - 02:06 AM UTC
Building the presentation piece for the 56th FG/Halesworth Memorial Museum has certainly given me a taste for 1:48th, so when my ACES HIGH Campaign was approved there could only be one scale for me.
Time to pull one of the excellent Tamiya P-47M kits from the stash! After mulling over various P-47 aces schemes I decided to go for one of the profiles that comes as an option with the kit.
Cpt George Bostwicks P47M 44-21112. Last CO of the 63rd FS 56th FG.

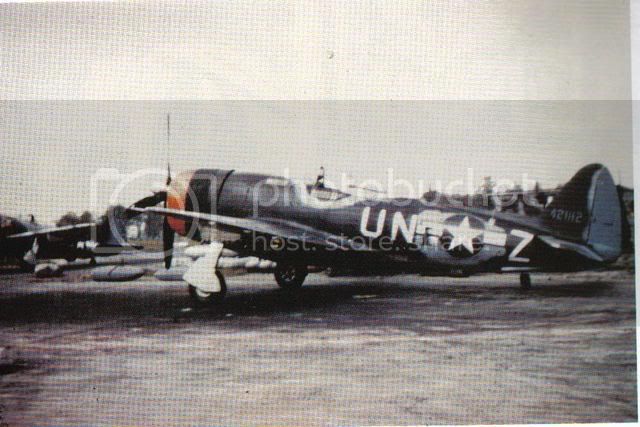
Bostwick christened each of his allocated Thunderbolts "Ugly Duckling" but theres no evidence to suggest the name appears on any of them.
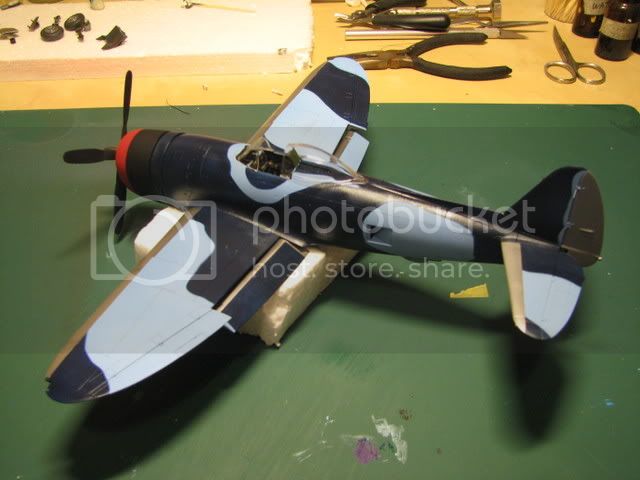
The 63rd FS P-47M's carried some beautiful paint schemes and Bostwicks was no exception.
NMF undersides,3 different shades of blue, red and black cowling and bare metal squadron codes!,,,,what a beauty! Hopefully I'll be able to do this stunning paint scheme justice.
"Ugly Duckling"?...this ones definately a swan!
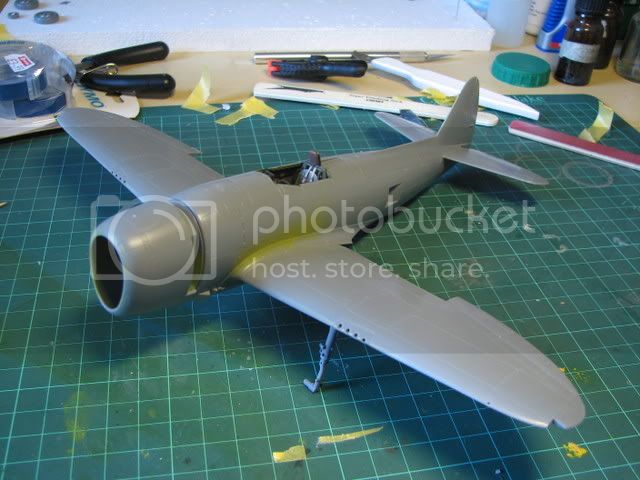
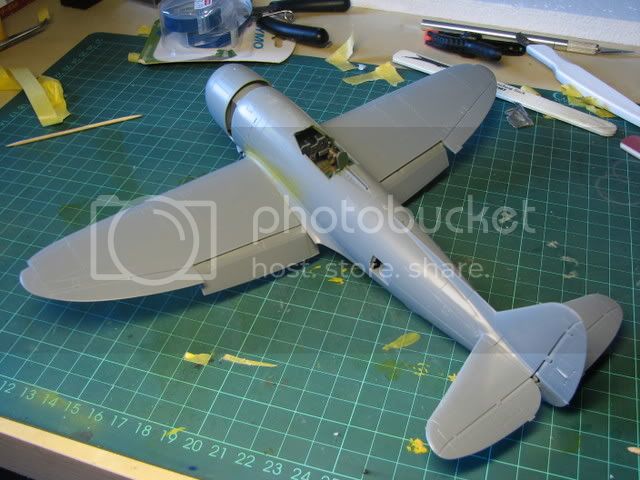
So,,onto the kit.
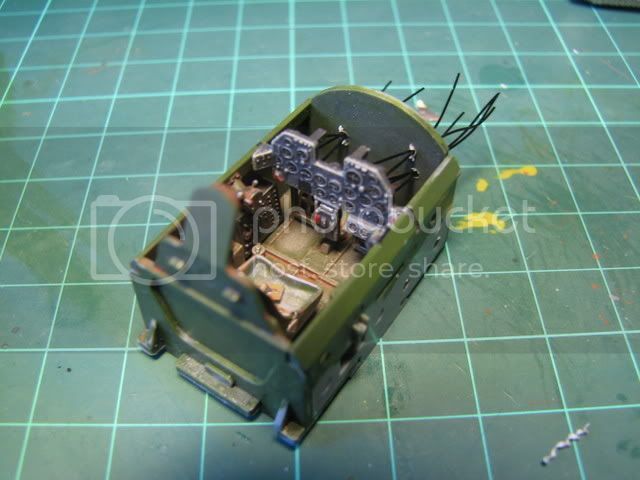
As usual, cockpit first. Ive done the base coats and next up will be details, washes, and dry brushing.

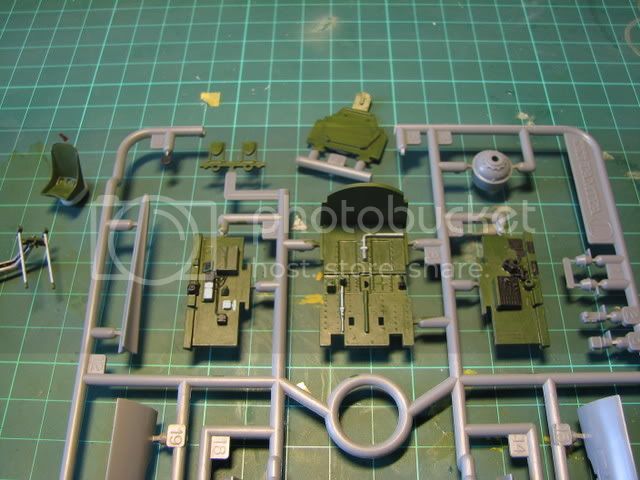
Instrument panels done apart from adding a couple of coloured dials and switches to give it some "life"

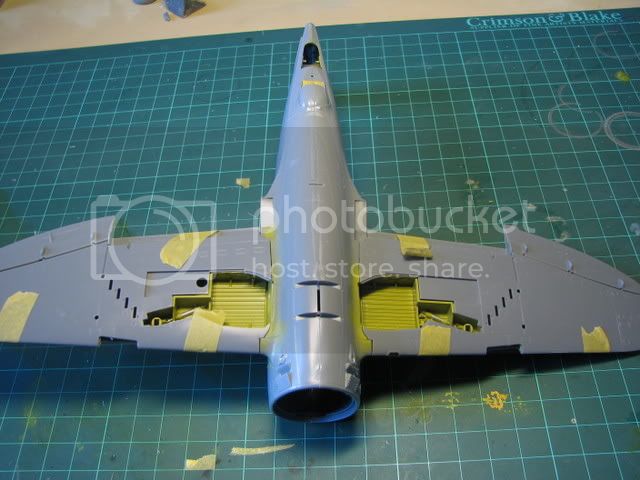
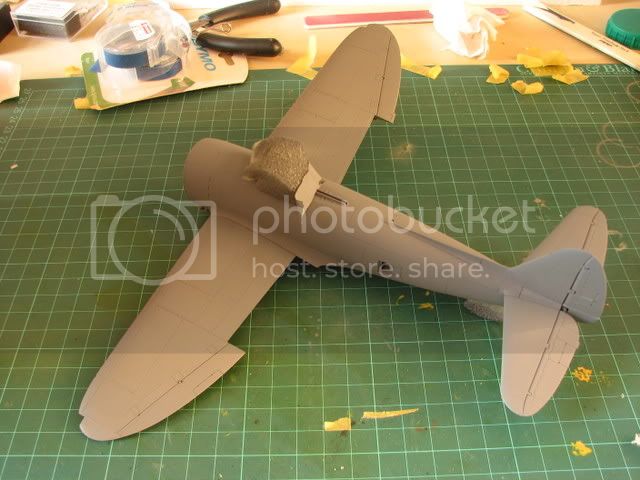
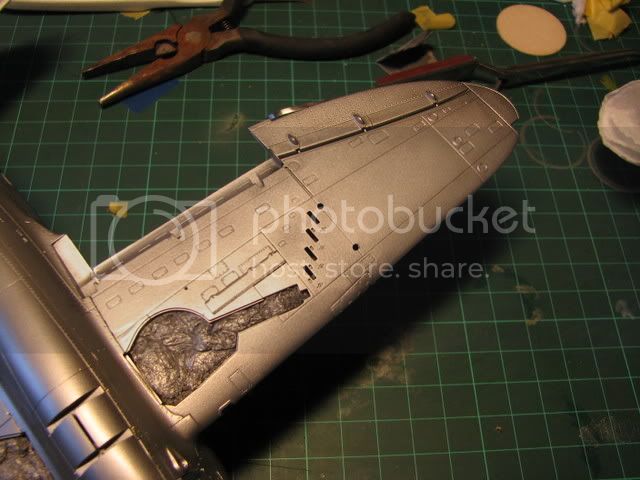
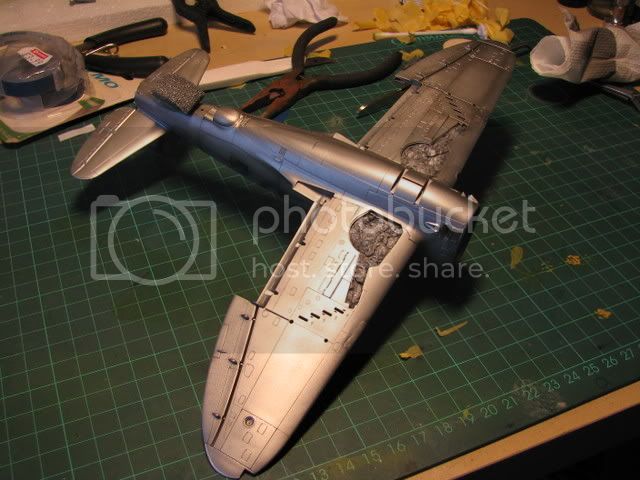
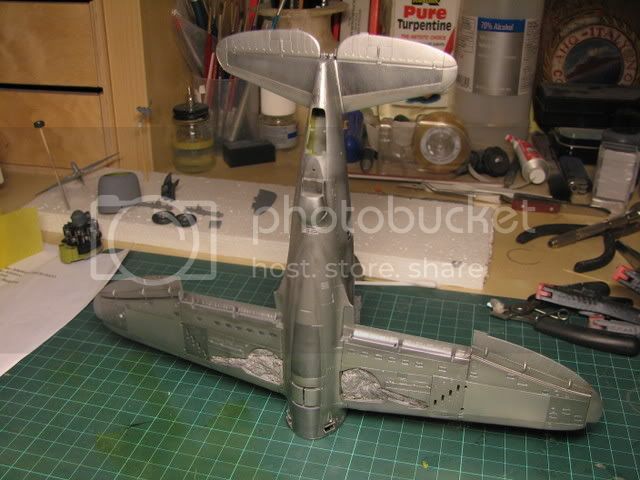
While I was waiting for the Klear coats to dry I shot some XF4 at the wheel wells and main spar area of the wings and fusalage.


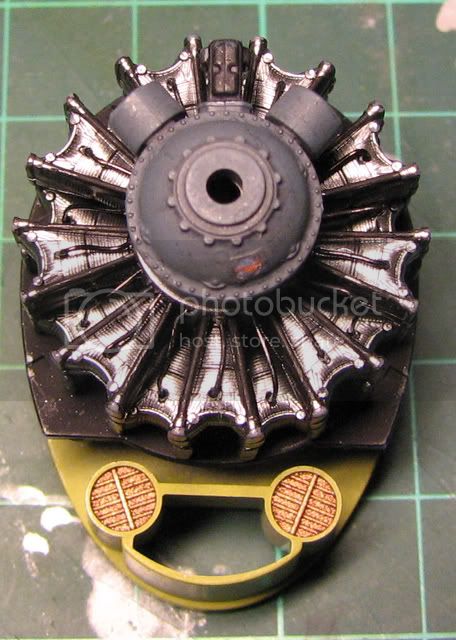
Im going to build this mainly OOB with some additional wiring here and there. Engine ignition harness, brake pipes etc. I'll also fit some of the excellent Eduard pre painted PE seatbelts.


Nige
propwash
_VISITCOMMUNITY
Charente, France
Joined: July 06, 2007
KitMaker: 289 posts
AeroScale: 231 posts
Posted: Monday, April 28, 2008 - 06:25 AM UTC
That control panel looks excellent. Look forward to watching this build, Nige.
whittman181
_VISITCOMMUNITY
Massachusetts, United States
Joined: December 30, 2006
KitMaker: 646 posts
AeroScale: 67 posts
Posted: Monday, April 28, 2008 - 06:31 AM UTC
Great job on the instrument panel The gauges look nice. Keep them coming , thanks , Bob
Removed by original poster on 04/28/08 - 18:18:22 (GMT).
Siderius
_VISITCOMMUNITY
Tennessee, United States
Joined: September 20, 2005
KitMaker: 1,747 posts
AeroScale: 1,673 posts
Posted: Monday, April 28, 2008 - 07:23 AM UTC
[img]http://gallery.kitmaker.net/500/thumbs/Picture_005_edited.jpg" BORDER="0">[/img]

I built a 72 scale Jug in the colors you've chosen, a couple of years ago. It is my favorite scheme of the three squadrons which make up the 56th fighter group. I can't wait to see how your turns out. Good work and keep the photos coming. Russell
lampie
#029
_VISITCOMMUNITY
England - East Midlands, United Kingdom
Joined: December 23, 2005
KitMaker: 6,249 posts
AeroScale: 3,270 posts
Posted: Monday, April 28, 2008 - 07:48 AM UTC
Thanks for the comments guys.
Im really looking forward to this build!
[quote]
I built a 72 scale Jug in the colors you've chosen, a couple of years ago. It is my favorite scheme of the three squadrons which make up the 56th fighter group. I can't wait to see how your turns out. Good work and keep the photos coming. Russell[/quote

Heres the pic Russell.


The 56th must have resembled Richtofens Flying Circus in the last months of WW2. Razorback and Bubbletop P-47's in NMF, olive drab, olive drab/grey, different shades of grey, different shades of blue, coloured rudders and the red cowlings!
Fitting extravagence for the most successfull 8th USAAF Fighter Group of the second world war!
Nige
lampie
#029
_VISITCOMMUNITY
England - East Midlands, United Kingdom
Joined: December 23, 2005
KitMaker: 6,249 posts
AeroScale: 3,270 posts
Posted: Wednesday, April 30, 2008 - 03:48 AM UTC
The cockpits all finished and ready to install.
Then I can close up the fusalage and the T'bolt can start to take shape.
A final photo before I close the "office doors"


And the finished office.


The wires on the rear of the instrument panel are black coated wire. Its simply representative and not technically accurate.
What about the control stick and gunsight I hear you cry!
I will be stuffing the cockpit with foam to mask it and I dont install the stick etc until the final stages of the build to save damaging them.

Nige
f1matt
_VISITCOMMUNITY
Manitoba, Canada
Joined: August 13, 2006
KitMaker: 1,021 posts
AeroScale: 184 posts
Posted: Wednesday, April 30, 2008 - 09:20 AM UTC
Sweet looking cockpit Nige. I suppose Ugly Duckling could be Fat Cat's younger brother. This should be fun watching both come to life. Got to love those pre painted seat belts. And thanks for all the help. I'm sure I'll have more questions for you soon.

-Matt
lampie
#029
_VISITCOMMUNITY
England - East Midlands, United Kingdom
Joined: December 23, 2005
KitMaker: 6,249 posts
AeroScale: 3,270 posts
Posted: Wednesday, April 30, 2008 - 10:04 AM UTC
Ugly Duckling..........................
Fat Cat...........................
I feel a campaign idea coming on?
My entry?
Easy...One of Mike Gladych's P-47s, all adorned with a peguin and named Pengie after his girlfriend.
Nige
f1matt
_VISITCOMMUNITY
Manitoba, Canada
Joined: August 13, 2006
KitMaker: 1,021 posts
AeroScale: 184 posts
Posted: Wednesday, April 30, 2008 - 10:43 AM UTC
Interesting idea. How about a plane name campaign? I've already got a Corsair named Black George. A Spitfire named Polly. Can't forget armour. I've got an Abrams named Black Sabbath and another named Boom Stick.

-Matt
lampie
#029
_VISITCOMMUNITY
England - East Midlands, United Kingdom
Joined: December 23, 2005
KitMaker: 6,249 posts
AeroScale: 3,270 posts
Posted: Wednesday, April 30, 2008 - 10:49 AM UTC
Who knows?
Im up to my neck in it at the moment so wont be submitting it, but feel free to pinch/modify the idea Matt.
Whats an Abrams? LOL
Fusalage is together now and Im going to start cleaning up the seams tomorrow and will probably have the wings on in the next day or so.
Nige
lampie
#029
_VISITCOMMUNITY
England - East Midlands, United Kingdom
Joined: December 23, 2005
KitMaker: 6,249 posts
AeroScale: 3,270 posts
Posted: Friday, May 02, 2008 - 04:07 AM UTC
Progress and suddenly it looks like an aeroplane!
The fusalage is together and the rear insert fitted. A small amount of work with a sanding stick will erase any traces of the liquid glue. I'll also run a rescriber down the panel line where the fusalage insert meets the fusalage.
Once the wheel wells are weathered I'll close the wings up and then fit them. At the moment they are at the dry fitting stage.


Its interesting to compare this build with F1Matts Fat Cat Razorback and to note the different ways we approach what is essentially the same kit.
No right ways or wrong ways, just personal preferences and what works best for the individual modeller.
While waiting for the glue to properly cure on the fusalage halves Ive made a start on the engine. The holes have all been drilled for the plug leads, and while Id got the pinvice out I drilled holes in the wheel wells for the hydraulic runs.
Nige
betheyn
Staff MemberSenior Editor
AEROSCALE
#019
_VISITCOMMUNITY
England - South East, United Kingdom
Joined: October 14, 2004
KitMaker: 4,560 posts
AeroScale: 2,225 posts
Posted: Friday, May 02, 2008 - 08:50 AM UTC
I turn my back for 5 minutes and you near enough build a plane .
Looking good so far Nige.
The black coated wire is excellent for the brake lines and instrument panel, and looks realistic (put a load of it on my Arado). Will you be using fuse wire for the plug leads?
Andy
f1matt
_VISITCOMMUNITY
Manitoba, Canada
Joined: August 13, 2006
KitMaker: 1,021 posts
AeroScale: 184 posts
Posted: Friday, May 02, 2008 - 11:11 AM UTC
I think I'm getting confused. Is this your build or mine? I can't tell the difference! We better get these birds painted so people can tell whose who. This is too much fun.

-Matt
lampie
#029
_VISITCOMMUNITY
England - East Midlands, United Kingdom
Joined: December 23, 2005
KitMaker: 6,249 posts
AeroScale: 3,270 posts
Posted: Friday, May 02, 2008 - 12:17 PM UTC

Quoted Text

I think I'm getting confused. Is this your build or mine? I can't tell the difference! We better get these birds painted so people can tell whose who. This is too much fun.

-Matt


Its a good job ones a razorback and ones a bubbletop otherwise noone else would be able to tell the difference at the moment either!...
Andy. I'll be using fusewire for the ignition leads and 0.3mm black coated wire for the brake pipes.Hydraulic lines in the wheel wells will be fusewire as well.
Tonight Ive been working the seams, especially around the top fusalage insert. The fits very good, but youve got to line everything up carefully. Ive spent some time sanding the join flush and then had to replace part of the panel line. Took a while but well worth it, especially as its one point on my first Bubbletop build that still bugs me,,lol.
The wings are now glued and it wont be long before Im shooting some primer at this one
Tell you what Matt,,I'll go on tour for a couple of weeks and let you get some paint on yours,, it'll seperate the builds a bit as well
I need to fit the "fine" needle and nozzle to my Badger 150 soon as start practicing as Im hopefully going to be painting the camo freehand and Mal The Mask is making me some masks for this.
Nige
lampie
#029
_VISITCOMMUNITY
England - East Midlands, United Kingdom
Joined: December 23, 2005
KitMaker: 6,249 posts
AeroScale: 3,270 posts
Posted: Saturday, May 03, 2008 - 03:26 AM UTC
Basic assembly is now complete.
These Tamiya P-47's go together extremely well, which doesnt mean you dont have to still test the fit and take your time.
Ive assembled the flaps and placed them in position using the main wing to act as a jig to keep everything in line while they dry. They wont be properly fitted until the end of the build though.
A small amount of sanding and a bit of liquid glue residue that a sanding stick will clean up in a couple of seconds is all thats left to address before I prime this.


Before I do though, everything will be left for 24 hours to cure properly. In the meantime I'll continue working on the engine and other bits and pieces.

Nige
whittman181
_VISITCOMMUNITY
Massachusetts, United States
Joined: December 30, 2006
KitMaker: 646 posts
AeroScale: 67 posts
Posted: Saturday, May 03, 2008 - 04:41 AM UTC
Excellent build so far and I can't wait to see some paint , thanks Bob
Yeti123
_VISITCOMMUNITY
Michigan, United States
Joined: February 11, 2008
KitMaker: 311 posts
AeroScale: 278 posts
Posted: Saturday, May 03, 2008 - 04:17 PM UTC
Nige:
Looks great. I like the mud colored wash on the cockpit . Its been fun watching your build along with Matt's.
lampie
#029
_VISITCOMMUNITY
England - East Midlands, United Kingdom
Joined: December 23, 2005
KitMaker: 6,249 posts
AeroScale: 3,270 posts
Posted: Monday, May 05, 2008 - 06:36 PM UTC
Just time for a quick update before I head off out on the road again.
Primers on and there only a couple of tiny areas on the underside seam that need attention.
But thats all going to have to wait until later in the month.

Im sure Matts "Fat Cat" thread will keep all the P-47 junkies happy while Im away.
Hope to see a finished Razorback when I return Matt
Nige
lampie
#029
_VISITCOMMUNITY
England - East Midlands, United Kingdom
Joined: December 23, 2005
KitMaker: 6,249 posts
AeroScale: 3,270 posts
Posted: Saturday, May 10, 2008 - 08:21 AM UTC
An unexpected free day before the tour starts and Ive been able to spend most of it at the bench
In previous builds, when Alclad has been involved Ive always sprayed it over a base coat of gloss black. This time,partly because Im writing an article on using Alclad, I decided to try something different.
Ive used preshading for the first time under the Alclad, and Im also thinking of using a "fading" technique. Lighter shades of Alclad in the middle of the panels and darker shades along the panel lines. I may also spray some panels different shades as well.
Should be fun!
So, over the preshading goes a base coat of Alclad Aluminium.
The first thing I noticed is how from certain angles the preshading is hidden and from others it stands out a mile!
Im not 100% sure I like this, but we'll see how things work out and if I decide I dont like it I'll just overspray the alclad in gloss black and adopt my usual technique.


See what I mean?

As always, comments, advice, insults and inspiration welcome
Nige
lampie
#029
_VISITCOMMUNITY
England - East Midlands, United Kingdom
Joined: December 23, 2005
KitMaker: 6,249 posts
AeroScale: 3,270 posts
Posted: Wednesday, May 28, 2008 - 10:44 AM UTC
Well,,its been a while.
A gap between tours and Ive actually managed to do some modelling!
Engines wired up and finished.

And fresh from having the masking taken off, heres a view of the underside now Ive painted some of the panels in different shades of Alclad.

Next up is masking the underside and I can make a start of the top camoflage colours.
Nige
dcandal
_VISITCOMMUNITY
Buenos Aires, Argentina
Joined: September 07, 2006
KitMaker: 918 posts
AeroScale: 688 posts
Posted: Wednesday, May 28, 2008 - 11:52 AM UTC
A very interest project Nigel, very good advances
lampie
#029
_VISITCOMMUNITY
England - East Midlands, United Kingdom
Joined: December 23, 2005
KitMaker: 6,249 posts
AeroScale: 3,270 posts
Posted: Saturday, June 07, 2008 - 08:47 AM UTC
Thanks Daniel.
Taking full advantage of a break between tours Ive steamed into "Ugly Duckling" over the last couple of days.In amongst all the madness involved with being on tour I have researched the colours of the 63rd FS P-47 M's and my conclusion is that the exact colours are not known and so Im going for something that looks as close as I can get.
So far Ive sprayed the lighter blue and Im slowly working my way through the various bits and pieces.
Hopefully I'll get the dark blue sprayed on tomorrow if I can mix a colour Im happy with. One things for certain,,this is going to be a VERY distinctive paint job when its finished.

Nige
lampie
#029
_VISITCOMMUNITY
England - East Midlands, United Kingdom
Joined: December 23, 2005
KitMaker: 6,249 posts
AeroScale: 3,270 posts
Posted: Sunday, June 08, 2008 - 05:03 AM UTC
Once more Im sitting surrounded by a pile of masking tape and wondering if I ought to be sponsored by Tamiya Tape!
Out with the white tac and a masking session lasting about 3 hours produced this..

Followed by another alchemy session mixing up various shades of blue until I eventually got one I was happy with.


Still got to paint the black band on the cowling and mix up yet another shade of blue for the rudder
Enough for today though!,it'l take me a couple of hours to create some space on the bench again after all this malarky!
Nige
lampie
#029
_VISITCOMMUNITY
England - East Midlands, United Kingdom
Joined: December 23, 2005
KitMaker: 6,249 posts
AeroScale: 3,270 posts
Posted: Sunday, June 08, 2008 - 10:33 AM UTC
I couldnt resist finishing the cowling and posing Ugly Duckling with some of the bits and pieces dry fitted before putting it down for the night

Soon be time for Klear then step forward Miracle Masks
Nige
 _GOTOTOP