_GOTOBOTTOM
Early Aviation
Discuss World War I and the early years of aviation thru 1934.
1/32 Roden GB 2008 Albatros D.III OAW
CaptainA
_VISITCOMMUNITY
Indiana, United States
Joined: May 14, 2007
KitMaker: 3,117 posts
AeroScale: 2,270 posts
Posted: Saturday, October 25, 2008 - 07:59 AM UTC

I will be joining this group build with Roden's Beautiful Albatros D.III OAW. Special thanks go to Fliegermeister Stephen Lawson and Roden, who sent this wonderful kit to me for this GB.
Click Here.

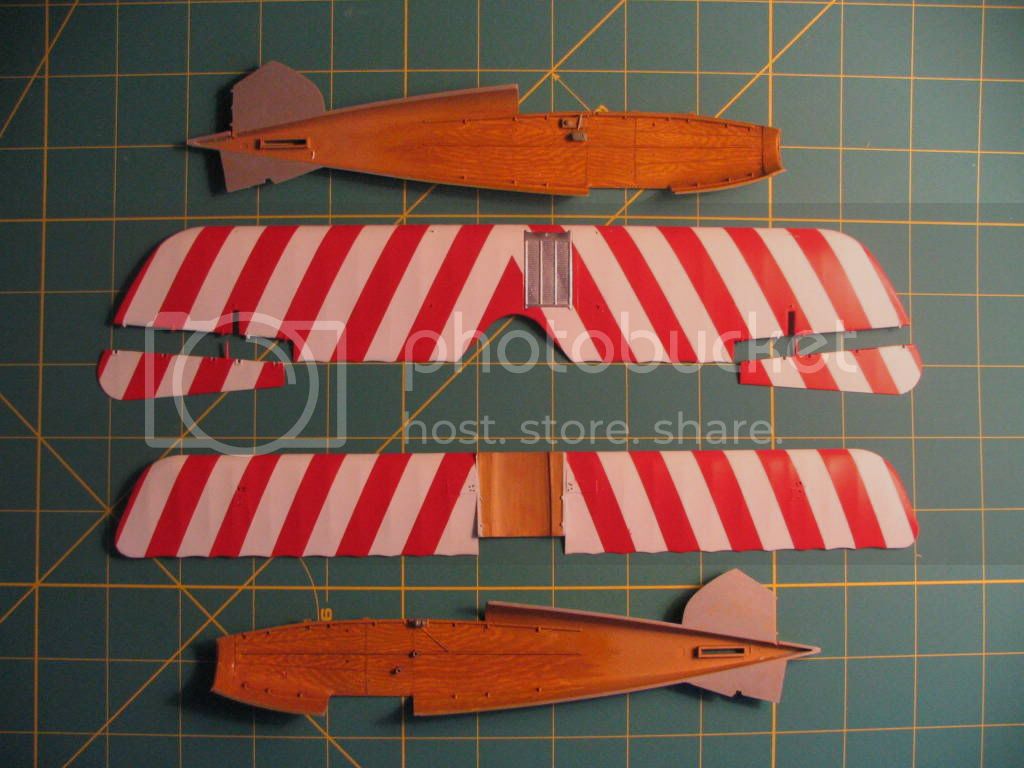
Now to answer some of your questions. I will be doing the red and white candy stripe scheme depicted on the box.

I will be using the Eduard PE set for the Roden Albatros D.III. But the wing radiators on the OAW version are different from the original release, so I already know some of the parts won't match up. But most of them will.

The OAW kit looks to be the same as the original release, but there are some version specific differences. The first thing that struck me was that the OAW release is molded in a light gray, instead of the usual light beige color. I also believe some of the details seem to be sharper in the OAW release.

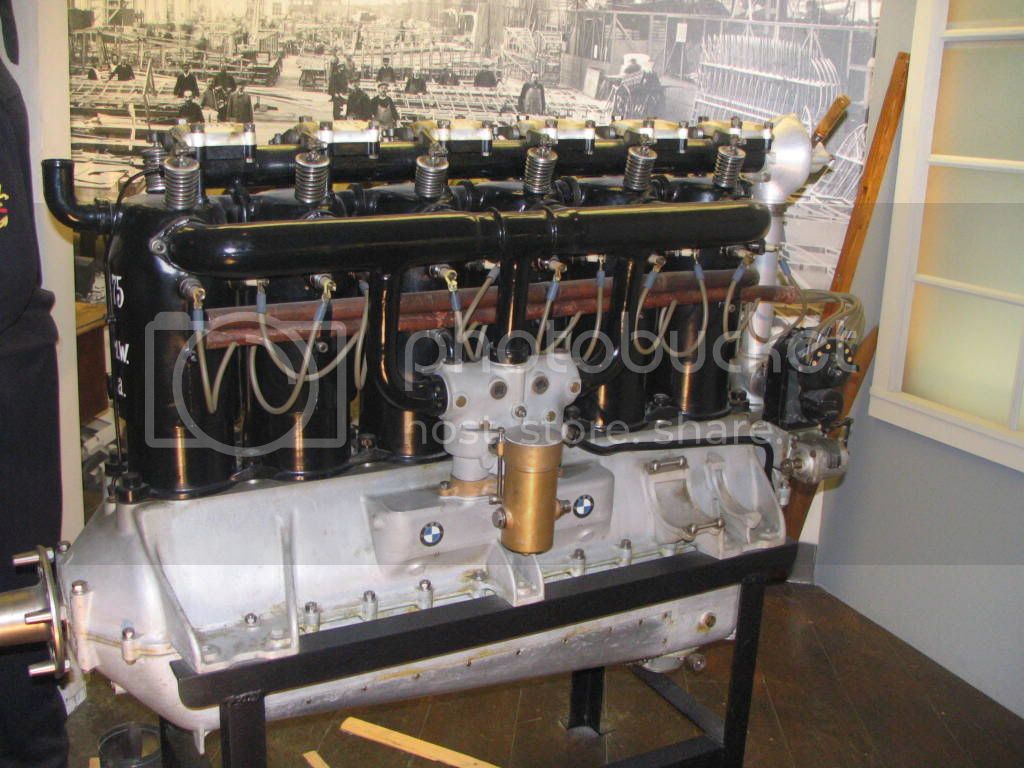
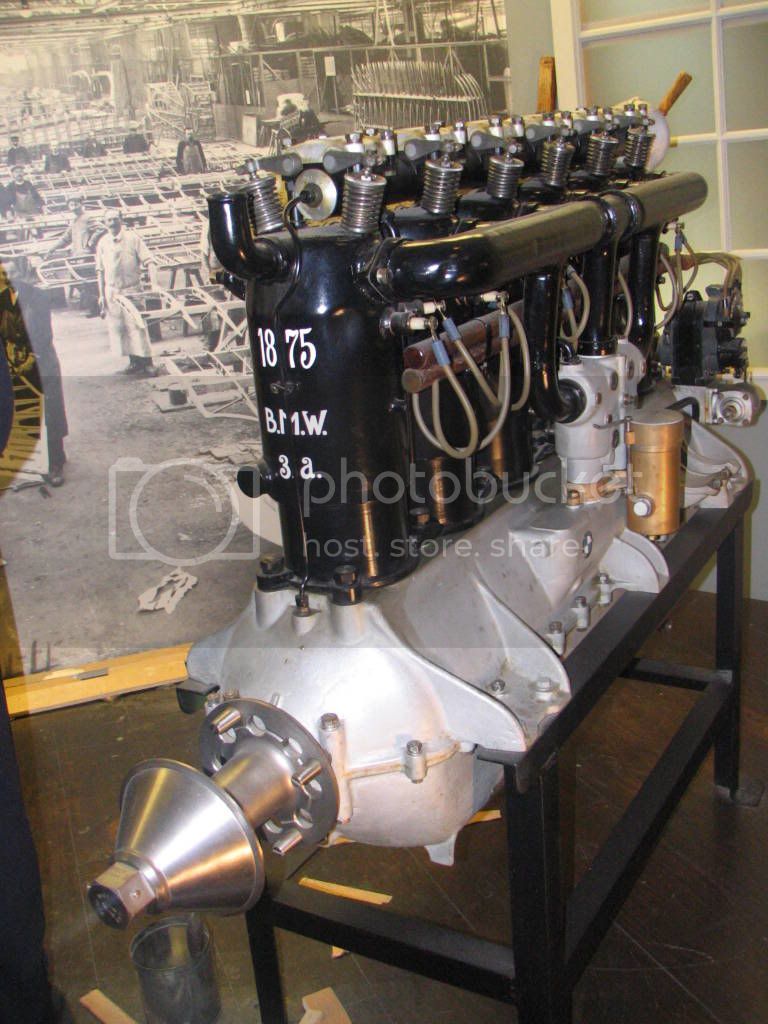
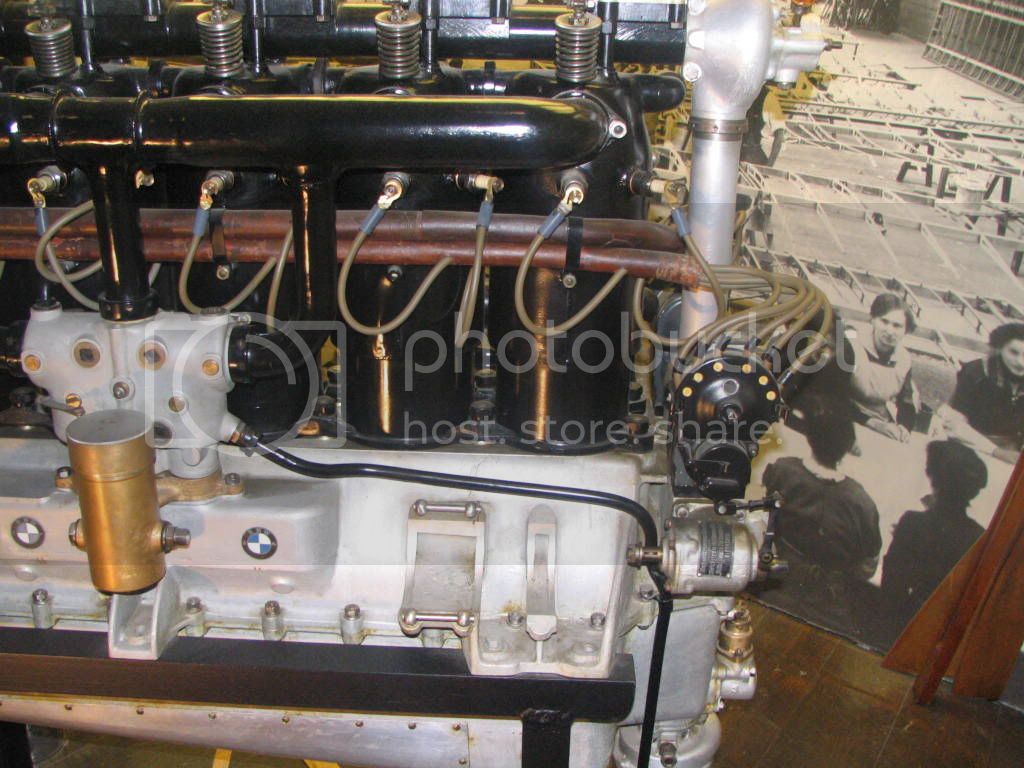
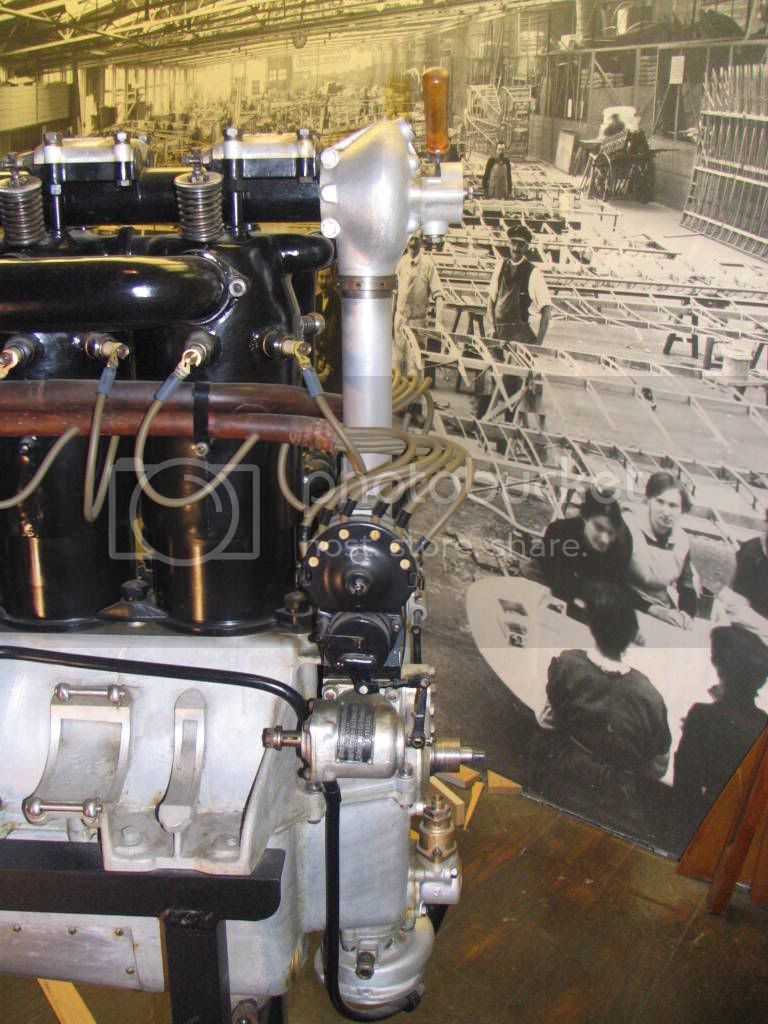
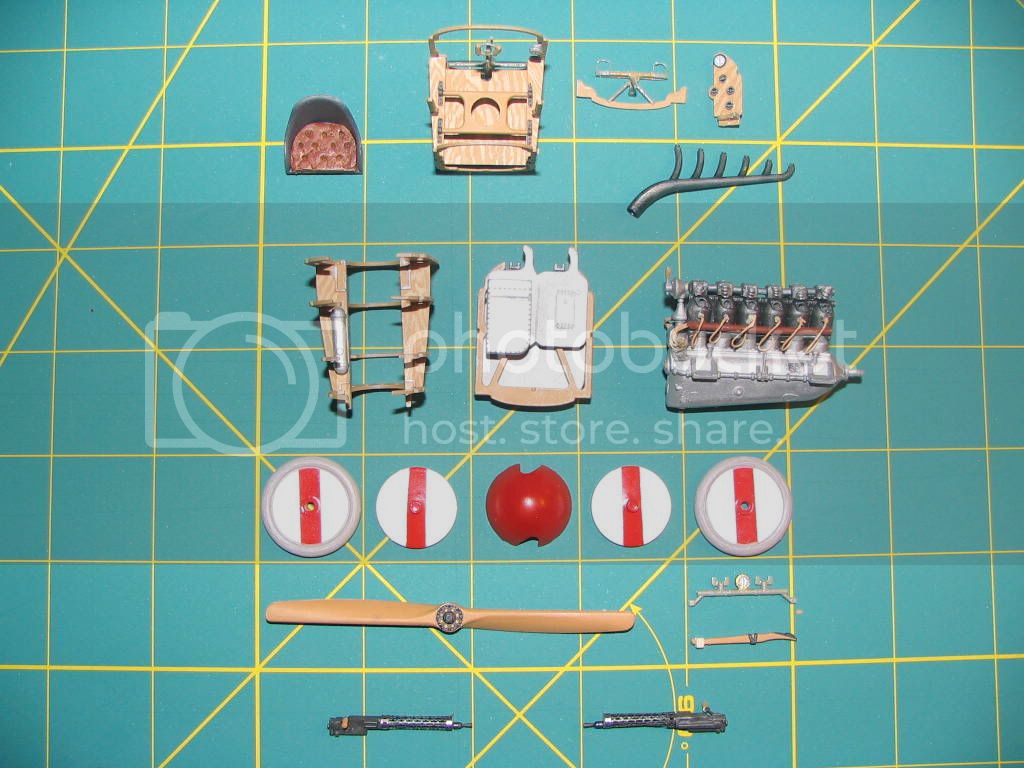
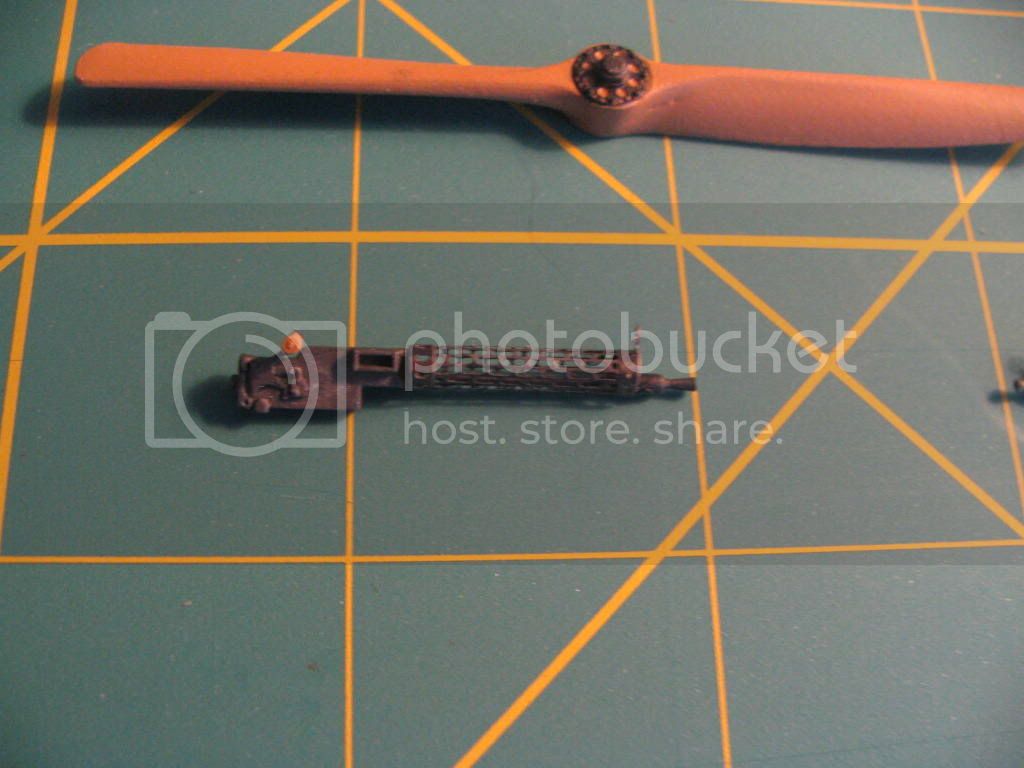
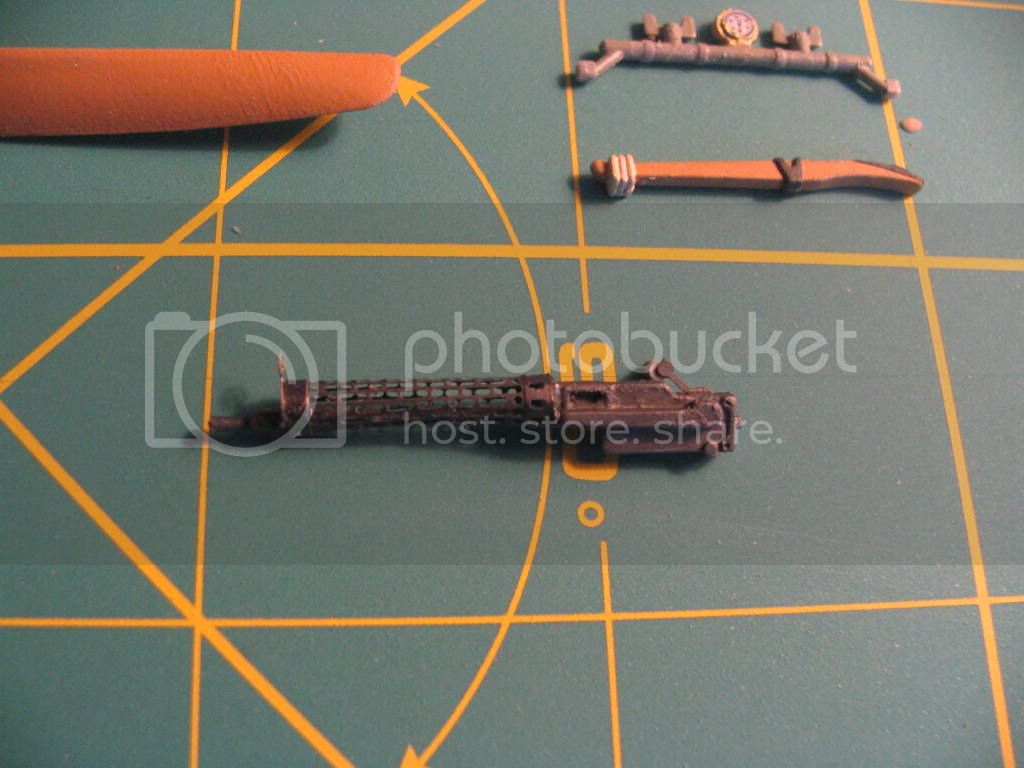
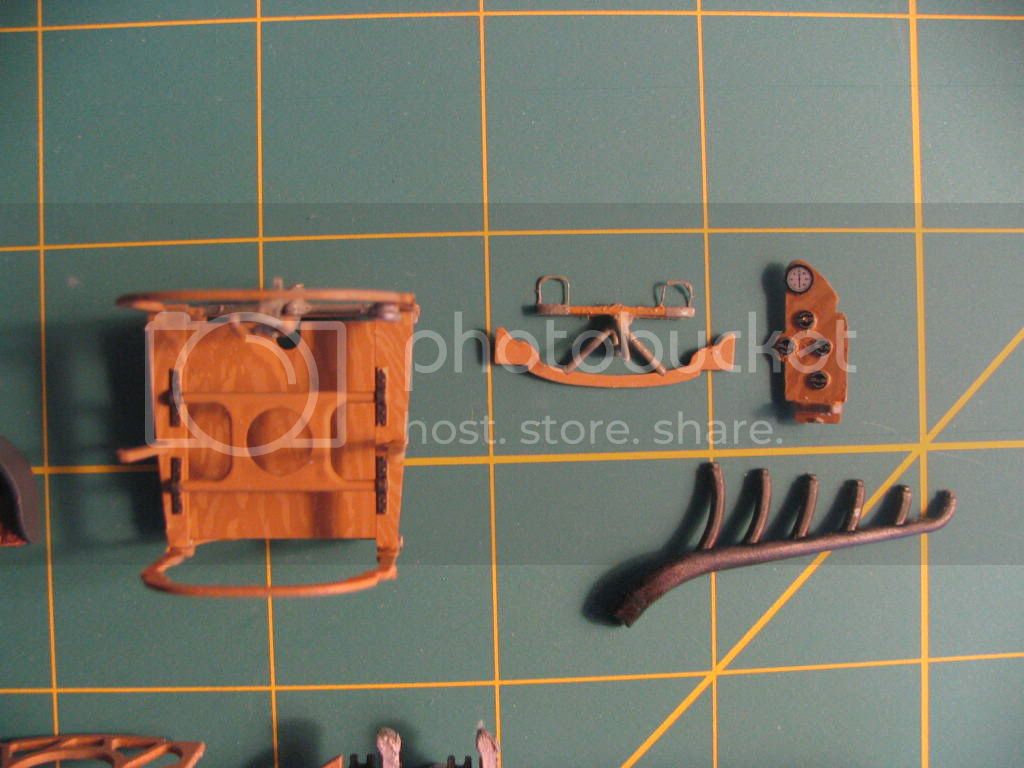
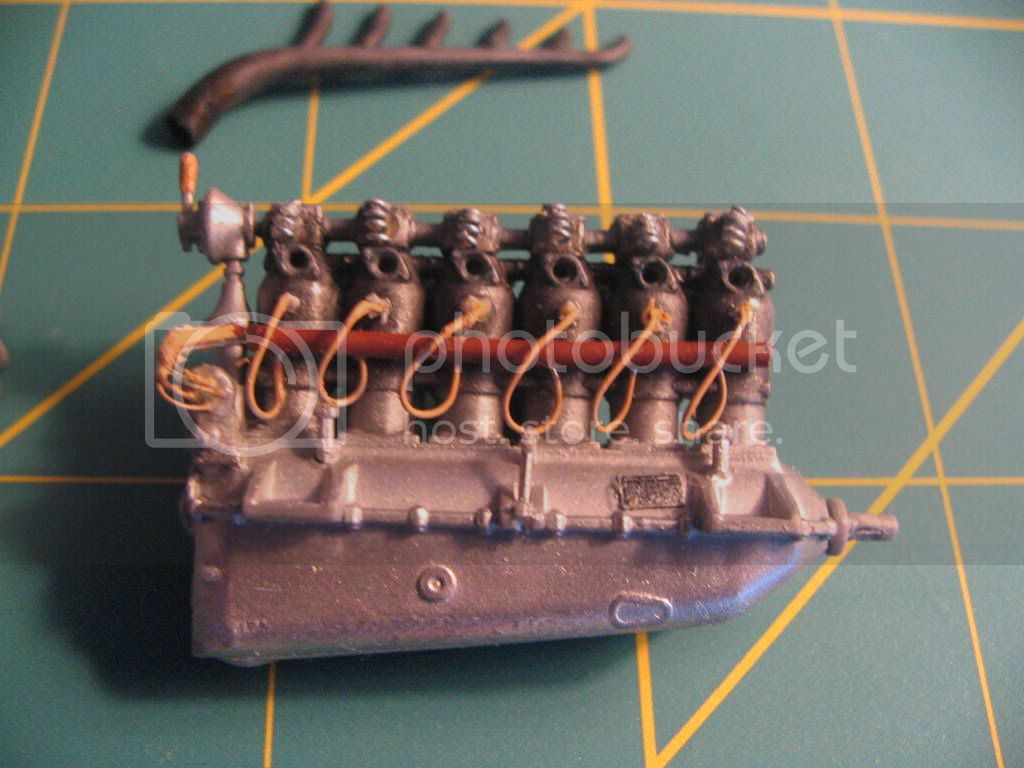
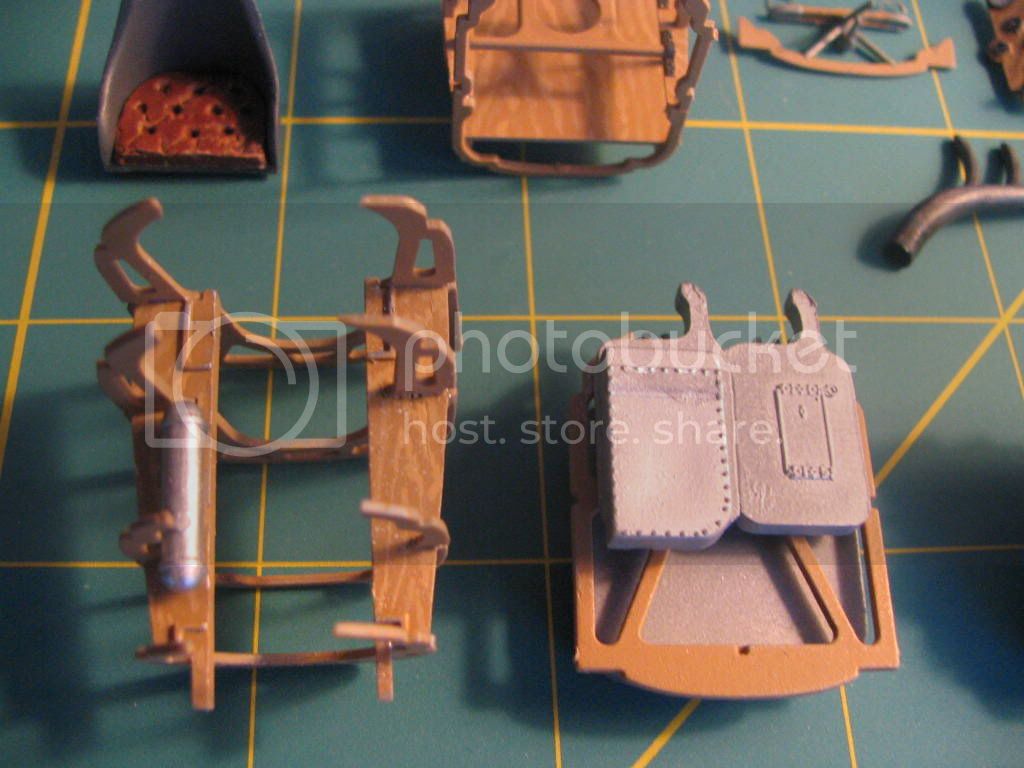
The "A" sprue containing the odds and ends parts is unchanged. The engine sprue "Z" has also remained unchanged. This is a good thing becuse the engine is a little gem. It was also used in the Pfalz D.III. The sprue with the wheels, horizontal stabilizers, and Spandaus, sprue "D" also remines unchanged. The sprue with the fuselage halves was the "B" sprue is now the "C" sprue, and has changed considerably. First, the fuselage halves themselves are different. They have updated panel lines, a squared of footstep, and engine compartment vents that are more detailed. The front deck over the engine compartment is also updated. We now have a small aero fairing over the axle, a rounded rudder and only one propeller. Other changes on this sprue are the larger wing root fairings and radiator pipes The wing sprue which was the "E" sprue, has become the "F" sprue, and now has larger radiators.

All that being said, I think we can expect this kit to build up as good as its predecessor. I hope to start on the engine soon. But I will heed the call of the links first.

Fore
thegirl
_VISITCOMMUNITY
Alberta, Canada
Joined: January 19, 2008
KitMaker: 6,743 posts
AeroScale: 6,151 posts
Posted: Saturday, October 25, 2008 - 01:05 PM UTC
I will be watching this one very close Carl . Just got the kit a few days ago along with Tom's Model Works PE set . I didn't know that Eduard has a set for this kit as well !
RAGIII
_VISITCOMMUNITY
North Carolina, United States
Joined: June 19, 2007
KitMaker: 604 posts
AeroScale: 600 posts
Posted: Monday, October 27, 2008 - 02:05 AM UTC
Welcome to the build. It should be noted that as far as I know, other than the rudder, Roden is the only company to ever incorperate all of the actual changes made to the OAW version of the Albatros DIII! Well done Roden!!
RAGIII
CaptainA
_VISITCOMMUNITY
Indiana, United States
Joined: May 14, 2007
KitMaker: 3,117 posts
AeroScale: 2,270 posts
Posted: Monday, October 27, 2008 - 09:15 AM UTC
I got a chance to do a little work this morning. I glued the engine halves and the horizontal stabilizer halves together. I also filled the ejector pin marks. I know most of them won't even show thanks to some good engineering. But it would bother me if I didn't. As for the engine. Same beautiful engine found in the other previously mentioned kits, but the molds are starting to show their age a bit. It appears there were a few small gouges in the molds that translate to a few worms on the engine. Not a big deal though. Most normal people wouldn't even bother to remove them. I have been looking at the details rather closely. Kudos and a big pat on the back to Roden on the level of detail they managed to attain on this. No pictures yet since there is no real progress. I hope to get in a few hours of modeling tomorrow. Maybe some pictures then. I will be downloading the 500+ pictures I shot in DC to clear some space on my memory card later this evening.

Terri, Specifically Speaking-
Eduard Accessories, EDU32583, 1/32 EDU32583 Albatros D.III Detail
Click Here.

Rick, if you don't have this kit yet... you might want to get one soon. I think it is better than the first one.
RAGIII
_VISITCOMMUNITY
North Carolina, United States
Joined: June 19, 2007
KitMaker: 604 posts
AeroScale: 600 posts
Posted: Tuesday, October 28, 2008 - 11:16 AM UTC

Quoted Text

I
Rick, if you don't have this kit yet... you might want to get one soon. I think it is better than the first one.


Actually I am still a 1/48th builder by choice. That being said, I am tempted to do a few more in this scale as opportunity allows. Perhaps I can score a SPAD VII for review when it becomes available
RAGIII
thegirl
_VISITCOMMUNITY
Alberta, Canada
Joined: January 19, 2008
KitMaker: 6,743 posts
AeroScale: 6,151 posts
Posted: Wednesday, October 29, 2008 - 04:21 AM UTC
Thanks for the link Carl . went and had a peek and only a few of the items are missing on the TMW set . However I will have to pick this one up the seat belts are well done , with the TMW one I have to find something sutiable to make the straps with .

Looking forward on seeing some pic's !
CaptainA
_VISITCOMMUNITY
Indiana, United States
Joined: May 14, 2007
KitMaker: 3,117 posts
AeroScale: 2,270 posts
Posted: Thursday, October 30, 2008 - 01:02 PM UTC
Fresh from my trip to DC.


JackFlash
_VISITCOMMUNITY
Colorado, United States
Joined: January 25, 2004
KitMaker: 11,669 posts
AeroScale: 11,011 posts
Posted: Thursday, October 30, 2008 - 01:29 PM UTC
An excellent BMW IIIa 185hp ! Though none were ever in the Alb. D.III (OAW).
thegirl
_VISITCOMMUNITY
Alberta, Canada
Joined: January 19, 2008
KitMaker: 6,743 posts
AeroScale: 6,151 posts
Posted: Thursday, October 30, 2008 - 04:13 PM UTC
Awesome pictures Carl ! very helpful with the ref's . How was the trip ?
CaptainA
_VISITCOMMUNITY
Indiana, United States
Joined: May 14, 2007
KitMaker: 3,117 posts
AeroScale: 2,270 posts
Posted: Friday, October 31, 2008 - 02:56 PM UTC
The trip was exhausting. The pictures are for reference use. I probably could have stuck them in a better spot. But sometimes things just land where they land.
JackFlash
_VISITCOMMUNITY
Colorado, United States
Joined: January 25, 2004
KitMaker: 11,669 posts
AeroScale: 11,011 posts
Posted: Saturday, November 01, 2008 - 01:46 AM UTC
No worries Carl! An interesting what if.. . One of the poorer Jastas getting a mis-marked engine crate and having to plant a BMW in an older Albie would indeed have been unique. Though the actual 200hp may have required the wings to be beefed up.
CaptainA
_VISITCOMMUNITY
Indiana, United States
Joined: May 14, 2007
KitMaker: 3,117 posts
AeroScale: 2,270 posts
Posted: Monday, November 10, 2008 - 08:43 AM UTC
What is the correct color for the seat?
Hatter50
_VISITCOMMUNITY
North Carolina, United States
Joined: June 17, 2006
KitMaker: 478 posts
AeroScale: 391 posts
Posted: Monday, November 10, 2008 - 08:50 AM UTC
Carl,

Your worried about the Color of the seat? I haven't seem a true blue REAL SEAT for the thing yet. Every reference has a different rendition. Do you have better references on the seat?

Regards
Steve
thegirl
_VISITCOMMUNITY
Alberta, Canada
Joined: January 19, 2008
KitMaker: 6,743 posts
AeroScale: 6,151 posts
Posted: Monday, November 10, 2008 - 08:59 AM UTC
I could be wrong , but most photo's on the subject and what ref's say . It's Black .
but it seem that every one say's something differnt about it . I know Stephen has posted a pic of this , but can recall on which thread it was on .
CaptainA
_VISITCOMMUNITY
Indiana, United States
Joined: May 14, 2007
KitMaker: 3,117 posts
AeroScale: 2,270 posts
Posted: Tuesday, November 11, 2008 - 03:48 AM UTC
I remember that post and spent about half an hour looking for it. Then I decided it would be easier to throw the question out there for comments. I was thinking black-gray, which is probably what I am going with. It seems to me the front and back are different colors though.

Here in Indiana, the golf season comes to a very abrubt end. That happened about 5:17 p.m. last Tuesday. So I have gotten a lot of building done. When the weather turns cold, the cats seem to want to help out a lot more. As a matter of fact, I am getting a lot of help typing gdhjfk bvuico this ermn even now. If the sun makes an appearance later, I will be doing some photos. There are a few things I want to get done first. The seat being one of them. picking cat hair out of the drying paint being the other. Well back to the work desk, aka cat lounge.
Hatter50
_VISITCOMMUNITY
North Carolina, United States
Joined: June 17, 2006
KitMaker: 478 posts
AeroScale: 391 posts
Posted: Tuesday, November 11, 2008 - 04:10 AM UTC
Carl,

I'm a little redfaced here........ When you said "seat color" I was thinking SE5a..........Sorry about that..........My references DO show seats in the Abbie......B&W of course....

So I have to backup and say "I dunno"!

Lost in Space Steve
JackFlash
_VISITCOMMUNITY
Colorado, United States
Joined: January 25, 2004
KitMaker: 11,669 posts
AeroScale: 11,011 posts
Posted: Tuesday, November 11, 2008 - 05:20 AM UTC
Here is a bit of fun on the subject of Alb. D.III seats. These are pics of the seat of Lt Georg Noth's green/ yellow polka-dot Albatros D.III, D796/17, brought down by Capt WM Fry and currently in storage at Museum of Flight, East Fortune, Scotland. Provided by Sandy Adam on the WWWI Modeler's Page.


CaptainA
_VISITCOMMUNITY
Indiana, United States
Joined: May 14, 2007
KitMaker: 3,117 posts
AeroScale: 2,270 posts
Posted: Tuesday, November 11, 2008 - 08:51 AM UTC
That is what I was looking for. It is real close to the color I chose, RLM 66 Schwarzgrau.
CaptainA
_VISITCOMMUNITY
Indiana, United States
Joined: May 14, 2007
KitMaker: 3,117 posts
AeroScale: 2,270 posts
Posted: Thursday, November 13, 2008 - 07:46 AM UTC
This is proof of some miniscule progress.


I hope to start putting the sub-assemblies in their place and get the fuselage glued up in the next few days. Does anybody have a profile of this aircraft? Roden did not profile the auxiliary wing between the main wheels. I am guessing it is light blue top and bottom. I also would like to know if this specific aircraft would have the two-tone propeller.

The picture brought a few things to my attention. I will be doing some touch up paining in a few spots.

The kit is going together very nicely. There is no big suprise there. I hope Roden does a D.V / D.Va real, real soon. Now that would be a pleasant suprise.
Hatter50
_VISITCOMMUNITY
North Carolina, United States
Joined: June 17, 2006
KitMaker: 478 posts
AeroScale: 391 posts
Posted: Thursday, November 13, 2008 - 08:36 AM UTC
"miniscule progress"????

It's all done but the Gluing together all the sub-assemblies.............Wish i could make some of those photos bigger, very good job. I DO like the wood......amongst other things.

And "organized too".................

Regards
Steve
MerlinV
_VISITCOMMUNITY
Victoria, Australia
Joined: November 26, 2006
KitMaker: 608 posts
AeroScale: 602 posts
Posted: Thursday, November 13, 2008 - 09:32 AM UTC
Sorry Captain A,
Going to have to stop you here!

Kindly explain for the more stupid of us around here how you managed to get the timber surfaces to look like.... Timber?

Wow!

Cheers,

Hugh
CaptainA
_VISITCOMMUNITY
Indiana, United States
Joined: May 14, 2007
KitMaker: 3,117 posts
AeroScale: 2,270 posts
Posted: Thursday, November 13, 2008 - 01:41 PM UTC
Base coat of ModelMaster Wood Enamel. Let dry for e few days while doing other things. Then I used Polly Scale Tan with a 0000 brush to make jagged lines. When dry, give it a thin coat of Tamiya clear yellow. You can also use clear yellow with a touch of clear orange to give a more aged varnish look. It always helps to look at a sheet of plywood before painting the second color to get an idea of what plywood looks like. It is a slow process, so I only did areas that will actually show.
thegirl
_VISITCOMMUNITY
Alberta, Canada
Joined: January 19, 2008
KitMaker: 6,743 posts
AeroScale: 6,151 posts
Posted: Thursday, November 13, 2008 - 05:01 PM UTC
Hey Carl , that is the best wood grain I have ever seen . Fantastic job done on that .

Would this side profile help ?

67foxtrot
_VISITCOMMUNITY
United States
Joined: February 13, 2008
KitMaker: 36 posts
AeroScale: 35 posts
Posted: Friday, November 14, 2008 - 07:32 AM UTC
Carl,

I am a relatively new member of this forum, but I have been collecting information, books, etc. on the Albatros D.I - D.Va to detail out a flying R/C model of one. When I was much, much younger, my life revolved around building plastic model kits - aircraft, tanks, cars, you name it. I love watching the beautiful builds on this forum, you guys give me much needed ideas and inspiration.

It appears that many of the D.III did not have the "Wing" treatment on the landing gear axle. I don't know if they came from the factory like that or if they were removed in the field.

Specifically, my references on this are from the two books "Albatros Aces of World War 1" by Greg VanWyngarden and part 2 by Norman Franks . Also from "Albatros Fighters a Windsock Datafile Special" Collector's Edition by Brian Knight. There are many photos showing no axle wings and in the back of the "Aces" book the 5 view of the DIII shows no axel wing as well. The 5 View of the D.III in the Windsock article also shows no "Wing" on the axle.

I do not remember any specific reference to the particular plane that you are building though.

I hope this helps. At least it can show you a new direction to research.

Dave

67foxtrot
_VISITCOMMUNITY
United States
Joined: February 13, 2008
KitMaker: 36 posts
AeroScale: 35 posts
Posted: Friday, November 14, 2008 - 07:37 AM UTC
terri werner,

That is a great page of color illustrations of the Albatrii! I can see that it is from an Albatros publication. But could you please tell us which one it is from?

Thanks,
Dave
 _GOTOTOP