

Just a few notes to begin this thread. I am pleased to be chosen to do a second build, and as always will do my best to point out any potential problems involved in the build, as well as positive comments when things go right!
First impressions are great! The parts are relatively crisp in their molding, with flash appearing mostly in non critical areas. A few sink marks are evident but nothing that will require much work. My criteria of a model conpany making progress is that each kit shows a little improvement. Looking at the parts on the sprue. I believe this to be the best 1/32nd mold yet by Roden. The details seem to be correct and several options are included.
One very small item that Roden HAS included shows me that they listen to the modelers! For the first time BASIC instrument dials are included on the decal sheet. Not much one might say, but to me an indicator that Roden is doing its best to include what we ask for. More to come later,
RAGIII
Early Aviation
Discuss World War I and the early years of aviation thru 1934.
Discuss World War I and the early years of aviation thru 1934.
Hosted by Jim Starkweather
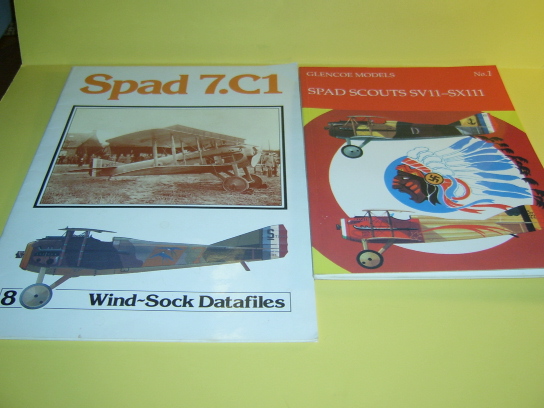
1:32 Roden GB 2008 Spad VII

RAGIII

Joined: June 19, 2007
KitMaker: 604 posts
AeroScale: 600 posts
Posted: Sunday, November 16, 2008 - 10:24 AM UTC

CaptainA
Joined: May 14, 2007
KitMaker: 3,117 posts
AeroScale: 2,270 posts
Posted: Sunday, November 16, 2008 - 11:05 AM UTC
I will be checking my LHS in the morning for this one. I think we all are looking forward to another one of your fine builds.
Time to stock up for that 5 color cammo.
Time to stock up for that 5 color cammo.


JackFlash
Joined: January 25, 2004
KitMaker: 11,669 posts
AeroScale: 11,011 posts
Posted: Sunday, November 16, 2008 - 03:19 PM UTC
Here is a bit of fun for those of you just tuning in. One of the few things I wish they had done was not represent the strut bindings. They would be much more in scale using decal strips.
Click here.
Click here.

Repainted

Joined: April 04, 2006
KitMaker: 1,058 posts
AeroScale: 1,004 posts
Posted: Monday, November 17, 2008 - 06:21 AM UTC
RAGIII´s right
This is the best so far. Roden has tried to give the model some locatior pins and connection holes on this one. They almost have this one working. So if the next one will have the same improvment...............If you only will buy one kit, get this one...
Larsa Q
This is the best so far. Roden has tried to give the model some locatior pins and connection holes on this one. They almost have this one working. So if the next one will have the same improvment...............If you only will buy one kit, get this one...
Larsa Q
RAGIII
Joined: June 19, 2007
KitMaker: 604 posts
AeroScale: 600 posts
Posted: Wednesday, November 19, 2008 - 04:03 PM UTC
Here is my look at the kit I will be building. I am posting some close up detail shots of certain parts to show what Roden has offered in the way of detail. For overall Sprue shots see Stephen Lawsons review. I have also posted the references I will be using for my build. In addition "MY" kit instructions conveinently came with hand written notes by Stephen Lawson. Quite a benefit for me


More to come!
More to come!
RAGIII
Joined: June 19, 2007
KitMaker: 604 posts
AeroScale: 600 posts
Posted: Wednesday, November 19, 2008 - 04:17 PM UTC


And a few more to come
RAGIII
Joined: June 19, 2007
KitMaker: 604 posts
AeroScale: 600 posts
Posted: Wednesday, November 19, 2008 - 04:23 PM UTC
...and finally..........


Thats all for now. I think the photos clearly show the quality of the details. We shall see if the kit goes together as great as it looks!
RAGIII
Thats all for now. I think the photos clearly show the quality of the details. We shall see if the kit goes together as great as it looks!
RAGIII

MerlinV

Joined: November 26, 2006
KitMaker: 608 posts
AeroScale: 602 posts

Posted: Wednesday, November 19, 2008 - 07:16 PM UTC
Hey Rick,
The plastic looks real nice. I can't wait to see how it goes together.
Cheers,
Hugh
The plastic looks real nice. I can't wait to see how it goes together.
Cheers,
Hugh
CaptainA
Joined: May 14, 2007
KitMaker: 3,117 posts
AeroScale: 2,270 posts
Posted: Thursday, November 20, 2008 - 07:46 AM UTC
If I was a working type person, I would probably take a few days off to work on it. But that explains why I am not a working person anymore. I did get one of these reserved at my LHS.
RAGIII
Joined: June 19, 2007
KitMaker: 604 posts
AeroScale: 600 posts
Posted: Friday, November 21, 2008 - 11:40 AM UTC
Quoted Text
If I was a working type person, I would probably take a few days off to work on it. But that explains why I am not a working person anymore. I did get one of these reserved at my LHS.
I am a working type person...... however I work for the WORLDS LARGEST RETAILER! That being said Not many days off this time of year in management

I have continued to look at the kit parts. I failed to mention all of the parts pictured on the instructions that have been gated out. We can look forward to several releases with different markings as indicated by the parts not included. Mid production, late production, DeMarcay etc. I would expect British, US, Russian etc. to be covered. The nice thing is that Roden isn't planning on just changing the markings!
I have also been looking ahead to the rigging. The inner struts( ties for rigging, are very "Scale". I am at a loss as to how to rig the double lines,(most often wrapped) through these parts. Any suggestions are welcomed! Thats all for now,
RAGIII

thegirl

Joined: January 19, 2008
KitMaker: 6,743 posts
AeroScale: 6,151 posts
Posted: Friday, November 21, 2008 - 02:00 PM UTC
I'm looking forward to this build Rick , the windsocks are a must ! As for the double rigging lines I have never had to do them before , but Stephen has a neat way of doing them on his SE5a build in 48 scale . Would be nice to refresh our memories on his method . ( Hello Stephen you there ! ) I do like his method it's simple , easy to do . He would most defenently be the best person to ask on this .
JackFlash
Joined: January 25, 2004
KitMaker: 11,669 posts
AeroScale: 11,011 posts
Posted: Tuesday, November 25, 2008 - 10:34 AM UTC
Unh uhhh Yes . . . I simply glue two turnbuckles together. Busy, busy folks. Must get back to the D.VI. I must get it done and spend time on finishing the Se 5a. Several items on the desk pending review. Need to order more display boxes.
The turnbuckle trick is in the 1/48 Roden SE 5a build notes thread.
The turnbuckle trick is in the 1/48 Roden SE 5a build notes thread.
CaptainA
Joined: May 14, 2007
KitMaker: 3,117 posts
AeroScale: 2,270 posts
Posted: Wednesday, December 03, 2008 - 12:02 PM UTC
I picked mie up today. It was the last one at my LHS, who was supposed to put one away for me, but didn't. So what I got was the one that was opened, and appropriately fondled. BTW it is still in my trunk (boot, for our cousins across the pond)
So Rick, which decal option?
So Rick, which decal option?
RAGIII
Joined: June 19, 2007
KitMaker: 604 posts
AeroScale: 600 posts
Posted: Thursday, December 04, 2008 - 10:35 AM UTC
Quoted Text
I So Rick, which decal option?
As I said earlier, since we are limited to the markings in the kit ,it will probably be Guynemers'#2. This is the first SPAD SVII to be equipped with the 180 hp geared Hisso engine, S254.
All things being equal, I would probably make my own Lafayette Escadrille indian head( the early so called Seminole) and butterfly and do S156, if the rules had allowed. Pretty much the same scheme anyway just different squadron and personal markings. I am still trying to study any external changes that may be necessary for the 180 geared engine. The engine will be cowled on this one!
RAGIII

Rob_Owens
Joined: December 05, 2008
KitMaker: 40 posts
AeroScale: 4 posts
Posted: Friday, December 05, 2008 - 03:17 AM UTC
I was sort of disappointed that Roden didn't include all the props & side covers shown in the instructions (though I understand their reasoning: sell more kits). Since I'm a fan of the unusual, I'm thinking my first build might have to be a Red Russian kite on skis, or perhaps a fictional IJAAF "roleur"( trainer w/ bottom wings removed). Another great reference is the Aviatik (Polish) volume on the Spad VII.
thegirl
Joined: January 19, 2008
KitMaker: 6,743 posts
AeroScale: 6,151 posts
Posted: Tuesday, December 23, 2008 - 01:50 AM UTC
Hey Rick any progress on this one so far ?
Repainted
Joined: April 04, 2006
KitMaker: 1,058 posts
AeroScale: 1,004 posts
Posted: Tuesday, December 23, 2008 - 06:37 AM UTC
Quoted Text
Hey Rick any progress on this one so far ?
I´m waiting too over here. Would it be me that sending the first photos?????

I haven´t started yet on this one
Larsa Q
RAGIII
Joined: June 19, 2007
KitMaker: 604 posts
AeroScale: 600 posts
Posted: Tuesday, December 23, 2008 - 02:37 PM UTC
Quoted Text
Quoted TextHey Rick any progress on this one so far ?
I´m waiting too over here. Would it be me that sending the first photos?????
I haven´t started yet on this one
Larsa Q
LOL! Yes you may just be the first to post! I think I mentioned in another thread that I work for A VERY LARGE discount retailer. Christmas leaves me little time to myself. Beginning in a week or so I will focus on finishing up the two reviews I am working on for Internet Modeler, and yes the SPAD will go into full gear. I have cut the major components off of the sprues and done some clean up. Not worth photographing the progress so far.
RAGIII
Removed by original poster on 12/27/08 - 15:15:15 (GMT).
Repainted
Joined: April 04, 2006
KitMaker: 1,058 posts
AeroScale: 1,004 posts
Posted: Sunday, December 28, 2008 - 11:31 PM UTC
Quoted Text
Quoted TextQuoted TextHey Rick any progress on this one so far ?
I´m waiting too over here. Would it be me that sending the first photos?????
I haven´t started yet on this one
Larsa Q
LOL! Yes you may just be the first to post! I think I mentioned in another thread that I work for A VERY LARGE discount retailer. Christmas leaves me little time to myself. Beginning in a week or so I will focus on finishing up the two reviews I am working on for Internet Modeler, and yes the SPAD will go into full gear. I have cut the major components off of the sprues and done some clean up. Not worth photographing the progress so far.
RAGIII
My Spad have to wait for Staaken to be build
so you have all the time my friend.Larsa
RAGIII
Joined: June 19, 2007
KitMaker: 604 posts
AeroScale: 600 posts
Posted: Saturday, January 03, 2009 - 11:53 AM UTC
Finally a real progress report. I have assembled the basic engine, and part of the interior prior to painting. I will take pictures soon.
RAGIII
RAGIII
thegirl
Joined: January 19, 2008
KitMaker: 6,743 posts
AeroScale: 6,151 posts
Posted: Saturday, January 03, 2009 - 03:27 PM UTC
This I'm looking forward to Rick . Heard so much talk about this kit , would like to know how it all fits together . 
Repainted
Joined: April 04, 2006
KitMaker: 1,058 posts
AeroScale: 1,004 posts
Posted: Wednesday, January 07, 2009 - 01:57 AM UTC
RAGIII
I have just airbrushed the first coats off primer to all sprues here. The primer is just to make easyer to see flash and mouldlines. So my kit is on the bench
 Larsa Q
I have just airbrushed the first coats off primer to all sprues here. The primer is just to make easyer to see flash and mouldlines. So my kit is on the bench
Larsa Qthegirl
Joined: January 19, 2008
KitMaker: 6,743 posts
AeroScale: 6,151 posts
Posted: Friday, January 23, 2009 - 02:08 PM UTC
So Rick , where are thoughs Picyures ? We are all waiting here , or trying too !
RAGIII
Joined: June 19, 2007
KitMaker: 604 posts
AeroScale: 600 posts
Posted: Friday, January 23, 2009 - 03:03 PM UTC
Quoted Text
So Rick , where are thoughs Picyures ? We are all waiting here , or trying too !
Terri,
Let me answer by saying the repair work is almost done

While assembling the engine bearers parts 3E and 4e, fire wall part 47a, seat part 6A etc. I thought things were going fine. I then painted the wood and aluminum parts and was ready to shoot the pics. While dry fitting I discovered that the tight fit ( read as widen the slots on this part), of the firewall over the bearers distorted the fit of the assembly to the fuselage sides and wings. Ok no reason to panic, Just a little brake fluid to dissolve the glue joints and reassemble. I rushed the process a little and the bearers were in three pieces,with one bearer severely bent, the pan?part number 5A,) in two, and the whole assembly needed to be repaired. The only fault I can attribute to the kit is the need to file out and widen the slots in the firewall. I would also suggest that one build this assembly on the lower wing lining things up as you go.( Do not glue this to the lower wing at this time, just use he slots in the lower wing as an alignment guide for the bearers.) Dry fitting has also shown that there may be a fit problem with the upper cowl panels parts 3A and 4A. More on this later.Finally I am on the right track again and I hope to post those promised pics soon!
RAGIII]
 |

WEB HOSTING BY


Copyright ©2021 AeroScale and Kitmaker Network, a subsidiary of Silver Star Enterprises
All Rights Reserved. Please read our Conditions of Use and Privacy Policy.
All Rights Reserved. Please read our Conditions of Use and Privacy Policy.