_GOTOBOTTOM
Early Aviation
Discuss World War I and the early years of aviation thru 1934.
WNW GB 2009 - 10 SE5a Keith
Kornbeef
_VISITCOMMUNITY
England - South East, United Kingdom
Joined: November 06, 2005
KitMaker: 1,667 posts
AeroScale: 1,551 posts
Posted: Sunday, April 26, 2009 - 08:11 AM UTC
Predictably, I had to open the box/es but thats another story .

Once inside how can you resist it, me want's the precious.......mine...it's mine.

So giving in to temptation after drooling over the ribdetail and the engine bolts......the snips came out to do a few testfits...*coughs* in the interet of science as they say.

once cleaned up I had most the components dryfitted easily, tight friction fit is the order of the day, excellent!

so in this pic the U?C is just snapfitted together, it lines up perfectly into well made slots in the fuselage........so excited I glued it together with glee......mistake 1 wrong U/g legs so all the marking options are null for me. Anyhoo I just got to make up the number and I have 1 or 2 options.


I have to say the kit slips together very nicely.....I'm detailing but not going crazy on this....there is parts that are simplified and not quite right but they are hardly noticable. th cockpit floot is simplified for construction but once the kit is together only a real rivet/stitch counter would notice.

I have got a lot further than this....but poor light means no pics tonight.

Comments welcome as always

Keith
Merlin
Staff MemberSenior Editor
AEROSCALE
#017
_VISITCOMMUNITY
United Kingdom
Joined: June 11, 2003
KitMaker: 17,582 posts
AeroScale: 12,795 posts
Posted: Sunday, April 26, 2009 - 09:33 AM UTC
Great stuff Keith!

I'll be pestering you to get this onto the Frontpage when it's finished!

All the best

Rowan
JackFlash
_VISITCOMMUNITY
Colorado, United States
Joined: January 25, 2004
KitMaker: 11,669 posts
AeroScale: 11,011 posts
Posted: Sunday, April 26, 2009 - 02:14 PM UTC
Hurry up precious! We must see it all. All of it we must sees. . .
Kornbeef
_VISITCOMMUNITY
England - South East, United Kingdom
Joined: November 06, 2005
KitMaker: 1,667 posts
AeroScale: 1,551 posts
Posted: Monday, April 27, 2009 - 01:35 PM UTC
well got some way so far....interior is painted (structural) just debating how much to detail the cockpit seeing as you really can't see too much in there but I have the PofP etch set for a Roden viper SE5a I was building behind the scenes. Temptation...wicked.

Anyhow hopefully some pics soon....the inspection windows in the wings work quite well

K is itching to paint the wings but thats a long ways off yet.


JackFlash
_VISITCOMMUNITY
Colorado, United States
Joined: January 25, 2004
KitMaker: 11,669 posts
AeroScale: 11,011 posts
Posted: Tuesday, April 28, 2009 - 08:23 AM UTC

Quoted Text

well got some way so far....interior is painted (structural) just debating how much to detail the cockpit seeing as you really can't see too much in there but I have the PofP etch set for a Roden viper SE5a I was building behind the scenes. Temptation...wicked.

Anyhow hopefully some pics soon....the inspection windows in the wings work quite well

K is itching to paint the wings but thats a long ways off yet.


Well precious it might be tasty to see your comparisons side by side. It would! Roden and WNW.
Kornbeef
_VISITCOMMUNITY
England - South East, United Kingdom
Joined: November 06, 2005
KitMaker: 1,667 posts
AeroScale: 1,551 posts
Posted: Tuesday, April 28, 2009 - 07:18 PM UTC

Quoted Text

Well precious it might be tasty to see your comparisons side by side. It would! Roden and WNW.


It might well......but will have to wait till the weekend cometh and the Taskmistress allows her minion his extra free time......
thegirl
_VISITCOMMUNITY
Alberta, Canada
Joined: January 19, 2008
KitMaker: 6,743 posts
AeroScale: 6,151 posts
Posted: Tuesday, April 28, 2009 - 07:26 PM UTC
See what happens when you don't get your chores done on time !
Looking forward to seeing the parts with some paint on them , you know ....those small jars with different liquid inside them !
Kornbeef
_VISITCOMMUNITY
England - South East, United Kingdom
Joined: November 06, 2005
KitMaker: 1,667 posts
AeroScale: 1,551 posts
Posted: Wednesday, April 29, 2009 - 07:52 AM UTC
Paint...yes soon soon....long weekend coming

Well Stephen asked for a few comparison shots.....between my Wingnut & Roden kit....of course
Andso here is a few. I'm not knocking at either companies...both have plusses and both minuses. I will give my conclusion at the end. I'm not rivet/stich counting either....I will when I dig deeper seeing some of the anomilities.

starting at the front...

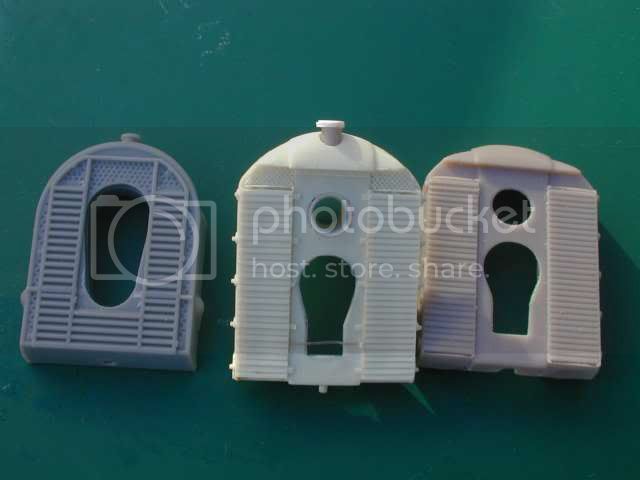
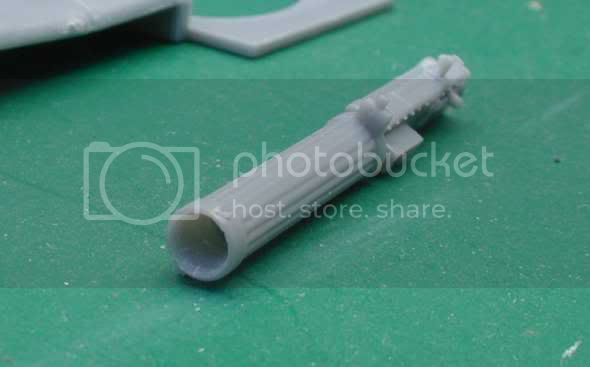
three offerings of radiator front grills, Wingnut...Mastercaster...Roden. The roden is very basic...the Wingnuts better bur not brilliant, Mastercasters Resin Viper replacement is much finer but even that could be inproved (it fits the WNW kit BTW...could end up modding mine yet)


The motor....here WNW shows some finer detail but on some of the ancillaries Roden actually beats it for detail. Now basically I'm presuming from my limited info that the viper was copied from the hisso so there is some big differences in the shape and size of the engines....the Roden cylinder bank is a good 3mm longer though the block from tail to front is the same....front of Roden casing to front of WNW gear housing. Correspondingly the fuselage is 3mm longer too, now isnt that strange?


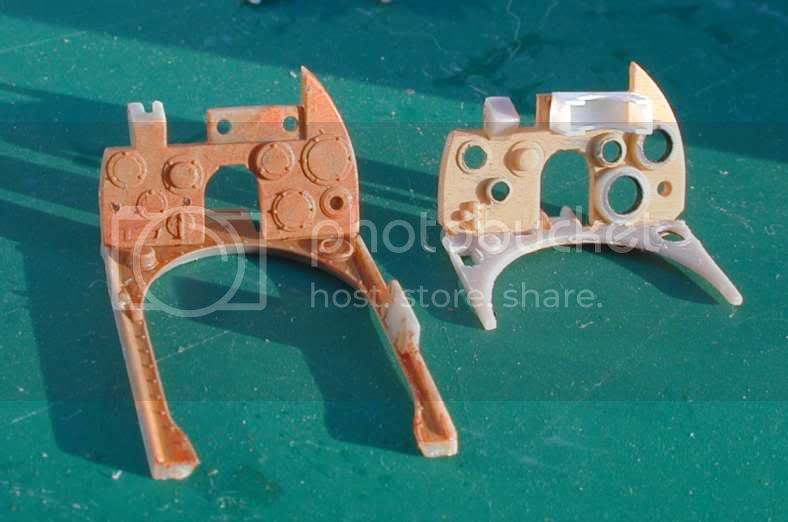
Dash.... now here I am oddly divided....the thin coaming? around the pilots seat is much better represented in the WNW but the actual dash.....I think Roden steal...mine here has had extensive work thinning and drilling out all the instruments. For such a focal point in any A/C kit, WNW might have done a little more to show the valves and pipework, it was rather old style relief before I shaved it off.


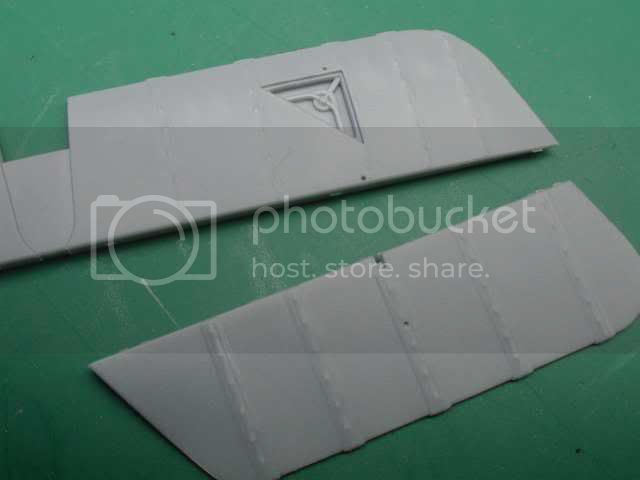
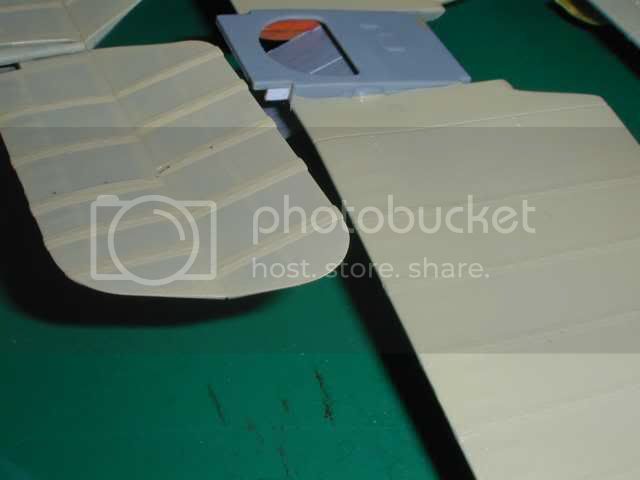
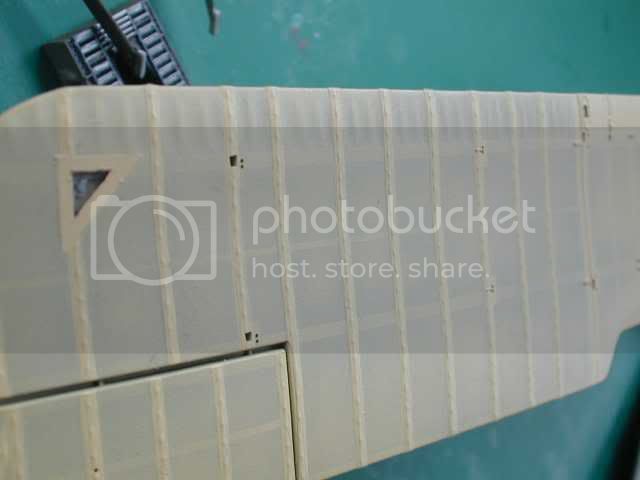
Wings...now this is where WNW have completely stole the show.........there is some differences in detail though see the rigging/control wire point on the lower wing for instance.
Now.....a lot of the detail, wing joints, mounting bolts etc I have added myselfto Roden's wings and theres a few little details even WNW missed I have to add to theirs.
Rodens wings sizes are different to WNWs slightly, wider chordwise by a smidgin and the upper is wider spanwise than WNWs but the lower is narrower by a mil or so. Again I have no idea which is closer to true.


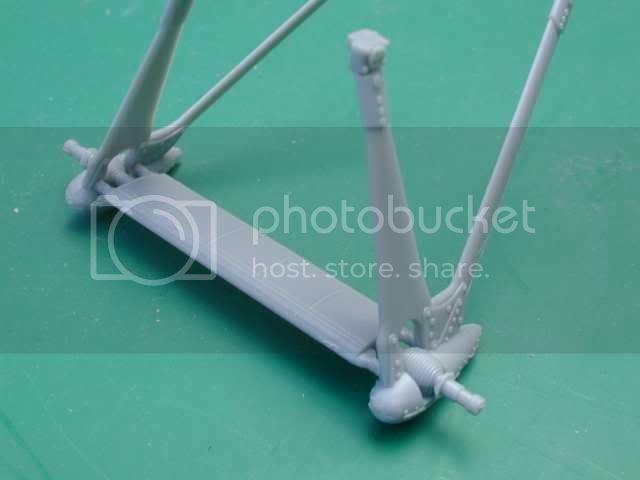
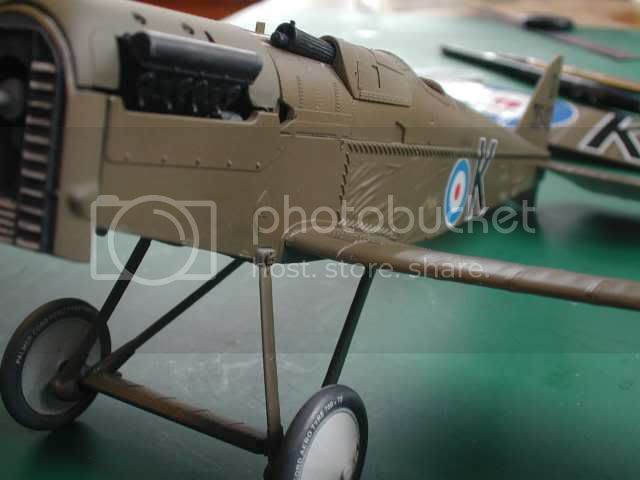
wheels and U/C.... here the difference is outstanding....detail wise and shape varies greatly
Wheels, Roden's on the right are a good 2.5mm larger.....Mastercasters in the centre match the WNW wheels pretty closely so I can only assume Rodens are OS but maybe there was variations...


well here the detail difference is just.....no comparison...the tails match up pretty spot on dimensionally but.....theres a noticeable difference in the angle of the inner edge of the elevators Rodensteeper leaving a wider gap than WNWs though both look right fitted to their relevant fuselages.

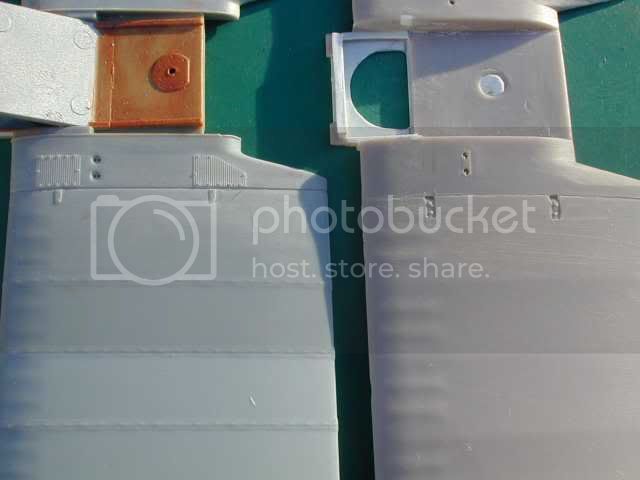
Well I did take other shots...but light, shakes etc make them unusable. but cowlings coaming etc all have much better refined detail on WNWs offering, the exhausts however...the fronts are beautiful but the tails are quite poor to my eye. And little things like the control column seem better on Rodens but point for point without checking for accuracy...WNW looks much finer, and builds easily into a nice finished kit OOB

My tuppence worth

Keith.

Kornbeef
_VISITCOMMUNITY
England - South East, United Kingdom
Joined: November 06, 2005
KitMaker: 1,667 posts
AeroScale: 1,551 posts
Posted: Sunday, May 03, 2009 - 03:03 PM UTC
working on this alongside the LVG.... poor Albi is pushed to the back of the hangar for now.....hope to god the DVa amd DVII arent released before she is finished..

Anyhow, back to the SE.....I found a new profile for her... A/C S for sugar of 40Sqn.....cant find a shot of the radiator grill so will have to hope I have the right one.....wanted to do K for kilo off the instructions but built the wrong undercarriage up when tired...excuses :-P

Hope to post spics tomorrow
Kornbeef
_VISITCOMMUNITY
England - South East, United Kingdom
Joined: November 06, 2005
KitMaker: 1,667 posts
AeroScale: 1,551 posts
Posted: Monday, May 04, 2009 - 06:34 AM UTC
well I have to admit, not getting so far as I wanted with this, spent most the weekend applying lower wing loz and wood finish to the LVG instead but got some work done.

I have the fuselage together but a lot of the internals still to fit the U/c s built and slots perfectly into place.


went ahead to try preshading to work out the effect.... used the tail as a guimea pig as it would require least work to strip back
painted it in Humbrol103 then after it dried sealed it with Klear.....masked the ribbing then the spars and framework, oversprayed the preshading in Humbrol 111 (I didnt want to use a plain greyand this left a greenish hue) as I sprayed coats of 111 I stripped away various parts of the masking to eventually leave the ribtapes. once that was dry I oversprayed it in 103 again till I got the desired effect.....as seen in the pics of the restored SE5a

Now I have to consider the upper wing too...through coats of PC10 would it show,other than to bring out the ribtapes and structure?


cheers keith
guitarlute101
_VISITCOMMUNITY
West Virginia, United States
Joined: December 18, 2006
KitMaker: 1,121 posts
AeroScale: 1,063 posts
Posted: Monday, May 04, 2009 - 07:53 AM UTC


Keith,

Looking good so far, I see you chose the wrinkled fabric fuselage. I'll use that option when i build mine too. I wonder why they didn't carry the wrinkles over into the inside of the fuselage?

Looking forward to see how your preshade turns out.

Mark
JimMrr
_VISITCOMMUNITY
Ontario, Canada
Joined: January 03, 2007
KitMaker: 1,505 posts
AeroScale: 595 posts
Posted: Tuesday, May 05, 2009 - 04:35 AM UTC
Ill be building this kit for a well-heeled client, so I am DEFINITELY watching with extreme interest....
thegirl
_VISITCOMMUNITY
Alberta, Canada
Joined: January 19, 2008
KitMaker: 6,743 posts
AeroScale: 6,151 posts
Posted: Tuesday, May 05, 2009 - 07:11 AM UTC
Nice effect on the per-shading there Keith , not to overly done . looking forward to more of this build .
Kornbeef
_VISITCOMMUNITY
England - South East, United Kingdom
Joined: November 06, 2005
KitMaker: 1,667 posts
AeroScale: 1,551 posts
Posted: Tuesday, May 05, 2009 - 07:40 AM UTC

Quoted Text

Ill be building this kit for a well-heeled client, so I am DEFINITELY watching with extreme interest....


What level of detail Jim?...OOB is pretty nice but if I do another I'll scratch a lot of the interior I think, floor is simpified and double skinned but what you see through the opening looks good as is.

Terri, Hi....thought you had the hump and was boycotting the 1/32 build....*joking* Thanks....got so much to do masking up the main wings.
Kornbeef
_VISITCOMMUNITY
England - South East, United Kingdom
Joined: November 06, 2005
KitMaker: 1,667 posts
AeroScale: 1,551 posts
Posted: Tuesday, May 05, 2009 - 08:52 AM UTC
just found I made a major Faux wotsit......somehow....working when tired...I fixed the floor/rear cockpit bulkhead in wrong...after several dryfits somehow. You can see in the pic above how it sits back behind the location peg...that alone should have warned me...and the instruction sheet pic...well lesson learned? No prolly not

Had to break the spine and dig it out odd how cement stick hardest in the most awkward places. Anyway its fixed and drying.
JimMrr
_VISITCOMMUNITY
Ontario, Canada
Joined: January 03, 2007
KitMaker: 1,505 posts
AeroScale: 595 posts
Posted: Tuesday, May 05, 2009 - 08:55 AM UTC
Cest un Faux pas ,mon amis..cest D'homage......Hes a Lawyer and old,like me ..so Im thinking hell want OOB,but Im sure if I do a wee "tweak" in the cockpit itll please him ...he may not see it ,but Itll please him As long as it has Billy Bishops markings and a nice finish, hell be happy
Kornbeef
_VISITCOMMUNITY
England - South East, United Kingdom
Joined: November 06, 2005
KitMaker: 1,667 posts
AeroScale: 1,551 posts
Posted: Tuesday, May 05, 2009 - 09:21 AM UTC
I'm not sure its the right type for Bishop...I know he had a SE5 but dont know if he progressed to a 5a ans whether it was a Hisso or Wolsey Viper if he did. The kit really doesnt need a tinker in the cockpit to be honest either, just some of us can't resist.

If you need to mod it to a viper, Mastercaster do a resin rad gril....a couple of other tweaks like rebuilding the front of the engine to lose the gearbox (Easy) and cut those small cutouts in the sidewalls and such and she would pass layman's inspection I think
thegirl
_VISITCOMMUNITY
Alberta, Canada
Joined: January 19, 2008
KitMaker: 6,743 posts
AeroScale: 6,151 posts
Posted: Tuesday, May 05, 2009 - 07:43 PM UTC
Boycotting !!!! now would I go out and really do that ? Really now keith

At least you caught the miss hap now and not when everything was done .
Repainted
_VISITCOMMUNITY
Östergötland, Sweden
Joined: April 04, 2006
KitMaker: 1,058 posts
AeroScale: 1,004 posts
Posted: Wednesday, May 06, 2009 - 03:33 AM UTC
Just love those wrinkles in the canvasside, perfect.Nice to see you compare parts from Roden with these, Model on

Larsa Q
Kornbeef
_VISITCOMMUNITY
England - South East, United Kingdom
Joined: November 06, 2005
KitMaker: 1,667 posts
AeroScale: 1,551 posts
Posted: Sunday, May 10, 2009 - 06:01 AM UTC
I got quite someway, the fuselage is buttoned up, the U/S of the wings is preshaded and coated, the tops in a first coat of PC10 ish......

fuselage has a basecoat on but needs a little tidyup

Hope to post progress pics tomorrow

CaptainA
_VISITCOMMUNITY
Indiana, United States
Joined: May 14, 2007
KitMaker: 3,117 posts
AeroScale: 2,270 posts
Posted: Sunday, May 10, 2009 - 11:14 AM UTC
I do agree the wrinkled effect looks good. Your build is coming along nicely.
Kornbeef
_VISITCOMMUNITY
England - South East, United Kingdom
Joined: November 06, 2005
KitMaker: 1,667 posts
AeroScale: 1,551 posts
Posted: Sunday, May 10, 2009 - 07:13 PM UTC
I know some said the wrinkles look overdone but with a coat of paint they look just right.... to my eye at least.
thegirl
_VISITCOMMUNITY
Alberta, Canada
Joined: January 19, 2008
KitMaker: 6,743 posts
AeroScale: 6,151 posts
Posted: Monday, May 11, 2009 - 07:40 AM UTC
Looking forward to those pic's Keith !
Kornbeef
_VISITCOMMUNITY
England - South East, United Kingdom
Joined: November 06, 2005
KitMaker: 1,667 posts
AeroScale: 1,551 posts
Posted: Monday, May 11, 2009 - 08:40 PM UTC
has antiquated digicam...batteries went flat.....LOL

One thing though that I was sadly dissappointed is the decal sheet seems overscale to the kit... roundels and the squadron zigzag flashes are substantially bigger than those in photos of the A/C!!!!!.... I tried the Roden roundels.... eep!

Keith
Kornbeef
_VISITCOMMUNITY
England - South East, United Kingdom
Joined: November 06, 2005
KitMaker: 1,667 posts
AeroScale: 1,551 posts
Posted: Tuesday, May 12, 2009 - 01:45 AM UTC
okay, progress pics so far.


As I stated above, I think the decals may be too big....the squadron markings I removed, deciding to paint them on by hand....the ref pic shows them stopping under thelacing...wingnuts profile shows it covering the lacing but the decal was a good 2-3 cm over and no easy way to chop it succesfully. The roundel was equally oversized, I tried the Roden one lat night, better size but a much darker blue and worse they just self destucted so easily and silvered like a silversmith... So... desperation drove me into the loft seeking th e fabled box of decals dating back to.....mid 20th century. Of course I couldnt find it but did find a half built abandoned 1/48th pup and the roundels were an acceptable match. YAY!


U/c and rad grill........partly painted in both cases, Yes I cut the wrong U/C legs away and remade with the correct...the wheel discs I thinned the opening some replacing the moulded spokes with thin rod and added valves...all to be weathered in.

inally, to me this seems odd...no doubt Wingnuts know whats what but the under engine panel seems really strange, the slots full size and not evenly spaced or sized.... all ref to the A?c I am building shows a standard eigh tslot arrangement. So I am thinking to trace the Pof P etch one for the roden kit onto thin Plasticard and reworking it to suit.


hard to see but I opened out the front and replaced the lewis gun barrel and cocking lever with brass tube. the vickers I cut the flash suppressor off, drilled the jacket out and used the kits PE front. the Flash suppressor I drilled out and slipped onto a length of rod before CAing it back in place....detailing still to do before graphiting them up.


the wings....long but very rewarding effort masking up ribtapes and structure, a step in my mind well worth the effort involved though, the upper wing surfaces I havent preshaded....most pics show quite a dense opaque finish and I have yet to work out how to bring out the detail and tone in the brightness of the decals.

So the only real sore point to my eye is the decals...even the wing ones seem big though I think they can be carried by the kit okay. Funny thing I am having probs with the LVG too but because the markings were too small... Ho Hum

regards, comments always welcome......

Keith


 _GOTOTOP