_GOTOBOTTOM
World War II
Discuss WWII and the era directly before and after the war from 1935-1949.
Hosted by Rowan Baylis
Airfix Tiger Moth 1/72
robot_
_VISITCOMMUNITY
United Kingdom
Joined: March 08, 2009
KitMaker: 719 posts
AeroScale: 691 posts
Posted: Saturday, August 15, 2009 - 11:51 AM UTC
I made an impulse buy in a toy shop on a lunch break last week- Airfix's 1/72 Tiger Moth. It is an old (very old) kit, and you don't get much for your money. I think it is quite poor value, when compared with their newer kits (like their Mk.XIX Spitfire for 50% more).

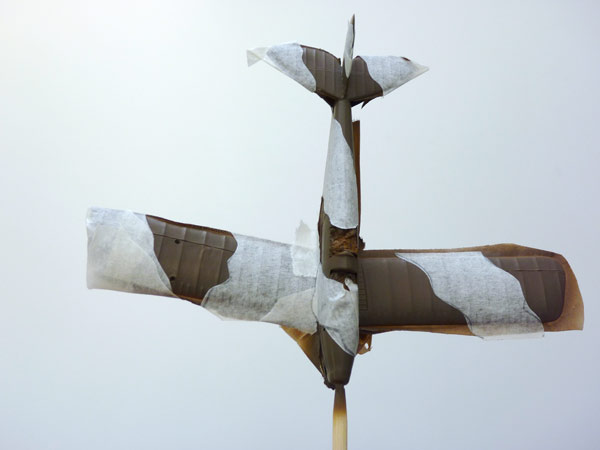
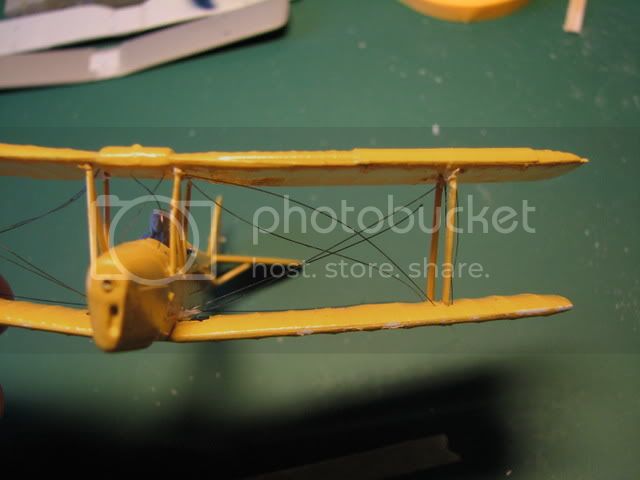
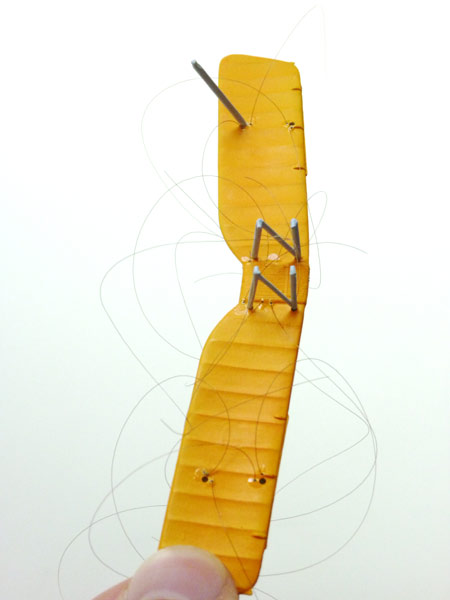
I plan to use it as practice for airbrushing camouflage (before I do the PDU scheme on my 1/72 Hudson that has been in progress for months and months), and as practice for rigging. I didn't really realise how small the aircraft was- I am now having second thoughts on the rigging!

I hope to complete it over one weekend.


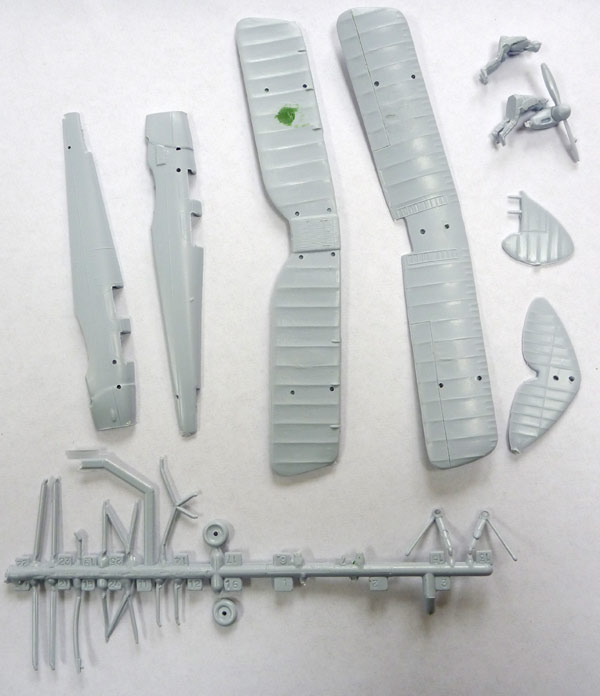
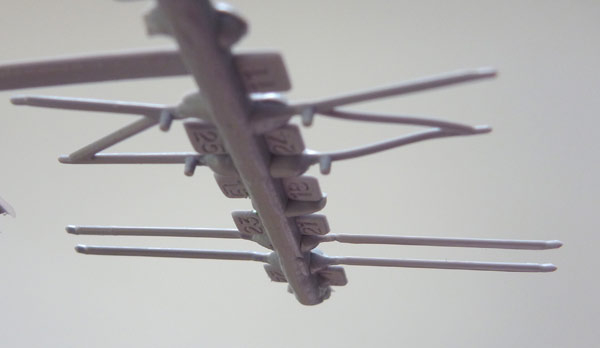
What I got for £3.90.


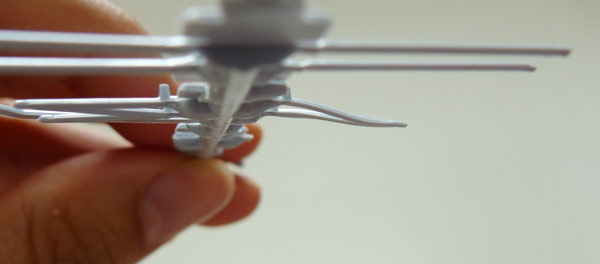
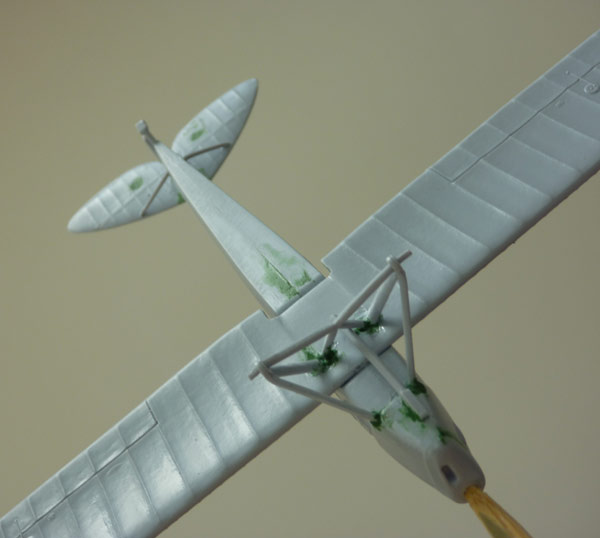
One of the sets of struts that goes between the fuselage and the upper wing is massively distorted.


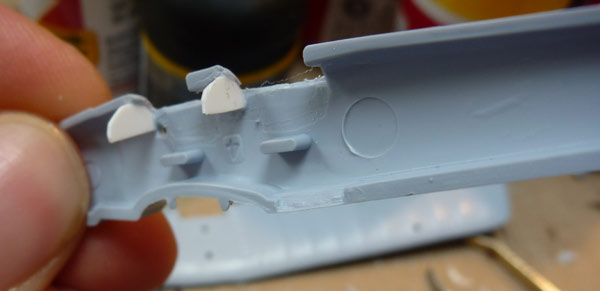
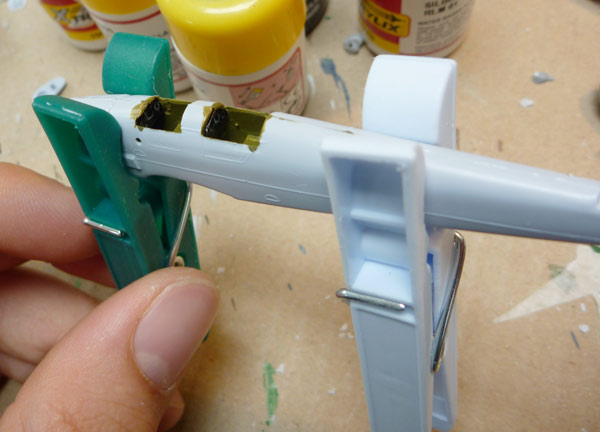
No cockpit supplied at all, so I have installed some styrene sheet instrument panels.


Hannants Interior Green is quite dark, very glossy, and poor at covering (needed 3+ coats).


Luckily the Tiger Moth only has a few instruments (I think it should have a compass in the bottom middle, but I wasn't going to put in much effort for this little kit).


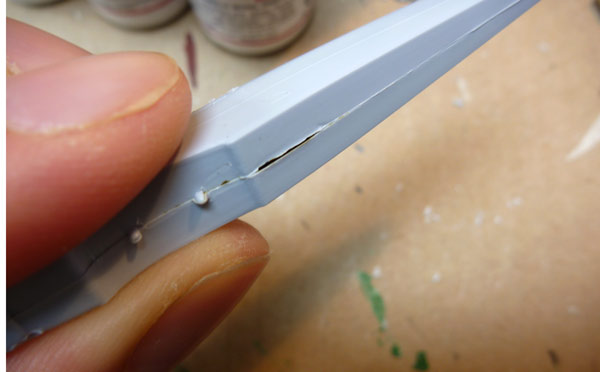
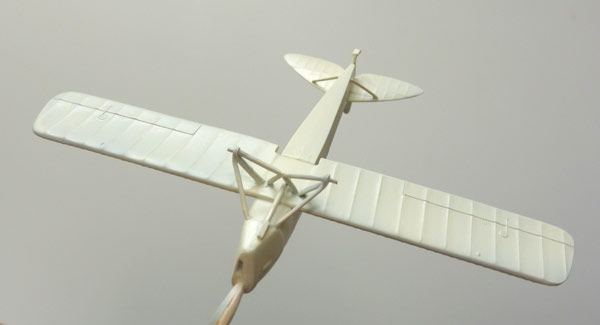
On closing the fuselage, I had a big gap on the underside.


Top was OK though (dark patches near seam are interior green paint, not gaps).


Wings and horizontal tail surfaces had ejector marks, which are quite hard to deal with the on uneven fabric effect.


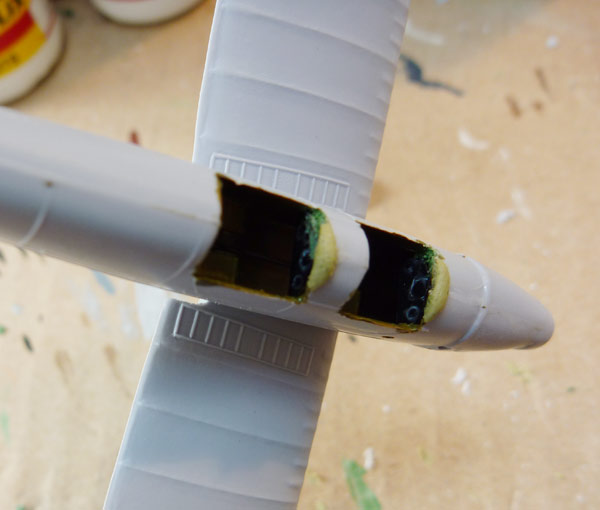
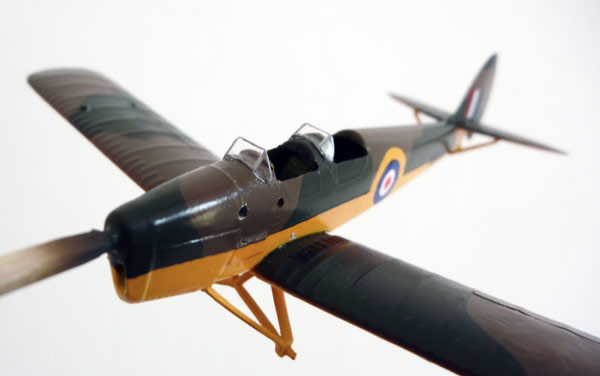
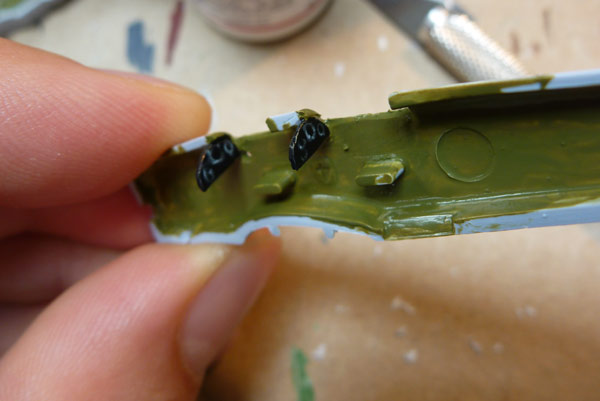
The kit doesn't represent the leather pad above the instrument panel, so I added some milliput ones. Also filled the gaps between instrument panels and other side of fuselage with green putty.


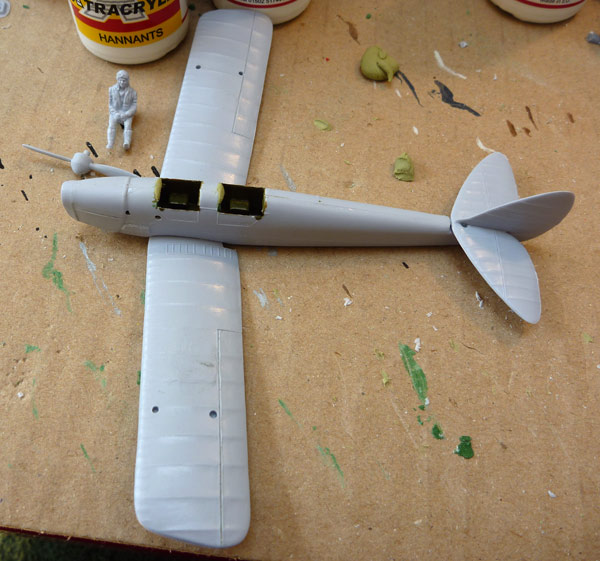
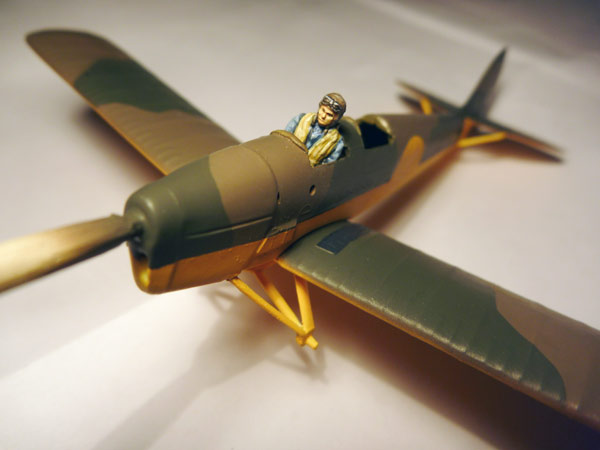
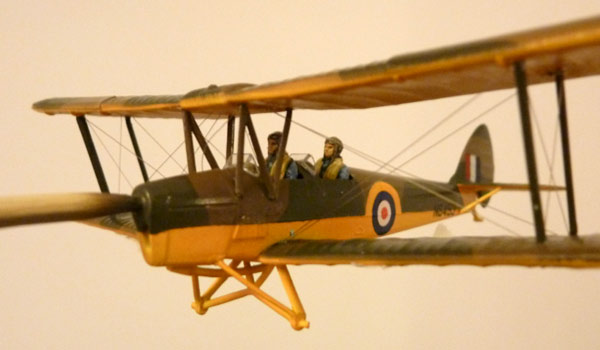
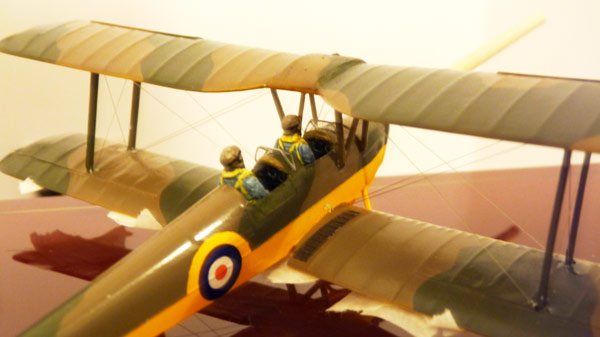
The pilots don't fit in the overly slim fuselage, so their arms have had to be filed down (and the side walls scraped back).


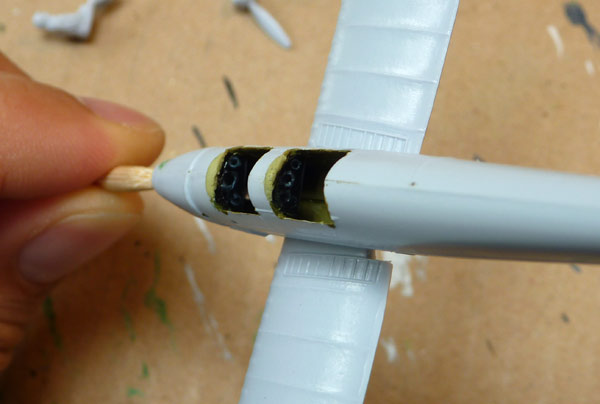
Instrument panels touched up where the filler went.


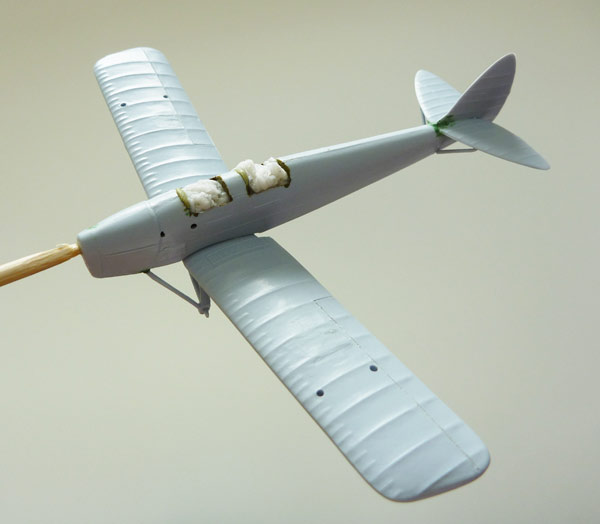
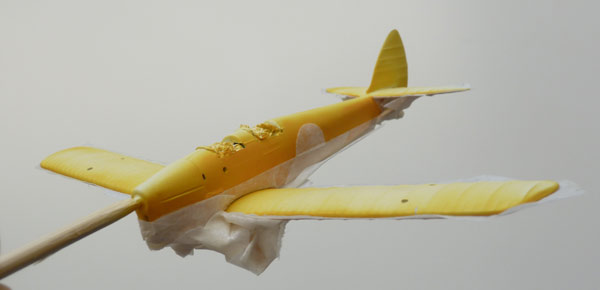
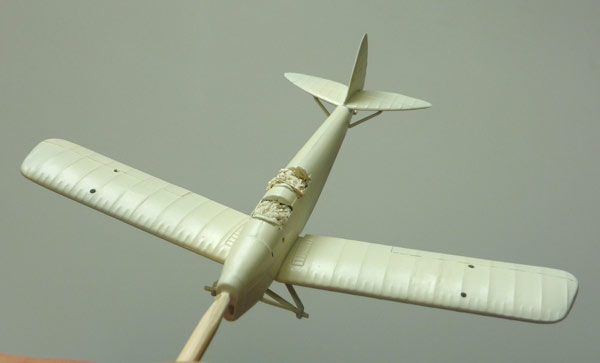
Ready for primer now- filled cabin with wet tissue.


Undercarriage was a pain- eventually got it straight. All holes for struts and supports are much bigger than they need to be.
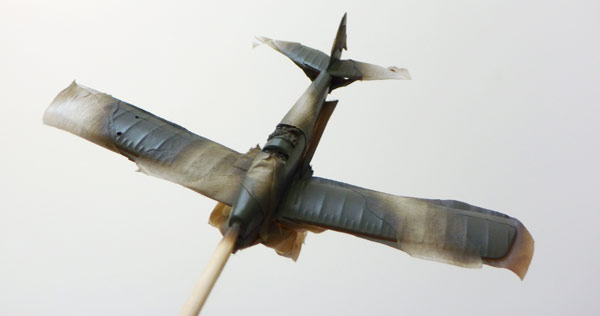

Primer on.


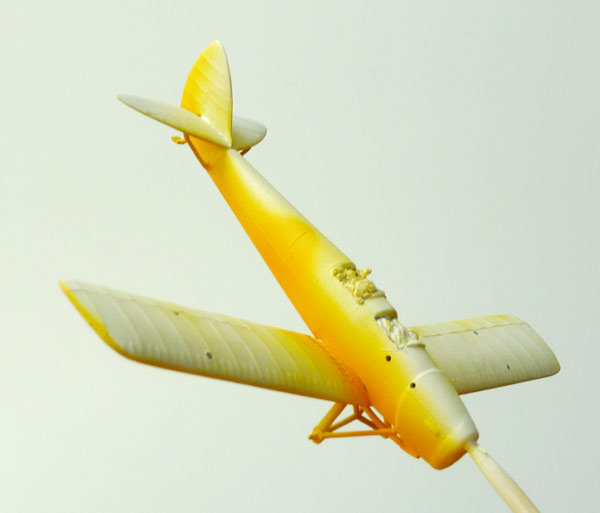
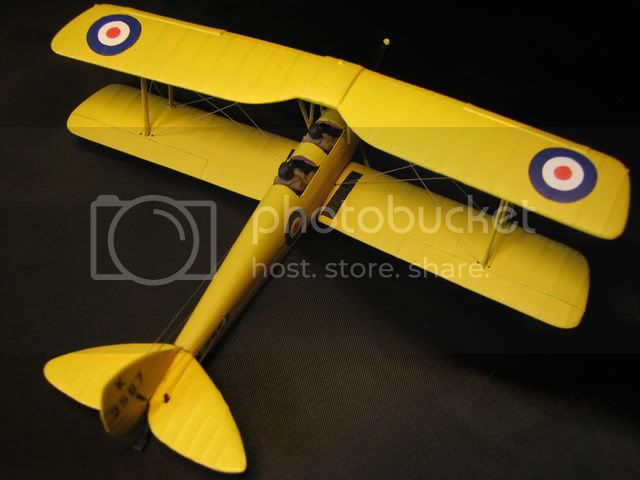
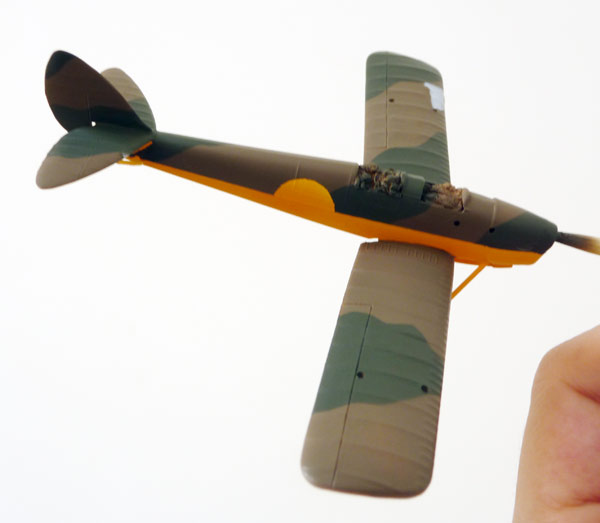
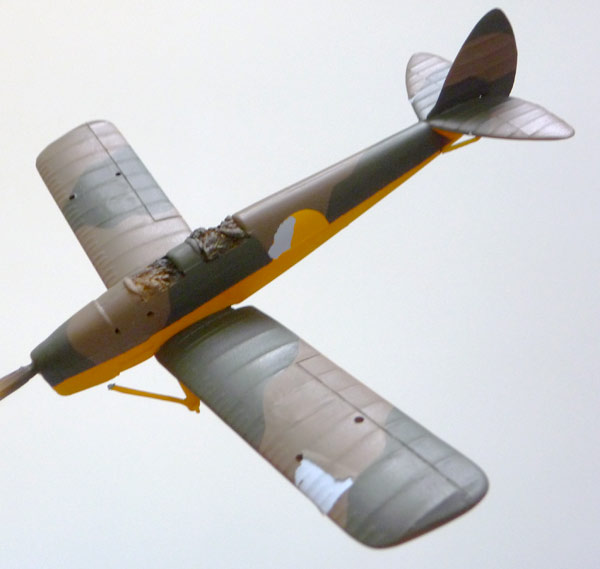
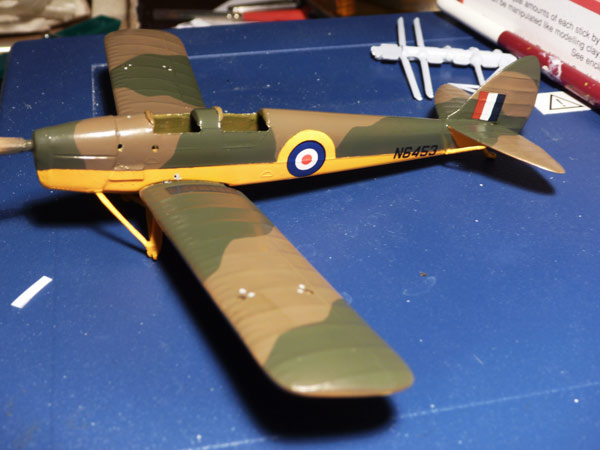
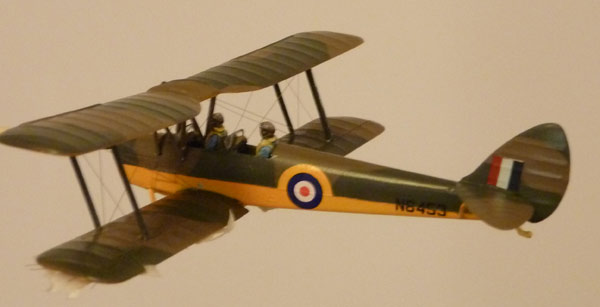
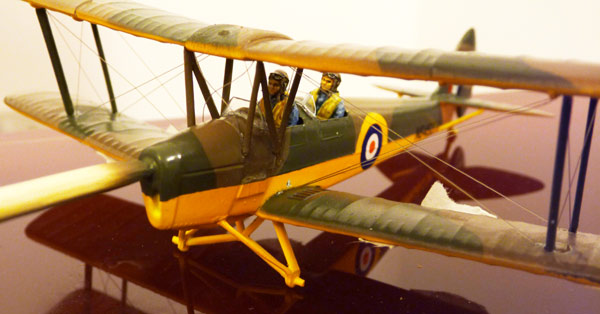
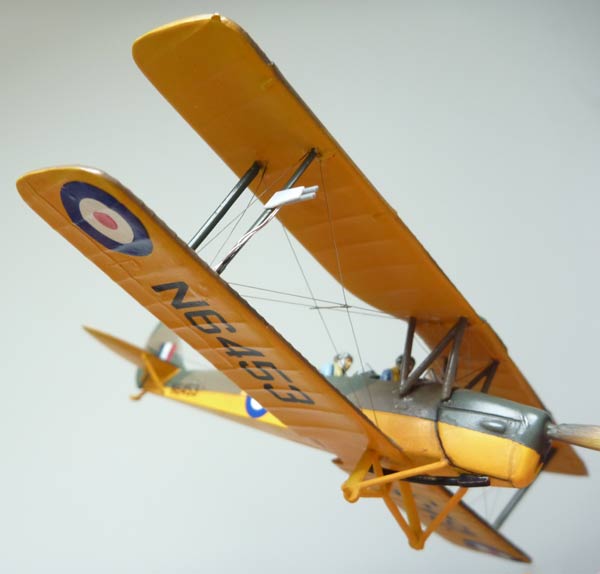
Underside and lower 1/3 of fuselage will be yellow- it needs another coat to even it out a little.


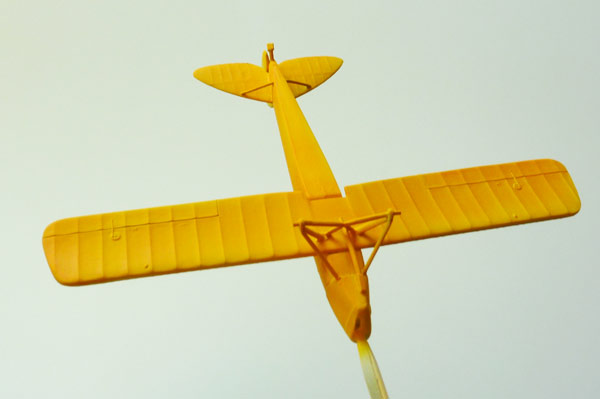
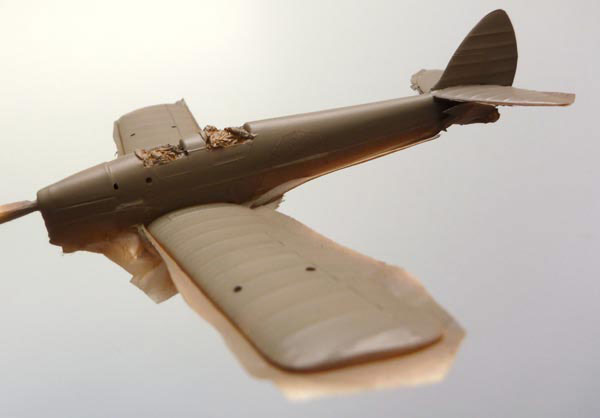
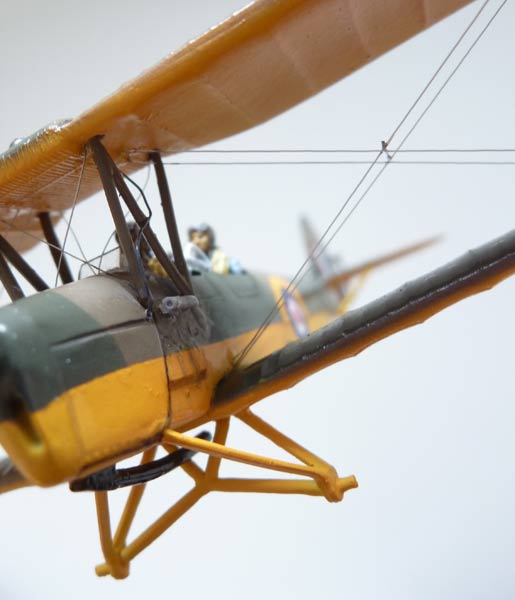
The uppers will be in Dark green/Dark Earth. Hopefully I will get this done tomorrow, then print some serial numbers and new roundels early next week to finish it off.
lampie
#029
_VISITCOMMUNITY
England - East Midlands, United Kingdom
Joined: December 23, 2005
KitMaker: 6,249 posts
AeroScale: 3,270 posts
Posted: Saturday, August 15, 2009 - 12:20 PM UTC
Hi Ben!
Great to see somebody tackling this old kit!
I know many modellers who wont even attempt it,,,they know who they are,,LOL
The photos really bring back some memories.

It took me two attempts, but the second time of trying I beat the old Airfix Tiger Moth!


Keep going, its worth it in the end!!
Nige
DaveCox
_VISITCOMMUNITY
England - South East, United Kingdom
Joined: January 11, 2003
KitMaker: 4,307 posts
AeroScale: 272 posts
Posted: Saturday, August 15, 2009 - 06:26 PM UTC
The kit isn't too bad when you remember that I first built this in the mid-1960s! Then it came moulded in bright yellow plastic packed in a polybag with paper header stapled to the top. The intructions were inside the header and invariably ended up with staples holes on some important wording! Cost 1s 10d in old money!
robot_
_VISITCOMMUNITY
United Kingdom
Joined: March 08, 2009
KitMaker: 719 posts
AeroScale: 691 posts
Posted: Sunday, August 16, 2009 - 07:09 AM UTC
Nigel: great to see a finished one with rigging- I guess the normal audience for this kit won't ever think about the wires.

Today has been a bit up and down, ending on a down.

Sorry for the poor photos, I was in a hurry, and not a particularly good mood


After a good while masking, shes ready for paint again.


Chocolate plane! I was really pleased with how the paint when on- I had been having issues with the airbrush, and so I overhauled it, with a strip down and ultrasonic clean in acetone- it is now working nicely.


Masked up for the dark green.


Now for the unveiling! I hadn't ever masked camouflage before (the three planes I have painted with a airbrush so far have all been one colour)- so I was pretty excited...

After the first few pieces of tape came off, I was becoming very pleased with myself


The disaster first showed itself in a tiny peel of paint on a fin of the tail- I put it down to the sharp angle of the surface. Then one of the undercarriage supports broke away from the fuselage as I tried to take off the tape.
Then a big, big piece of paint came free with the tape on the left side of the lower wing- I was pretty gutted. Then I removed the masked circles on the fuselage side- one was fine, the other just pulled everything away....


Not sure I can face masking and air-brushing the touch-ups, in case more paint comes off with the masking.

I have learnt a few things:

1) don't use cheap B+Q masking tape.

2) Use better primer- I will try some of the Halfords stuff people have been recommending- the primer I used doesn't seem any better at sticking than normal paint.

3) Take more time taking off tape.

4) Never wrap tape tightly around thin pieces of styrene.
FalkeEins
_VISITCOMMUNITY
England - South East, United Kingdom
Joined: March 07, 2005
KitMaker: 868 posts
AeroScale: 690 posts
Posted: Tuesday, August 18, 2009 - 05:27 AM UTC

..bad luck Ben....

still, you did say you were only building it to practise on ....as for tape, you can't go wrong with Tamiya...
lampie
#029
_VISITCOMMUNITY
England - East Midlands, United Kingdom
Joined: December 23, 2005
KitMaker: 6,249 posts
AeroScale: 3,270 posts
Posted: Tuesday, August 18, 2009 - 05:58 AM UTC
Hi Ben.
Theres no need to repeat what you already said about the masking tape, you know what the problem was there
Tamiya tape is definately the way to go, like Neil said.
Dont bin it though, just pop it in a sealed bag of oven cleaner overnight and it'll be good to go again after a rinse and scrub with an old toothbrush
Ive been using Halfords grey primer for years now and love the stuff!

Heres how my first Airfix Tiger Moth turned out.................


Keep at it,,you CAN beat the Airfix Tiger Moth!!!
Nige
robot_
_VISITCOMMUNITY
United Kingdom
Joined: March 08, 2009
KitMaker: 719 posts
AeroScale: 691 posts
Posted: Tuesday, August 18, 2009 - 10:49 AM UTC
Thanks Neil: Tamiya tape has been ordered!

Nige: There is no way I could face re-doing the paint from the start- I have done it the bodger's way, and just touched it up with a brush. I plan on doing some post shading on the wings (masking the ribs), and after that and a matte coat, I hope it would be too obvious (probably less obvious than the ejector marks I didn't successfully eliminate).

The yellow half-circle will be mostly under a transfer, so should be too glaringly botched either.


I spent the evening doing the touch-ups, painting the walkways, and painting one of the pilots.

I am dreading the assembly of the top wing and solving the problem of the distorted struts- even more daunting than the rigging. But I'm feeling quite positive overall- I have the transfers designed, and will be printing them tomorrow (new roundels for the upper wings, new serials).
jaypee
_VISITCOMMUNITY
Scotland, United Kingdom
Joined: February 07, 2008
KitMaker: 1,699 posts
AeroScale: 1,384 posts
Posted: Tuesday, August 18, 2009 - 11:53 AM UTC
nice work with the pilot, what method do you use?

if you can't sort the struts get some strut material from aeroclub or your LHS might stock some.
It is cheap and probably easier than trying to save that.

@Nige eek what a horror show!
robot_
_VISITCOMMUNITY
United Kingdom
Joined: March 08, 2009
KitMaker: 719 posts
AeroScale: 691 posts
Posted: Tuesday, August 18, 2009 - 07:44 PM UTC
Hi J-P,

I painted Games Workshop models for 7 years in my youth. Each colour had a base coat that is slightly lighter than it would end up, then I added a 'guided wash' of thinned paint delivered pretty much where it should go, rather than everywhere. The face was the exception- the detail was so defined, that you could just put the wash over the whole thing. The face then had the eyes painted in a dark brown. Then the highlights are painted with a normal consistency paint.

Some details (eg. those straps on his back) were not sculpted in the figure, but at this scale it looks better to paint the details there than try and make them (e.g. out of strips of tape or paper).

Thanks for the the tip about the Aeroclubs struts- I hadn't heard that you can buy generic strut material- that is good to have as a back-up.
robot_
_VISITCOMMUNITY
United Kingdom
Joined: March 08, 2009
KitMaker: 719 posts
AeroScale: 691 posts
Posted: Thursday, August 20, 2009 - 10:31 AM UTC
Last night I did a bit of work on the second pilot and the airscrew.

Tonight I gave it a few coats (5 in some places) of thinned gloss coat with a large flat brush (bought for use with Klear, but now I can't find the old formula anywhere- so I am just using Xtracrylix). This was to resist handling damage as much as to give a smooth surface for the transfers. I drilled the lower wing (all the way through) for the rigging.


I applied some of the transfers- the fin flashes are cut-down from the ones that came with a Tamiya Spitfire Mk.I. They are the first transfers that I have seen peel away as the began to dry- I had to apply a lot of MicroSol and stretch/poke around the edges when it was really fragile to get it to stick.

The Airfix roundels were a pain because the red part was separate. I was always thinking they could be a bit more central, then in trying to move them a tiny amount ended up making them worse...

The transfers for the upper wing roundels are going to need an undercoat of white (something I hadn't expected, as I thought the red laser toner was quite opaque).

I was also able to bend the deformed struts back into true, and hopefully will mount the upper wing tomorrow, and maybe do the rigging too?
Murdo
_VISITCOMMUNITY
Scotland, United Kingdom
Joined: May 25, 2005
KitMaker: 2,218 posts
AeroScale: 211 posts
Posted: Thursday, August 20, 2009 - 11:06 AM UTC
That is really looking great, especially for such a tiny and old kit.

I had one of these a few hundred years ago.
robot_
_VISITCOMMUNITY
United Kingdom
Joined: March 08, 2009
KitMaker: 719 posts
AeroScale: 691 posts
Posted: Thursday, August 20, 2009 - 09:33 PM UTC
Thanks Murdo!

I was up early today, making and attaching the windscreens, preparing the struts, drilling upper wing (not all the way through), gluing on all the smoke invisible thread to the upper wing. I did some dry tests for the wing fitting- it is quite tricky!


robot_
_VISITCOMMUNITY
United Kingdom
Joined: March 08, 2009
KitMaker: 719 posts
AeroScale: 691 posts
Posted: Friday, August 21, 2009 - 11:35 AM UTC
Once I figured out how to mount the wing, it actually holds itself onto the the plane without glue- the tension from the central struts (with their horizontally attaching pins into the fuselage) hold the outer struts to the wing.


The rigging went much better than I thought- no dramas so far, though they are not glued yet- just taped. Finished the second pilot. I have attached two pairs of crossing wires over the fuselage, but they are hard to tension as you can't pull on them (though I may try grabbing them from inside the cockpit)- I may just have to do as best I can, then use the 'blown out match' method.

There is also a bit of clean-up to be done (superglue blobs, and filling rigging holes), and the transfers for the wings.
lampie
#029
_VISITCOMMUNITY
England - East Midlands, United Kingdom
Joined: December 23, 2005
KitMaker: 6,249 posts
AeroScale: 3,270 posts
Posted: Friday, August 21, 2009 - 11:53 AM UTC
Looking great Ben!

Quoted Text

I have attached two pairs of crossing wires over the fuselage, but they are hard to tension as you can't pull on them (though I may try grabbing them from inside the cockpit


Thats the way to do it!
When I rig a biplane I tension the thread by using locking tweezers to get hold the thread taught and then secure it with a drop of CA Glue. No heat required!

Good luck with the last few bits and pieces
Nige
robot_
_VISITCOMMUNITY
United Kingdom
Joined: March 08, 2009
KitMaker: 719 posts
AeroScale: 691 posts
Posted: Tuesday, August 25, 2009 - 09:54 PM UTC
Slow progress over the last few days- had no time for modelling on the weekend.


I have added pieces of wire across the crossed lines of the rigging, added a fuel line, and added the control cables for the tail. I touched up where the superglue was left from rigging and applied the upper roundels (taken from the MPM Mk. I Blenheim kit, as I don't think I would have been able to accurately paint an undercoat of white for my home-made transfers). I did some shading, but I regret it, as it was done with acrylics, so not easy way to correct mistakes... anyway, I am learning a lot from this little kit. I also started on the wheels, and the airscrew is nearly ready.

I will need to do some sanding on the lower wing underside where the rigging lines come out, then re-paint those patches, then apply transfers. I am planning to mask all the ribs on the wings and tail, and then dust with very little paint, just to weather it a bit, and define the ribs. I need to make a pitot that attaches to one of the outer struts. I am not 100% sure it is a pitot, as there is a tube-type-speed-measuring-thingy on the side of the front fuselage too.

Then the flat coat, and it'll be finished!
Dangeroo
#023
_VISITCOMMUNITY
Zurich, Switzerland
Joined: March 13, 2009
KitMaker: 2,058 posts
AeroScale: 67 posts
Posted: Tuesday, August 25, 2009 - 10:12 PM UTC
Wow! I didn't know the old Airfix kits could be turned into something like that!

Can you teach an old armor guy how you do the rigging? What material is it and how do you attach it?

Cheers
Stef
lampie
#029
_VISITCOMMUNITY
England - East Midlands, United Kingdom
Joined: December 23, 2005
KitMaker: 6,249 posts
AeroScale: 3,270 posts
Posted: Tuesday, August 25, 2009 - 11:04 PM UTC
This is looking lovely
Its only the 3rd one I've seen built on the site.

Quoted Text

I need to make a pitot that attaches to one of the outer struts. I am not 100% sure it is a pitot, as there is a tube-type-speed-measuring-thingy on the side of the front fuselage too.


Hope these help.


Theres a full Tiger Moth Walkround
HERE

Nige
robot_
_VISITCOMMUNITY
United Kingdom
Joined: March 08, 2009
KitMaker: 719 posts
AeroScale: 691 posts
Posted: Wednesday, August 26, 2009 - 09:36 PM UTC
Stefan: The rigging is done with Smoke Invisible Mending thread. It is a bit more stretchy than fishing line, and is darker. I use the finest drill bit I could find (0.3 mm), and drill half way into the top wing, and glue all the lines in place, as seen here:


Then I drilled through the holes on the lower wing (all the way through). Then I attached the top wing to the rest of the plane (already painted, but no decals on the under surface of the wing). You then thread all the lines through, hold in place with masking tape, then put a little spot of glue on each hole on the lower surface. I think this is similar to how Mark rigged his Pfalz that is currently on the front page. Terri's technique (on her Pfalz build) looks really, really good, but may be too hard to scale down to 1/72- I want to try it soon though.

Nigel:

Thanks a lot for those images- I hadn't seen that walk-around before. I constructed the pitot for the wing and fuselage this morning, and applied the lower wing transfers. My strut mounted pitot is not very close to the original, but it looks OK from normal viewing distances.

I think I will add the things sticking out above the fuel tank, as they are quite prominent.

Nearly finished!


Grumpy1
_VISITCOMMUNITY
United Kingdom
Joined: August 27, 2009
KitMaker: 3 posts
AeroScale: 2 posts
Posted: Thursday, August 27, 2009 - 05:25 AM UTC
Excuse me interfering but you've got the inboard attachment points of those bracing wires wrong. To anyone familiar with the Tiger Moth it stands out like a sore thumb.

The inboard ends of both landing wires are attached to the rear spar of the upper wing. The inboard ends of both flying wires are attached to the front spar of the lower wing. Have a look at this photo. http://gallery.kitmaker.net/showphoto.php/photo/256645

Also note how they cross in the centre.
robot_
_VISITCOMMUNITY
United Kingdom
Joined: March 08, 2009
KitMaker: 719 posts
AeroScale: 691 posts
Posted: Thursday, August 27, 2009 - 05:57 AM UTC
Doug, thanks for the info- I noticed cross linking rod in that photo looked very different to mine (my crossed lines pretty much touch each other). I admit I didn't use any references other than the box art!
Grumpy1
_VISITCOMMUNITY
United Kingdom
Joined: August 27, 2009
KitMaker: 3 posts
AeroScale: 2 posts
Posted: Thursday, August 27, 2009 - 08:38 AM UTC
Glad to help Ben. You've made a nice job of it.


Quoted Text

I need to make a pitot that attaches to one of the outer struts. I am not 100% sure it is a pitot, as there is a tube-type-speed-measuring-thingy on the side of the front fuselage too.


The pitot tube is mounted on the starboard/front interplane strut. The tube-type-speed-measuring-thingy is a venturi that provides the suction for the vacuum powered instruments.There should be one on each side of the fuselage, one for each cockpit.

This is what the bracing wires should look like where they cross in the centre. http://gallery.kitmaker.net/showphoto.php/photo/256640

Looks like the port wing taken from the rear.

PS. It's a long time since I did any of this type of modelling. The gap in the fuselage you mentioned is probably a slot for the stand that used to be supplied with all Airfix kits. Not sure if they still do this.
robot_
_VISITCOMMUNITY
United Kingdom
Joined: March 08, 2009
KitMaker: 719 posts
AeroScale: 691 posts
Posted: Thursday, August 27, 2009 - 11:12 AM UTC
Doug: great info on the venturi tubes- I shall have to add another one now!

And I think you have solved the mystery of the gap- it did look like it was purposely there (it was more prominent from the inside than is shown in the photo with the closed fuselage). I think Airfix supply stands with a few boxed sets (BoB memorial flight?), but they are the only ones.

I am going to try some outdoors 'in flight' photography with this model, once it is finished. Hopefully on the weekend.
lampie
#029
_VISITCOMMUNITY
England - East Midlands, United Kingdom
Joined: December 23, 2005
KitMaker: 6,249 posts
AeroScale: 3,270 posts
Posted: Thursday, August 27, 2009 - 10:33 PM UTC
Hi Ben.
Looking very nice, cant wait to see the finished photos
The slot is mention is most probably for a stand. If I remember correctly back to when I was a nipper most if not all of the little Airfix kits included a stand and there was quite often a decal for the stand as well.
Probably the old memory playing tricks though lol
Nige
Dirkpitt289
_VISITCOMMUNITY
New Jersey, United States
Joined: May 24, 2008
KitMaker: 346 posts
AeroScale: 307 posts
Posted: Friday, August 28, 2009 - 05:17 AM UTC
Great looking plane, I always veered away from doing a biplane because I was intimidated by the rigging. Thanks to you I now have an idea how to do it. I might have to try one someday soon.

I look forward to seeing the finished product.

Regards

Dirk
robot_
_VISITCOMMUNITY
United Kingdom
Joined: March 08, 2009
KitMaker: 719 posts
AeroScale: 691 posts
Posted: Friday, August 28, 2009 - 05:25 AM UTC
Dirk, I was pretty worried about the rigging, but it turned out very easy. Just take your time, and get some good tweezers that can easily grab the hair-thin line. It is so satisfying to see it all come together after the preparation of the drilling, etc. Also, remember to let the superglue fully dry before starting the threading part. Give it a go!
 _GOTOTOP