Cold War (1950-1974)
Discuss the aircraft modeling subjects during the Cold War period.
Hosted by Tim Hatton
High Planes CAC Winjeel
Merlin
Staff MemberSenior Editor
AEROSCALE
#017
_VISITCOMMUNITY
United Kingdom
Joined: June 11, 2003
KitMaker: 17,582 posts
AeroScale: 12,795 posts
Posted: Friday, September 11, 2009 - 07:24 AM UTC
Hi Tim

Thanks for the heads-up on the canopy. I'm pretty sure I've got a T-6 replacement in one of the Falcon sets.

Yes, packing!... I'm suffering from a kind of "battle fatigue" after sorting out all my kits and other stuff - it seems never ending!

All the best

Rowan
magnusf
_VISITCOMMUNITY
Stockholm, Sweden
Joined: May 02, 2006
KitMaker: 1,953 posts
AeroScale: 1,902 posts
Posted: Sunday, September 13, 2009 - 09:49 PM UTC
Tim & Rowan! Thanks for the kind words regarding my seats!


They have now gotten a bit of padding to the back rests using Tamiya 2-component epoxy putty. I rolled it with a knife handle to create a miniature "putty pizza", roughly cutting it to fit the seat backs and then installing it using a moistened toothpick.

I won't do any embossing since it
1) Will be hidden behind the padding
2) Probably would have made the glue joints pop open again

I'll save that for another project!


Magnus
magnusf
_VISITCOMMUNITY
Stockholm, Sweden
Joined: May 02, 2006
KitMaker: 1,953 posts
AeroScale: 1,902 posts
Posted: Monday, September 14, 2009 - 01:42 AM UTC
Second update for today.


Tape belts added. I have photo etched belts but they are stiffer to work with, there is three seats to fit with belts and canopy will be closed so tape is good enough and a lot easier to work with!


A quick coat of Games Workshop "Chaos Black" primer.


Magnus
Tango-India-Mike
_VISITCOMMUNITY
Western Australia, Australia
Joined: August 31, 2009
KitMaker: 88 posts
AeroScale: 79 posts
Posted: Monday, September 14, 2009 - 02:16 AM UTC
Looking good Magnus...it's the little things that count. I like the 'putty pizza' and the scale thickness of the seat construction, which is done with nice, neat precision.

By the way, I forgot to say before...that's a handsome Sabre just back a bit. I've been looking at it and contemplating my 1/72 High Planes Sabre. Will it be my next model, I wonder? Or should I stick with the Meteor? Or else just do them both!

Anyway, my Winjeel won't be too far behind once I get in the groove. Looking forward to seeing yours in the meantime.

All the best,

Tim.
magnusf
_VISITCOMMUNITY
Stockholm, Sweden
Joined: May 02, 2006
KitMaker: 1,953 posts
AeroScale: 1,902 posts
Posted: Monday, September 14, 2009 - 09:31 AM UTC
Third update for today, this will be a hard day to live up to in the future


Blue padding , green seat and blue seat belts. All painted using Vallejo acrylics, base coats were airbrushed freehand and then everything was tidied up with a brush.


The green looks a lot more realistic over a black primer even if it is the same mix that resulted in the poisonous green that can be seen in my earlier posts!

When all is dry tomorrow I will probably do some more adjustments and add the buckles.

Tim! A Sabre is a perfect "first High Planes". Most of the parts will come from Academy ensuring that you don't have to tamper too much with the interior or landing gear. And it is a cool plane!


Magnus
magnusf
_VISITCOMMUNITY
Stockholm, Sweden
Joined: May 02, 2006
KitMaker: 1,953 posts
AeroScale: 1,902 posts
Posted: Wednesday, September 16, 2009 - 08:57 AM UTC
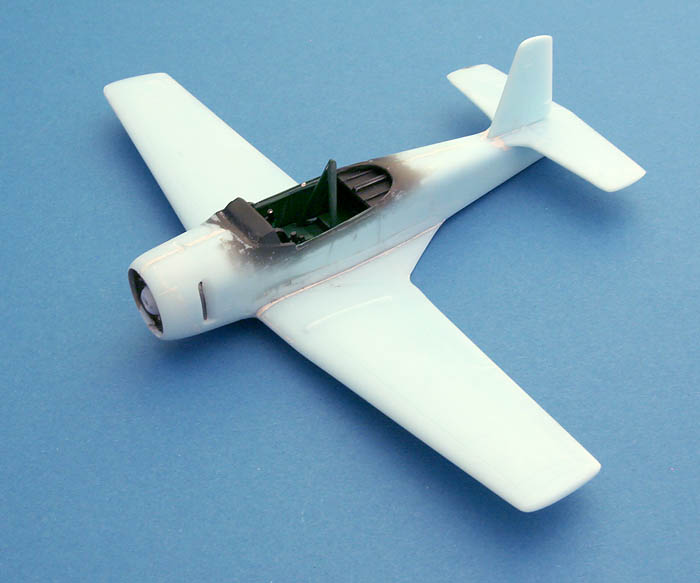
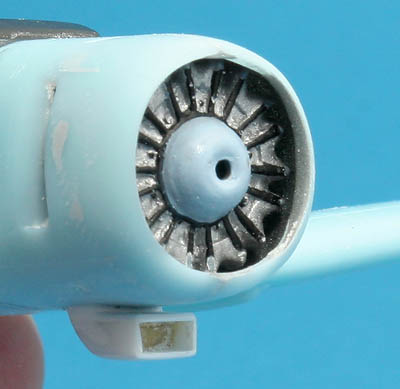
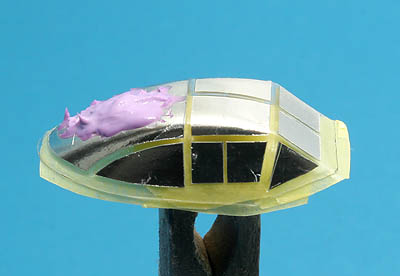
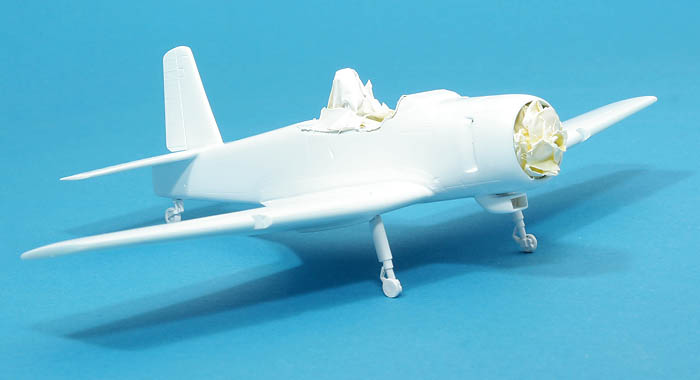
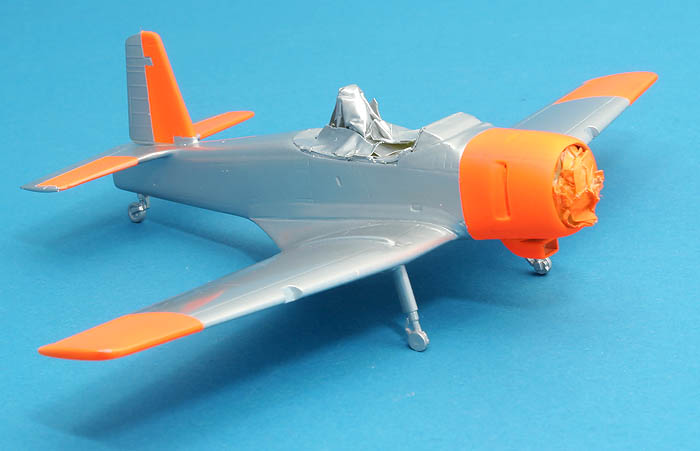
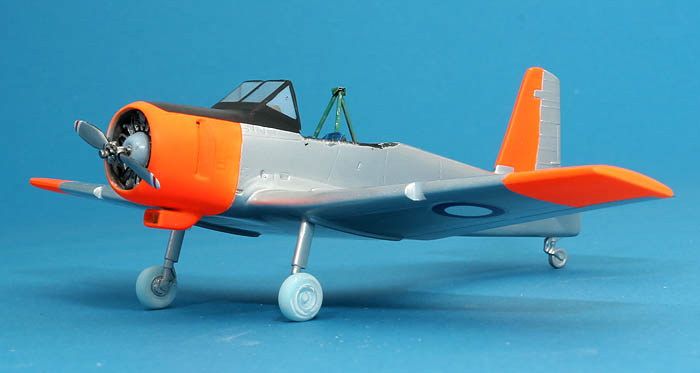
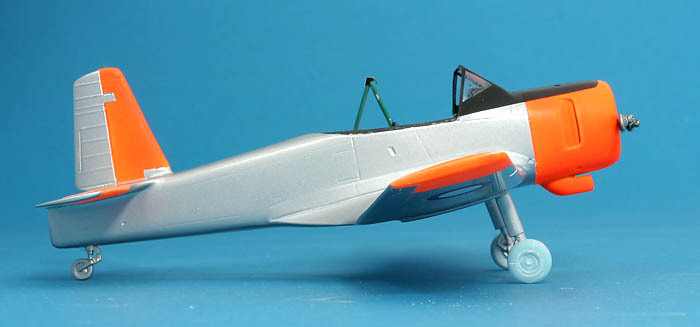
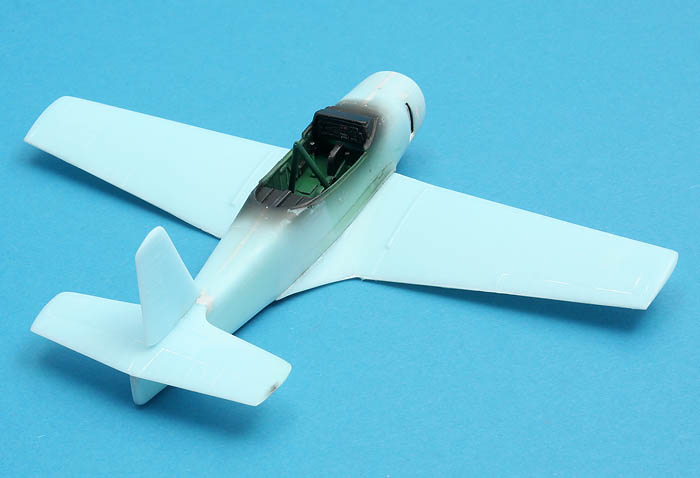
Looking like an airplane now!


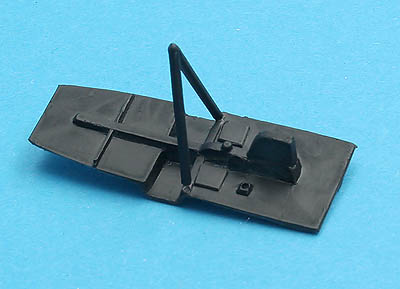
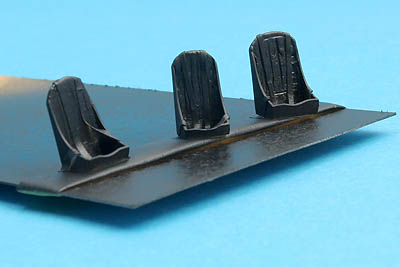
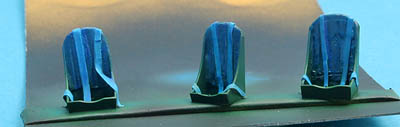
Interior parts in black primer...


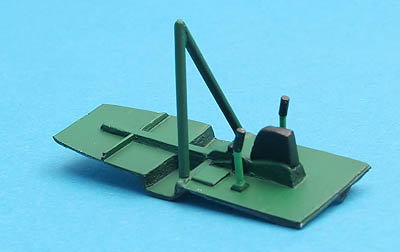
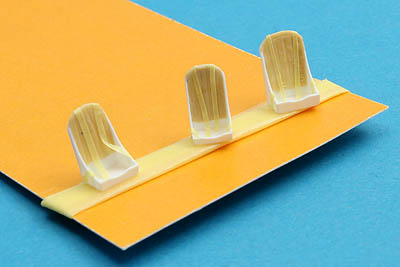
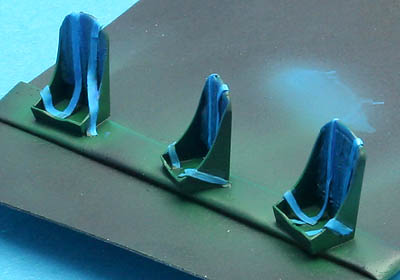
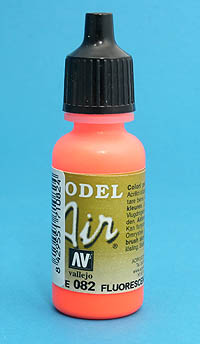
...and painted green with details picked out in black.

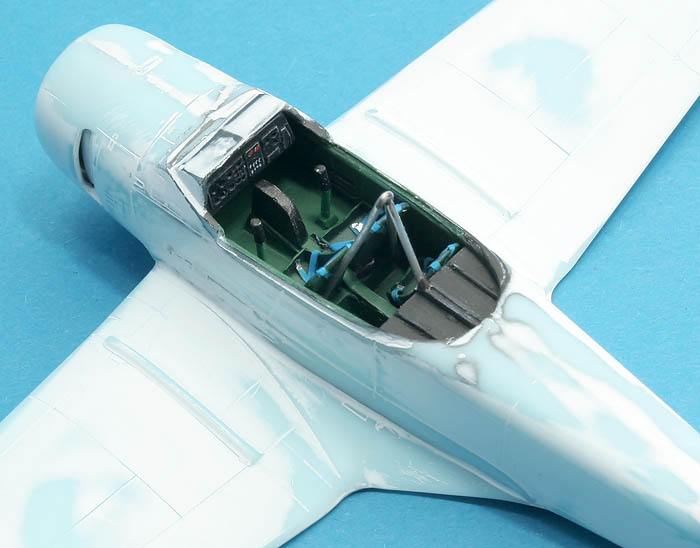
The green turned out quite good over black primer but I will probably not do it again. Andrea colours thinned for airbrush don't cover that well and it took many attempts to get an acceptable coverage. I still think it is a bit on the dark side but it will have to do for now, I'll try something else on the next kit!


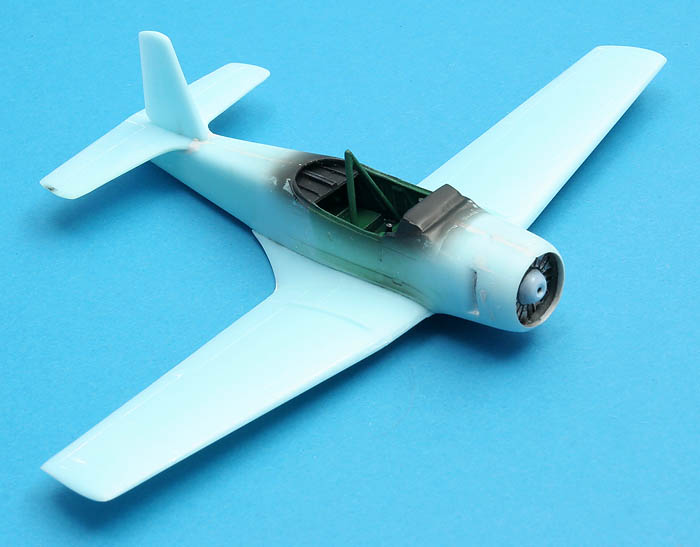
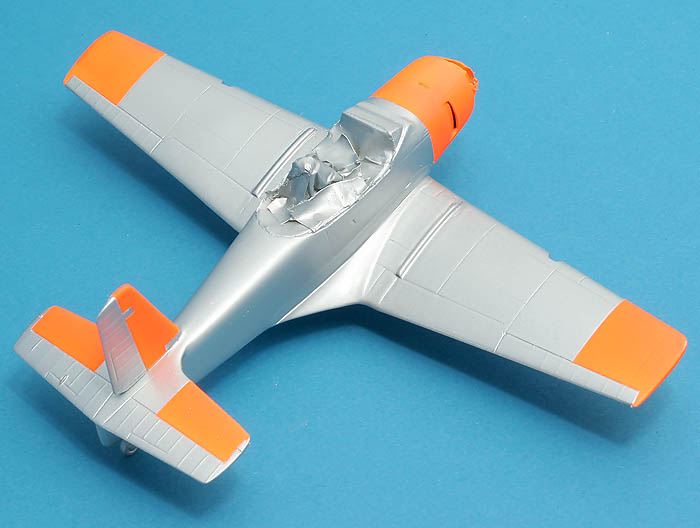
After finishing the interior time had come to assemble wings, fuselage and fin. Location for the fin isn't very well defined, I eyeballed it from photos.


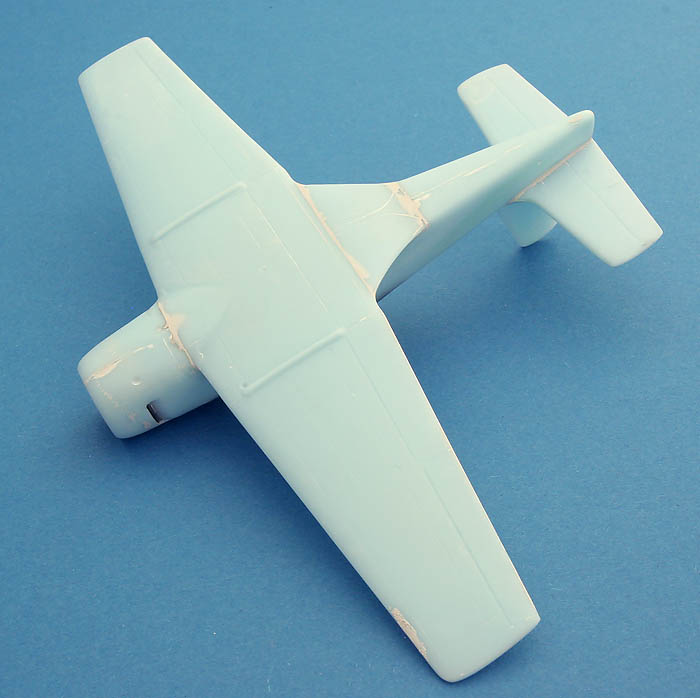
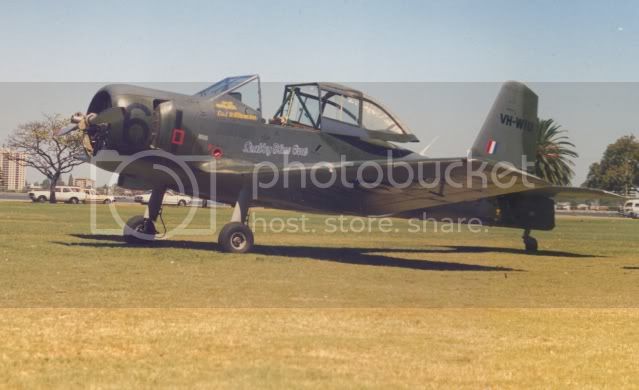
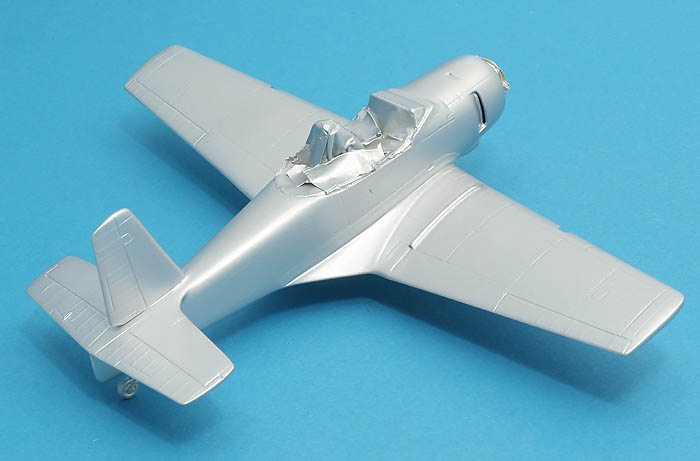
Looking a bit like a mini-Skyraider from this angle! And I wonder where that wing come from, certain parts of it look like they come from a T-6. Well, could they do a fighter using that wing, why not a trainer as well ?


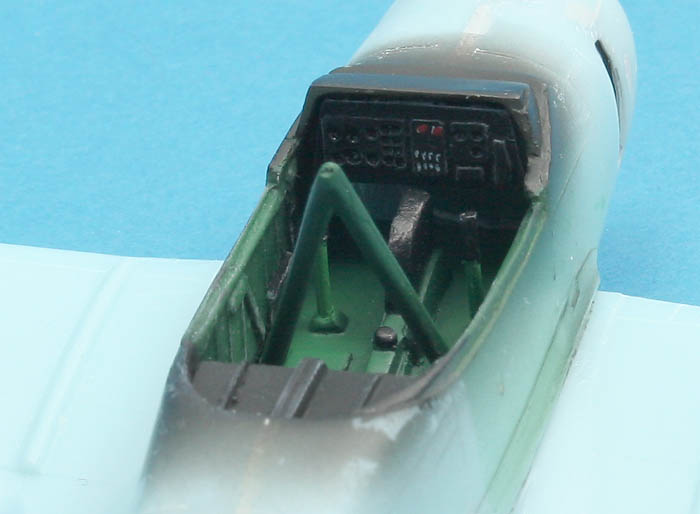
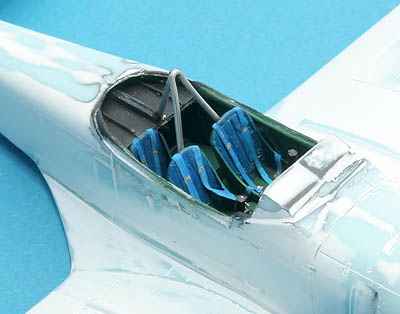
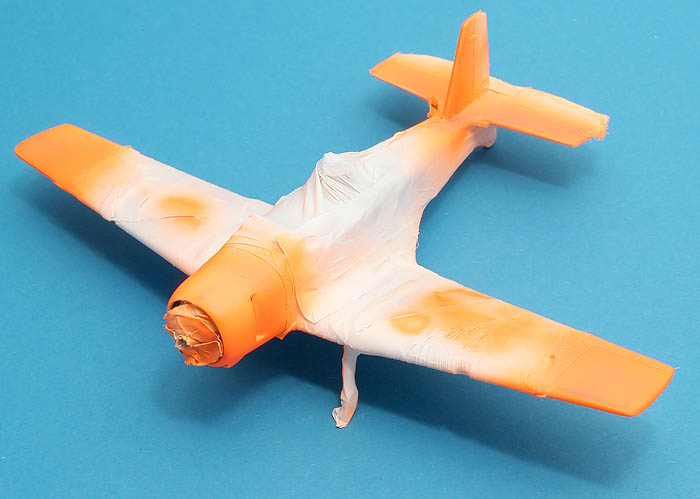
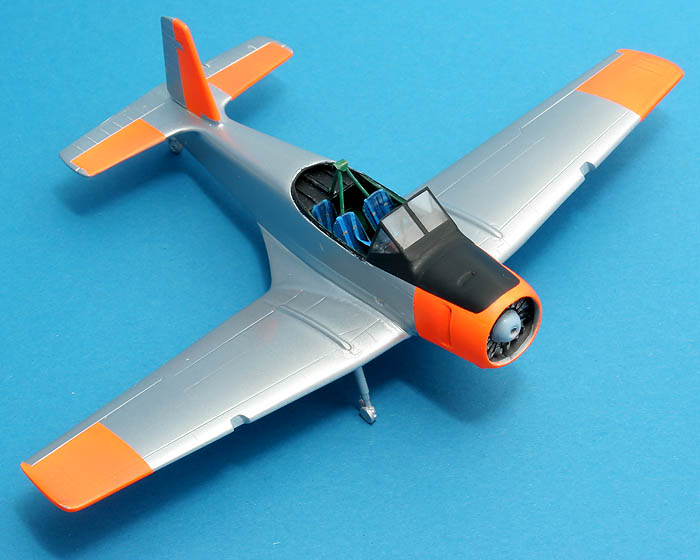
And this is the finished interior, without the seats and rear support for the crash pylon. I repainted the fuselage sides green-over-black to get rid of the poisonous shade of green!
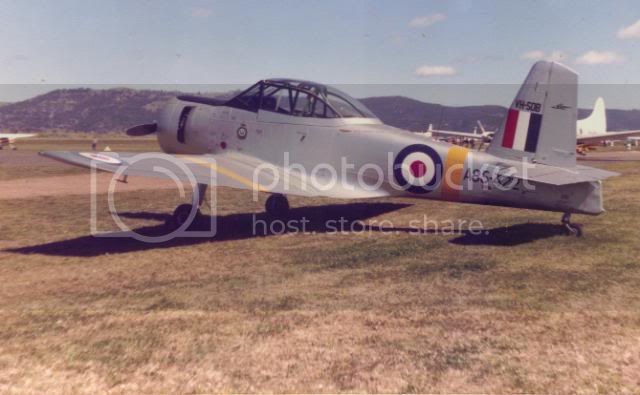


Magnus
magnusf
_VISITCOMMUNITY
Stockholm, Sweden
Joined: May 02, 2006
KitMaker: 1,953 posts
AeroScale: 1,902 posts
Posted: Friday, September 18, 2009 - 10:01 AM UTC
Another update, I am almost there with the filling and sanding!


Just to prove to you that this isn't the putty-monster I guess some of you suspected!

However, there are other problems:


This kind of shape problem always makes me a bit worried over those things that I haven't seen (yet...). I have found an old Italeri DC-3 intake that is my prime candidate for a rebuild to fit a Winjeel!

I have noticed that there is a certain lack of symmetry on some parts. The horizontal tailplanes look a bit odd (especially if staring at them for a long time ) but they are not so wrong so it is possible to figure out where to attack them with a file!


Magnus
magnusf
_VISITCOMMUNITY
Stockholm, Sweden
Joined: May 02, 2006
KitMaker: 1,953 posts
AeroScale: 1,902 posts
Posted: Monday, September 21, 2009 - 01:44 AM UTC
The result of a DC-3 intake, Tamiya putty and a bit of work with the file!


The blank for the intake. I filled it with putty so that I could sand it the way I wanted without going through the material.


Two views of the finished intake. Now all there is to do is removing it from the sprue handle and test fitting it!


Magnus
magnusf
_VISITCOMMUNITY
Stockholm, Sweden
Joined: May 02, 2006
KitMaker: 1,953 posts
AeroScale: 1,902 posts
Posted: Monday, September 21, 2009 - 09:00 AM UTC
Winjeel intake, take 1:


I am quite proud of my achievement but I think it got a bit big!

Yes, it definitely did!

Winjeel intake, take 2:


After another few minutes with the file... So now the proportions are off, it probably is a bit wide but it doesn't look so dominant any more at least!


Magnus
Tango-India-Mike
_VISITCOMMUNITY
Western Australia, Australia
Joined: August 31, 2009
KitMaker: 88 posts
AeroScale: 79 posts
Posted: Tuesday, September 22, 2009 - 08:12 PM UTC
Some photographs for you Magnus. I was going through a box of old photos and came across these....possibly not a great deal of use to you, but you might as well have them. At least you can see the interior colour a bit better in daylight, plus there being another strut extending rearwards from the apex of the crash pylon, so maybe of some use after all.

The model's shaping up nicely in the meantime....


Cheers for now,

Tim.
Merlin
Staff MemberSenior Editor
AEROSCALE
#017
_VISITCOMMUNITY
United Kingdom
Joined: June 11, 2003
KitMaker: 17,582 posts
AeroScale: 12,795 posts
Posted: Wednesday, September 23, 2009 - 06:36 AM UTC
Hi Magnus

Great progress! The crash pylon looks very heavy compared with Tim's pics - is it still possible to replace it without ruining the cockpit?

All the best

Rowan
magnusf
_VISITCOMMUNITY
Stockholm, Sweden
Joined: May 02, 2006
KitMaker: 1,953 posts
AeroScale: 1,902 posts
Posted: Wednesday, September 23, 2009 - 06:55 AM UTC

Quoted Text

Hi Magnus

Great progress! The crash pylon looks very heavy compared with Tim's pics - is it still possible to replace it without ruining the cockpit?

All the best

Rowan


Tim! Thanks for the photos! That third member of the crash pylon is included in the kit but has yet to be attached.

Rowan! No problem at all. I rescribed a few lines below the wing this morning and managed to break off the crash pylon in the process ! I'll do a new one tonight from thinner plastic, the difference is astonishing (and I really ought to have seen that myself, thanks for pointing it out!).


Magnus
magnusf
_VISITCOMMUNITY
Stockholm, Sweden
Joined: May 02, 2006
KitMaker: 1,953 posts
AeroScale: 1,902 posts
Posted: Thursday, September 24, 2009 - 09:25 AM UTC
I'm close to the painting stage now!


Canopy masked my usual way: Bare Metal chrome foil. I use Maskol to cover where the foil doesn't.


After a coat of black primer.


Thanks to Rowan for pointing out the over-scale crash pylon. I made a new one from metal wire that is a lot thinner (and probably safer for the pilots, being a lot crash-worthier than plastic ).


Another view of the almost finished cockpit. There is an angular piece of sheet metal covering the top of the crash pylon that I will have to make, more on that tomorrow!


Magnus
magnusf
_VISITCOMMUNITY
Stockholm, Sweden
Joined: May 02, 2006
KitMaker: 1,953 posts
AeroScale: 1,902 posts
Posted: Monday, September 28, 2009 - 09:19 AM UTC

A final coat of primer.


Tamiya TS-17, "Gloss Aluminium" from a spray can.

I'll let it dry for a day or two, then it is time for the dayglo areas!


Magnus
magnusf
_VISITCOMMUNITY
Stockholm, Sweden
Joined: May 02, 2006
KitMaker: 1,953 posts
AeroScale: 1,902 posts
Posted: Wednesday, September 30, 2009 - 09:54 AM UTC

All dayglo areas have been masked off, primed white and then airbrushed.


I used this Vallejo paint diluted with acrylic medium and artists gloss acrylic. The paint didn't work very well in the airbrush with frequent clogging and spattering. It probably has something to do with the paint actually being fluorescent, I very seldom have any trouble with the other paints in the range!

I didn't dare to remove the masking tonight, I'll let it dry thoroughly and then I'll give it a light rubbing and a second coat of paint, probably with a bit more gloss in it.


Magnus
AussieReg
Staff MemberAssociate Editor
AUTOMODELER
#007
_VISITCOMMUNITY
Victoria, Australia
Joined: June 09, 2009
KitMaker: 8,156 posts
AeroScale: 3,756 posts
Posted: Wednesday, September 30, 2009 - 10:32 AM UTC
Hi Magnus,

This build is looking great. My LHS has a couple of these kits on the shelf that I keep eyeing off when I'm there, and your effort might push me over the edge to get one soon.

Keep the photo's coming, D

P.S. What material did you use to mask the large areas when painting the Dayglo??
magnusf
_VISITCOMMUNITY
Stockholm, Sweden
Joined: May 02, 2006
KitMaker: 1,953 posts
AeroScale: 1,902 posts
Posted: Wednesday, September 30, 2009 - 06:39 PM UTC

Quoted Text

Hi Magnus,

This build is looking great. My LHS has a couple of these kits on the shelf that I keep eyeing off when I'm there, and your effort might push me over the edge to get one soon.


Of course you need one Damian! You know you really do ! And I'm glad you like the build!


Quoted Text


P.S. What material did you use to mask the large areas when painting the Dayglo??


I use a material called Parafilm. This is used in laboratories to seal test tubes but it is even more useful at the modelling table ! It comes on a roll (I think there is 60 ft in mine), you cut off a short length, stretch it to more than double its original length and attaches it to the model. There is no glue whatsoever on it, making it perfectly safe for the paintwork. It is a bit like cling film but a lot better, highly recommended!

:-H

Magnus
magnusf
_VISITCOMMUNITY
Stockholm, Sweden
Joined: May 02, 2006
KitMaker: 1,953 posts
AeroScale: 1,902 posts
Posted: Wednesday, September 30, 2009 - 10:52 PM UTC
I couldn't resist removing the masking!


Even with a corrected white balance it is hard to show what it really looks like. It is a vibrant red-orange colour that almost glows, this one won't go unnoticed in the display cabinet !


Magnus
Merlin
Staff MemberSenior Editor
AEROSCALE
#017
_VISITCOMMUNITY
United Kingdom
Joined: June 11, 2003
KitMaker: 17,582 posts
AeroScale: 12,795 posts
Posted: Friday, October 02, 2009 - 10:16 AM UTC
Hi Magnus

Sorry - I'm behind the curve as usual! Great new crash-bar - Wohh! Spray-can on a tiny kit, but the results look great... I really should check out the Tamiya sprays...

And, finally, Vallejo paint. I have to say, I've never quite got on with this stuff (and I've got a shelf-full...) There has to be a reliable fool-proof answer to spraying it, but it's eluded me so far - all the range has played up on occasions for me, to the point where I've given up on them. But again, your result looks great! This is going to be a cracker of a build!

All the best

Rowan
magnusf
_VISITCOMMUNITY
Stockholm, Sweden
Joined: May 02, 2006
KitMaker: 1,953 posts
AeroScale: 1,902 posts
Posted: Friday, October 02, 2009 - 07:47 PM UTC

Quoted Text

Hi Magnus

Sorry - I'm behind the curve as usual! Great new crash-bar - Wohh! Spray-can on a tiny kit, but the results look great... I really should check out the Tamiya sprays...


It is a bit like flying a GR Tornado or a Jaguar through enemy air defences: If you don't move fast your'e very dead. Or at least you have a ruined paint job !


Quoted Text


And, finally, Vallejo paint. I have to say, I've never quite got on with this stuff (and I've got a shelf-full...) There has to be a reliable fool-proof answer to spraying it, but it's eluded me so far - all the range has played up on occasions for me, to the point where I've given up on them. But again, your result looks great! This is going to be a cracker of a build!


The Vallejo paint range is NOT the holy grail of modelling so don't expect too much. The ones with the black tops are supposedly ready for the airbrush but they often need a few drops of water. I also add a drop of "Acrylic medium" that (maybe...) reduces the "drying on the needle tip"-effect. With these measures, you will get a paint that works as well as "the average paint". That means that it is about two lightyears from Gunze when it comes to performance... But they come in practical easy-to-handle bottles, the dark ones are excellent for brush painting and they stick well if the plastic is primed. That's about it!


Magnus
Merlin
Staff MemberSenior Editor
AEROSCALE
#017
_VISITCOMMUNITY
United Kingdom
Joined: June 11, 2003
KitMaker: 17,582 posts
AeroScale: 12,795 posts
Posted: Saturday, October 03, 2009 - 01:57 AM UTC
Hi Magnus

Thanks for the tips on Vallejo paints. I've brought them all with me on my move to the coast, so I'll give them another chance.

All the best

Rowan
magnusf
_VISITCOMMUNITY
Stockholm, Sweden
Joined: May 02, 2006
KitMaker: 1,953 posts
AeroScale: 1,902 posts
Posted: Wednesday, October 07, 2009 - 12:42 AM UTC
And now we have a finished prop and an anti-glare panel as well!


Wing walkways will be added after decalling. Speaking of decalling, project ground to a screeching halt yesterday with the disintegration of the decals into zillions of pieces... I sent a mayday e-mail to Steve at High Planes and an hour later he had mailed back and promised to send me a new sheet. Customer Service at its best!

I guess the decals will be here sometimes next week so I will make the deadline anyway!


Magnus
Tango-India-Mike
_VISITCOMMUNITY
Western Australia, Australia
Joined: August 31, 2009
KitMaker: 88 posts
AeroScale: 79 posts
Posted: Wednesday, October 07, 2009 - 02:58 AM UTC
Hey Magnus, that's looking really good!

Sorry I haven't been around much...still having these blasted computer problems and a few unrelated problems preventing me getting someone here to fix it. I wanted to alert you to something concerning the undercarriage, but couldn't get into the site (sometimes I can and most times I can't). Anyway, it looks like it might not be too late. It appears that the undercarriage is moulded at full (or nearly full) extension...as it would be with the aircraft airborne. Compare the torque links with the photographs I posted for you a while ago and you'll see what I mean. I suspect that if you leave it as it is, then the model will sit incorrectly with its nose too high.

I have the parts of my own kit in front of me right now and this does seem to be the case, although I'm not entirely sure how it can be rectified, given that the legs are cast metal rather than moulded plastic. When I get around to building mine, I think I'll probably scratch-build new undercarriage legs in plastic and metal rod, as the supplied oleos appear to be overscale anyway.

Still, I'll be interested to see yours with its wheels attached...perhaps it won't look as bad as I suspect. Perhaps also, it may be possible to cheat a little by removing the torque links, forcing some compression into them and then re-attaching them. What do you think?

Either way, it's going to be a lovely little model!

All the best for now,

Tim.
magnusf
_VISITCOMMUNITY
Stockholm, Sweden
Joined: May 02, 2006
KitMaker: 1,953 posts
AeroScale: 1,902 posts
Posted: Wednesday, October 07, 2009 - 08:12 PM UTC
Tim! I'll dry-fit the wheels tonight and have a look. I don't think it is a problem to adjust it if it looks wrong, I can probably cut off the oleo and the link at the top, drill a hole in the leg and re-attach the oleo. The link can then be bent to fit again!

Thanks for pointing it out!


Magnus
magnusf
_VISITCOMMUNITY
Stockholm, Sweden
Joined: May 02, 2006
KitMaker: 1,953 posts
AeroScale: 1,902 posts
Posted: Thursday, October 08, 2009 - 09:21 AM UTC
I put the wheels on for a photo shoot. It sits a bit high with the nose (more than I who envision a begging Terrier ?) but I'll probably leave the gear legs the way they are anyway. Probably... I'll keep you posted!


Magnus