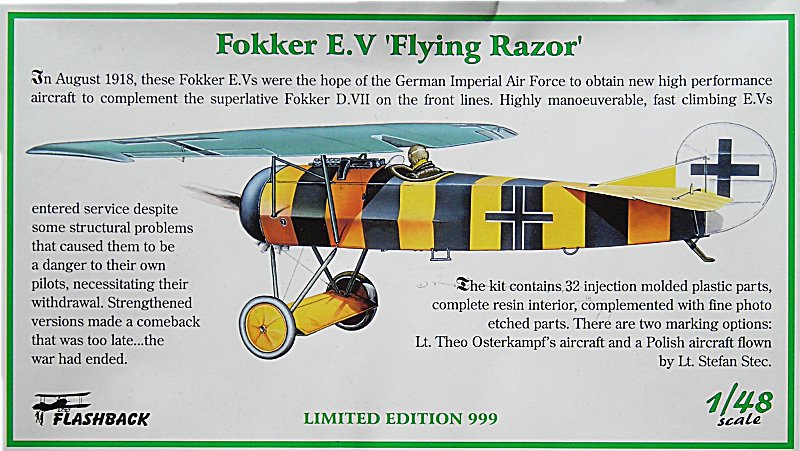
Fokker E.V "Osterkamp" - Eduard WE 1/48
Germany
Joined: September 07, 2005
KitMaker: 5,609 posts
AeroScale: 5,231 posts
Posted: Sunday, September 06, 2009 - 12:24 AM UTC
Hi all
now I will finally start my campaign build for "Stripes in the sky". Hope I can make it in time. (Thanks again for the extension, Terri!)

Please bear with me as WWI is not my main modelling field. Stephen has posted a lot of good information in his Blog .. which I will mostly ignore. I know this c&m is debatable and I will also (have to) do some deviations. I have no spare Rautenstoff (Lozenge .. as it is correctly written) decal, so my interior will be as per instructions "sail" colour. For the wing I will probably go with a lightly streamed olive green (one colour). I will also use a few parts from this kit (mainly PE and decals)
I'll post some pix as soon as it is worth it.
all the best
Steffen
DULCE ET DECORUM EST PRO HOBBY MORI
Alberta, Canada
Joined: January 19, 2008
KitMaker: 6,743 posts
AeroScale: 6,151 posts
Posted: Sunday, September 06, 2009 - 02:21 AM UTC
I will be following your build with a keen eye Steffen . Been waiting along time for you to build a WW1 thingie . Look forward to the progress pic's my friend !

Joined: December 23, 2007
KitMaker: 1,596 posts
AeroScale: 1,275 posts
Posted: Sunday, September 06, 2009 - 04:55 AM UTC
Everything you do - I'll be watching you...
Colorado, United States
Joined: January 25, 2004
KitMaker: 11,669 posts
AeroScale: 11,011 posts
Posted: Sunday, September 06, 2009 - 03:40 PM UTC
There is room for everyone here.
". . .The most important thing is to know why you build and then get the most that you can out of building." via D.D.
Germany
Joined: September 07, 2005
KitMaker: 5,609 posts
AeroScale: 5,231 posts
Posted: Sunday, September 06, 2009 - 08:08 PM UTC
Thank you Terri, Michal and Stephen!
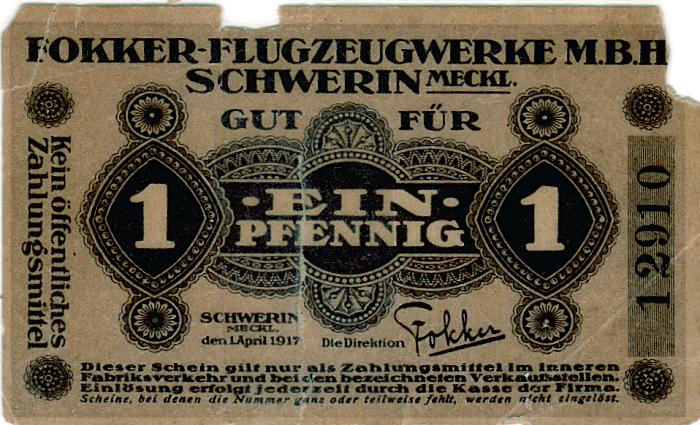
(Fokker Notgeld ...
look at the date!, I am not sure this is some real stuff, but it is really old .. bought it from Ebay once)
I know I cannot "compete" with the other WWI cracks here, but I hope I can do a model, that I am half way satisfied with. As I wrote in another thread, it may take a few days until I post some WIP pix, as I have to find my way of doing the specific WWI things, like wood and linen surfaces in the cockpit.....
all the best
Steffen
BTW Terri I already did a few WW1 models .. but only one is finished. maybe I can find some motivation to finalize my 95% models --- Rodens D.VII of Löwenhardt and the Flashback Linke-Crawford machine .. sadly i went as per instructions (red letters and band) which Stephen mentioned recently is wrong and should be black

Here is the sole finished stringbag in my display (klick img):
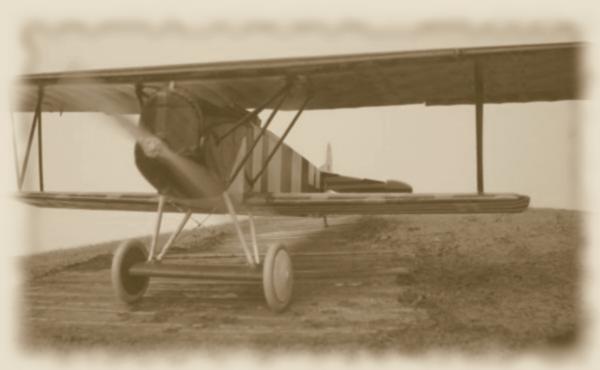
do you like the pink wheels

... prove me wrong .. colour photos from that time period only

DULCE ET DECORUM EST PRO HOBBY MORI
Alberta, Canada
Joined: January 19, 2008
KitMaker: 6,743 posts
AeroScale: 6,151 posts
Posted: Monday, September 07, 2009 - 02:39 AM UTC
Nice job on the Fokker Steffen . I'm sure when you get it finally finished you will be happy with the results .
Nothing wrong with pink tires ! From the time period the rubber was like a light grey or a light pinkish in hue .
Germany
Joined: September 07, 2005
KitMaker: 5,609 posts
AeroScale: 5,231 posts
Posted: Monday, September 07, 2009 - 03:28 AM UTC
Many thanks Terri!
Well, I have read different account son the pinkish colour .. when I build it I thought it was likely or at least possible.
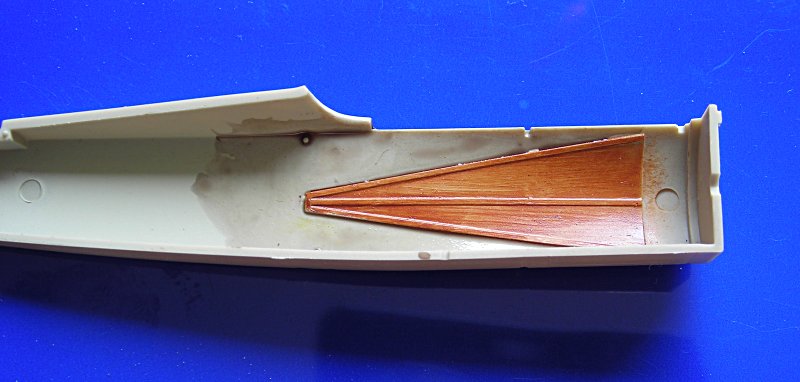
I played a bit with the fuselage today. First I sprayed a light beige colour, the I masked the wood and used some oils and finally some wash for the sides ... more when it is dry
cheers
Steffen
DULCE ET DECORUM EST PRO HOBBY MORI
Germany
Joined: September 07, 2005
KitMaker: 5,609 posts
AeroScale: 5,231 posts
Posted: Tuesday, September 08, 2009 - 11:42 PM UTC
Still waiting for the oils to dry ...
I thought about the interior colour (metal tubes). the instructions call for RLM 02 (a greenish beige grey for those not familiar with WW2 colours) this would mean it looks quite similar to the linen behind it .. are there other colours possible .. maybe with a blue hue (like "neutral grey") ??? TIA!
all the best
Steffen
DULCE ET DECORUM EST PRO HOBBY MORI
Alberta, Canada
Joined: January 19, 2008
KitMaker: 6,743 posts
AeroScale: 6,151 posts
Posted: Wednesday, September 09, 2009 - 01:55 AM UTC
Well it's close to the shade but it's to light in my opinion . Most builders will use RLM 02 .
It should have less grey in it and a little more green .
You can mix your shade starting with green and added grey ( not light grey ) until you get the shade you want . I mix my using a olive green cant really tell you the mixing ratio , I never write this down .
This shade would also vary on the manufacture at the time when supplies are low .
Have you ever tried using acrylics for doing the wood grain ?
Germany
Joined: September 07, 2005
KitMaker: 5,609 posts
AeroScale: 5,231 posts
Posted: Wednesday, September 09, 2009 - 02:04 AM UTC
Thank you Terri
so I will darken the 02 a bit to get more contrast ...
Acrylic wood .. how does that work? ..
It is quite easy to get the fine streaked effect with oils (thats why I used these) but at the moment this is rather painful as I concentrate on just one or two projects at a time and thus when I have to wait I must wait actively (read I am occupied with waiting and cannot do anything else) ... sooooo I would be interested how I get a similar effect with as few work and less waiting than with oils!!!
all the best
Steffen
DULCE ET DECORUM EST PRO HOBBY MORI
Alberta, Canada
Joined: January 19, 2008
KitMaker: 6,743 posts
AeroScale: 6,151 posts
Posted: Wednesday, September 09, 2009 - 02:16 AM UTC
Steffen , I used oils once didn't like it and the drying time really was the killer on that . So i started using acrylics . Tamiya and Vallejo are what I use and future . My plate is really full right now more over flowing then any thing else . I've been ask this question before so I guess it's time I do a article on this . Hopefully in the very near future I will have this done .
Germany
Joined: September 07, 2005
KitMaker: 5,609 posts
AeroScale: 5,231 posts
Posted: Wednesday, September 09, 2009 - 02:24 AM UTC
Quoted Text
...I guess it's time I do a article on this . Hopefully in the very near future I will have this done .
Thanks Terri!
I am looking forward to that!!
.. for now I will just have to wait .... 2 projects stalled

all the best
Steffen
DULCE ET DECORUM EST PRO HOBBY MORI
Indiana, United States
Joined: May 14, 2007
KitMaker: 3,117 posts
AeroScale: 2,270 posts
Posted: Wednesday, September 09, 2009 - 07:35 AM UTC
Steffan, One thing I do on the wood, that you might want to try. After oil paint is dry, put a coat of Tamiya clear yellow over it to simulate varnish. It really looks good when finished.
"Treat 'em Rough", Current Builds--Wingnut Rumpler
I am frequently seen with blood shot eyes from staying up past my nap time to get the right colour scheme on my latest WWI model?
Germany
Joined: September 07, 2005
KitMaker: 5,609 posts
AeroScale: 5,231 posts
Posted: Wednesday, September 09, 2009 - 07:48 AM UTC
Thank you Carl !
I intend to put on a Citadel Wash (Ogryn Flesh) to give it a more uneven appearance and it dries up glossy .. I will see how it turns out. At the moment I find the look pretty nice and "woody"...
all the best
Steffen
DULCE ET DECORUM EST PRO HOBBY MORI
Colorado, United States
Joined: January 25, 2004
KitMaker: 11,669 posts
AeroScale: 11,011 posts
Posted: Wednesday, September 09, 2009 - 09:48 AM UTC
Quoted Text
". . .do you like the pink wheels ... prove me wrong .. colour photos from that time period only. . ."
I am sure you meant black and white only no colour. We have had this discussion here before and I post this for the readers. Steffen is right that we only have chemical make up to asess from.
colour of tires. ". . .The most important thing is to know why you build and then get the most that you can out of building." via D.D.
Germany
Joined: September 07, 2005
KitMaker: 5,609 posts
AeroScale: 5,231 posts
Posted: Wednesday, September 09, 2009 - 08:05 PM UTC
Thank you Stephen!
and no; I meant: show me a colour photo from 1918 of Loerzers machine to prove me wrong
... sometimes i like a little artistic license, though I generally would prefer to stick to solid information.
I must state again, that WWI is a fun build for me, that I take not as serious (from the accuracy point of view) as a WW2 Luftwaffe bird and sometimes even there I have to rely on (more or less) educated guessing. That's why I am glad we have some WWI buffs on board so my guessing does not go too wild
all the best
Steffen
DULCE ET DECORUM EST PRO HOBBY MORI
England - South East, United Kingdom
Joined: November 06, 2005
KitMaker: 1,667 posts
AeroScale: 1,551 posts
Posted: Wednesday, September 09, 2009 - 09:48 PM UTC
Steffen,
Hi, two points of advice... my personal taste only though
For wood that isnt overly visible I use Citadel *flesh wash* from Games Workshop, over a light buff enamel. Its a thin ink like acrylic that if applied very sparingly builds up nicely to show wood grain for but it can be a little dark if over applied. but its water based so washes off if you mess up if you are quick.
tubing and Metal work colour, I usually use a field grey colour myself lightened a little for 1/48th
Best regards Keith
Still can't cure the AMS even with sausage finger implants & olde eyes.
Germany
Joined: September 07, 2005
KitMaker: 5,609 posts
AeroScale: 5,231 posts
Posted: Wednesday, September 09, 2009 - 09:57 PM UTC
Thank you Keith!
I like the Citadel products .. especially the new washes are just great (ogryn flesh is the new flesh wash).
Still I do not see how I could build up the wood grain texture with it, so I would be interested in a faster/acrylic method .. I do agree that a wash would have been suffice in the cockpit as you cannot see much of it once it is closed ..
all the best
Steffen
DULCE ET DECORUM EST PRO HOBBY MORI
Germany
Joined: September 07, 2005
KitMaker: 5,609 posts
AeroScale: 5,231 posts
Posted: Thursday, September 10, 2009 - 11:44 PM UTC
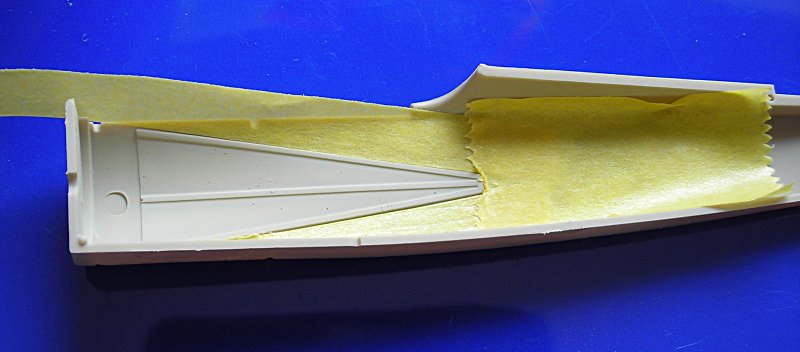
Well, after some chatter let's move on with some model building...
Here are some pix of the cockpit work so far. Again the remark to keep in mind that I normally build larger models and that I do not like doing cockpits at all ... plus this is mostly OOB. I am actually preparing (painting) the seat belts from the flashback kit .. when that is done I will probably close the pit (I am sure there are a lot of essential parts and instruments missing, but I will probably go as per instructions)
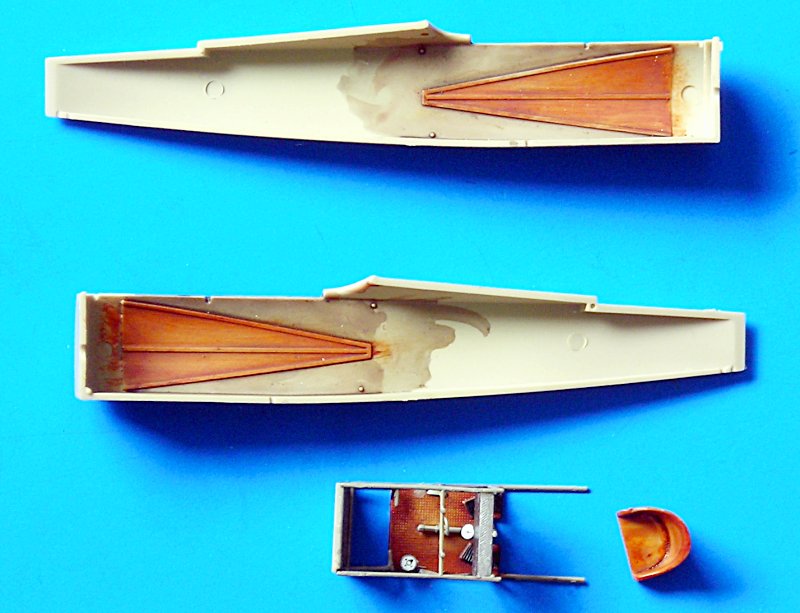
Thanks for looking and please do not hesitate to post your comments .. I have more WW1 in the stack and i can only learn!
all the best
Steffen
DULCE ET DECORUM EST PRO HOBBY MORI
Alberta, Canada
Joined: January 19, 2008
KitMaker: 6,743 posts
AeroScale: 6,151 posts
Posted: Friday, September 11, 2009 - 01:54 AM UTC
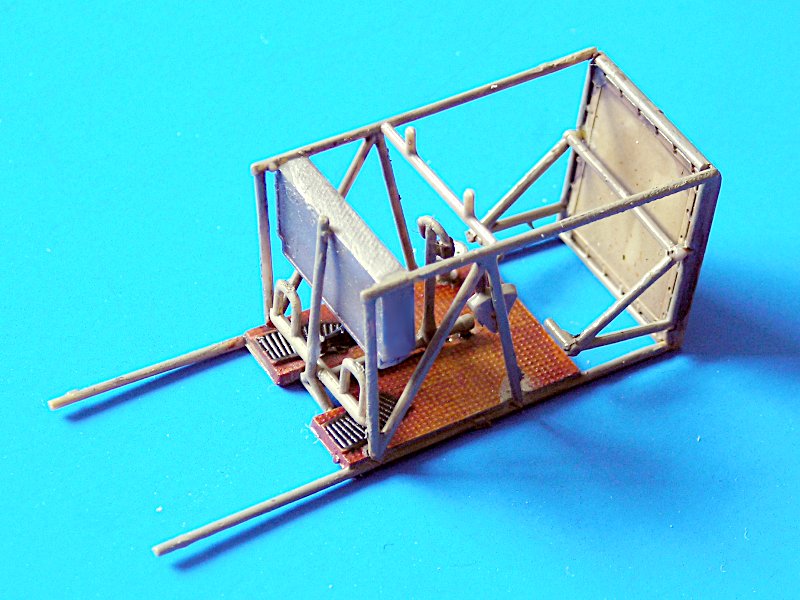
So far Steffen it's turning out very well ! Really like your wood grain on the reinforcing panels on the cockpit walls .
For the lacing on the panel behide the seat , a little dry brushing of an off white will really make them stand better and give it some depth .
Germany
Joined: September 07, 2005
KitMaker: 5,609 posts
AeroScale: 5,231 posts
Posted: Friday, September 11, 2009 - 02:11 AM UTC
Thank you Terri!
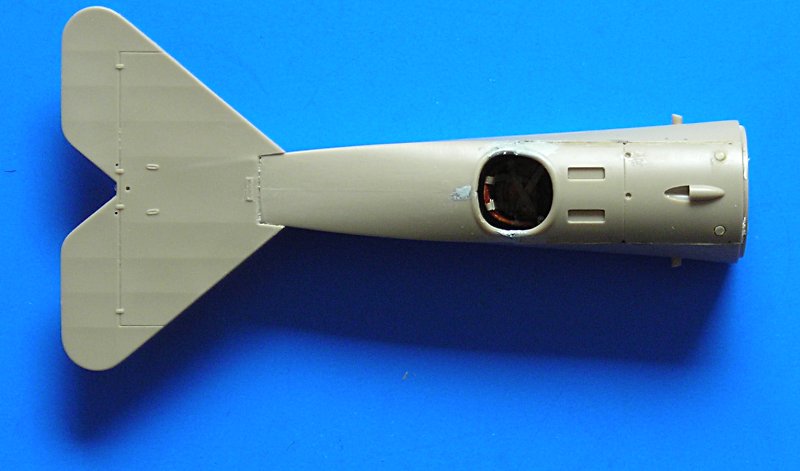
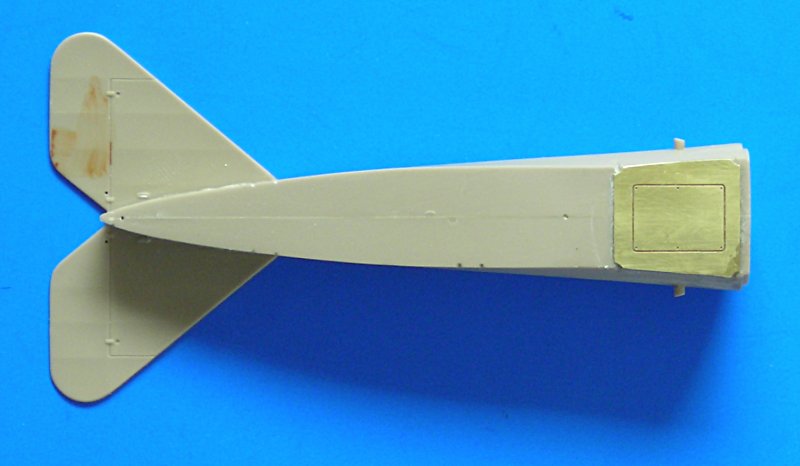
will do with the next model. As I was "in the move" I just finished the fuselage ... even attached the elevator ( I did not even take photos .. sorry)
BTW ever noticed that WW1 models are small ... in 48 scale.
all the best
Steffen
DULCE ET DECORUM EST PRO HOBBY MORI
England - South East, United Kingdom
Joined: March 07, 2005
KitMaker: 868 posts
AeroScale: 690 posts
Posted: Friday, September 11, 2009 - 02:55 AM UTC
looking good Steffen...now I build even fewer WWI models than you do, but I'm wondering about your finish for the seat there ...were they not metallic at all ?
Germany
Joined: September 07, 2005
KitMaker: 5,609 posts
AeroScale: 5,231 posts
Posted: Friday, September 11, 2009 - 03:06 AM UTC
Thanks Neil!
Well, In my opinion they were wood or plywood, also the instructions called for a brown colour, so if you know something I don't, please let me know...
Edit: here are a few pictures at present state:

all the best
Steffen
DULCE ET DECORUM EST PRO HOBBY MORI
Germany
Joined: September 07, 2005
KitMaker: 5,609 posts
AeroScale: 5,231 posts
Posted: Saturday, September 12, 2009 - 04:18 AM UTC
Some more progress:

all the best
Steffen
DULCE ET DECORUM EST PRO HOBBY MORI
Alberta, Canada
Joined: January 19, 2008
KitMaker: 6,743 posts
AeroScale: 6,151 posts
Posted: Saturday, September 12, 2009 - 04:20 AM UTC
Very nice Steffen !
I do like the wood graining on the seat , but the instructions are wrong . The seats are alum / with the back and front portions cover in lozenge and the seat had a parachute cushion type thingie .
How are you finding the fit of the kit so far ?


