

My Roden Camel with Bentley engine in 1/72 arrived today. I have the Part PE set for this too. I will be building this as my contribution to the Fokker vs. Camel Campaign.
I have some questions before I get started! The kit's instructions are not particularly clear on a few things. I am modelling B6212 'Black Prince'. Should I enlarge the cockpit opening- extending it forward? Should I use the engine cowl with the two slots on the port side of the front face? Should I use the prop with the broad tips, or the less broad tips?
The box art shows 'Laura' with the automatic fuel pump propeller mounted to the starboard front undercarriage strut, but the kit has this attached to the starboard rear cabane strut. Does anyone know where this should be for Black Prince? I have this as a Part part, so I will be removing the Roden one whatever.
Did this aircraft have the gun sight telescope thing between the guns (as the box art shows)? This is not represented in the Roden or Part parts.
Thanks for any and all help!
Early Aviation
Discuss World War I and the early years of aviation thru 1934.
Discuss World War I and the early years of aviation thru 1934.
Hosted by Jim Starkweather
Roden 1:72 Sopwith Camel

robot_

Joined: March 08, 2009
KitMaker: 719 posts
AeroScale: 691 posts
Posted: Monday, October 19, 2009 - 10:53 AM UTC

thegirl

Joined: January 19, 2008
KitMaker: 6,743 posts
AeroScale: 6,151 posts
Posted: Monday, October 19, 2009 - 01:17 PM UTC
Hi Ben ! Got the same kit and look forward to your build on this in 72 scale .
As for your questions I'm really not to sure . Stephen or some one else will be able to anwser this better the me .
As for your questions I'm really not to sure . Stephen or some one else will be able to anwser this better the me .

JackFlash

Joined: January 25, 2004
KitMaker: 11,669 posts
AeroScale: 11,011 posts
Posted: Monday, October 19, 2009 - 04:03 PM UTC
I will check my references.
thegirl
Joined: January 19, 2008
KitMaker: 6,743 posts
AeroScale: 6,151 posts
Posted: Tuesday, October 20, 2009 - 02:28 AM UTC
Hello again Ben . I did some digging and found the profile I was looking for . Also look in the Stash of kit's and Eduard has this making option in kit # 8056 .
From what I can tell Black Prince didn't use the bentley engine . So none of the parts on the E spruce are used . As for the engine(s) parts 30 and 31 , 31 being the La Rhone I'm not a hundred % sure but could have had the Clegt in her . Now I could be total off the mark , but this is from the little info I have . For the pump it's not shown in the profiles . Please don't take my word for any of this , but I do hope it helps you out in some way .
From what I can tell Black Prince didn't use the bentley engine . So none of the parts on the E spruce are used . As for the engine(s) parts 30 and 31 , 31 being the La Rhone I'm not a hundred % sure but could have had the Clegt in her . Now I could be total off the mark , but this is from the little info I have . For the pump it's not shown in the profiles . Please don't take my word for any of this , but I do hope it helps you out in some way .
robot_
Joined: March 08, 2009
KitMaker: 719 posts
AeroScale: 691 posts
Posted: Tuesday, October 20, 2009 - 02:55 AM UTC
Thanks Terri. That is funny, if you're correct about the engine! In the profiles, can you see if the cockpit is the usual round hole, or does it extend forward, as the Roden instructions seem to describe?
I've read somewhere on the web that this aircraft was made by Sopwith (who only produced ~500 of ~5000 total Camels), and this means it might have been painted in PC12 instead of PC10. And someone in a random forum was saying all RNAS aircraft would be in PC12 anyway, as RFC "owned the formula to PC10".
I've read somewhere on the web that this aircraft was made by Sopwith (who only produced ~500 of ~5000 total Camels), and this means it might have been painted in PC12 instead of PC10. And someone in a random forum was saying all RNAS aircraft would be in PC12 anyway, as RFC "owned the formula to PC10".
thegirl
Joined: January 19, 2008
KitMaker: 6,743 posts
AeroScale: 6,151 posts
Posted: Tuesday, October 20, 2009 - 01:36 PM UTC
Hi Ben ! From what I can tell ( which could be wrong ) looking at the side profile the gun/cockpit decking stops before the cowling . On the Bentley engine Camels the cockpit decking sits on part of the cowl . I don't have a top view so I can't say the size of the openning for sure , but judging from the side profile it appears to be a regular one . However , at some time in it's career it could have had a engine replacement and had a Bentley put in .
For the wind pump i just don't have enough ref's to give you an answer . Seems to be in different spots on most Camels . Which spot for your bird can't tell . Sorry Ben .
Now you got me wanting to know more !
For the wind pump i just don't have enough ref's to give you an answer . Seems to be in different spots on most Camels . Which spot for your bird can't tell . Sorry Ben .
Now you got me wanting to know more !
robot_
Joined: March 08, 2009
KitMaker: 719 posts
AeroScale: 691 posts
Posted: Tuesday, October 20, 2009 - 09:06 PM UTC
Thanks for taking the time to look at your references Terri. I saw some posts by Stephen on the Aerodrome forum from 2006 where he states it had a Bentley- but as you say, it may well have had one as a replacement.
Anyway, onwards with some pics:
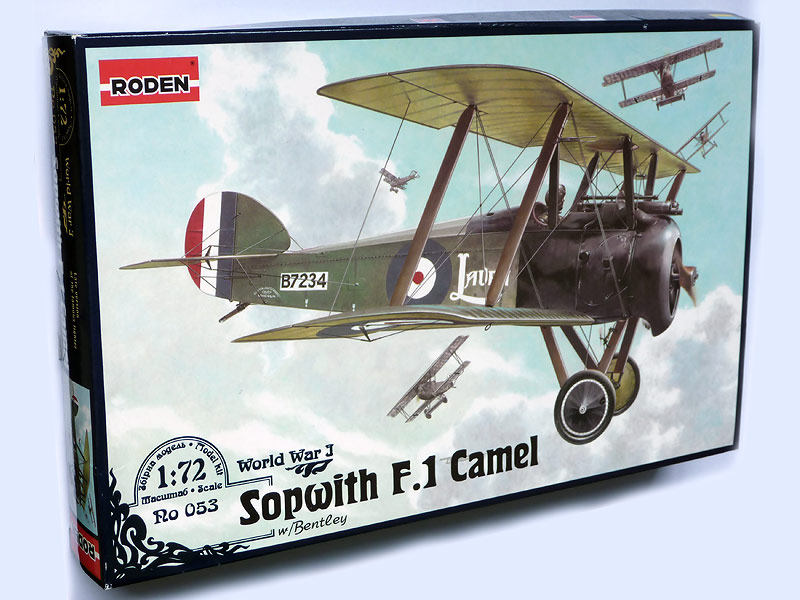
Great painting and art nouveau design.
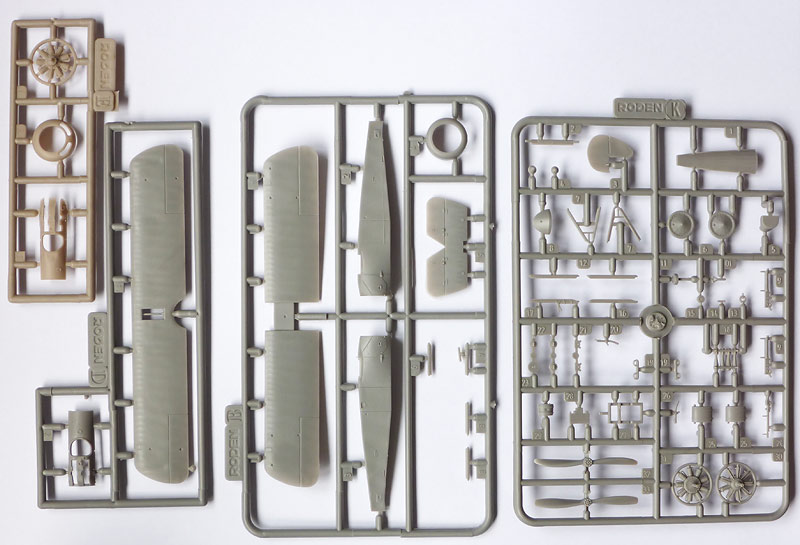
4 sprues for a 1/72 WWI biplane- due to the number of variants Roden has produced in its Camel range. There are three engines supplied, two cockpit decks, and some unused armaments.
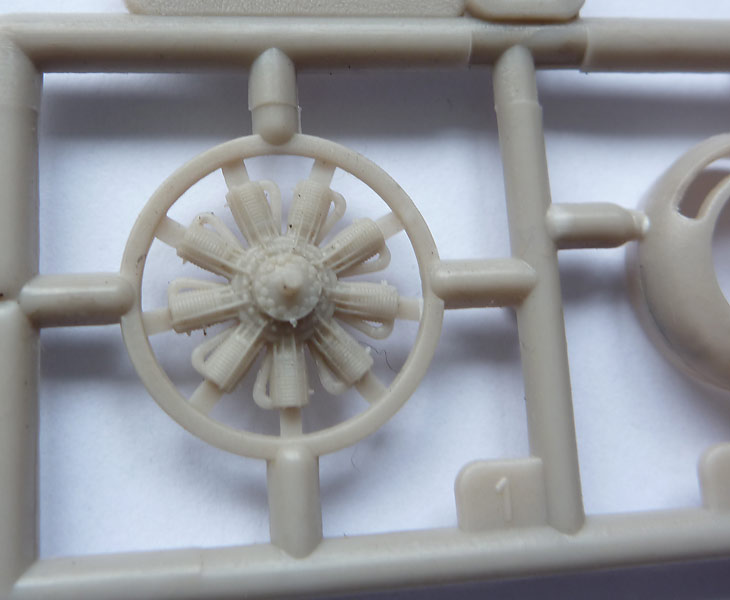
The Bentley engine (moulded in a slightly more beige plastic than the other sprues).
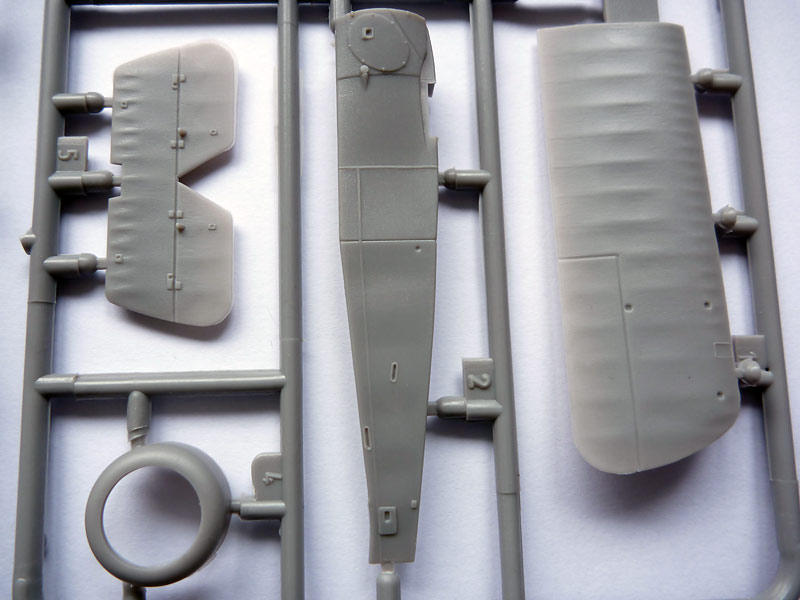
beautiful canvas effects, and the wings are very thin.
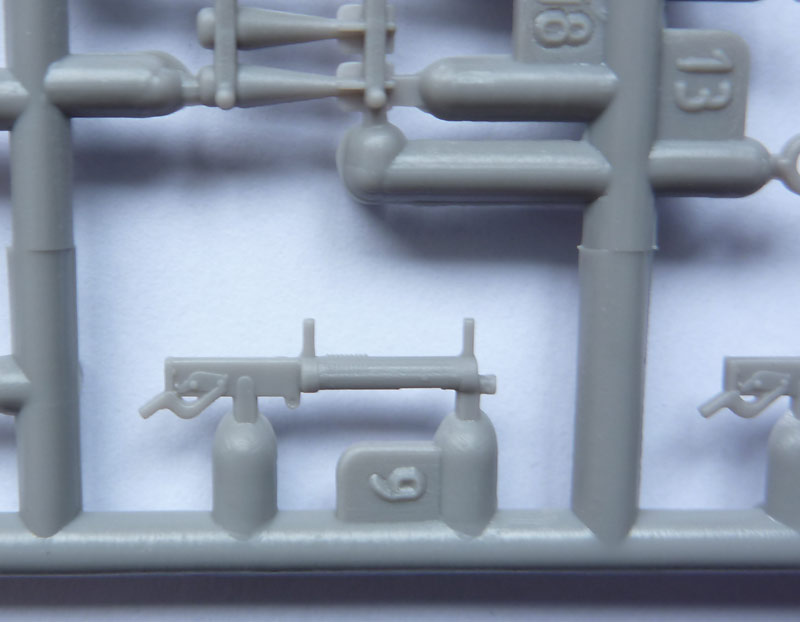
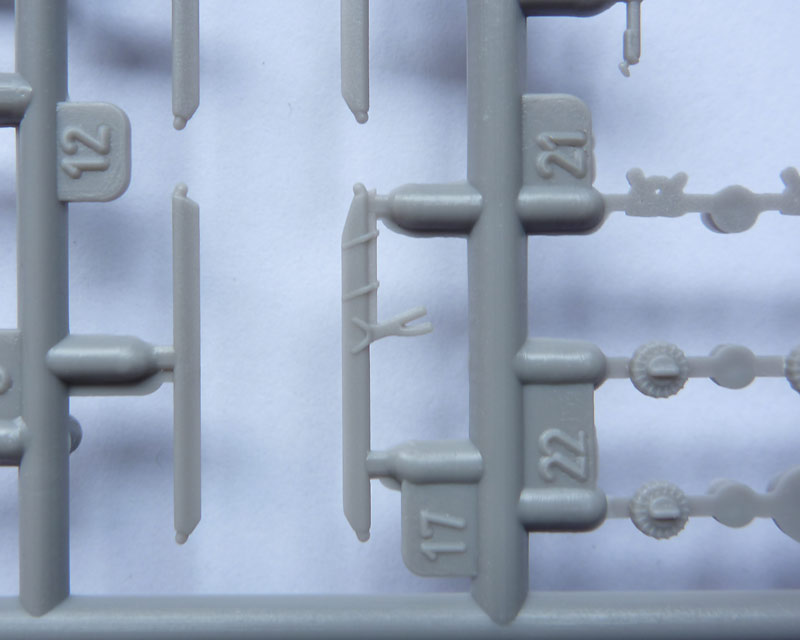
The kit features small details without resorting to photo-etched metal- here they have moulded a delicate pitot tube to a strut.

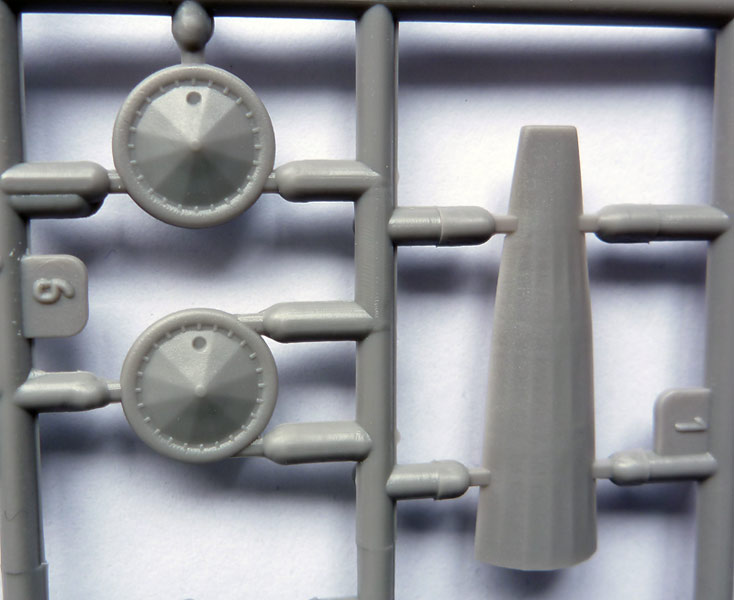
Two options on props.

The transfers are a little weak- particularly the uneven printing of the grey/silver parts, and having separate centres to the roundels.
The kit is supposed to also have a very small clear sheet with a windscreen part to cut out- mine was definitely not in the box (I searched it well!). I didn't mind, as I had a replacement in the Part set, which has the bonus of a PE frame.
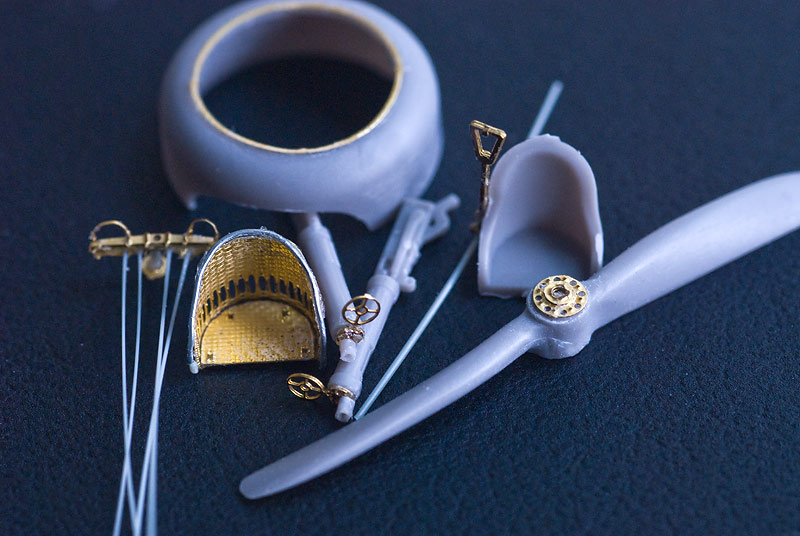
And now the Part PE set (cost the same as the kit!):
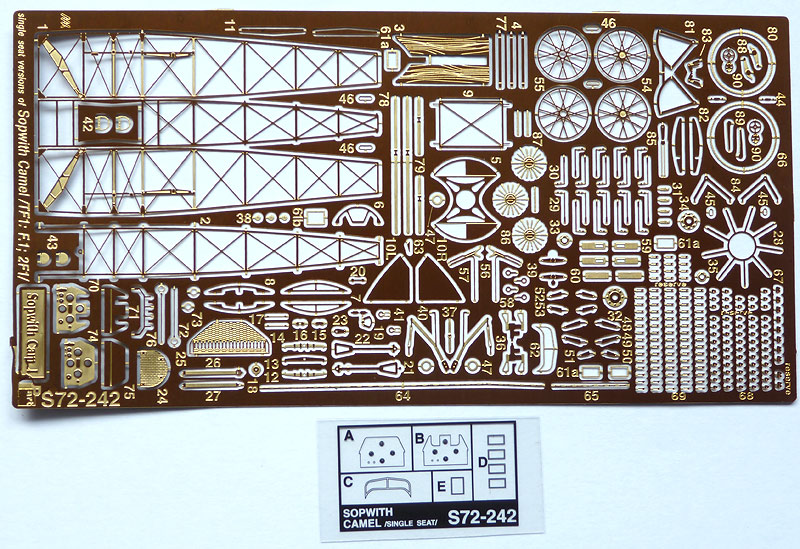
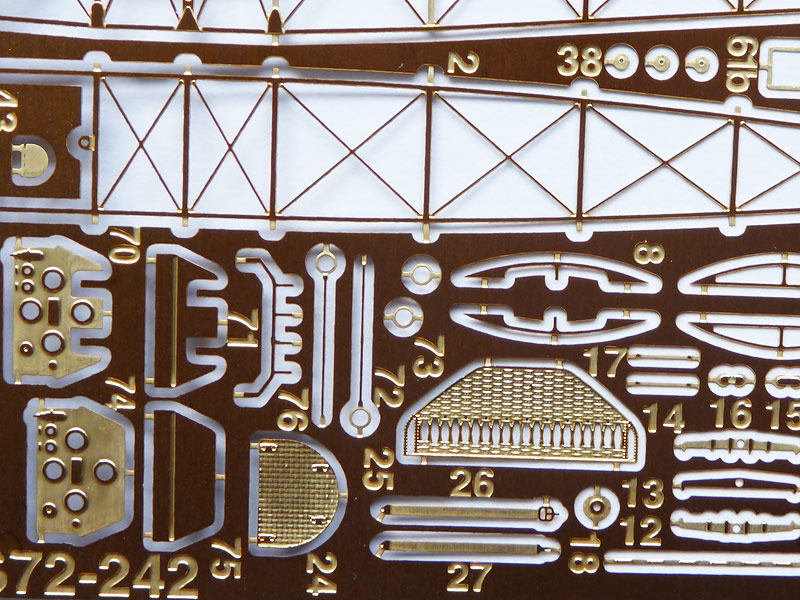
But it is lovely- look at the wicker seat (which is probably the only bit of the interior anyone will see)!
Anyway, onwards with some pics:
Great painting and art nouveau design.
4 sprues for a 1/72 WWI biplane- due to the number of variants Roden has produced in its Camel range. There are three engines supplied, two cockpit decks, and some unused armaments.
The Bentley engine (moulded in a slightly more beige plastic than the other sprues).
beautiful canvas effects, and the wings are very thin.
The kit features small details without resorting to photo-etched metal- here they have moulded a delicate pitot tube to a strut.
Two options on props.
The transfers are a little weak- particularly the uneven printing of the grey/silver parts, and having separate centres to the roundels.
The kit is supposed to also have a very small clear sheet with a windscreen part to cut out- mine was definitely not in the box (I searched it well!). I didn't mind, as I had a replacement in the Part set, which has the bonus of a PE frame.
And now the Part PE set (cost the same as the kit!):
But it is lovely- look at the wicker seat (which is probably the only bit of the interior anyone will see)!
thegirl
Joined: January 19, 2008
KitMaker: 6,743 posts
AeroScale: 6,151 posts
Posted: Wednesday, October 21, 2009 - 01:11 AM UTC
No trouble at all Ben ! Like I said I'm not sure if the info is accurate but it was fun looking it up . Stephen can give you more details on the subject .
You have your work cut out for you with all of those small PE parts , looking forward to your progress ......................
You have your work cut out for you with all of those small PE parts , looking forward to your progress ......................
JackFlash
Joined: January 25, 2004
KitMaker: 11,669 posts
AeroScale: 11,011 posts
Posted: Wednesday, October 21, 2009 - 07:32 AM UTC
Sopwith Camel F.1 B6212 with a Bentley BR. 1 150hp rotary was flown by Flt. Sub-Lt. W.A. Moyle of Sea plane Defense Squadron at St. Pol France in December 1917. This unit became 13N Sqdn RNAS by 15 January 1918. It was damaged on 19 February 1918 when flown by Flt. Sub-Lt. W. J. Mackenzie. Then repaired and sent to 203 RAF by 10 April 1918 where it was flown by an American, 1/Lt. W. W. Goodlow. Last recorded as being at Farnborough 30 June 1918.
robot_
Joined: March 08, 2009
KitMaker: 719 posts
AeroScale: 691 posts
Posted: Wednesday, October 21, 2009 - 09:13 AM UTC
Thanks for the engine confirmation Stephen.
Should I use the deck that is longer and blends into the cowling from above, or the shorter one that ends flush with the cowl?
Strangely, Roden say to only use the longer deck for one of the four options (not this one).
And why are they saying to open up the cockpit opening?!
Have you ever seen a photo of a Camel with the slots in the front of the cowling- I haven't so far?
JackFlash
Joined: January 25, 2004
KitMaker: 11,669 posts
AeroScale: 11,011 posts
Posted: Wednesday, October 21, 2009 - 12:07 PM UTC
Quoted Text
Thanks for the engine confirmation Stephen. Should I use the deck that is longer and blends into the cowling from above, or the shorter one that ends flush with the cowl? Strangely, Roden says to only use the longer deck for one of the four options (not this one). And why are they saying to open up the cockpit opening?!
Have you ever seen a photo of a Camel with the slots in the front of the cowling- I haven't so far?
The RNAS Camels used the overlapping cowlings on the Bentley rotaries. Since it was a two gun type it may have had the right side altered to access the right Vickers receiver mechanisms. There was one cowling with 4 cooling slots was Barker's B 6313 in Italy. Usually these were field modifications.
thegirl
Joined: January 19, 2008
KitMaker: 6,743 posts
AeroScale: 6,151 posts
Posted: Wednesday, October 21, 2009 - 12:57 PM UTC
Thank-you as well Stephen ! I didn't think I was right and I was right ! Was the naval units the only ones who used the Bentleys ?
robot_
Joined: March 08, 2009
KitMaker: 719 posts
AeroScale: 691 posts
Posted: Wednesday, October 21, 2009 - 08:55 PM UTC
Stephen- excellent information, thank you!
I shall proceed with the overlapping cowl/top deck. I don't think I'll cut the deck opening, as it is just as possible it was uncut, and I'm more likely to make it look worse by inexperienced butchery.
The front cowl with the slots is an uncertainty- the main circular opening is smaller than the normal camel cowl on the other sprue, so maybe these slots went with the smaller front opening. I had thought of filling the slots, but maybe that would be worse than just using the other front cowling. I shall dry-fit the parts, and if it goes together OK with the un-slotted front cowl, I'll use that, as I'll be able to see more of the engine that way.
I'll be using the pointy prop, as these are the more common, from what I have seen (yet to see a photo of the broader type).
I won't use the spoked PE wheels, as these look like a nightmare, and I've never seen a bare-wheeled Camel.
I'm undecided as to how I'll rig it. If I was crazy, I would use the PE anchors and the PE turnbuckles- this would probably be easiest with the very stretchy thread I had recently bought (Aeroclub stretch rigging thread, but it is just elastane, i.e. spandex/lycra).
Or I could use the 'part-drill the top holes, and drill all the way through the lower ones' method, and then glue the PE turnbuckles on top- this would make things easier to line up, so would probably look better.
Or I could try the method Terri used on the dual build with wire loops glue in holes, and stretched cottonbud turnbuckles... hmmm... lots to think about.
robot_
Joined: March 08, 2009
KitMaker: 719 posts
AeroScale: 691 posts
Posted: Saturday, October 24, 2009 - 03:29 AM UTC
OK, I am several hours into this build, and have very little to show for it. So far I have lost three pieces of photo-etch in the carpet, but the 'good' news is I found the wing-tip skip from the Fokker Dr.I that I lost a couple of weeks ago (and have already scratch-built a replacement for) 
I added a piece of wire around the top of the seat, as it looked a bit thin without it. I've given up adding any more PE to the guns- the detail in the plastic parts is good enough.
I have test-fitted some parts, and wish Roden used location pins in the fuselage!
I added a piece of wire around the top of the seat, as it looked a bit thin without it. I've given up adding any more PE to the guns- the detail in the plastic parts is good enough.
I have test-fitted some parts, and wish Roden used location pins in the fuselage!
Jamo_kiwi

Joined: November 04, 2008
KitMaker: 123 posts
AeroScale: 122 posts
Posted: Saturday, October 24, 2009 - 09:56 AM UTC
Nice photos Ben. I'm looking for a new camera - would you recommend the one you're using?
The PE seat looks great! Big improvement over the kit item. I'm looking forward to seeing it painted.
Suggestion for recovering PE bits lost to the carpet gods: get a piece of muslin and put it in between two of the vacuum cleaner pipes so that it filters all the bits sucked up. You'll probably have to run it on low power because the muslin increases the resistance quite dramatically. Then the job is to sift through the debris collected in the muslin and (if it hasn't been too long since you last vacuumed) you should find the missing bits!
Happy Modelling
James
robot_
Joined: March 08, 2009
KitMaker: 719 posts
AeroScale: 691 posts
Posted: Saturday, October 24, 2009 - 10:38 AM UTC
Hi James,
The shots of the box and sprues, etc. were taken with a little compact Panasonic- the FT1 (I can't remember what it is called outside Europe, or maybe just in the US). It is waterproof to 3m, shockproof and very small. I bought it for snorkelling! It does good video too (720p). It has a 28mm wide setting, which is very sharp, but the tele end is poor. The lens is a periscope design, so there are no external movements of the lens, it is vertically positioned inside the body with a prism at the top to look out forwards. I really enjoy it, as I don't have to think that much, and it is very fast to change between a manual configuration and full auto.
The close-ups of the bits assembled so far have been taken with a Nikon D200 and Tamron 90mm macro lens (just hand-held). I wouldn't normally get an SLR out for build progress shots, but these bits are very small.
Check out reviews on dpreview.com , because no camera is right for everyone. Every camera is a compromise of cost, size, lens range, lens quality, sensor size, noise, etc.- you just have to choose which has the right balance for you. If you buy from one of the major brands, they will all be pretty good, but try one out for handling and interface friendliness if you are going to buy it on-line.
Anyway, back on topic: thanks for the tip about the vacuum. I should also tidy and clean my desk, then it would be a lot easier to find missing parts. At the moment I have lots of bits (some pretty small!) from several kits on the desk.
I've just struggled through attaching the push rods to the engine. They are a bit over-scale, but should make it look suitably 'busy'.
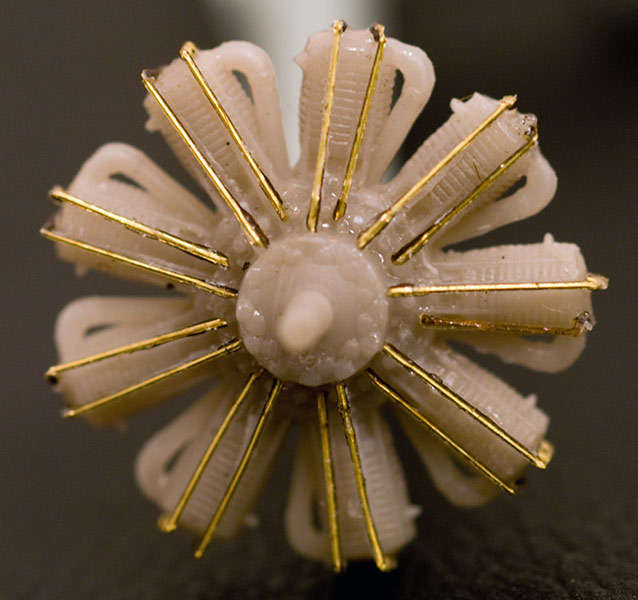
thegirl
Joined: January 19, 2008
KitMaker: 6,743 posts
AeroScale: 6,151 posts
Posted: Sunday, October 25, 2009 - 03:27 AM UTC
Have to hand it to you on working in 72 scale PE parts ! I would have lost more then 3 bye now  Every build I lose them to the carpet monster .
Nicely done so far Ben , what do you use for your lighting ?
Every build I lose them to the carpet monster .Nicely done so far Ben , what do you use for your lighting ?
thegirl
Joined: January 19, 2008
KitMaker: 6,743 posts
AeroScale: 6,151 posts
Posted: Sunday, November 01, 2009 - 01:40 AM UTC
How goes the build Ben ?
robot_
Joined: March 08, 2009
KitMaker: 719 posts
AeroScale: 691 posts
Posted: Monday, November 02, 2009 - 10:39 AM UTC
Well, I'm just back from a short break in France- so no progress to report. As for lighting, I just use natural light from the window, but if it is dark outside (as it is most of the time I have for modelling at this time of year) I use the normal room lighting, or the desk lamp. It helps that the room is white, so the light is very soft.

Bristol

Joined: November 04, 2009
KitMaker: 31 posts
AeroScale: 30 posts
Posted: Wednesday, November 04, 2009 - 05:57 AM UTC
Hi Ben,
You do know that the Laura boxing is a 2F1 'ships Camel---and as such has subtle differences to a standard F1?---Not having the kit myself (eyes won't work in 72nd. any more) I don't know if they included correct span wings--but either way you need to fill the 'break' line moulded into fuse. and fill the location hole for the external control horn. Also 'B6212 used the early steel tube U/C legs--I doubt they are 'in the box'...
Hope I'm not to late--but also feel free to tell me to shut up

Cheers,
dave. EDIT actually looking more carefully at the sprues in your pic,---they are the right legs.
You do know that the Laura boxing is a 2F1 'ships Camel---and as such has subtle differences to a standard F1?---Not having the kit myself (eyes won't work in 72nd. any more) I don't know if they included correct span wings--but either way you need to fill the 'break' line moulded into fuse. and fill the location hole for the external control horn. Also 'B6212 used the early steel tube U/C legs--I doubt they are 'in the box'...
Hope I'm not to late--but also feel free to tell me to shut up
Cheers,
dave. EDIT actually looking more carefully at the sprues in your pic,---they are the right legs.
robot_
Joined: March 08, 2009
KitMaker: 719 posts
AeroScale: 691 posts
Posted: Thursday, November 12, 2009 - 11:48 AM UTC
Hi David, Thanks for your comment. I'm not following you 100% about the fuselage: do you mean they re-used the fuselage sprue from the Ship's Camel? So the vertical groove in the fuselage is wrong? (I am replacing the stitching- just lines in the plastic- with PE ones, so it won't be too hard to sand the sides).
Do you know for sure that this plane didn't have the external control horns (coming out of the fuselage, not the ones on the control surfaces)? I was planning to use the PE ones, as they look cool
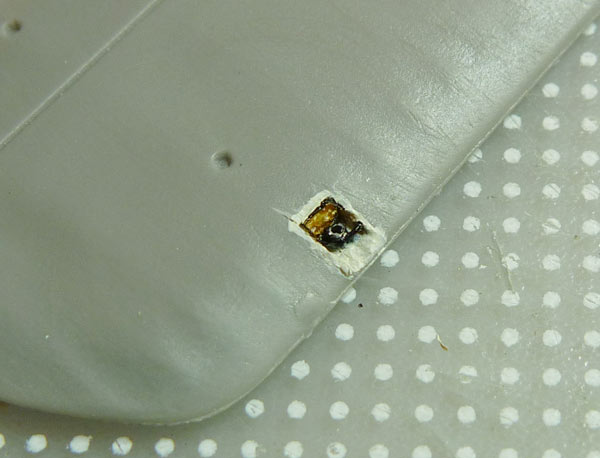
I have been fiddling, not making much progress. I have opened one of the four inspection panels in the wings, and have made a mini pulley and added a short piece of control line going around it. For scale, the dots are at 1mm centres.
Do you know for sure that this plane didn't have the external control horns (coming out of the fuselage, not the ones on the control surfaces)? I was planning to use the PE ones, as they look cool
I have been fiddling, not making much progress. I have opened one of the four inspection panels in the wings, and have made a mini pulley and added a short piece of control line going around it. For scale, the dots are at 1mm centres.
JackFlash
Joined: January 25, 2004
KitMaker: 11,669 posts
AeroScale: 11,011 posts
Posted: Thursday, November 12, 2009 - 04:37 PM UTC
Greetings Ben;
Here is a thread from the Aeroscale past on the Sopwith 2F.1. Its in 1:48 scale but all the better to see the differences with said the big bad wolf. In short the wings were shorter and the fuselage came apart behind the cockpit and the tail control cables were outside the fuselage and worked off an outside pivot. The RNAS had F.1 Camels as well.
Sop. 2F.1
Here is a thread from the Aeroscale past on the Sopwith 2F.1. Its in 1:48 scale but all the better to see the differences with said the big bad wolf.
In short the wings were shorter and the fuselage came apart behind the cockpit and the tail control cables were outside the fuselage and worked off an outside pivot. The RNAS had F.1 Camels as well. Sop. 2F.1
robot_
Joined: March 08, 2009
KitMaker: 719 posts
AeroScale: 691 posts
Posted: Thursday, November 12, 2009 - 08:16 PM UTC
So it's this joint, about half way down the fuselage, and the hole near it that need to be filled?
And did the stitching go up the vertical joint of the wooden section of fuselage to the cloth rear section?
The stitching on the kit fuselage side above is represented by a ridge, but I will be using PE. The other side has a trench rather than a ridge to represent this join.
I am now having second thoughts about using the normal cowling. I read a review that suggests the Bentley cowl flared out from the fuselage a little, like the kit Bentley cowl, but without the cut-outs. Is the size of the opening at the front (big round one that you see the engine through) really smaller on the Bentley one? If so, I have a bit of work to do filling those added vents...

jaypee

Joined: February 07, 2008
KitMaker: 1,699 posts
AeroScale: 1,384 posts

Posted: Thursday, November 12, 2009 - 10:37 PM UTC
Doing a basic build of the revell camel. I really appreciate the effort you are putting into this tiny package.
All that detail will pay off into making a jewel.
Keep her lit.
All that detail will pay off into making a jewel.
Keep her lit.

Bristol
Joined: November 04, 2009
KitMaker: 31 posts
AeroScale: 30 posts
Posted: Thursday, November 12, 2009 - 11:33 PM UTC
Hi Ben,
Yes--that vertical line must go--and the 'pip' for the outside control horn---they are not on F1 Camels.---the extreme outside 'pips' on the wings have to go also. You should check your wingspan as the Ship's Camel had a shorter Centre section and corresponding shorter lower wings.
The 'embossed' vertical is the end of the plywood side panel---your lacing should run parrelell with this and a tad aft-----the fore and aft lacing should more or less follow the molding as is.
If you have 'Sopwith Camel Squadrons' by Windsock (or any of the guys) and can post a pic,---there are two on page 51.----I know you're not there yet but the cockpit is also cut away--certainly on port side and quite possibly on s'board side.
Why they chose to box an F.1 Camel using 2F1 parts--or even a full kit---as I say, check your wingspan---I can't begin to imagine!!!! But you are certainly putting consumate effort into your build Ben. I am sorry to be the 'bearer' of this.........
Dave.
 |

WEB HOSTING BY


Copyright ©2021 AeroScale and Kitmaker Network, a subsidiary of Silver Star Enterprises
All Rights Reserved. Please read our Conditions of Use and Privacy Policy.
All Rights Reserved. Please read our Conditions of Use and Privacy Policy.