Thanks for the support Nick!
After fiddling with pulleys in the wing windows, I found the first photo today, and I see that only half of the pulley was visible in the window- the other half being mounted in the spar itself. Too late to change mine now (and they are so tiny on 1% of people would notice even if they knew how they should be).
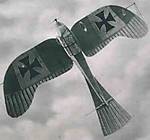
I've been considering how to shade the wings. I could do complex pre-shading, but if I do too thick a coat over it, there would be no going back. One confusing thing is that in some photos the rib tapes look dark (eg. when back-lit strongly, I guess), but most of the time, they look lighter than the surrounding cloth. Some photos show the spars inside as a shadow, sometimes a pale strip, almost as clear as the rib tapes. I have seen a very nice photo of how the light from the pulley window shines into the wing, illuminating the under surface:
I have planned out how I'll do the shading- all will be post-shading. I'll be using water colour paint, so any disasters can be easily removed. I may spray a thin varnish coat between the shading and the highlight mists, so I can wipe off the highlights if they go wrong without having to re-do the shading as well.
The plan for the upper wing surfaces:
And for the lower:
(images have been automatically scaled by the forum software, right click and 'open image in new window' to see full size)
Early Aviation
Discuss World War I and the early years of aviation thru 1934.
Hosted by Jim Starkweather
Roden 1:72 Sopwith Camel
robot_
United Kingdom
Joined: March 08, 2009
KitMaker: 719 posts
AeroScale: 691 posts
Joined: March 08, 2009
KitMaker: 719 posts
AeroScale: 691 posts
Posted: Thursday, December 17, 2009 - 10:11 AM UTC
jaypee
Scotland, United Kingdom
Joined: February 07, 2008
KitMaker: 1,699 posts
AeroScale: 1,384 posts
Joined: February 07, 2008
KitMaker: 1,699 posts
AeroScale: 1,384 posts
Posted: Thursday, December 17, 2009 - 09:20 PM UTC
Wow that is brilliantly explained. Demystifies the excellent finishes we see here. Top man Ben.
robot_
United Kingdom
Joined: March 08, 2009
KitMaker: 719 posts
AeroScale: 691 posts
Joined: March 08, 2009
KitMaker: 719 posts
AeroScale: 691 posts
Posted: Sunday, December 20, 2009 - 09:52 AM UTC
Thanks John-Paul, I wanted to get it totally clear in my head, and I hope it helps someone else.
A few updates (mostly very picky little things...).
robot_
United Kingdom
Joined: March 08, 2009
KitMaker: 719 posts
AeroScale: 691 posts
Joined: March 08, 2009
KitMaker: 719 posts
AeroScale: 691 posts
Posted: Sunday, January 10, 2010 - 11:17 AM UTC
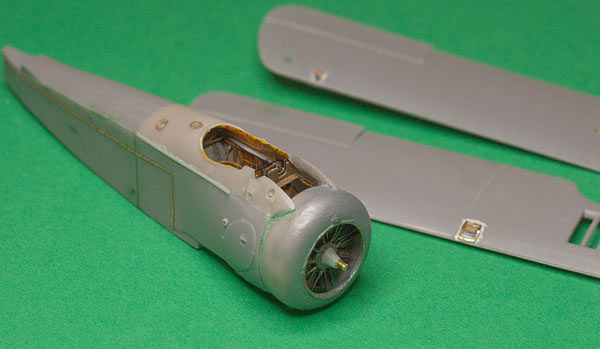
Final solution to getting a freely moving motor when blowing on the prop. I had to tear off the cowling after the part holding the rear of the axel came off inside the fuselage (I was messing around fitting the tapering sleeve onto the front of the engine, and pulled on the engine too hard). The new tapering drive shaft to the prop is much more accurate than the thin kit part, or my brass rod. I have also stuck the spare prop boss to the back of the prop, as the bolts on the back are prominent in photos of the real thing.
First attempt at oil paint. Love the way it never dries, but hopefully it will dry at some point in the next few weeks.... I plan to paint a coat of klear mixed with a bit of Tamiya clear yellow over the top. Do Tamiya clear colour mix OK with Klear? My Tamiya clear colours seem to dry very quickly, and I don't seem to be able to get an even coat brushed on before it starts to dry.
You can see one of the inspection windows in the wing is now covered in the clear cover and PE frame- this was a complete nightmare. The PE is too easily distorted- it is a very thin frame made of foil-thick brass. I tried gluing with Micro Kristal Klear, but this was not strong enough, so I used CA, which was asking for trouble on such small parts, and you're trying to maintain visibility through the window...
JackFlash
Colorado, United States
Joined: January 25, 2004
KitMaker: 11,669 posts
AeroScale: 11,011 posts
Joined: January 25, 2004
KitMaker: 11,669 posts
AeroScale: 11,011 posts
Posted: Sunday, January 10, 2010 - 04:22 PM UTC
In 1:72 its like seeing the details in 1:48. Nice work!
Bristol
United Kingdom
Joined: November 04, 2009
KitMaker: 31 posts
AeroScale: 30 posts
Joined: November 04, 2009
KitMaker: 31 posts
AeroScale: 30 posts
Posted: Wednesday, January 13, 2010 - 04:35 AM UTC
Indeed i second that--this (in this scale) is consumate workmanship my friend.
One point--I don't believe the undersurface 'wrap around' of upper colour extended to the trailing edges. Leading edges and tips only I think....
Again---masterful modelling.
Dave.
One point--I don't believe the undersurface 'wrap around' of upper colour extended to the trailing edges. Leading edges and tips only I think....
Again---masterful modelling.
Dave.
Posted: Wednesday, January 13, 2010 - 07:18 AM UTC
WOW! That's fantastic stuff.
I prefer 1/72 stuff with single wings, but this seems like it's an order of magniture smaller and WAY more complex.
Keep up the good work!
I prefer 1/72 stuff with single wings, but this seems like it's an order of magniture smaller and WAY more complex.
Keep up the good work!
wombat58
New South Wales, Australia
Joined: March 26, 2009
KitMaker: 366 posts
AeroScale: 309 posts
Joined: March 26, 2009
KitMaker: 366 posts
AeroScale: 309 posts
Posted: Wednesday, January 13, 2010 - 12:29 PM UTC
Brilliant build so far - how you guys work in 1:72 is beyond me, I find it hard enough doing 1:32.
Looking forward to more photos of your build, very well done.
Des.
Looking forward to more photos of your build, very well done.
Des.
thegirl
Alberta, Canada
Joined: January 19, 2008
KitMaker: 6,743 posts
AeroScale: 6,151 posts
Joined: January 19, 2008
KitMaker: 6,743 posts
AeroScale: 6,151 posts
Posted: Sunday, January 17, 2010 - 04:01 AM UTC
How goes the progress Ben ?
NickZour
Attica, Greece / Ελλάδα
Joined: May 01, 2008
KitMaker: 1,437 posts
AeroScale: 1,241 posts
Joined: May 01, 2008
KitMaker: 1,437 posts
AeroScale: 1,241 posts
Posted: Thursday, January 21, 2010 - 04:42 AM UTC
Quoted Text
I find it hard enough doing 1:32.
That was very funny
By the way this model is awesome until now
Keep going
Cheers Nick
robot_
United Kingdom
Joined: March 08, 2009
KitMaker: 719 posts
AeroScale: 691 posts
Joined: March 08, 2009
KitMaker: 719 posts
AeroScale: 691 posts
Posted: Thursday, January 21, 2010 - 05:41 AM UTC
Thanks everyone for the encouragement. I've been unable to make any progress since the last update- due in part to having no fresh superglue (I use the thick old superglue as an excuse as to why I messed up the little inspection window glazing).
Also due to the cold weather- I need to spray some Mr. Surfacer 1200 from a rattlecan to prime the whole plane, and it is pretty cold outside... but I could be getting on with the wood grain on the struts... will try and make some progress soon.