Östergötland, Sweden
Joined: April 04, 2006
KitMaker: 1,058 posts
AeroScale: 1,004 posts
Posted: Wednesday, February 03, 2010 - 12:55 AM UTC
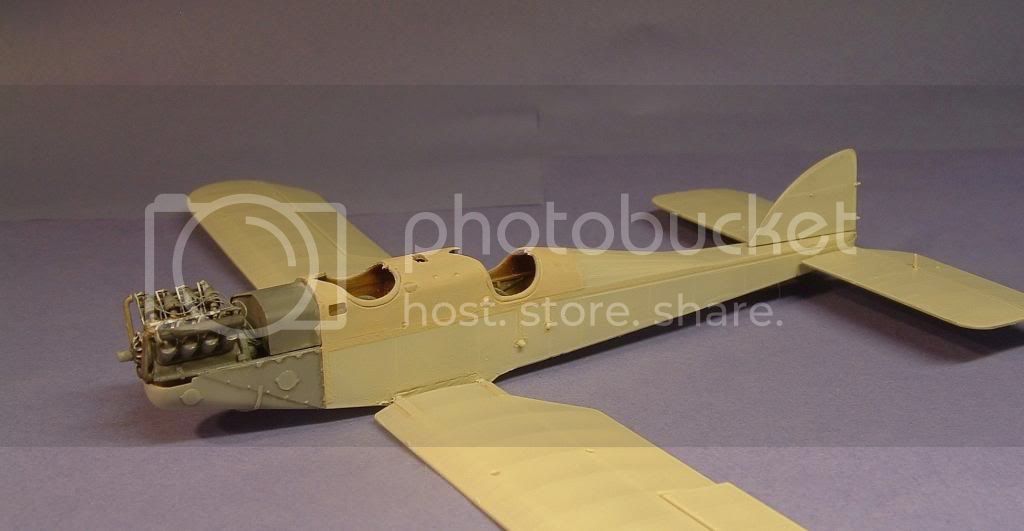
It´s nice to see Terri starting up her´s Be2c, that will be a gem guys. I´ve started up mine too and have got this far with it.

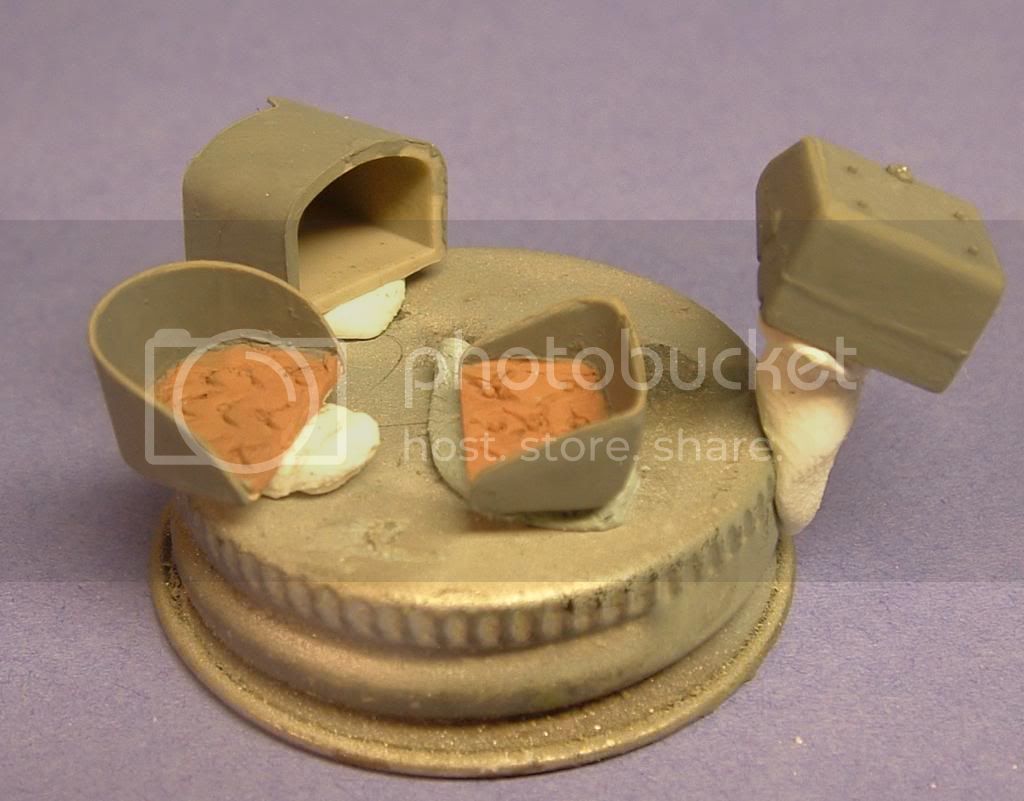
Engine detailed and painted up,This is a real beauty, sorry for the por pic.
New seats was made from thin plasticard, all thing painted up set aside for later use.
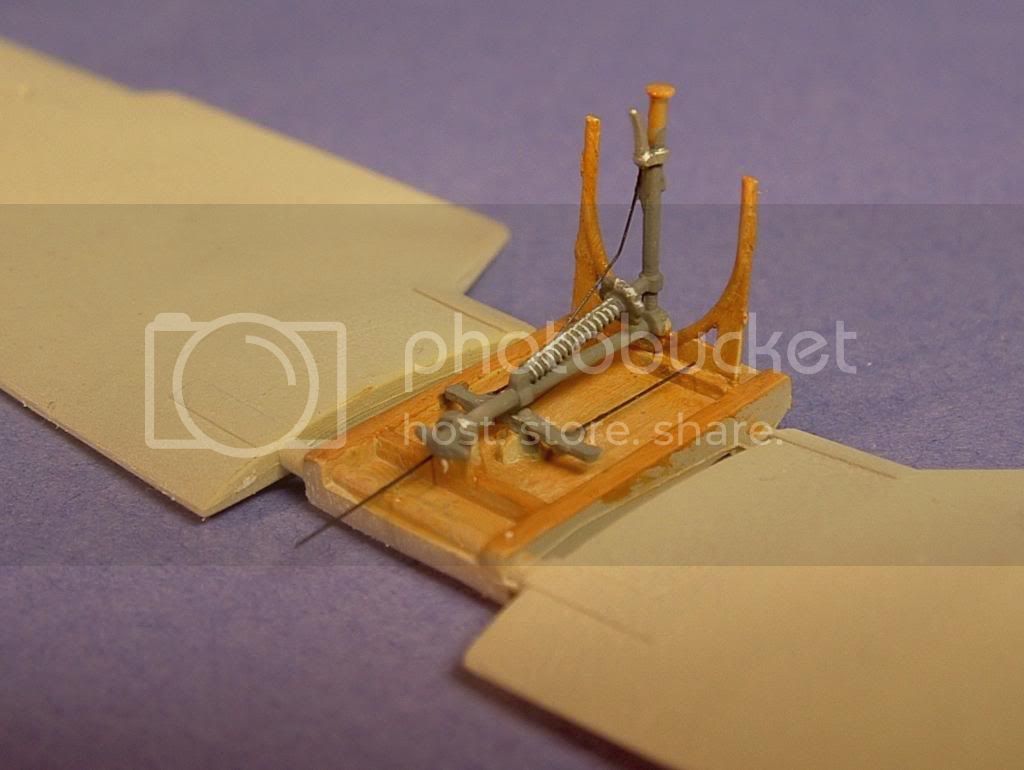
The floor is painted in oils and detailed up with streched sprues.


Larsa Q
Alberta, Canada
Joined: January 19, 2008
KitMaker: 6,743 posts
AeroScale: 6,151 posts
Posted: Wednesday, February 03, 2010 - 01:37 AM UTC
Hi Lars ! It has been awhile my friend since we have last seen your work here . Welcome back and a excellent subject to start with

Nice progress

Östergötland, Sweden
Joined: April 04, 2006
KitMaker: 1,058 posts
AeroScale: 1,004 posts
Posted: Friday, February 05, 2010 - 05:18 AM UTC
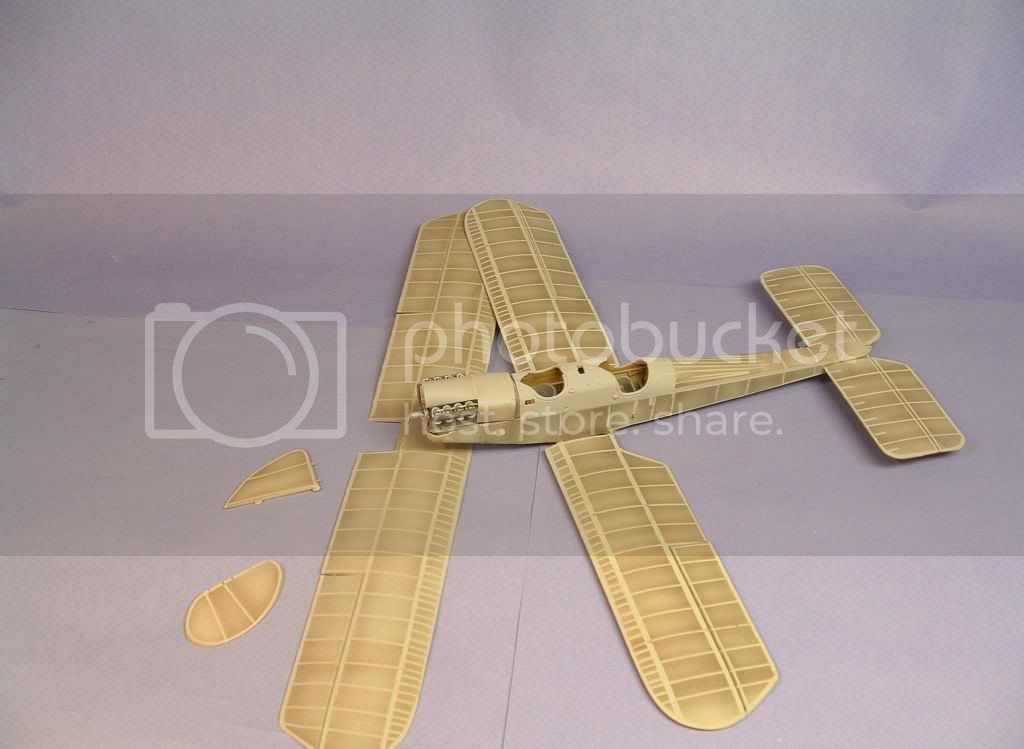
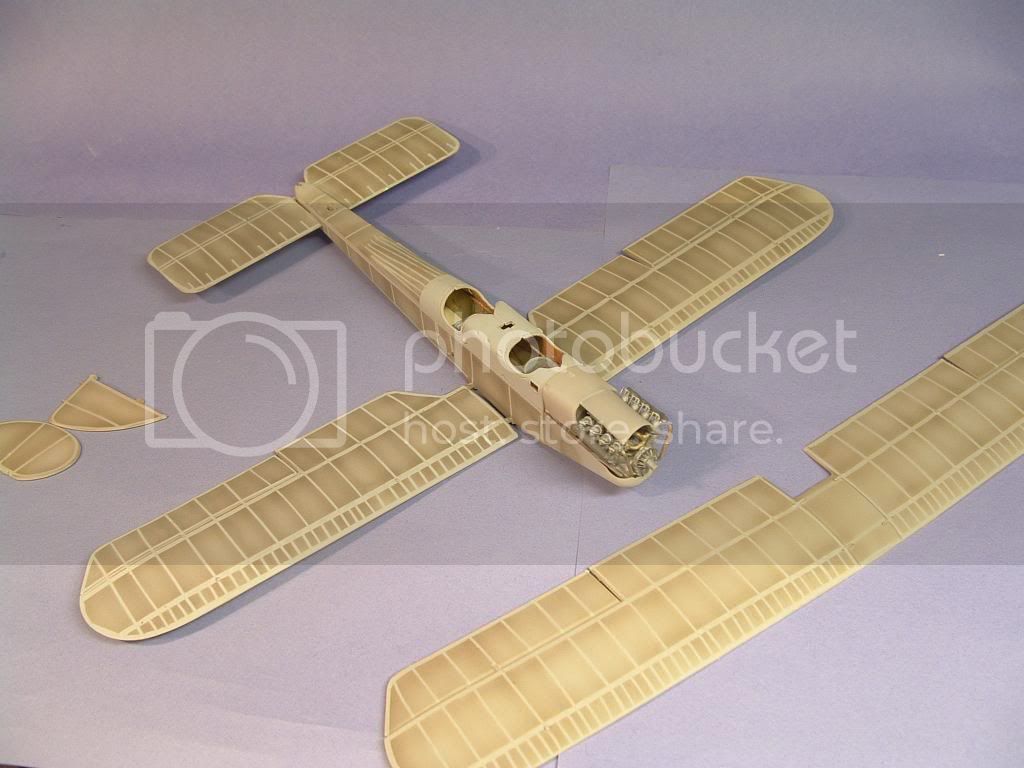
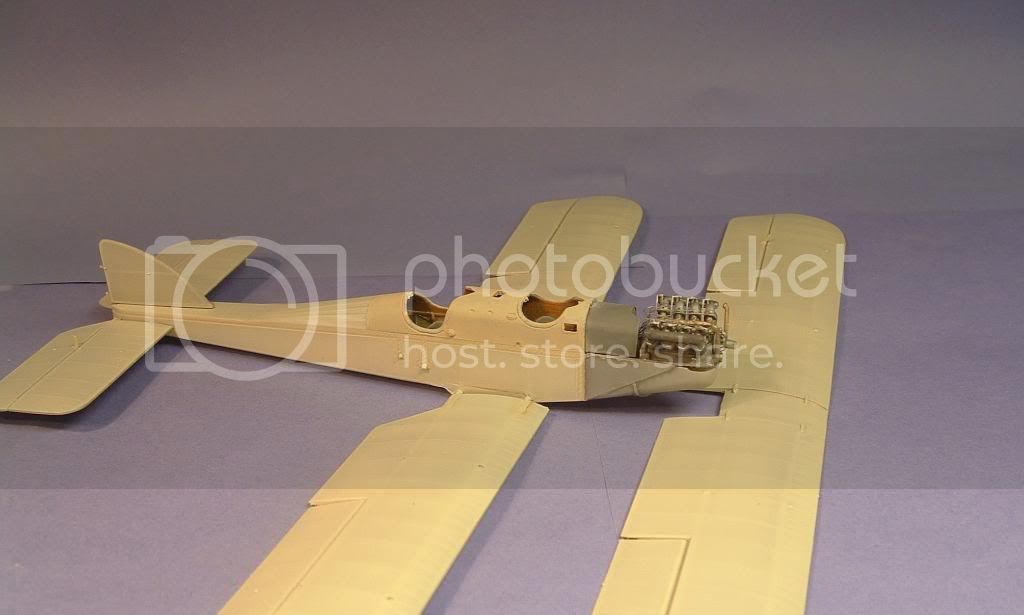
Hi folks
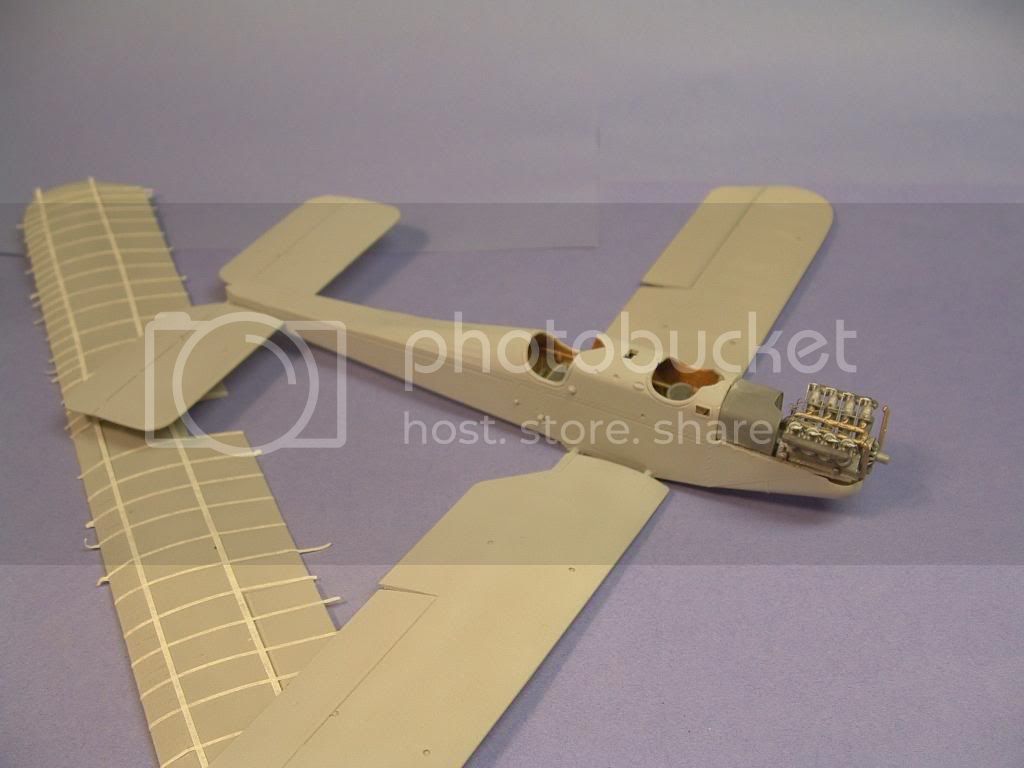
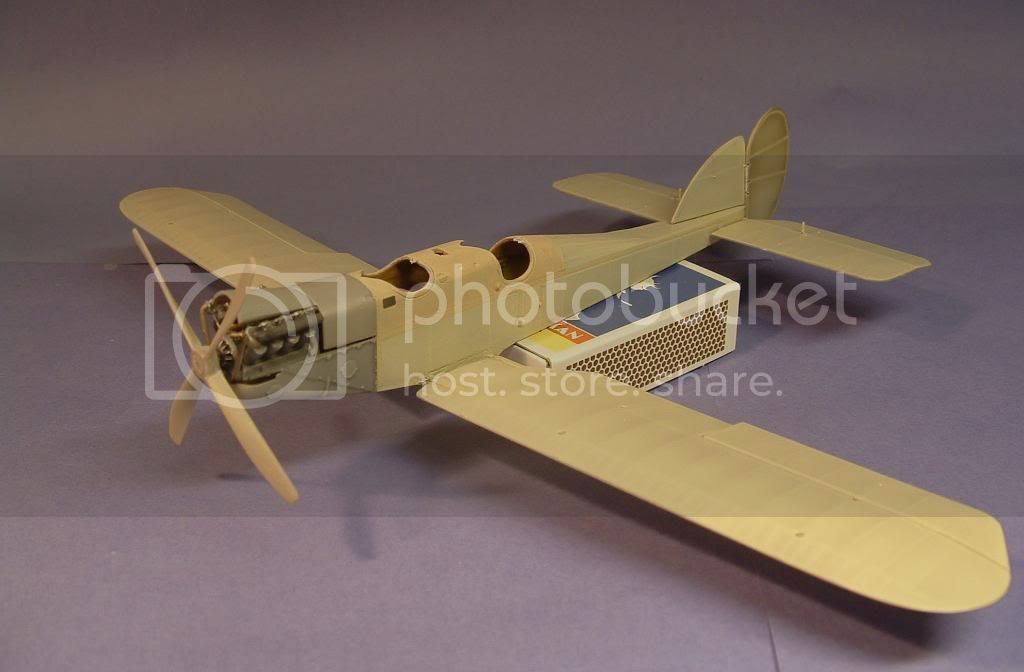
The fuselagehalves is together.
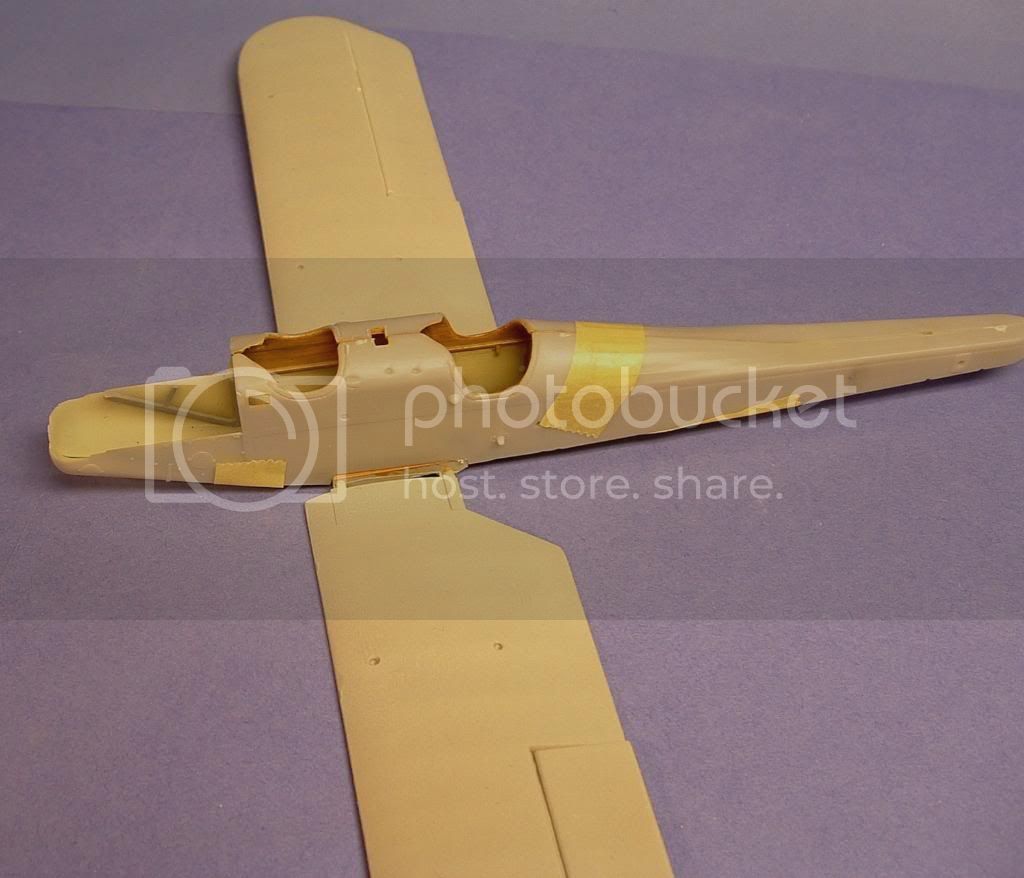
(old pics)
The engine is in place and all interior stuff, so for now it´s going for masking all the ribs and details. Then we have the same as for the "Comic" (look for this thread) some preshading to fix.
pics soon guys(and Terri)
Larsa
Alberta, Canada
Joined: January 19, 2008
KitMaker: 6,743 posts
AeroScale: 6,151 posts
Posted: Sunday, February 07, 2010 - 02:49 PM UTC
Lars , how do you find the fit of the lower wing ?
The fit on my is snug , maybe a little too tight . Over all a good fit which won't need a lot of filler .
Östergötland, Sweden
Joined: April 04, 2006
KitMaker: 1,058 posts
AeroScale: 1,004 posts
Posted: Monday, February 08, 2010 - 09:06 PM UTC
Hi Terri
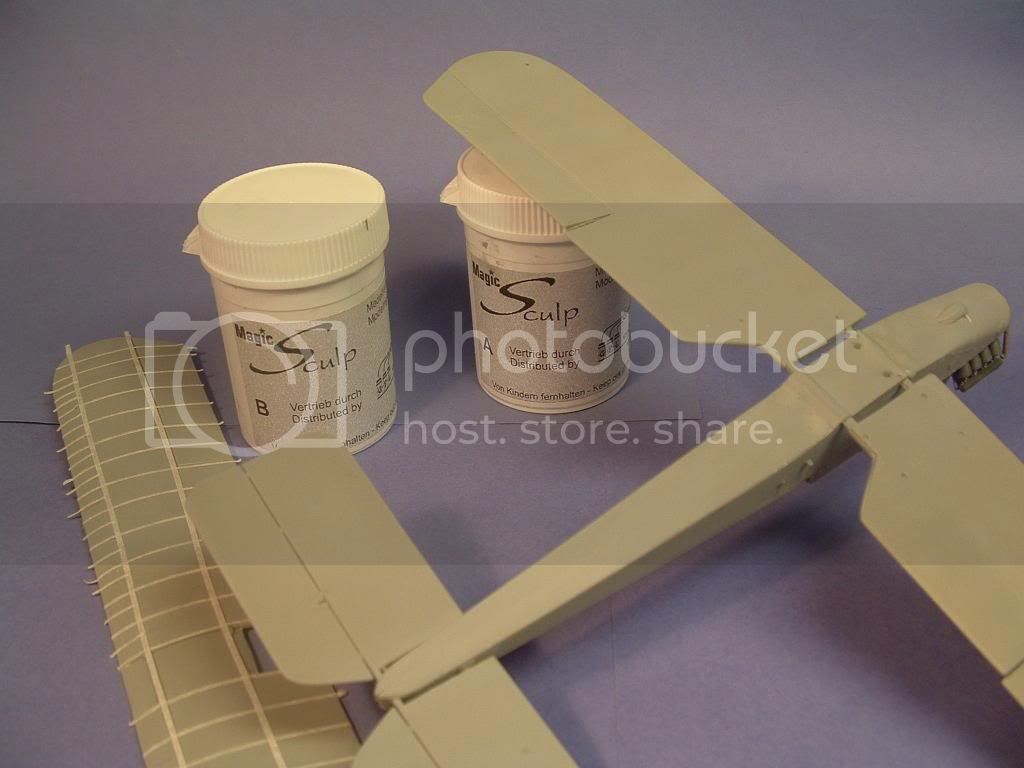
yep, there´s a tight fit. The lower wing needs some help, gentley sand the opening at the bottom of the fuselage. Part number 13D also needs some gentle sanding to easely fit inside the fuselage.Because I sanded, I´ll needed some filler on the underside of the lower wing. I´ll fixed that with Magic Sculp a wunderful kind of filler, no sanding at all.
For me, all maskingstrips of tape is going on for the moment.

Larsa Q
Texas, United States
Joined: June 02, 2008
KitMaker: 232 posts
AeroScale: 155 posts
Posted: Wednesday, February 10, 2010 - 07:11 AM UTC
Looks great so far Lars. I cn't wait to see how it turns out.
"So it goes"
Kurt Vonnegut
Guatemala
Joined: April 12, 2005
KitMaker: 343 posts
AeroScale: 111 posts
Posted: Wednesday, February 10, 2010 - 12:26 PM UTC
I am completly new to this WWI aircraft technics, (So new, that I even have not got a WWI plane yet) so please forget my asking, Why do you put masking on the wings? is it to simulate the internal structure?
Byron
Never mind, Terri did answer that question.
"All the ribs and internal strucuture get masked of with thin strips of masking tape with the wing spars done a little wider . Black and brown paint gets mixed and thinned for spraying . Just the edges of the tape get sprayed . Let dry remove tape and spray the clear dope linen in light pass's building it up to the desired effect . You should able to make out the shadows of the ribbing and the national marking . Clear coat, finish off the decals on the top of the wing making sure the line up with the under side of the top wing . Fuselage framing can be done in the manner as well with the tail surfaces . "
If you are not part of the solution, Don't be a part of the problem.
Östergötland, Sweden
Joined: April 04, 2006
KitMaker: 1,058 posts
AeroScale: 1,004 posts
Posted: Saturday, February 13, 2010 - 09:50 PM UTC
Hi Ruffus
Here u have Terri´s words in pics, almost.
All maskings is done and the airbrush have some work to do.
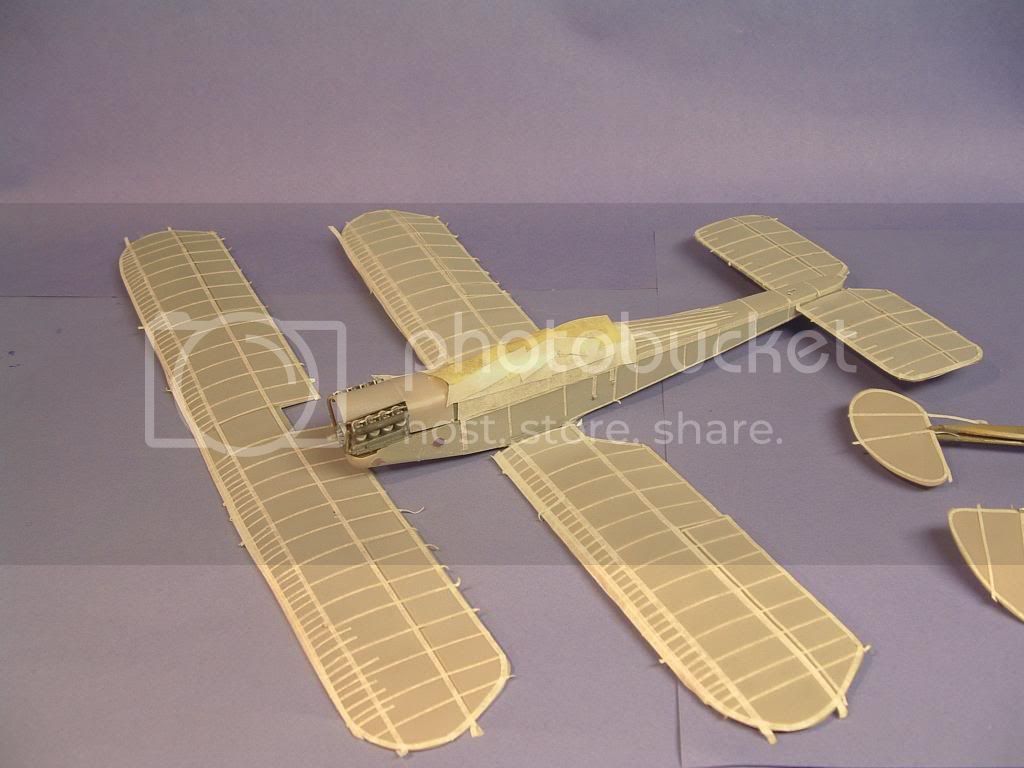
A mix off Humbrols leather and black was thinned out, some gentle airbrushing over the strips off masking.
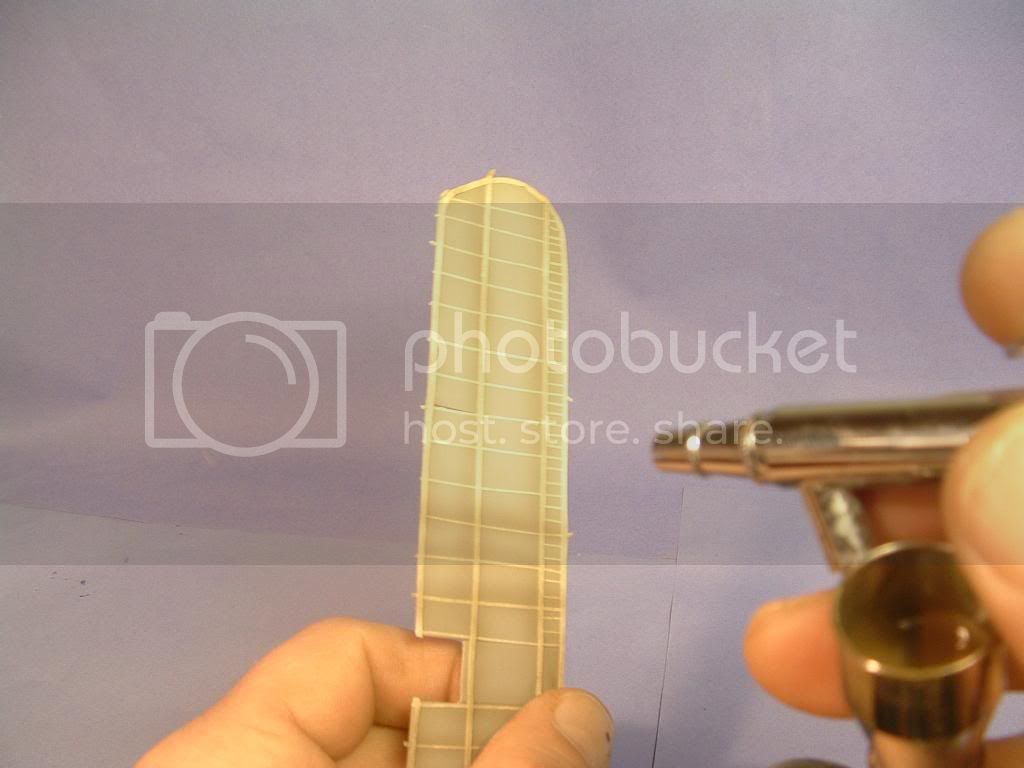
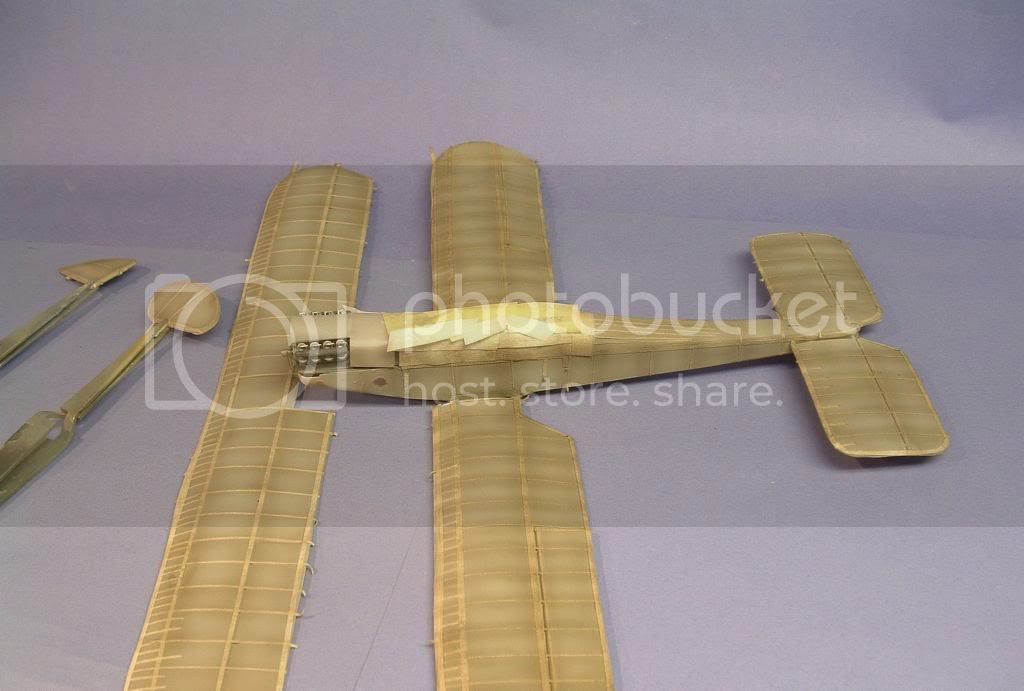
And with all tapes off it look like this.
Now the paint have to dry until tomorrow and then I can fix up some spots, where I missed some off the masks, thereafter I can mix up that linnecolour.
Regards
Larsa Q
Alberta, Canada
Joined: January 19, 2008
KitMaker: 6,743 posts
AeroScale: 6,151 posts
Posted: Sunday, February 14, 2010 - 12:28 AM UTC
That's the ticket Lars ! Very nice job done on the pre-shading . What marking option are you doing for this one ?
Östergötland, Sweden
Joined: April 04, 2006
KitMaker: 1,058 posts
AeroScale: 1,004 posts
Posted: Sunday, February 14, 2010 - 01:13 AM UTC
Hi Terri
I hope not that Q turned up. At the moment I´m not shure at all,so I´ll have to set this one at side and make my mind up.
At first the 4:th option, all linnen was my aim.But now I have a runner up in option 5. i´ll never used the rockets before and it´s temting..
Can u see I´m needing some help to decide,witch will u go for?Would be fun not to build the same or?
Larsa
Alberta, Canada
Joined: January 19, 2008
KitMaker: 6,743 posts
AeroScale: 6,151 posts
Posted: Sunday, February 14, 2010 - 02:02 AM UTC
Both are good options and a hard choice to make . Number 5 would look great with the rockets and bombs , but like you I'm not sure on which one to go with and really don't want to do the same option as you . However , it would be great to see two different builds with the same markings !
In the mean time I will keep looking up different options

Texas, United States
Joined: February 01, 2007
KitMaker: 365 posts
AeroScale: 356 posts
Posted: Sunday, February 14, 2010 - 02:16 AM UTC
Lars,
Excellent progress to date.Looking forward to your next update.
Regards,
Gregory Jouette
Östergötland, Sweden
Joined: April 04, 2006
KitMaker: 1,058 posts
AeroScale: 1,004 posts
Posted: Sunday, February 14, 2010 - 02:48 AM UTC
Quoted Text
However , it would be great to see two different builds with the same markings !
In the mean time I will keep looking up different options

U will have the gold, if that would happen Terri, you`r just better
Larsa
Östergötland, Sweden
Joined: April 04, 2006
KitMaker: 1,058 posts
AeroScale: 1,004 posts
Posted: Sunday, February 14, 2010 - 02:50 AM UTC
Quoted Text
Lars,
Excellent progress to date.Looking forward to your next update.
Regards,
Gregory Jouette
Thanks´Jouette
If I only can deside witch, I´ll going to flipp i coin linnen-or green.
Larsa Q
Milano, Italy
Joined: November 30, 2007
KitMaker: 642 posts
AeroScale: 382 posts
Posted: Monday, February 15, 2010 - 09:32 PM UTC
Very well done Lars!
Good job indeed!
I keep learning from you!
Östergötland, Sweden
Joined: April 04, 2006
KitMaker: 1,058 posts
AeroScale: 1,004 posts
Posted: Wednesday, February 17, 2010 - 06:24 AM UTC
Thank´s
Still can´t make my mind up for witch option, so this will hold until my mind is set.Give me a day or two.
Larsa Q
New South Wales, Australia
Joined: March 26, 2009
KitMaker: 366 posts
AeroScale: 309 posts
Posted: Wednesday, February 17, 2010 - 07:59 AM UTC
Excellent job to date, looking forward to the next lot of photos.
Great job on the pre-shading.
Des.
Check my site for 1:32 scale WW1 aircraft model build logs, build techniques, how to make turnbuckles and eyelets plus much more, plenty of photos of my finished models
Arizona, United States
Joined: December 12, 2008
KitMaker: 1,423 posts
AeroScale: 1,319 posts
Posted: Wednesday, February 17, 2010 - 12:22 PM UTC
Hi Larsa:
The preshading really turned out nice. I appreciated your step by step how you did it, very helpful. I too am looking forward to your further progress on this build.
Best
Mark
We few, we happy few........
California, United States
Joined: January 22, 2010
KitMaker: 16 posts
AeroScale: 15 posts
Posted: Thursday, February 18, 2010 - 03:36 PM UTC
Hi Larsa,
Excellent job, so far! I love this plane. I'm working on one, too. I'm doing 4395 in Arabia. Just started decaling today. I'd been warned not to use the kit decals, so I painted the rudder stripes and used Blue Rider roundels. But since I wanted to do 4395, I decided to use the kit codes.

DO NOT USE THE KIT DECALS! They will not respond to ANY solvent or setting solution. They actually seem to levitate off the surface. So, for the sake of your sanity, PLEASE find alternative decals. I need a drink...

,
Bud
Östergötland, Sweden
Joined: April 04, 2006
KitMaker: 1,058 posts
AeroScale: 1,004 posts
Posted: Friday, February 19, 2010 - 04:11 AM UTC
Thank´s Bud, Then I´ll go for alternetiv decals.
Larsa Q
Östergötland, Sweden
Joined: April 04, 2006
KitMaker: 1,058 posts
AeroScale: 1,004 posts
Posted: Thursday, March 04, 2010 - 06:00 AM UTC
Hi folks
back on this build again, and now I have my mind at decaloption IV. So a linencolour was mixed up from Humbrols and gentle airbrushed on.Had to do this in three stages.
A darker tone of the same linencolour was mixed and the stichings was carefully painted,tomorrow I´ll going back to the same linenmix and will make it lighter. With this mix I´ll will paint the t stitches.
Oils for the woodgrains will go the top next.
Sone it´s time for the
refeerences about all that riggings. Plenty of tiny holes to drill everywhere, just hoping not to break the wings.

Larsa
Indiana, United States
Joined: May 14, 2007
KitMaker: 3,117 posts
AeroScale: 2,270 posts
Posted: Thursday, March 04, 2010 - 06:36 AM UTC
Looks great. Hope you have plenty of tiny drill bits.
"Treat 'em Rough", Current Builds--Wingnut Rumpler
I am frequently seen with blood shot eyes from staying up past my nap time to get the right colour scheme on my latest WWI model?
Colorado, United States
Joined: January 25, 2004
KitMaker: 11,669 posts
AeroScale: 11,011 posts
Posted: Thursday, March 04, 2010 - 09:14 AM UTC
Quoted Text
Looks great. Hope you have plenty of tiny drill bits.
That reminds me I need to restock.
". . .The most important thing is to know why you build and then get the most that you can out of building." via D.D.
Guatemala
Joined: April 12, 2005
KitMaker: 343 posts
AeroScale: 111 posts
Posted: Thursday, March 04, 2010 - 12:15 PM UTC
Lars: Thanks for the "how to pictures", very helpful; will follow your build more closely. As I say before, never have I build a WWI aircraft, seems to me that is more demanding that WWII or jets. also very nice DH.2. Is there some books that are "basic" for WWI plane building?
Let's do some plastic
Byron
If you are not part of the solution, Don't be a part of the problem.
Colorado, United States
Joined: January 25, 2004
KitMaker: 11,669 posts
AeroScale: 11,011 posts
Posted: Thursday, March 04, 2010 - 05:39 PM UTC
Quoted Text
Lars: Thanks for the "how to pictures", very helpful; will follow your build more closely. As I say before, never have I build a WWI aircraft, seems to me that is more demanding that WWII or jets. also very nice DH.2. Is there some books that are "basic" for WWI plane building?
Let's do some plastic Byron
Honestly Byron you will find almost anything on building WWI aviation kits right here. Or at least a link to it can be found here.
". . .The most important thing is to know why you build and then get the most that you can out of building." via D.D.