


Modern (1975-today)
Discuss the modern aircraft age from 1975 thru today.
Discuss the modern aircraft age from 1975 thru today.
Hosted by Jim Starkweather
1:48 Trumpeter SU-24 Build up/review
Red4

Joined: April 01, 2002
KitMaker: 4,287 posts
AeroScale: 1,164 posts

Posted: Friday, March 26, 2010 - 09:55 AM UTC
Thanks Steffan. I'll still finish it, just don't know if I will be quite as happy as I initially thought I would about it... lol. Thanks. "Q"

Merlin

#017


Joined: June 11, 2003
KitMaker: 17,582 posts
AeroScale: 12,795 posts

Posted: Friday, March 26, 2010 - 10:31 AM UTC
Hi Matthew
Don't worry about missing items in the instructions, I did the same thing on the Eduard Fw 190D - I just never told anyone. Ohh darn it - I just did!

Great build! The cockpit looks superb painted up!
All the best
Rowan
Don't worry about missing items in the instructions, I did the same thing on the Eduard Fw 190D - I just never told anyone. Ohh darn it - I just did!
Great build! The cockpit looks superb painted up!
All the best
Rowan


OygenDem

Joined: March 27, 2010
KitMaker: 6 posts
AeroScale: 5 posts

Posted: Saturday, March 27, 2010 - 12:12 AM UTC
Red4
Joined: April 01, 2002
KitMaker: 4,287 posts
AeroScale: 1,164 posts
Posted: Saturday, March 27, 2010 - 02:33 AM UTC
Thanks Rowan. It's just frustrating when things like this happen..  that, and I have been splitting my time with this build and redoing my daughters bathroom in her house. Hoping to have the latter done in the next few days so I can put the wraps on this beasty. Thanks again for the support. Thanks for the website addy Zhenya. Some great reference pics on there. Wish I could read the text! ;o)
Thanks, "Q"
that, and I have been splitting my time with this build and redoing my daughters bathroom in her house. Hoping to have the latter done in the next few days so I can put the wraps on this beasty. Thanks again for the support. Thanks for the website addy Zhenya. Some great reference pics on there. Wish I could read the text! ;o)Thanks, "Q"

ViperEnforcer
Joined: December 05, 2007
KitMaker: 204 posts
AeroScale: 202 posts
Posted: Saturday, March 27, 2010 - 08:56 AM UTC
Wow, lots of parts. Nice work on the one.
I'm a bit under impressed with the cockpit detail, especially the "generic" console sides. The wheel wells, though with structure detail, lack plausible plumbing and wiring. Still not too bad, though overall I expected a lot better for $150.
I'm a bit under impressed with the cockpit detail, especially the "generic" console sides. The wheel wells, though with structure detail, lack plausible plumbing and wiring. Still not too bad, though overall I expected a lot better for $150.
Red4
Joined: April 01, 2002
KitMaker: 4,287 posts
AeroScale: 1,164 posts
Posted: Saturday, March 27, 2010 - 09:29 AM UTC
Yep, lots of parts Mike. In some of the pre-release pics that were out there, there were some pretty impressive looking bang seats installed. Obviously they didn't make it into the released kit. Not a hard fix though. The decal for the IP is nice looking for what it is. If I had it to do over again, I probably would have painted the entire thing. I'm considering this build as more of a shake down cruise than anything. Hopefully the snags and problems I encounter will help folks who decide to tackle this thing in the future. You are correct though, $150 is pretty steep, regardless of the amount of weapons included. More to follow. Was going to try and get some paint on it today, but the wind is howling hard enough here to blow in through my paint booth exhaust...not a good time to try and paint. Hopefully calmer weather tomorrow. "Q"
Red4
Joined: April 01, 2002
KitMaker: 4,287 posts
AeroScale: 1,164 posts
Posted: Monday, March 29, 2010 - 01:45 PM UTC
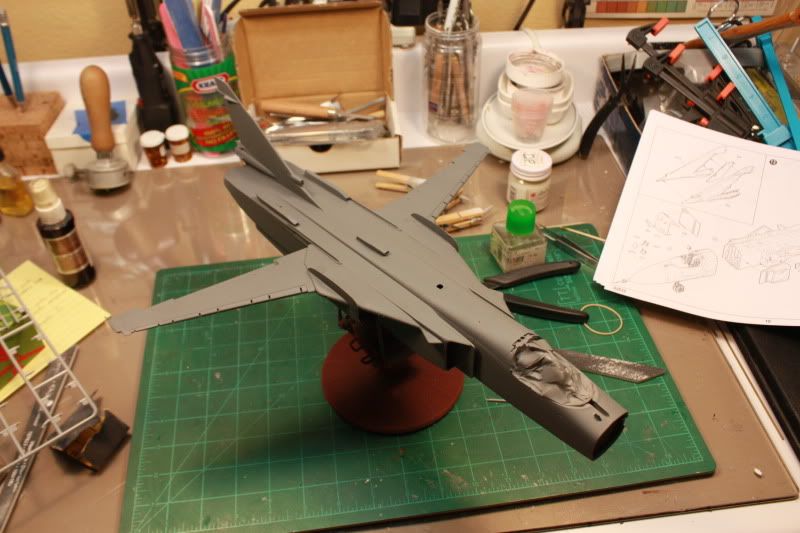
Not a huge update, but an update none the less. I got a coat of gray primer shot and it is drying as I type. There was nothing that jumped out at me so I am hoping that I addressed all the touble spots I saw during the build. Will probably have a few minor clean ups, but so far, so good. Stay tuned and thanks for looking. "Q" 

Big_Poppa_Pump
Joined: March 31, 2010
KitMaker: 2 posts
AeroScale: 1 posts

Posted: Tuesday, March 30, 2010 - 02:18 PM UTC
Looking good. Can't wait to see that beast finished
Red4
Joined: April 01, 2002
KitMaker: 4,287 posts
AeroScale: 1,164 posts
Posted: Wednesday, March 31, 2010 - 02:17 AM UTC
Welcome aboard Bro. Good to see you here. "Q"
Firecaptain
Joined: November 03, 2006
KitMaker: 165 posts
AeroScale: 2 posts
Posted: Thursday, April 01, 2010 - 11:47 AM UTC
Q....
I follow a lot of aircraft forums and there has been a ton of talk both pre and post release....but this is the first Fencer WIP that I have seen.......Bravo!
Top notch work.....I have noted all of your helpful "heads-ups" for my upcoming build.
I have seen some Fencers without the wing fences and some with them, can this kit version be built without them?
Thanks
Red4
Joined: April 01, 2002
KitMaker: 4,287 posts
AeroScale: 1,164 posts
Posted: Thursday, April 01, 2010 - 11:56 AM UTC
Hi Joe,
Thanks for the kudos. As long as you don't open the holes for them, then you should be able to build it without the fences. I wish I would have left mine off after the whole "where's the slots" fiasco. It goes together well, just be careful of those slots for the fences, and if by chance you do decide to install them, treat them gently as one of mine some how ended up with a chip in the edge of it. It has proven a real PITA to fix too. I'll be adding some pics of the damage and repair here soon. Thanks again for the kudos. Much appreciated.
"Q"
Thanks for the kudos. As long as you don't open the holes for them, then you should be able to build it without the fences. I wish I would have left mine off after the whole "where's the slots" fiasco. It goes together well, just be careful of those slots for the fences, and if by chance you do decide to install them, treat them gently as one of mine some how ended up with a chip in the edge of it.
It has proven a real PITA to fix too. I'll be adding some pics of the damage and repair here soon. Thanks again for the kudos. Much appreciated."Q"
Red4
Joined: April 01, 2002
KitMaker: 4,287 posts
AeroScale: 1,164 posts
Posted: Sunday, April 04, 2010 - 02:32 AM UTC
Update coming soon. Have been swamped as of late with school work and re-installing the bathroom on my daughters house.....still. Hoping to have the base layer of painting laid in in the next day or so. Thanks and sorry for the delay folks. "Q"
Red4
Joined: April 01, 2002
KitMaker: 4,287 posts
AeroScale: 1,164 posts
Posted: Monday, April 05, 2010 - 04:26 PM UTC
I was able to get some time in at the bench this evening so I masked this ginormous beast, and shot the white and gray. Used almost a 1/4 of a bottle of MM1753 on this thing!  Luckily it covered well. It is drying now and I will hopefully unmask it in the morning. So far I have ID'd a few spots that will need some touch up, but nothing major. Just a few passes with a scouring pad and some touch up painting should take care of things. More pics to follow as progress is made. Thanks for looking. "Q"

Luckily it covered well. It is drying now and I will hopefully unmask it in the morning. So far I have ID'd a few spots that will need some touch up, but nothing major. Just a few passes with a scouring pad and some touch up painting should take care of things. More pics to follow as progress is made. Thanks for looking. "Q" Red4
Joined: April 01, 2002
KitMaker: 4,287 posts
AeroScale: 1,164 posts
Posted: Wednesday, April 07, 2010 - 01:03 AM UTC
I unmasked the beast yesterday and all is well. As I figured, I have a small bit of clean up to do, but nothing horrible. I am going to be out all day so nothing update wise for a day or so. More pics to follow soon. Thanks, "Q"
ps. I goofed on my above post. The color I shot was not MM1753 but rather MM1731...damn these fat fingers.
ps. I goofed on my above post. The color I shot was not MM1753 but rather MM1731...damn these fat fingers.
markske

Joined: April 14, 2007
KitMaker: 71 posts
AeroScale: 58 posts

Posted: Sunday, April 11, 2010 - 06:29 AM UTC
Very nice to follow.
I like what i see.
So i think i go to buy one.
Mark
I like what i see.
So i think i go to buy one.
Mark
Red4
Joined: April 01, 2002
KitMaker: 4,287 posts
AeroScale: 1,164 posts
Posted: Monday, April 19, 2010 - 02:22 AM UTC
Hi Mark,
Glad you like what you have seen so far. Sorry for the late reply. I have been busy with school work as of late. Updates will be a little sketchy from here out as I am going into finals for school, but I will post as much as I can. Not a lot left to do to the build but paint/ install the MLG and do some touch ups on the overall painting and add decals. I've got a game plan in mind so I am hoping it works out. Again folks, sorry for the delay in getting more updates outs. Thanks, "Q"
Glad you like what you have seen so far. Sorry for the late reply. I have been busy with school work as of late. Updates will be a little sketchy from here out as I am going into finals for school, but I will post as much as I can. Not a lot left to do to the build but paint/ install the MLG and do some touch ups on the overall painting and add decals. I've got a game plan in mind so I am hoping it works out. Again folks, sorry for the delay in getting more updates outs. Thanks, "Q"
Red4
Joined: April 01, 2002
KitMaker: 4,287 posts
AeroScale: 1,164 posts
Posted: Sunday, April 25, 2010 - 11:32 AM UTC
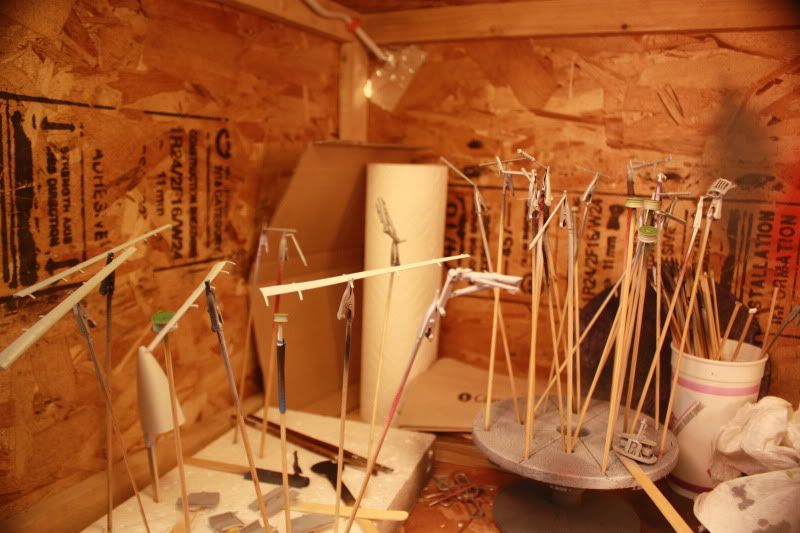
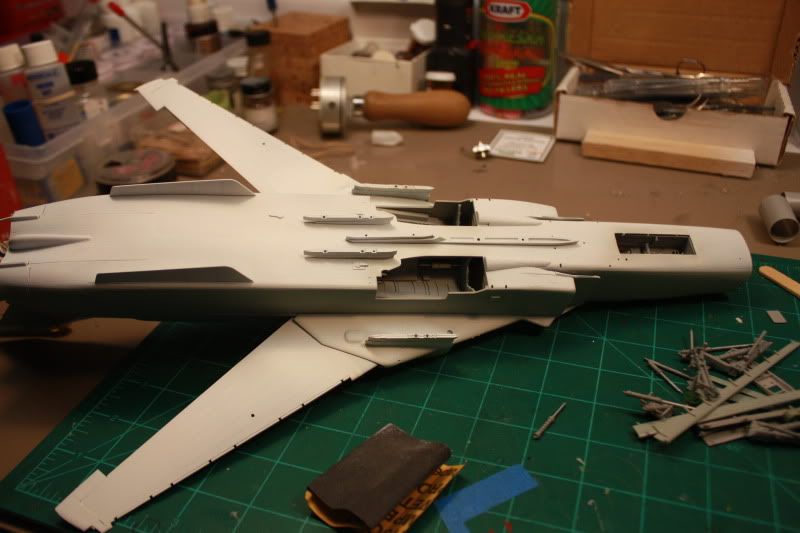
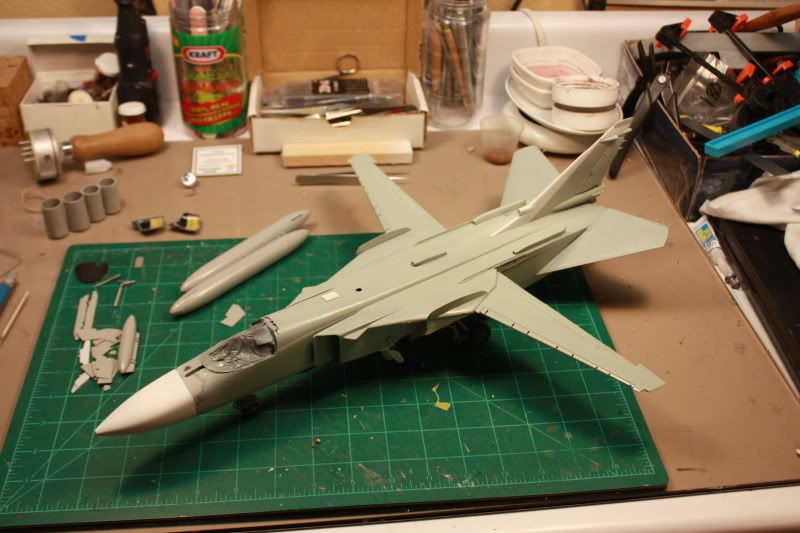
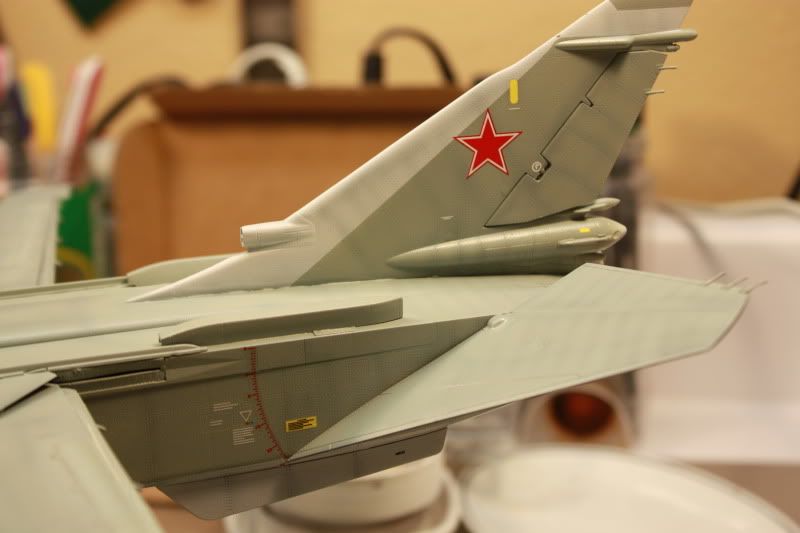
Alrighty then. When it rains it pours....  I apologize for the seriously long length between updates folks. That thing called life got in the way of my build. All is not lost though. While I had a busy week-end I did get some time in at the bench today and was able make some headway on this beast. I was able to get all of gear doors painted..inside and out. Painted the interior of the landing gear bays. Painted all of the landing gear components and gloss coated them in preparation for washes etc. I have some touch up to do on the tail area, and around the wing fence I had to make some repairs. A little thinned down putty and some spot painting should tighten things up easily. I did have a minor set back though. While prepping the landing gear components for paint, I dropped one. I looked for the better part of 45 mins for it before deciding to scratch build one later. Shouldn't be too hard, just another monkey wrench thrown into the mix....First pic is the forest of small parts that I got painted and gloss coated.
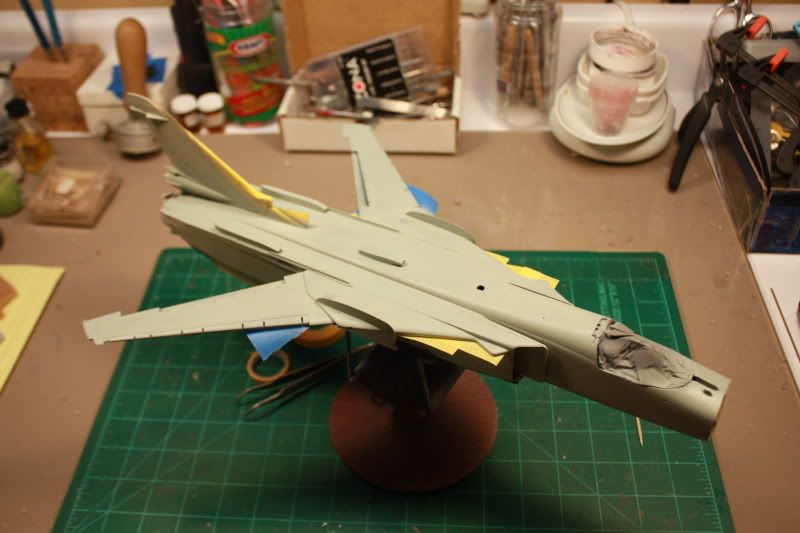
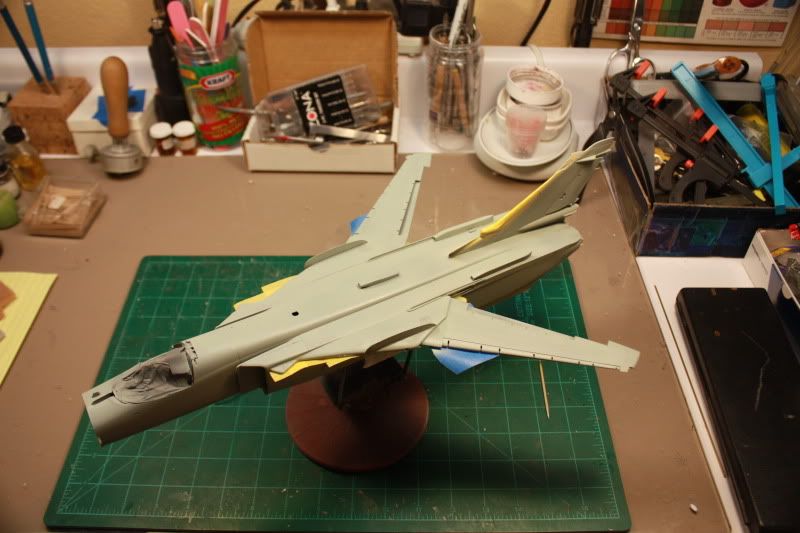
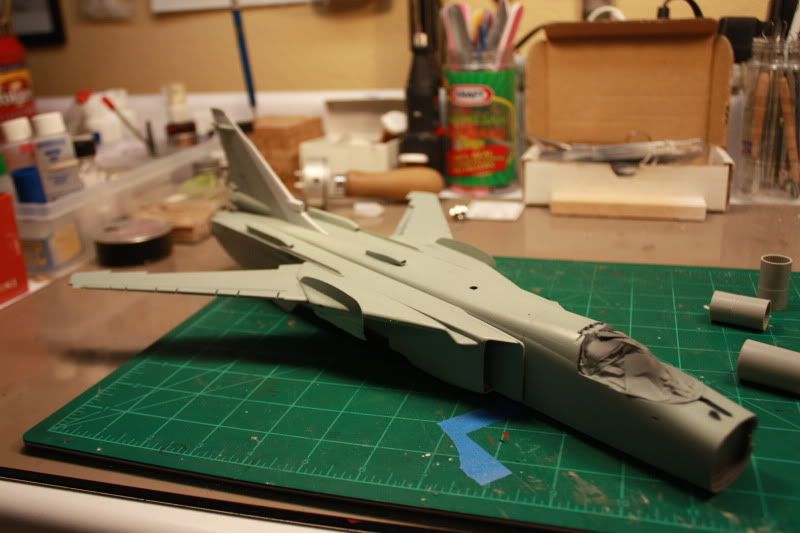
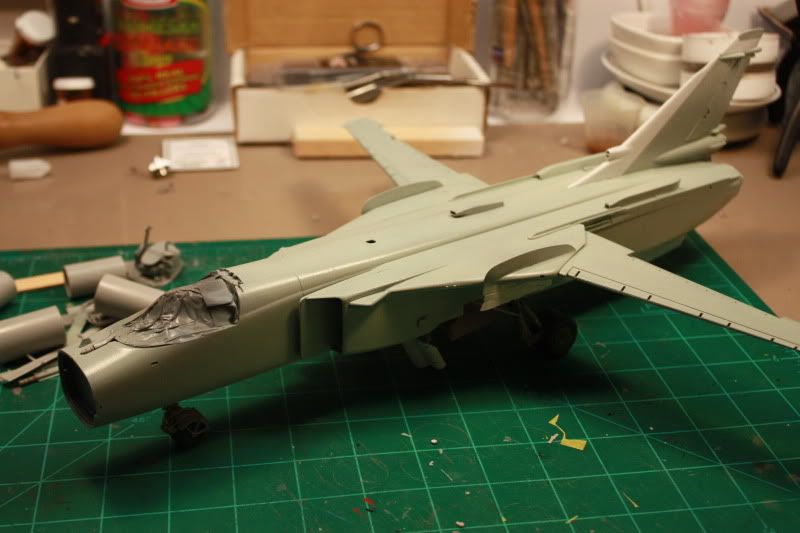
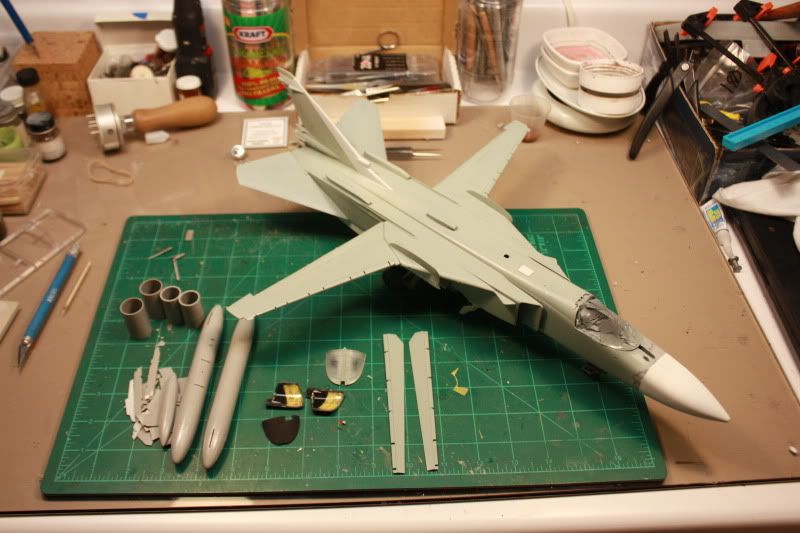
Overall shots of the build as it sit now.

Close up of the tail area....a little clean up required here...

and last but not least is the wing fence....I lost a wee bit of detail during the repairs...

More to follow soon....I promise Thanks for looking, "Q"
I apologize for the seriously long length between updates folks. That thing called life got in the way of my build. All is not lost though. While I had a busy week-end I did get some time in at the bench today and was able make some headway on this beast. I was able to get all of gear doors painted..inside and out. Painted the interior of the landing gear bays. Painted all of the landing gear components and gloss coated them in preparation for washes etc. I have some touch up to do on the tail area, and around the wing fence I had to make some repairs. A little thinned down putty and some spot painting should tighten things up easily. I did have a minor set back though. While prepping the landing gear components for paint, I dropped one. I looked for the better part of 45 mins for it before deciding to scratch build one later. Shouldn't be too hard, just another monkey wrench thrown into the mix....First pic is the forest of small parts that I got painted and gloss coated. Overall shots of the build as it sit now.
Close up of the tail area....a little clean up required here...
and last but not least is the wing fence....I lost a wee bit of detail during the repairs...
More to follow soon....I promise
Thanks for looking, "Q" Red4
Joined: April 01, 2002
KitMaker: 4,287 posts
AeroScale: 1,164 posts
Posted: Monday, April 26, 2010 - 01:37 PM UTC
I am making progress, albeit slow progress. Score another one for the carpet monster. Another one of the gear arms went the way of the Do-do bird. Same drill, off the bench, onto the chair pad and bounced into the unknown. I saw hit, saw it bounce and land......but it is nowhere to be found. It was one of the pieces that is tucked up way inside the gear bay, so unless one is looking for it, it wouldn't be seen....still sucks to lose another one though. The pile of parts is getting smaller. I assembled the wheels today and got the MLG installed. There is a trick to installing these. Install as many of the gear legs as you can...dry, then tack them in place. The MLG is about the most complex in regards to a model kit I have dealt with. There is a sequence to getting everything in place correctly, but I'll be damned if I know what it is. I will write about it in the review. Should give me enough time to figure it out.....should being the operative word here. Without further ado, here is where she stands....yes she is standing on her own three legs....as of today.
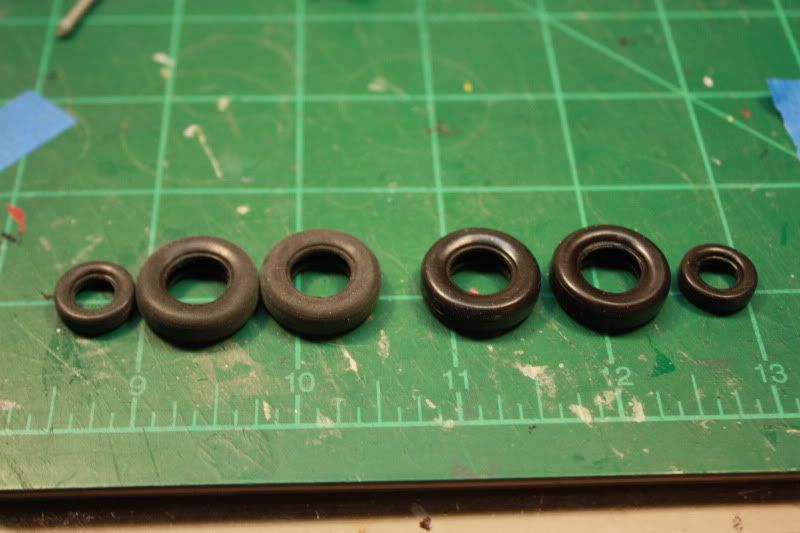
I started by sanding down the tires. This made them look more the part. You can see the difference in the pics....
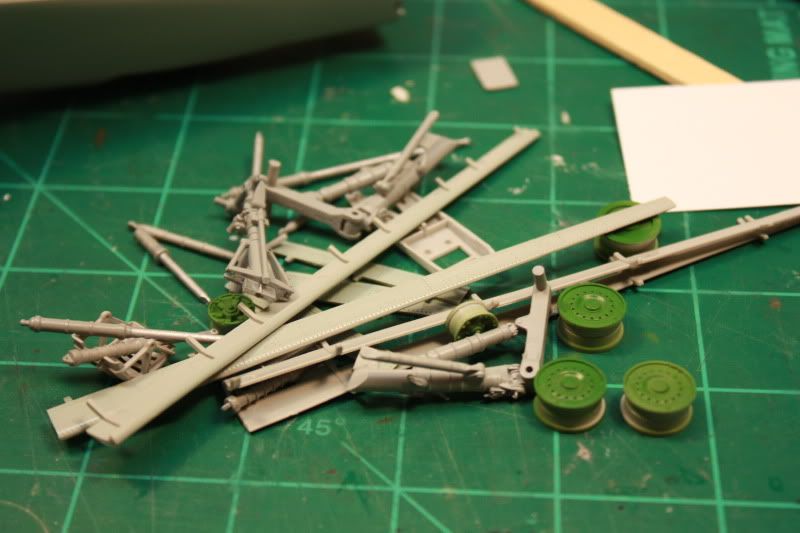
Here is all the assorted greeblie parts yet to go on...sheesh...
bottom cleaned up, gloss coated and ready for the parts...
She stands!
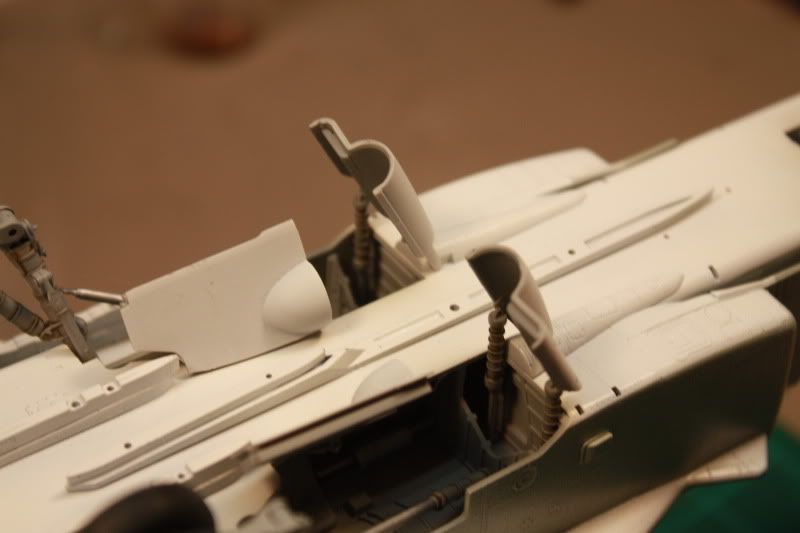
tricky, tricky, tricky parts to install....
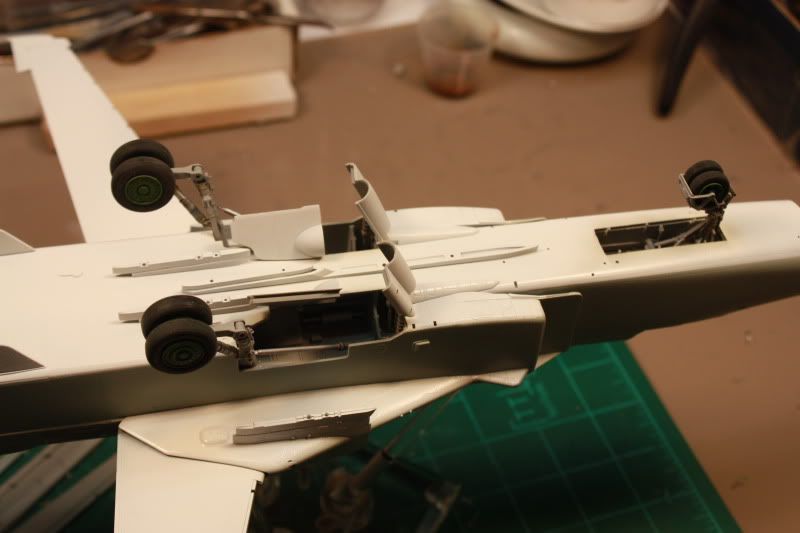
The initial gear arm I lost and where it goes can be seen in the emptiness...argh.
Also painted the interior/exterior of the canopy today. Just no pics of those as yet.
More to follow as I make progress. Thanks for looking.
"Q"
The pile of parts is getting smaller. I assembled the wheels today and got the MLG installed. There is a trick to installing these. Install as many of the gear legs as you can...dry, then tack them in place. The MLG is about the most complex in regards to a model kit I have dealt with. There is a sequence to getting everything in place correctly, but I'll be damned if I know what it is. I will write about it in the review. Should give me enough time to figure it out.....should being the operative word here. Without further ado, here is where she stands....yes she is standing on her own three legs....as of today.I started by sanding down the tires. This made them look more the part. You can see the difference in the pics....
Here is all the assorted greeblie parts yet to go on...sheesh...
bottom cleaned up, gloss coated and ready for the parts...
She stands!
tricky, tricky, tricky parts to install....
The initial gear arm I lost and where it goes can be seen in the emptiness...argh.
Also painted the interior/exterior of the canopy today. Just no pics of those as yet.
More to follow as I make progress. Thanks for looking.
"Q"

JPTRR
#051
Joined: December 21, 2002
KitMaker: 7,772 posts
AeroScale: 3,175 posts
Posted: Monday, April 26, 2010 - 04:49 PM UTC
Great work Matt,
You are really smokin' through this one! Eagerly awaiting updates.
You are really smokin' through this one! Eagerly awaiting updates.

Red4
Joined: April 01, 2002
KitMaker: 4,287 posts
AeroScale: 1,164 posts
Posted: Tuesday, April 27, 2010 - 01:37 AM UTC
Thanks for the kudos, but I am actually behind schedule. I was hoping to have this done back around spring break! Thanks again for the kudos, much appreciated. "Q"
SGTJKJ
#041

Joined: July 20, 2006
KitMaker: 10,069 posts
AeroScale: 3,788 posts

Posted: Tuesday, April 27, 2010 - 07:44 AM UTC
Looks very good, Matthew. Nice trick on the rubber tires - I will try using that as well. I am looking forward to see more of this beast.
Thanks for sharing
Thanks for sharing

Red4
Joined: April 01, 2002
KitMaker: 4,287 posts
AeroScale: 1,164 posts
Posted: Tuesday, April 27, 2010 - 01:53 PM UTC
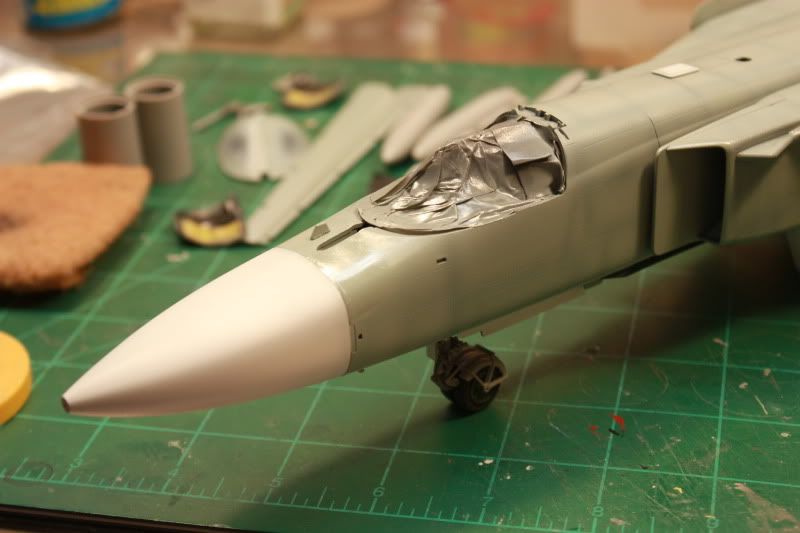
Still making my way forward.... I had some fit issues with the nose so I decided to close the radar up. Even then the nose cone didn't fit exactly like it should. I had to do some sanding to level things up. Caused a bit of damage, but nothing some primers and paint won't fix. Assembled the drop tanks, and a radar pod. Still trying to figure out how the drop tanks mount as what the instructions call for isn't lining up correctly. Will sleep on this one. Installed the flap extensions for lowering them. These and the slats will be the last things added. Slowly but surely getting closer to being complete. Will begin decals and post shading here shortly. Final assembly shouldn't be too far behind that. Thanks for watching. "Q"
Red4
Joined: April 01, 2002
KitMaker: 4,287 posts
AeroScale: 1,164 posts
Posted: Thursday, April 29, 2010 - 02:58 AM UTC
Howdy all. Just a quick note to let you know I won't be able to post any updates over the week-end as I will be out of town. Will try to get something up either today or tomorrow morning before I leave. Thanks for following along. I'm working on some of the weapons for it now... "Q"
Red4
Joined: April 01, 2002
KitMaker: 4,287 posts
AeroScale: 1,164 posts
Posted: Friday, April 30, 2010 - 05:45 AM UTC
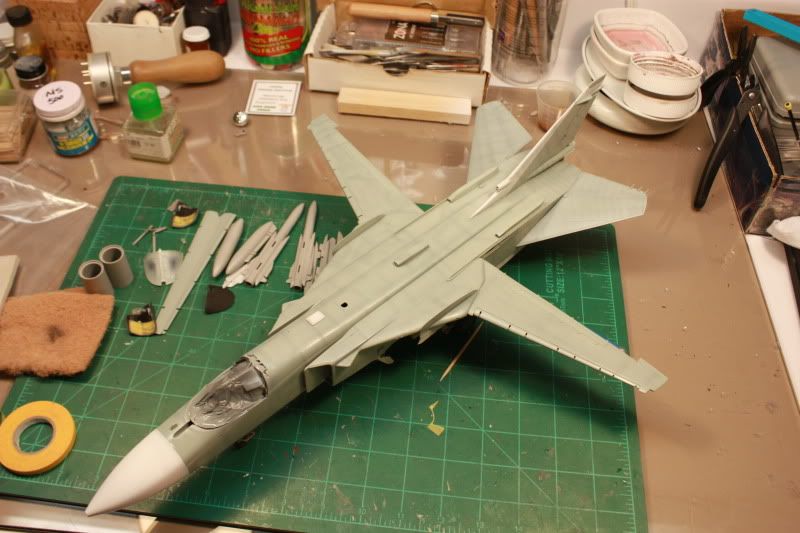
Alrighty folks, last update before the week end, but I have made some good progress. I got the weapons cleaned up and they are drying as I type. Had to use a wee bit of Mr. Surfacer on them for some low spots, but otherwise, they are fine. I did my post-shading, and spot painted around the nose where I had the damaged area before from sanding. I will go back and weather that area as needed. From here I went right into decaling while the weapons were drying and was able to get the entire port side of the plane decaled. The decals are excellent!! They lay down well and settle into all the nooks and crannies using Micro Set/Sol treatment. It is actually looking considerably better than I had initially thought it was going to in this particular scheme. That's it for now. See you all after the week end. Thanks for watching. "Q"


alpha_tango

Joined: September 07, 2005
KitMaker: 5,609 posts
AeroScale: 5,231 posts
Posted: Friday, April 30, 2010 - 06:00 AM UTC
Hello Matt
Great model ... looking forward to see it finished!!!
all the best
Steffen
Great model ... looking forward to see it finished!!!
all the best
Steffen

 |

WEB HOSTING BY


Copyright ©2021 AeroScale and Kitmaker Network, a subsidiary of Silver Star Enterprises
All Rights Reserved. Please read our Conditions of Use and Privacy Policy.
All Rights Reserved. Please read our Conditions of Use and Privacy Policy.