_GOTOBOTTOM
World War II
Discuss WWII and the era directly before and after the war from 1935-1949.
Hosted by Rowan Baylis
Cyber-Hobby (Dragon) 1:48 Bf 110D
Merlin
Staff MemberSenior Editor
AEROSCALE
#017
_VISITCOMMUNITY
United Kingdom
Joined: June 11, 2003
KitMaker: 17,582 posts
AeroScale: 12,795 posts
Posted: Sunday, May 30, 2010 - 10:37 PM UTC
Hi again

Well, my Internet connection packed up yesterday, so there was no excuse not to do some more on the Bf 110 before going out with the family! At least it meant I hit my build-target for a change!

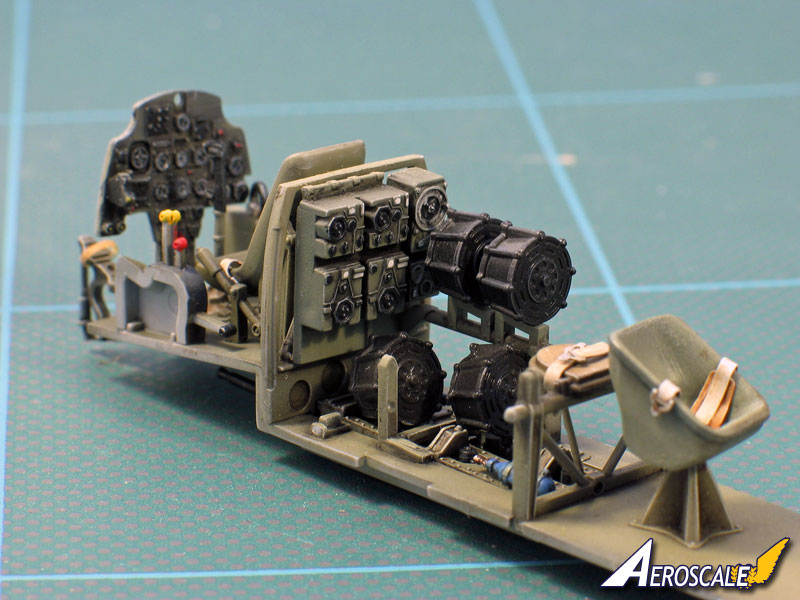
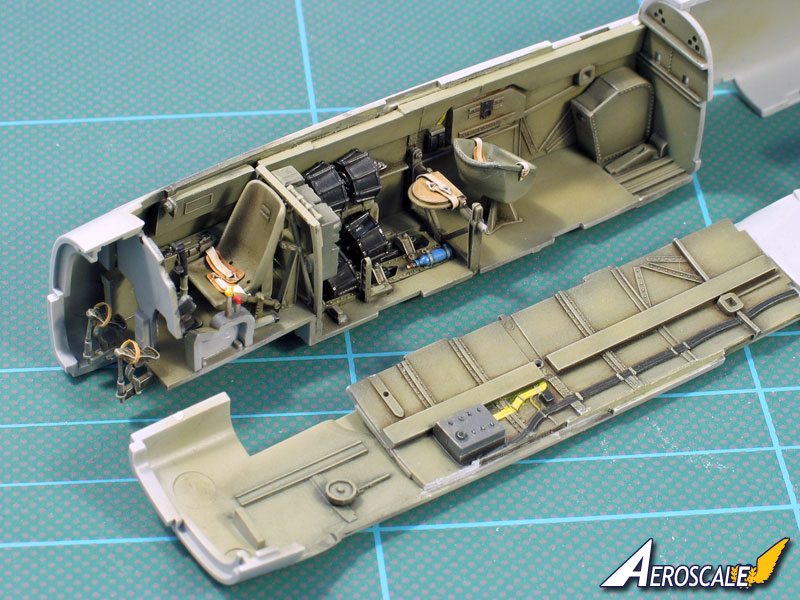
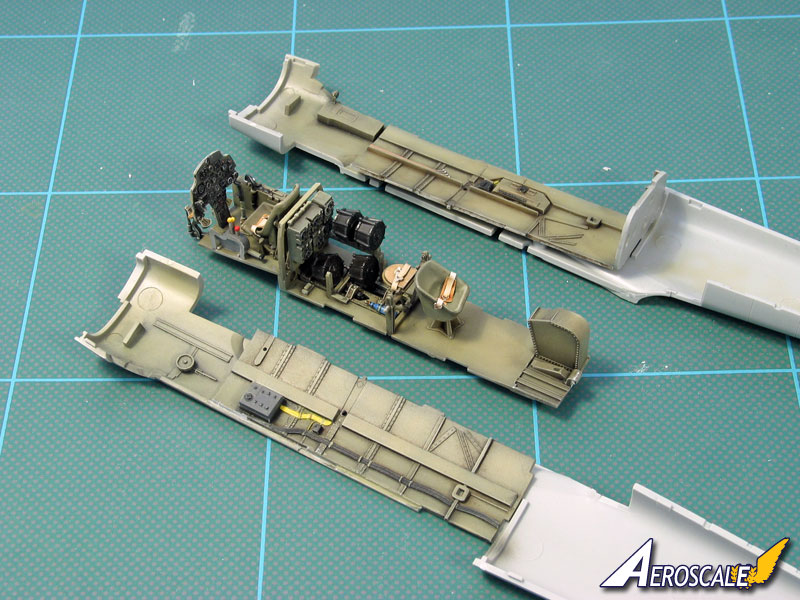


I've filed down the top of the sidewalls and installed the cockpit. I think the "top decking" should fit better in terms of height now, but there'll still be some work to do getting the width right. But that can wait for another day...
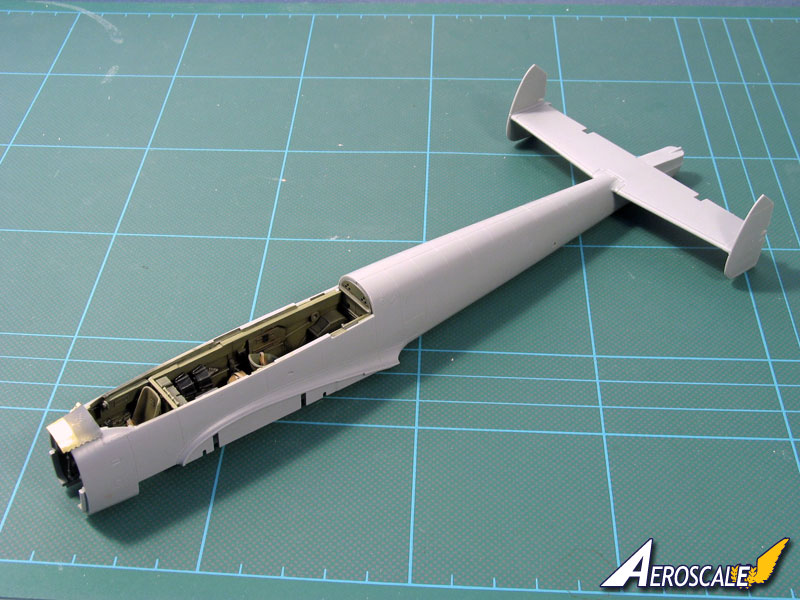


You can see there are no shoulder harnesses for the pilot yet. This is because I think the ones supplied in the kit are too big, so I'll hunt out some others from the spares box.

I've got the wings partly done and will work on the "Steffen Slats" next, so that'll be my next update. But first I really must do some Reviews and Admin stuff.

All the best

Rowan
alpha_tango
_VISITCOMMUNITY
Germany
Joined: September 07, 2005
KitMaker: 5,609 posts
AeroScale: 5,231 posts
Posted: Sunday, May 30, 2010 - 10:44 PM UTC
Very nice Rowan!!

do not forget the dinghy release cable ....

cheers

Steffen
who is not really aware why some parts are christened after him ... otoh this might have nothing to do with my poor soul but with the sense of the name Stephan
Merlin
Staff MemberSenior Editor
AEROSCALE
#017
_VISITCOMMUNITY
United Kingdom
Joined: June 11, 2003
KitMaker: 17,582 posts
AeroScale: 12,795 posts
Posted: Sunday, May 30, 2010 - 11:04 PM UTC
Hi Steffen

We've christened them "Steffen Slats" because it was your calls for a Bf 110 kit with separate slats that prompted me to suggest them to our contact at Dragon. You're lucky - I only partly got my own request for fabric-covered "Rowan Flaps" fulfilled.

All the best

Rowan

Edit: Yes - don't worry about the cable, it's not forgotten. Cheers.
Merlin
Staff MemberSenior Editor
AEROSCALE
#017
_VISITCOMMUNITY
United Kingdom
Joined: June 11, 2003
KitMaker: 17,582 posts
AeroScale: 12,795 posts
Posted: Saturday, June 05, 2010 - 05:10 AM UTC
Hi there

Just a little update to show I'm still chugging along.

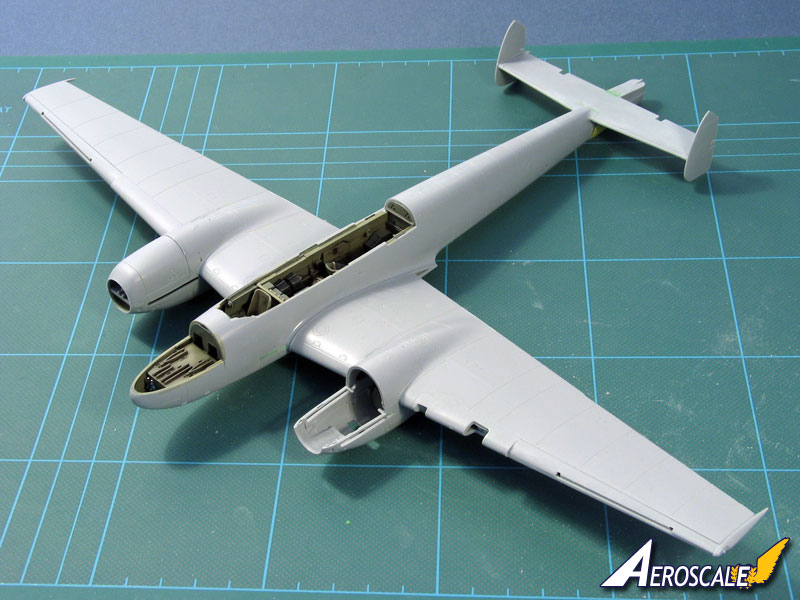
I've got the basic airframe assembled. No filler needed at the wing roots, but a little was required on the underside at the trailing edge. The extended tail needed a little bit to blend it in too:


I've opted to have one engine on show and the other cowling closed up to see how well things work with both construction methods. The closed cowl has fitted nicely.

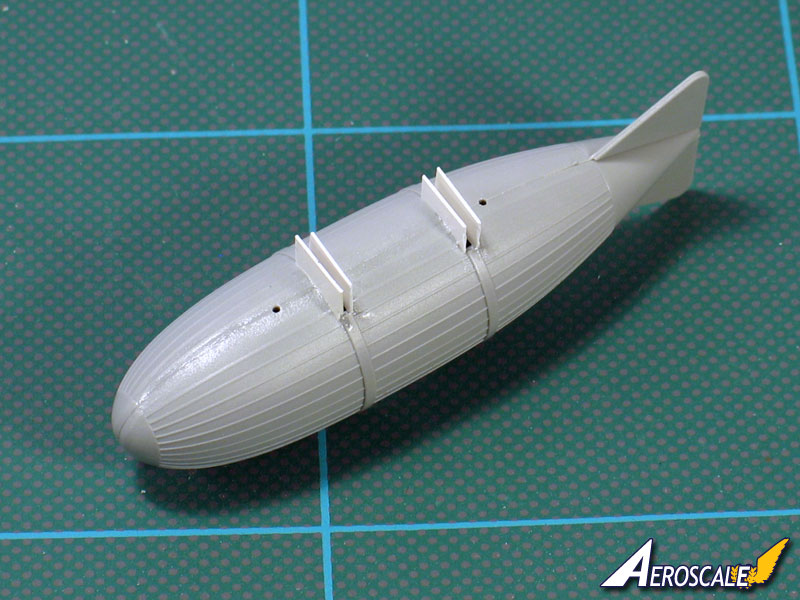
I've decided to use the big 198 litre auxiliary tanks. The fit of the mounts is very loose, so I've lined the slots with plastic card. Dragon have gone for a prominent "ribbed" effect which I can't see in pics in John Vasco's or the Kagero books. I can see some faint lines in some photos, but not really like on the kit tanks (which are done a bit like P-51s' "paper tanks"). Can anyone confirm what the real tanks were made from?:


Sadly the kit doesn't include an accompanying 75 litre oil tank. I might scratchbuild one of these, but it wasn't always carried, so I may not bother...

More anon.

All the best

Rowan
alpha_tango
_VISITCOMMUNITY
Germany
Joined: September 07, 2005
KitMaker: 5,609 posts
AeroScale: 5,231 posts
Posted: Saturday, June 05, 2010 - 05:36 AM UTC
Hi Rowan

I too do not think this ribbed effect is correct. Here is a photo that was recently posted on Hyperscale and in the latest LiF are two further pix and a longer explanation:


(fur discussion only soon to be deleted)

seems there was kind of a mess... err mass production of this outhouse. No ribs to be seen here (at least not as strong as on the kit parts).

cheers

Steffen
Merlin
Staff MemberSenior Editor
AEROSCALE
#017
_VISITCOMMUNITY
United Kingdom
Joined: June 11, 2003
KitMaker: 17,582 posts
AeroScale: 12,795 posts
Posted: Saturday, June 05, 2010 - 06:00 AM UTC
Many thanks Steffen

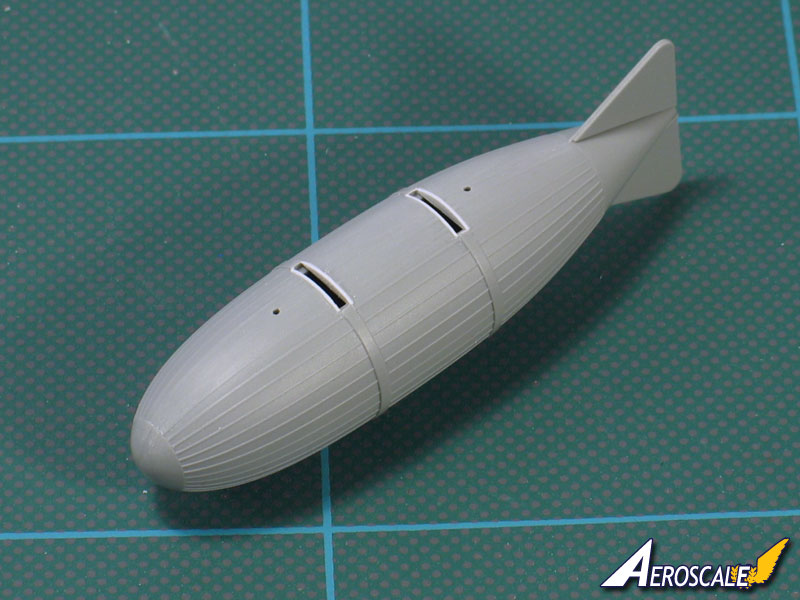
Great photo! (There's nothing like having an audience while you're tying to do your "business"! LOL!) It definitely backs up the smooth appearance I've found elsewhere. A couple of photos seem to show fine lines, as though the tanks were made from slim tapered panels (maybe 15 or 16?) like the staves of a barrel. I might go for that look.

All the best

Rowan
Tojo72
_VISITCOMMUNITY
North Carolina, United States
Joined: June 06, 2006
KitMaker: 4,691 posts
AeroScale: 238 posts
Posted: Saturday, June 05, 2010 - 04:08 PM UTC
Really looking good,have you decided on a scheme yet ?
Merlin
Staff MemberSenior Editor
AEROSCALE
#017
_VISITCOMMUNITY
United Kingdom
Joined: June 11, 2003
KitMaker: 17,582 posts
AeroScale: 12,795 posts
Posted: Saturday, June 05, 2010 - 09:35 PM UTC
Cheers Anthony

I haven't totally decided, but I keep getting drawn back to the "Iraqi" scheme... that might be fun.

All the best

Rowan
litespeed
Staff MemberNews Reporter
AEROSCALE
_VISITCOMMUNITY
England - North West, United Kingdom
Joined: October 15, 2009
KitMaker: 1,976 posts
AeroScale: 1,789 posts
Posted: Saturday, June 05, 2010 - 09:51 PM UTC
Hi Rowan
That fuel tank looks like the Hindeburg. Enjoying your build so far and great photo of the outside loo Steffen.
tim
betheyn
Staff MemberSenior Editor
AEROSCALE
#019
_VISITCOMMUNITY
England - South East, United Kingdom
Joined: October 14, 2004
KitMaker: 4,560 posts
AeroScale: 2,225 posts
Posted: Saturday, June 05, 2010 - 10:00 PM UTC

Quoted Text

Cheers Anthony

I haven't totally decided, but I keep getting drawn back to the "Iraqi" scheme... that might be fun.

All the best

Rowan


Hi,
Hehehehe, that's the one I'm doing for the NOT correct (and I know, and I don't care ) Eduard 110E, that I got back out the unfinished kit pile.
I didn't even know you were building this kit, i could have sworn you were building something else .
The cockpit looks great. Looks on par with the Eduard one.
Andy
Merlin
Staff MemberSenior Editor
AEROSCALE
#017
_VISITCOMMUNITY
United Kingdom
Joined: June 11, 2003
KitMaker: 17,582 posts
AeroScale: 12,795 posts
Posted: Saturday, June 05, 2010 - 10:21 PM UTC
Hi Andy

Nice one! We've got our own variation on the Dual-Build theme! Just remember - lock that bl**dy white aerosol out of reach this time!

All the best

Rowan
betheyn
Staff MemberSenior Editor
AEROSCALE
#019
_VISITCOMMUNITY
England - South East, United Kingdom
Joined: October 14, 2004
KitMaker: 4,560 posts
AeroScale: 2,225 posts
Posted: Saturday, June 05, 2010 - 10:36 PM UTC

Quoted Text

Hi Andy
Just remember - lock that bl**dy white aerosol out of reach this time!

All the best

Rowan


Hi,
I threw it away, just to be safe .
Andy
Merlin
Staff MemberSenior Editor
AEROSCALE
#017
_VISITCOMMUNITY
United Kingdom
Joined: June 11, 2003
KitMaker: 17,582 posts
AeroScale: 12,795 posts
Posted: Friday, June 11, 2010 - 07:27 AM UTC
Hi again

Slow progress and no major update, I'm afraid.

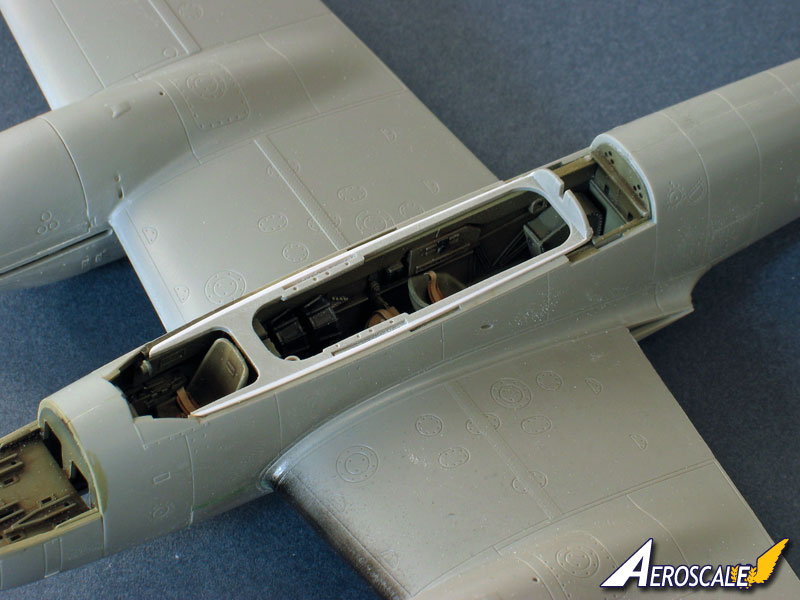
I've been sanding the ridges off the drop tanks for what seems like forever add I think they're becoming presentable. Today's task was to sort out the cockpit "decking". I've reduced it to about half its original thickness and widened it, and I reckon it should work now:


I'll try to finish the engine this weekend and maybe get towards starting to paint the exterior...

All the best

Rowan
GastonMarty
_VISITCOMMUNITY
Quebec, Canada
Joined: April 19, 2008
KitMaker: 595 posts
AeroScale: 507 posts
Posted: Saturday, June 26, 2010 - 07:13 PM UTC

A quick comparison of the Dragon canopy sill, in Rowan's last picture, to the Eduard Me-110G, reveals they both feature the "swelling" of the canopy center in plan view; maybe the Dragon is ever so slightly more pronounced, but both are essentially correct, and similar in form, except for the thinner and more detailed appearance of the edges on Rowan's model, as you would expect...

This slight "swelling" of the center canopy plan view is especially noticeable on the top edge of the canopy, so it remains to be seen if the Eduard canopy has captured this as well as the Dragon kit might...

http://www.warbirdphotographs.com/LCBW7/Me110-19bf+.jpg

In the end, this seems to matter more: Looking at the tail cross-section of the Dragon kit, just behind the tail gunner position, the extra "roundness", and lack of a flat spot on top, on the Eduard kit's tail is very apparent in this area compared to the Dragon kit... And we already know from a very explicit previous picture in this thread that the flat spot on top of the fuselage, plus the added squareness of the corners, is definitely more on the Dragon kit's side...

However, a thin coating of putty along all four corners of the Eduard tail could help fix the problem, with fairly easy connect-the-lines re-scribing... Maybe not so pleasant for those who like thin coats of primer...

Gaston


Tojo72
_VISITCOMMUNITY
North Carolina, United States
Joined: June 06, 2006
KitMaker: 4,691 posts
AeroScale: 238 posts
Posted: Wednesday, January 12, 2011 - 11:49 AM UTC
Hello Rowan,Just was wondering what happened to this one ? It was coming along good.I was looking foward to the painting and finishing,as I have this kit.Any plans to finish it up ?

Anthony
 _GOTOTOP