


Air Campaigns
Want to start or join a group build? This is where to start.
Want to start or join a group build? This is where to start.
Hosted by Frederick Boucher, Michael Satin
OFFICIAL: Vac Attack Campaign Thread

Jessie_C


Joined: September 03, 2009
KitMaker: 6,965 posts
AeroScale: 6,247 posts

Posted: Friday, December 09, 2011 - 04:37 PM UTC
Its okay, there's always the Hangar Queen campaign coming up

GaryKato

Joined: December 06, 2004
KitMaker: 3,694 posts
AeroScale: 163 posts

Posted: Saturday, December 10, 2011 - 04:33 AM UTC
Quoted Text
Its okay, there's always the Hangar Queen campaign coming up
I've picked some very old Monogram kits for that campaign. The Venom will be more of a long term project.
ludwig113

Joined: February 05, 2008
KitMaker: 1,381 posts
AeroScale: 1,110 posts

Posted: Saturday, December 10, 2011 - 11:59 PM UTC
come on brent you can do it !
dont give up on it gary, its a nice feeling to know you've finished a vac.
paul
dont give up on it gary, its a nice feeling to know you've finished a vac.
paul

Dunners01

Joined: April 05, 2011
KitMaker: 15 posts
AeroScale: 14 posts
Posted: Friday, December 23, 2011 - 11:51 PM UTC
Hi Folks
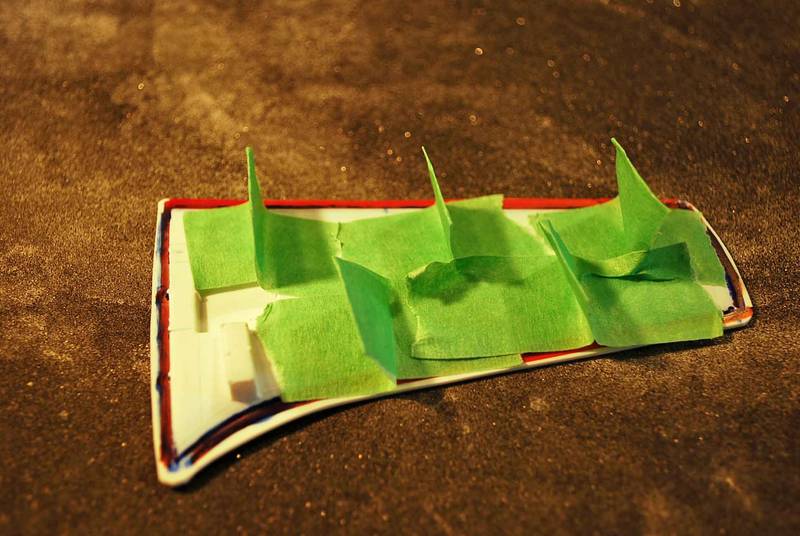
A quick up-date on the Skyshark.
The paint never completely went off. In desparation I proceeded to future over the top. Generally OK with a bit of crazing here and there. If worst comes to worse it will be a strip back but hopefully (touch wood!) it won't come to that.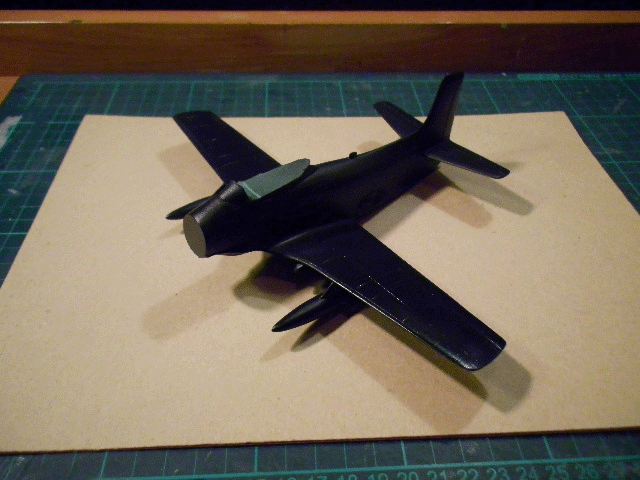
Sorry these photos aren't the best.
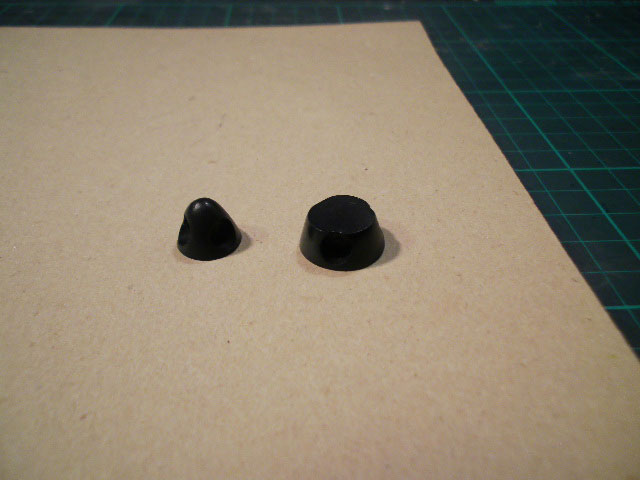
Spinners finally got sorted. Went with an engineering drill press, drill bit followed by a router bit. Worked nicely in the end. I was initially concerned that this heavy equipment would be over the top but the plastic held up well to the clamps etc. to hold things in place during the drilling.
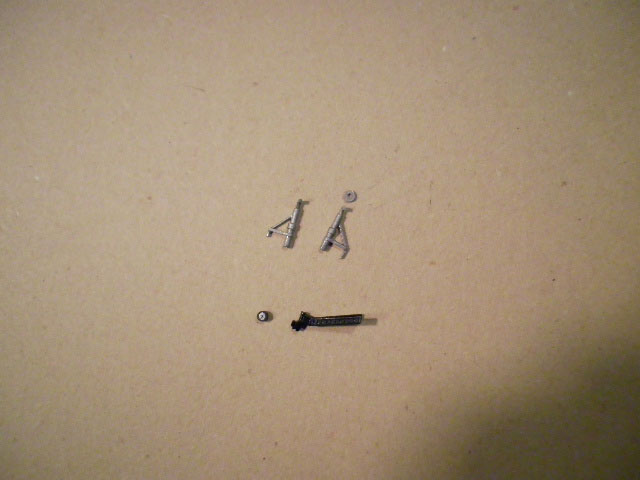
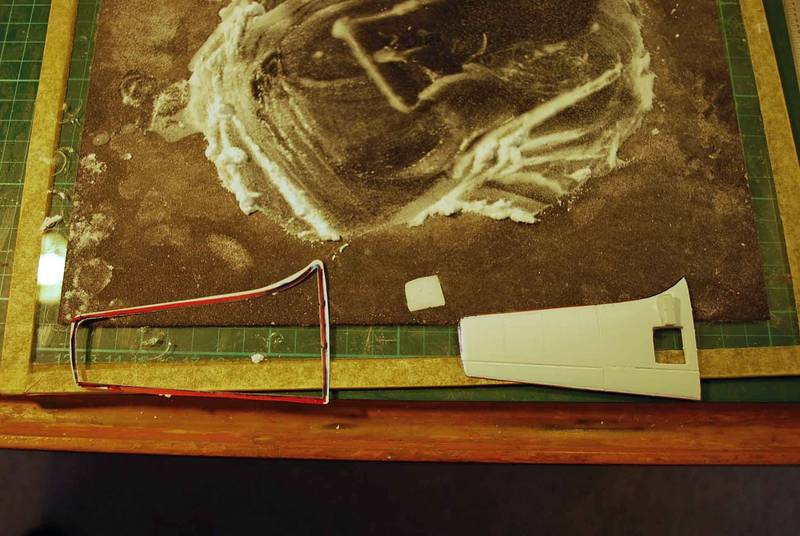
Undercarridge legs had to be modified. As they came there was a strange donut for connection to the wheels. Made up stubs to work as axles. Hopefully they will stand to rigors of holding the model.
Progress on the canopy. My preferred method for canopy frames is painted decal. Works well except for curves which have to be made up as a series of little short lengths.
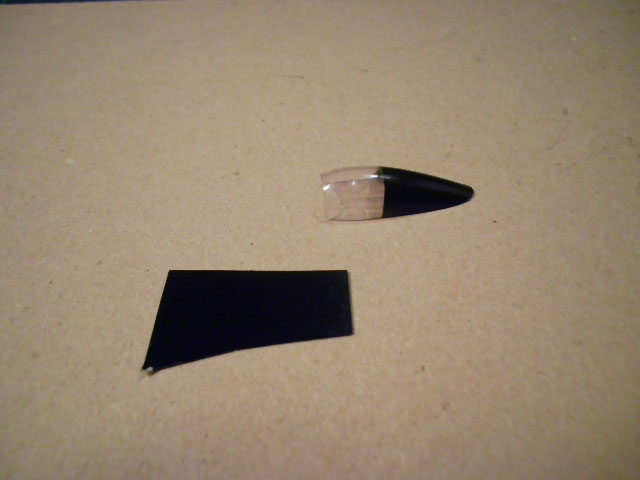
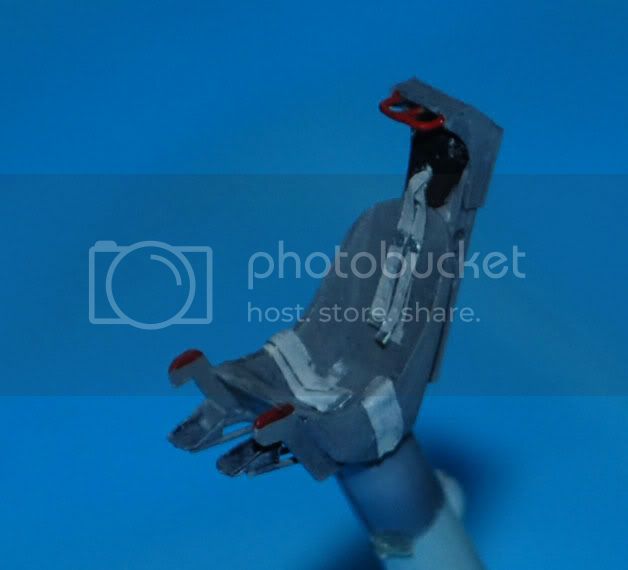
Finally the bang seat. Being a homegrown Douglas product means scratchbuilding something. This seat started life as a Venture Spitfire seat, filed to shape and fiddly bits added on. Hopefully under a coat of paint it will look the part.
6 days to go, next up is the decalling and final assembly.
Have a Merry Christmas all
Brent
A quick up-date on the Skyshark.
The paint never completely went off. In desparation I proceeded to future over the top. Generally OK with a bit of crazing here and there. If worst comes to worse it will be a strip back but hopefully (touch wood!) it won't come to that.
Sorry these photos aren't the best.
Spinners finally got sorted. Went with an engineering drill press, drill bit followed by a router bit. Worked nicely in the end. I was initially concerned that this heavy equipment would be over the top but the plastic held up well to the clamps etc. to hold things in place during the drilling.
Undercarridge legs had to be modified. As they came there was a strange donut for connection to the wheels. Made up stubs to work as axles. Hopefully they will stand to rigors of holding the model.
Progress on the canopy. My preferred method for canopy frames is painted decal. Works well except for curves which have to be made up as a series of little short lengths.
Finally the bang seat. Being a homegrown Douglas product means scratchbuilding something. This seat started life as a Venture Spitfire seat, filed to shape and fiddly bits added on. Hopefully under a coat of paint it will look the part.
6 days to go, next up is the decalling and final assembly.
Have a Merry Christmas all
Brent
ludwig113
Joined: February 05, 2008
KitMaker: 1,381 posts
AeroScale: 1,110 posts
Posted: Monday, December 26, 2011 - 03:56 AM UTC
excellent brent, really glad to see its getting there 
paul
paul
Dunners01
Joined: April 05, 2011
KitMaker: 15 posts
AeroScale: 14 posts
Posted: Wednesday, December 28, 2011 - 11:42 PM UTC
The Skyshark on the home stretch
Here she is decalled. A slight oil wash into the panel lines to highlight slightly and break the expanse of blue.
This beast has a serious fan up the front.

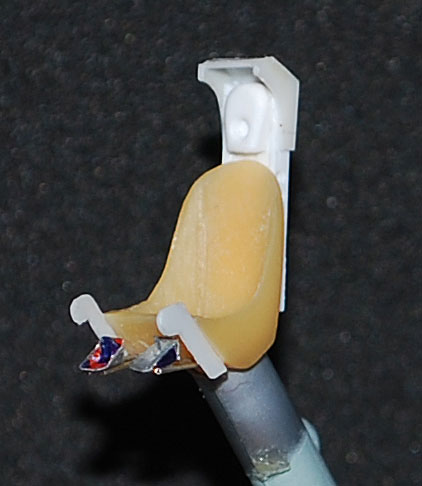
And the ejection seat finished.
Onto final assembly now, with a final varnish to follow with fitting off the cockpit canopy etc.
Regards
Brent
Here she is decalled. A slight oil wash into the panel lines to highlight slightly and break the expanse of blue.
This beast has a serious fan up the front.
And the ejection seat finished.
Onto final assembly now, with a final varnish to follow with fitting off the cockpit canopy etc.
Regards
Brent
ludwig113
Joined: February 05, 2008
KitMaker: 1,381 posts
AeroScale: 1,110 posts
Posted: Wednesday, December 28, 2011 - 11:56 PM UTC
thats great brent, so glad to see you very nearly finished, well done for all the hard work 
paul
paul

JClapp

#259
Joined: October 23, 2011
KitMaker: 2,265 posts
AeroScale: 1,715 posts

Posted: Thursday, December 29, 2011 - 01:34 AM UTC
the Skyshark looks awesome!
I hadnt heard of it before reading this thread.
found a bunch of prototype pics
I hadnt heard of it before reading this thread.
found a bunch of prototype pics

Dunners01
Joined: April 05, 2011
KitMaker: 15 posts
AeroScale: 14 posts
Posted: Friday, December 30, 2011 - 07:49 PM UTC
Thanks Paul and thanks Jonathon for the link to those photos, some crackers in there, especially those in colour.
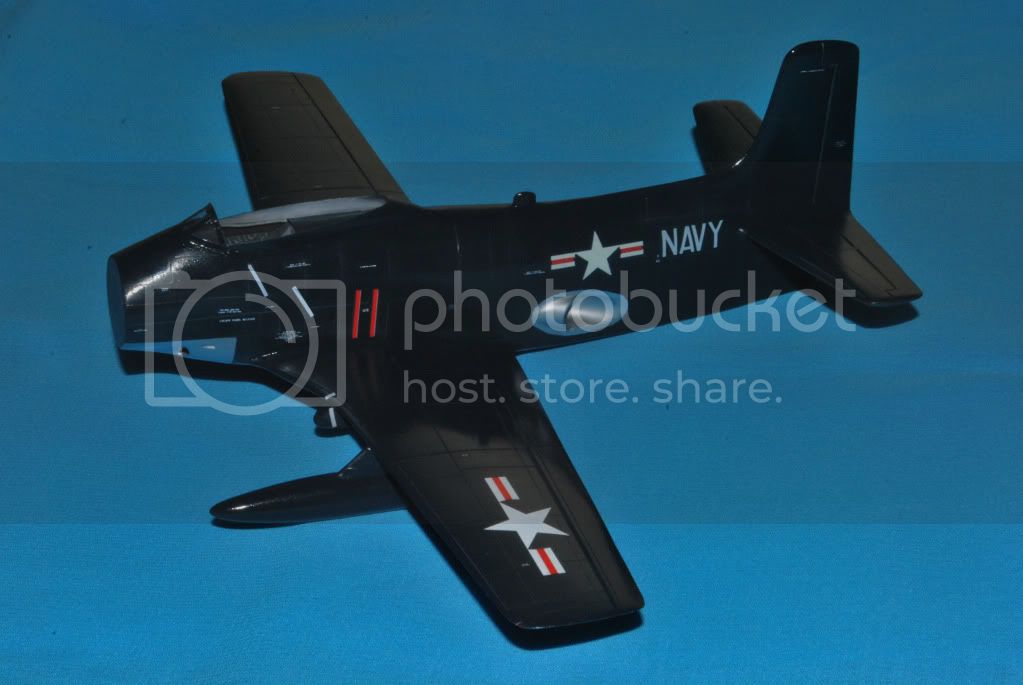
3 1/2 hours to deadline, (how much time do you need!!). Here is the end product.
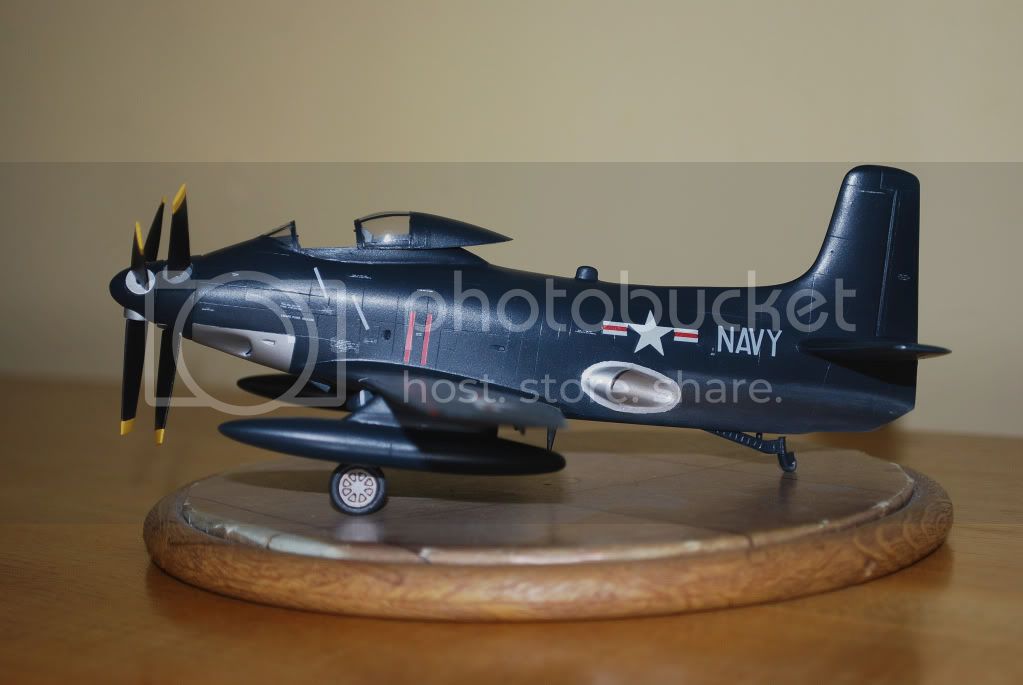

A great looking subject to model. The Rareplanes kit is not too bad but has a couple of quirks to deal with along the way, but that is part of the enjoyment. I was happy enough with the construction but let down by the finishing. My problems with the paint gave endless problems that made for a messy job. The prolonged drying time turned the model into a dust magnet, and the paint, being soft, needed endless touch-up. The final result is a model that is reasonable at stand-off distance but doesn't stand up to closer scrutiny, which is a shame (but not that uncommon for my efforts unfortunately). I'm well pleased to have this model finished within the deadline. This is about three times quicker that normal for me, as you can tell by the push at the end.
Thanks to John and Steve for their help with access to machinery during the build and a big thanks to Warren who came to the rescue with the white stencil data that really makes a huge difference to this model.
3 1/2 hours to deadline, (how much time do you need!!). Here is the end product.
A great looking subject to model. The Rareplanes kit is not too bad but has a couple of quirks to deal with along the way, but that is part of the enjoyment. I was happy enough with the construction but let down by the finishing. My problems with the paint gave endless problems that made for a messy job. The prolonged drying time turned the model into a dust magnet, and the paint, being soft, needed endless touch-up. The final result is a model that is reasonable at stand-off distance but doesn't stand up to closer scrutiny, which is a shame (but not that uncommon for my efforts unfortunately). I'm well pleased to have this model finished within the deadline. This is about three times quicker that normal for me, as you can tell by the push at the end.
Thanks to John and Steve for their help with access to machinery during the build and a big thanks to Warren who came to the rescue with the white stencil data that really makes a huge difference to this model.
Dunners01
Joined: April 05, 2011
KitMaker: 15 posts
AeroScale: 14 posts
Posted: Friday, December 30, 2011 - 08:00 PM UTC
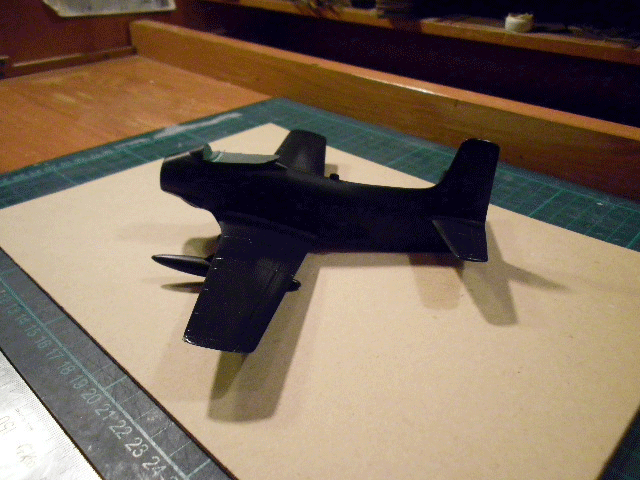
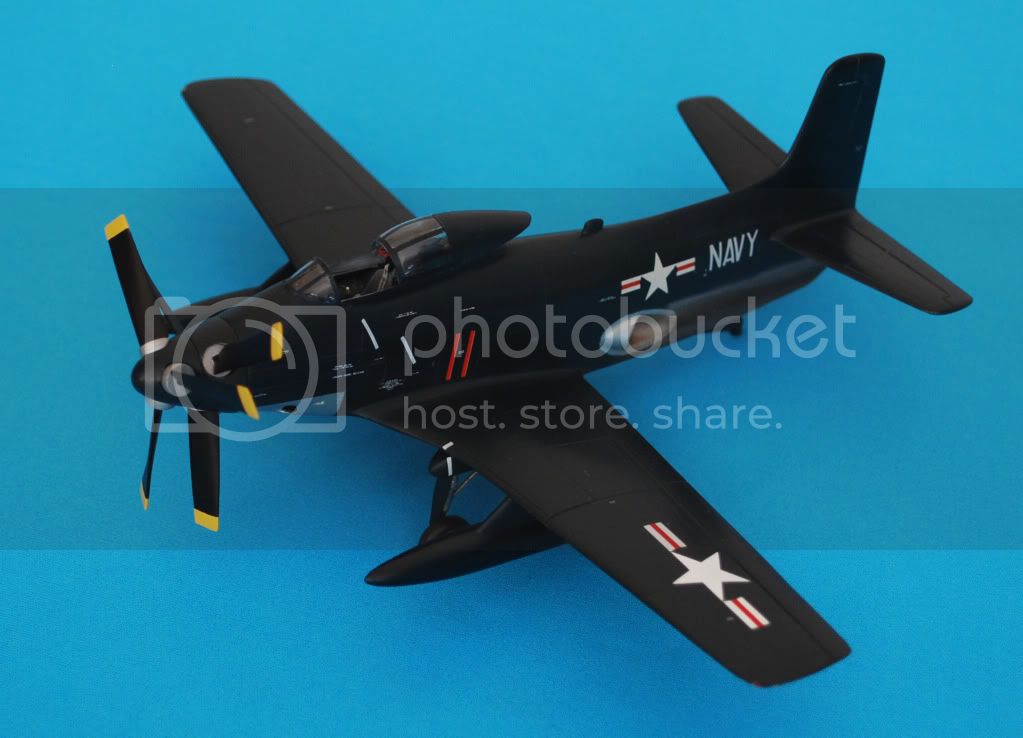
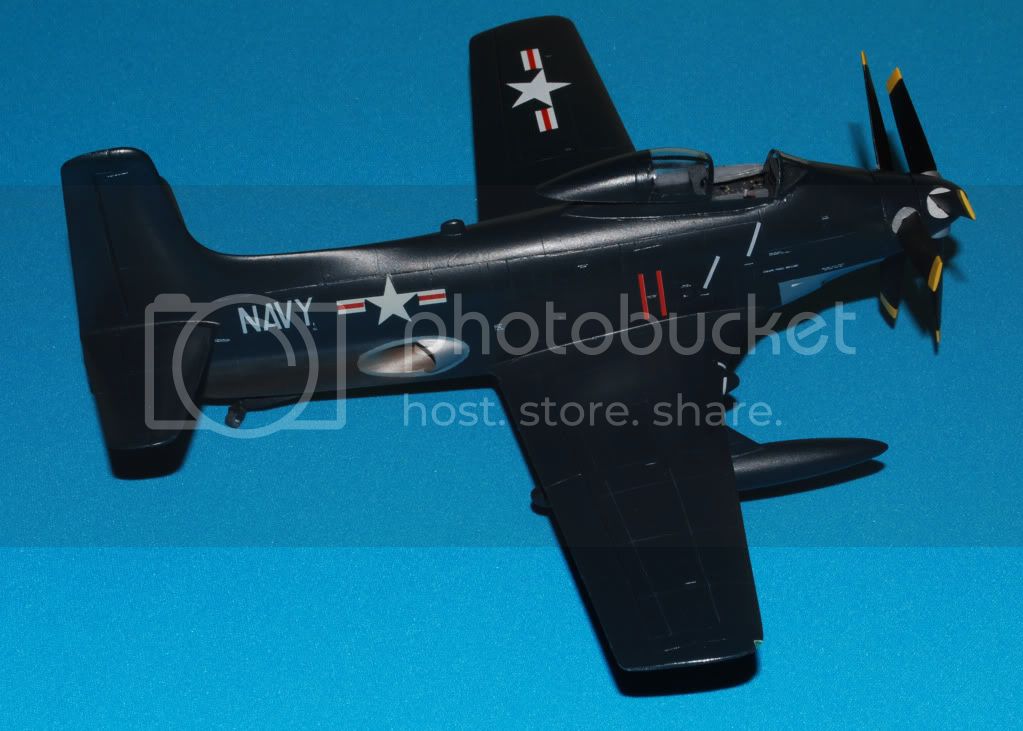
Just realised that the previous photos are all of the same side. Here are a couple to show that I didn't finsh just the one side.

Cheers people, have a Happy New Year
Regards
Brent C
Cheers people, have a Happy New Year
Regards
Brent C
ludwig113
Joined: February 05, 2008
KitMaker: 1,381 posts
AeroScale: 1,110 posts
Posted: Friday, December 30, 2011 - 09:33 PM UTC
thats fantastic brent, really glad you finished , the effort was def. worth it. 
i think we've all proved that vac kits arn't that much harder than a normal kit( just a bit messier when sanding to size) but with resin interiors and etch details there is no limit to what can be achived.
to anyone who started but didn't finish please dont give up, there's always a "hanger queen" campaign around the corner!
many thanks to everyone
paul
Jessie_C
Joined: September 03, 2009
KitMaker: 6,965 posts
AeroScale: 6,247 posts
Posted: Saturday, December 31, 2011 - 01:03 AM UTC
Yay Brent! It was getting lonely on the finishers' podium I'll bet that would look interesting sitting next to a production model Skyraider.
I'll bet that would look interesting sitting next to a production model Skyraider.WAB123
Joined: November 28, 2011
KitMaker: 3 posts
AeroScale: 2 posts
Posted: Saturday, December 31, 2011 - 08:02 AM UTC
Great effort Brent. I was fortunate enough to see this model in the "plastic" last week and even though the photos are great, it looks fabulous for real. In spite of what Brent says, you have to look hard to see the "blemishes". Anyone who can finish a vacform to the standards that I have seen across this forum is a very patient and dedicated modeller. Well done to all the finishers.. Warren IPMS Christchurch NZ.
JClapp
#259
Joined: October 23, 2011
KitMaker: 2,265 posts
AeroScale: 1,715 posts
Posted: Monday, February 27, 2012 - 02:23 AM UTC
Quoted Text
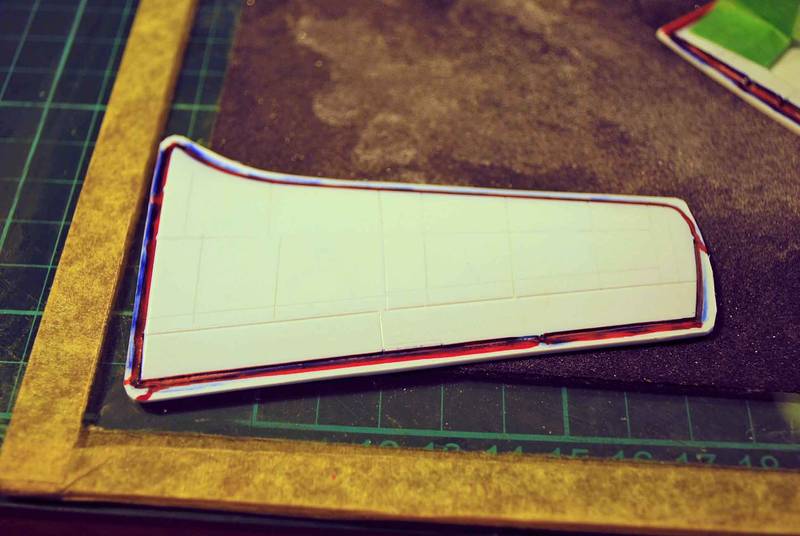
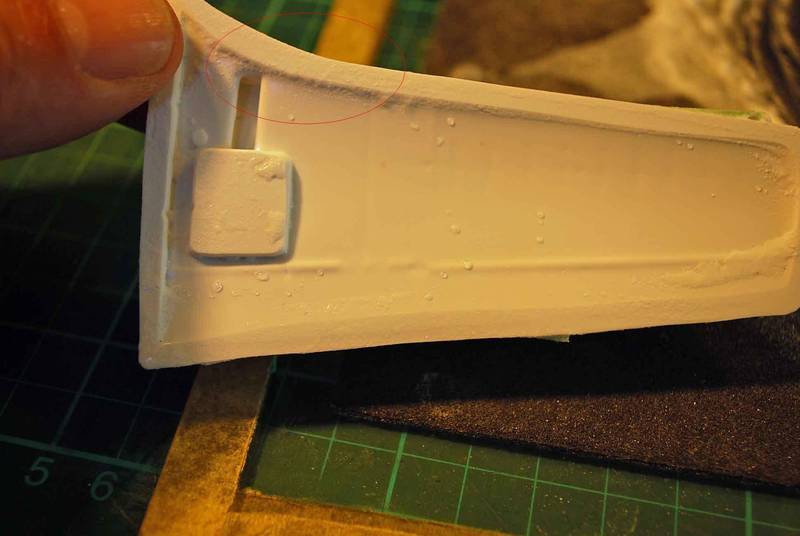
Nice work on the Vemon Gary, one of my favourite aircraft. Heres a tip that may help you to avoid oversanding. Having done this in the past I can appreciate what a pain it is.
First up I mark the outline of the part in a thick marker pen. The type I use has ink that is soluable in methylated spirit. This way the ink can be removed when we're done.
Being a wing I have added masking tape handles. These flat parts are almost impossible to hold onto without them. The handles allow me to adjust the pressure applied to various spots. The tape does have a tendancy to loose interest in its job when it gets wet however.
As the part is sanded keep moving the application of pressure around the top surface (this is where the handles really help). Flip the part over and keep a regular check on the side that is getting sanded. In this photo we can see the marker pen just starting to show through the plastic.
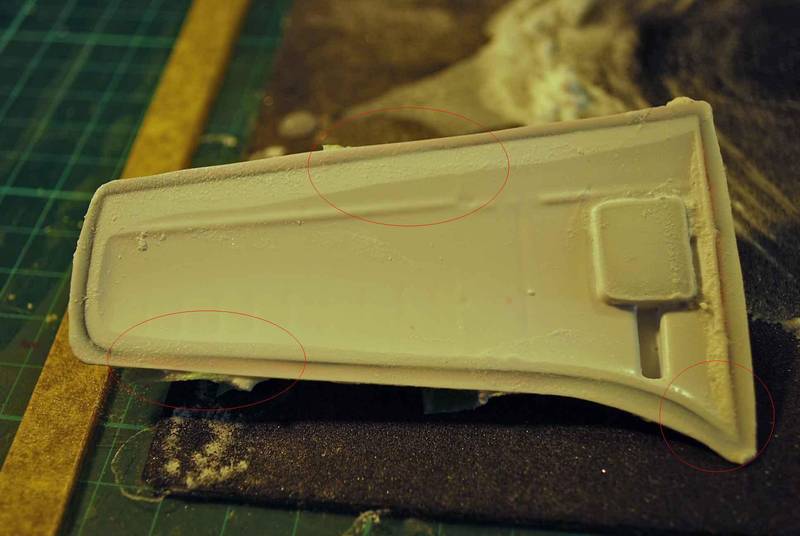
In this next photo you can see that some areas are thinning out much quicker than others. Pressure to these areas will be avoided now until we have a consist line around the outside of the part. Without checking like this I would have blown through these areas and had a hell of a mess to try and fix.
Getting through it now, we are just about done. A check underneath shows a couple of areas that still need attention. Incidentally, at this stage 5 rotations on the sand paper will take a region from being underdone to overdone. It doesn't take much. Constant checking is the name of the game.
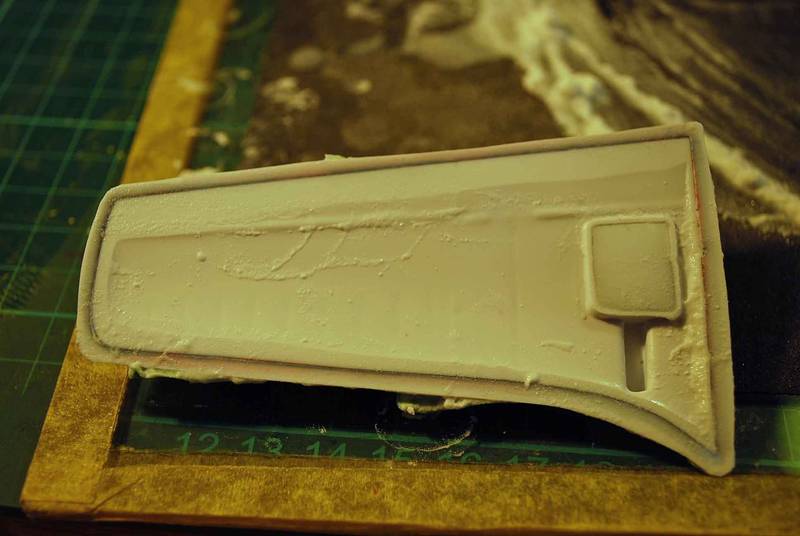
All done. The outer ring of surplus plastic is hanging on by a coulpe of threads here and there. Running you thumb across the part generally sees it removed. Trailing edges and tail fins usually take a bit more grunt because of the broard surafec area of plastic in contact with the sandpaper. I'm sure you will have noticed this with the tail booms. A prime example where the forward end will sand so much quicker than the fin. For me it was the wheelwells which made it tricky to get the wing roots sanded evenly.
The end result. Note that the wheelwell excess sanded out at the same time.
Hope your don't think I'm telling you how to suck eggs Gary but I could never understand all the magazine articles over the years stating to use the pencil line as a guide to sanding parts out, cause it never worked for me until one day I flipped the part over and could see the line shining through the plastic. I'm sure there are many other ways to skinning this cat but this one works for me.
Regards
Brent

I keep coming back to this thread because I have developped a fascination for the vacuform medium, and there are several planes I want to build that can only be had in vacuform.
This post right here is the best guidance on this process Ive seen anywhere, and certainly deserves a bump. Thanks for sharing!
I cut out my first vacufrom part last night with this guide post open on my laptop. It worked perfectly!

onward!
 |

WEB HOSTING BY


Copyright ©2021 AeroScale and Kitmaker Network, a subsidiary of Silver Star Enterprises
All Rights Reserved. Please read our Conditions of Use and Privacy Policy.
All Rights Reserved. Please read our Conditions of Use and Privacy Policy.