KotS GB 2011 Bristol Frightener warreni
South Australia, Australia
Joined: August 14, 2007
KitMaker: 5,926 posts
AeroScale: 2,201 posts
Posted: Tuesday, May 03, 2011 - 10:09 PM UTC
Hello everyone.
Finally got around to starting my 1/32 WNW Bristol Fighter. Nothing to report so far except that as usual this kit has been a pleasure to build so far.. I haven't got to the rigging yet..

One difference with this kit and 99% of others i have built is that I have done no airbrushing yet.. all brushing so far.
Cheers
You may be right, I may be crazy.
England - South East, United Kingdom
Joined: November 06, 2005
KitMaker: 1,667 posts
AeroScale: 1,551 posts
Posted: Wednesday, May 04, 2011 - 08:06 AM UTC
Great start Warren, good to see you with us with such an excellent choice of build.
Still can't cure the AMS even with sausage finger implants & olde eyes.
South Australia, Australia
Joined: August 14, 2007
KitMaker: 5,926 posts
AeroScale: 2,201 posts
Posted: Wednesday, May 04, 2011 - 08:54 AM UTC
Thanks Keith. Lets hope I can do the kit justice. I am trying to build the WNW kits in the order they were released. This was number 4.
You may be right, I may be crazy.
North Carolina, United States
Joined: June 19, 2007
KitMaker: 604 posts
AeroScale: 600 posts
Posted: Wednesday, May 04, 2011 - 02:29 PM UTC
As Keith said, great start! keep the photos coming.
RAGIII
Alberta, Canada
Joined: January 19, 2008
KitMaker: 6,743 posts
AeroScale: 6,151 posts
Posted: Thursday, May 05, 2011 - 01:16 AM UTC
Go Warren Go !
Like the others , nice to see you taking part in the GB
South Australia, Australia
Joined: August 14, 2007
KitMaker: 5,926 posts
AeroScale: 2,201 posts
Posted: Thursday, May 05, 2011 - 07:17 AM UTC
OK.. I am going!!
Thanks for the encouragement guys and the lovely Terri.
Sorry for the blurriness.. I will have to learn a bit more about depth of field with my camera I think..

Only problem I have had was with the rear PE curtain. I should have annealed it first I suppose. Something for the memory as it would have been much easier to shape methinks..
I have gone about as far as I can with my Bf110 until the brass barrels arrive from Aeroscale for my build review, so I can now concentrate on this kit and my 1/350 Saratoga. Might even start another one for the times when the other two are drying.. I find I can leave the kits for days if necessary for paint and delicate build parts to totally dry using this method of multiple kit builds.
More piccies as I do more..

You may be right, I may be crazy.
New Jersey, United States
Joined: June 02, 2006
KitMaker: 1,212 posts
AeroScale: 468 posts
Posted: Friday, May 06, 2011 - 12:45 AM UTC
Great stuff so far.
Dunno how some guys can have several builds going at once. Would that mean the the pile of clutter on my bench would be 3 feet high instead of the normal 1 foot

I would be afraid my Bristol would have 15" guns and a twin tail.
Arizona, United States
Joined: December 12, 2008
KitMaker: 1,423 posts
AeroScale: 1,319 posts
Posted: Friday, May 06, 2011 - 12:57 AM UTC
Hi Warren:
Looking good so far. Looking forward to more.
Best
Mark
We few, we happy few........
South Australia, Australia
Joined: August 14, 2007
KitMaker: 5,926 posts
AeroScale: 2,201 posts
Posted: Sunday, May 08, 2011 - 01:43 PM UTC
Thanks guys.
Marc, I have always got at least two builds going so there is always something to do on one of them.
You may be right, I may be crazy.
Idaho, United States
Joined: March 09, 2010
KitMaker: 557 posts
AeroScale: 193 posts
Posted: Sunday, May 08, 2011 - 05:20 PM UTC
I was trying to encourage some of my friends to take up the hobby and used your post here as an example of modeling expertise...you da man
War is cruelty.There is no use trying to reform it.The crueler it is, the sooner it will be over.
South Australia, Australia
Joined: August 14, 2007
KitMaker: 5,926 posts
AeroScale: 2,201 posts
Posted: Sunday, May 08, 2011 - 05:48 PM UTC
Thanks heaps Dave. One day I might be good..
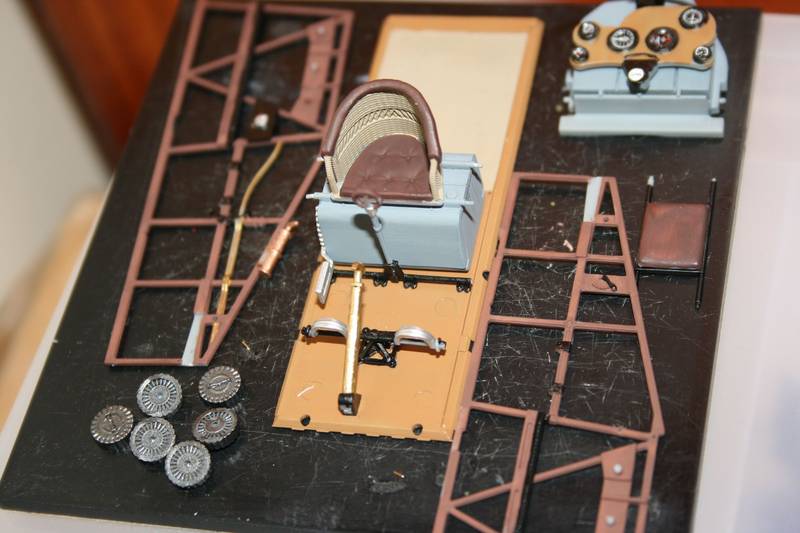
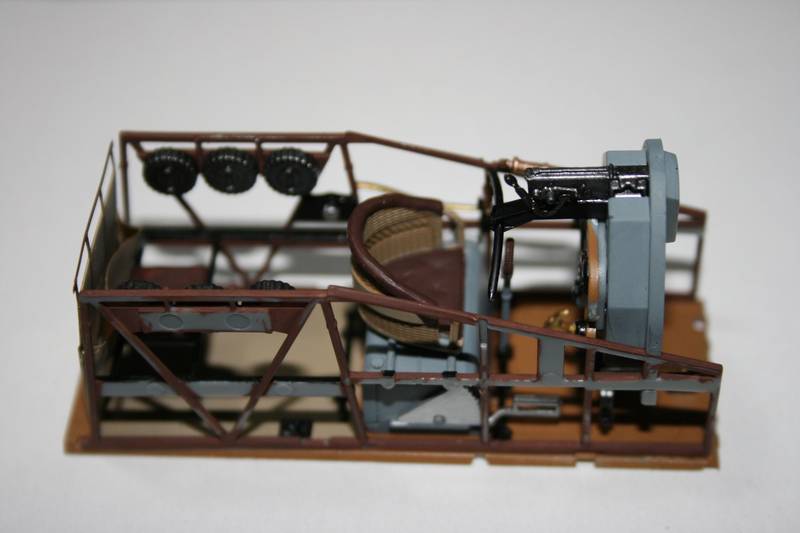
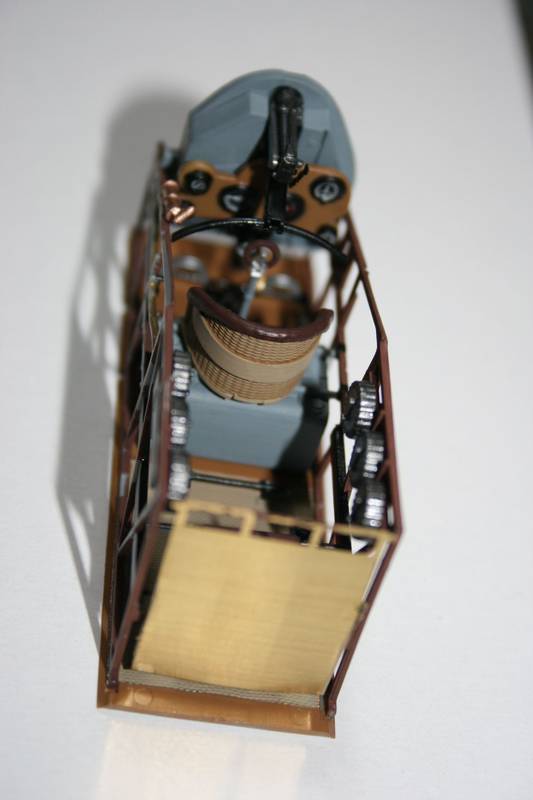
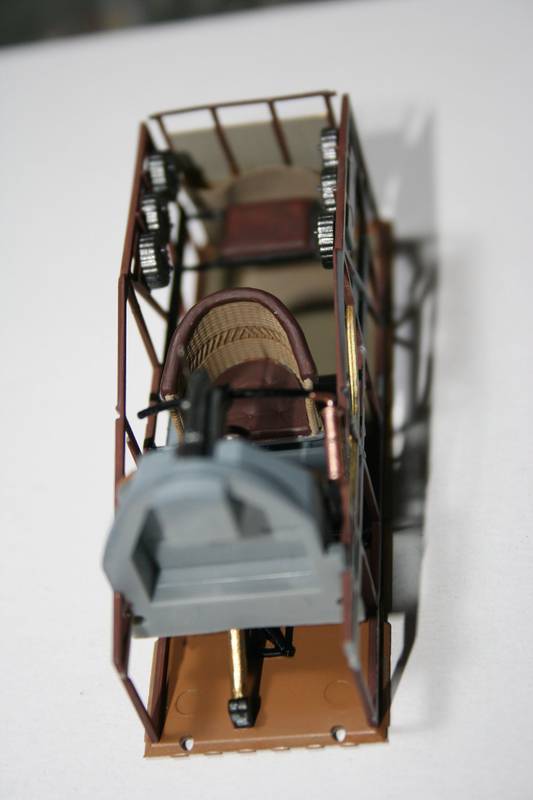
Anyway, here are some more photos of the progress of the Brisfit...
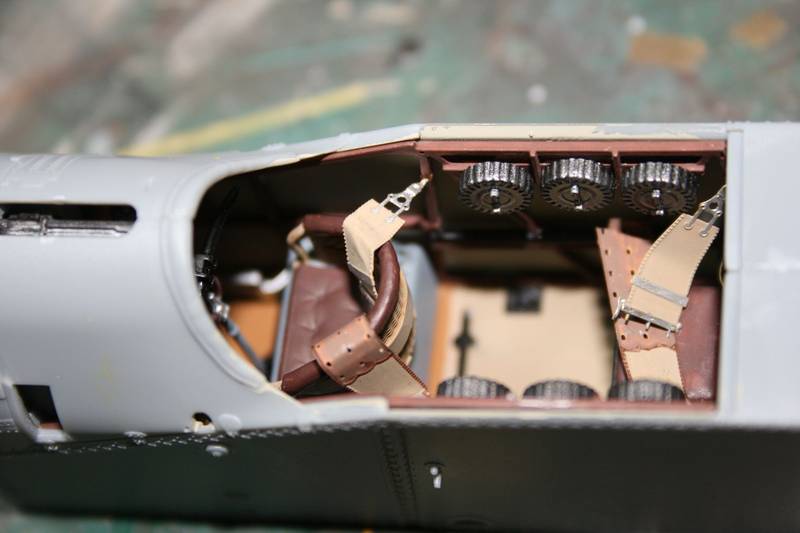
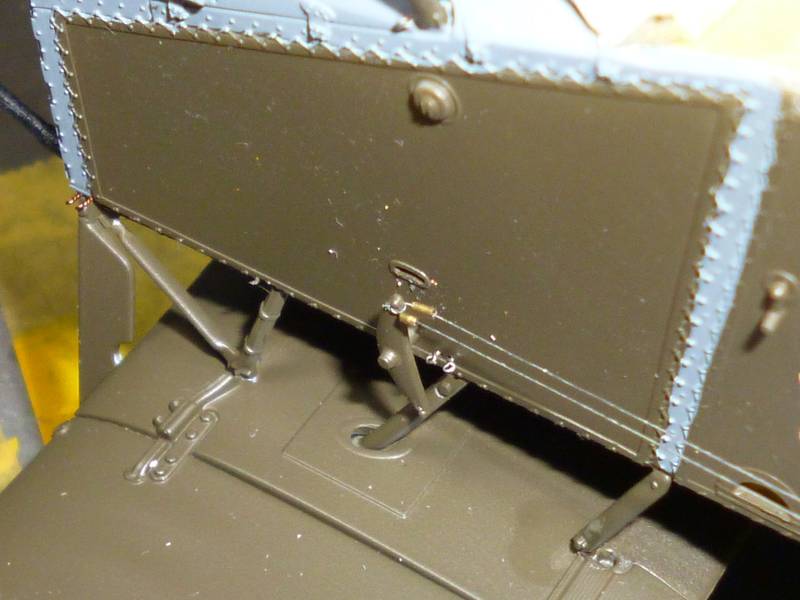
The seat belts fought me for a little while as the WNW instructions are not very clear in this area. But I finally figured out that the little tabs on the ends of the attachment buckles went into some small holes in the cockpit framing.
The cockpit assembly itself slid into the fuselage without much fuss. Only had to clamp the bottom of the cockpit in place in the fuselage while it dried flush.

Here is the Rolls-Royce Falcon V12 engine in all its lightly oiled glory. I cheated and brushpainted on the airbrush-only Testors metaliser brass colour as it is the best brass colour I have at the moment. Aluminium is Testors Chrome Silver, and the rest of the colours are as stipulated in the instructions.
Does anyone know if any paint company has released PC-10 yet?
Cheers
Warren
You may be right, I may be crazy.
South Australia, Australia
Joined: August 14, 2007
KitMaker: 5,926 posts
AeroScale: 2,201 posts
Posted: Wednesday, May 18, 2011 - 08:21 AM UTC
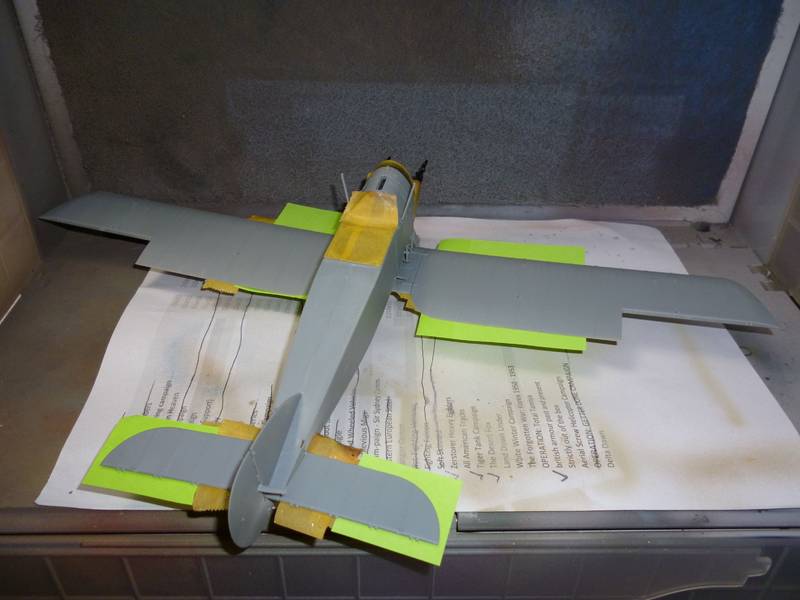
The Brisfit enters the spray booth for its upper colour...
Hi all. As you can see the Brisfit has got a bit further. The lower surfaces have already been painted in their Natural Linen colour and this was the Bristol all masked up and ready to be painted in PC-10.. olive green to most of us..
I used Gunze 78 on this one. All went on in the typical lovely Gunze fashion and it has been curing for 24 hours now.
Next up is the decals then I will glue all the struts and tiny turnbuckles in place.
More progress later.
You may be right, I may be crazy.
New Jersey, United States
Joined: June 02, 2006
KitMaker: 1,212 posts
AeroScale: 468 posts
Posted: Wednesday, May 18, 2011 - 09:09 AM UTC
Getting that 1st bit of paint down is always a nice milestone in the build. Looking forward to seeing the results.
South Australia, Australia
Joined: August 14, 2007
KitMaker: 5,926 posts
AeroScale: 2,201 posts
Posted: Wednesday, May 18, 2011 - 05:30 PM UTC
Greetings from Downunder.
Well another day and a bit more progress on the Brisfit. I previously sprayed the undersides with Tamiya XF-55 to replicate the natural linen finish. I have now applied the upper surface colour using Gunze H78 in their aqueous range.
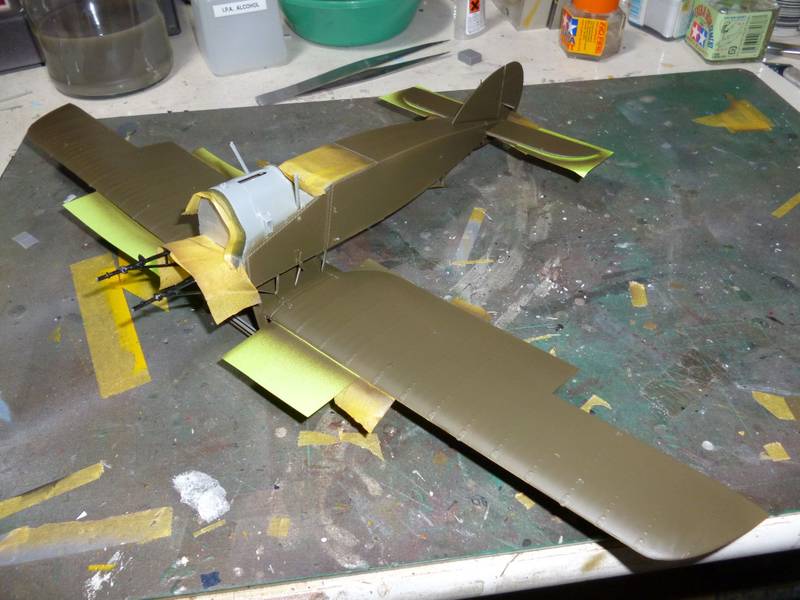
I will give it until tomorrow to dry, mask it up and apply the gray to the parts of the fuselage that need it.
You may be right, I may be crazy.
Västra Götaland, Sweden
Joined: February 19, 2010
KitMaker: 1,473 posts
AeroScale: 1,450 posts
Posted: Thursday, May 19, 2011 - 12:18 AM UTC
Hi Warren checked this build thread just now Looking very good indeed I'll follow your progress with great interest.
Mikael
_________________________________________________________
Just finished the Wingnut Wings Taube. On to the Junkers D.1
South Australia, Australia
Joined: August 14, 2007
KitMaker: 5,926 posts
AeroScale: 2,201 posts
Posted: Thursday, May 19, 2011 - 08:42 PM UTC
Thanks Mikael.
Some more progress...
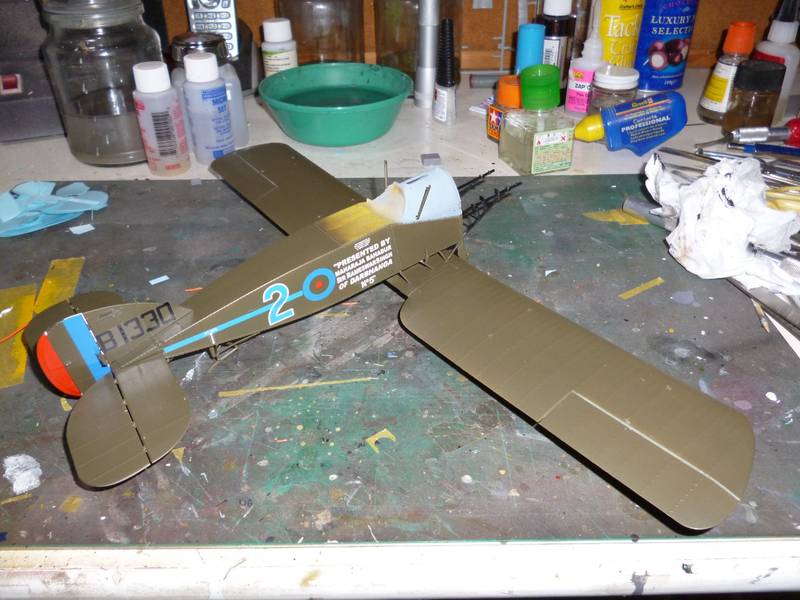
Hmmm.. that PC10 between the wing and aileron will need touching up..
Wouldn't it be nice to be rich enough to donate an aircraft to an air-force in todays money..
Decals are on and will be clear-coated tomorrow after having a chance to dry thoroughly. I now have to wait for my turn buckles to arrive as I do not have enough to do the kite with the few I have left, so please excuse a lack of progress for a few days..
You may be right, I may be crazy.
Arizona, United States
Joined: December 12, 2008
KitMaker: 1,423 posts
AeroScale: 1,319 posts
Posted: Friday, May 20, 2011 - 07:03 AM UTC
Hi Warren:
This is really turning out nicely Warren. I like the presentation markings, quite a concept for the time. Looking forward to more.
Best
Mark
We few, we happy few........
South Australia, Australia
Joined: August 14, 2007
KitMaker: 5,926 posts
AeroScale: 2,201 posts
Posted: Friday, May 20, 2011 - 10:05 AM UTC
Thanks Mark.
I will only be doing little things for the next few days like wheels, prop etc until the turnbuckles get here from England.
You may be right, I may be crazy.
New Jersey, United States
Joined: June 02, 2006
KitMaker: 1,212 posts
AeroScale: 468 posts
Posted: Friday, May 20, 2011 - 11:42 PM UTC
Looks great with decals on.
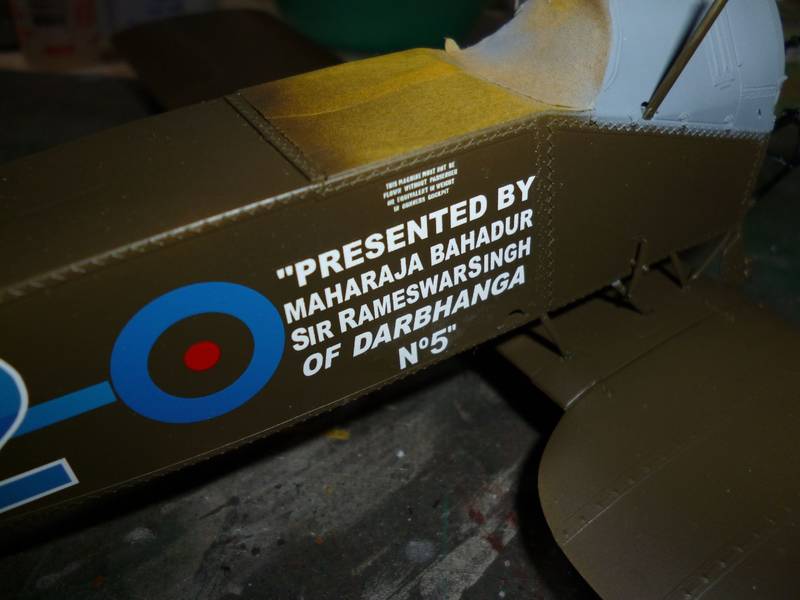
Darbhanga #5? Is the a men fragrance

South Australia, Australia
Joined: August 14, 2007
KitMaker: 5,926 posts
AeroScale: 2,201 posts
Posted: Saturday, May 21, 2011 - 08:24 AM UTC
Quoted Text
Looks great with decals on.
Darbhanga #5? Is the a men fragrance
It sounds like it doesn't it Marc..
I finally taught myself how to make my own eyelets for the rigging so will be getting back to the Brisfit soon.
You may be right, I may be crazy.
South Australia, Australia
Joined: August 14, 2007
KitMaker: 5,926 posts
AeroScale: 2,201 posts
Posted: Monday, May 23, 2011 - 08:44 PM UTC
Some more progress!!
I was going to use the RB Productions photo-etch flying wires and brackets but I then found out that I needed four different sorts for this one aircraft. I only have one sort here and don't have 24 GBP to buy three more sets.. so it is back to good ole invisible thread, that I make visible with a paint marker.
I made all my own eyelets for this one as well. Easy when you know how!
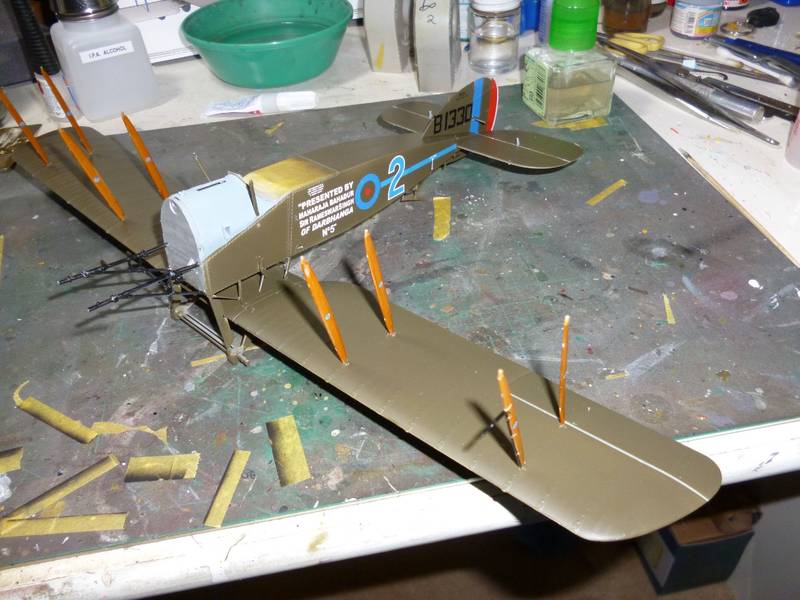
Struts in. I touched up between the aileron and the wing after taking this shot.
Just a few threads..
Not to hard when you get used to it, but it is easy to mix wires up.
I am not sure if you can actually notice mush difference with the aerodynamic wires, but maybe one of the Pup's will get that treatment. It is not hard to do, just needed more than I had, and I want to finish this plane sooner than later..
Cheers
You may be right, I may be crazy.
Alberta, Canada
Joined: March 08, 2009
KitMaker: 394 posts
AeroScale: 360 posts
Posted: Tuesday, May 24, 2011 - 12:28 AM UTC
Quoted Text
I made all my own eyelets for this one as well. Easy when you know how!
But if we didn't know how, would you take the time to show us the way?
Your doing a fine job, bye the way.
Guy
Current Projects: 1/144 R5D-3 (MiniCraft)
1/48 Ford Flivver (Williams Bro.)
1/72 UC-64A Norseman (MatchBox)
MAAC No.51187
IPMS CANADA No. 3369
South Australia, Australia
Joined: August 14, 2007
KitMaker: 5,926 posts
AeroScale: 2,201 posts
Posted: Tuesday, May 24, 2011 - 07:54 AM UTC
Quoted Text
Quoted Text
I made all my own eyelets for this one as well. Easy when you know how!
But if we didn't know how, would you take the time to show us the way?
Your doing a fine job, bye the way. Guy
Thanks Guy.
Just say the word and I will generate an article on how I do it.. Only need a few simple tools and some wire. But it is very fiddly...
On another note, I just went to use the 2BA Aero wires I have at home but the fret says they are 4BA wires?! Looks like I got the wrong fret. Have sent an email and it will be interesting to see what happens.
So no aero wires for this build. I am too impatient to finish it to wait for the other wires.
Cheers
Warren
You may be right, I may be crazy.
South Australia, Australia
Joined: August 14, 2007
KitMaker: 5,926 posts
AeroScale: 2,201 posts
Posted: Tuesday, May 24, 2011 - 09:45 PM UTC
Hi All.
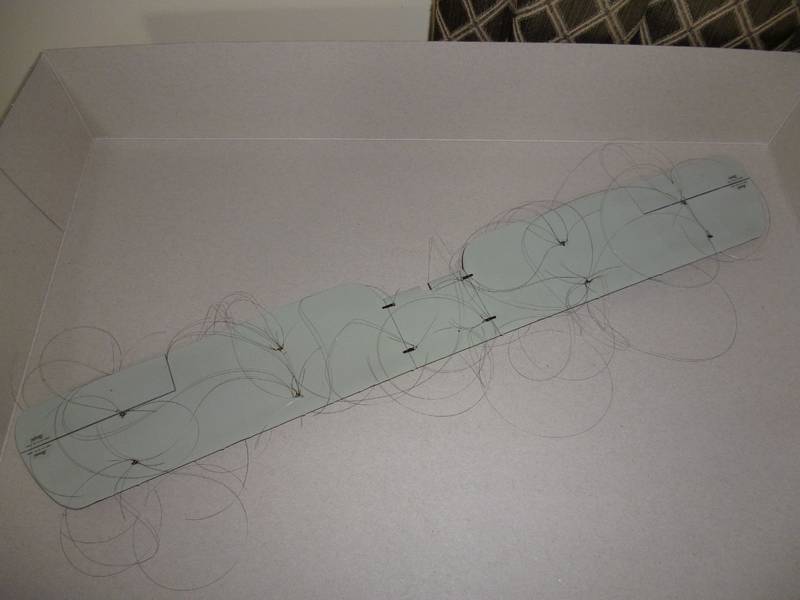
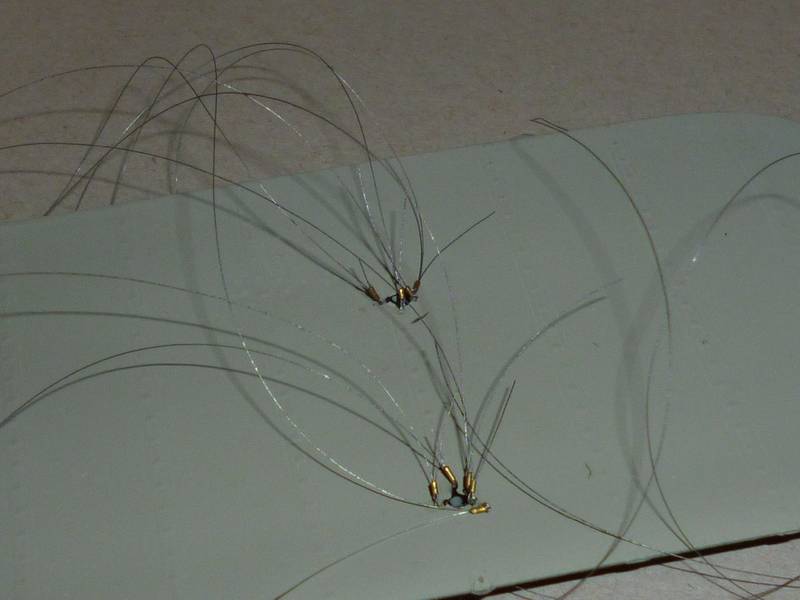
I started rigging the beasty today and am learning rapidy. I am using monofilament that I colour with one of my ancient Tamiya Paint Pens that never seems to run out, XF-56 variety.
I started with the aileron control wires today.
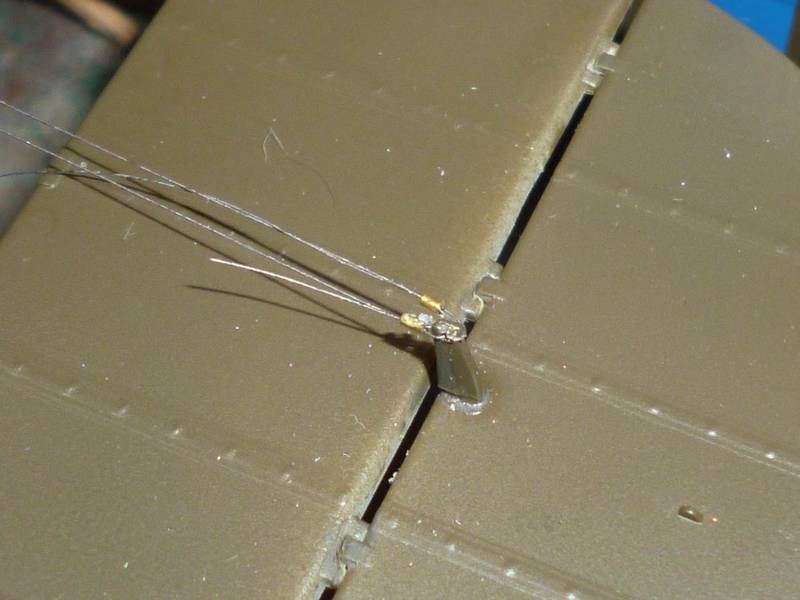
This new camera shows it all warts and all!! I am using brass tube to simulate the turnbuckles.
One thing I would advise is that anytime you are going to be rigging a plane make sure you drill all the holes you need before assembly. I forgot quite a few in the tail area and it has been very tricky to get them done. SOme I couldn't do and had to use another method to attach the runs to the control horns. Of course they would have to use double wires for each aileron run wouldn't they. Just to make it more interesting.
More progress pics if I make any tomorrow. I have a long drive out to inspect a flight simulator.
You may be right, I may be crazy.
South Australia, Australia
Joined: August 14, 2007
KitMaker: 5,926 posts
AeroScale: 2,201 posts
Posted: Thursday, May 26, 2011 - 10:19 AM UTC
Hi All.
Imagine my surprise when I walked into the Museum of Aviation and what is sitting in one corner, a Bristol F2b!! I got very excited until I got up close and personal and worked out it was a replica. But I still took a heap of photos of it as about the only thing I could pick that wasn't exactly like the original was that they has used metal on the fuselage rather than fabric. Fair enough as it required far less maintenance.
It was built for a series called '1000 Skies' or something similar.
For a list of other aircraft go
here.
There is also about ten Caribous and a Nomad sitting in open storage outside the museum. I spotted a few I had worked on back in the early 1980s while I was at 38SQN in Richmond.
Well worth the drive and just $5 entry fee.
You may be right, I may be crazy.


