

Orlando,
Sorry about the Monogram kit! I hope you can get the missing pieces some day, as it's an excellent model. I'd suggest trying to get hold of Revell directly to see what you can do, but meanwhile 1/72 Airfix PBY it is.
Michael
Air Campaigns
Want to start or join a group build? This is where to start.
Want to start or join a group build? This is where to start.
Hosted by Frederick Boucher, Michael Satin
OFFICIAL: Battle of Midway, 1942 Campaign
MichaelSatin


Joined: January 19, 2008
KitMaker: 3,909 posts
AeroScale: 2,904 posts
Posted: Monday, June 13, 2011 - 03:07 AM UTC
flyboy92187
Joined: March 30, 2011
KitMaker: 199 posts
AeroScale: 150 posts

Posted: Monday, June 13, 2011 - 04:34 AM UTC
Well my practice kit is really helping, can't say I have made any WWII Pacific era 1/72 models. I am currently working with a friend to try and track down a Devastator kit. After sitting at work the past few days doing nothing but looking at midway aircraft. Has anyone done the 1/72 Airfix kit? Otherwise I was thinking of tracking down a 1/48, only trouble is I am running out of shelf space for the large kits.


flyboy92187
Joined: March 30, 2011
KitMaker: 199 posts
AeroScale: 150 posts
Posted: Wednesday, June 15, 2011 - 11:43 AM UTC
I totally made an impulse buy. I have never made a Japanese aircraft, so I decided to pick up the 1/72 Hasegawa B5N2 kit. As it matches with one of the above listed units in terms of markings (Akagi Air Unit Cdr. Mitsuo Fuchida (Rated Observer) 1 Type 97 B5N2 carrier attack plane) I should be in business. If anyone wants I can post my finished Dauntless once I finish it, otherwise once she is done, I shall commence work on the Kate.
robtmelvin
Joined: October 05, 2010
KitMaker: 205 posts
AeroScale: 18 posts

Posted: Thursday, June 16, 2011 - 08:33 AM UTC
This should be a really great group build, with all of the possibilities, both ships and warplanes. First "interdisciplinary" group build I've seen! I hope to get started on Hornet before too much longer. I'm finishing up a Tamiya Fletcher right now, about 90% done, and I have a 1/350 U.S.S. North Carolina that I'm working on. I want to try to get her done before I start on Hornet, since I prefer not to have two major projects going at once. But, given the end date for this one, I don't see any problems with getting Hornet ready to go in plenty of time. I'm really looking forward to seeing every body's contributions.
Bob
Bob
MichaelSatin
Joined: January 19, 2008
KitMaker: 3,909 posts
AeroScale: 2,904 posts
Posted: Thursday, June 16, 2011 - 11:25 AM UTC
Michael, Glad you're stretching a bit!
Robert, Really looking forward to your Hornet
The list as it exists a this time:
1. Bruce Miller/Grayghost666: Ship or TBF
2. Jesper/SgtJKJ: A6M2
3. Allen Berry/Tomcat31: SBD
4. Bob R./BigRip74: F4F
5. Naseby: D3A1 1/48 Hasegawa
6. Robert Melvin: USS Hornet 1/350 Trumpy
7. Jeremy H/vonHengest: IJN Ayanami 1/700 Pit Road
8. Vance/vanize: SBD, B5N or D3A
9. Jim/potchip: Diorama of Japanese carriers being attacked
10. Aaron Newlands/611_sqn: D3A 1/48 Hasegawa
11. Sean Hadfield/windysean: TBF 1/72 Academy
12. Daniel Chavez: USS Hornet 1/350 Trumpy or Japanese ship
13. Paul Pawlak/ppawlak1: F4F 1/48 Tamiya
14. Michael/flyboy92187: B5N2 1/72 Hasegawa
15. Michael/MichaelSatin: F2A-3 1/32 Czech Model
16. Tom Gore/usmartial: A6M2 1/32 Doyusha
17. Orlando Pantoja/opantoja: PBY-5a 1/72 Airfix
Please note my current plan for myself! I saw a dearth of Buffaloes so I thought I might break out that kit and give it a whirl. We'll see...
Michael

opantoja
Joined: April 25, 2008
KitMaker: 22 posts
AeroScale: 19 posts
Posted: Thursday, June 16, 2011 - 12:22 PM UTC
Glad to see the list I pulled out of that book is helping!

Tomcat31

#042

Joined: November 18, 2006
KitMaker: 2,828 posts
AeroScale: 1,720 posts

Posted: Friday, June 17, 2011 - 11:25 AM UTC
I'm unfortunately going to have to bow out of this campaign for the time being.
Unfortunately I slightly over subscribed to campaigns and then Camogirl and I moved out of our respective parents into our new house. as such i've not been getting to the bench as much as i like due to all the DIY and decorating that's needed.
I will keep checking in from time to time and if my situation improves towards the end of the year I may re-enlist

flyboy92187
Joined: March 30, 2011
KitMaker: 199 posts
AeroScale: 150 posts
Posted: Friday, June 17, 2011 - 12:16 PM UTC
-Orlando: Ya! it really is. While I was looking for another kit to do, I simply looked up included or after market markings based on the names you had listed. Thanks a million!
flyboy92187
Joined: March 30, 2011
KitMaker: 199 posts
AeroScale: 150 posts
Posted: Monday, June 20, 2011 - 07:37 AM UTC
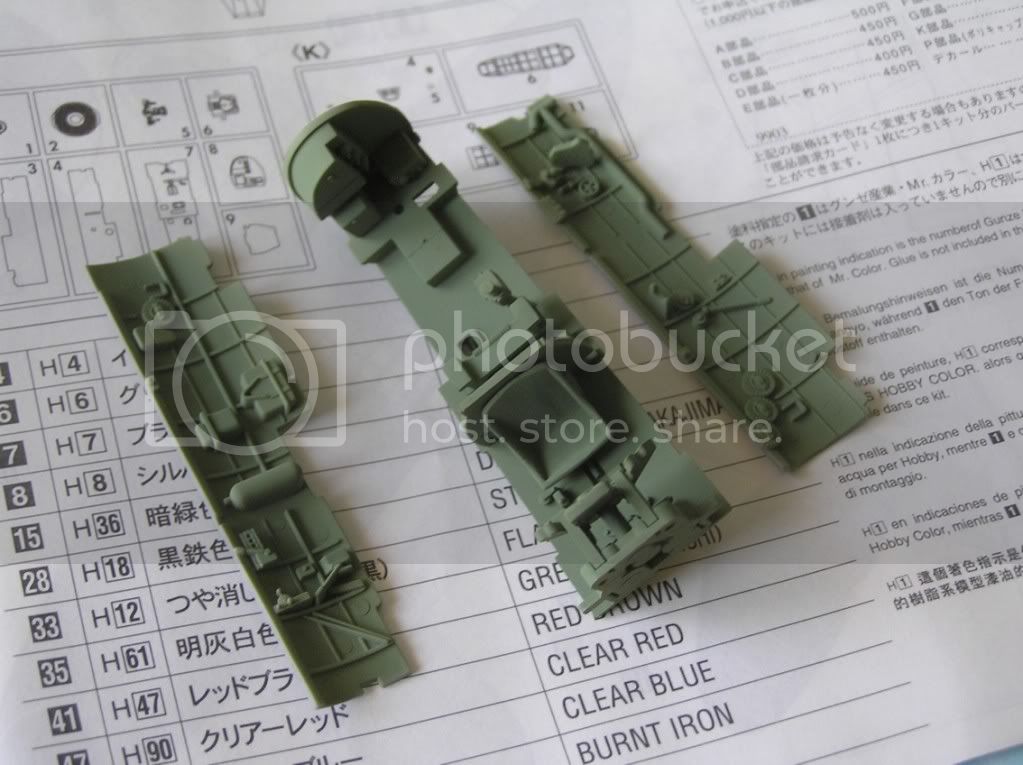
Here is some progress on the Kate: As it is an old kit, there is a ton of flash that needed to be nipped off. Other than that, it has been easy thus far. I did the base coat as tamiya flat aluminum, used micro mask, and went over that with JN Green. I have some more mask to pull off after work yet, but that is where it was when I had to leave this morning.


flyboy92187
Joined: March 30, 2011
KitMaker: 199 posts
AeroScale: 150 posts
Posted: Friday, June 24, 2011 - 04:27 AM UTC
Well, I finished the kit. Lets just say that the decals on the bottom of the wings took more than a few mirco sol treatments to set. After the mask was removed, I went post shaded the interior of the IJN Green panels with a shade lighter, and then did the usual black thin wash over the silver. I also used a bit of the pro modeler wash for some of the smaller details. The other paint chips were dry brushed onto the decals, and along the panel lines. This was a fun kit, and is perhaps one of the better ones in my collection. I owe it to this site, and all the other excellent contributors for sharing their expertise. So, without further adieu, here is Commander Fuchida's Kate as it would have appeared in June of 1942 for the battle.


MichaelSatin
Joined: January 19, 2008
KitMaker: 3,909 posts
AeroScale: 2,904 posts
Posted: Friday, June 24, 2011 - 09:38 AM UTC
Michael,
Wow, that was fast! Nice work being the first one done
Don't forget to post pictures of the finished product in the gallery.
Well everyone, Michael has set the bar high, let's see how the rest of us can do!
Michael
Wow, that was fast! Nice work being the first one done
Don't forget to post pictures of the finished product in the gallery.
Well everyone, Michael has set the bar high, let's see how the rest of us can do!
Michael
flyboy92187
Joined: March 30, 2011
KitMaker: 199 posts
AeroScale: 150 posts
Posted: Friday, June 24, 2011 - 01:51 PM UTC
Hey Michael,
Thank you for the kind words. I was really looking forward for this build. I have been wanting to tackle an IJN Aircraft for some time, as it was a good oppertunity to try new things. I look forward to seeing what others on here do, and hopefully picking up some more tips and tricks. And, as the campaign is long, I am still looking for that Devastator...
Thank you for the kind words. I was really looking forward for this build. I have been wanting to tackle an IJN Aircraft for some time, as it was a good oppertunity to try new things. I look forward to seeing what others on here do, and hopefully picking up some more tips and tricks. And, as the campaign is long, I am still looking for that Devastator...

Naseby

Joined: October 15, 2010
KitMaker: 825 posts
AeroScale: 476 posts

Posted: Tuesday, June 28, 2011 - 10:14 AM UTC
@Michael: You have chosen a very interesting camouflage. I didnt knew that the japanese planes had such camouflages so early on in the war. Im late with my build, so I just took a few pictures to show what I have chosen from the stash.


MichaelSatin
Joined: January 19, 2008
KitMaker: 3,909 posts
AeroScale: 2,904 posts
Posted: Tuesday, June 28, 2011 - 04:44 PM UTC
Naseby, Nice choice, I always liked the D3A, looking forward to seeing your progress!
All, As some of you may have noticed before, I have something of a pathological desire to build to themes. Now Midway, of course, is one big theme; but I've been thinking about a smaller theme within the bigger one that I might be actually able to commit to and maybe even get done. An idea occurred to me today and I thought I'd run it up the flagpole and see who salutes.
How about if I do a three plan "Swan Song" build? Midway was the last combat use by the US of the F2A, SB2U and TBD, and they each showed pretty clearly why it was past time for them to go. I could do one of each in 1/48 (Special Hobby, Acc. Min. and Monogram). Got 'em all and it would be kind of neat to see them together and might be something I could actually get done in a year.
Anyway, you all are my Midway buddies, so I thought I'd ask. Feel free to fire away!
And great work so far everyone, thanks for keeping the campaign alive while I dither!
Michael
flyboy92187
Joined: March 30, 2011
KitMaker: 199 posts
AeroScale: 150 posts
Posted: Tuesday, June 28, 2011 - 04:46 PM UTC
I was kind of surprised myself, as based off the paint guide, it appears to be possibly large scale paint wear or perhaps in the process of repainting? It was labeled as seen in the instructions, and really could not find a ton online. I can only speculate as to why the aircraft looked as it did based off Hasegawa's guide. Though this is an earlier war aircraft, I still want to try and land a late war kit, and try the hairspray technique.

611_sqd

Joined: January 24, 2011
KitMaker: 470 posts
AeroScale: 99 posts
Posted: Tuesday, June 28, 2011 - 07:46 PM UTC
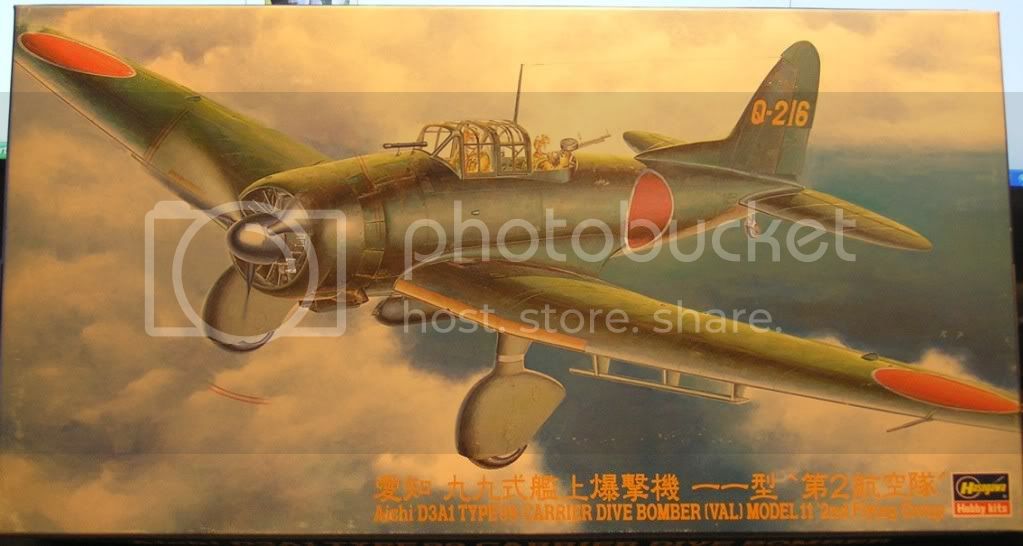
I am finishing up a Me-410 for a different campaign and then I will be full speed ahead on my Hase Val Dive Bomber.

windysean
Joined: September 11, 2009
KitMaker: 1,917 posts
AeroScale: 563 posts
Posted: Wednesday, July 06, 2011 - 10:12 AM UTC
I'm jumping into the fray!
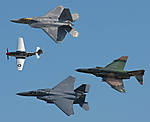
Here's my kick-off photo, and since I don't usually buy a paper, I'm including the free Onion (tongue-in-cheek newspaper) for the week of June 30th that was already laying around my house.

Also, I took the opportunity to brush off my workspace and lay down a clean sheet of paper to work on!
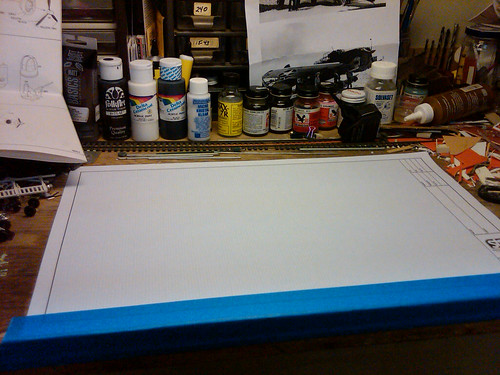
cheers!
-Sean
Here's my kick-off photo, and since I don't usually buy a paper, I'm including the free Onion (tongue-in-cheek newspaper) for the week of June 30th that was already laying around my house.
Also, I took the opportunity to brush off my workspace and lay down a clean sheet of paper to work on!
cheers!
-Sean
Naseby
Joined: October 15, 2010
KitMaker: 825 posts
AeroScale: 476 posts
Posted: Sunday, July 10, 2011 - 05:29 AM UTC
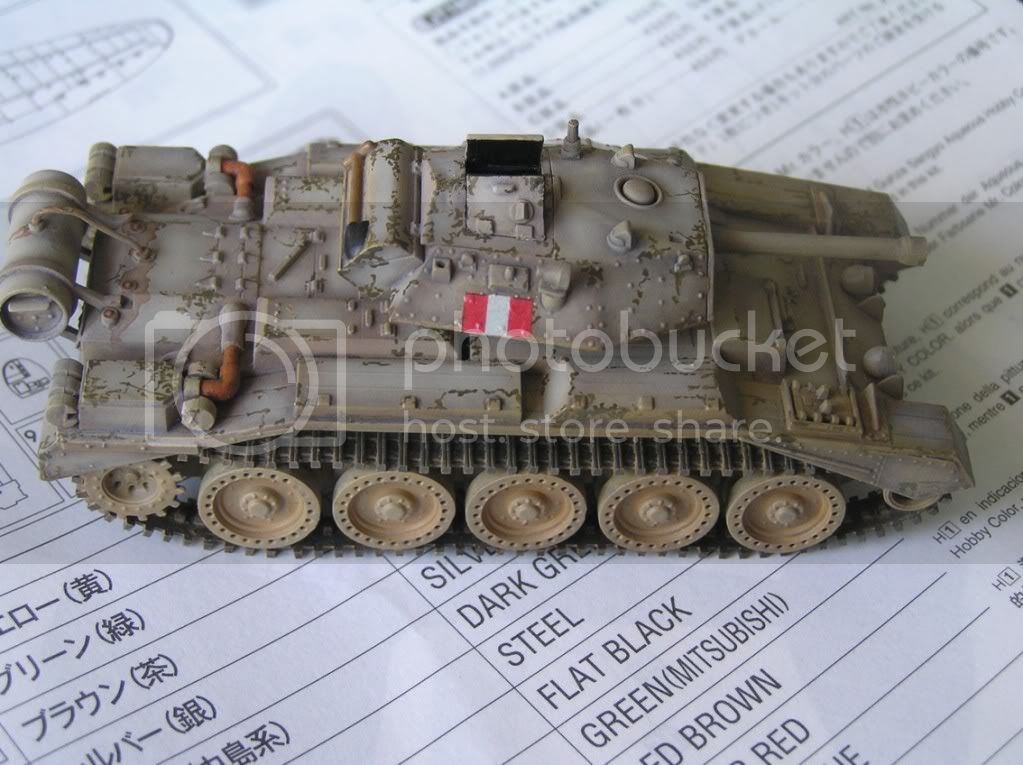
I finally started my build this weekend. I was bussy at work, but also I needed to fix something that "crash-landed" on my table - the old little Crusader tank from Hasegawa. It was hand painted 15+ years ago and needed an overhaul and this is how it looks now.

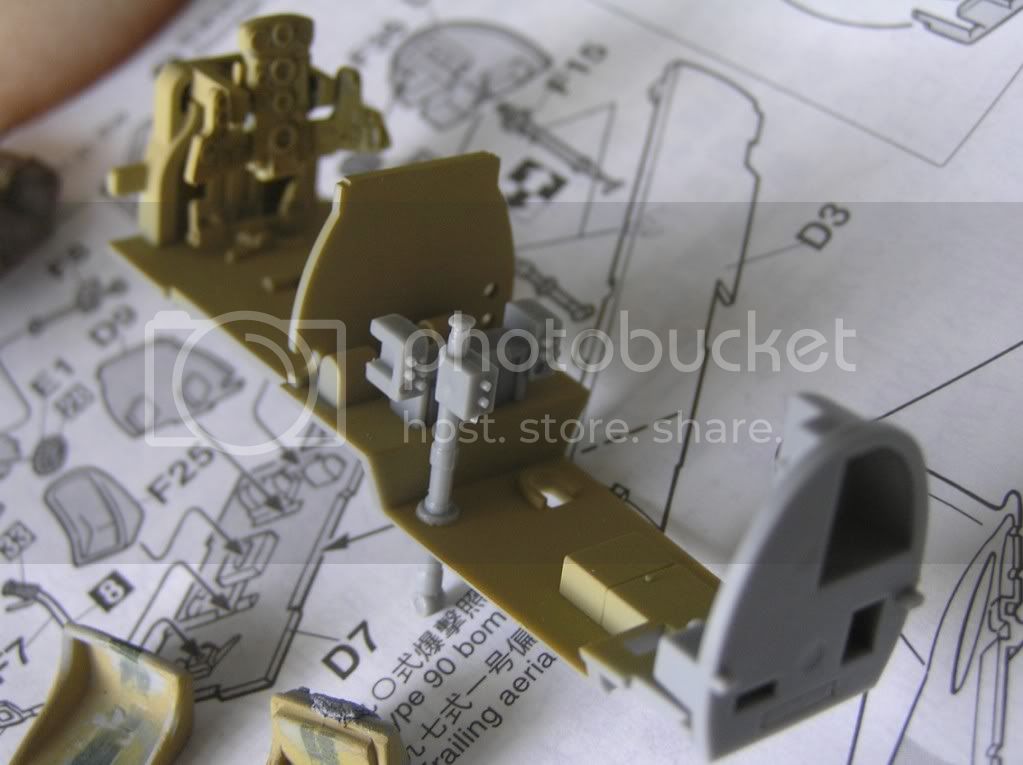
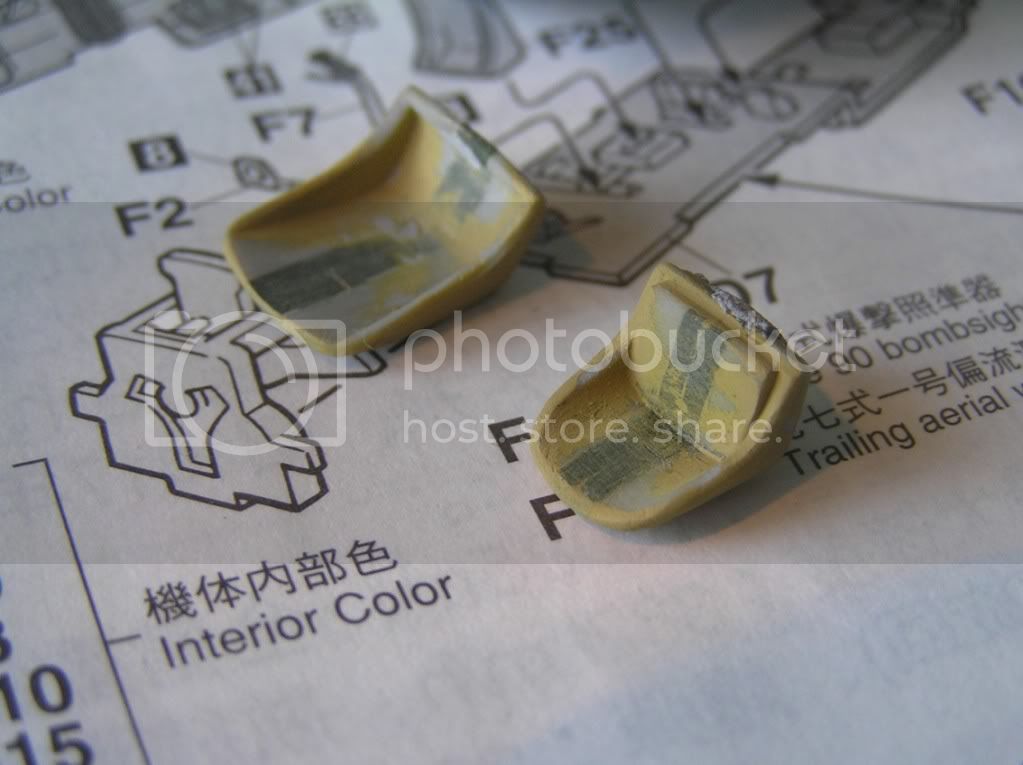
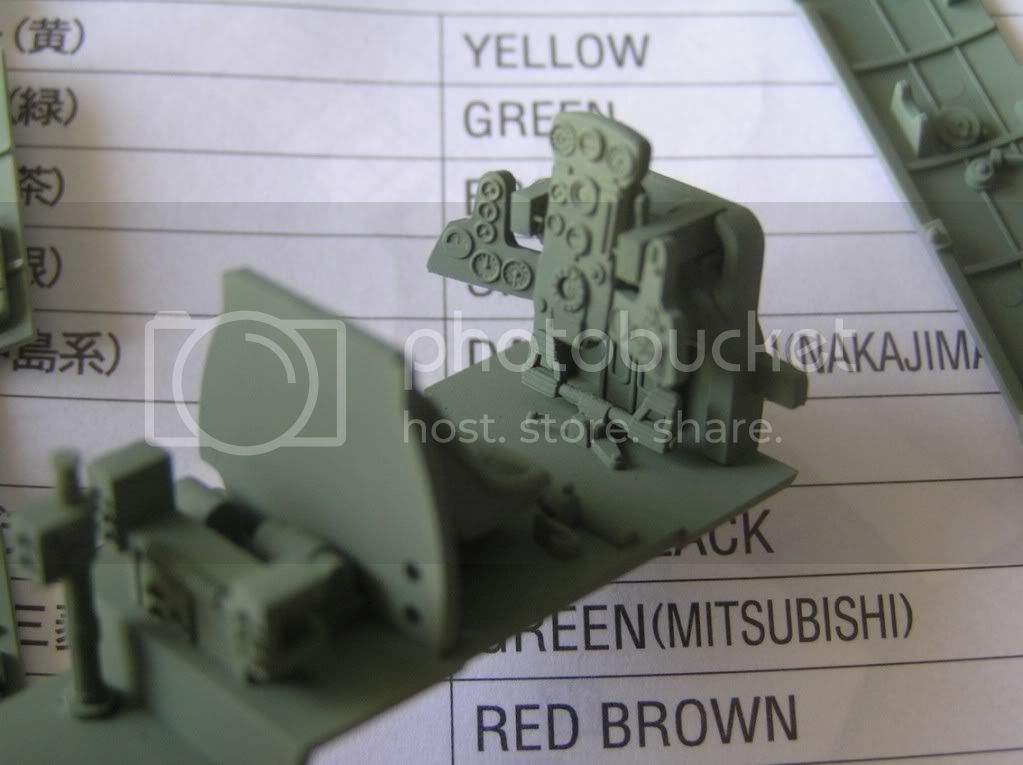
As I never build a Val before, I took to my books to find usefull information. What is interesting and most reviews also mention it, is that both pilot°s and rear gunner°s seat are too small for the 1/48 scale. I found some japanese technical dravings in one of their unreadable books and I realised, tha both seats are not too small, but too narrow. I fixed it with stripes of green plastic from Academy°s 1/35 Stuart tank desert fenders. Othervise the cockpit is preaty neat and I decided to use it as it is.
Most of You will already know that japanese interiour colours are an unending issue amongs the modeling comunity and the Val is no exception. One can find all sorts of "information" on the web and in the books ranging from green over blue to yellow with everything inbetween. I used Tamiyas "IJN cockpit green" to be at least in the "area".
windysean
Joined: September 11, 2009
KitMaker: 1,917 posts
AeroScale: 563 posts
Posted: Monday, July 11, 2011 - 02:22 AM UTC
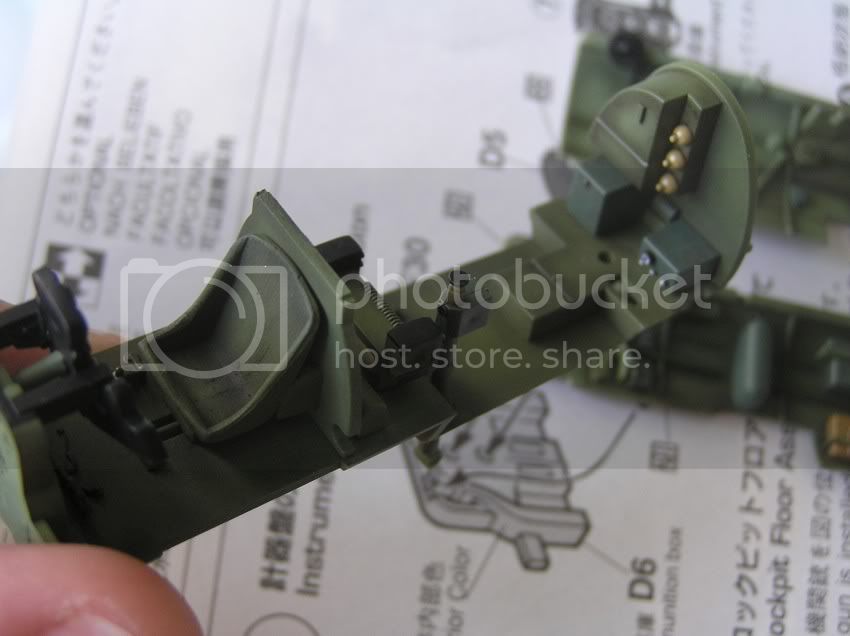
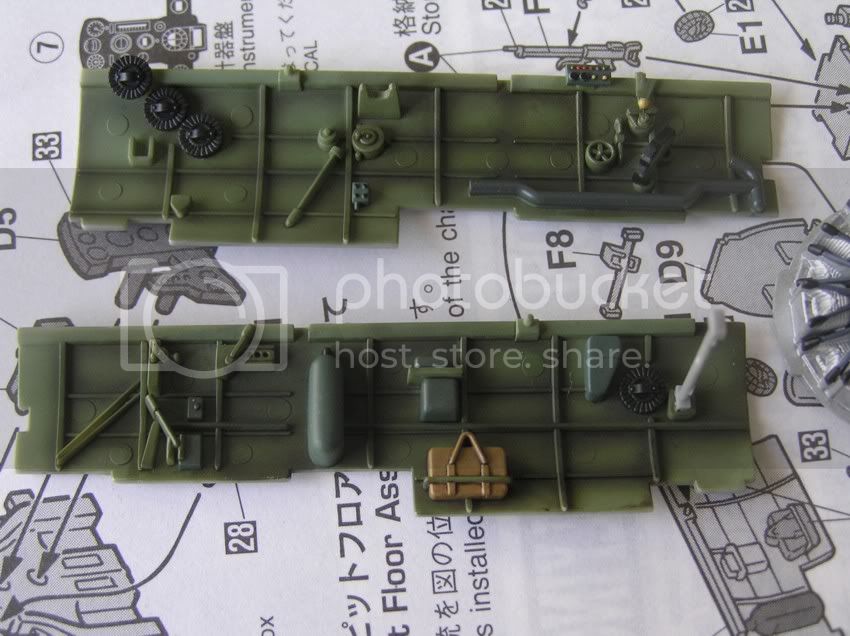
Making some headway on my Midway build. Fitting the kit cockpit components and checking against references-- not a lot of detail in 1/72 scale, so I'm even using pictures of other peoples' 1/32 scale builds to modify mine.
I added a stick to the rear seat with brass wire and moved the pilot's arm to the stick. Moved the turret seat back further on the kit mounting ring. Cut away the fake control panel alongside the rear seat, where the accessway should be.
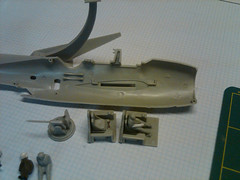
Here I cut out a lot of the cockpit opening -- must have been to strengthen the kit or to hide their lack of detail.
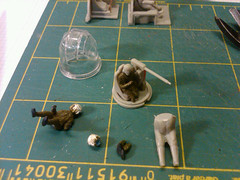
For the turret, the kit has almost no detail, so I scrounged up a brave rear gunner and started scratching together details-- a discharge chute and I'm yet to make a shield and trigger.

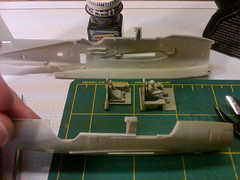
Hopefully I'll have something better to show soon. I've also scribed the torpedo bay doors deeper than the rest of the panels, using the back of a #11 blade. I'm still trying to make a strategy for battle damage. My plan is to make this one of the non-returning 5 Avengers, valiantly fighting it out.
thanks for looking!
-Sean.
I added a stick to the rear seat with brass wire and moved the pilot's arm to the stick. Moved the turret seat back further on the kit mounting ring. Cut away the fake control panel alongside the rear seat, where the accessway should be.
Here I cut out a lot of the cockpit opening -- must have been to strengthen the kit or to hide their lack of detail.
For the turret, the kit has almost no detail, so I scrounged up a brave rear gunner and started scratching together details-- a discharge chute and I'm yet to make a shield and trigger.
Hopefully I'll have something better to show soon. I've also scribed the torpedo bay doors deeper than the rest of the panels, using the back of a #11 blade. I'm still trying to make a strategy for battle damage. My plan is to make this one of the non-returning 5 Avengers, valiantly fighting it out.
thanks for looking!
-Sean.
windysean
Joined: September 11, 2009
KitMaker: 1,917 posts
AeroScale: 563 posts
Posted: Thursday, July 14, 2011 - 06:34 AM UTC
Another quick bump here, since it was quiet for a few days...
I let loose with an X-acto saw and cut all the control surfaces loose, so I can pose the plane in some frantic maneuver. I also closed up the larger side windows (for a later TBF or British Tarpon?) and sanded down the detail around them, filled with CA cement, then rescribed the panel lines there with the back of a #11 X-acto knife blade.
I think that, like Michael also from the great state of Wisconsin, I won't need the entire year for this campaign build. It'll be cool to see the ships start mixing into this thread. I know this'll wind up an excellent campaign all around.
Thanks for looking!
-Sean H.
I let loose with an X-acto saw and cut all the control surfaces loose, so I can pose the plane in some frantic maneuver. I also closed up the larger side windows (for a later TBF or British Tarpon?) and sanded down the detail around them, filled with CA cement, then rescribed the panel lines there with the back of a #11 X-acto knife blade.
I think that, like Michael also from the great state of Wisconsin, I won't need the entire year for this campaign build.
It'll be cool to see the ships start mixing into this thread. I know this'll wind up an excellent campaign all around.Thanks for looking!
-Sean H.
MichaelSatin
Joined: January 19, 2008
KitMaker: 3,909 posts
AeroScale: 2,904 posts
Posted: Saturday, July 16, 2011 - 12:24 PM UTC
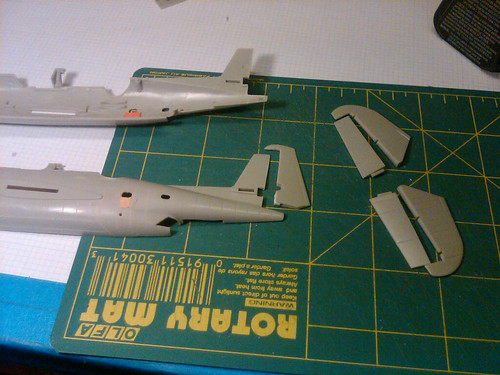
Great to see some progress guys!
Got some paint on my 1/32 Czech Model F2A-3:
Don't know why I've got a thing for the Buffalo, but I grabbed all the Special Hobby iterations of it in 1/48 and 1/32, so I'm glad to finally be actually building one!
Michael
Got some paint on my 1/32 Czech Model F2A-3:
Don't know why I've got a thing for the Buffalo, but I grabbed all the Special Hobby iterations of it in 1/48 and 1/32, so I'm glad to finally be actually building one!
Michael
Naseby
Joined: October 15, 2010
KitMaker: 825 posts
AeroScale: 476 posts
Posted: Sunday, July 17, 2011 - 07:46 AM UTC
@ Sean: Since most people do buid the 1/48 Avenger either from HB or AccMin, its nice to see somebody make the smaler one. I will watch this one closely.
@ Michael: Interesting choise. Its a shame theres not a good 1/48 mainstream kit of the Buffalo on the market The shortruns are fine, but not ideal for sure.
I had some bench time this weekend so I finished the interiour and engine and here are the pics. There are however still some small things (as is the back seat) which will be added when the fuselage is together.

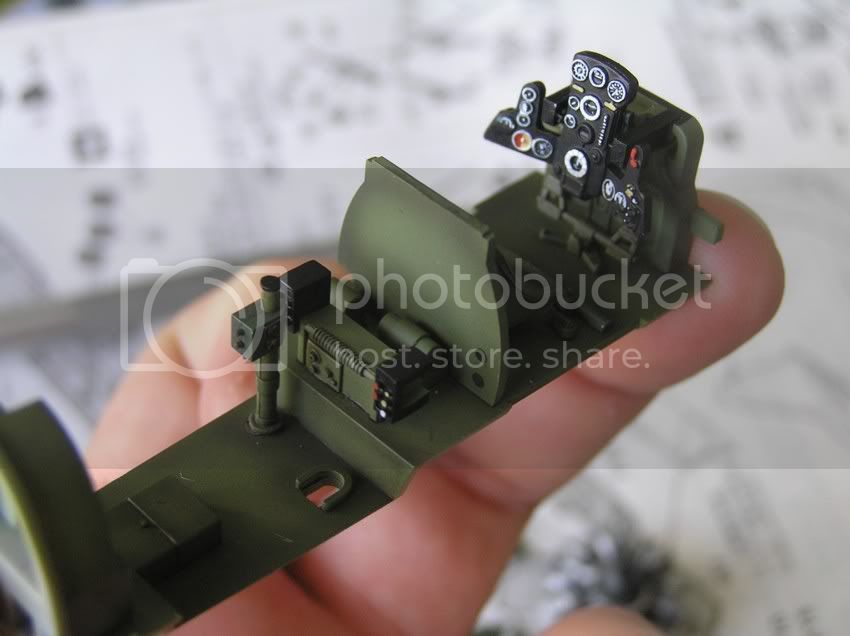
@ Michael: Interesting choise. Its a shame theres not a good 1/48 mainstream kit of the Buffalo on the market
The shortruns are fine, but not ideal for sure. I had some bench time this weekend so I finished the interiour and engine and here are the pics. There are however still some small things (as is the back seat) which will be added when the fuselage is together.
windysean
Joined: September 11, 2009
KitMaker: 1,917 posts
AeroScale: 563 posts
Posted: Sunday, July 17, 2011 - 09:43 AM UTC
Naseby, your color fading and washes and panel detail are expertly done! I'm going to have to really work on mine.
I've sidetracked a bit here, to make a nifty pose for the plane, I experimented with near-boiling water to warp the stand to put the plane at a tilt.
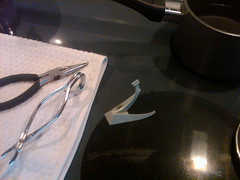
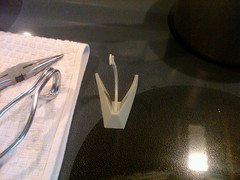
I got the vertical piece to go where I wanted it, but the feet curled up. Luckily I've built this kit before, wheels down, so I have a spare base to splice onto this one.
As for holes in the plane, I'm trying a technique I read by Karl Logan in Finescale Modeler (on auto upholstery rips). I took a spare piece and tried different shaped holes, then applied Bare Metal Foil and pierced it with a toothpick or hobby blade and compared the results.
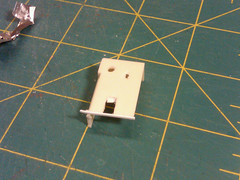
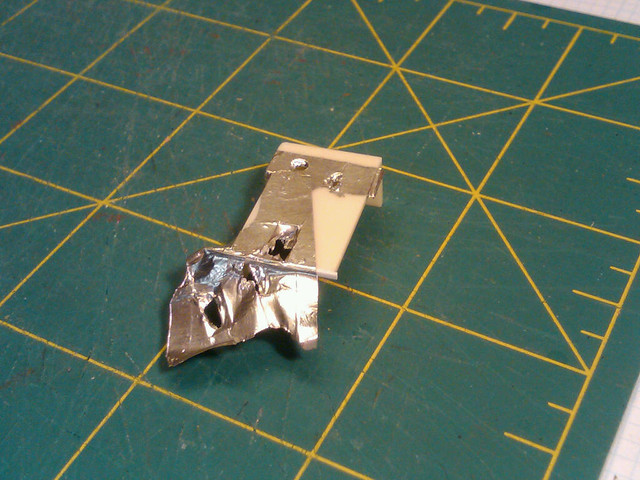
The circular hole was not believable at all. The rectangular one is passable for what I intend with the horizontal stabilizer. The roughly gouged hole is most believable for a bullet or cannon hole.
As for placement, I don't want to overdo it-- it's still going to be flying, no structural damage.
thanks for looking,
Sean H.
I've sidetracked a bit here, to make a nifty pose for the plane, I experimented with near-boiling water to warp the stand to put the plane at a tilt.
I got the vertical piece to go where I wanted it, but the feet curled up. Luckily I've built this kit before, wheels down, so I have a spare base to splice onto this one.
As for holes in the plane, I'm trying a technique I read by Karl Logan in Finescale Modeler (on auto upholstery rips). I took a spare piece and tried different shaped holes, then applied Bare Metal Foil and pierced it with a toothpick or hobby blade and compared the results.
The circular hole was not believable at all. The rectangular one is passable for what I intend with the horizontal stabilizer. The roughly gouged hole is most believable for a bullet or cannon hole.
As for placement, I don't want to overdo it-- it's still going to be flying, no structural damage.
thanks for looking,
Sean H.
611_sqd
Joined: January 24, 2011
KitMaker: 470 posts
AeroScale: 99 posts
Posted: Monday, July 18, 2011 - 03:35 AM UTC
Started the Val. Its a nice kit, though a little over engineered in places. I have some tidying up to do on it still, only headache is in front of the cockpit where the fuse was slightly different sizes. Its going to be a fair bit of filing to get it done and i'm trying to think of a easier way to do it.


611_sqd
Joined: January 24, 2011
KitMaker: 470 posts
AeroScale: 99 posts
Posted: Friday, July 22, 2011 - 04:19 AM UTC
Painting 90% done, needed to get black for the nose as I ran out. Decals on. Not bad but I have had better decals. Black nose and start of weathering today.


 |

WEB HOSTING BY


Copyright ©2021 AeroScale and Kitmaker Network, a subsidiary of Silver Star Enterprises
All Rights Reserved. Please read our Conditions of Use and Privacy Policy.
All Rights Reserved. Please read our Conditions of Use and Privacy Policy.