

If you need anything airbrush-related, check out Chicago Airbrush Supply (linked above). They were very knowledgeable, professional, and obviously very well priced! I intend to only use acrylics with my Iwata. I just had too many problems with enamels in my Badger. Should get it (along with your decals--thanks again!) by the end of the week and I'll give it a try then!
And no, I'm not in actual car trouble--just video games!
Early Aviation
Discuss World War I and the early years of aviation thru 1934.
Discuss World War I and the early years of aviation thru 1934.
Hosted by Jim Starkweather
KotS GB 2011 Fokker D.VII buckeye198

Buckeye198

Joined: May 02, 2010
KitMaker: 596 posts
AeroScale: 197 posts

Posted: Tuesday, July 05, 2011 - 05:34 PM UTC
Buckeye198
Joined: May 02, 2010
KitMaker: 596 posts
AeroScale: 197 posts
Posted: Friday, July 15, 2011 - 05:52 PM UTC
Again, I apologize for the delays in my progress, but I got a LOT done today! The main source of delay was my wait for new lozenge decals. Thinking the splintering problem of Roden's decals was just due to the age of the kit, I wrote to Roden and Olga (seems like there are quite a few people here and on other sites that are very well acquainted with her  ) sent me a brand new set of the kit's decals. Unfortunately, they also suffer from the same problem as the decals that came in the box, so I'm at a loss there. At least I have some spare insignia decals now! Fortunately, today my mailbox was graced by a brown envelope from the Great White North...Lance Carroll's ("lcarroll") spare Eagle Strike lozenge decals arrived! Again, a public thank-you to Lance...I'll use them well!
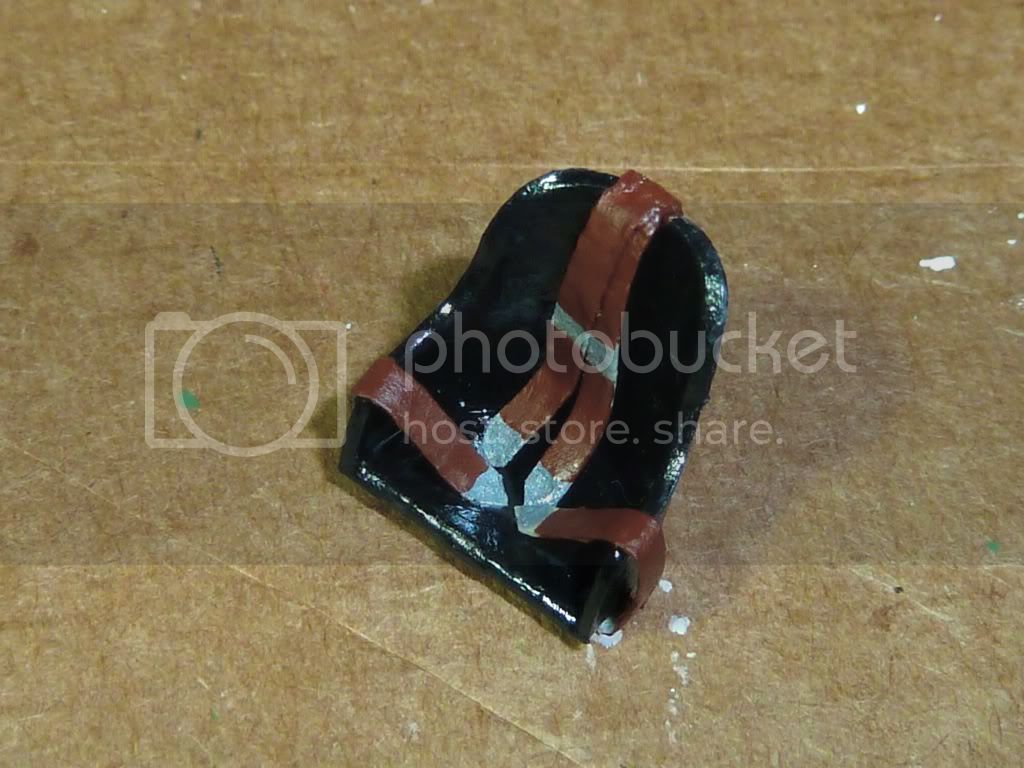
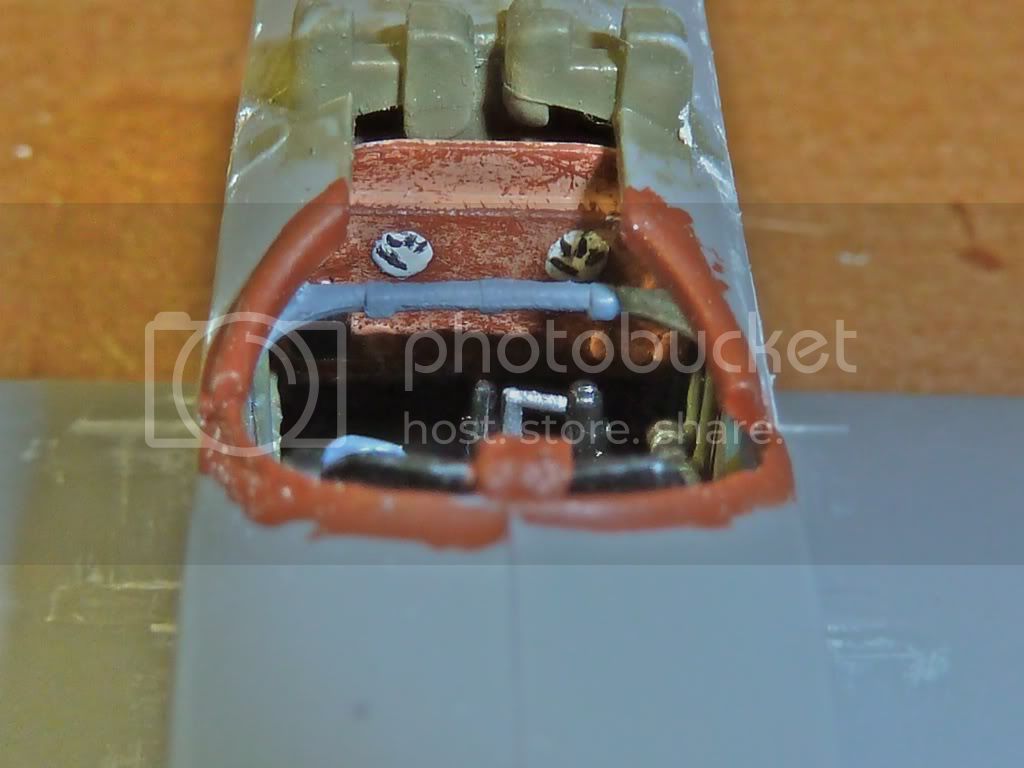
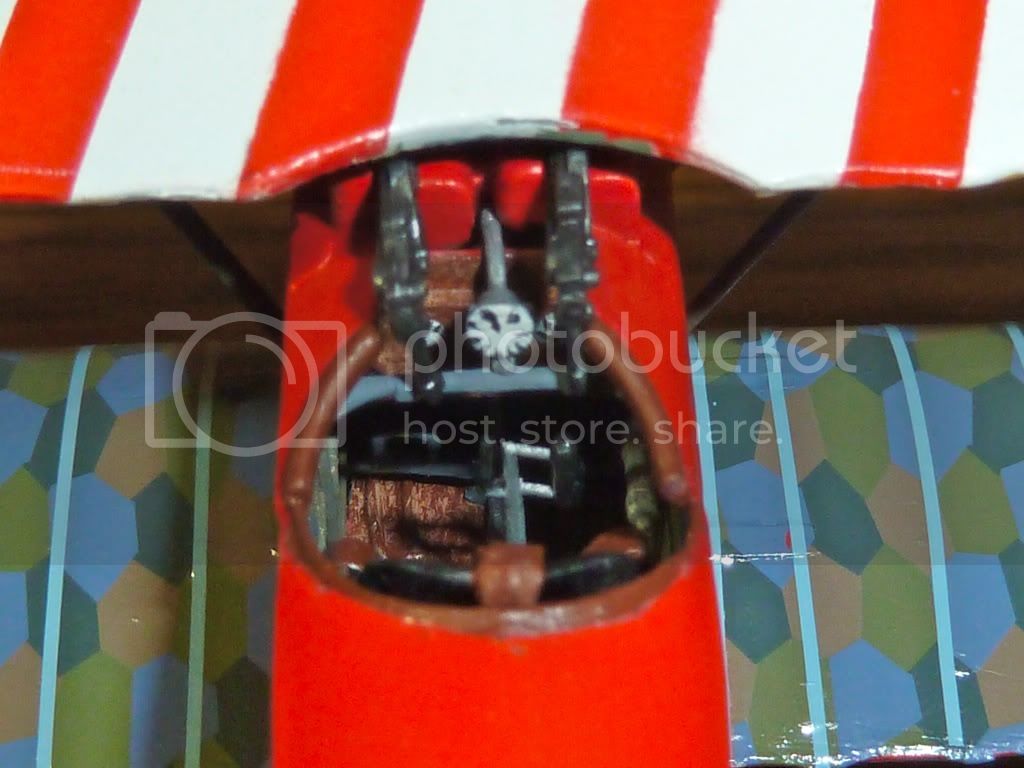
Now on to the pictures! Here's the seat. Seatbelts made from masking tape, painted Testors Rust (Aluminum buckles) and held with white glue.
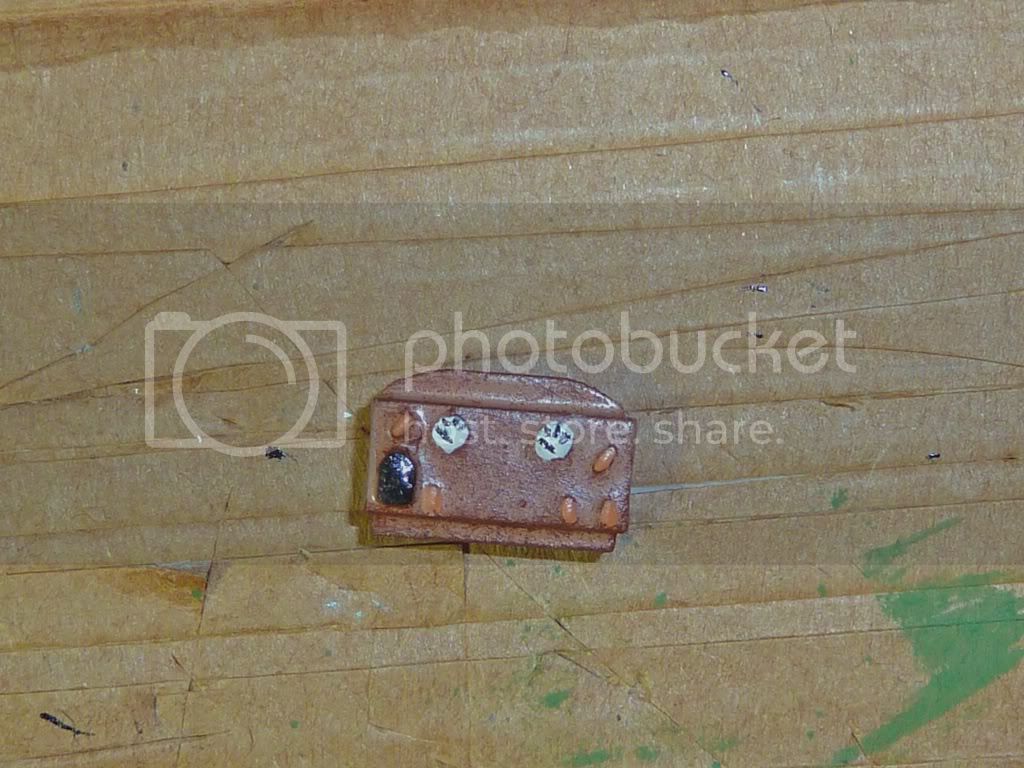
The control panel, detailed using a fantastic picture from the Smithsonian National Air and Space Museum's website of their D.VII's control panel. I'm pretty proud of the dials.
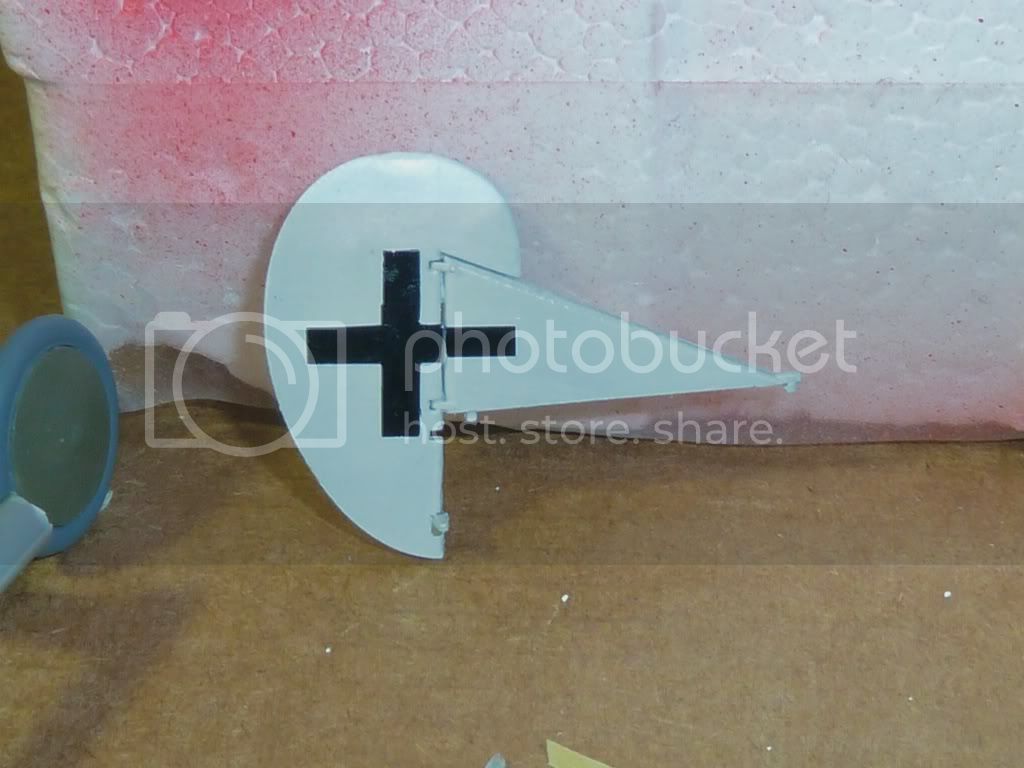
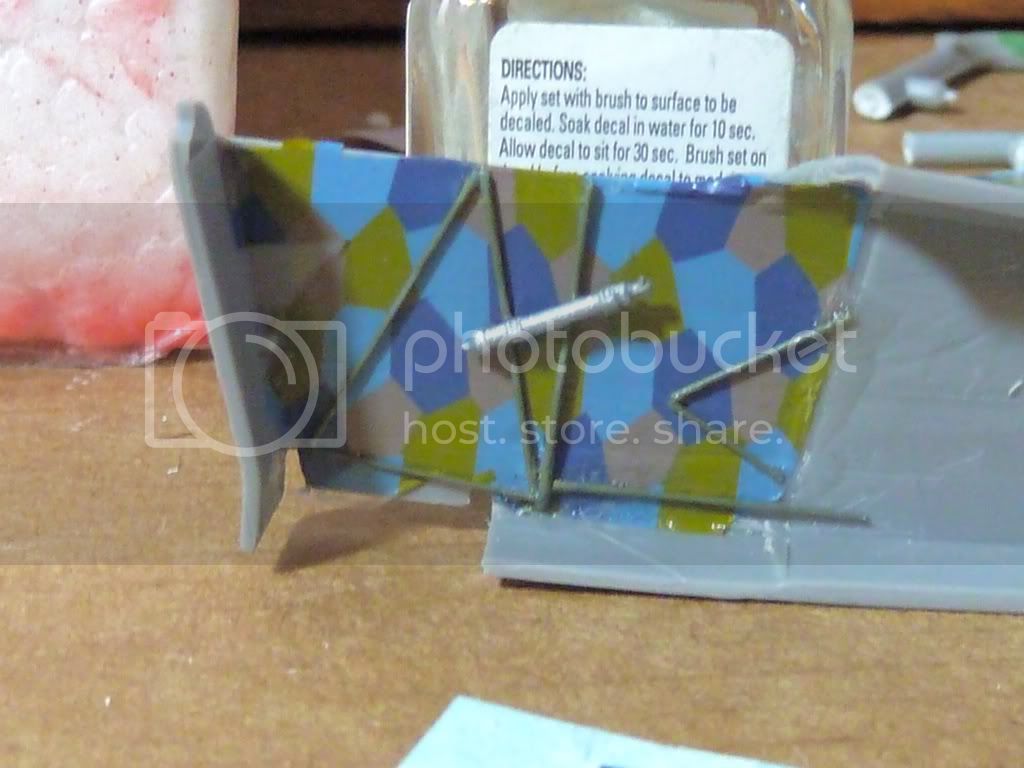
I got the decals on the tail in the meantime. I was pretty happy with the way it went on. I thought maybe all would be well...
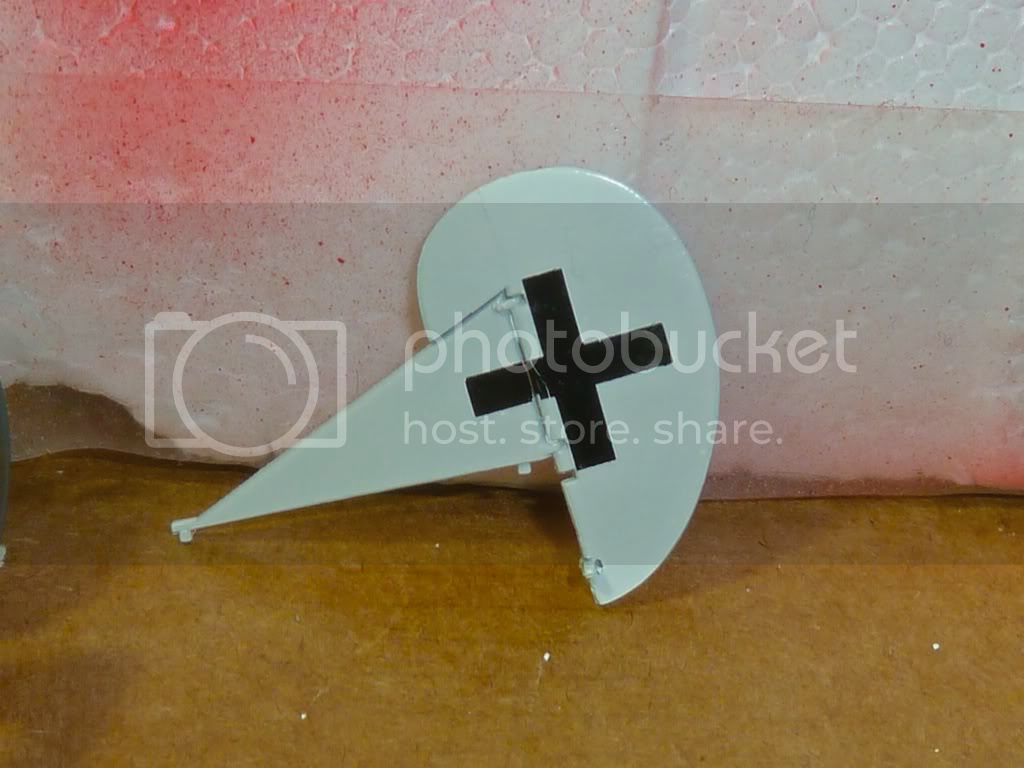
...Until this decal shattered, reminding me why so many people decided to get aftermarket decals when building a Roden kit.
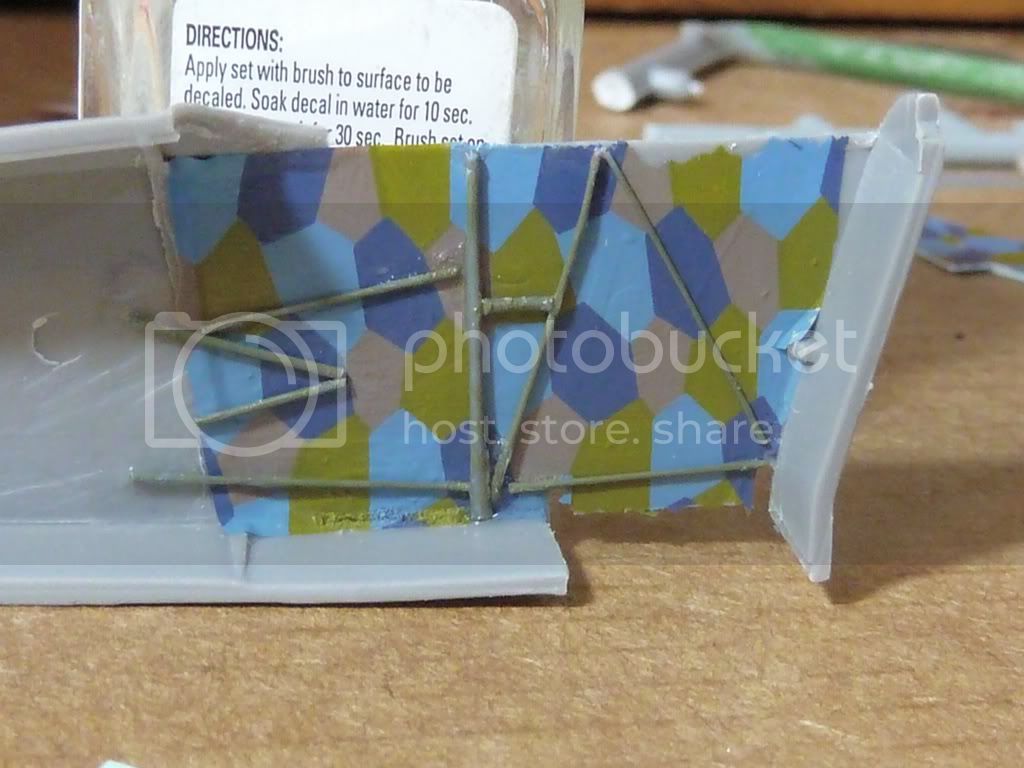
I have to admit, I was getting pretty impatient waiting for the new decals to arrive, so I sucked it up and used Roden's lozenges for the cockpit interior. A very large pain at times, but I figured so little of the cockpit (and the screw-ups within) will be visible, so I moved on and recreated the framework. Naturally, the decals arrived the next day.
More work had to be done with the framework after it was all in place to ensure proper fit of the instruments and such.
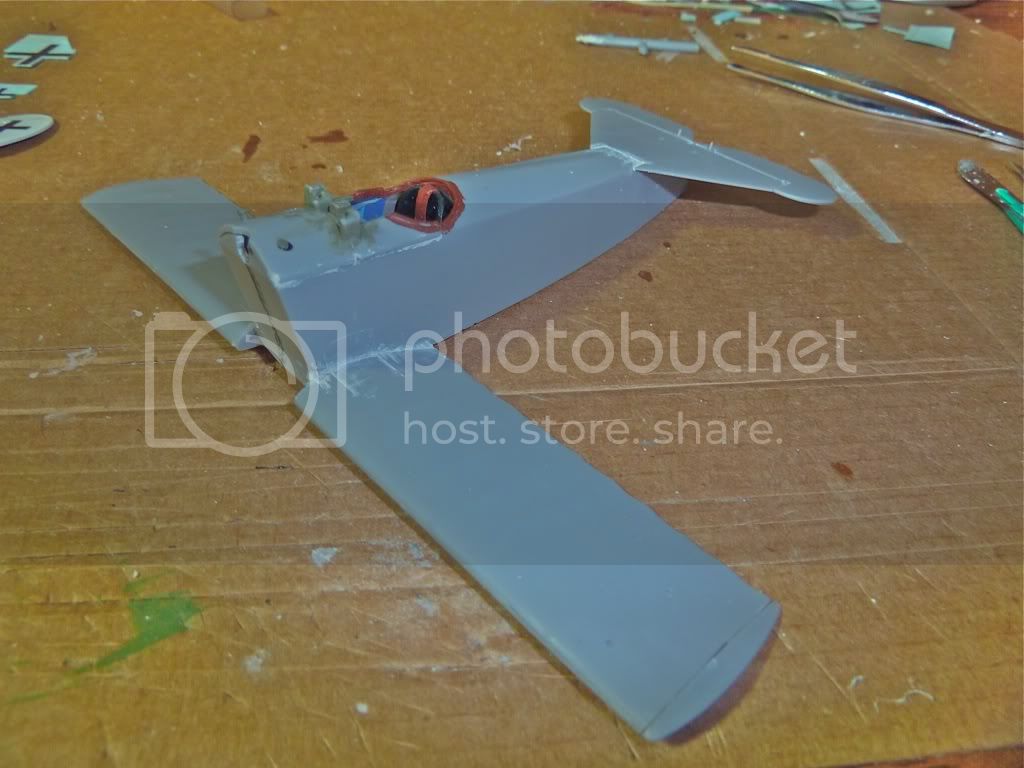
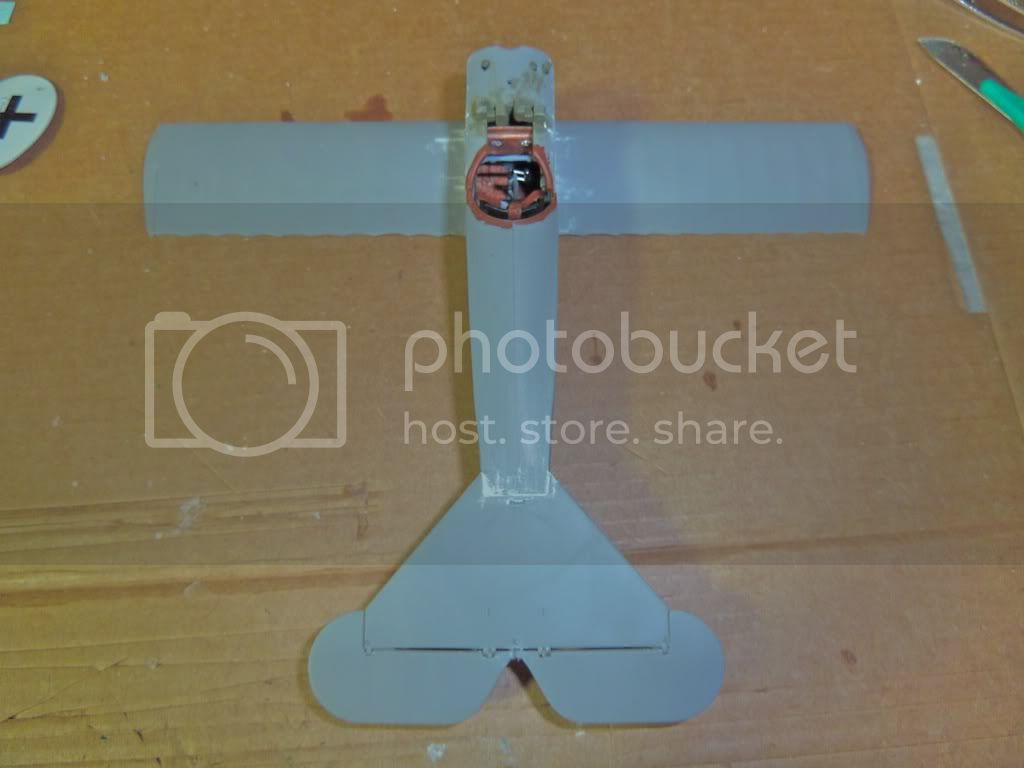
Quick layout before major construction. As you can (sorta) see, I got a very nice WWI purple on the landing gear carriage, and the top wing is lookin' snazzy!

I got pretty excited during construction and forgot to take pictures until the whole fuselage and lower wing were in place...sorry. Stephen's guidance with shaving down the fuselage-wing joints was much needed and appreciated. Finally, some putty fixed up the super-nasty seams, but there really wasn't much to fill.
View into the cockpit. The lozenge decals look nice (can't see much here though) and the framework is visible from the side and adds a lot. I may touch up the woodgrain a bit on the control panel though...looks kinda bare in this shot.
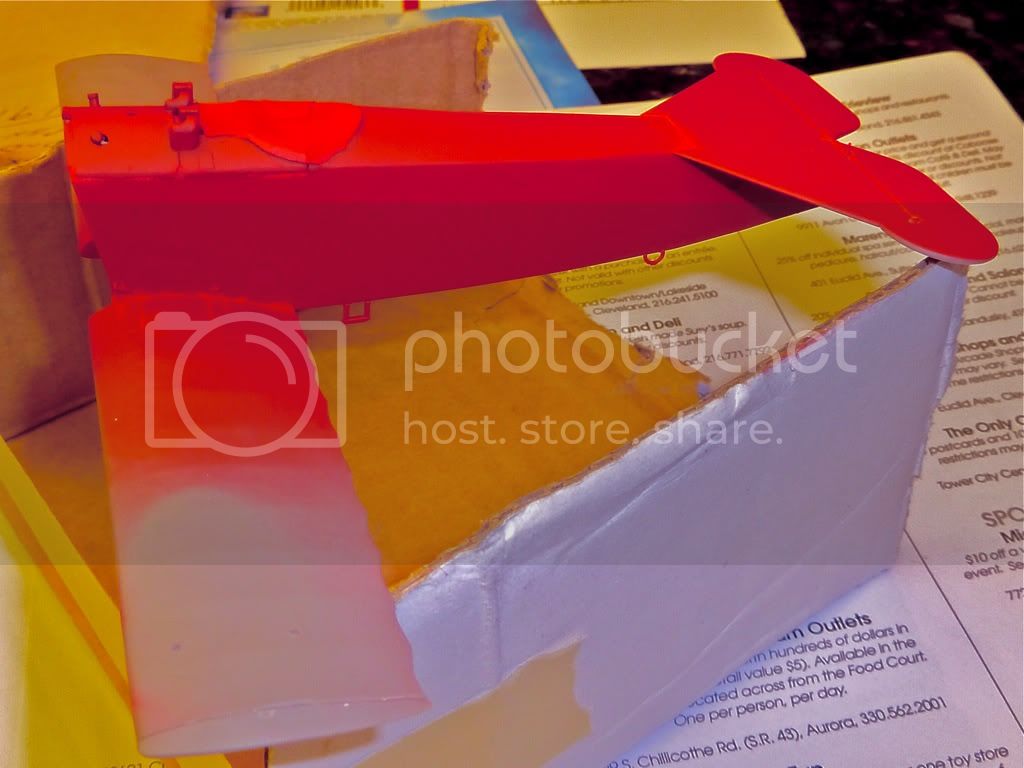
Pre-painting.
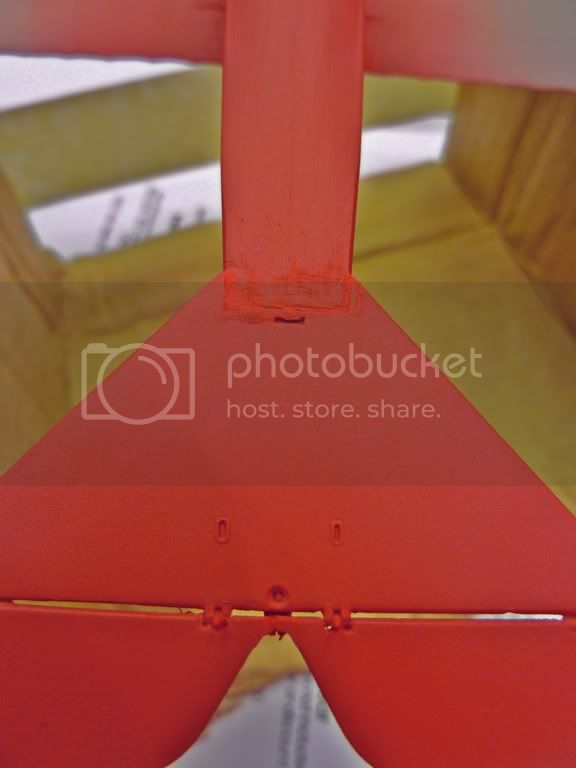
Post-painting. Probably should've done a white base coat though. The red is pretty dark, especially when compared to the top wing, and the putty stands out. Would it be a bad idea to try a white coat or two over this red coat, then another red coat on top of all that?
The bottom-left is pretty close to how the red looks in real life, and the contrast between putty and paint really is that dramatic.
So that's where I am now. Should be MUCH faster sailing from here on out. (Notice I didn't say "smoother sailing" ) I hope to get those white coats in tomorrow, then maybe even the red before day is done. After that, just have to decal the crap out of everything, get the struts in place, and then the top wing and I'm set. Easy, no?
) sent me a brand new set of the kit's decals. Unfortunately, they also suffer from the same problem as the decals that came in the box, so I'm at a loss there. At least I have some spare insignia decals now! Fortunately, today my mailbox was graced by a brown envelope from the Great White North...Lance Carroll's ("lcarroll") spare Eagle Strike lozenge decals arrived! Again, a public thank-you to Lance...I'll use them well!Now on to the pictures! Here's the seat. Seatbelts made from masking tape, painted Testors Rust (Aluminum buckles) and held with white glue.
The control panel, detailed using a fantastic picture from the Smithsonian National Air and Space Museum's website of their D.VII's control panel. I'm pretty proud of the dials.
I got the decals on the tail in the meantime. I was pretty happy with the way it went on. I thought maybe all would be well...
...Until this decal shattered, reminding me why so many people decided to get aftermarket decals when building a Roden kit.
I have to admit, I was getting pretty impatient waiting for the new decals to arrive, so I sucked it up and used Roden's lozenges for the cockpit interior. A very large pain at times, but I figured so little of the cockpit (and the screw-ups within) will be visible, so I moved on and recreated the framework. Naturally, the decals arrived the next day.
More work had to be done with the framework after it was all in place to ensure proper fit of the instruments and such.
Quick layout before major construction. As you can (sorta) see, I got a very nice WWI purple on the landing gear carriage, and the top wing is lookin' snazzy!
I got pretty excited during construction and forgot to take pictures until the whole fuselage and lower wing were in place...sorry. Stephen's guidance with shaving down the fuselage-wing joints was much needed and appreciated. Finally, some putty fixed up the super-nasty seams, but there really wasn't much to fill.
View into the cockpit. The lozenge decals look nice (can't see much here though) and the framework is visible from the side and adds a lot. I may touch up the woodgrain a bit on the control panel though...looks kinda bare in this shot.
Pre-painting.
Post-painting. Probably should've done a white base coat though. The red is pretty dark, especially when compared to the top wing, and the putty stands out. Would it be a bad idea to try a white coat or two over this red coat, then another red coat on top of all that?
The bottom-left is pretty close to how the red looks in real life, and the contrast between putty and paint really is that dramatic.
So that's where I am now. Should be MUCH faster sailing from here on out. (Notice I didn't say "smoother sailing"
) I hope to get those white coats in tomorrow, then maybe even the red before day is done. After that, just have to decal the crap out of everything, get the struts in place, and then the top wing and I'm set. Easy, no?
thegirl

Joined: January 19, 2008
KitMaker: 6,743 posts
AeroScale: 6,151 posts
Posted: Saturday, July 16, 2011 - 02:12 AM UTC
Looking pretty good so far 
Red is one of those colours which is better applied over a base of white , over grey it will show darker as you have found out and will show where putty was applied .
If you re-spray white over the red it will take very many coats to cover this up and will lose surface detail . For best results strip off the red paint . Re prime once more using a light grey to cover the areas where the putty is , then spray the white ( hint flat flat will take less coats to get a good coverage ) Then spray your red and thiis will match with the top wing . Clear cote and added the markings .
Some of the guy's will have a different way to re-touch this up , there are more ways to skin a cat .

CaptainA
Joined: May 14, 2007
KitMaker: 3,117 posts
AeroScale: 2,270 posts
Posted: Saturday, July 16, 2011 - 04:34 AM UTC
The Girl knows her stuff.
So how do you feel about these early aviation things, Robby?
So how do you feel about these early aviation things, Robby?

Buckeye198
Joined: May 02, 2010
KitMaker: 596 posts
AeroScale: 197 posts
Posted: Saturday, July 16, 2011 - 05:43 AM UTC
Terri, thanks for the advice! I'm thinking though (and you can tell me what you think of this) that I may want to just spray a gray primer on top of the single red coat, then the white, and then the red. I understand your concern about something like this, but frankly, there isn't THAT much surface detail to cover up. Also, I'm more worried about how I'd go about stripping the paint; sandpaper would also eliminate the surface detail and a knife--in my experience--would scratch the surface too much to validate its use. Here's a thought I just had while typing this, and forgive me if it sounds stupid or basic or whatever...can I dip a Q-Tip in thinner (used red enamel) and strip the paint with that? In my ideal world, that sounds like it just may work. Then again, in my ideal world, the red paint wouldn't have darkened up against the grey plastic... 
Carl, I feel pretty good about these early birds. I LOVE the subject itself, and I've actually been pretty tempted to buy a Gotha bomber kit just because Great War planes look so damn cool! However, I'm still not certain about rigging. There's barely any on the D.VII, but the Nieuport 28 has enough to have me worried. If I end up able to rig, I seriously may get a G.IV or V!
Carl, I feel pretty good about these early birds. I LOVE the subject itself, and I've actually been pretty tempted to buy a Gotha bomber kit just because Great War planes look so damn cool! However, I'm still not certain about rigging. There's barely any on the D.VII, but the Nieuport 28 has enough to have me worried. If I end up able to rig, I seriously may get a G.IV or V!

lcarroll
Joined: July 26, 2010
KitMaker: 1,032 posts
AeroScale: 1,025 posts

Posted: Sunday, July 17, 2011 - 02:35 AM UTC
Robby,
I've recently had good results soaking parts in Windex and then using an old stiff toothbrush to strip the paint, Takes a couple of times but works and no damage to the surface. Got this hint on the site some time ago and just used it a few days ago on the "floor" of the Pup I'm working on. Like Terry, I'd say the end result will be better if you can strip the red off, prime/white, and then apply the red.
Cheers,
Lance
CaptainA
Joined: May 14, 2007
KitMaker: 3,117 posts
AeroScale: 2,270 posts
Posted: Sunday, July 17, 2011 - 04:37 AM UTC
Quoted Text
Carl, I feel pretty good about these early birds. I LOVE the subject itself, and I've actually been pretty tempted to buy a Gotha bomber kit just because Great War planes look so damn cool! However, I'm still not certain about rigging. There's barely any on the D.VII, but the Nieuport 28 has enough to have me worried. If I end up able to rig, I seriously may get a G.IV or V!
There are soooo many great kits out there. Might I suggest an Eduard kit. They have a Roland C.II that is fantastic and has little rigging. They also have a fantastic Dr.I, E.V, and D.VII kit that all have virtually no rigging. Their Albatros kits have some rigging, but not so much they would be daunting. Good kits for when you have a few builds under your belt. The Gotha is a fantastic kit. I have it, and have fiddled around with it a little bit. You might want to do a few builds before you try it though. The WNW Albatros are fantastic. I have done two so far. I see at least two more in my future. So many kits, so little time.
Whatever you decide, we will be here to help you out.
I love what you have done so far. It is rough when you start a kit that has so many molding flaws in it. Roden kits are usually better. I have done three of their Albatros D.IIIs and two Dr.Is. They were great. I also did a 48th D.VII that was nicely molded. But you have managed to take this kit, and overcome the molding problems. Good work.
thegirl
Joined: January 19, 2008
KitMaker: 6,743 posts
AeroScale: 6,151 posts
Posted: Sunday, July 17, 2011 - 09:21 AM UTC
Hello again Rob !
Since you used an enmael paint windex will not be strong enough to attack the paint fully . Works like a charm with acrylics though .
You can use thinner to remove the paint but an old sock would be better then a q-tip . The thinner will weaking the tail plane making the plastic brittle so care must be taking when doing this .
You can also use over cleaner such as easy-off . Mask the cockpit openning really well , place in the bottom of the sink and coat the model with it . Let it sit for 20 minutes then srub with an old tooth brush . You might have to rebeat this depending on how think of a coat the paint is . Once you are happy with the out come . rinse off very well with warm water and some soap to get any residue off .
Buckeye198
Joined: May 02, 2010
KitMaker: 596 posts
AeroScale: 197 posts
Posted: Sunday, July 17, 2011 - 03:51 PM UTC
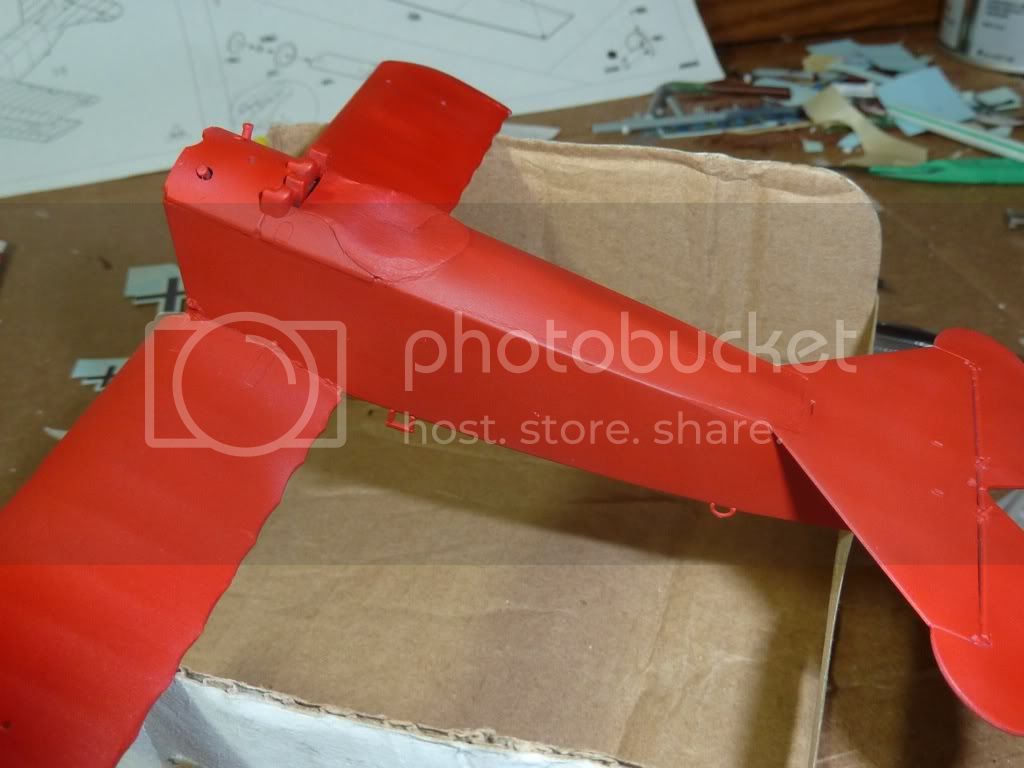
Pretty good progress the past few days. I started by stripping the red coat. Just used thinner and a Q-Tip. I didn't want to go crazy with this part! Then I laid down some grey on the putty to blend colors with the plastic, and then I was ready for a white primer coat, then another coat of red.
Much better the second time around! There's no enhancement of the colors in this picture at all...the red is much brighter, more vibrant, and closer to the shade of red on the top wing.
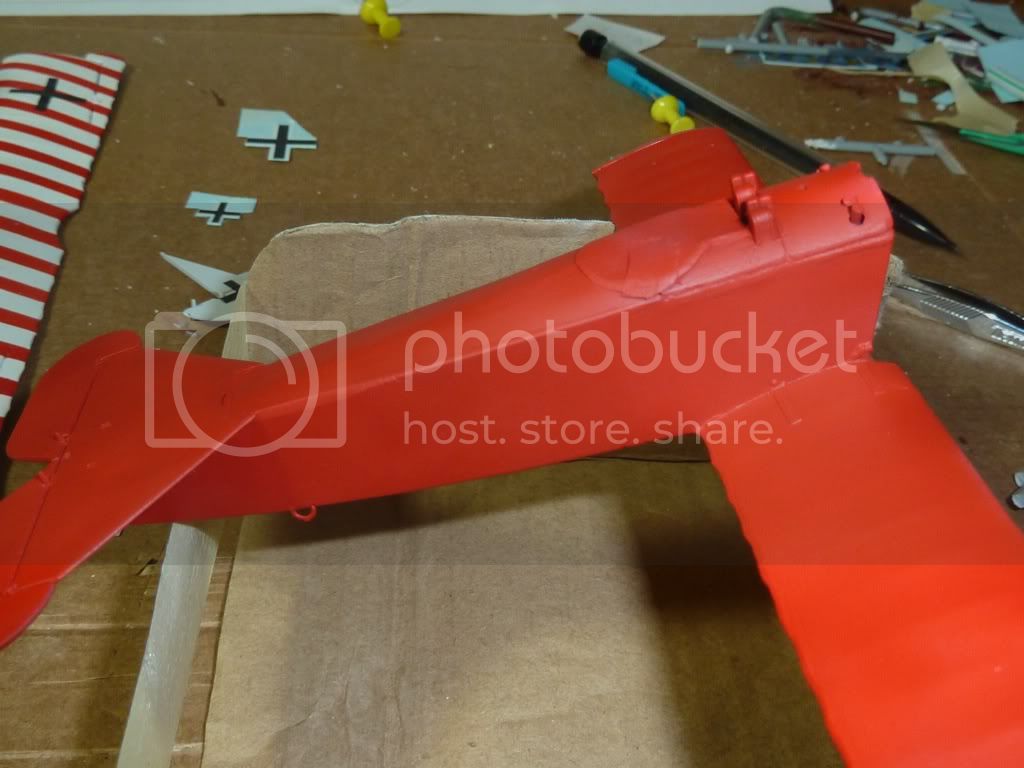
Oh yeah, try to find the putty now...betcha can't do it!
The tail stripe was kinda see-through, and also ripped up a tad. Love Roden's decals...ugh...
Fortunately, I was able to use my second decal sheet Roden sent me and put another stripe over the original. That covered up the rips as well as thickened the stripe a bit more.
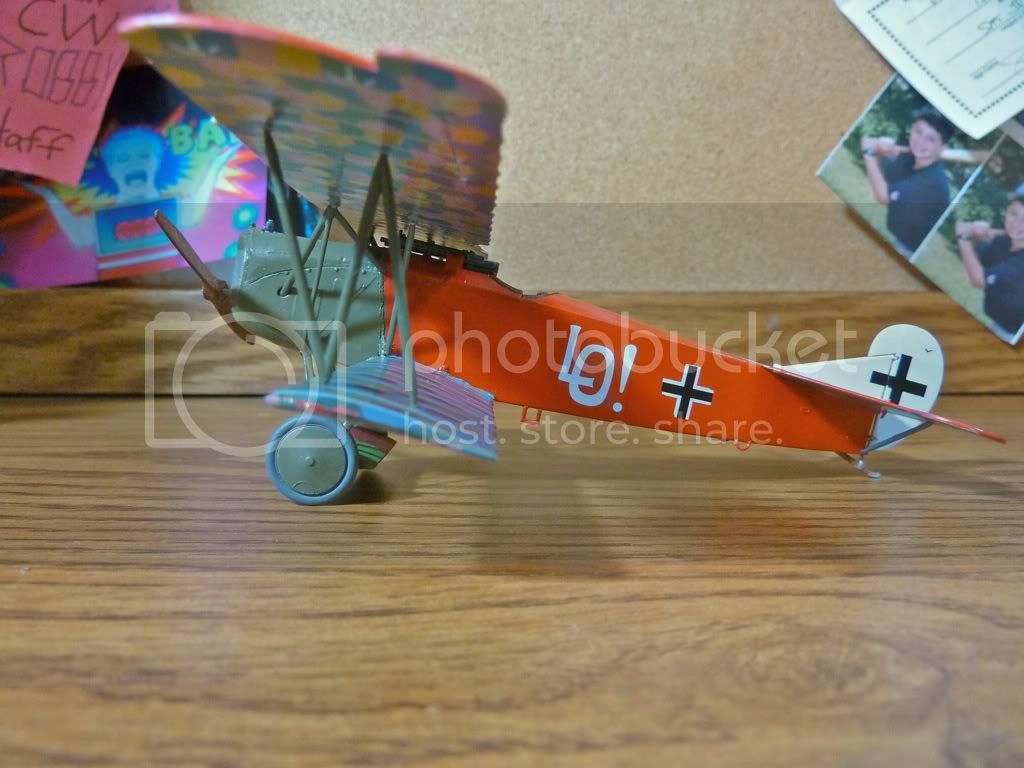
My first attempt at real lozenge work. I couldn't really get it over the edges very well. Maybe next time...
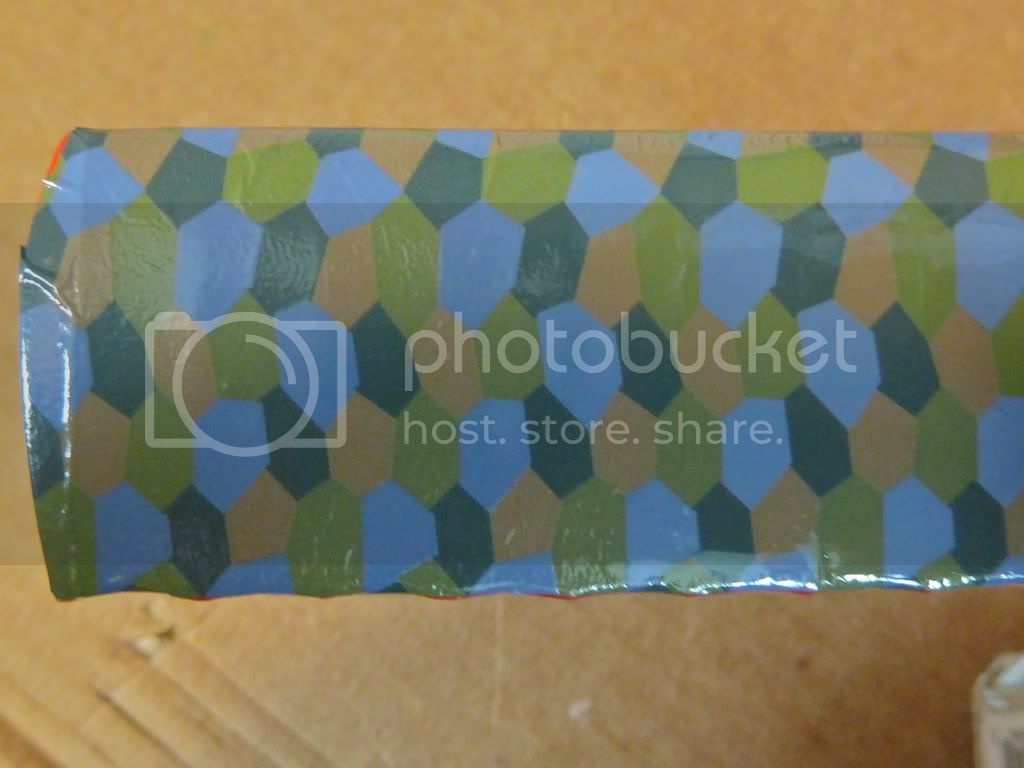
From afar, though, the lozenge work looks pretty sweet. It's when you get close that you can really analyze every spot the decal missed, every miniscule air bubble, every rip, etc. Anal Modeler's Syndrome... Oh and the fuselage decals are all done and sealed by this point. (But the stripe isn't doubled up here.)
Here are the lower lozenge surfaces. They came out much better than the uppers!
Future coats are over everything, and tomorrow I should be clear to start the rib tapes. (That is, provided I don't get called in to work...) I'm a little worried though since I can't exactly make out the ribs that well anymore what with the paint and decals over the whole thing. Any advice on ribbing? Thanks in advance!
Oh and Stephen, I noticed on the instructions for the Eagle Strike decals that it thanks "Steven Lawson...for [his] invaluable help!" They wouldn't happen to be thanking you, would they??
Much better the second time around! There's no enhancement of the colors in this picture at all...the red is much brighter, more vibrant, and closer to the shade of red on the top wing.
Oh yeah, try to find the putty now...betcha can't do it!
The tail stripe was kinda see-through, and also ripped up a tad. Love Roden's decals...ugh...
Fortunately, I was able to use my second decal sheet Roden sent me and put another stripe over the original. That covered up the rips as well as thickened the stripe a bit more.
My first attempt at real lozenge work. I couldn't really get it over the edges very well. Maybe next time...
From afar, though, the lozenge work looks pretty sweet. It's when you get close that you can really analyze every spot the decal missed, every miniscule air bubble, every rip, etc. Anal Modeler's Syndrome...
Oh and the fuselage decals are all done and sealed by this point. (But the stripe isn't doubled up here.)Here are the lower lozenge surfaces. They came out much better than the uppers!
Future coats are over everything, and tomorrow I should be clear to start the rib tapes. (That is, provided I don't get called in to work...) I'm a little worried though since I can't exactly make out the ribs that well anymore what with the paint and decals over the whole thing. Any advice on ribbing? Thanks in advance!
Oh and Stephen, I noticed on the instructions for the Eagle Strike decals that it thanks "Steven Lawson...for [his] invaluable help!" They wouldn't happen to be thanking you, would they??
Buckeye198
Joined: May 02, 2010
KitMaker: 596 posts
AeroScale: 197 posts
Posted: Sunday, July 17, 2011 - 06:33 PM UTC
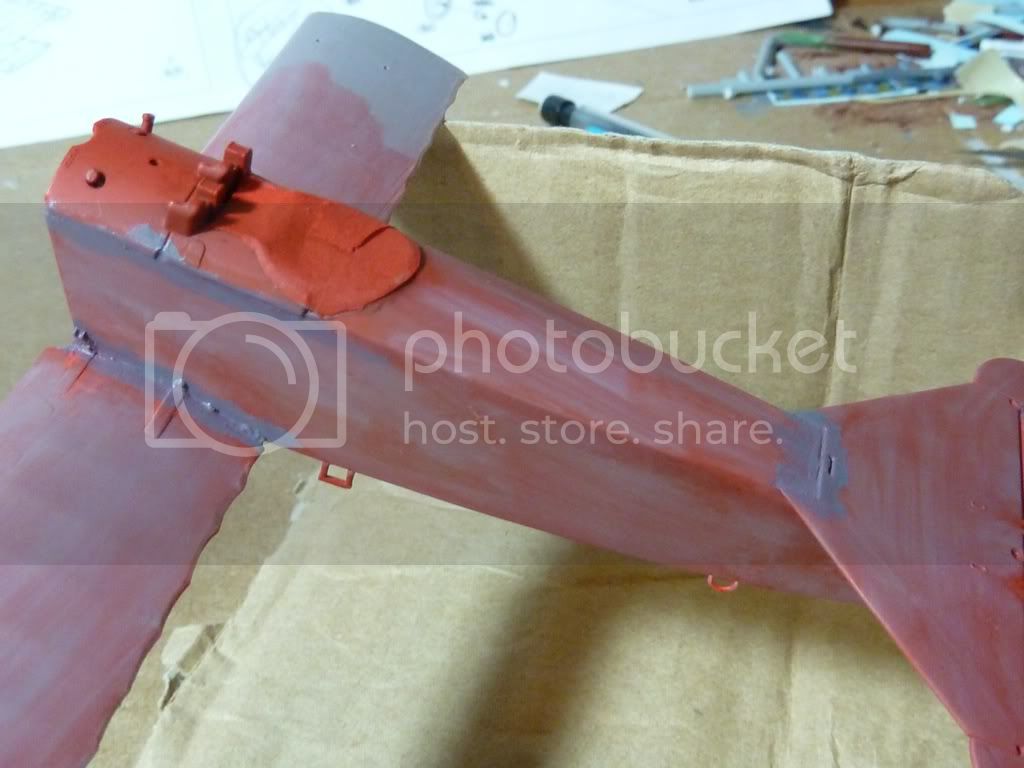
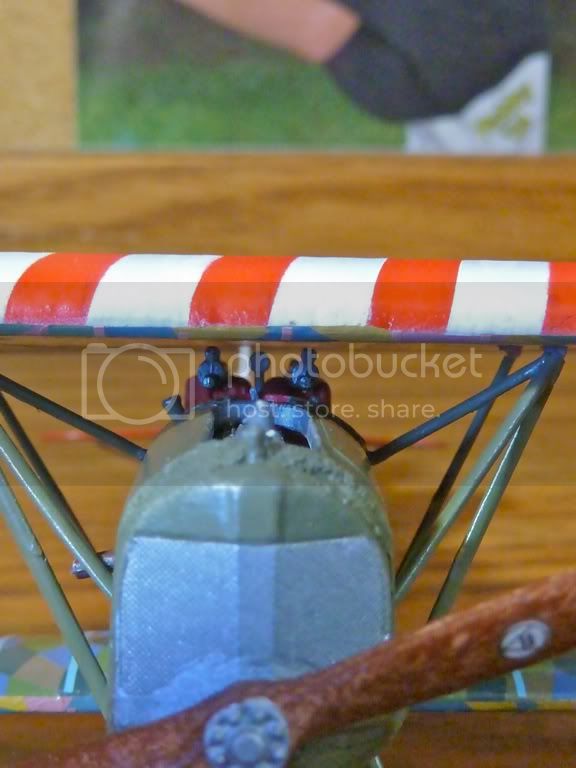
Here's a quickie for you. I was looking at my model before I was going to bed, and I decided to try a quick test-fit of the engine housing and the fuselage. Not surprisingly, it didn't fit. So I had a fifteen minute impromptu modeling session where I attached the housing. I wasn't even planning on doing that until after the decals, but whatever. I bought a new tube of putty, so I was anxious to use it here. I used tape to isolate the seam and save as much of my paintjob as possible.
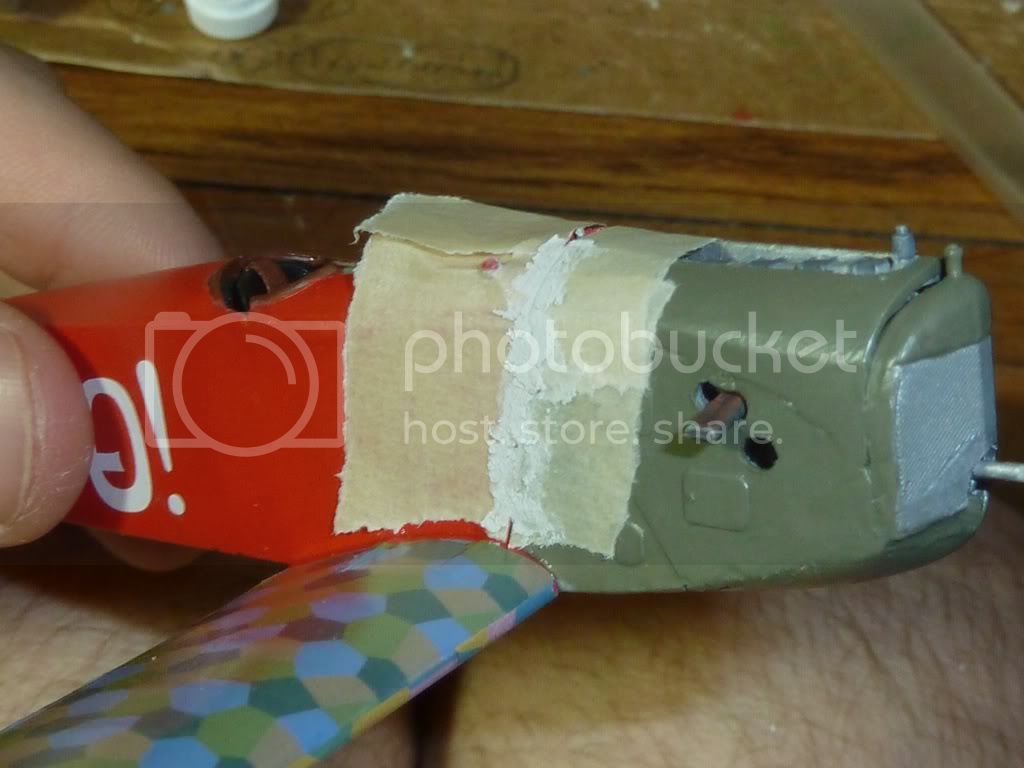
When I removed the tape, the wet putty remained perfectly in the seam (except for that one part up top...bad masking job on my part) and it should now be a simple line of paint to blend it all together. And yes, the housing is pointing slightly down and right. I told you it was a crappy fit.
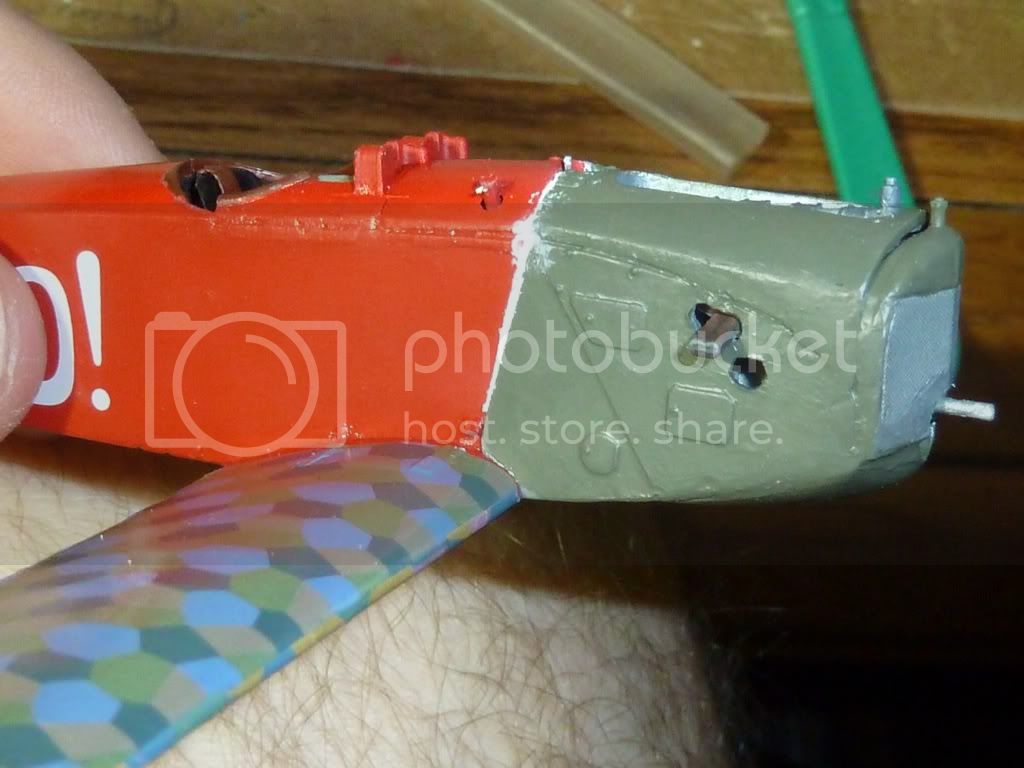
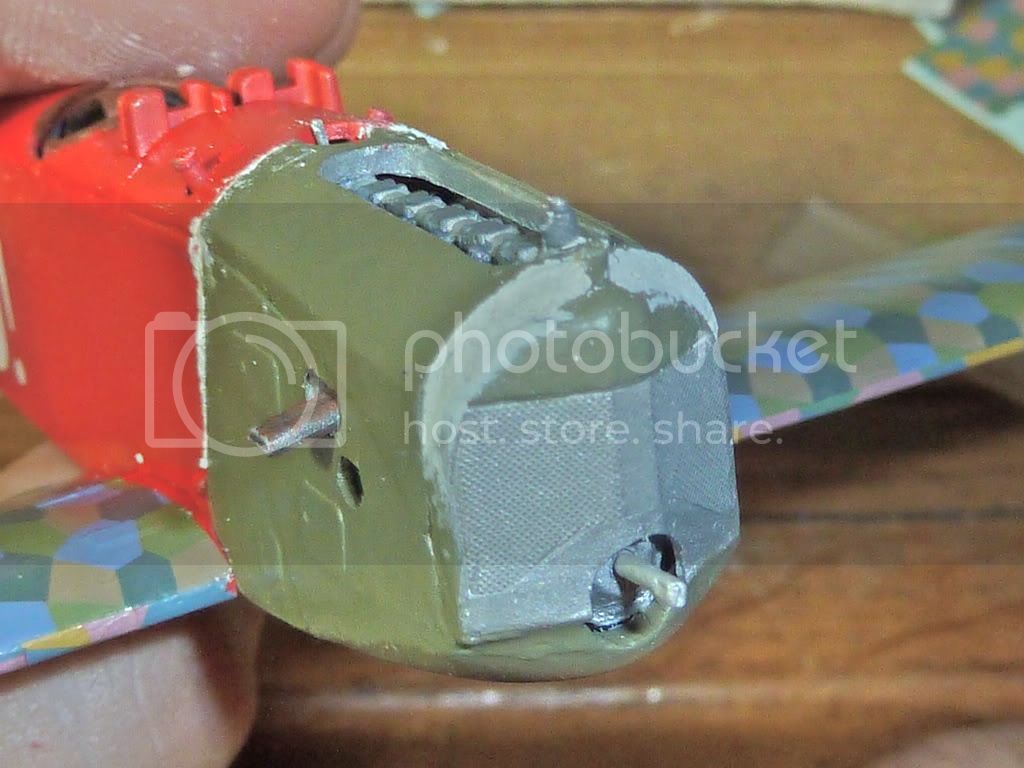
Remember that massive opening in the housing that I couldn't fix? Well it's all gone now!
Okay I'm going to bed now. I'm serious this time!
When I removed the tape, the wet putty remained perfectly in the seam (except for that one part up top...bad masking job on my part) and it should now be a simple line of paint to blend it all together. And yes, the housing is pointing slightly down and right. I told you it was a crappy fit.
Remember that massive opening in the housing that I couldn't fix? Well it's all gone now!
Okay I'm going to bed now. I'm serious this time!
lcarroll
Joined: July 26, 2010
KitMaker: 1,032 posts
AeroScale: 1,025 posts
Posted: Monday, July 18, 2011 - 03:56 AM UTC
Robby,
Nice recovery again. Like all of us you get better as you go along; I'll bet there are very few members out there that don't believe every build is just a little better then the last. Practice makes better and with the expertise and helpful approach of the Forum Members the sky is the limit!
Keep at it; by the time this one's done your learning curve will amaze you. (and NO, AMS never allows you to say "it's perfect ") We've all got it to some degree and to me that's a good thing.............
Cheers,
Lance
Buckeye198
Joined: May 02, 2010
KitMaker: 596 posts
AeroScale: 197 posts
Posted: Tuesday, July 19, 2011 - 06:52 PM UTC
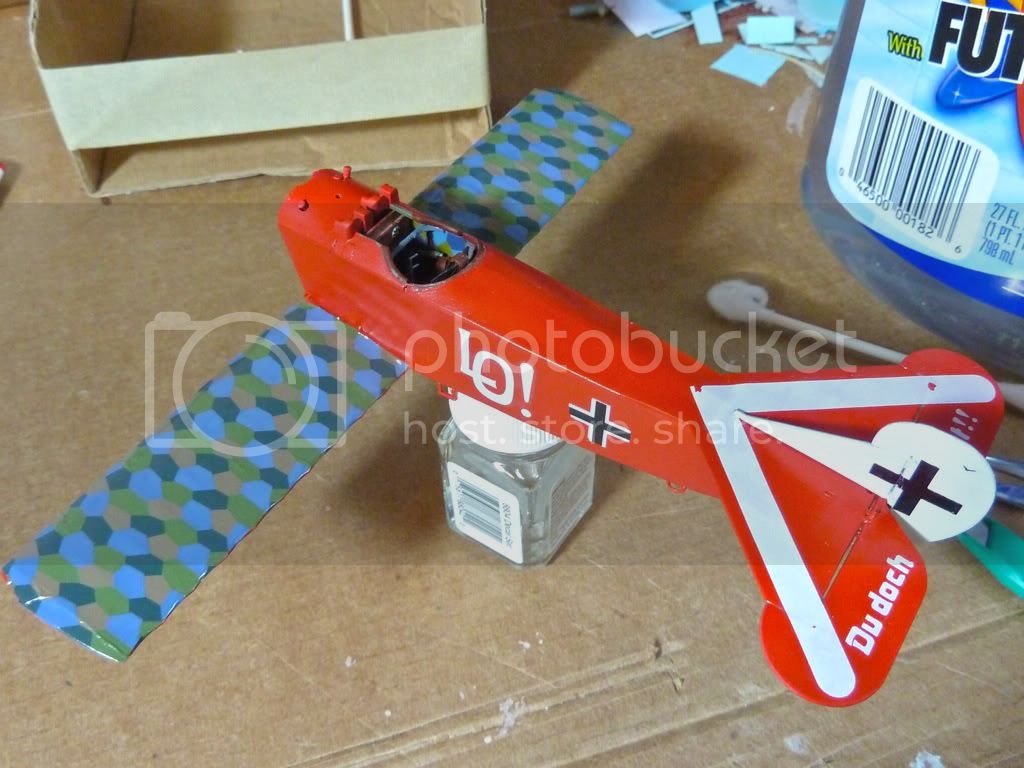
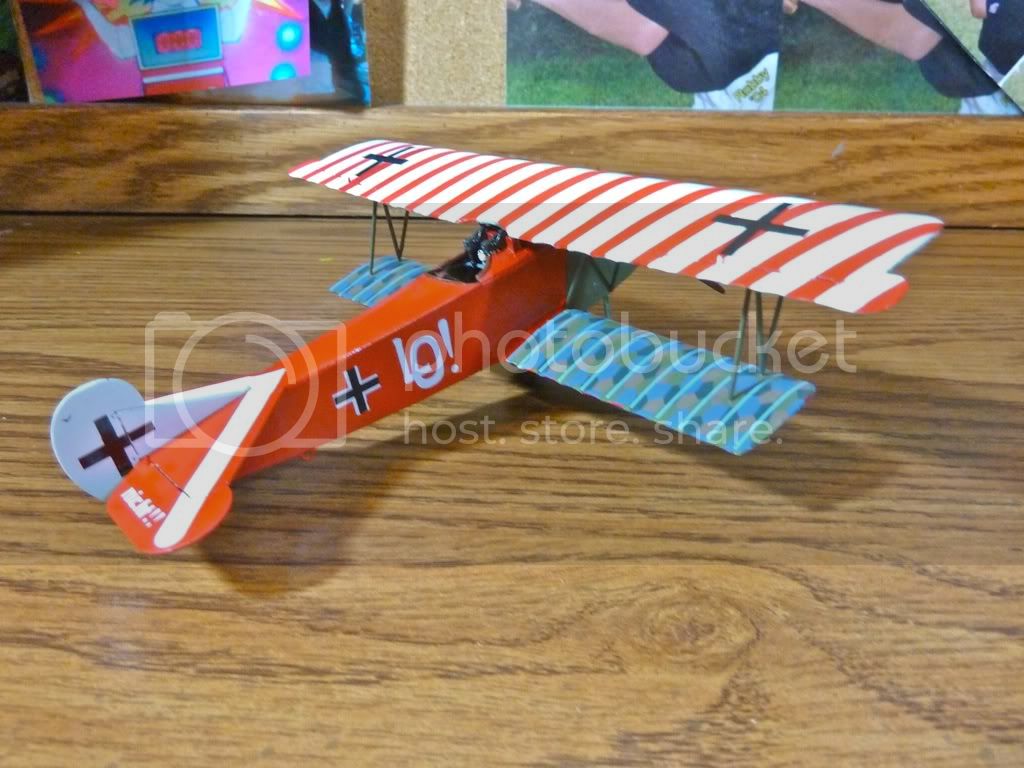
Success!! I have officially completed my Knights of the Sky 2011 entry!! Here be the pictures:
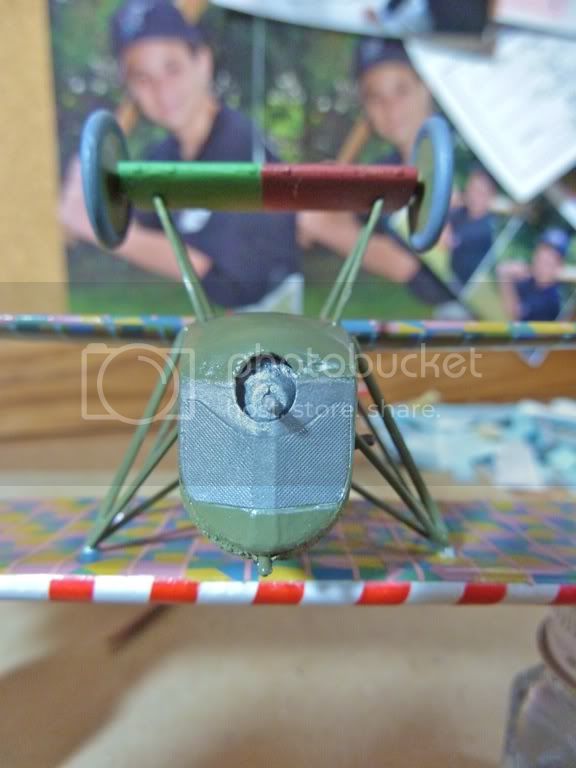
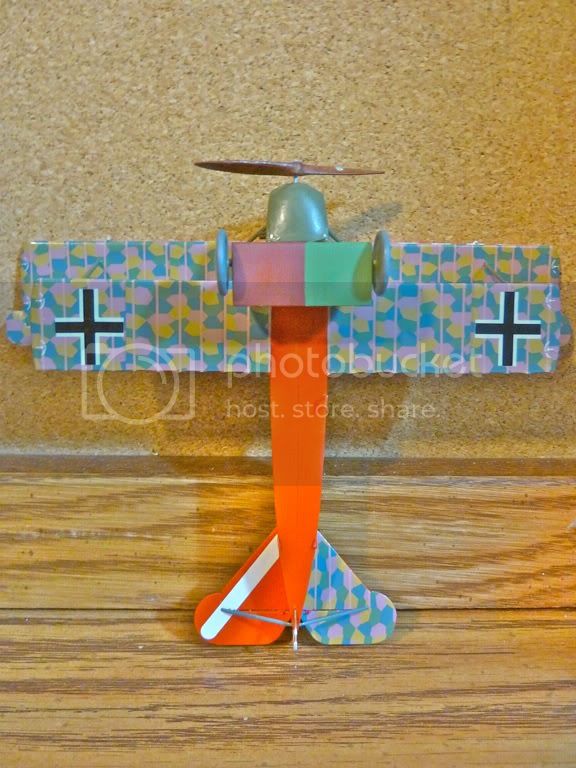
I read in a review of this kit somewhere that the N-struts are too low, and I didn't get what they meant until I attempted to attach the top wing. As you can see in the picture, there is barely any room for a pilot to see in front of him. Maybe this is true to the original and it just looks odd to me, I don't know. But I didn't argue and just glued the top wing in place starting with the N-struts and working my way in to the fuselage struts.

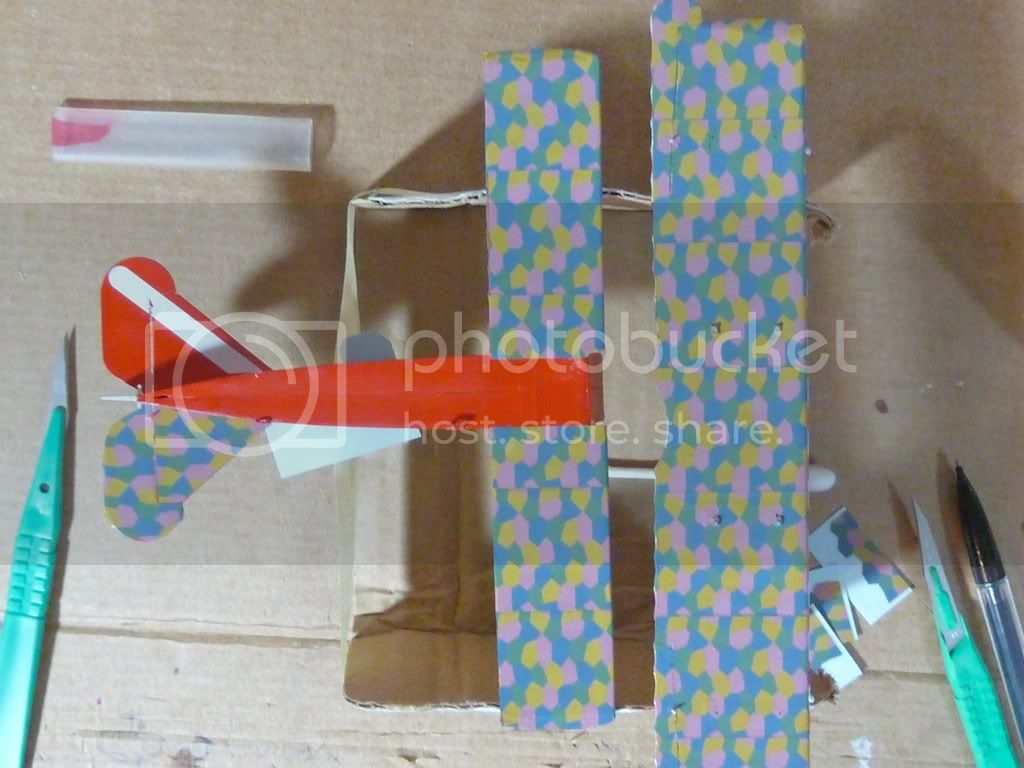
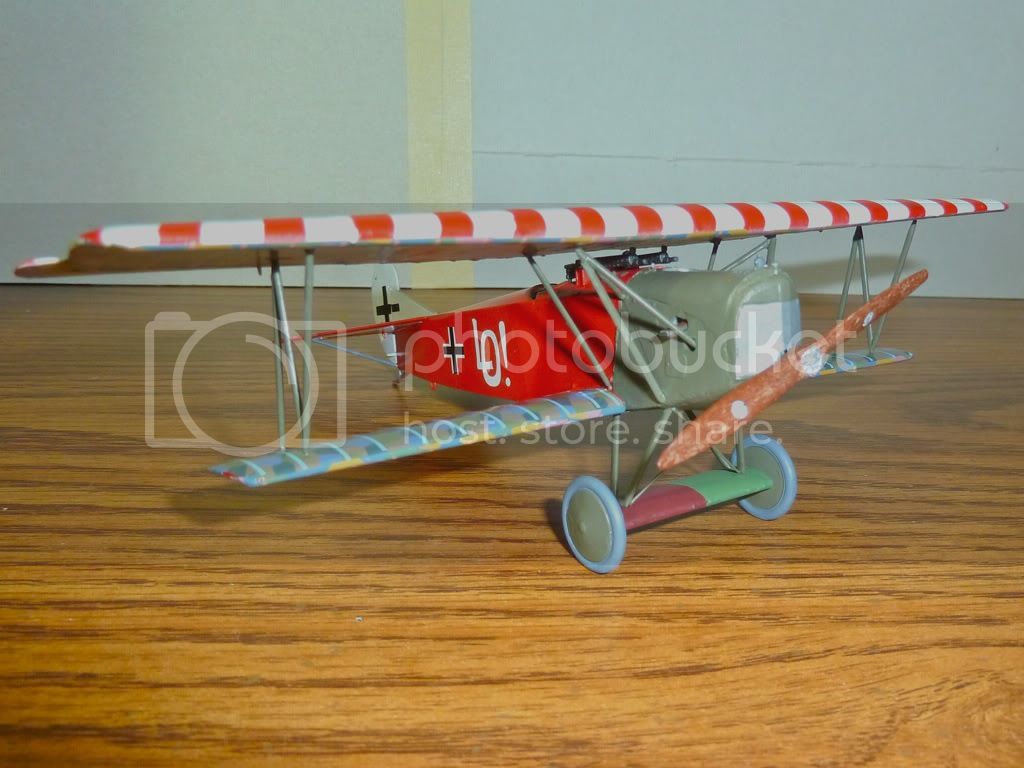
All struts in place, landing gear attached, and just letting it all harden up before putting any weight on the wheels. It's surprisingly a VERY heavy kit and the carriage would not have held up for long.

Another look at the carriage. Not too strong, and it wobbled badly when the kit's weight was placed on it.
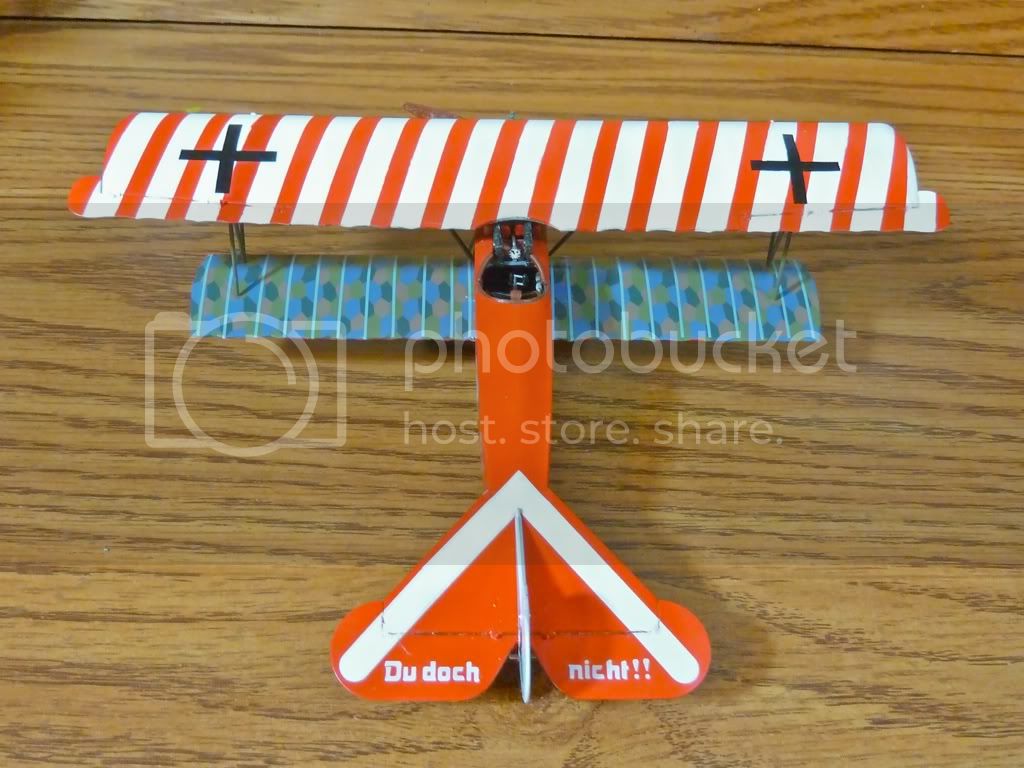
But it's all done now! Despite my nitpicking of my work all around the kit, it looks pretty damn solid as a full unit. I'll shut up now and let you all look.
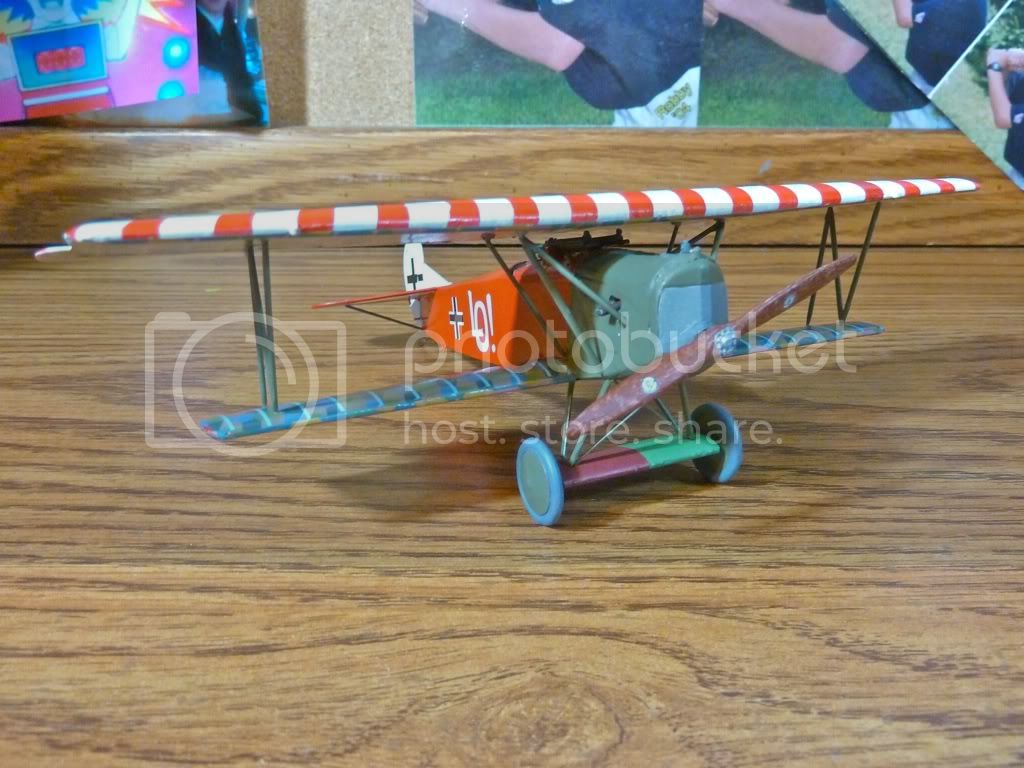
Quick note: I was surprised just how much those two stretched-sprue support lines really help out. Virtually no wobble with them installed!

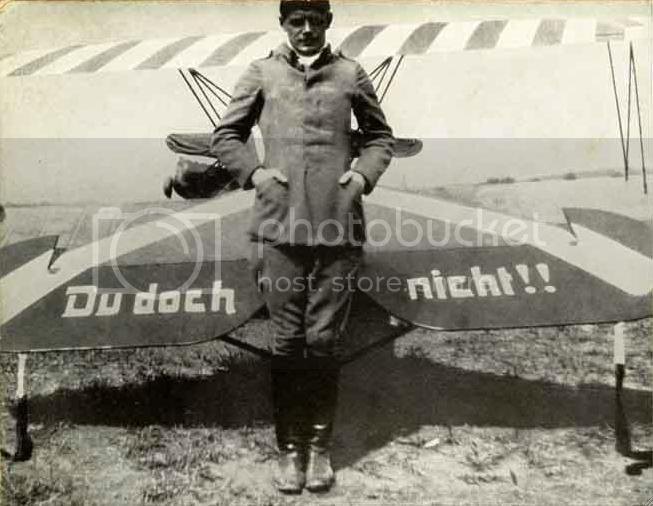
The Man of the Hour, Ernst Udet in front of his candy-stripe Fokker (1918).
Overall, a very enjoyable build. Frustrating at times (like any kit), but as Lance said, I'm pleased with my learning curve. I had a lot of fun with my first attempt at WWI equipment and I've got another one--Rickenbacker's Nieuport N28--on the bench for the WWI campaign. That'll be a bigger challenge, as it actually has rigging, but I feel that this kit was essential for me to get a better feel for how WWI kits go and what I can expect. Thanks to everyone who helped me along the way, and I look forward to seeing the rest of the KotS builds!
I read in a review of this kit somewhere that the N-struts are too low, and I didn't get what they meant until I attempted to attach the top wing. As you can see in the picture, there is barely any room for a pilot to see in front of him. Maybe this is true to the original and it just looks odd to me, I don't know. But I didn't argue and just glued the top wing in place starting with the N-struts and working my way in to the fuselage struts.
All struts in place, landing gear attached, and just letting it all harden up before putting any weight on the wheels. It's surprisingly a VERY heavy kit and the carriage would not have held up for long.
Another look at the carriage. Not too strong, and it wobbled badly when the kit's weight was placed on it.
But it's all done now! Despite my nitpicking of my work all around the kit, it looks pretty damn solid as a full unit. I'll shut up now and let you all look.
Quick note: I was surprised just how much those two stretched-sprue support lines really help out. Virtually no wobble with them installed!
The Man of the Hour, Ernst Udet in front of his candy-stripe Fokker (1918).
Overall, a very enjoyable build. Frustrating at times (like any kit), but as Lance said, I'm pleased with my learning curve. I had a lot of fun with my first attempt at WWI equipment and I've got another one--Rickenbacker's Nieuport N28--on the bench for the WWI campaign. That'll be a bigger challenge, as it actually has rigging, but I feel that this kit was essential for me to get a better feel for how WWI kits go and what I can expect. Thanks to everyone who helped me along the way, and I look forward to seeing the rest of the KotS builds!
lcarroll
Joined: July 26, 2010
KitMaker: 1,032 posts
AeroScale: 1,025 posts
Posted: Wednesday, July 20, 2011 - 04:55 AM UTC
Robby,
Congratulations on finishing, you certainly had your work cut out for you on this kit and it's a great entry into the WWI arena. The lozenge looks great, the tapes set it off nicely, and it's great that youré talking build #2 immediately. I see your priorities are totally on the mark; you said you had fun which is what it's all about..............to quote our Leader, model on !!
Cheers,
Lance

JackFlash
Joined: January 25, 2004
KitMaker: 11,669 posts
AeroScale: 11,011 posts
Posted: Wednesday, July 20, 2011 - 11:33 AM UTC
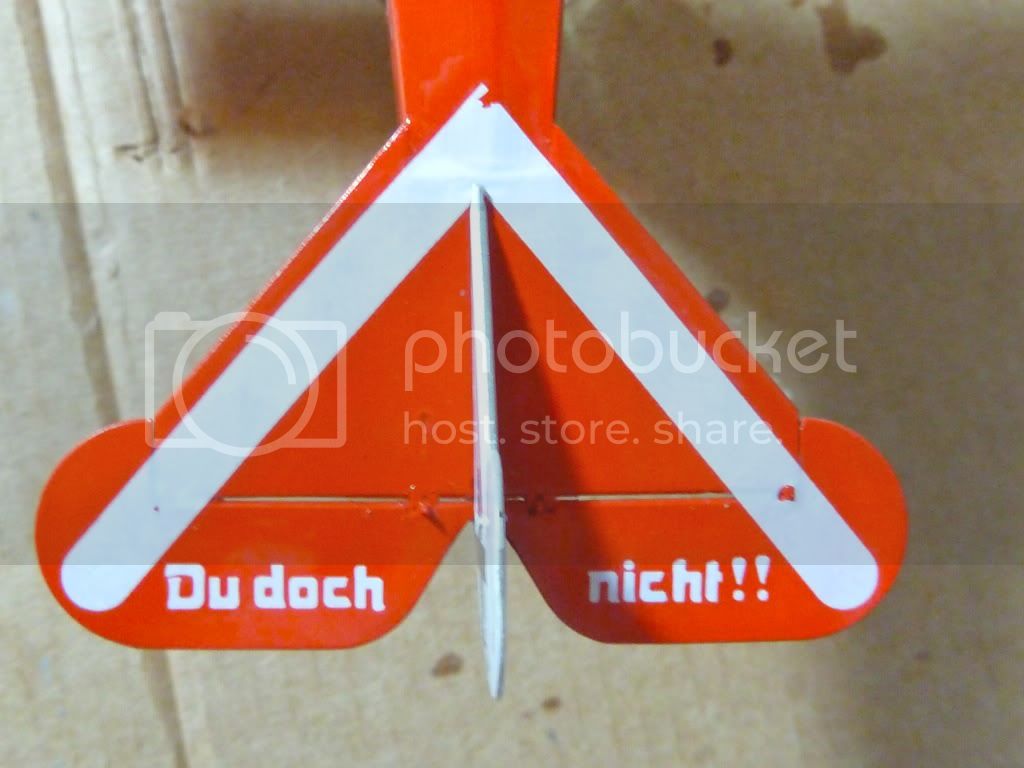
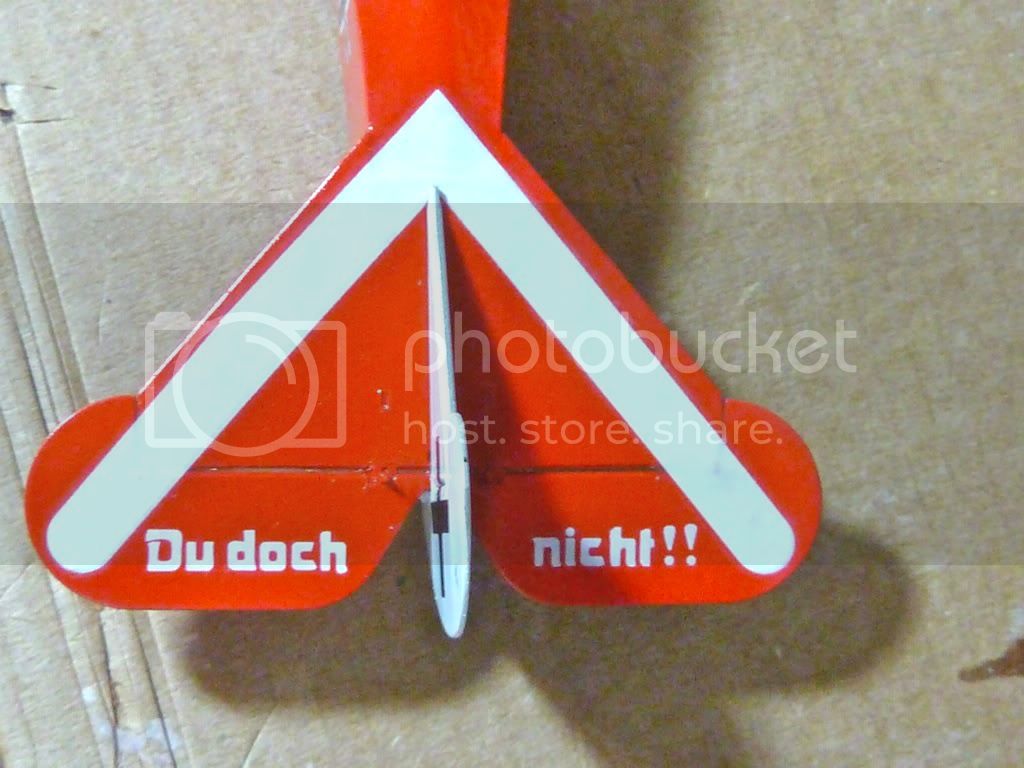
Here is a bit of fun on "du doch nicht!!"
And here
Also, Udet flew at least 4 different Fokker D.VII aircarft, and least 3 of which had distinctly different markings: "Du Doch Nicht!!" with the LO! on the red fuselage and striped top wing. Then there was an OAW 2056/18 machine with 4 color lozenge covering, tailplane chevron and LO!; 4253/18 with red fuselage with LO! and lozenge wings. He flew at least one other D.VII that was similar to 4253/18, but if you're looking for variety, you have it with his D.VII aircraft.
I highly recommend the Ospery books, particularly Richthofen's Circus, Albatros Aces of WWI Part 2, and Fokker Dr.I Aces of WWI. All have excellent photos and profiles of Udet's machines.

warreni

Joined: August 14, 2007
KitMaker: 5,926 posts
AeroScale: 2,201 posts

Posted: Friday, July 22, 2011 - 11:54 PM UTC
Hey Robby!!
Just saw the Fokker in the KotS photo gallery and came for a look-see.
You did a great job on what appears to have been a bit of a pup.. (Aussie slang for pile of p**p)
But you overcame lots of obstacles and got the colourful little Fokker finished.
Congratulations!
Have a beer in me!
Just saw the Fokker in the KotS photo gallery and came for a look-see.
You did a great job on what appears to have been a bit of a pup.. (Aussie slang for pile of p**p)
But you overcame lots of obstacles and got the colourful little Fokker finished.
Congratulations!
Have a beer in me!
 |

WEB HOSTING BY


Copyright ©2021 AeroScale and Kitmaker Network, a subsidiary of Silver Star Enterprises
All Rights Reserved. Please read our Conditions of Use and Privacy Policy.
All Rights Reserved. Please read our Conditions of Use and Privacy Policy.