_GOTOBOTTOM
Early Aviation
Discuss World War I and the early years of aviation thru 1934.
KotS GB 2011 Fokker D.VII buckeye198
Buckeye198
_VISITCOMMUNITY
Ohio, United States
Joined: May 02, 2010
KitMaker: 596 posts
AeroScale: 197 posts
Posted: Wednesday, June 15, 2011 - 07:42 PM UTC
With my submarine diorama effectively sunk in action, I'm turning my attention away from experimental stuff and back to straightforward modeling! This will be my first WWI bird (Roden's 1/48 Fokker D.VII in the style of ace Ernst Udet) and I can almost guarantee it won't be considered for Roden's company showcase. Anyway, on to business...

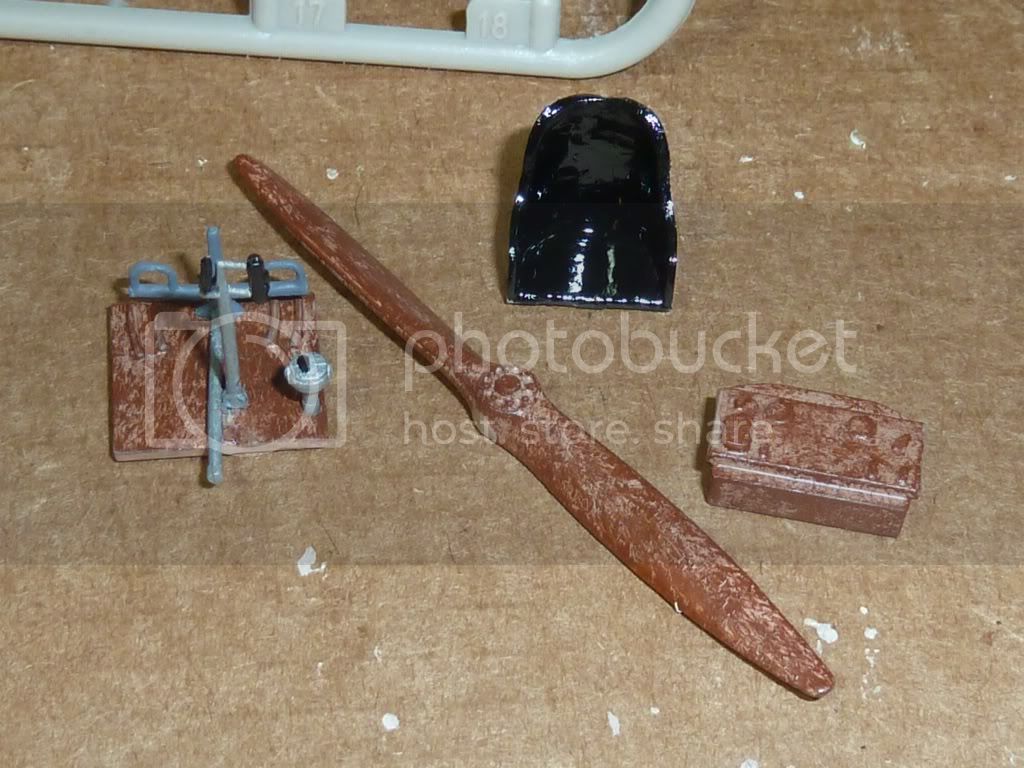
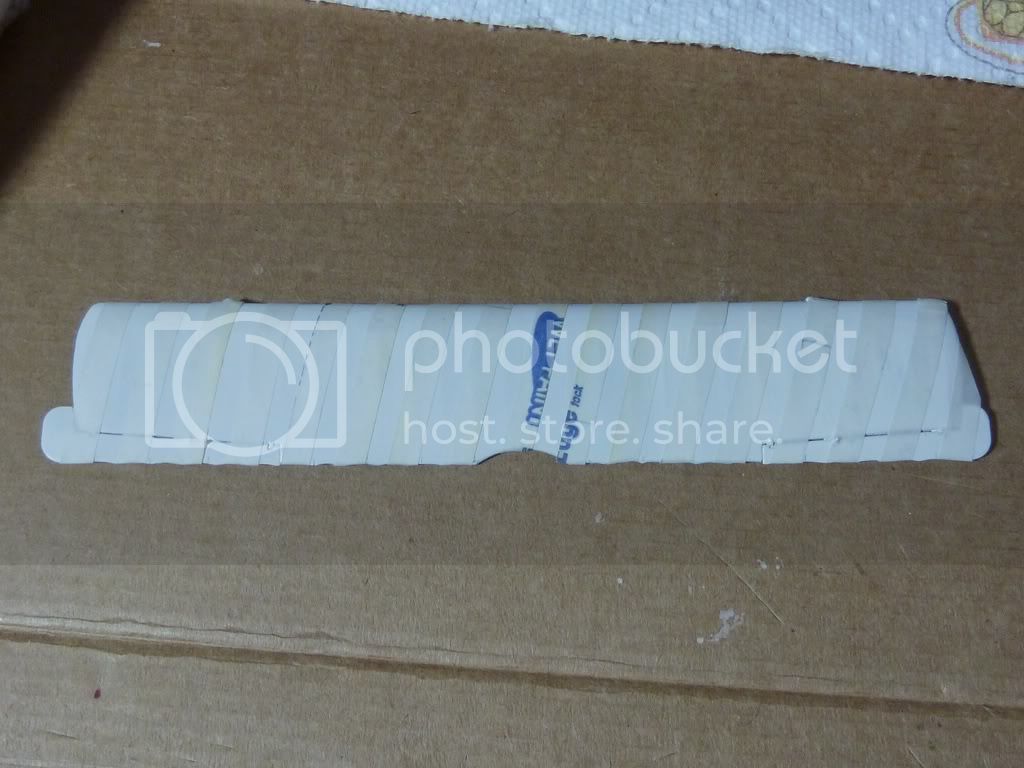
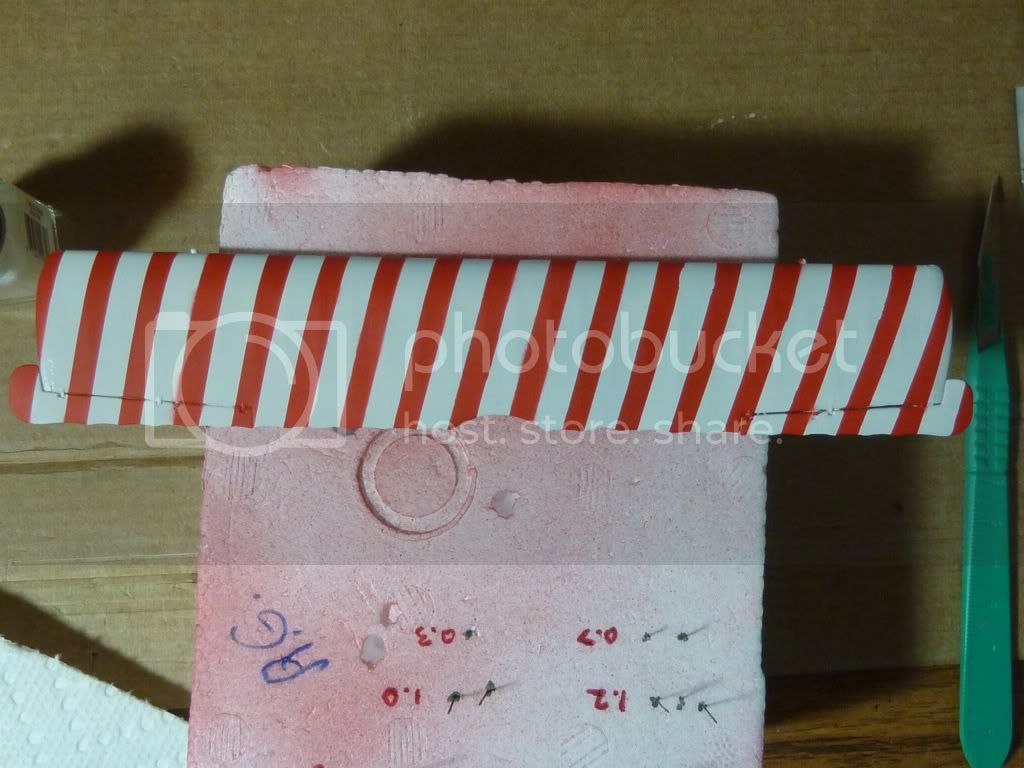
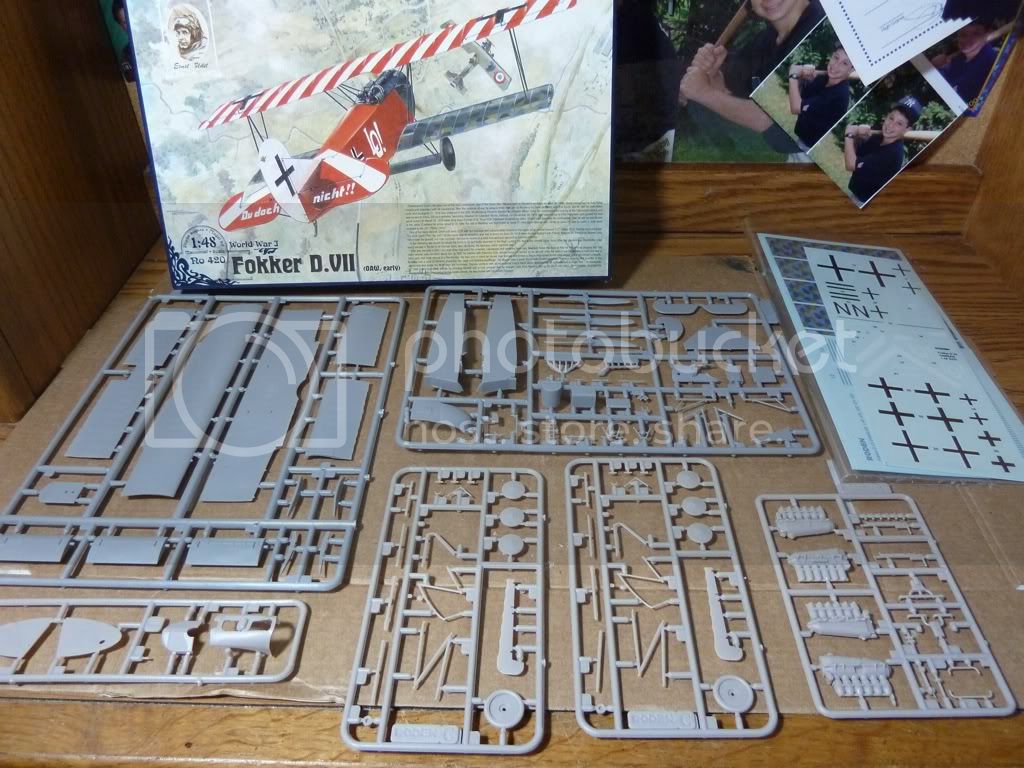
Here's the kit pre-build. The sprues seem kinda chunky (almost like a level 2 Academy kit. Don't ask me why I know this...), though there isn't much flash and the detail looks pretty nice. Wings and fuselage in dark plastic, engine, arms, and other small pieces in lighter plastic. I've heard some "wonderful" things about the decal sheets...can't wait to work with them...


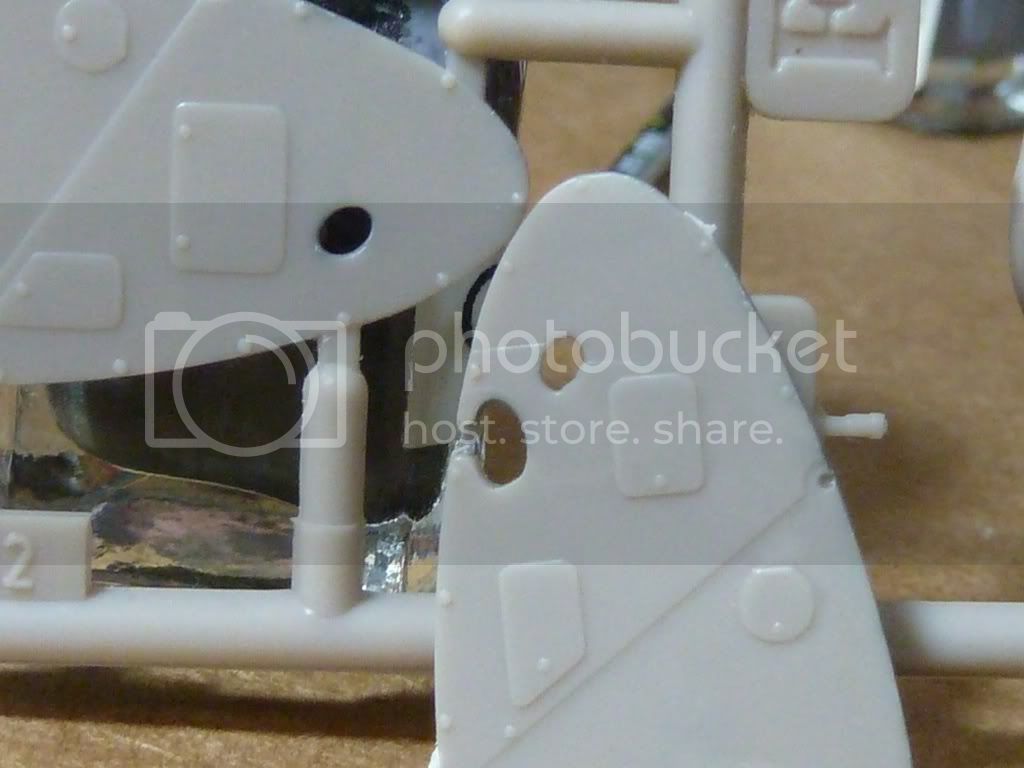
I know I took a picture of the engine alone, but I can't seem to find it. Anyway, the engine made me so happy to build. Simple construction, abundant detail, and everything fit almost perfectly! It really gave me high hopes for this kit! Then the misery began. First, I noticed that there were holes in the cowlings, but there was an extra hole in the right cowling. I had read about Roden skimping on styrene and resulting in holes in parts or even nonexistent parts, so I figured I must've gotten a kit they got lazy with.


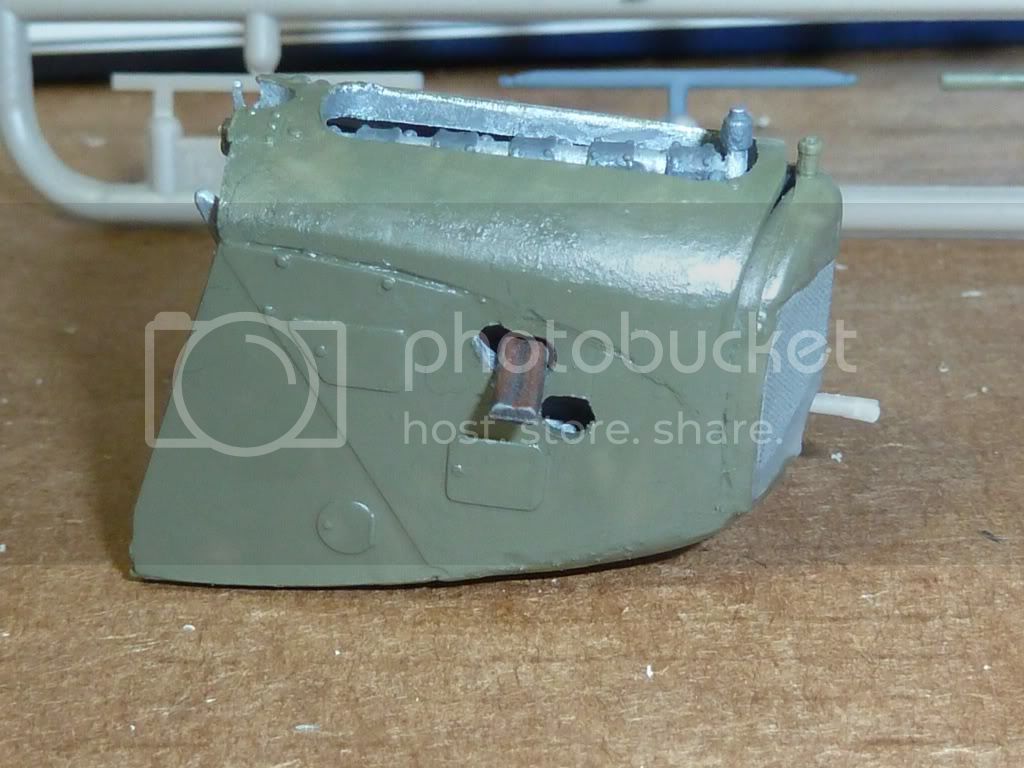
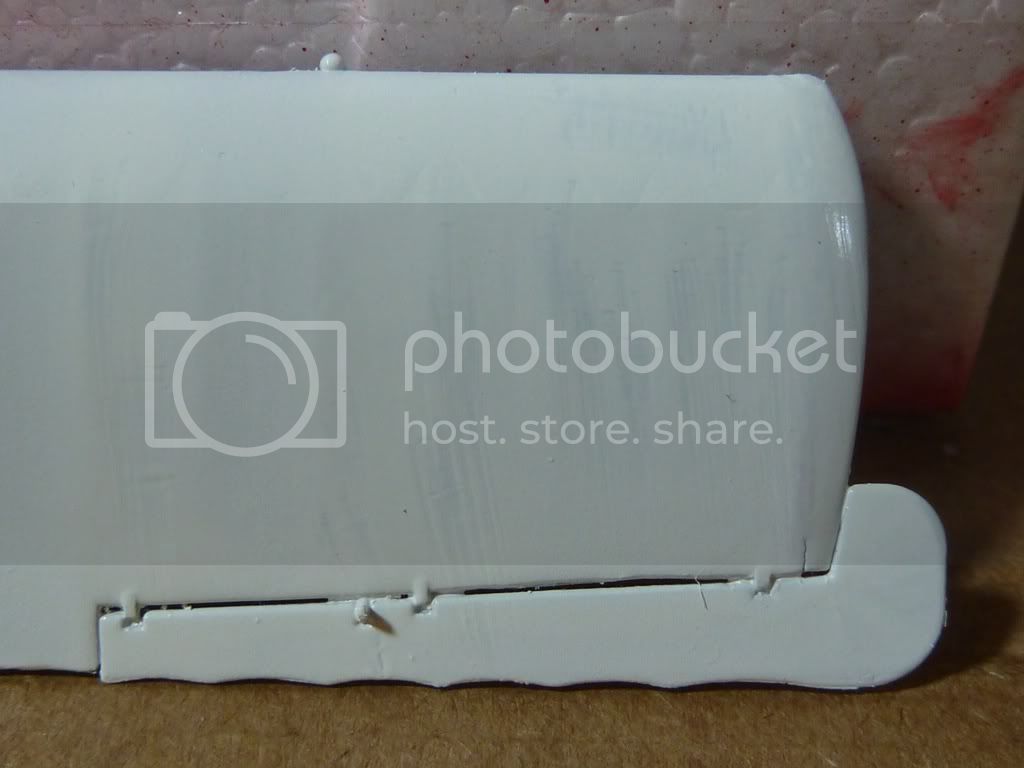
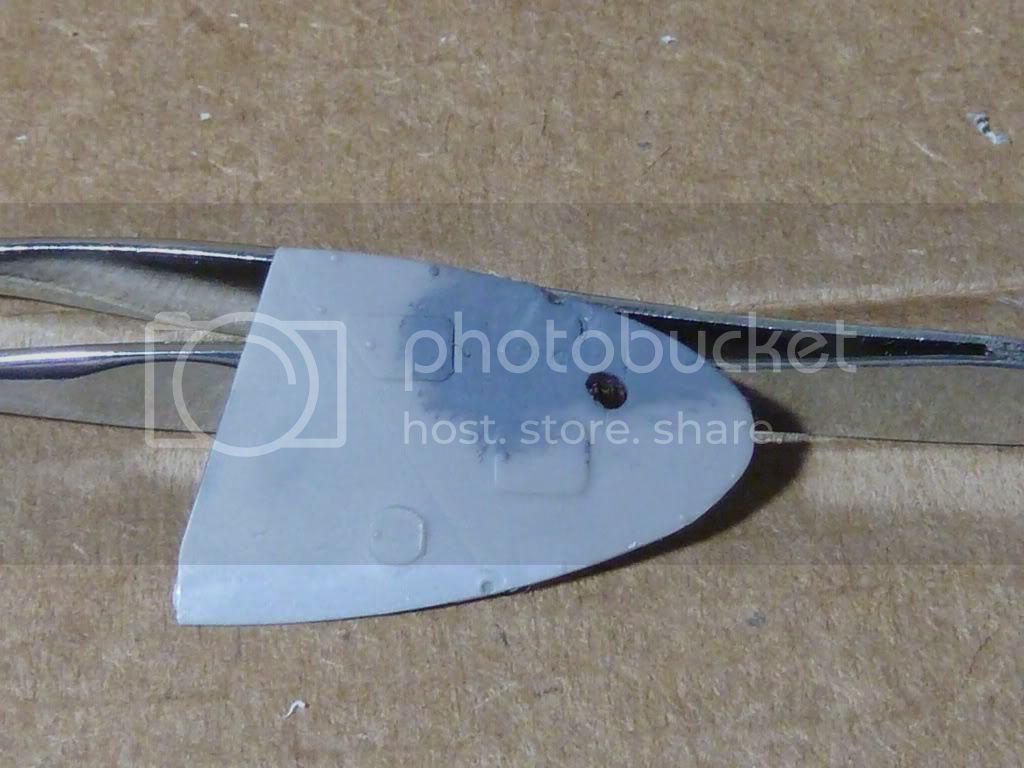
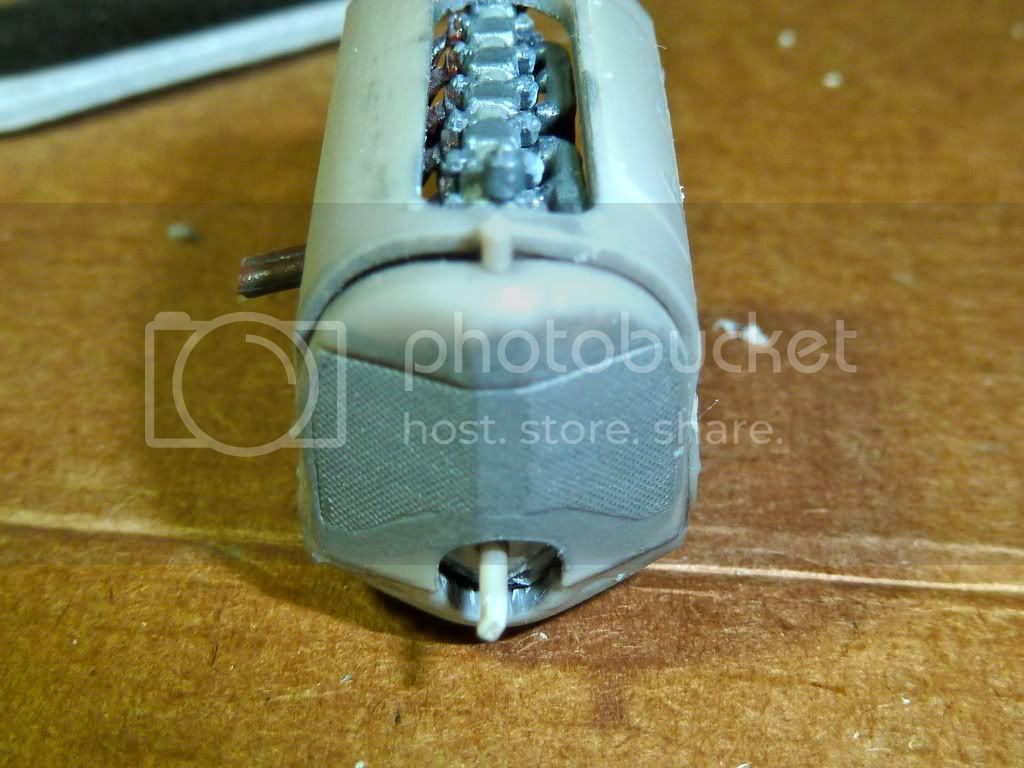
The light sprues were near perfect thickness if pressed slightly with pliers. I sculpted a sprue, glued it in the hole, then sanded and carved it flush with the side. To make sure it worked okay, I painted it (pictured here). Not a bad repair, I figured, and I moved on.


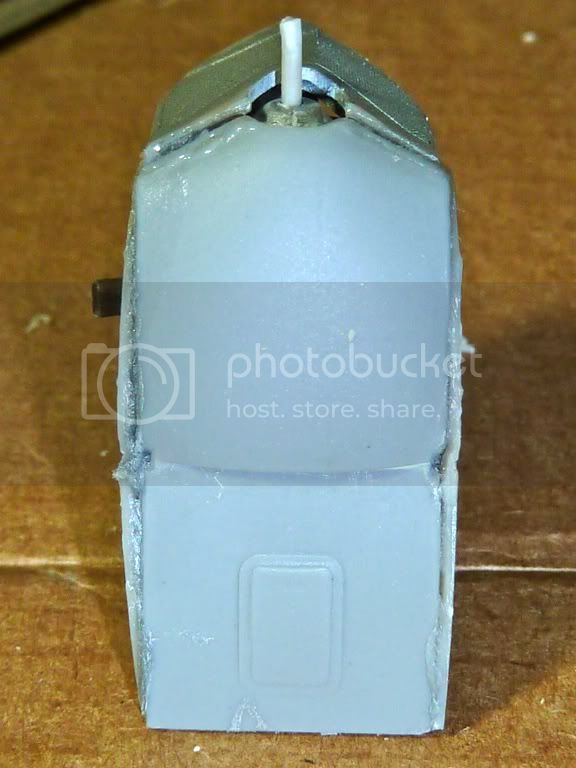
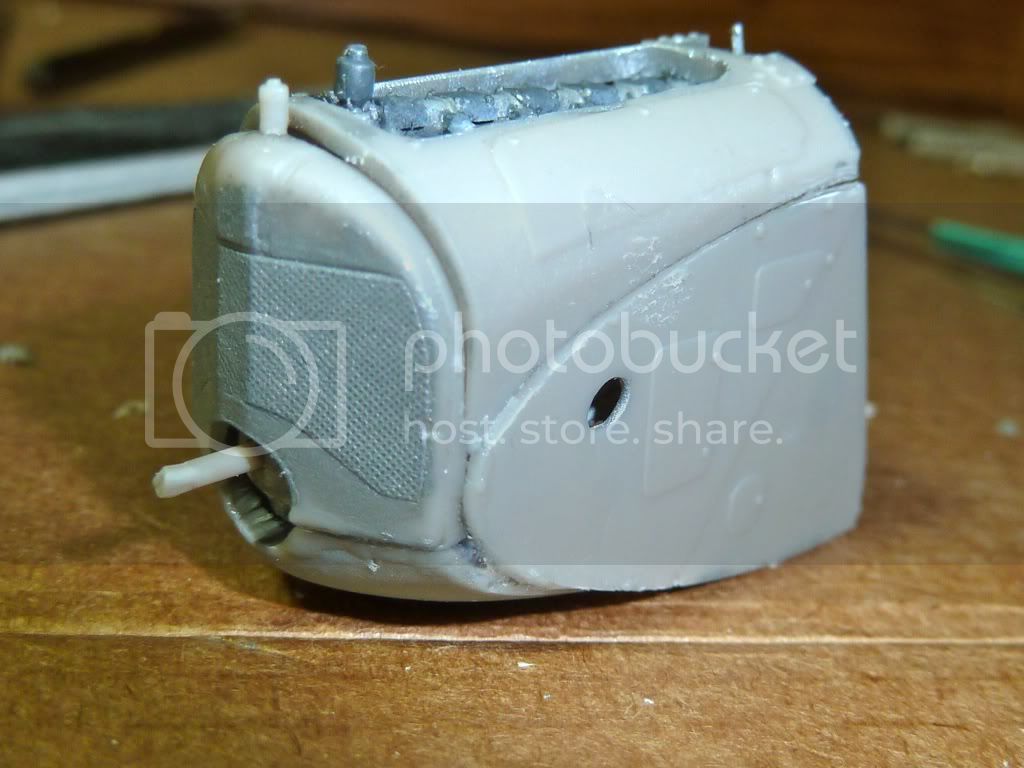
Then I found out that that extra hole is for the exhaust pipes. Great. So out came the rotary tool. Luckily this was an easy fix. Just kinda frustrating. So then I moved on to encase the engine. I must've spent over an hour trying to reshape, manipulate, finagle, and finally brutally force these five pieces into place. And even then the best result I could manage would probably be rated "atrocious" on a scale of 1 to 10. The pieces simply didn't fit, like the classic square-peg-round-hole problem. I should also mention that my tube of putty had dried up. Perfect timing, no? So here I am with a dysfunctional engine housing hiding a beautiful engine. I'll be going back tomorrow to try to clean up the glue-filled canyons a little bit, but I'm honestly not expecting to make much more progress on this section.


If anyone else has built this kit and can advise me as to what other little joys I can expect, please let me know! In the meantime, I'll keep pushing along with this kit. Hopefully, the worst is FAR behind me now...
Buckeye198
_VISITCOMMUNITY
Ohio, United States
Joined: May 02, 2010
KitMaker: 596 posts
AeroScale: 197 posts
Posted: Friday, June 17, 2011 - 05:45 PM UTC
Quick update! Been doing mainly painting for now. Not much construction other than a few of the smaller parts. Here's the engine section as it currently appears. Needs more paint, I know, but even one coat of paint (this is hand-done...not enough painting to warrant pulling out the airbrush) makes this monster look a little more tame.


Here's my woodwork. It doesn't really look that realistic or anything, but at a first glance, it'll do.


And here are the spars and wheels. There's another sprue like this one and the paint job is pretty much the same.


I hope to actually get to some construction soon. Maybe I should just stop being so intimidated by the lozenge decals and get to work already!
guitarlute101
_VISITCOMMUNITY
West Virginia, United States
Joined: December 18, 2006
KitMaker: 1,121 posts
AeroScale: 1,063 posts
Posted: Saturday, June 18, 2011 - 01:42 AM UTC


You are doing a great job. Keep up the good work!

Mark
thegirl
_VISITCOMMUNITY
Alberta, Canada
Joined: January 19, 2008
KitMaker: 6,743 posts
AeroScale: 6,151 posts
Posted: Saturday, June 18, 2011 - 02:26 AM UTC
Hi Robby !

You are doing a very nice jod so far Just a heads up though , there is fit issues with the lower wing to fuselage join so some sanding and lots of test fitting will be needed . Stephen ( jackflash ) has his methoded in a thread on how he attact the problem . I tried a sreach for his thread , but could not find it .
Hopefully he will chime in and bring it up .

Looking forward to seeing your progress
Buckeye198
_VISITCOMMUNITY
Ohio, United States
Joined: May 02, 2010
KitMaker: 596 posts
AeroScale: 197 posts
Posted: Saturday, June 18, 2011 - 08:45 AM UTC
Thanks for the kind words! Terri, I just searched every one of Stephen's topics he began for "D.VII" and, thirty pages later, I only found build logs for Eduard kits. Maybe that's what you're thinking of? It appears that he's just too good to build a RODEN kit...
thegirl
_VISITCOMMUNITY
Alberta, Canada
Joined: January 19, 2008
KitMaker: 6,743 posts
AeroScale: 6,151 posts
Posted: Saturday, June 18, 2011 - 12:22 PM UTC

Quoted Text

Thanks for the kind words! Terri, I just searched every one of Stephen's topics he began for "D.VII" and, thirty pages later, I only found build logs for Eduard kits. Maybe that's what you're thinking of? It appears that he's just too good to build a RODEN kit...


Nope , not the Eduard kit . It was his build which had the tip and how to go about fixing the problem . He has built this kit a few times I'll see if I'm able to find it , maybe even PM him .....................
thegirl
_VISITCOMMUNITY
Alberta, Canada
Joined: January 19, 2008
KitMaker: 6,743 posts
AeroScale: 6,151 posts
Posted: Saturday, June 18, 2011 - 12:26 PM UTC
Found it !

Here is the link to the build ....

Bit of fun.
JackFlash
_VISITCOMMUNITY
Colorado, United States
Joined: January 25, 2004
KitMaker: 11,669 posts
AeroScale: 11,011 posts
Posted: Saturday, June 18, 2011 - 01:54 PM UTC
Here is a direct reference to the lower wing fix.
1/48 Roden Fokker D.VII - HELP!!!


Lets get to it then. There are three ways to fix the problem. I will keep it simple, as is usually best.

Step 5. Assembles the lower wing parts (1, 4, 5, 12, 13 A.) One could actually insert spars held in place with double sided tape or glued in place. This type of wing assembly is great for the modeler who wants to simulate damage. By thinning down the inner surfaces, internal structure is easy to replicate. Also, before putting the lower wing together sand down the butt edges of the lower wing surfaces that contact the fuselage (PP 1, 4 & 5.) The unmodified fit between the lower wing an fuselage is tight. This will eliminate the fit problem. Do Not narrow the whole fuselage by taking away from the center union area. Sanding the edges far more effective than to cut this bridge area and fill in with sheet stock. The 2mm limit is a guide for you. If you have already glued them together it will be less time consuming to accomplish. Since you have already split the bridge just glue a locator tab / scrap piece over the split that over laps on the bridge interior.
warreni
_VISITCOMMUNITY
South Australia, Australia
Joined: August 14, 2007
KitMaker: 5,926 posts
AeroScale: 2,201 posts
Posted: Saturday, June 18, 2011 - 11:23 PM UTC
Robby!! You lucky fella! You got a one of a kind Roden kit as well! Short shotting means that we all get different versions of the same kit.. Aren't we lucky?

Keep at it mate and you will feel a big sense of accomplishment when you finally beat it into submission.. or maybe it will learn to fly and come to a sudden halt against something solid.. But try to keep in the back of your mind all the hours you have spent on it before you consider stomping it to pieces..

Good luck Sir!

Buckeye198
_VISITCOMMUNITY
Ohio, United States
Joined: May 02, 2010
KitMaker: 596 posts
AeroScale: 197 posts
Posted: Sunday, June 19, 2011 - 05:08 PM UTC
Terri and Stephen, I can't thank you two enough...never again shall I question your infinite wisdom! I haven't had much progress as of late...I'm helping my neighbor paint his deck and I've been searching for a job in every store within a 30-mile radius! Quick question though. I found an article (Tom Cleaver's D.VII: http://modelingmadness.com/reviews/w1/ger/cleaverd7.htm ) that stated that the lozenge fabric was visible in the cockpit, and so he applied the lozenge decal there. I'm just going to assume that he's got his facts correct, but reassurance from the masters would really put my mind at ease! However, I'm not sure how best to apply the decal to such a rugged 3D surface. Should I cut a decal for each flat section? How did either of you go about this? Thanks again!
Buckeye198
_VISITCOMMUNITY
Ohio, United States
Joined: May 02, 2010
KitMaker: 596 posts
AeroScale: 197 posts
Posted: Sunday, June 19, 2011 - 05:13 PM UTC
Oh and I forgot to ask this! Stephen, in this thread you posted to, https://aeroscale.kitmaker.net/forums/160598, is the Ukrainian marking historically accurate? Ukraine as a national entity with its own markings didn't exist during the time period the D.VII would've flown, and to the best of my knowledge, there was no "Ukrainian Air Force" or markings for such a group until after the dissolution of the USSR. Is the model in the thread a what-if build or am I missing something? I am anxiously awaiting the mental onslaught of knowledge you will be offering me!
JackFlash
_VISITCOMMUNITY
Colorado, United States
Joined: January 25, 2004
KitMaker: 11,669 posts
AeroScale: 11,011 posts
Posted: Sunday, June 19, 2011 - 05:35 PM UTC

Quoted Text

Terri and Stephen, I can't thank you two enough...never again shall I question your infinite wisdom! I haven't had much progress as of late...I'm helping my neighbor paint his deck and I've been searching for a job in every store within a 30-mile radius! Quick question though. I found an article (Tom Cleaver's D.VII that stated that the lozenge fabric was visible in the cockpit, and so he applied the lozenge decal there. I'm just going to assume that he's got his facts correct, but reassurance from the masters would really put my mind at ease! However, I'm not sure how best to apply the decal to such a rugged 3D surface. Should I cut a decal for each flat section? How did either of you go about this? Thanks again!


The fabric shows through in reverse. I usually took the interior down to the flat laid the decal (Microsculpt loz.) down by flipping it over on the face. (The carrier is clear so th colours come through in reverse.) Then built up the skeletal structure and interior parts from there. Not a difficult task.
Buckeye198
_VISITCOMMUNITY
Ohio, United States
Joined: May 02, 2010
KitMaker: 596 posts
AeroScale: 197 posts
Posted: Sunday, June 19, 2011 - 05:49 PM UTC
And...how might one go about "building up the skeletal structure and internal parts" after the decals have been applied? Sorry about this...I have VERY limited scratchbuilding skills...
thegirl
_VISITCOMMUNITY
Alberta, Canada
Joined: January 19, 2008
KitMaker: 6,743 posts
AeroScale: 6,151 posts
Posted: Monday, June 20, 2011 - 01:09 AM UTC

Quoted Text

And...how might one go about "building up the skeletal structure and internal parts" after the decals have been applied? Sorry about this...I have VERY limited scratchbuilding skills...


Hi Buckeye !

I have done it the same way Stephen . Removed the framing by sanding it away , then placing the decal in place . Re do the frame with stock rod .

You can lay the decal down over what is there now and use a little super sol to help it conform to the framing . Then paint the framing when dried , or paint the framing and cut the decals to find . You have a few choicies , go with what feels right for you
Buckeye198
_VISITCOMMUNITY
Ohio, United States
Joined: May 02, 2010
KitMaker: 596 posts
AeroScale: 197 posts
Posted: Wednesday, June 22, 2011 - 05:47 PM UTC
I've taken both of your advice and sanded away the framing to lay down the decals. I made detailed sketches of every bar and nub to replace them post-decaling. Now I've run into a problem: I was hoping my kit was new enough not to experience this difficulty, but the decals are flaking pretty badly. I could probably make them work for just the cockpit, but I really don't want to deal with this stuff for the wings. Do either of you or anyone else out there have 1/48 4-color lozenge decals? I'll need both top and bottom. I do have Paypal. Thank you very much!
JackFlash
_VISITCOMMUNITY
Colorado, United States
Joined: January 25, 2004
KitMaker: 11,669 posts
AeroScale: 11,011 posts
Posted: Wednesday, June 22, 2011 - 06:12 PM UTC
In 1:48 try

http://www.microsculpt.com

They are the best. IMHO
lcarroll
_VISITCOMMUNITY
Alberta, Canada
Joined: July 26, 2010
KitMaker: 1,032 posts
AeroScale: 1,025 posts
Posted: Thursday, June 23, 2011 - 04:46 AM UTC

Quoted Text

I've taken both of your advice and sanded away the framing to lay down the decals. I made detailed sketches of every bar and nub to replace them post-decaling. Now I've run into a problem: I was hoping my kit was new enough not to experience this difficulty, but the decals are flaking pretty badly. I could probably make them work for just the cockpit, but I really don't want to deal with this stuff for the wings. Do either of you or anyone else out there have 1/48 4-color lozenge decals? I'll need both top and bottom. I do have Paypal. Thank you very much!


Robby,
I think I can help; I've recently switched to the larger 1/32 Scale to adjust for older eyes and thicker fingers (take my advice, don't get old!) and have a lot of stuff sitting around here from my 1/48 Scale days. I have the Eagle Strike 4 Color top and bottom sheets and the rib tapes (Sets 48011, 12, and 13). They are about 6 years old and have been stored in their original sealed bags; should be fine if you read over some of the recent threads on decals. I think if you do a small piece as a trial and use some Microsol and / or set they'll work however if not take a look at some of Stephen's and Terri's comments on use of Decal Setting Solution.
If you think this will solve your problem send me a "PM" with your mailing address and, once our Canadian Postal Service ends their strike (probably they'll be ordered back to work by the Gov't in the next 48 hours) , I'll zip them off to you. No Pay Pal required, glad to help out. I just got a similar gesture from one of our members and am happy to provide support to a fellow member.

Cheers,
Lance
Buckeye198
_VISITCOMMUNITY
Ohio, United States
Joined: May 02, 2010
KitMaker: 596 posts
AeroScale: 197 posts
Posted: Thursday, June 23, 2011 - 03:30 PM UTC
Lance, a PM has been sent your way. Thanks for reaching out!
JackFlash
_VISITCOMMUNITY
Colorado, United States
Joined: January 25, 2004
KitMaker: 11,669 posts
AeroScale: 11,011 posts
Posted: Thursday, June 23, 2011 - 04:08 PM UTC
Ahh yes the old Eagle Strike 4 colour Loz. They were out before Microsculpt. Some plugger here-abouts consulted on these.
wing_nut
_VISITCOMMUNITY
New Jersey, United States
Joined: June 02, 2006
KitMaker: 1,212 posts
AeroScale: 468 posts
Posted: Friday, June 24, 2011 - 12:45 AM UTC
Good work Robby.

I love the way folks jump in to help a brother (or sister modeler out.
Buckeye198
_VISITCOMMUNITY
Ohio, United States
Joined: May 02, 2010
KitMaker: 596 posts
AeroScale: 197 posts
Posted: Sunday, June 26, 2011 - 08:56 AM UTC
So last night I tried spraying the white undercoat for the top wing (the end result will be in Ernst Udet's candy-stripe livery) and my airbrush spotted and globbed the wing up pretty badly. I'm thinking this is because I'm using enamels instead of acrylics. The paint was thinned very well and I have been having problems like this in the recent past--too gunked up to operate now? I know people can and do use enamels in their brushes, but maybe I'm just not experienced enough to do so, who knows? So anyway, now I'm in the running for a new airbrush. I'm thinking something with a gravity-feed color cup, don't care single- or double-action (my late airbrush was single-action), and I really don't want to spend much. I know, that last bit kind of throws a wrench in the works, but if anyone has a brush in mind to suggest--or even to sell--please let me know. Thanks a bunch!!
OEFFAG_153
_VISITCOMMUNITY
Västra Götaland, Sweden
Joined: February 19, 2010
KitMaker: 1,473 posts
AeroScale: 1,450 posts
Posted: Sunday, June 26, 2011 - 08:48 PM UTC
Hi Robby,

If you're willing to spend a little bit more – I think the Harder Steenbeck Evolution is very good value for money – and will serve you very well with little trouble.

To my mind, its better to put in a little bit extra $, and be happy with it in the long run, rather than spend less on something thats so-so and will not last you very long.

Just my 2pennies worth

Best Regards

Mikael
dmopath
_VISITCOMMUNITY
Kentucky, United States
Joined: July 02, 2010
KitMaker: 175 posts
AeroScale: 174 posts
Posted: Monday, June 27, 2011 - 07:02 AM UTC
Hi Robby

I've been checking out your build. It looks like you are off to an excellent start.

From an airbrush standpoint, I have been using a Badger 155 Anthem (double action with a medium point). It wasn't too expensive, and I've found it to be reliable, and easy to take apart and clean. It is, however, a siphon feed, which I find uses more paint.

I also acquired an Iwata Kustom airbrush for fine work. It is a double action gravity feed which I find works extremely well for its intended purpose. It is, however, "somewhat more expensive" than the Badger.

Hope this helps
Buckeye198
_VISITCOMMUNITY
Ohio, United States
Joined: May 02, 2010
KitMaker: 596 posts
AeroScale: 197 posts
Posted: Tuesday, July 05, 2011 - 02:57 PM UTC
Update! After some time of inactivity related to (1) my search--and potential find--for a job, (2) frustration with my spattering airbrush, (3) shattered Roden decals, and (4) Grand Theft Auto IV (I know, I know, leave me alone ), I finally have some progress!

MAJOR shout-out to Lance Carroll (call-sign lcarroll) for his generosity in donating his sheets of 1/48 lozenge decals! Despite the Canuck Postal Strike, he's gone ahead and shipped them across the border and in a few days I'll finally be able to put together this cockpit! Lance, I can't thank you enough!!

Another shout-out to Chicago Airbrush Supply ( http://www.chicagoairbrushsupply.com/ ). After a half-hour on the phone probing them with all kinds of questions of specifications and options and whatnot, I bought an Iwata Revolution CR, moisture trap/pistol grip, and hose adapter for under $110. Not too shabby, if you ask me! Hopefully all this will help me get my models from the bench to the display shelf looking a little happier. In the meantime, I tried super-cleaning my brush and super-thinning my enamels, and it seems to be working okay-ish. I'm still glad I bought the Iwata and I'm now in the process of looking for some good acrylics that I can get a hold of easily and cheaply. Any suggestions?

Now to the pictures! The elevator section was too narrow to fit around the stabilizer, so I ended up cutting it down the middle and gluing each half separately.


With both halves in place, I put a few dabs of glue in between them, and when painted, it should look solid. (Note: this was taken before the glue.)


The top wing got a base coat of flat white. This was when my airbrush was splatty, so it's not the best coverage. I cleaned it up by hand as best I could and moved on.


Masking off the stripes took me WAY too long...I kept doing the math wrong for the thickness and spacing of the stripes. I hate math so much...


The top wing is now all stripied-up! The tape (very low tack) held better than I expected and there was minimal paint under the tapes. Still enough to warrant a few brush-overs by hand though.


The landing gear piece (can't think of a technical term...sorry) is to be painted half green, half purple. I don't want to buy an entire jar of WWI purple for this one piece, so I'll have to find a good mix. Also, can anyone help me find a good mix for the color "linen?" I use basic Testors enamels.


When the decals arrive, I'll be ready to construct the cockpit! I made detailed drawings of where each framing strut goes and how long each one is. They're painted in my custom German Grey and are separated by length.


Next on tap: make seatbelts, paint the instrument panel, get the lozenge decals and make this hunk of plastic look like a plane already!
lcarroll
_VISITCOMMUNITY
Alberta, Canada
Joined: July 26, 2010
KitMaker: 1,032 posts
AeroScale: 1,025 posts
Posted: Tuesday, July 05, 2011 - 03:44 PM UTC
Robby,
Nice paint work on the wing, crisp, clean, and looking very much ready for the follow on construction phase. Also, you got a heck of a deal on the airbrush. On-line here in Canada is roughly double if the pistol grip etc. are included in the price. If I may offer some advice keep it clean, cleaner, and CLEANEST and it will serve you well for a lifetime of modeling. I had an old Paasche VL-1 single action that I passed on to my son after 30 years of use and it's still going strong!
So, Grand Theft Auto???? Please don't tell me your wheels got stolen!?

Keep the updates coming.........she's looking good.

Cheers,
Lance
 _GOTOTOP