Nice! – with a bit of clear orange this will look great, not to much and not to little...
Mikael
Early Aviation
Discuss World War I and the early years of aviation thru 1934.
Discuss World War I and the early years of aviation thru 1934.
Hosted by Jim Starkweather
KotS GB 2011 Roland D.VIa wing_nut

OEFFAG_153

Joined: February 19, 2010
KitMaker: 1,473 posts
AeroScale: 1,450 posts

Posted: Wednesday, August 24, 2011 - 03:17 AM UTC
chukw1

Joined: November 28, 2007
KitMaker: 817 posts
AeroScale: 729 posts

Posted: Wednesday, August 24, 2011 - 03:57 AM UTC
What? Dovetailed planks and pencilled grain? No way- just, wow! You're a true inspiration, Marc- cheers!
chuk
chuk

wing_nut

Joined: June 02, 2006
KitMaker: 1,212 posts
AeroScale: 468 posts

Posted: Thursday, August 25, 2011 - 04:19 AM UTC
Mikael, Chuck... thanks so much for the compliments.
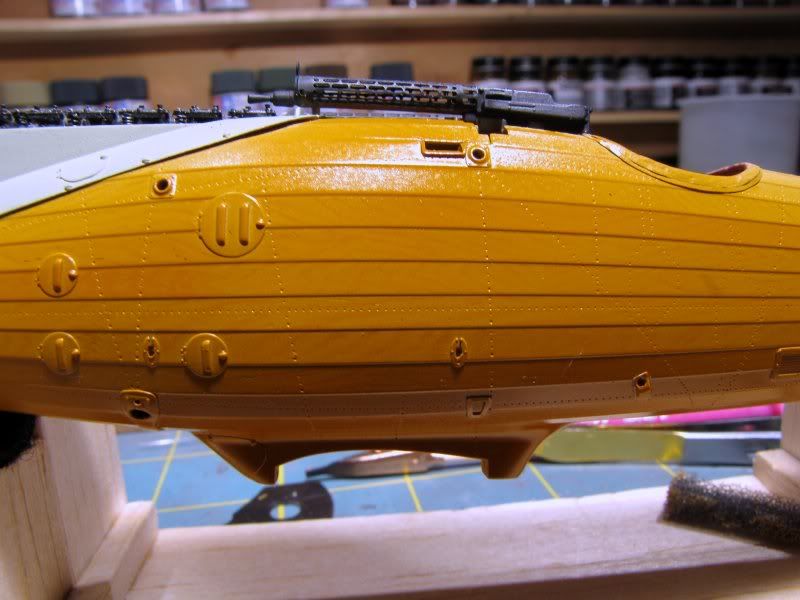
Ah, the lessons learned when modeling. They never cease. I think the idea worked well if not the application. The effect I achieved are very subtle. On close inspection the grain can be seen but from what would be considered a normal viewing distance i think a bit too subtle. The grain would have "popped" more if I had A) not toned it down before the over coat and B) used I different color pencil. The pencil color is close to the over coat color so it is blocked quite a bit. A darker color, maybe even a medium gray, would have given a touch of contrast. C) Too much orange in the yellow. The smear on a piece of paper looked good but it is fairly orange on the model.
Am I being too critical of myself? Your opinions please. I am on the fence to strip/redo.


Kornbeef

Joined: November 06, 2005
KitMaker: 1,667 posts
AeroScale: 1,551 posts

Posted: Thursday, August 25, 2011 - 08:10 PM UTC
Honestly Marc, It's a difficult one to call. Everything you say is right of course, but It does loook very nice as is.
Hard to say from one pic but my first thought was the Clear orange/yellow is a little too intense (for my taste alone, not from an authorative POV) I always think of Rolies paler probably because of the Data file & WNW profiles show it so
Whether it is worth stripping back, I really couldnt say, I'm sure in the flesh she looks much different anyway.
So my position isnt on the fence... its floating above hanging from a hot air balloon


JackFlash

Joined: January 25, 2004
KitMaker: 11,669 posts
AeroScale: 11,011 posts

Posted: Friday, August 26, 2011 - 04:08 AM UTC
I have been know to be full of hot air, but my feet have not left the ground because of it. In this scale you might consider adding some darker veins of grain over the fuselage as is. Then add a translucent mist coat.

wing_nut

Joined: June 02, 2006
KitMaker: 1,212 posts
AeroScale: 468 posts

Posted: Friday, August 26, 2011 - 01:21 PM UTC
Just couldn't get myself to go backward. So I went forward instead. And if you thank that looks stark in the photo... you should see it here and now  Need to work on that a bit with some toning down and weathering. I did oil the wood with some raw umber and while still dark it has a more appealing tone I think.
I have a new favorite product. I used Frog Tape for the first time for the stripes. The stuff is awesome. Best edges i have gotten yet. I can't wait to have to mask something else now.
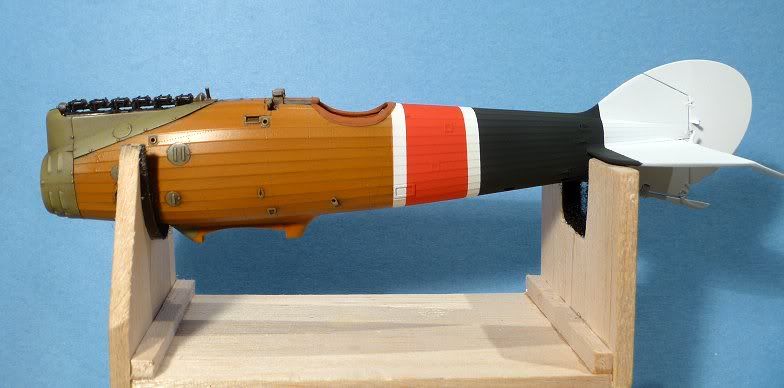
 Need to work on that a bit with some toning down and weathering. I did oil the wood with some raw umber and while still dark it has a more appealing tone I think.
I have a new favorite product. I used Frog Tape for the first time for the stripes. The stuff is awesome. Best edges i have gotten yet. I can't wait to have to mask something else now.

lcarroll

Joined: July 26, 2010
KitMaker: 1,032 posts
AeroScale: 1,025 posts

Posted: Friday, August 26, 2011 - 03:45 PM UTC
Marc,
I like the end result with your added raw umber application. The wood effect is very subtle, which a great modeler told me recently is the key in many effects/applications. (think it was a guy with a callsign Wingnut!?)
The last photo is eye-catching and very much "on the mark". Now that you've commited to the next stage I beleive you should continue to forge on ahead; she's looking mighty fine at this point.
Cheers,
Lance


wing_nut

Joined: June 02, 2006
KitMaker: 1,212 posts
AeroScale: 468 posts

Posted: Wednesday, August 31, 2011 - 02:27 PM UTC
Lance... sos sorry mate but missed your response. Thanks for the compliments my friend.
Just 1 update pic but at least it shows I've gotten closer to wing mounting/rigging. But 1st... tape, tape, tape, tape, tape, and then more tape ;_|
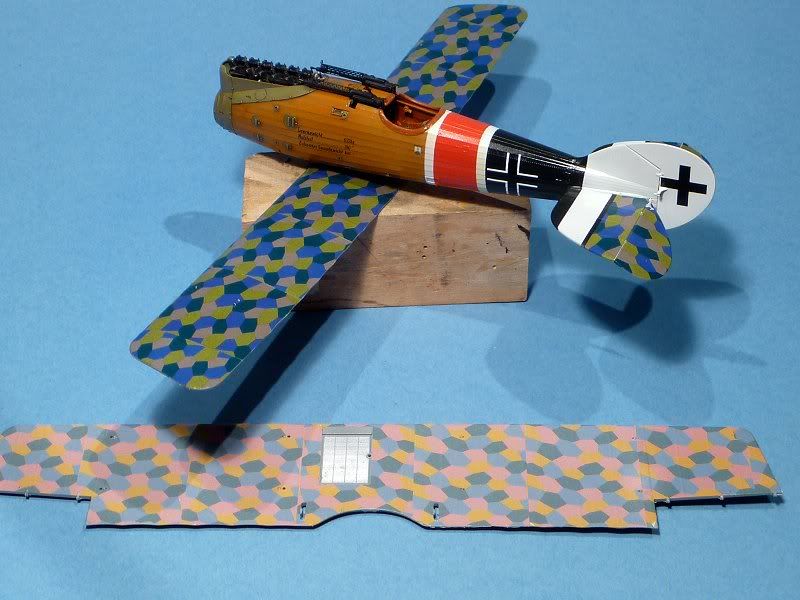
Just 1 update pic but at least it shows I've gotten closer to wing mounting/rigging. But 1st... tape, tape, tape, tape, tape, and then more tape ;_|


OEFFAG_153

Joined: February 19, 2010
KitMaker: 1,473 posts
AeroScale: 1,450 posts

Posted: Wednesday, August 31, 2011 - 07:08 PM UTC
Hi Marc,
I think this is jelling togehter really well – wood, loz and paint – well done, this will be an eyecatcher. I think you did the right call with raw umber, to my eyes I think the wood tone is spot on.
Best Regrads
Mikael
I think this is jelling togehter really well – wood, loz and paint – well done, this will be an eyecatcher. I think you did the right call with raw umber, to my eyes I think the wood tone is spot on.
Best Regrads
Mikael

eseperic

Joined: November 06, 2009
KitMaker: 624 posts
AeroScale: 609 posts

Posted: Wednesday, August 31, 2011 - 09:03 PM UTC
Marc, I am not an expert on the subject... It is very, very nice. I personally appreciate your subtle aproach to weathering, and it really looks nice and convincing. My compliments!
gajouette

Joined: February 01, 2007
KitMaker: 365 posts
AeroScale: 356 posts

Posted: Thursday, September 01, 2011 - 04:04 AM UTC
Marc,
Excellent Roland my friend.Outstanding wood graining and paint.Very impressive subtle wood works.It's a joy to follow this thread.
Highest Regards,
Gregory Jouette


Excellent Roland my friend.Outstanding wood graining and paint.Very impressive subtle wood works.It's a joy to follow this thread.
Highest Regards,
Gregory Jouette


wing_nut

Joined: June 02, 2006
KitMaker: 1,212 posts
AeroScale: 468 posts

Posted: Thursday, September 01, 2011 - 09:04 AM UTC
Mikael, Entoni, Gregory... thanks so much for the kind words.
4 beers? Works for me
4 beers? Works for me


Kornbeef

Joined: November 06, 2005
KitMaker: 1,667 posts
AeroScale: 1,551 posts

Posted: Thursday, September 01, 2011 - 07:45 PM UTC
Marc,
Looking VERY nice, glad you plumped for the red band, I would have done too if I hadnt fell for the humbug scheme.
Good to see the engine nice and level too
How did the cowls fit, any issues with them?
Keith
Looking VERY nice, glad you plumped for the red band, I would have done too if I hadnt fell for the humbug scheme.
Good to see the engine nice and level too

How did the cowls fit, any issues with them?
Keith

wing_nut

Joined: June 02, 2006
KitMaker: 1,212 posts
AeroScale: 468 posts

Posted: Friday, September 02, 2011 - 01:53 AM UTC
Hey Keith
Thanks so much.
The cowl fit very nicely. I did not realize the lower edge is meant to be raised a bit, I went through a brief "I'm not paying attention period" so I was trimming to get the edge to fit flush. Luckily I looked at another build and stopped before I screwed it up entirely. The top edge of the right side needed a minor trim to allow clearance for the exhaust. That is likely doe to my engine sitting up a bit to high though.
thehannaman

Joined: April 04, 2006
KitMaker: 279 posts
AeroScale: 194 posts

Posted: Sunday, September 04, 2011 - 02:51 AM UTC
Love the build Marc! I have this same kit packed away (moving.) I can't wait to relocate my workbench simply to tear into this one.
Keep up the great work!
Keep up the great work!

wing_nut

Joined: June 02, 2006
KitMaker: 1,212 posts
AeroScale: 468 posts

Posted: Sunday, September 04, 2011 - 04:39 AM UTC
Hey Justen. Nice to see you over here. Thanks for the comments. Where ya moving too? Staying in OH? At least I think that was it.. The memory is only going 1 way and it ain't "better"

wing_nut

Joined: June 02, 2006
KitMaker: 1,212 posts
AeroScale: 468 posts

Posted: Wednesday, September 07, 2011 - 06:56 AM UTC
It may not be the "light at the end of the tunnel" yet... but it's getting brighter down there 
in order of appearance...Wheels weathered, cabanes mounted and aligned with a jig. And least A final mock up of the sub-assemblies.
I have about 100 eyelets made. Whatever does not get tweezer-pulted into oblivion will carry over to the next build. I start cutting the brass tubing tonight.
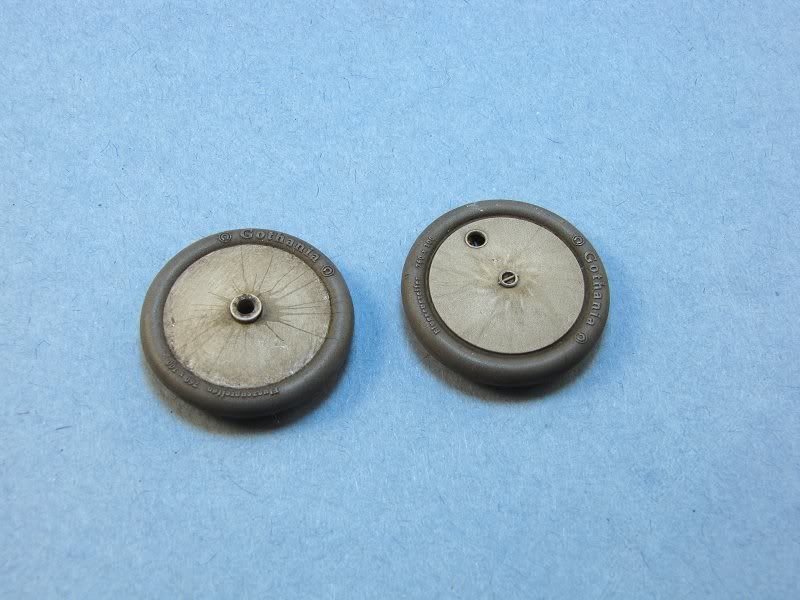
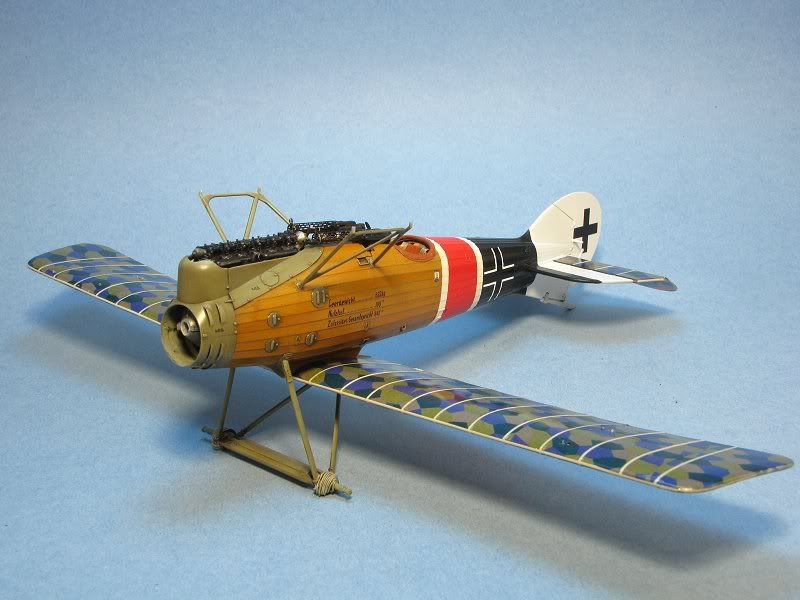
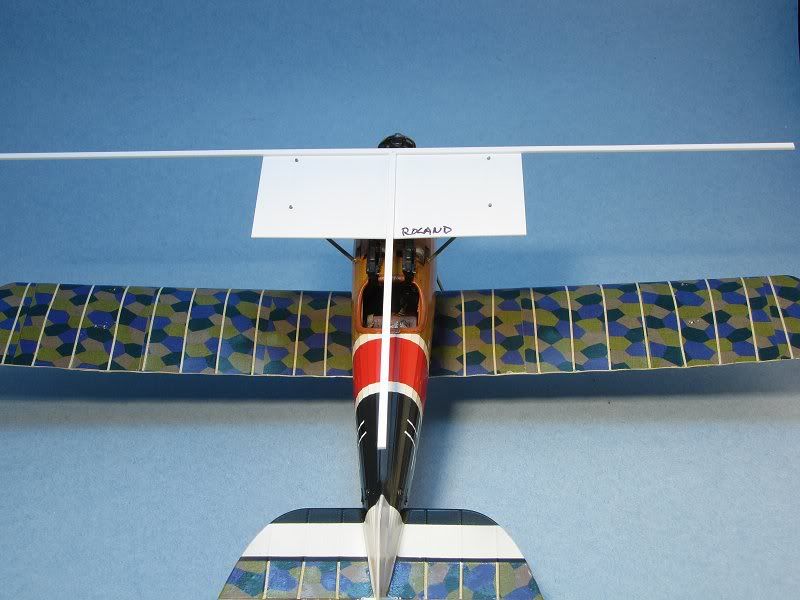
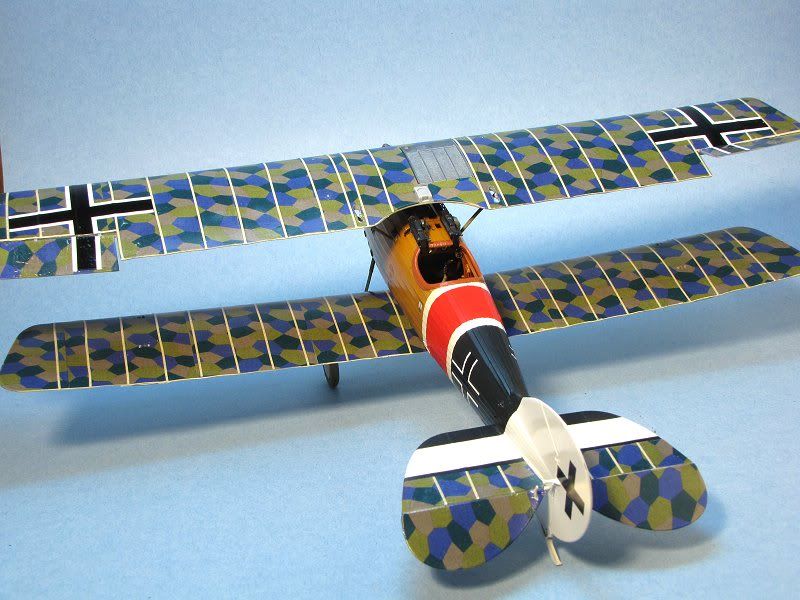

in order of appearance...Wheels weathered, cabanes mounted and aligned with a jig. And least A final mock up of the sub-assemblies.
I have about 100 eyelets made. Whatever does not get tweezer-pulted into oblivion will carry over to the next build. I start cutting the brass tubing tonight.


OEFFAG_153

Joined: February 19, 2010
KitMaker: 1,473 posts
AeroScale: 1,450 posts

Posted: Wednesday, September 07, 2011 - 07:35 AM UTC
Beautiful update Marc 


JackFlash

Joined: January 25, 2004
KitMaker: 11,669 posts
AeroScale: 11,011 posts

Posted: Wednesday, September 07, 2011 - 10:59 AM UTC
Nicely done so far Marc!
lcarroll

Joined: July 26, 2010
KitMaker: 1,032 posts
AeroScale: 1,025 posts

Posted: Wednesday, September 07, 2011 - 03:05 PM UTC
Marc,
Just gotta say it again, she's a beauty. The combo of wood, painted areas, and lozenge is more impressive with every step closer to completion. You've done a great job and I'm really looking forward to the final update.
Cheers!
Lance


Just gotta say it again, she's a beauty. The combo of wood, painted areas, and lozenge is more impressive with every step closer to completion. You've done a great job and I'm really looking forward to the final update.
Cheers!
Lance


wing_nut

Joined: June 02, 2006
KitMaker: 1,212 posts
AeroScale: 468 posts

Posted: Thursday, September 08, 2011 - 10:02 AM UTC
Thanks Lance. I have a bit more than half the lines made with eyelets and turnbuckles attached ready to install. That final update is getting closer all the time.

wing_nut

Joined: June 02, 2006
KitMaker: 1,212 posts
AeroScale: 468 posts

Posted: Thursday, September 15, 2011 - 04:46 PM UTC
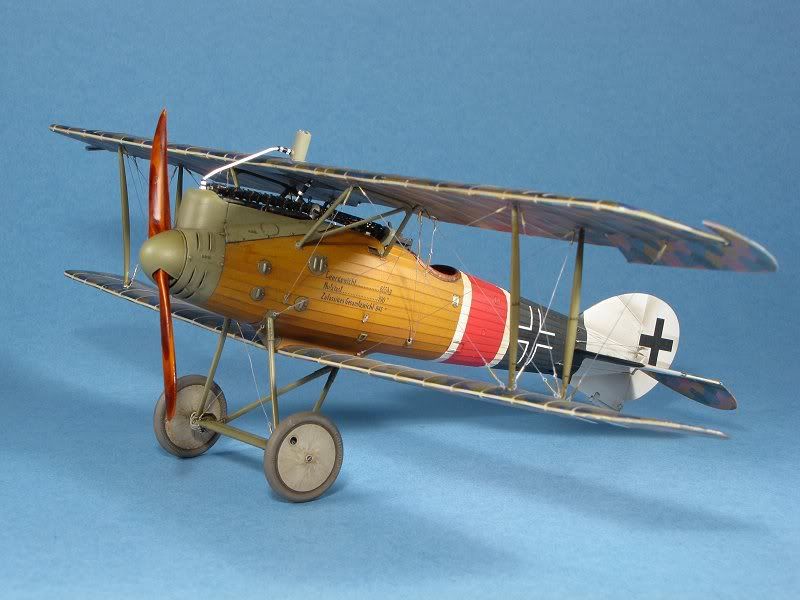
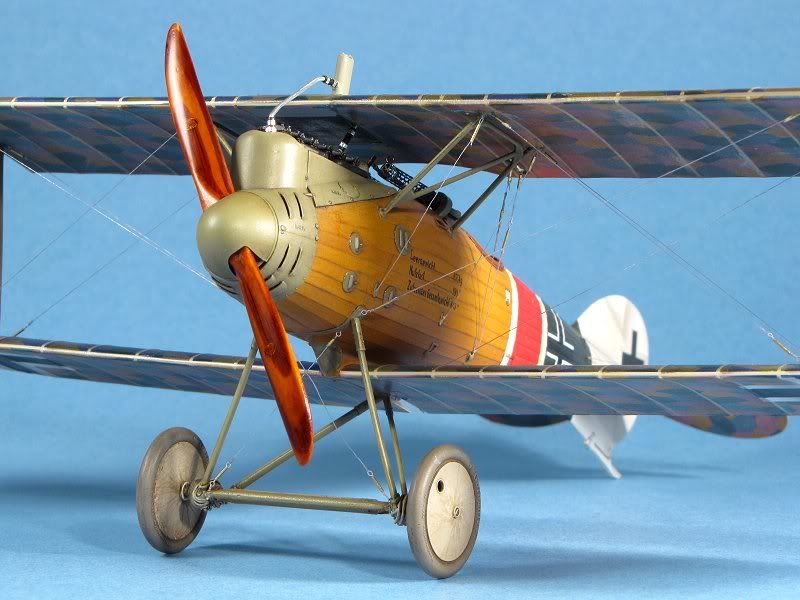
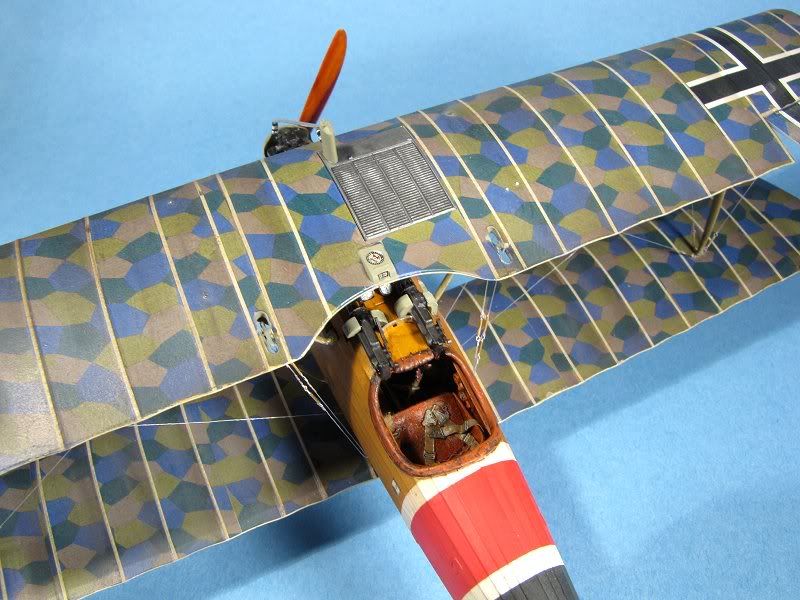
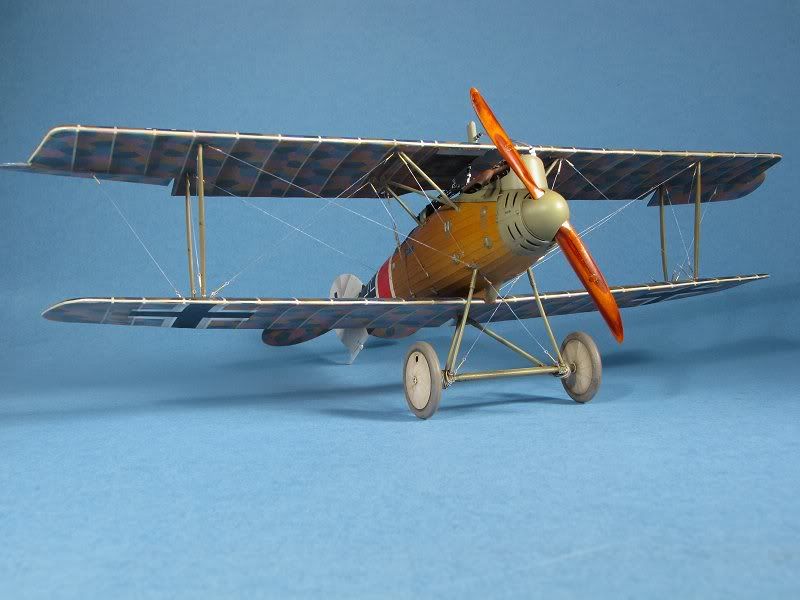
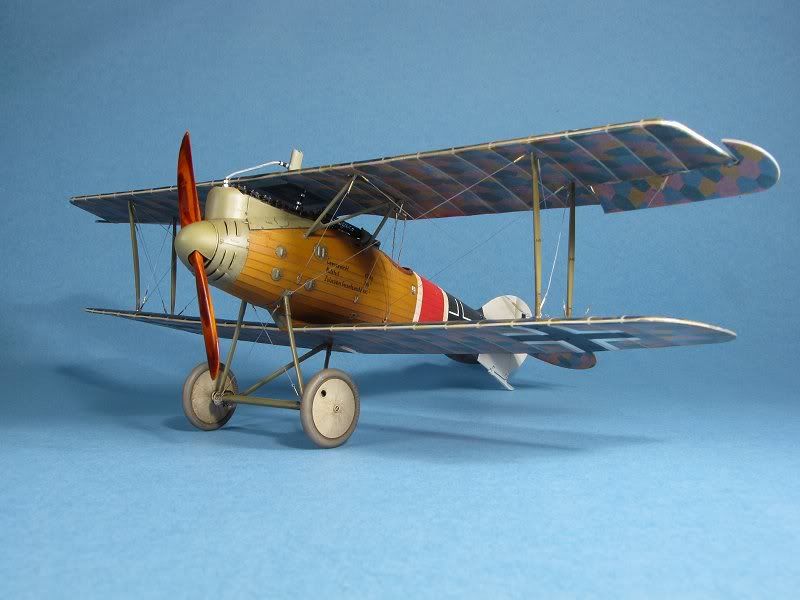
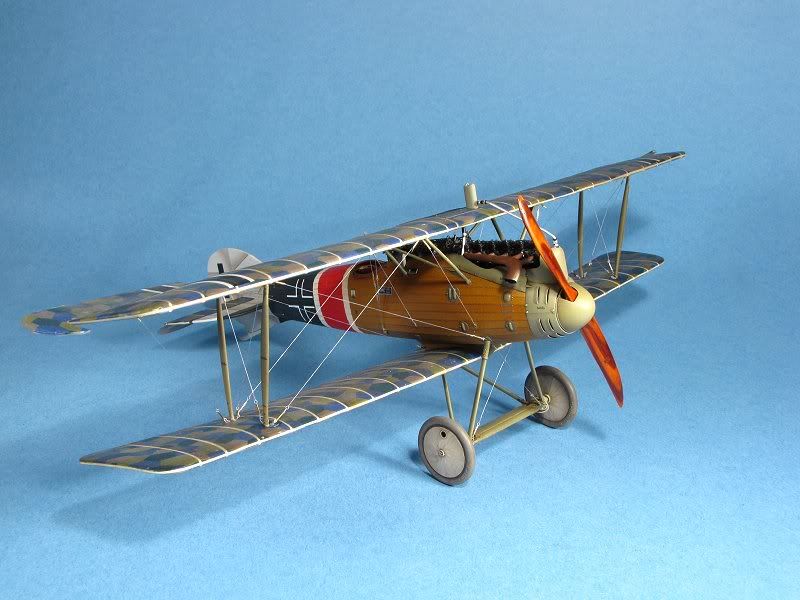
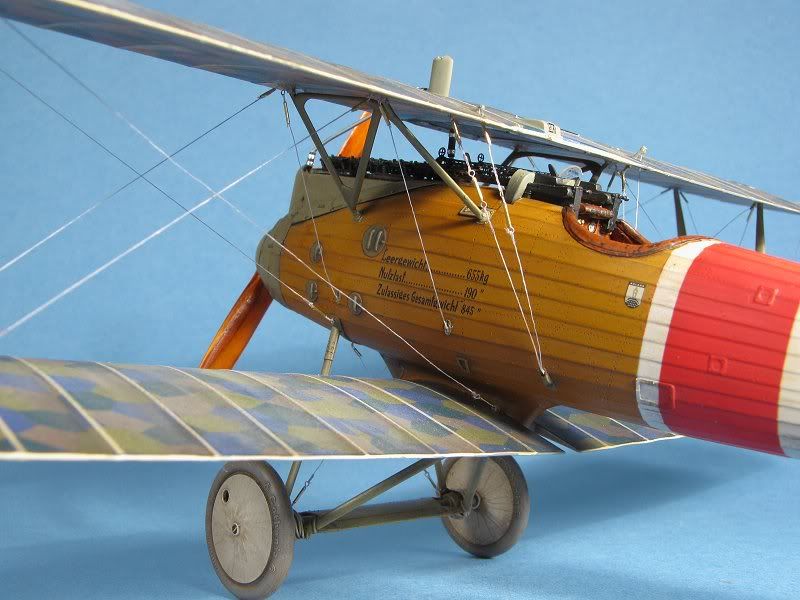
Except that I noticed I need to paint the tail skid I am calling this one done. The photos hide a LOT of things that I am not happy with that would not stand upo to close scruntiny. having said that... once again... oh man did I have some fun builing this. And there will be more. Got a couple of projects that I have put off for a while that need takin' care of but i will be back as soon as possible. And I iwll be lurking too 


JackFlash

Joined: January 25, 2004
KitMaker: 11,669 posts
AeroScale: 11,011 posts

Posted: Thursday, September 15, 2011 - 05:02 PM UTC
Excellent Marc! A fine build you enjoyed !

Kornbeef

Joined: November 06, 2005
KitMaker: 1,667 posts
AeroScale: 1,551 posts

Posted: Thursday, September 15, 2011 - 08:06 PM UTC
Nice sweet build Marc, The red band really adds something, so glad you erred that way and not to black.
Lovely work, yes we all know our own builds shortcomings all to well. Enjoy your other projects, I'm doing the same right now, which explains my lack of input recently. *curse Tamiya for fragging me out of era
TY for sharing Keith
Lovely work, yes we all know our own builds shortcomings all to well. Enjoy your other projects, I'm doing the same right now, which explains my lack of input recently. *curse Tamiya for fragging me out of era

TY for sharing Keith

OEFFAG_153

Joined: February 19, 2010
KitMaker: 1,473 posts
AeroScale: 1,450 posts

Posted: Thursday, September 15, 2011 - 08:09 PM UTC
Superb in so many ways – like Keith says, we all know things about our builds that others don't see... Yours look absolutely beautiful to me!
Mikael
Mikael
 |


