KotS GB 2011 Roland D.VIa warreni
South Australia, Australia
Joined: August 14, 2007
KitMaker: 5,926 posts
AeroScale: 2,201 posts
Posted: Saturday, July 23, 2011 - 10:56 PM UTC
Hello yet again from a Land Downunder.
Yes, I started another kit this beautiful day and got a bit done in about 4 hours of building.
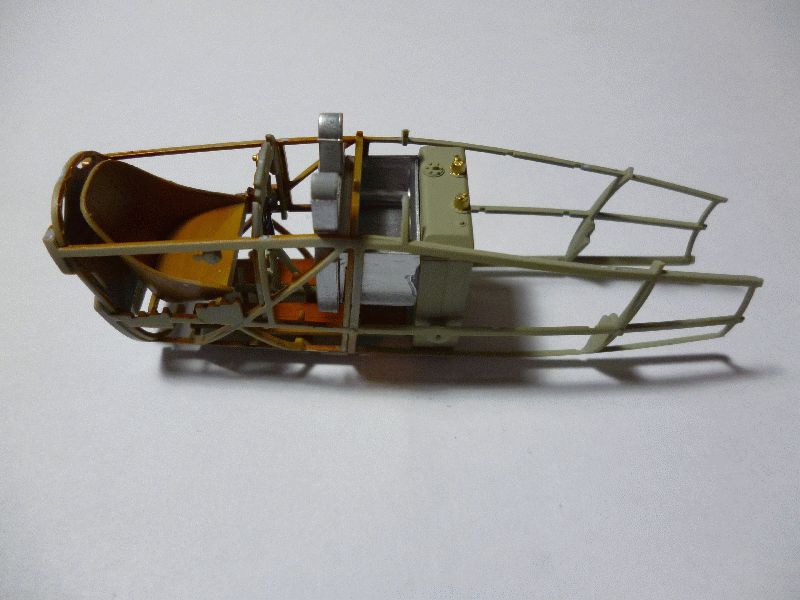
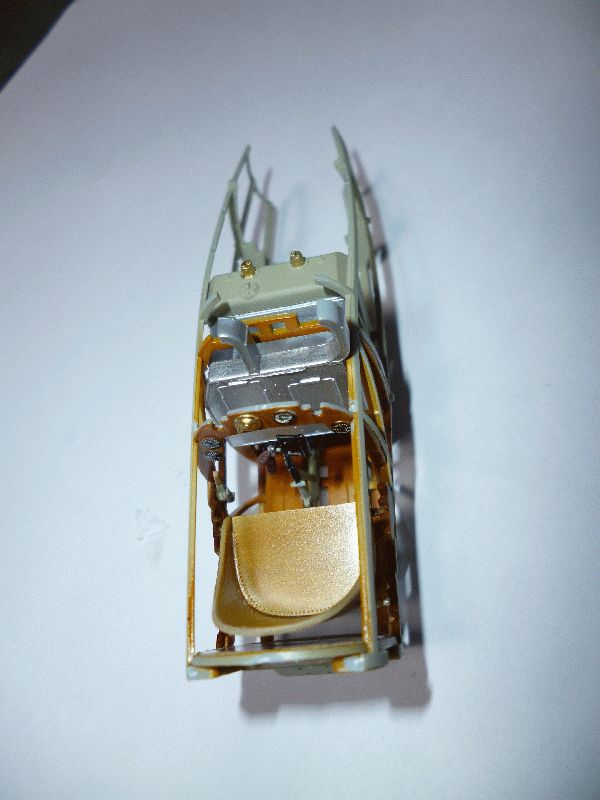
I also got the struts, fuselage and various other bits and bobs painted in that lovely German Grey-green colour.
I also came up with a new painting technique for the wood graining which I think may make it even easier to get good wood-grain than my other techniques, but only in a hand-full of cases. It involved putting the dark grain coat first then putting the wood colour over it. We will see how it pans out after a lot more tries.
Still not sure which colour scheme to go with. Will be either Scheme A , D or E. Have to make up my mind soon as scheme E uses a different engine to the other two. Scheme E uses the 160hp, while A and D use the 200hp engine.
Thanks for looking.

You may be right, I may be crazy.
New Jersey, United States
Joined: June 02, 2006
KitMaker: 1,212 posts
AeroScale: 468 posts
Posted: Sunday, July 24, 2011 - 01:25 AM UTC
Warren, the doctor just called. Your condition has advanced to acute AMS. This will soon be followed by hyper AMS which is characterized by styrene fingernails and rigging wire hair.
But it has not affected your skills. Very nice stuff.
I also just started to Roland but will lag behind you in build rate. Heck, I am already behind

Since you have 3 scheme choices in mind I thought I would let you know I am definitely doing E... if it matters to you and want to something different. It doesn't matter to me for sure. If you do decide to do the same, I plan to do the red fuselage band as suggested as a possibility on the instruction book. It could be like a mini GB within a GB.
South Australia, Australia
Joined: August 14, 2007
KitMaker: 5,926 posts
AeroScale: 2,201 posts
Posted: Sunday, July 24, 2011 - 09:01 AM UTC
Good choice Marc. That photo definitely makes it look as if the band is a different colour to the tail colour which was black on Jasta 23 aircraft. Scheme A is currently in the lead as it is the most colourful scheme available.

You may be right, I may be crazy.
South Australia, Australia
Joined: August 14, 2007
KitMaker: 5,926 posts
AeroScale: 2,201 posts
Posted: Friday, July 29, 2011 - 08:40 PM UTC
Greetings!
Well I have made a bit of progress on the Roland, built the engine and joined the fuselage halves.
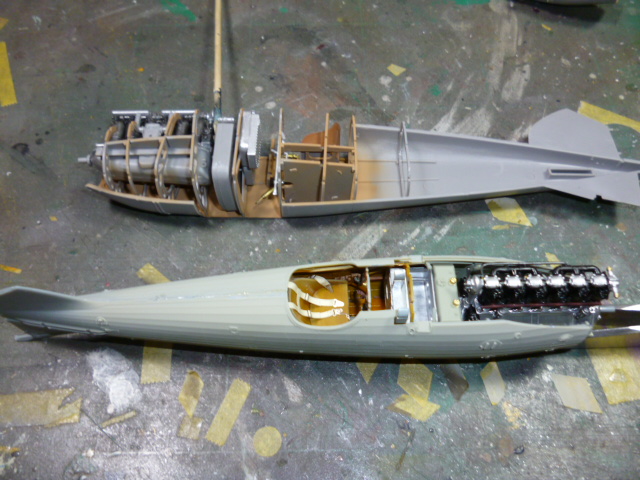
Roland and Albie keeping each other company..
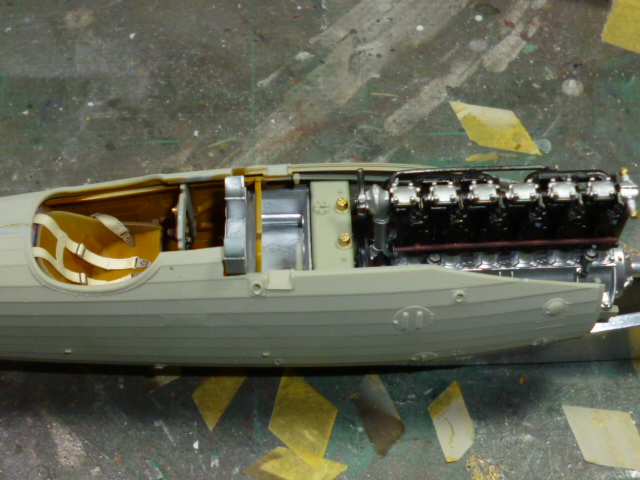
Should get some more done tomorrow.
Cheers!
You may be right, I may be crazy.
South Australia, Australia
Joined: August 14, 2007
KitMaker: 5,926 posts
AeroScale: 2,201 posts
Posted: Saturday, July 30, 2011 - 09:39 PM UTC
Continuing my one-man WW1 aircraft crusade, here are some more shots of the Roland..
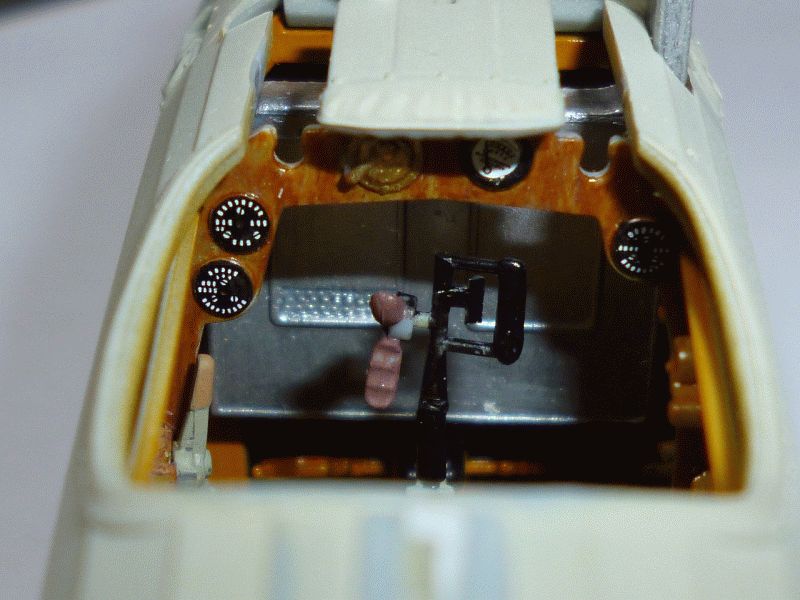
Here is a piccy of the cockpit with the craftily bit of grey paint I put on the throttle lever.. Well I mean the bit I forgot to put the semi-gloss black on.. really.... ahem....
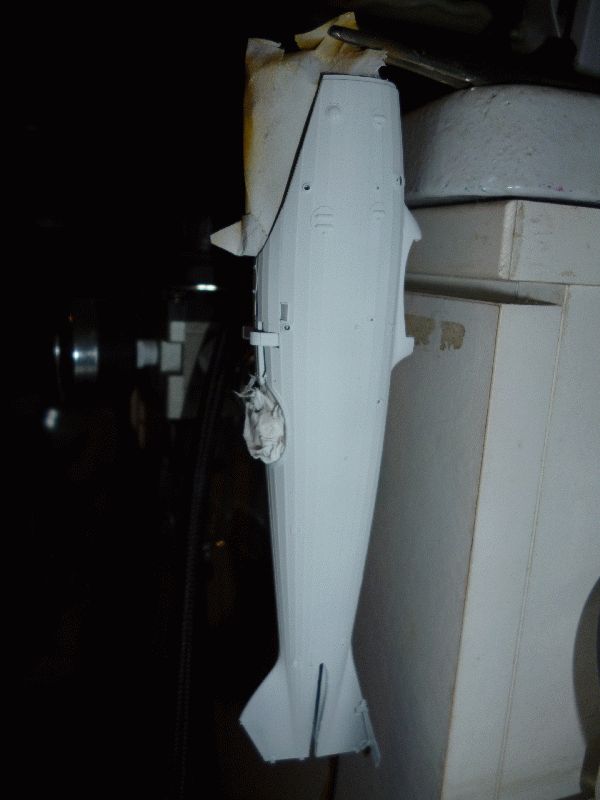
Here is the fuselage just hanging around after its coat of white in preparation for the black stripes. I hung it from its prop shaft using some locking tweezers. I will give it most of the week to dry before I do anything else. I can fiddle with the wings and their lozenge in the meantime..
More news as it comes to hand!

You may be right, I may be crazy.
South Australia, Australia
Joined: August 14, 2007
KitMaker: 5,926 posts
AeroScale: 2,201 posts
Posted: Sunday, July 31, 2011 - 08:35 AM UTC
Hmmm,, I just noticed that someone else has done the stripey scheme, so I will change my mind and do the overall blue scheme..

The white is no wasted though as I can mask it up and have painted on white stripes around the tail rather than use the decals in the kit.
Or I might change my mind again before next weekend..

You may be right, I may be crazy.
South Australia, Australia
Joined: August 14, 2007
KitMaker: 5,926 posts
AeroScale: 2,201 posts
Posted: Saturday, August 06, 2011 - 09:58 PM UTC
Greetings Everyone!
Well it is time for my weekly update. Got a fair bit done over the weekend.
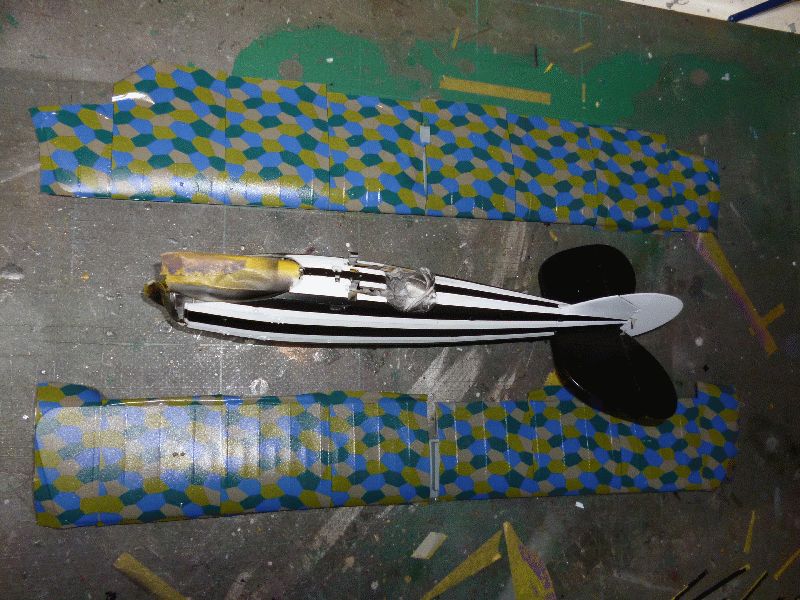
As you can see the fuselage is painted and ready for decalling.
The wings have had their lozenge applied and when it is dry I will trim off the excess and apply the rib tapes.
Thanks for looking.
You may be right, I may be crazy.
New Jersey, United States
Joined: June 02, 2006
KitMaker: 1,212 posts
AeroScale: 468 posts
Posted: Wednesday, August 10, 2011 - 01:44 AM UTC
Nice Warren... very nice. Can't wait to see it all come together.
And oh yeah... don't forget your pills

South Australia, Australia
Joined: August 14, 2007
KitMaker: 5,926 posts
AeroScale: 2,201 posts
Posted: Wednesday, August 10, 2011 - 07:39 AM UTC
Only the blue ones Marc...

Started applying the rib tapes today. underwing first, trim them, then top of wings, then trim them, then around the edges of the wing..... hopefully..
You may be right, I may be crazy.
New Jersey, United States
Joined: June 02, 2006
KitMaker: 1,212 posts
AeroScale: 468 posts
Posted: Wednesday, August 10, 2011 - 03:32 PM UTC
Quoted Text
Only the blue ones Marc... 
Diamond shaped? You dog you!

South Australia, Australia
Joined: August 14, 2007
KitMaker: 5,926 posts
AeroScale: 2,201 posts
Posted: Wednesday, August 10, 2011 - 05:55 PM UTC
You may be right, I may be crazy.
New Jersey, United States
Joined: June 02, 2006
KitMaker: 1,212 posts
AeroScale: 468 posts
Posted: Saturday, August 13, 2011 - 01:31 AM UTC
Not just a "modelling" stud? Good on ya!

New Jersey, United States
Joined: June 02, 2006
KitMaker: 1,212 posts
AeroScale: 468 posts
Posted: Saturday, August 13, 2011 - 01:35 AM UTC
BTW, how did the engine fit? I put my interior together and all seems to go just great. The way the parts fit if you don't get them right they just won't go together. But the prop shaft on mine is about an 1/8" high. That's HUGE. The parts aren't even that thick. can't figure what the heck I could've done

South Australia, Australia
Joined: August 14, 2007
KitMaker: 5,926 posts
AeroScale: 2,201 posts
Posted: Saturday, August 13, 2011 - 07:23 PM UTC
Hehehehe.
No mate, mine went together without a problem in that department. My only little niggle was the left hand machine gun that wouldn't click into place easily.
Is OK now though.
You may be right, I may be crazy.
Alberta, Canada
Joined: January 19, 2008
KitMaker: 6,743 posts
AeroScale: 6,151 posts
Posted: Monday, August 15, 2011 - 03:04 PM UTC
Cool , just gotta love stripes !
Texas, United States
Joined: February 01, 2007
KitMaker: 365 posts
AeroScale: 356 posts
Posted: Monday, August 15, 2011 - 08:11 PM UTC
Warren,
The Roland sure is coming along in a flash my friend.Love the Black & White Stripes.Looking forward to your next update.
Highest Regards,
Gregory Jouette


Västra Götaland, Sweden
Joined: February 19, 2010
KitMaker: 1,473 posts
AeroScale: 1,450 posts
Posted: Monday, August 15, 2011 - 09:19 PM UTC
That is noe very handsome paintjob – like Terri says – you've got to love the B/W stripes.
Are you finding the Lozeneg easy to work with?
Keep it up – Mikael
_________________________________________________________
Just finished the Wingnut Wings Taube. On to the Junkers D.1
South Australia, Australia
Joined: August 14, 2007
KitMaker: 5,926 posts
AeroScale: 2,201 posts
Posted: Monday, August 15, 2011 - 09:31 PM UTC
Thanks Terri, Greg and Mikael.
The lozenge is very easy to work with except around the edges of the wingtips.. But then again nothing would be easy there!

You may be right, I may be crazy.
South Australia, Australia
Joined: August 14, 2007
KitMaker: 5,926 posts
AeroScale: 2,201 posts
Posted: Saturday, August 20, 2011 - 10:40 PM UTC
Just a little progress since my last post.
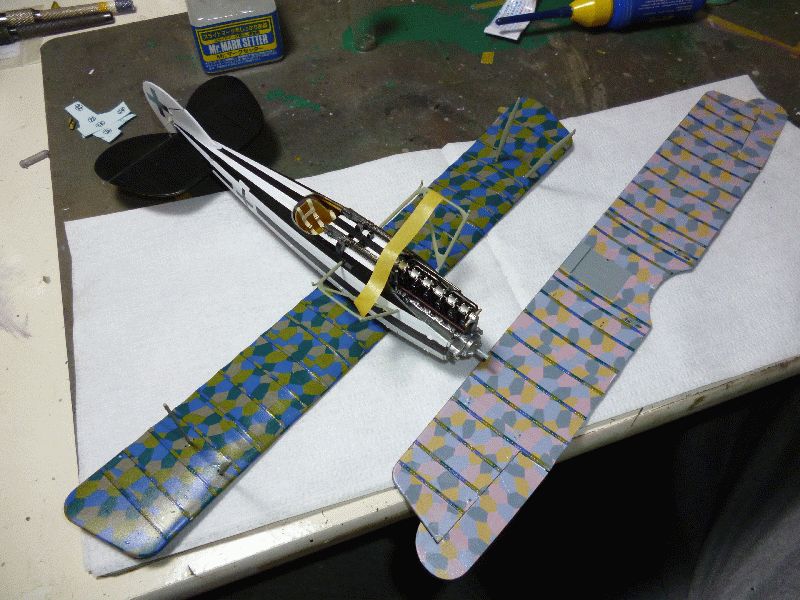
All the decals are on...
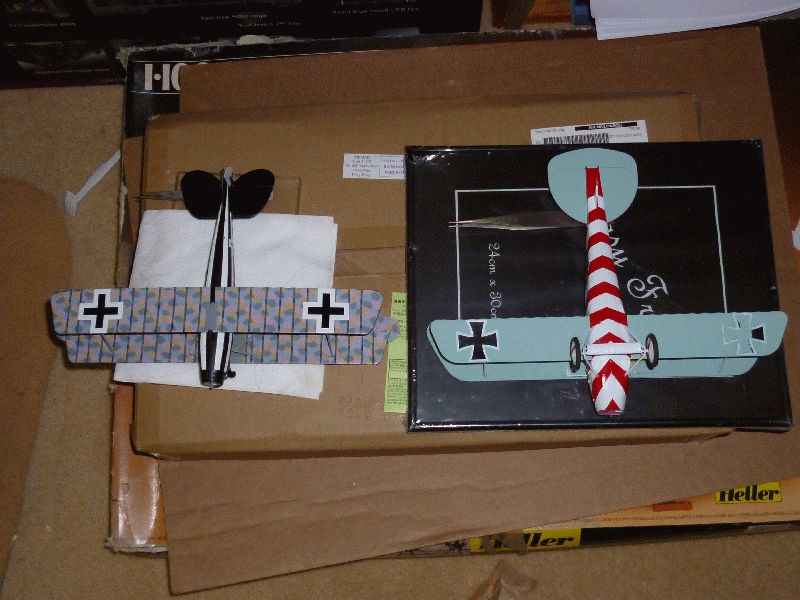
And so is the top wing now.. in stereo with the D.III (OAW)

Next is the rigging and undercarriage and it is almost finished!
Cheers
You may be right, I may be crazy.
New Jersey, United States
Joined: June 02, 2006
KitMaker: 1,212 posts
AeroScale: 468 posts
Posted: Monday, August 22, 2011 - 05:25 PM UTC
That's going to look so sweet when it's all done. Lovin'it.
South Australia, Australia
Joined: August 14, 2007
KitMaker: 5,926 posts
AeroScale: 2,201 posts
Posted: Monday, August 22, 2011 - 06:52 PM UTC
If it comes out looking as good as your models Marc I will be very happy!

You may be right, I may be crazy.
Alberta, Canada
Joined: July 26, 2010
KitMaker: 1,032 posts
AeroScale: 1,025 posts
Posted: Tuesday, August 23, 2011 - 03:24 AM UTC
Quoted Text
That's going to look so sweet when it's all done. Lovin'it.
Warren,
Both you and Marc are doing wonders with this kit. I didn't have this one high on my list but watching your builds has stirred me up considerably, my poor wallet he said with considerable pain!
Looking forward to more.
Cheers,
Lance
Officially Retired as of 20 August 2013 and looking forward to some un-interrupted bench time. Currently starting Roden's Nieuport 28 and hoping to follow that with another WNW Fokker DVII.
South Australia, Australia
Joined: August 14, 2007
KitMaker: 5,926 posts
AeroScale: 2,201 posts
Posted: Saturday, August 27, 2011 - 04:16 PM UTC
Finished..

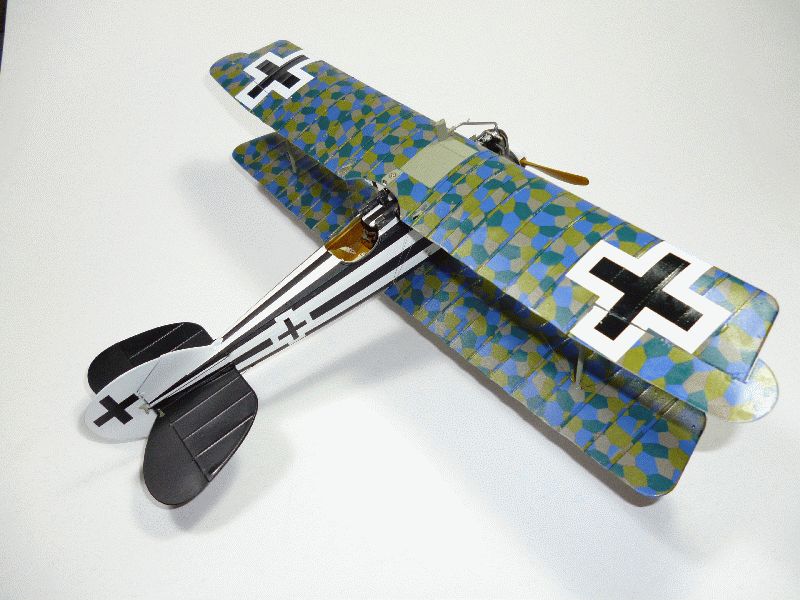
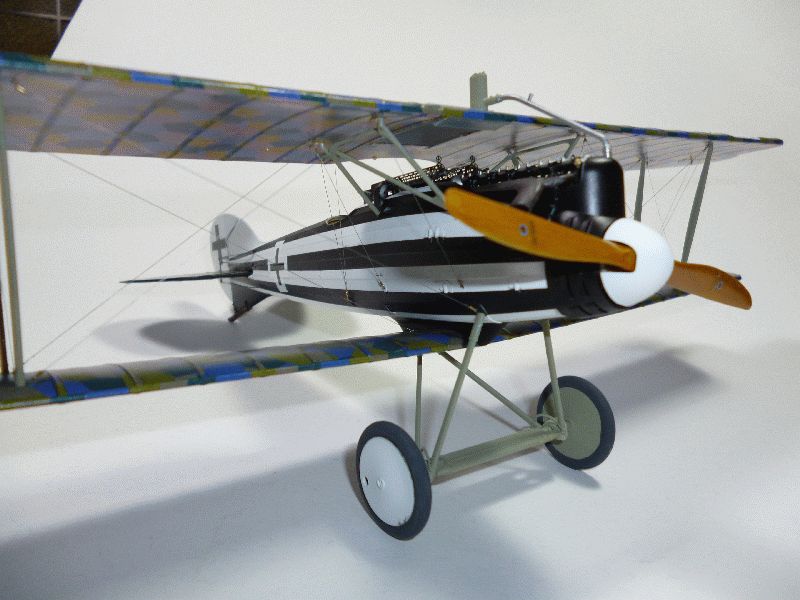
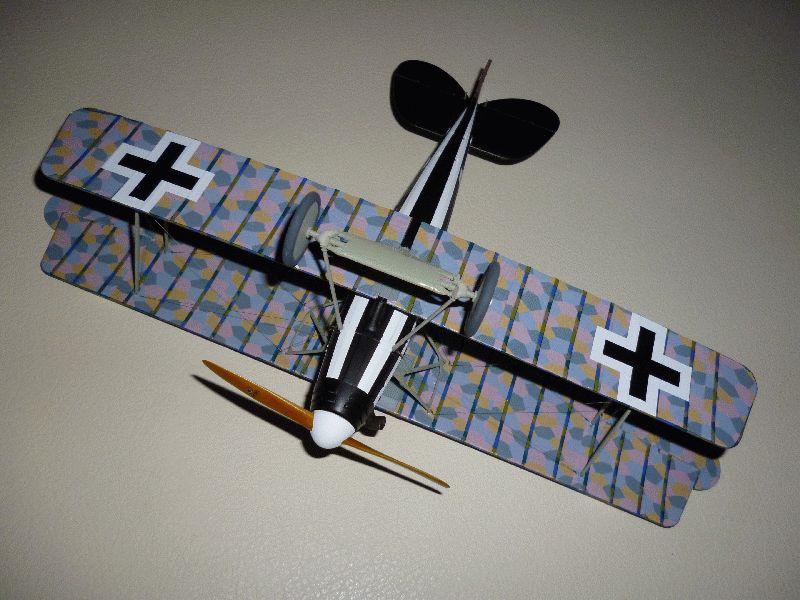
It took a while but it is finally done. One of the best looking of the WNW fighters, and there are a few other schemes I would like to do one day. But that is a long way off!

Cheers
Warren
You may be right, I may be crazy.
Texas, United States
Joined: February 01, 2007
KitMaker: 365 posts
AeroScale: 356 posts
Posted: Sunday, August 28, 2011 - 06:23 AM UTC
Warren,
Outstanding Roland my friend.It's been a joy to follow this thread and your others as well.Once you run out of WNW kits what's next? Whatever you choose no doubts in my mind it or they will be every bit as great.
Highest Regards,
Gregory Jouette


New Jersey, United States
Joined: June 02, 2006
KitMaker: 1,212 posts
AeroScale: 468 posts
Posted: Sunday, August 28, 2011 - 09:40 AM UTC
If it comes out looking as good as your models Marc I will be very happy!
OK, my turn to say that now. Just swap the Marc for Warren please

And what do you mean it took a while

It was only a month and you are building more models at one time than some guys finish in a year.


