_GOTOBOTTOM
Early Aviation
Discuss World War I and the early years of aviation thru 1934.
KotS GB 2001 Pfalz DIIIa Kornbeef
Kornbeef
_VISITCOMMUNITY
England - South East, United Kingdom
Joined: November 06, 2005
KitMaker: 1,667 posts
AeroScale: 1,551 posts
Posted: Saturday, August 06, 2011 - 01:06 PM UTC
Well you might wonder what the old beef has been upto recently and why he's been so quiet.

I hit a stumbing block on the DII, someone felt orry and allowed me a pressie to cheer me up

So it's late here but heres a few pics of progress so far


now later


got her buttoned up today, hope to post more pics and add some flesh (words) then, nitey nite all

Keith
thegirl
_VISITCOMMUNITY
Alberta, Canada
Joined: January 19, 2008
KitMaker: 6,743 posts
AeroScale: 6,151 posts
Posted: Saturday, August 06, 2011 - 04:42 PM UTC
Nice to see you building a Pfalz D.IIIa Keith !
Excellent progress so far

Still though no cookies
Kornbeef
_VISITCOMMUNITY
England - South East, United Kingdom
Joined: November 06, 2005
KitMaker: 1,667 posts
AeroScale: 1,551 posts
Posted: Saturday, August 06, 2011 - 07:44 PM UTC
After doing the Roli it just had to be done Terri... both are quite excellent kits.

Thank you
Kornbeef
_VISITCOMMUNITY
England - South East, United Kingdom
Joined: November 06, 2005
KitMaker: 1,667 posts
AeroScale: 1,551 posts
Posted: Saturday, August 13, 2011 - 08:04 AM UTC
pokes the dead... yooo hoo


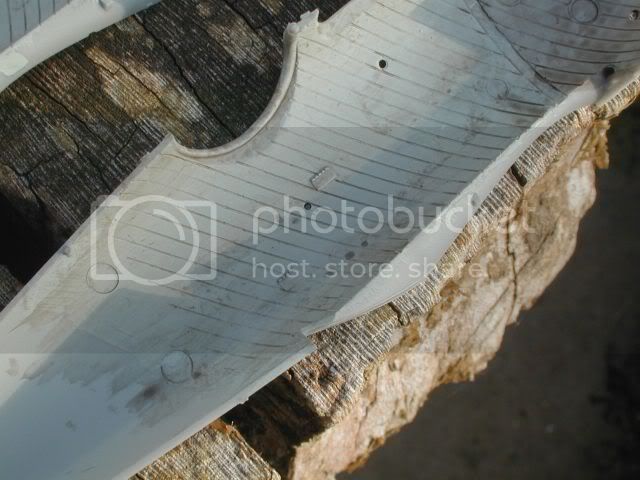
I've leapt on leaps and bounds I'll try to fill in details where I can so here goes.... and yes I see the fingerprints..funny how such things look glaringly obvious under the lens.

Anyway 1st the motor. I wanted to keep the crankcase for another project, at last I found a use for that battleaxe resin engine thats been gathering dust.


On this build I havent gone OTT with engine detail but was fascinated with pics of Pfalz that showed a strange appearance to the inlet manifold, some look almost as if both braches are joined into one. After much poring over my limoted material I decided to fit am interpretation of what might be a blast deflector. The resin block sits in the fuselage painted, the cowls are on and the cylinders just pop into the opening, yes I have to add air pump lines and oil lines yet but theres little else to see. Rocker is loose BTW which explains the gap.

U/c is pretty OOB just deepened the holes for rigging and brought out some of the detail a little around the brackets on the axle shroud.
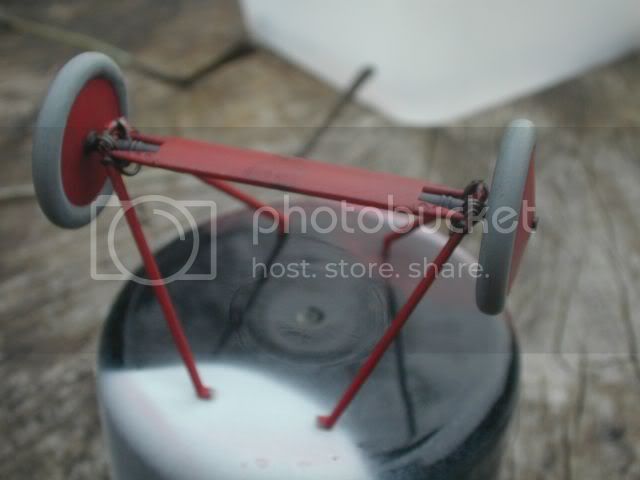

Underside complete with infamous Merc oil leaks


Okay fuselage proper. It just went together like a dream, I thinned the cowlings and fixed them before joining the fuselage even, the nose cowl just slipped behind them nicelty when assembled. I think this a good policy having had cowling issues with my Roli & Albies and hearing of similar with other builds

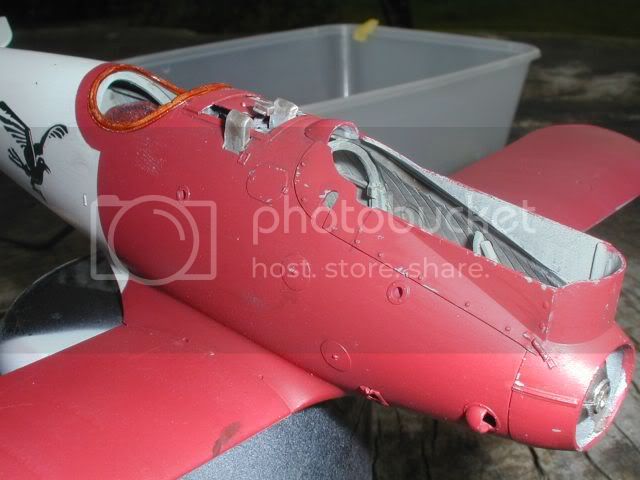


two shots with and without the cylinder block in place, chipping and weathering underway and I'm so glad I spotted those finger prints, some cleaned off, one will be retouched tomorrow.
There really was little to add without going OTT, so I restrained myself to cowl catches made from coiled copper wire and the enclosing panels around the Maxims, some of which is guestimated of course

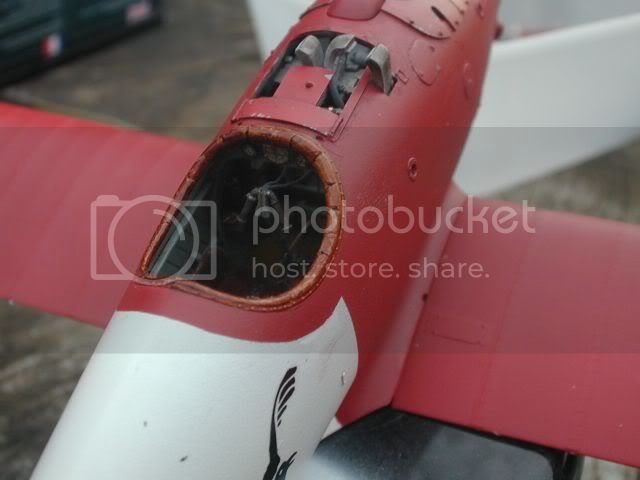

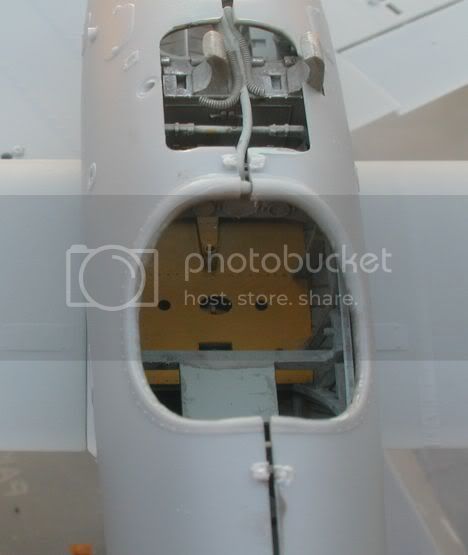
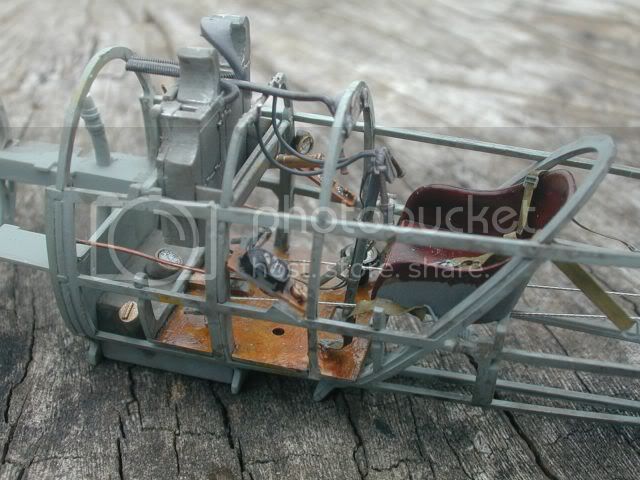
two shots of the pilots nest, a bit dark, the light was turning, the flash worked spradically.

Soon be eyelet and tube time..yay?

Comments always welcome.

K
vulkanizer
_VISITCOMMUNITY
Croatia Hrvatska
Joined: December 26, 2009
KitMaker: 144 posts
AeroScale: 109 posts
Posted: Saturday, August 13, 2011 - 08:49 AM UTC
Beautiful work, realistic pait job
Kornbeef
_VISITCOMMUNITY
England - South East, United Kingdom
Joined: November 06, 2005
KitMaker: 1,667 posts
AeroScale: 1,551 posts
Posted: Saturday, August 13, 2011 - 11:38 AM UTC

Quoted Text

Beautiful work, realistic pait job


Even down to the giants thumbprint... laughs.

Thank you Dani, something of a speed build for me so far.

Keith.
vulkanizer
_VISITCOMMUNITY
Croatia Hrvatska
Joined: December 26, 2009
KitMaker: 144 posts
AeroScale: 109 posts
Posted: Saturday, August 13, 2011 - 09:38 PM UTC
The real one was a full of fingerprints too .

I saw it, but I did not mention because I'm sure you know how to fix it .
lcarroll
_VISITCOMMUNITY
Alberta, Canada
Joined: July 26, 2010
KitMaker: 1,032 posts
AeroScale: 1,025 posts
Posted: Sunday, August 14, 2011 - 05:58 AM UTC
Keith,
Have to add my compliments to the foregoing......very nice! Particularly like your control of the weathering, just enough to take her out of the clean/new category but not too much as I often get trapped by. The Jasta 18 scheme is one that I am planning for either this kit or an Albie, striking. I'll be very interested in how you finish/touch up the white section as I havn't got my head around that challenge just yet.
Two quick questions if you have time; what red have you used on the wings/fuselage? Also the reddish "mahogany" look of the seat, how did you achieve that?
BTW, nice to see you back and active once again; we were missing the "tales from the old oak stump" !!

Cheers,
Lance
OEFFAG_153
_VISITCOMMUNITY
Västra Götaland, Sweden
Joined: February 19, 2010
KitMaker: 1,473 posts
AeroScale: 1,450 posts
Posted: Sunday, August 14, 2011 - 07:06 AM UTC
Hi Keith – you've been very busy haven't you – very nice progress, and a great choice of profile.

I got this kit for my birthday of my brother a while back (He's a nice guy – who mostly builds FW 190s and ME 262s) and I was thinking of doing the same profile once I get to it in the pile!

Looking forward to the continuation

Best Regards

Mikael
Kornbeef
_VISITCOMMUNITY
England - South East, United Kingdom
Joined: November 06, 2005
KitMaker: 1,667 posts
AeroScale: 1,551 posts
Posted: Sunday, August 14, 2011 - 07:12 AM UTC
Hi there Lance.

thanks for the comments.

Paintwise its the old favourite (Games Workshop) Citadel Mechrite red & actually Tamiya white primer for the tail.

The seat was done in Citadel Tallarn Flesh, then over painted with a thin coat of Dark flesh which has a rich colour. finally given a few coats of their fleshwash (A Brown ink) which sadly is out of production I believe but I'm sure art stores stock something similar,

I do like Citadel paints, odd names and some odd colours but their metallics take some beating.

K
thegirl
_VISITCOMMUNITY
Alberta, Canada
Joined: January 19, 2008
KitMaker: 6,743 posts
AeroScale: 6,151 posts
Posted: Sunday, August 14, 2011 - 07:23 AM UTC
Keith you are making very good progress on this build and at a steady pace !
Really love the weathering job you did on the red ! Very eye catching
eseperic
_VISITCOMMUNITY
Croatia Hrvatska
Joined: November 06, 2009
KitMaker: 624 posts
AeroScale: 609 posts
Posted: Sunday, August 14, 2011 - 08:08 PM UTC
Hi Keith! I am completely alien to WWI aircraft. However, my compliments for the fine work there! You really work wonders with your painting/weathering. I enjoy reading the post!
wing_nut
_VISITCOMMUNITY
New Jersey, United States
Joined: June 02, 2006
KitMaker: 1,212 posts
AeroScale: 468 posts
Posted: Tuesday, August 16, 2011 - 03:48 AM UTC
Keith that really looks nice. I like the grooves in the coaming.

What is the model resting on in the photos? That is some awesome looking wood. May sound weird ... but any chance for some "detail" shots of whatever that is? Something looking down at the flat surface to see the pattern/colors.
Mgunns
_VISITCOMMUNITY
Arizona, United States
Joined: December 12, 2008
KitMaker: 1,423 posts
AeroScale: 1,319 posts
Posted: Friday, August 19, 2011 - 03:38 AM UTC
Hi Keith:

This is really turning out nice. I likek the addition to the engine. Adds a bit of interest and I am sure questions will abound as to what and why. I too like the subtle weathering, not way out there but just enough to add interest. The jury is still out on the paint scheme, not sure I would do one, but I like how it is turning out. Something different than the usual silver. Looking forward to seeing more. I like the stump as well, a nice touch to the photo's.

Best

Mark
Kornbeef
_VISITCOMMUNITY
England - South East, United Kingdom
Joined: November 06, 2005
KitMaker: 1,667 posts
AeroScale: 1,551 posts
Posted: Friday, August 19, 2011 - 09:04 AM UTC
Hi all and once again thanks for the comments. Always appreciated

Marc, the wood is a round of oak a friend carved into a table shape witha chainsaw ages ago, its well worn now but weighs a ton....

Entoni, thank you so much, it's nice to know people enjoy what we do.

Mikael, it wasnt my first profile of choice, I was going for Holtzem's Comet but SWMBO liked the red and I've always wanted a Jasta Raben Build in the case.

Terri I have to admit The Pfalz is growing on me... depending what WNW announce I might even get another (planned to build a previous bog standard unpersonalised example.. fresh off the line.

Anyway making good progress, almost ready for the top wing..pics tomorrow if the weathers okay.

Once more Thanks

K

Kornbeef
_VISITCOMMUNITY
England - South East, United Kingdom
Joined: November 06, 2005
KitMaker: 1,667 posts
AeroScale: 1,551 posts
Posted: Friday, August 19, 2011 - 11:03 PM UTC
Thanks again Guys.

Like most us know gomments encourage building... or comments even!

A few pics to show my progress, small details to add, touch ups here and there, bu its almost at top wing on time.

So on with the show. lol
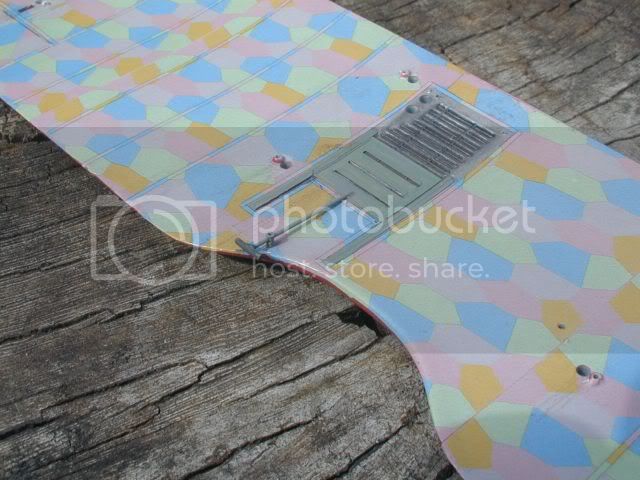
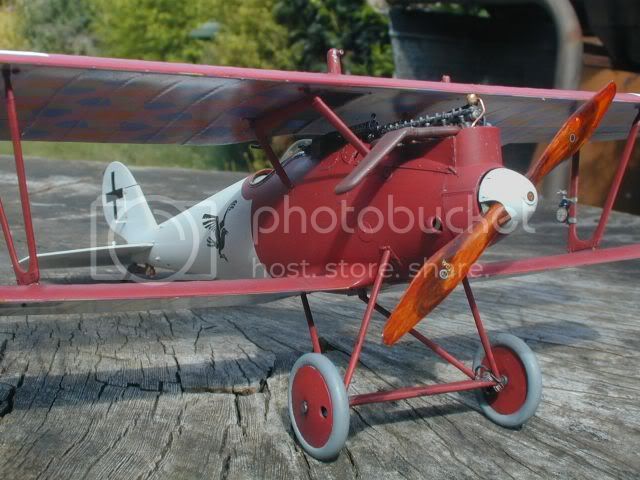
After seeing another build of this profile on the web, the builder had painted the rad surround red, at first i thought it odd then on studying the one pic I have (WNW booklet) I thought the header tower looked a little dark and followed suit, of course red dope over bare solder dipped metal doesnt stick well? I also tried to improve the operating handle on the radiator shutter (WIP here) unfortunately when drilling the top wing I peirced through both it an my finger with the bit... still hasnt learned NOT to model when TIRED :-"


Okay a nose shot.. I added the airpump pipework and the oil pipes from the top front housing (still on the possible but not guaranteed list is the drain cocks for this and the rad...depends how my fiddliness factor goes.
So I made an attempt to show the mounting points for the spinner and added the pfalz logo...whether this is right or wrong I dont care, I wanted one on the build somewhere. Theres a lining up issue with the prop boss and the resin engine block... blutack disguised it here bit needs fixing.


And finally a shot or two of the completish build, the engine, top wing and undercarriage are dryfitted...dont you love WNW tolerances?...sometimes!


All shot on the now infamous stump.. {{6

Keith
OEFFAG_153
_VISITCOMMUNITY
Västra Götaland, Sweden
Joined: February 19, 2010
KitMaker: 1,473 posts
AeroScale: 1,450 posts
Posted: Saturday, August 20, 2011 - 01:42 AM UTC
Keith – beautiful and stunning in every way (Terri would probably say sexy ) That painted? prop is simply superb! I agree with you that the painted rad is very likely and convincing.

Looking forward to the finale!

Mikael
thegirl
_VISITCOMMUNITY
Alberta, Canada
Joined: January 19, 2008
KitMaker: 6,743 posts
AeroScale: 6,151 posts
Posted: Saturday, August 20, 2011 - 01:53 AM UTC
Keith , you my friend are doing one hell of a fine job with this build ! To keep your AMS in check through out the build and working at steady pace I tip my hat to you !

Hurts when you drill into your finger don't it ...........

Looking forward to the rigging and the final steps of the build
lcarroll
_VISITCOMMUNITY
Alberta, Canada
Joined: July 26, 2010
KitMaker: 1,032 posts
AeroScale: 1,025 posts
Posted: Saturday, August 20, 2011 - 04:19 AM UTC
Keith,
Beautiful, just plain beautiful. IMHO you have achieved the perfect balance in weathering for realism and the "scale effect". Looking forward to the photos once the rigging is completed.
Cheers,
Lance
wing_nut
_VISITCOMMUNITY
New Jersey, United States
Joined: June 02, 2006
KitMaker: 1,212 posts
AeroScale: 468 posts
Posted: Monday, August 22, 2011 - 05:28 PM UTC
Gotta love that. Look terrific. The plane... this time... not the stump
Kornbeef
_VISITCOMMUNITY
England - South East, United Kingdom
Joined: November 06, 2005
KitMaker: 1,667 posts
AeroScale: 1,551 posts
Posted: Tuesday, September 06, 2011 - 01:39 AM UTC
Hi all thanks, sorry if I seem to have gone quiet on this, truth is I'm sinning... couldnt resist a Tamya P51. I know its so so wrong
OEFFAG_153
_VISITCOMMUNITY
Västra Götaland, Sweden
Joined: February 19, 2010
KitMaker: 1,473 posts
AeroScale: 1,450 posts
Posted: Tuesday, September 06, 2011 - 02:51 AM UTC

Quoted Text

Hi all thanks, sorry if I seem to have gone quiet on this, truth is I'm sinning... couldnt resist a Tamya P51. I know its so so wrong


Ohhh, You sinner you... (As a matter of a fact I won a Tamiya P47 this weekend – I might follow you on your decent into... )

Mikael
wing_nut
_VISITCOMMUNITY
New Jersey, United States
Joined: June 02, 2006
KitMaker: 1,212 posts
AeroScale: 468 posts
Posted: Tuesday, September 06, 2011 - 06:22 AM UTC
That one s tough to resist. So far I have been able to... but it's still early
RAGIII
_VISITCOMMUNITY
North Carolina, United States
Joined: June 19, 2007
KitMaker: 604 posts
AeroScale: 600 posts
Posted: Tuesday, September 06, 2011 - 11:12 AM UTC
Keith, Stunning build! The prop is amazing!!
RAGIII
67foxtrot
_VISITCOMMUNITY
United States
Joined: February 13, 2008
KitMaker: 36 posts
AeroScale: 35 posts
Posted: Wednesday, November 16, 2011 - 09:25 AM UTC
Keith,

We've been waiting Oh-so-long to see this one finished. I know you have been seduced by the Dark-side, but would really like to see this one finished. It is soooo great and I love the tone of red you have chosen for it, Plus your exhaust painting is PERFECT.

Your student,
Dave
 _GOTOTOP