WIP - WnW Pfalz D.XII 1:32
New South Wales, Australia
Joined: March 26, 2009
KitMaker: 366 posts
AeroScale: 309 posts
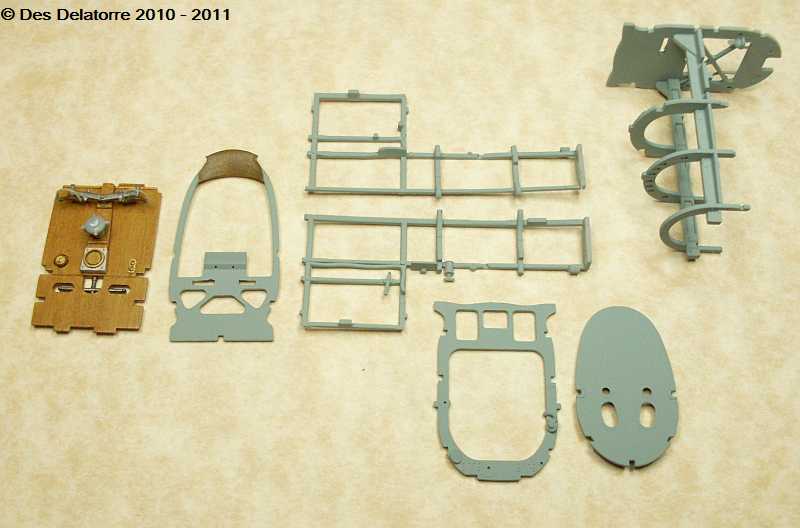
Posted: Wednesday, September 14, 2011 - 01:08 PM UTC
Check my site for 1:32 scale WW1 aircraft model build logs, build techniques, how to make turnbuckles and eyelets plus much more, plenty of photos of my finished models
New South Wales, Australia
Joined: March 26, 2009
KitMaker: 366 posts
AeroScale: 309 posts
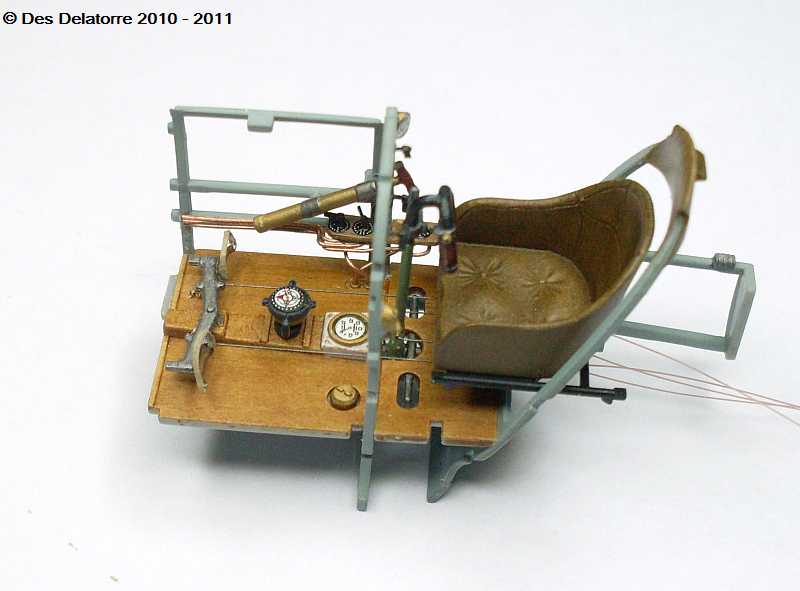
Posted: Wednesday, September 14, 2011 - 01:13 PM UTC
Check my site for 1:32 scale WW1 aircraft model build logs, build techniques, how to make turnbuckles and eyelets plus much more, plenty of photos of my finished models
Colorado, United States
Joined: January 25, 2004
KitMaker: 11,669 posts
AeroScale: 11,011 posts
Posted: Wednesday, September 14, 2011 - 01:17 PM UTC
Alright Des! Looking good.
". . .The most important thing is to know why you build and then get the most that you can out of building." via D.D.
Alberta, Canada
Joined: July 26, 2010
KitMaker: 1,032 posts
AeroScale: 1,025 posts
Posted: Wednesday, September 14, 2011 - 02:12 PM UTC
Des,
Very nice! I am looking forward to more on this one. Got to ask, are the spark plugs RB Motion or have you scratched them??
Cheers,
Lance
Officially Retired as of 20 August 2013 and looking forward to some un-interrupted bench time. Currently starting Roden's Nieuport 28 and hoping to follow that with another WNW Fokker DVII.
New South Wales, Australia
Joined: March 26, 2009
KitMaker: 366 posts
AeroScale: 309 posts
Posted: Wednesday, September 14, 2011 - 02:53 PM UTC
Thanks Lance,
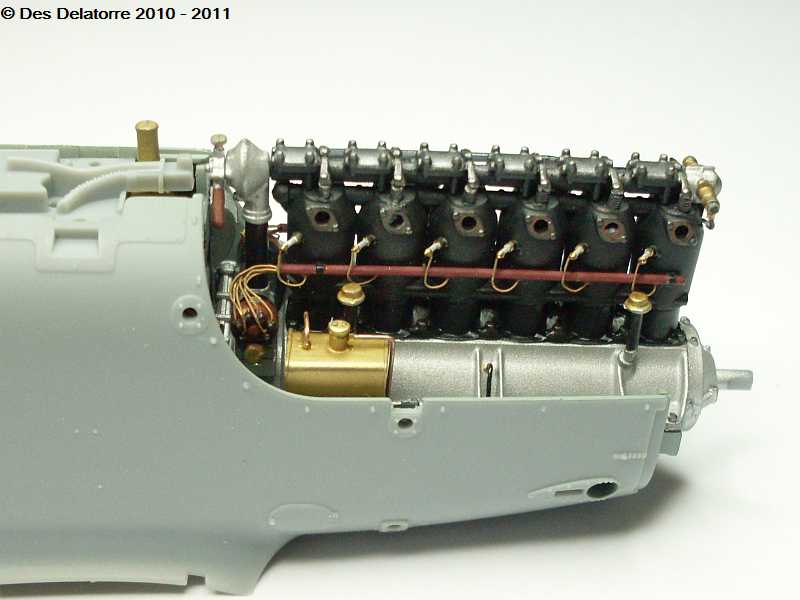
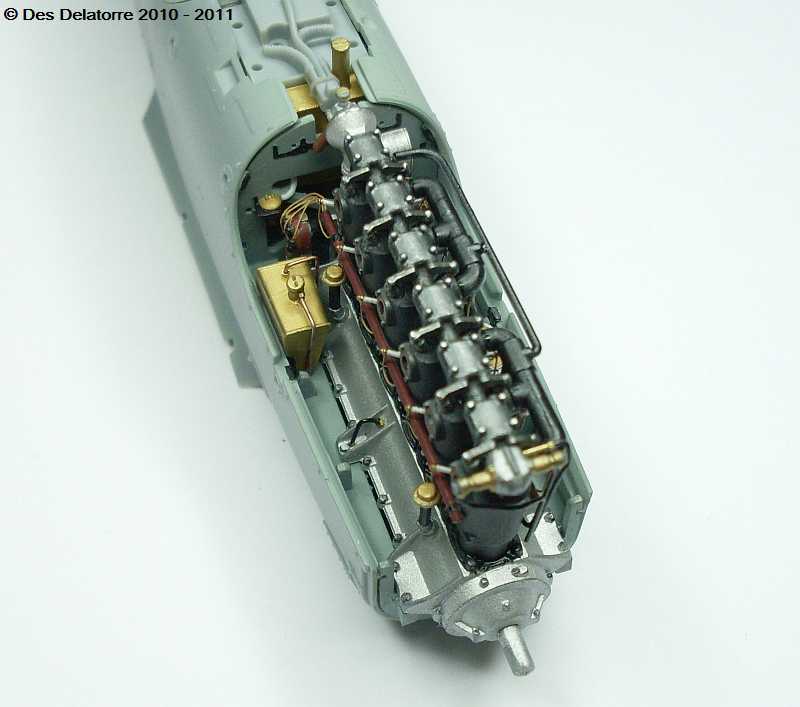
I made the spark plugs, I used 0.4mm brass tube cut to about 3mm lengths, I then slipped the brass tube into a RB Motion brass nut, I used the .025" hex nut P/N 1280B, I used CA to hold it in place leaving 1.0mm of brass tube above the nut, to finish it off I inserted a short length of 0.24,, copper wire into the top of the brass tube for the ignition leads to attach, I painted the insulator with Humbrol Gloss White. It is then a simple matter of drilling 0.4mm holes in the cylinders and fitting each plug, CA hold them in place. These plugs are very simple to make and look the part.
Des.
Check my site for 1:32 scale WW1 aircraft model build logs, build techniques, how to make turnbuckles and eyelets plus much more, plenty of photos of my finished models
Alberta, Canada
Joined: January 19, 2008
KitMaker: 6,743 posts
AeroScale: 6,151 posts
Posted: Wednesday, September 14, 2011 - 03:33 PM UTC
Hi Des , been following your build already , thumbs up my friend !
Terri
Oklahoma, United States
Joined: November 08, 2006
KitMaker: 217 posts
AeroScale: 82 posts
Posted: Wednesday, September 14, 2011 - 04:21 PM UTC
That's just not right! Doing a build before the kit is even available to the rest of us!!!!!

England - South East, United Kingdom
Joined: November 06, 2005
KitMaker: 1,667 posts
AeroScale: 1,551 posts
Posted: Wednesday, September 14, 2011 - 06:43 PM UTC
Beautiful work as always Des
Still can't cure the AMS even with sausage finger implants & olde eyes.
Västra Götaland, Sweden
Joined: February 19, 2010
KitMaker: 1,473 posts
AeroScale: 1,450 posts
Posted: Wednesday, September 14, 2011 - 08:20 PM UTC
Quoted Text
Beautiful work as always Des
Second that!
Mikael
_________________________________________________________
Just finished the Wingnut Wings Taube. On to the Junkers D.1
New South Wales, Australia
Joined: March 26, 2009
KitMaker: 366 posts
AeroScale: 309 posts
Posted: Wednesday, September 21, 2011 - 10:30 PM UTC
Thank you for all the kind comments.
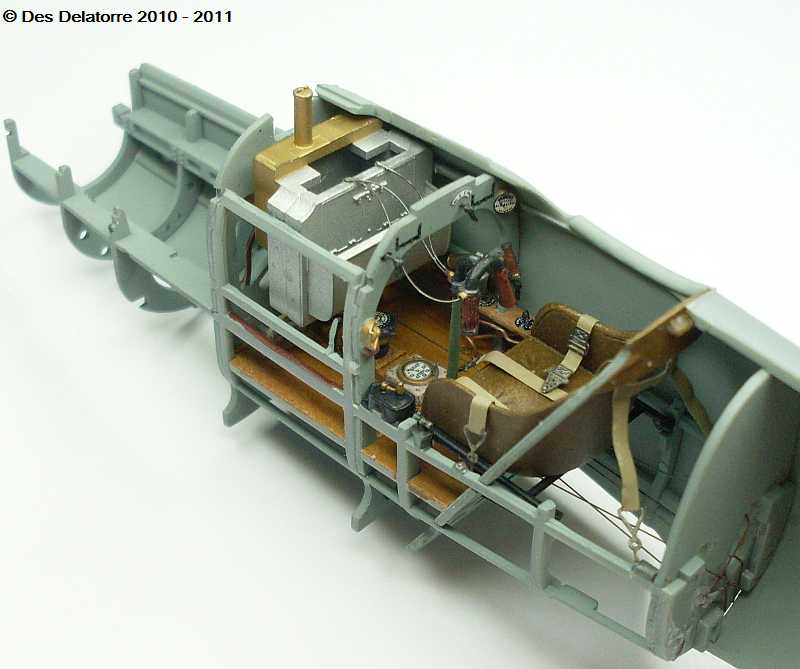
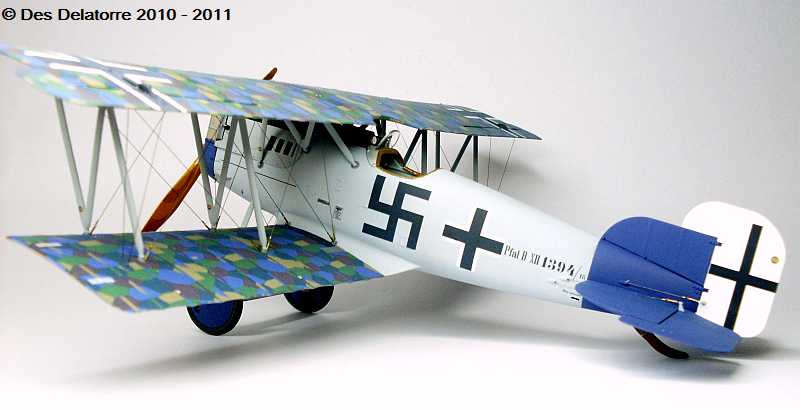
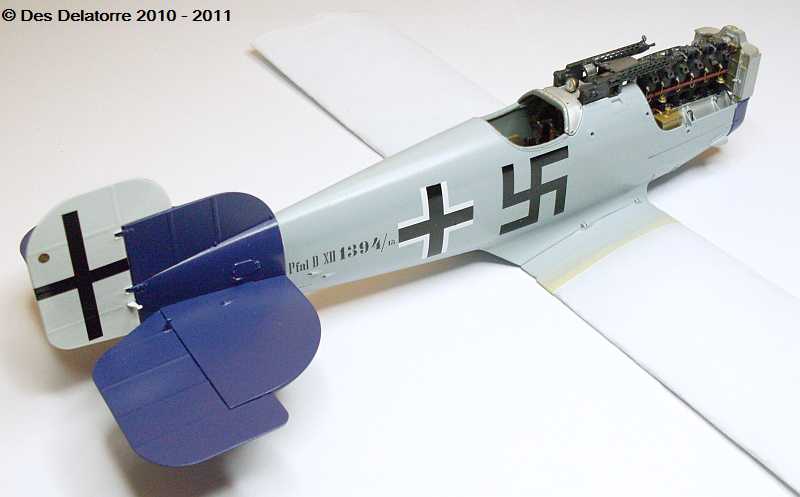
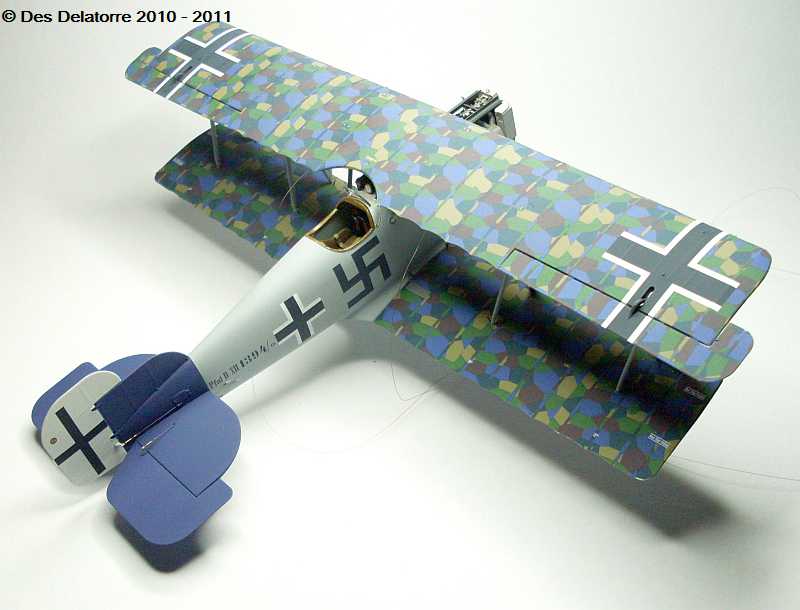
just a quickie up-date showing the fuselage painted and the decals on, the tail planes, fin and rudder are now fitted.
Des.
Check my site for 1:32 scale WW1 aircraft model build logs, build techniques, how to make turnbuckles and eyelets plus much more, plenty of photos of my finished models
New Jersey, United States
Joined: June 02, 2006
KitMaker: 1,212 posts
AeroScale: 468 posts
Posted: Thursday, September 22, 2011 - 09:19 AM UTC
WOW... If I didn't know better I'd swear I was at McDonald's because I'm lovin' it!
Colorado, United States
Joined: January 25, 2004
KitMaker: 11,669 posts
AeroScale: 11,011 posts
Posted: Thursday, September 22, 2011 - 03:14 PM UTC
He does make it look easy. Des, I know your doing the blog on your site but can you compare the fit of this kit to say one of WNW early kits? Are the tolerances the same or slightly looser? Any word on the fit of the cowls? Are you going to add some plumbing or close up the motor with the cowls?
". . .The most important thing is to know why you build and then get the most that you can out of building." via D.D.
New South Wales, Australia
Joined: March 26, 2009
KitMaker: 366 posts
AeroScale: 309 posts
Posted: Thursday, September 22, 2011 - 03:54 PM UTC
Thanks Stephen. As you know I have built nearly all of the Wingnut kits (not the Gotha) and I must say that this would have to be their best one yet. The fit of parts is still tight, it is most important to remove all traces of paint from the parts to be assembled, this is no big deal and makes for a perfect fitting part. This is a trademark of Wingnuts and I believe most builders who have completed more than one kit have come to realise that this is the way their kits are manufactured.
There are the usual instruction abnormalities which seems to be prevelent in all of their instructions, maybe this is one area that needs to be looked at. It is very important to read right through the instructions before assembly commences, familiarise yourself with every step.
The detail in this kit is excellent but they could have added some smaller items which, with todays injection moulding technology could quite easily be done and would further add to the already well detailed model.
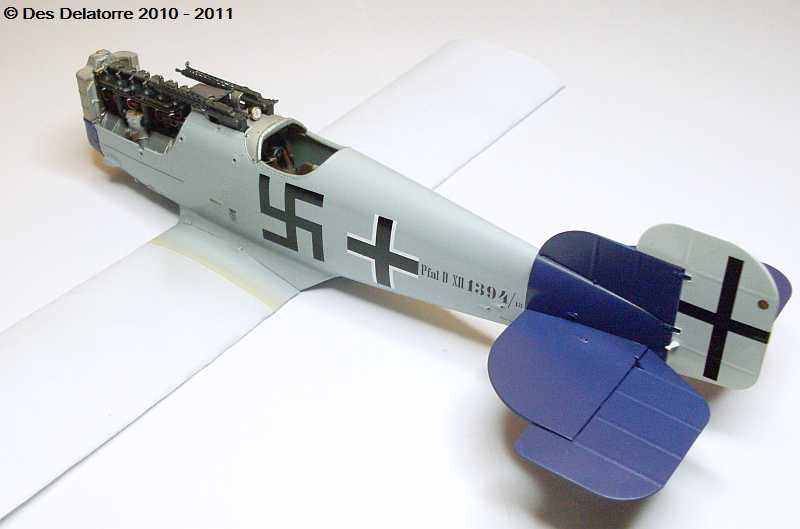
I am closing the cowls completely on this one so I won't be adding any more to the engine, but it is a beautiful engine and with a little bit of extra plumbing could well be a model in it's own right. The engine cowl fits quite well as a dry fit, I don't see any problems arising here.
I highlight any 'errors' I find with the kit and the instructions in my build log on my sight just to pre-warn those wishing to build this model, it is not to discredit Wingnuts in any way.
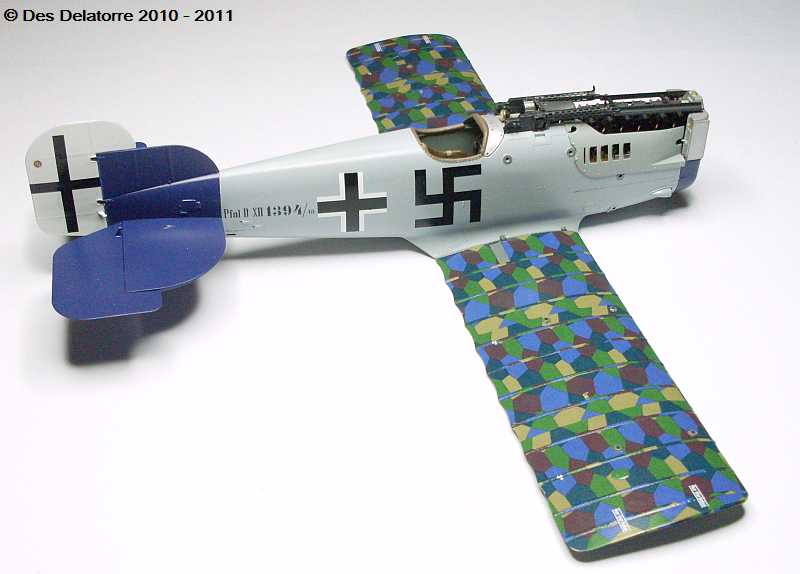
The decals I have applied so far are brilliant, they conform well to any shape and adhere very well, I always use Mr Mark Softer on to the glossy surface before applying the decals, the lozenge decals are next to be fitted.
All in all a brilliant kit, easy to assemble, perfect fit of parts, beautiful detail, easy to work plastic, excellent decals and apart from the sometimes confusing instructions it is a kit I would highly recommend.
Des.
Check my site for 1:32 scale WW1 aircraft model build logs, build techniques, how to make turnbuckles and eyelets plus much more, plenty of photos of my finished models
New South Wales, Australia
Joined: March 26, 2009
KitMaker: 366 posts
AeroScale: 309 posts
Posted: Thursday, September 22, 2011 - 10:36 PM UTC
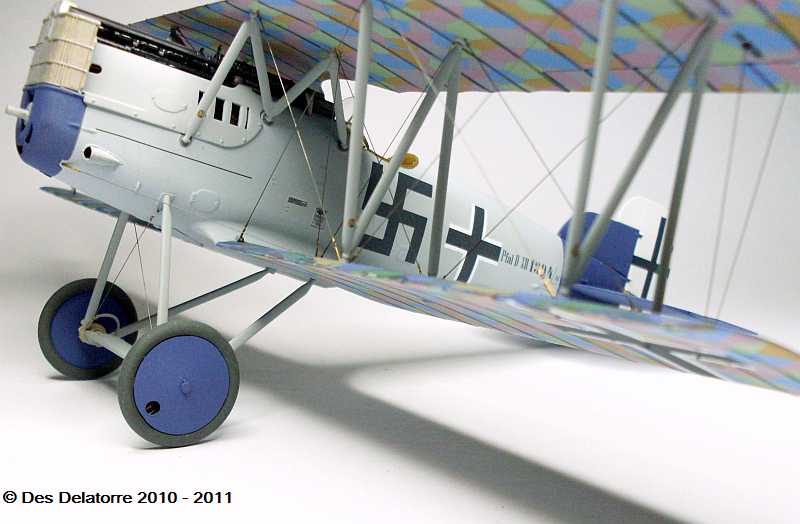
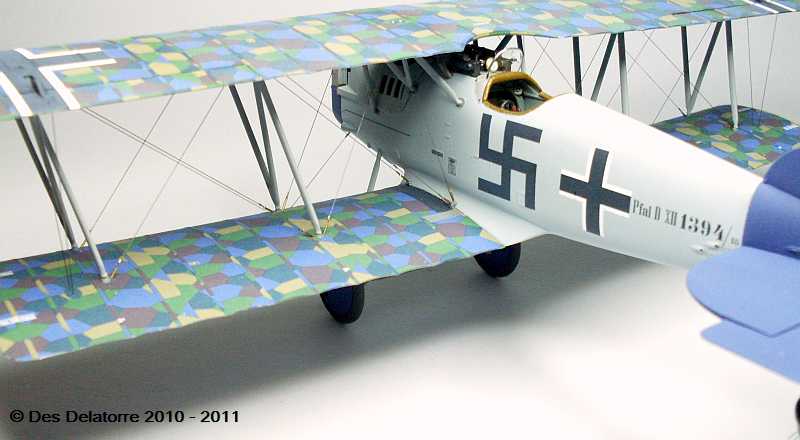
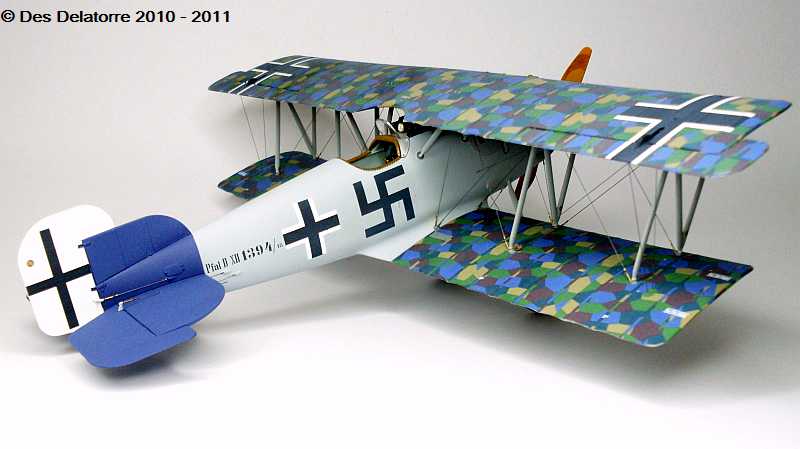
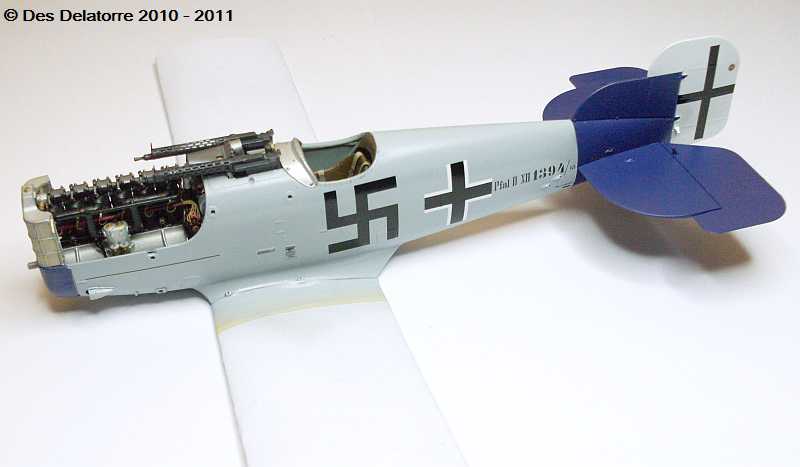
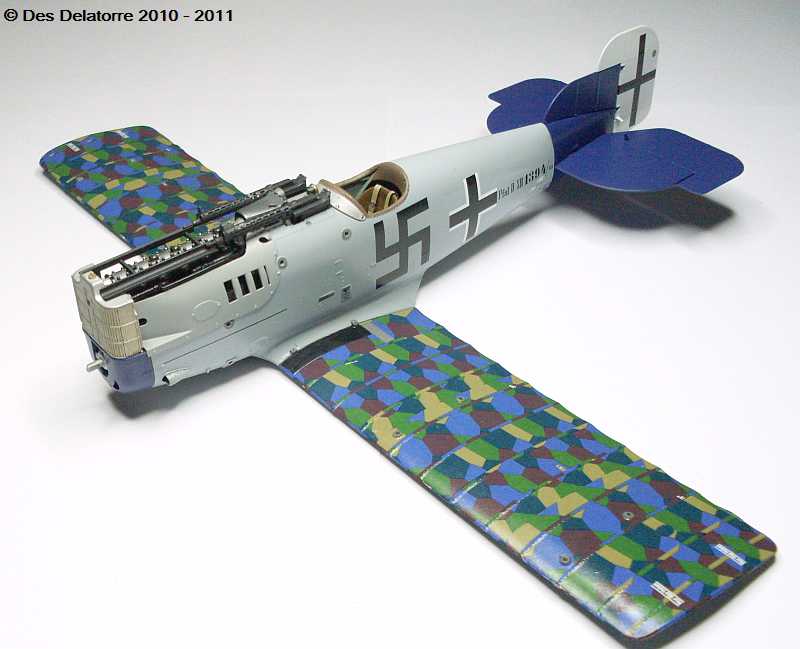
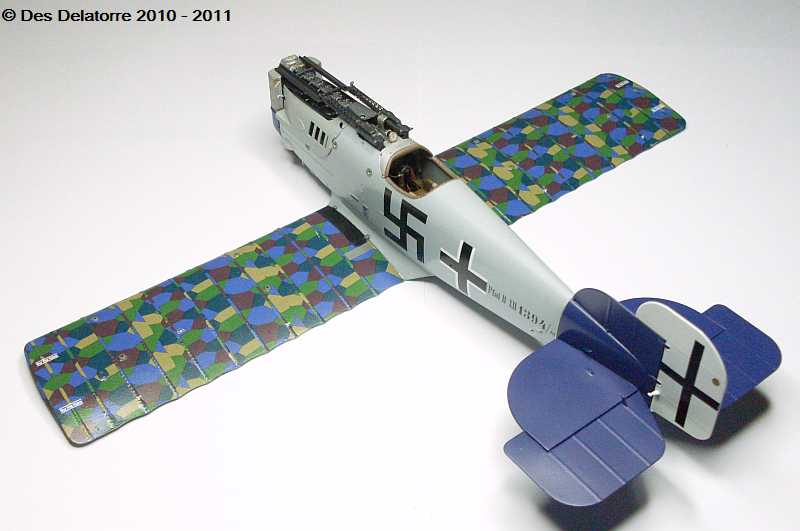
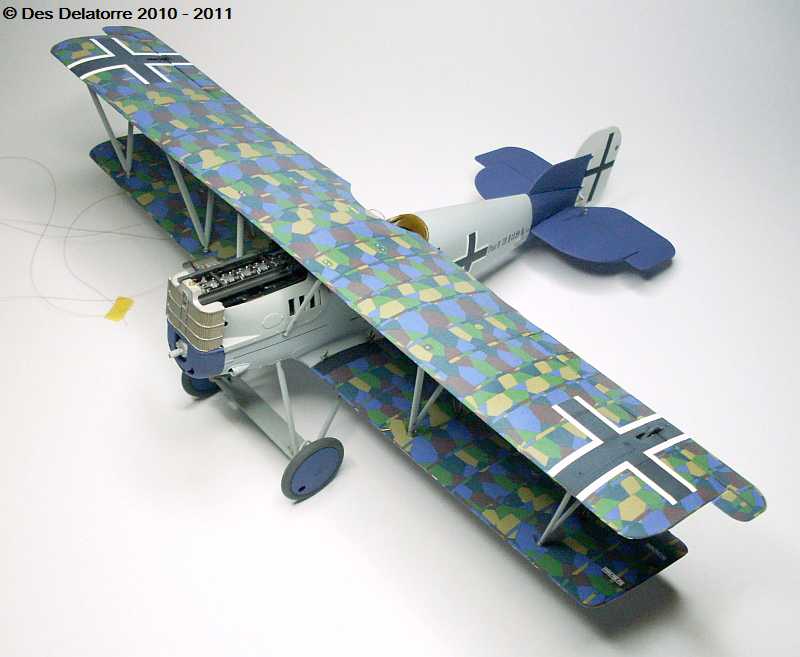
The lozenge decals went on well, but even though they are supposed to be sized, they still needed trimming at both leading and trailing edges plus at the wing tip. The decals conformed well the the wing shapes and adhered extremely well. The radiator and engine cowls are now fitted, the cowls had no fit problems at all.
Des.
Check my site for 1:32 scale WW1 aircraft model build logs, build techniques, how to make turnbuckles and eyelets plus much more, plenty of photos of my finished models
New South Wales, Australia
Joined: March 26, 2009
KitMaker: 366 posts
AeroScale: 309 posts
Posted: Tuesday, October 11, 2011 - 09:40 PM UTC
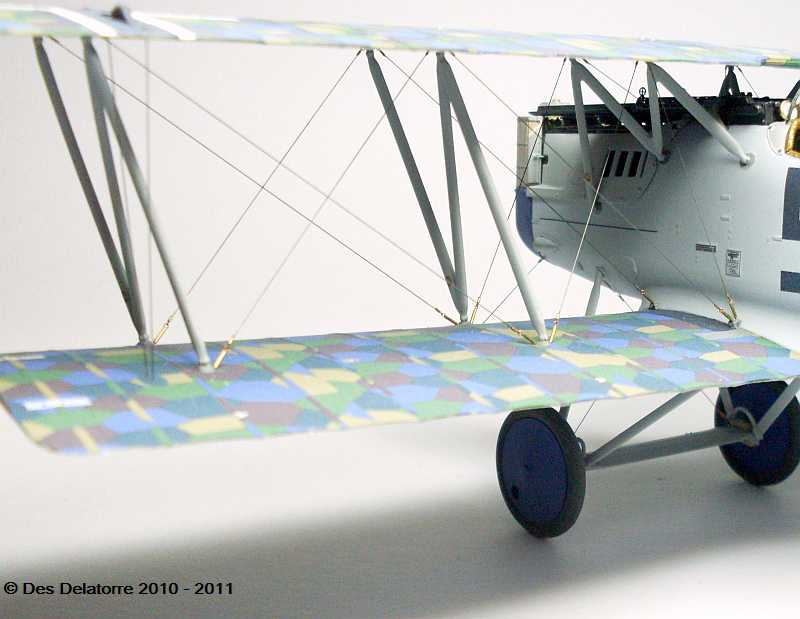
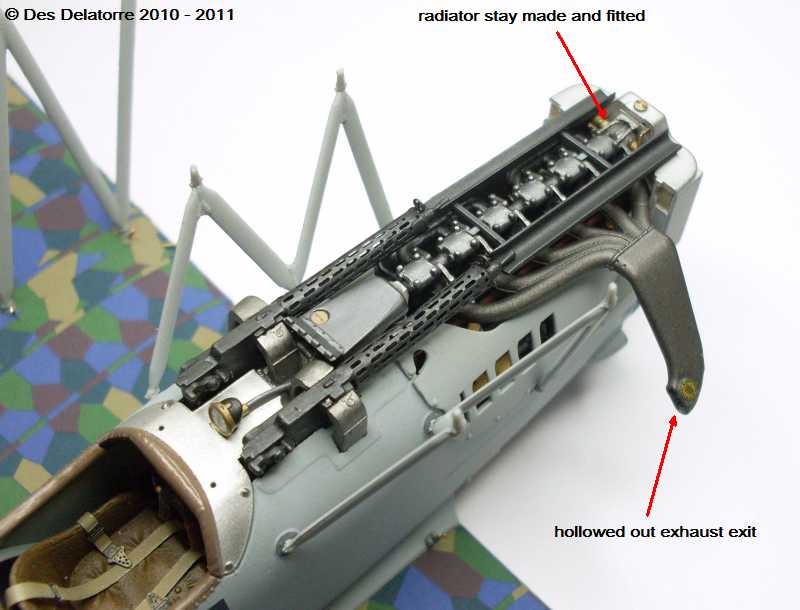
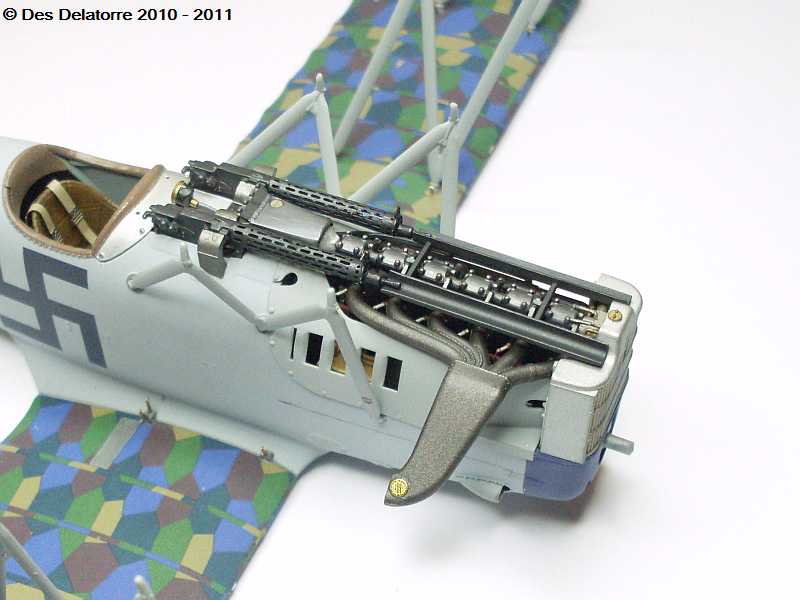
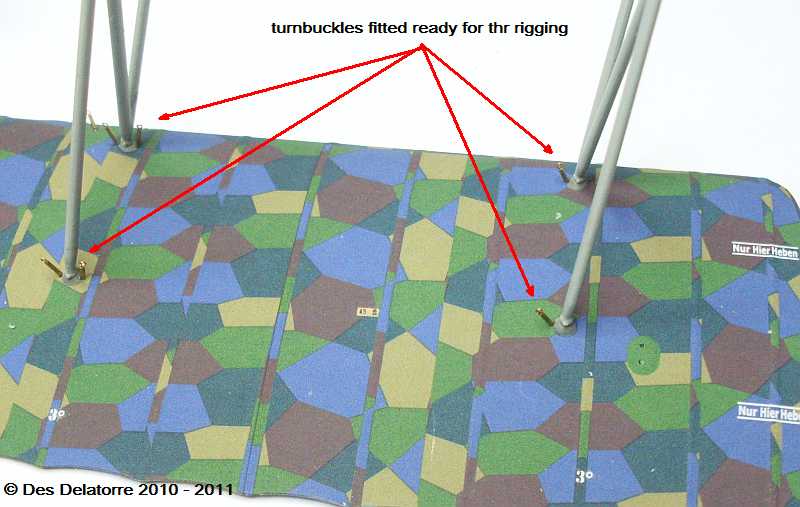
I made the small radiator bracket, it mounts to the back of the radiator and then to the forward rocker box. I also made turnbuckles which fit directly into the top of the bottom wing, on the under surface of the top wing I fitted eyelets.
The turnbuckles and eyelets are held in place with CA.
Des.
Check my site for 1:32 scale WW1 aircraft model build logs, build techniques, how to make turnbuckles and eyelets plus much more, plenty of photos of my finished models
New South Wales, Australia
Joined: March 26, 2009
KitMaker: 366 posts
AeroScale: 309 posts
Posted: Tuesday, October 11, 2011 - 09:45 PM UTC
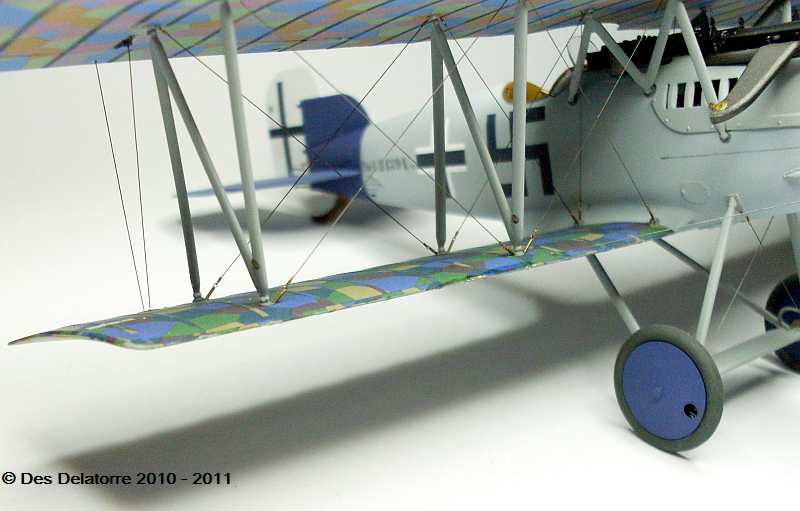
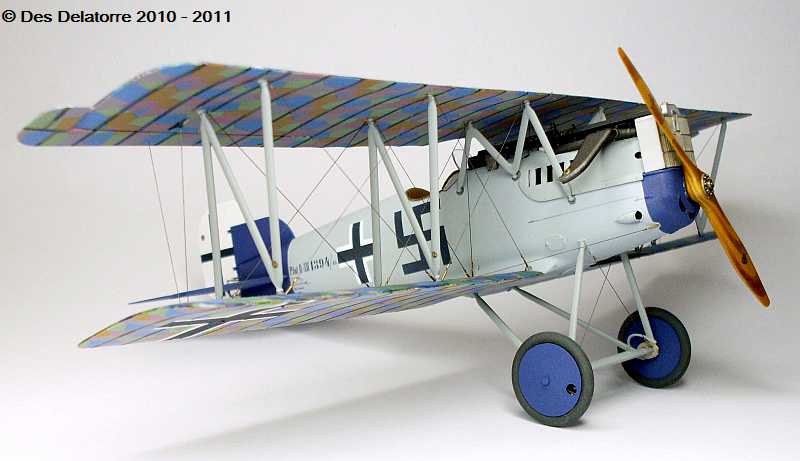
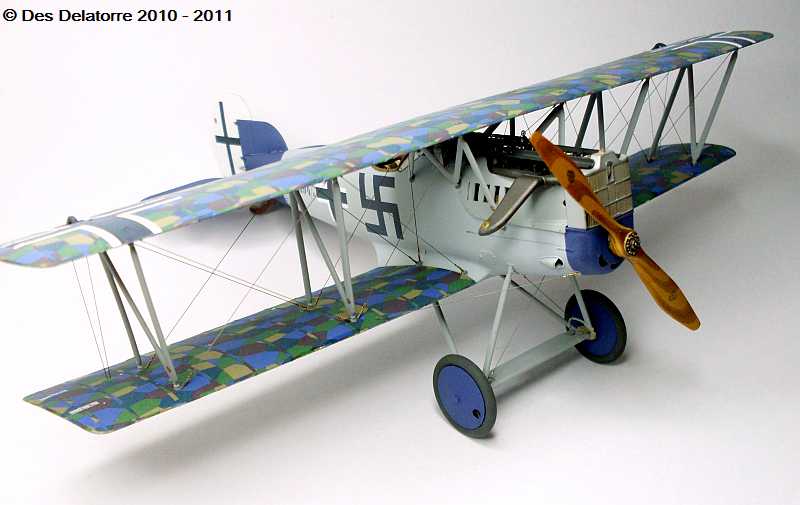
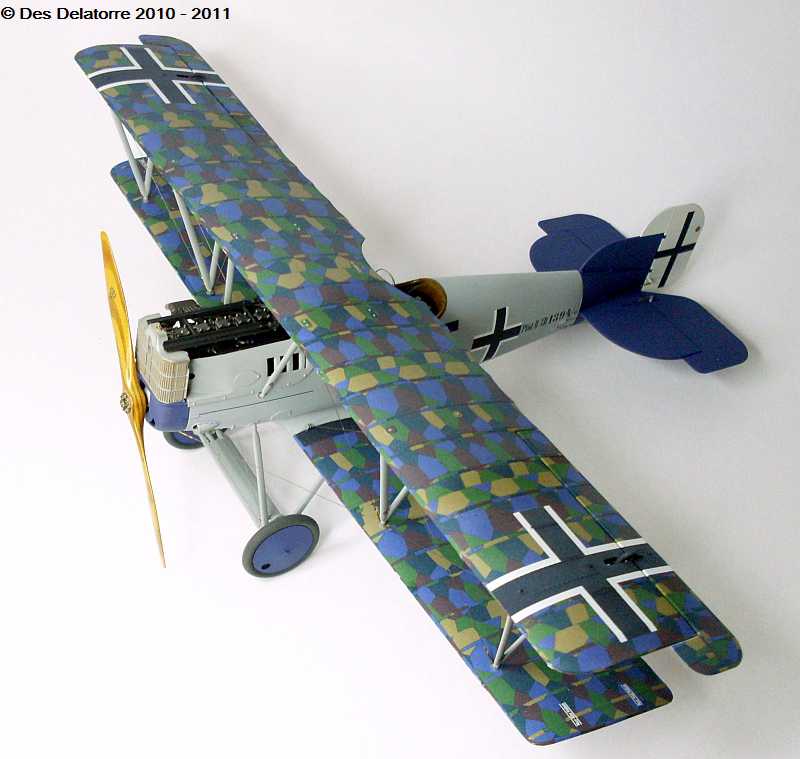
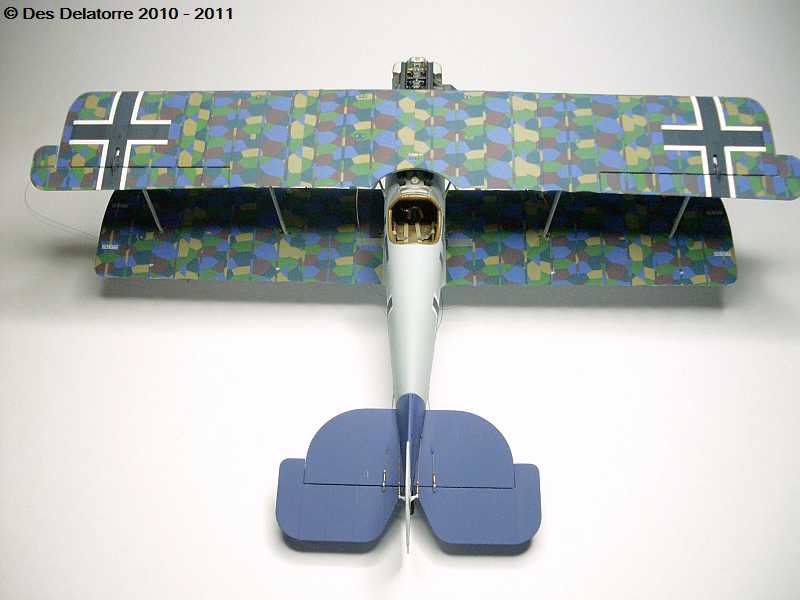
The top wing is now mounted, it took a little bit of effort to fit the struts but once lined up it located well. The undercarriage in also fitted, it is a fairly weak structure until the bracing wires are fitted, the locating pins and holes are very good.
Des.
Check my site for 1:32 scale WW1 aircraft model build logs, build techniques, how to make turnbuckles and eyelets plus much more, plenty of photos of my finished models
New South Wales, Australia
Joined: March 26, 2009
KitMaker: 366 posts
AeroScale: 309 posts
Posted: Tuesday, October 11, 2011 - 09:51 PM UTC
Check my site for 1:32 scale WW1 aircraft model build logs, build techniques, how to make turnbuckles and eyelets plus much more, plenty of photos of my finished models
New South Wales, Australia
Joined: March 26, 2009
KitMaker: 366 posts
AeroScale: 309 posts
Posted: Tuesday, October 11, 2011 - 09:59 PM UTC
Check my site for 1:32 scale WW1 aircraft model build logs, build techniques, how to make turnbuckles and eyelets plus much more, plenty of photos of my finished models
Alberta, Canada
Joined: July 26, 2010
KitMaker: 1,032 posts
AeroScale: 1,025 posts
Posted: Wednesday, October 12, 2011 - 05:52 AM UTC
Des,
Absolutely beautiful; you have raised the bar considerably with this one!
The rigging and the interior work really catches the eye and, thanks to you, my wallet is vibrating in anticipation of an order.
Compliments on an outstanding build,
Cheers,
Lance

Officially Retired as of 20 August 2013 and looking forward to some un-interrupted bench time. Currently starting Roden's Nieuport 28 and hoping to follow that with another WNW Fokker DVII.
Colorado, United States
Joined: January 25, 2004
KitMaker: 11,669 posts
AeroScale: 11,011 posts
Posted: Wednesday, October 12, 2011 - 06:24 AM UTC
Excellent Des! Any final thoughts on the build?
". . .The most important thing is to know why you build and then get the most that you can out of building." via D.D.
New South Wales, Australia
Joined: March 26, 2009
KitMaker: 366 posts
AeroScale: 309 posts
Posted: Wednesday, October 12, 2011 - 09:39 AM UTC
Thanks Lance and Stephen for your comments.
This was a very enjoyable build, the kit abounds with detailed parts and the fit of parts is very good, as a Wingnuts custom the tolerances are tight so paint has to be removed before items will sit home properly. There were one or two minor fit problems but nothing that could not be rectified quite easily. The cockpit and engine lend themselves to super detailing if the modeler so desires but built OOB they are excellent items. No rigging material is supplied with the kit but all rigging location points are clearly marked. The decals are superb and adhere very well, the fit to size lozenge decals are also brilliant, the top lozenge still require trimming but the bottom lozenge fits near perfectly. This is an excellent kit and could quite easily be built by a modeler of any standard, the rigging would be a little difficult for a beginner. I congratulate Wingnuts for producing another excellent 1:32 scale WW1 aircraft model and I look forward to the release of their next batch of kits.
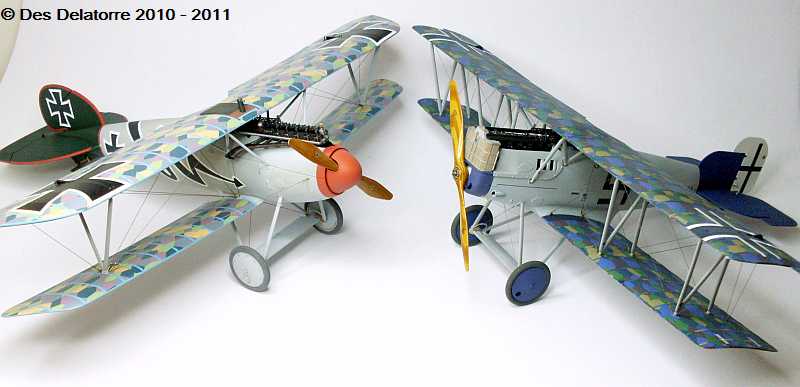
Just for a bit of fun, below is a comparison photo between the Pfalz D.XII and the Albatros DV
Des.
Check my site for 1:32 scale WW1 aircraft model build logs, build techniques, how to make turnbuckles and eyelets plus much more, plenty of photos of my finished models