_GOTOBOTTOM
Early Aviation
Discuss World War I and the early years of aviation thru 1934.
Oh my dear! A Camel in my bedroom!
edoardo
_VISITCOMMUNITY
Milano, Italy
Joined: November 30, 2007
KitMaker: 642 posts
AeroScale: 382 posts
Posted: Friday, November 25, 2011 - 07:55 PM UTC
Hi all!
Well, I am here to respond to John (Dolly15) with a new diorama attempt
Also, having my previous diorama been quoted by Stephen, I felt very incouraged to give it another try!

So, after having thougt of it for a while, I decided to continue the crashed plane serie, but this time on a larger scale
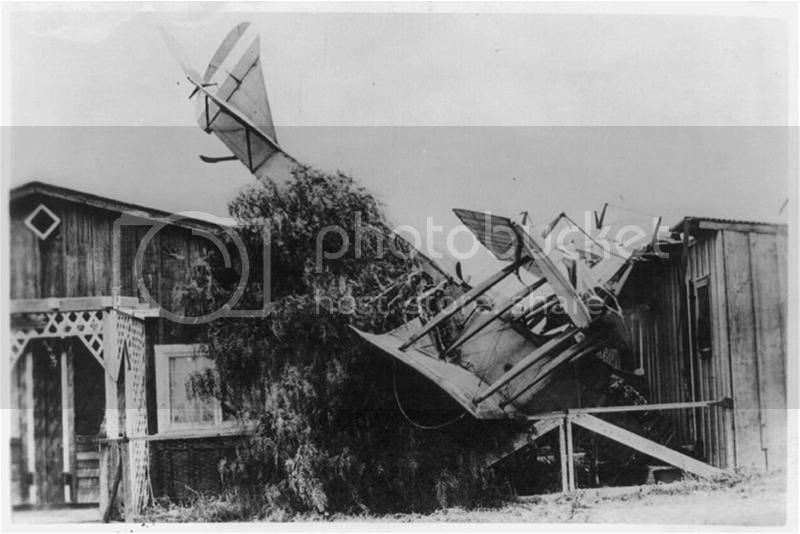
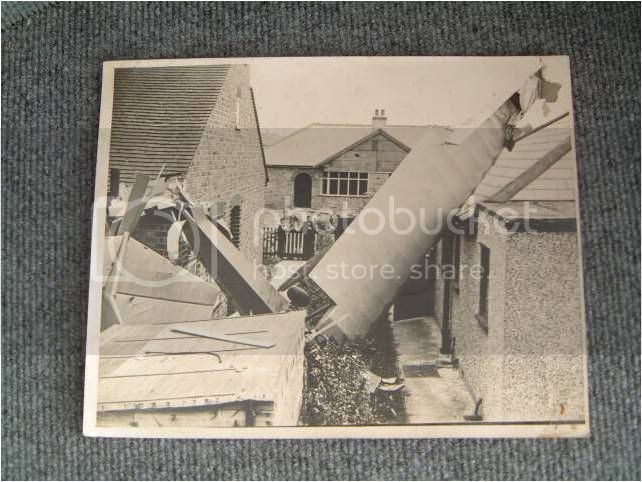
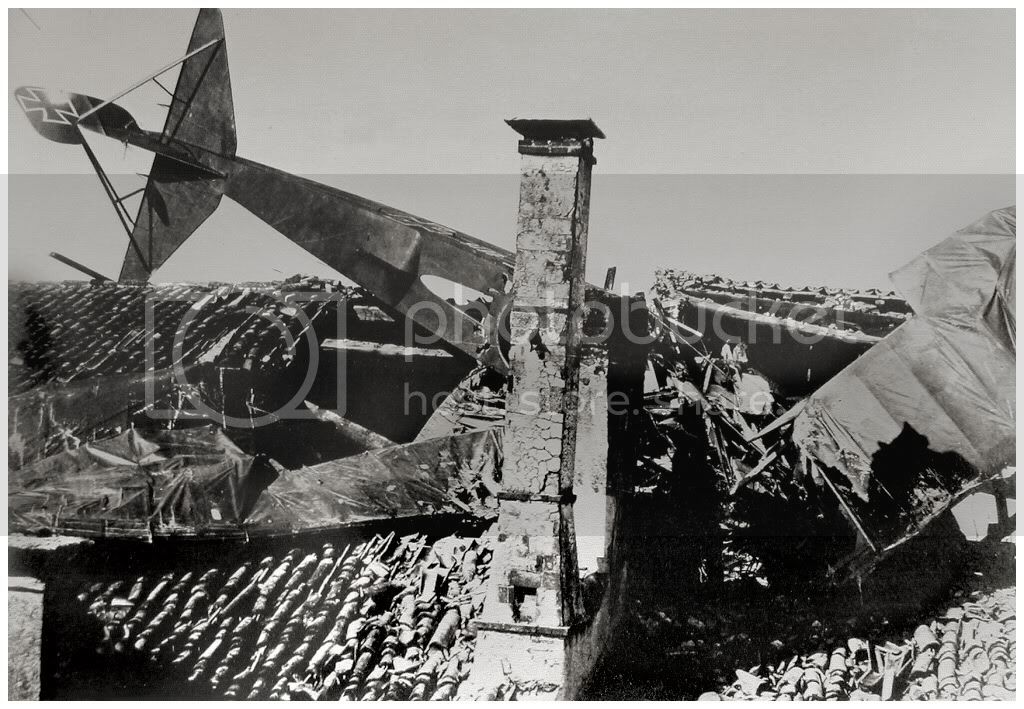
Here are some pictures that I used as an inpiration.
(to come)
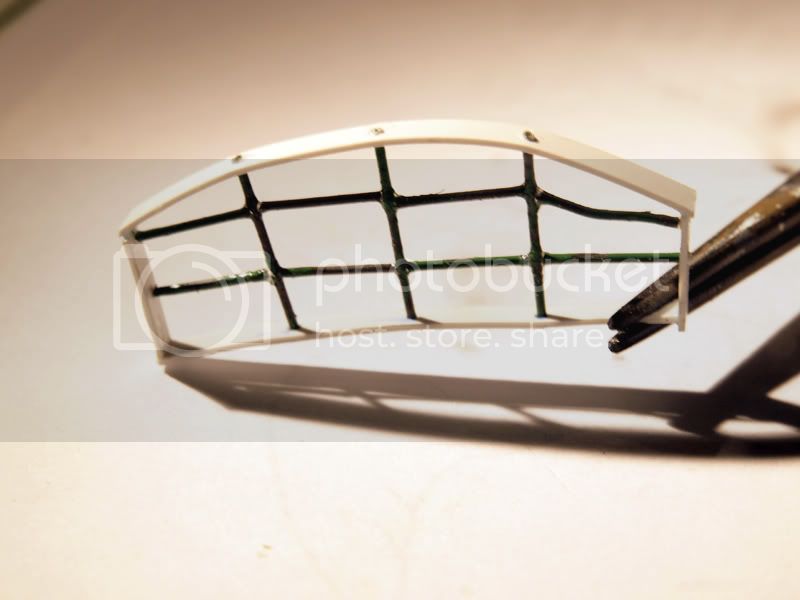
And here are some pics of the work in progress...


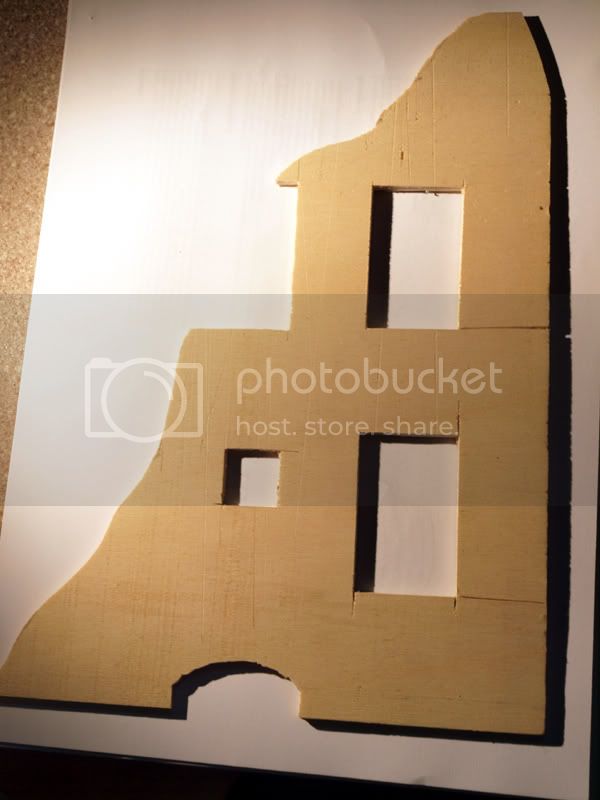
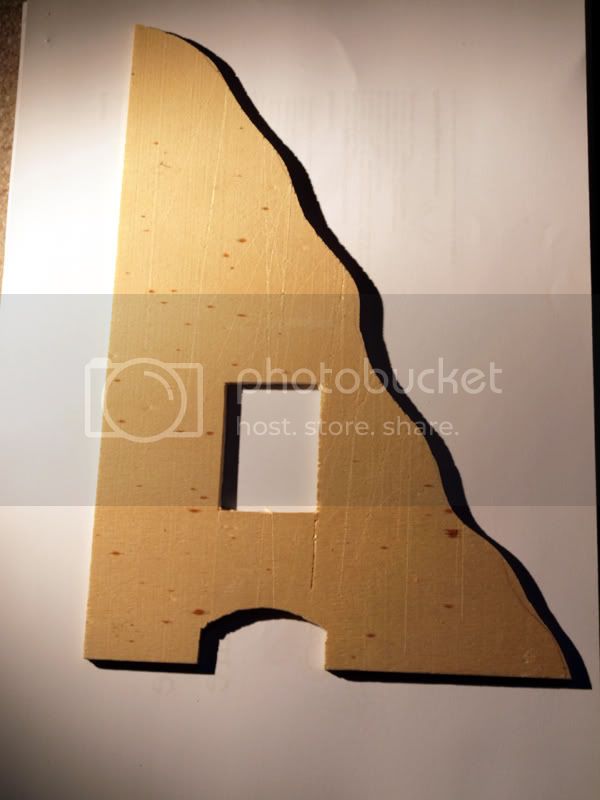
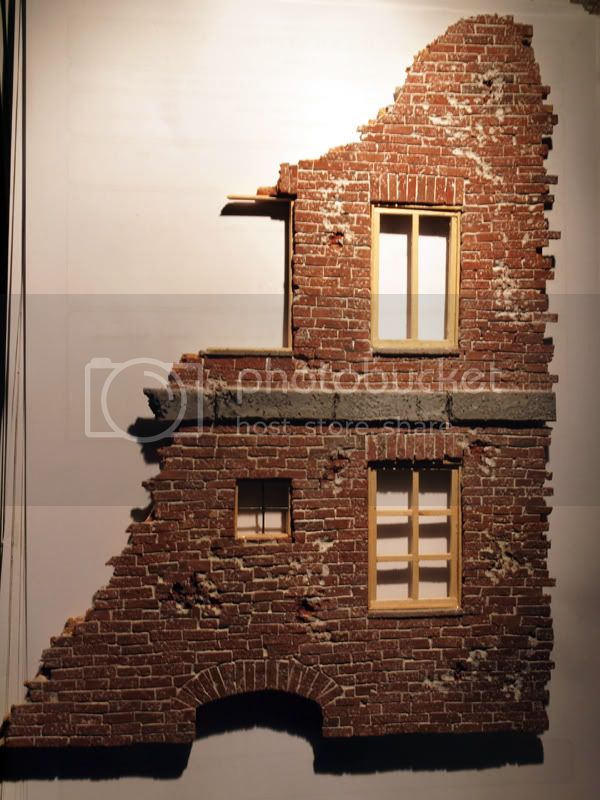
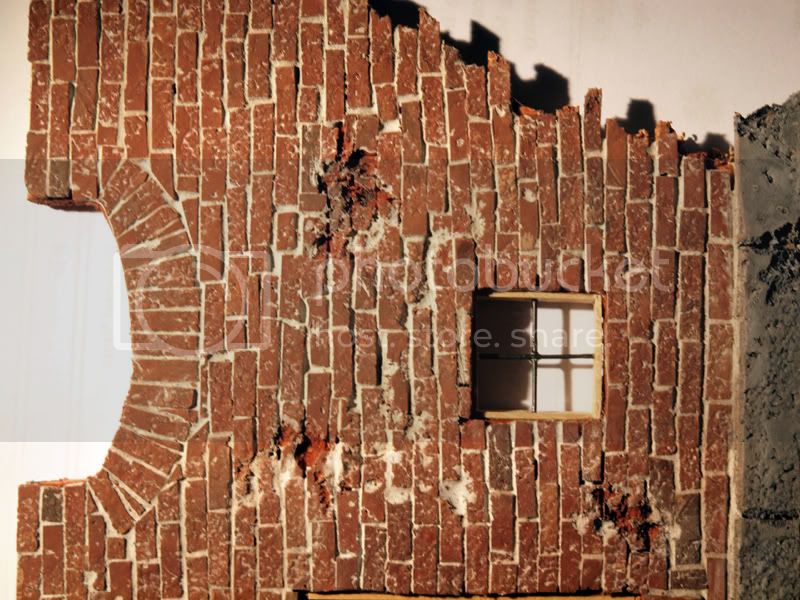
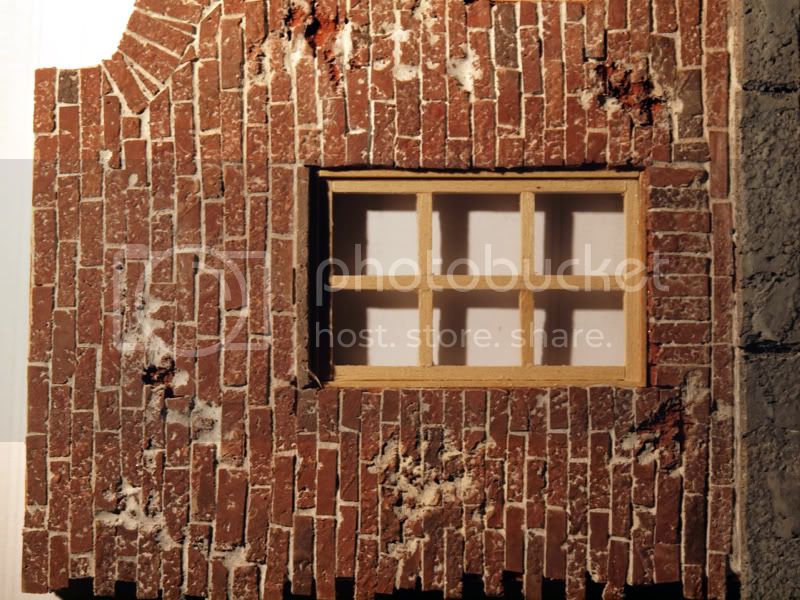
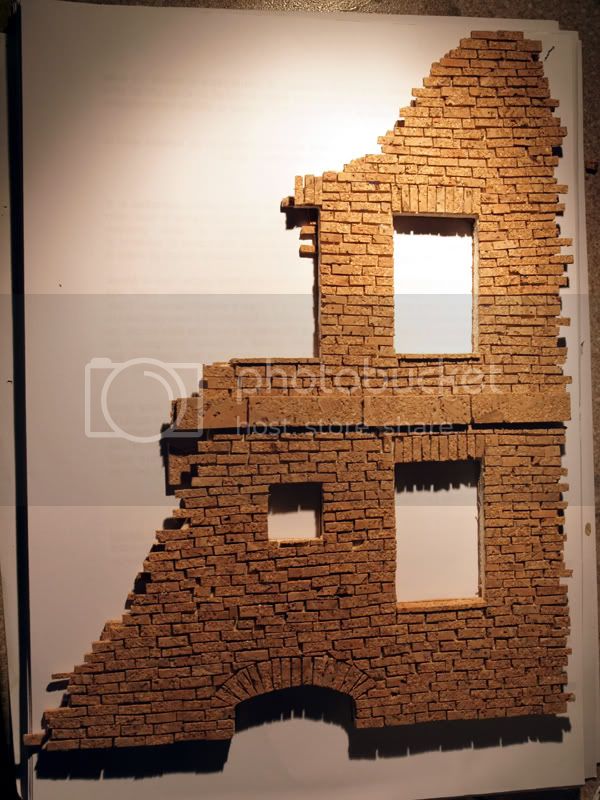
For my build I decided to go the corck way (if you are interested there are a lot of useful info you can find on the sister site Armorama), so after cutting the walls out of wood, I covered them with corck briks (the briks come out of corck sheet 2 mm thick and are about 2,5mm by 10 mm).
And here is the result on one of the facade....


And this is all for now, hope you enjoy it....
Ciao
Edo

Kornbeef
_VISITCOMMUNITY
England - South East, United Kingdom
Joined: November 06, 2005
KitMaker: 1,667 posts
AeroScale: 1,551 posts
Posted: Friday, November 25, 2011 - 08:55 PM UTC
Well after that first wonderful dio Edo, I'm watching this quite excitedly Go for it!

Keith
OEFFAG_153
_VISITCOMMUNITY
Västra Götaland, Sweden
Joined: February 19, 2010
KitMaker: 1,473 posts
AeroScale: 1,450 posts
Posted: Sunday, November 27, 2011 - 08:01 PM UTC
Hello Edo – wow, this should be fun to watch, will follow this with interest

Mikael
thegirl
_VISITCOMMUNITY
Alberta, Canada
Joined: January 19, 2008
KitMaker: 6,743 posts
AeroScale: 6,151 posts
Posted: Monday, November 28, 2011 - 01:43 AM UTC
Nice to see you back on another project Edo , looking forward to seeing this one unfold .


Terri
edoardo
_VISITCOMMUNITY
Milano, Italy
Joined: November 30, 2007
KitMaker: 642 posts
AeroScale: 382 posts
Posted: Tuesday, November 29, 2011 - 03:44 AM UTC
Hi Terri and Mikael!
Thank you for the ingouragment!

Here is just a quick update with some old pics that served me as inspiration... just to have in mind where we are heading!

ciao
Edo


lcarroll
_VISITCOMMUNITY
Alberta, Canada
Joined: July 26, 2010
KitMaker: 1,032 posts
AeroScale: 1,025 posts
Posted: Tuesday, November 29, 2011 - 03:36 PM UTC
Edo,
Having just reviewed your DVII Crash Diorama Thread this will be a project I will follow with great interest. Also nice to see you back in business; thought we may have lost you.
Keep the pics coming; you have inspired several others to possibly follow your lead already and have only just started on your project.

Cheers,
Lance
edoardo
_VISITCOMMUNITY
Milano, Italy
Joined: November 30, 2007
KitMaker: 642 posts
AeroScale: 382 posts
Posted: Thursday, December 01, 2011 - 03:44 AM UTC
Hi Lacnce!
Thank you very much, Sir!

I have some new pics to show you...
The first one is the grille for the basement


The next fiew pics are of the facade.
Using a Dremmell tool I damaged some sections, then I painted the bricks with red ochre oil and picked out some individual brick with a lighter or darker tone, just to break the monotony.
The plaster of Paris I used as mortar is highly deluted and hued with a little black and yellow guache, to form a graish tone.
After being applied with a small palette knife, I whiped off the excesses with a wet towel.


The windows, which are still paneless, are scratch built from wood.

I hope you like it!
Ciao for now!
Edo
ludwig113
_VISITCOMMUNITY
England - South East, United Kingdom
Joined: February 05, 2008
KitMaker: 1,381 posts
AeroScale: 1,110 posts
Posted: Friday, December 02, 2011 - 02:09 AM UTC
this looks great

paul
OEFFAG_153
_VISITCOMMUNITY
Västra Götaland, Sweden
Joined: February 19, 2010
KitMaker: 1,473 posts
AeroScale: 1,450 posts
Posted: Monday, December 05, 2011 - 01:14 PM UTC
Very nice indeed Edo, I think you've captured the look of brick really well.

Mikael
edoardo
_VISITCOMMUNITY
Milano, Italy
Joined: November 30, 2007
KitMaker: 642 posts
AeroScale: 382 posts
Posted: Sunday, December 11, 2011 - 10:37 PM UTC
Thank you Paul and Mikael !
I'd have some update for you, but, alas!, I cannot access to the Photobucket site...did you too encounter the same problems?
Thnak you...
Edo
edoardo
_VISITCOMMUNITY
Milano, Italy
Joined: November 30, 2007
KitMaker: 642 posts
AeroScale: 382 posts
Posted: Wednesday, December 14, 2011 - 02:02 AM UTC
Hi all!
Still having problems with the Photobucket site
Trying another one, let's see if it works...
edoardo
_VISITCOMMUNITY
Milano, Italy
Joined: November 30, 2007
KitMaker: 642 posts
AeroScale: 382 posts
Posted: Wednesday, December 14, 2011 - 02:10 AM UTC
YES !!!

Ok, up and running!
Now, what you see above is one of the windows. You can see the broken glass I added. This is made using the clear package of precooked food.
Next is a picture of the upper floor...

... and of the ground floor...


This is a detail of the inside wall

and here you can see the same wall with the wallpaper on it (I downloaded the pattern from the net and scaled it down before printing).

same as before...

Lastly the base as it is now...


Well, this is ti for now...
Ciao
Edo
Mgunns
_VISITCOMMUNITY
Arizona, United States
Joined: December 12, 2008
KitMaker: 1,423 posts
AeroScale: 1,319 posts
Posted: Wednesday, December 14, 2011 - 07:26 AM UTC
Hello Edo:

The wall paper is definately a nice touch. You have made some real progress with the setting and I am looking forward to see how this unfolds. Another neat one to do would be the Gotha "Mo Ro Tas" in the farm house.

Best
Mark
OEFFAG_153
_VISITCOMMUNITY
Västra Götaland, Sweden
Joined: February 19, 2010
KitMaker: 1,473 posts
AeroScale: 1,450 posts
Posted: Wednesday, December 14, 2011 - 08:58 PM UTC
This is looking very, very nice Edo. Your idea of printing the wallpaper at scale is brilliant

Mikael
edoardo
_VISITCOMMUNITY
Milano, Italy
Joined: November 30, 2007
KitMaker: 642 posts
AeroScale: 382 posts
Posted: Wednesday, December 21, 2011 - 09:28 PM UTC
Hi guys!
Thank you for the kind comments!
Hera are a fiew updates...
The first one is a very simple one: it is a q-tips gutter ...


I started some work on the model too... I am lucky as also Des Delatorre is working on the same subject so I have a good guide to follow!!

The first picture is just to show how bad the moulding of this kit is...

Here you can see how I stripped the outside of the plane where I plan do some damage, and the repositioning of the exhausts ...


And here is the engine. It is my first attempt in detailing a rotary engine in this scale and I find it quite a bit of work ... also following Des's steps is not as easy as it looks: he is a master and all he does seems plain and straightforward, but it is not...anyway, being my first attempt, I hope to receive an indugent welcome...


I am sorry that the quality of the pictures is not very good, I hope to add some more pictures soon, but it is all for now!
I wish you all a Merry Xmas!
ciao
Edo
Mgunns
_VISITCOMMUNITY
Arizona, United States
Joined: December 12, 2008
KitMaker: 1,423 posts
AeroScale: 1,319 posts
Posted: Thursday, December 22, 2011 - 03:42 AM UTC
Hello Edo:

I think your engine work is outstanding. It is more effort than I am prepared to do. It will definately enhance the appearance of the kit. Too bad the "Good" camel is so hard to find. The "Bad" one is plentiful.

Have a merry Christmas and a great New year.

Best

Mark
lcarroll
_VISITCOMMUNITY
Alberta, Canada
Joined: July 26, 2010
KitMaker: 1,032 posts
AeroScale: 1,025 posts
Posted: Thursday, December 22, 2011 - 07:12 AM UTC
Edo,
If the engine is any indication the Aircraft itself will be supurb. Nice work and looking forward to seeing more.

Cheers, and Best Christmas and New Years' Wishes,
Lance
Merlin
Staff MemberSenior Editor
AEROSCALE
#017
_VISITCOMMUNITY
United Kingdom
Joined: June 11, 2003
KitMaker: 17,582 posts
AeroScale: 12,795 posts
Posted: Thursday, December 22, 2011 - 09:54 AM UTC
Hi Edoardo

I echo the others' admiration for your work on the engine. But going back a step or two, I have to say the model brickwork is just about the most convincing I've ever seen! I've never heard of using cork before - the effect is amazing! Thanks for sharing.

All the best

Rowan
gajouette
_VISITCOMMUNITY
Texas, United States
Joined: February 01, 2007
KitMaker: 365 posts
AeroScale: 356 posts
Posted: Saturday, December 24, 2011 - 09:01 PM UTC
Edo,
How did I miss this great thread my friend. Very impressive project to date,I really love how you handled the brick facing. No doubt about your work here will be an inspiration to all especially those working on dioramas now.Curiously though the resident diorama guru hasn't mentioned your excellent project in the least. I'll be looking forward to your next installment,
Highest Regards,
Gregory Jouette
BUON NATALE TO YOU AND YOUR'S
dolly15
_VISITCOMMUNITY
Quebec, Canada
Joined: May 20, 2004
KitMaker: 8,227 posts
AeroScale: 3,915 posts
Posted: Friday, December 30, 2011 - 12:01 AM UTC
Like my dear friend and aspiring guru Gregory,I too missed this thread,I guess because it didn't have any hint that it was a diorama.I get a little tired of most of the ooohs and awess threads of self and inner circle type congratulations and don't bother reading them.Too boring !
Now this is different and extremely well done.Great idea and very creative stuff.I will be following along closely from now on !
Kornbeef
_VISITCOMMUNITY
England - South East, United Kingdom
Joined: November 06, 2005
KitMaker: 1,667 posts
AeroScale: 1,551 posts
Posted: Friday, December 30, 2011 - 07:06 AM UTC
Coming along really great Edo, keep it up
edoardo
_VISITCOMMUNITY
Milano, Italy
Joined: November 30, 2007
KitMaker: 642 posts
AeroScale: 382 posts
Posted: Sunday, January 08, 2012 - 09:07 PM UTC
Hi guys!
Thak you, thank you, thank you! for the great comments!
I hope that the old year ended well, and that the new one started even better, for all of you!

I have some update for you, even if they are minor one...
Here it goes: first I want to add a cuople of pics of the engine, I hope they are better on focus.


I started working on the cockpit. The seat is awful...


so I started a new one (same technique as on the previuos buids)...


I also started working on the fusolage and wings... I couldn't wait to try some damage...so maybe the building sequence is not perfect, and some trouble lay ahead (particularely for painting), but that'll add the fun!

This time I used a thicker foil to simulate the linen: I find that alu foil is too thin and you can hardly 'shape' it, so I moved to my trusted 'mustard tube' foil. Here the danger is to leavea non smooth enough surface...

Hera are some pics of the fusolage:


and of the upper wing:


Lastly, I bought a forniture set to be added to the interior of the house. It is 1:35 but I think that it should be ok anyway...
To tell the truth, I think that the quality of the kit is not very good, the right thing to do should be to go the scratch building way... but being lazy, I preferred just to modify a little something to add realism...


What do you think?

Well, this is it for now...
Ciao
Edo
OEFFAG_153
_VISITCOMMUNITY
Västra Götaland, Sweden
Joined: February 19, 2010
KitMaker: 1,473 posts
AeroScale: 1,450 posts
Posted: Sunday, January 08, 2012 - 10:21 PM UTC
The distressed chest of drawers are brilliant! It will ad a lot of carachter to this set I'm sure. And the detailing of the Camel is looking great!

I do like what you're doing here – looking forward to more as it develops.

Mikael
dolly15
_VISITCOMMUNITY
Quebec, Canada
Joined: May 20, 2004
KitMaker: 8,227 posts
AeroScale: 3,915 posts
Posted: Monday, January 09, 2012 - 12:51 AM UTC
Nice stuff ! Have you thought about a appropriate storyline yet ? My philosophy is buy what you can and build what you must ,after all these are only props to help you tell your story,I take a lot of artistic license with scale and forced perspective in my work and scratch build only what is necessary which in the larger scales seems to be most of it anyway.
The wing root damage looks good but if you don't mind me saying it looks more like damaged metal than fabric.I would try to soften up the look a bit.I hope that you don't mind me commenting on this,just my 2 cents.
edoardo
_VISITCOMMUNITY
Milano, Italy
Joined: November 30, 2007
KitMaker: 642 posts
AeroScale: 382 posts
Posted: Sunday, January 22, 2012 - 09:15 PM UTC
Hi guys, and thank you for looking!
@ John: well, no, I don't have a story line yet... I read your posts and I know what you think on the subjec, and you are probably right... you have a kind of director's way of thinking that I just lack... I just pile things up and see haow it comes without much planning I fear... all part of my character I think...
Anyway, I have thougt of what you said, and I come up with the idea of some figures talking to each other under the downed Camel. A kind of surreal-calm on the western front where precarity is ever present and depicted by the balancig Camel on the roof... What do you think?

One of the greatest Italian poets wrote a poem on trench warfare:
"si sta come d'autunno
sull'alberi le foglie"

[we stand like in autumn
leves on trees]

ok... enought talking...
here is a little update.
I rebuilt the cockpit trying to follow Des's build as close as I could...


Here some better pics after painting...


And here are some detail...


This las one makes me particularely proud... it is made out of flattened copper wire...

Then I moved to the instrument panel.
This is what is provided in the kit:

And this is what I rebuilt fron scratch (a full 5 hours work )


Lastly some addition to the house and the forniture:
courtains, books, and candles...


This is all for now...
Have a nice day
Ciao
Edo
 _GOTOTOP