_GOTOBOTTOM
Early Aviation
Discuss World War I and the early years of aviation thru 1934.
KotS GB 2012 SE5a - lcarroll
lcarroll
_VISITCOMMUNITY
Alberta, Canada
Joined: July 26, 2010
KitMaker: 1,032 posts
AeroScale: 1,025 posts
Posted: Wednesday, February 01, 2012 - 06:53 AM UTC
My submission for this Campaign is the Wingnut Wings SE5a "Hisso" which I'll be doing as Capt. James TB McCudden's 56 Sqn. 4891 as flown on 30 Jan 1918 from Baizieux, France when he shot down two Jasta 10 aircraft over Anneux for his 45th and 46th victories of an eventual record of 57 kills.
I've had this kit since it hit the market when WNW released their initial four subjects and have been more or less planning and researching the build for almost two years. The "market" is replete with excellent material including after market components and reference publications; many of the latter contradictory and confusing at times.
In keeping with the Build Log format I'll launch this with a photo of the kit. The quality is outstanding and, with some added after market accesories and some "scratched" components this promises to be a great addition to the display case.

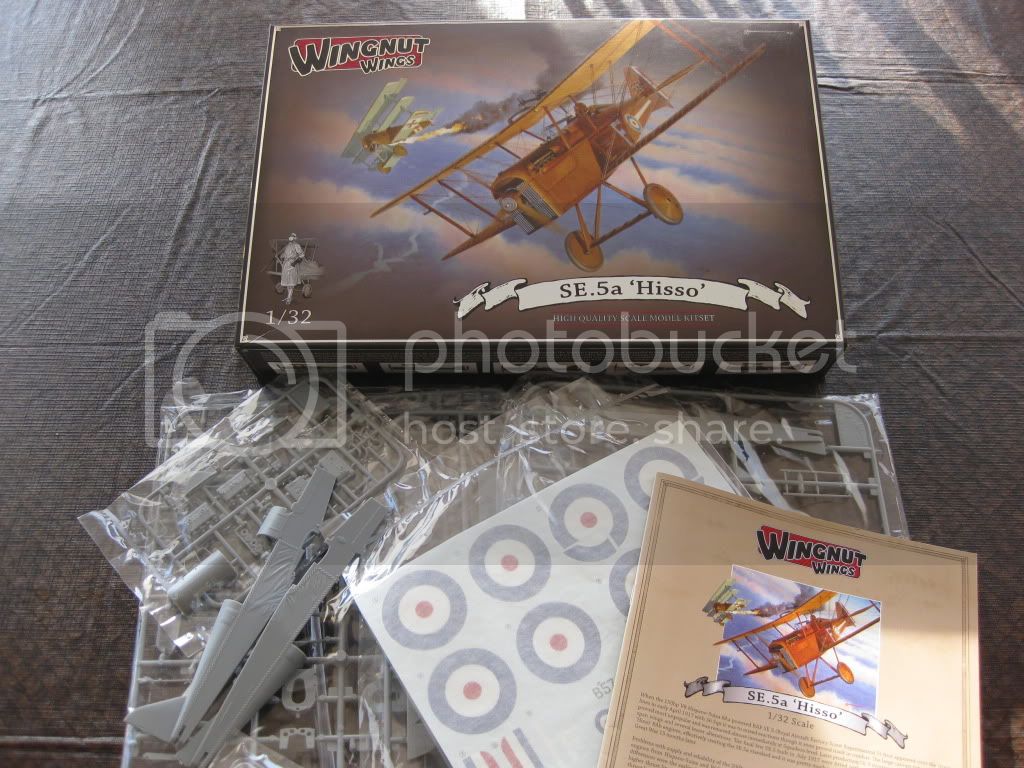
References are illustrated, all excellent in their own rights however the Windsock Special "SE5/SE5a Squadrons" volume and the Osprey Aviation Elite Units "No. 56 Sqn. RAF/RFC" pubs stand out as exceptional, the latter's cover painting illustrating my subject. The Windsock Worldwide March/April 09 issue has the Ray Rimell build of the kit. I should also mention the tremendous amount of reference material provided in the Kit Instruction Booklet, a volume on it's own! I'll be mentioning the contradictions I encountered in the References as the build progresses.

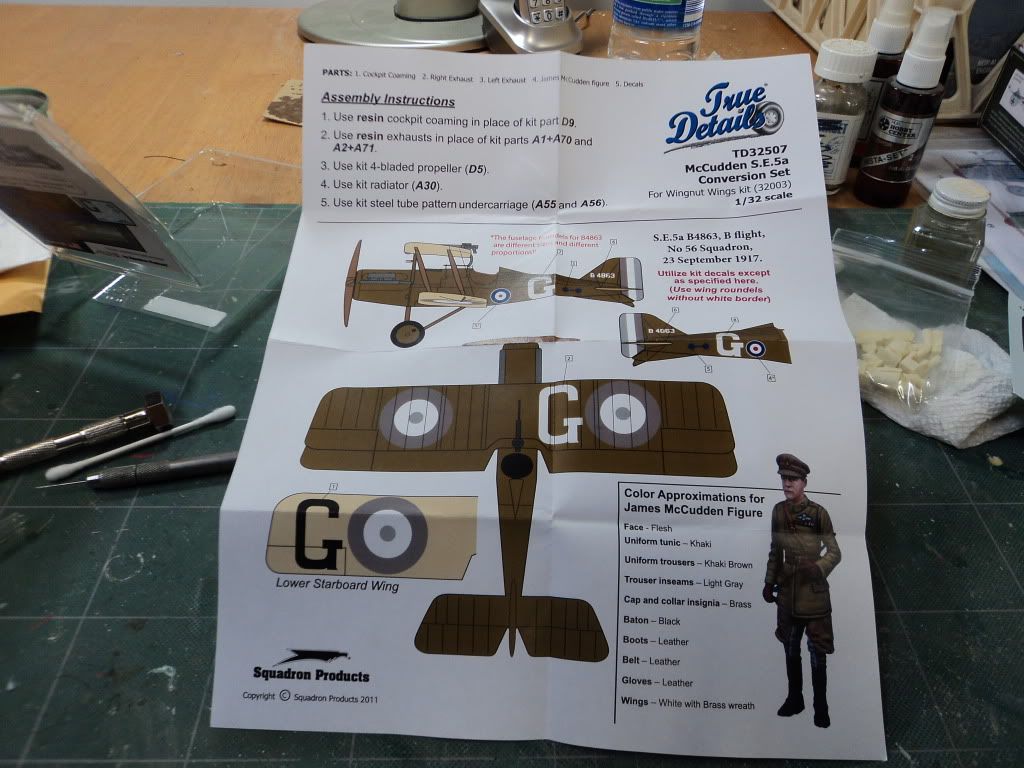
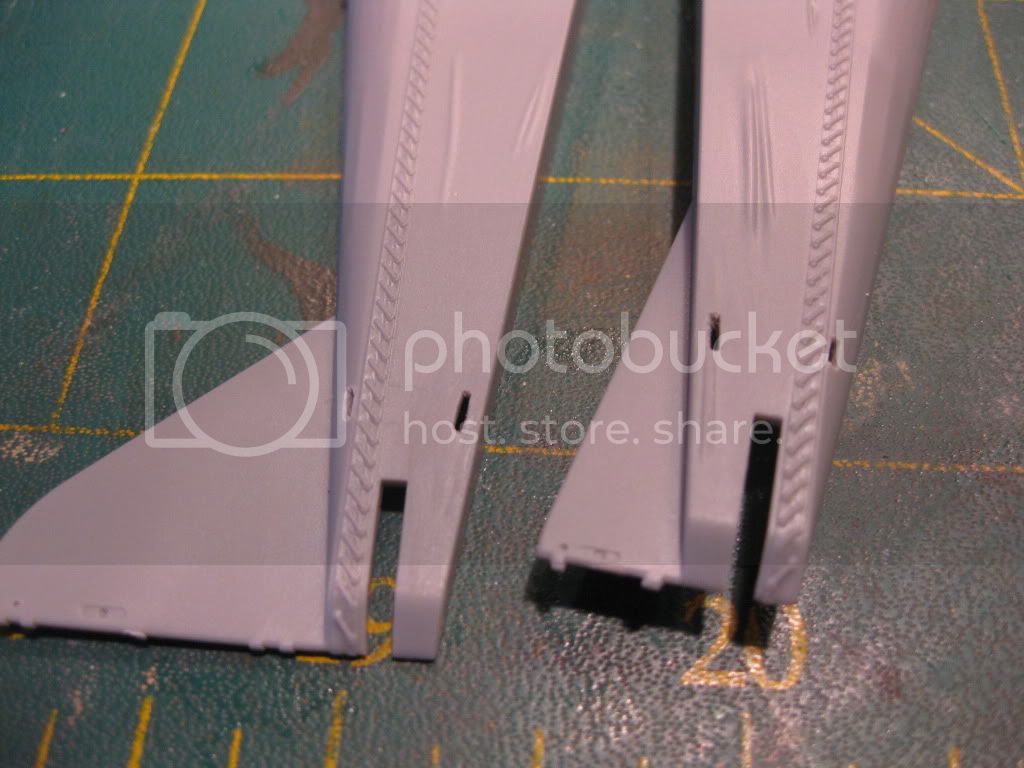
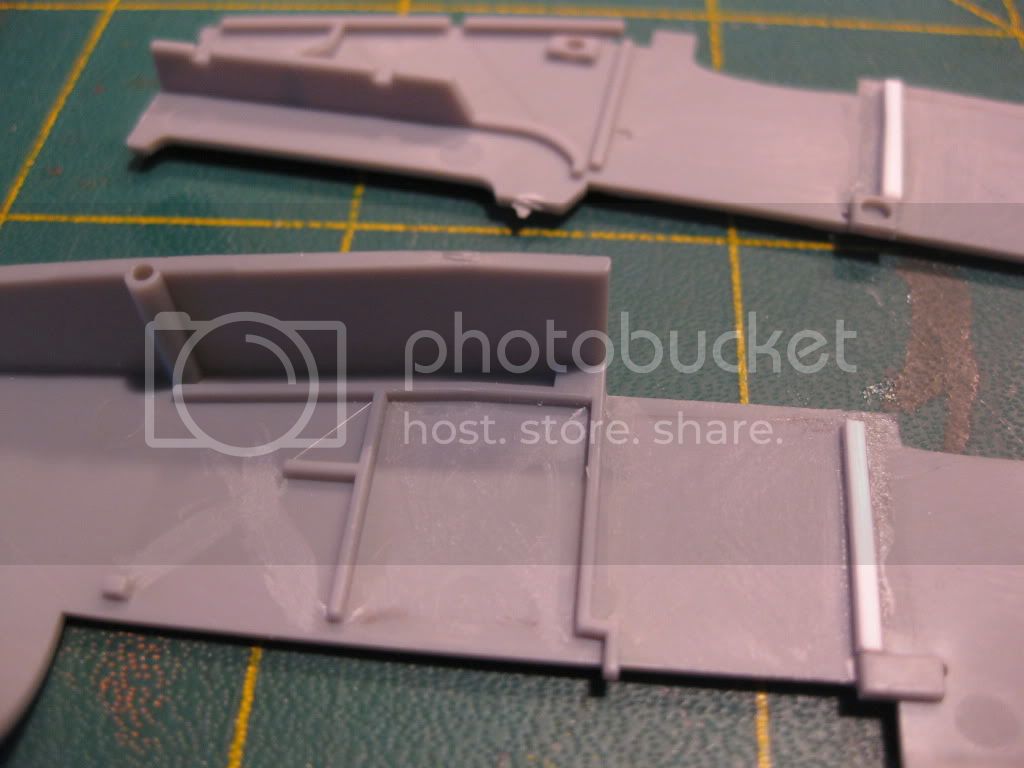
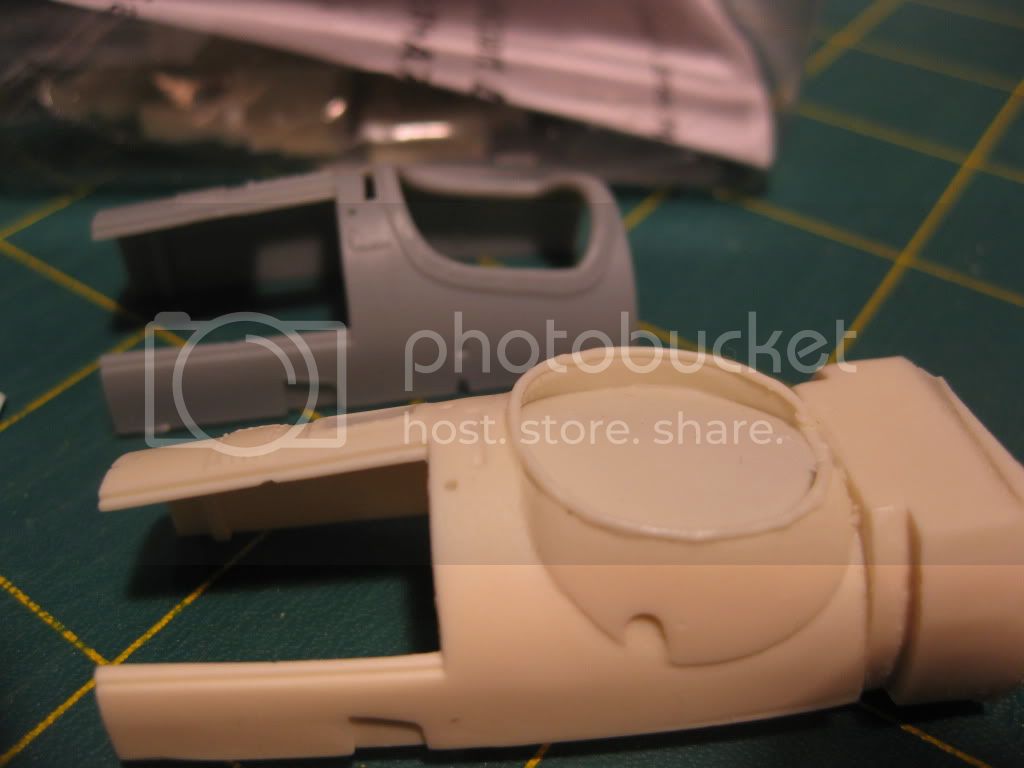
My original plan to replicate this subject was to use the WNW Kit augmented by conversion items from the Encore SE5a McCudden Kit. That's still the "plan" however I discovered that the cockpit component with the "bulged" opening does not fit the WNW fuselage,being approx. one mm. wider at the join. I have now ordered the Squadron's conversion set (which is actually for McCudden's 4853) however, with the spinner, prop, exhausts and narrow chord elevators from the Encore kit, I should be O.K. The decals will be a mix from the original kit, Encore kit, and Pheon's excellent "SE5a Aces in France" sheet 32004. I've also got the Scale Aircraft Conversions SE5a (Late) white metal Landing Gear and Struts, Eduard PE Set along with the Encore version, and a Tom's Modelworks #501 British Guns Pe Set to add to the mix. The desk "floweth over"!
(the Encore Kit can still be completed as a "stock" Hisso machine, I'm thinking APF Rhys-David's on the day of the Voss Fight)

Again, in keeping with the Contest Rules, a brief history.............
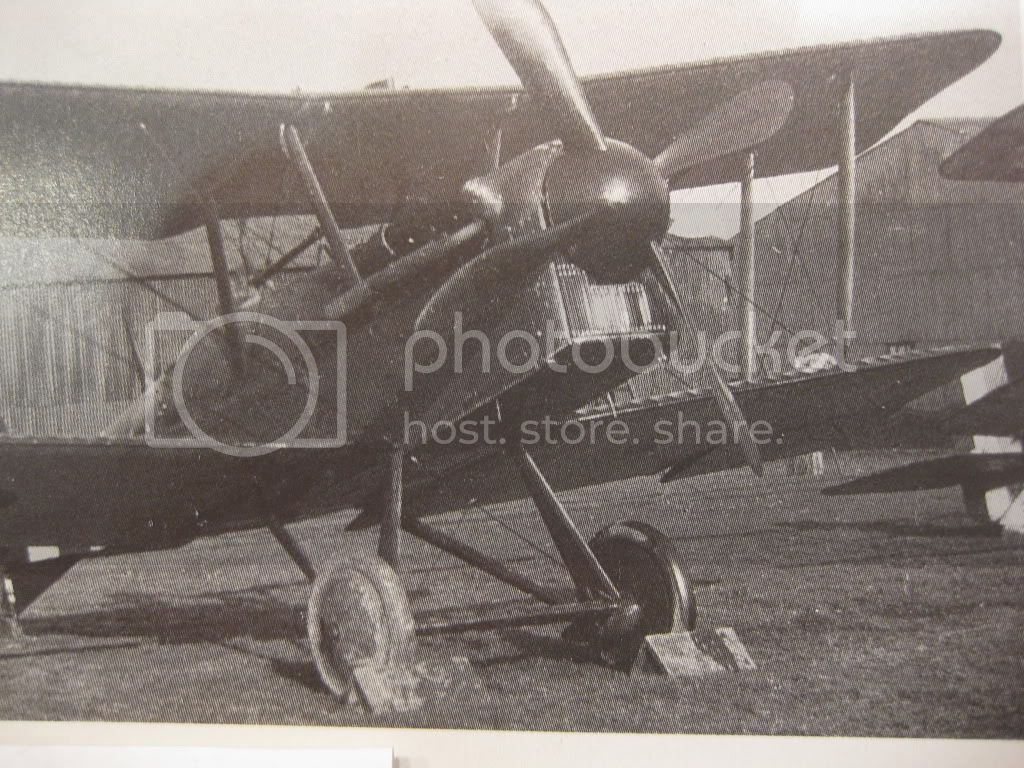
James McCudden was no ordinary Fighter Pilot; he had joined the flying service as an Air Mechanic and did much of his own aircraft maintenance including performance enhancing modifications. His first SE5a, 4853 was somewhat "souped up" however 4891 was the ultimate of his efforts. It was one of the rare airframes with narrow chord elevators, he fitted high compression pistons to the Hispano Suiza 8b powerplant, had a fully optimised bulged cockpit fairing for extreme high altitude work, the improved higher strength landing gear, shortened exhaust pipes to increase engine efficiency, and he fitted the spinner from an LVG he had downed which he claimed gave him an "extra 3 mph". His forte was high altitude interception, an art he perfected in shooting down 40 high altitude two seater Recce aircraft.
One of the few photos I could find of 4891 (some labelled as such were actually his earlier airframe, 4853)

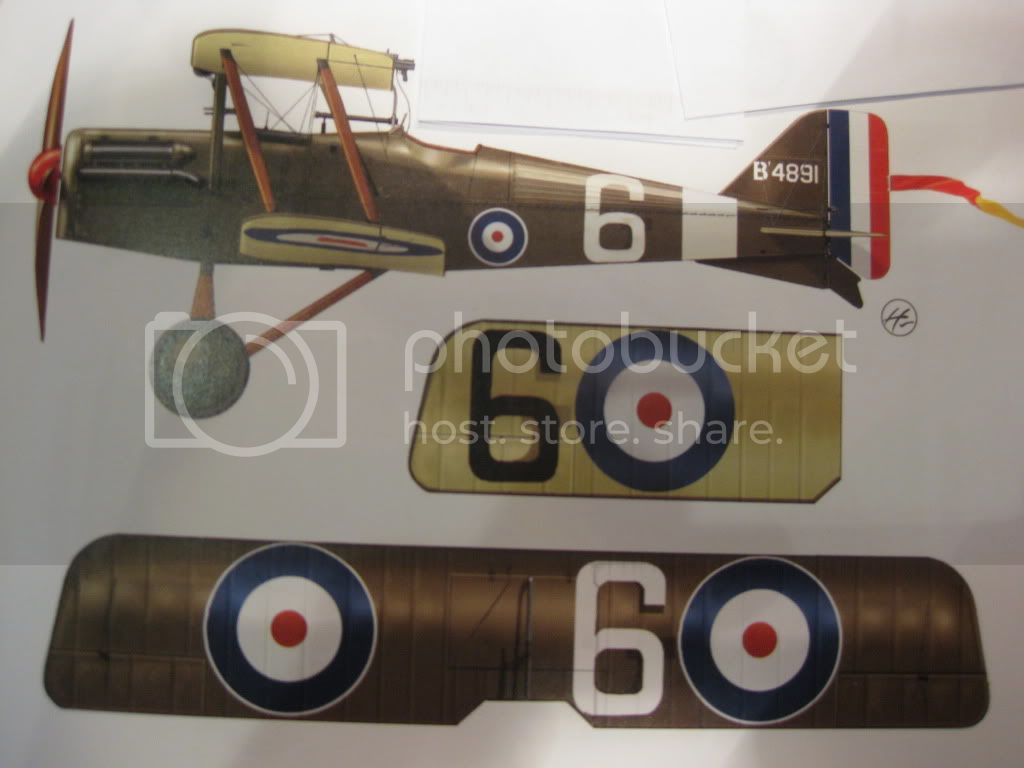
4891 as marked prior to 29 Dec 1917 when 56 Sqn. changed aircraft letter identifiers to numbers, in this case "G" being changed to "6".
....and 4891 as she was marked on 30 January 1918 in her final livery.

That's the intro in all it's glory, now on to the fun part of bringing it all together in a hopefully succesful build. Given the wonderful kit from WNW, all the "bells and whistles" I've gathered up, and the motivation and encouragement provided by a Group Build I am really looking forward to getting at it!
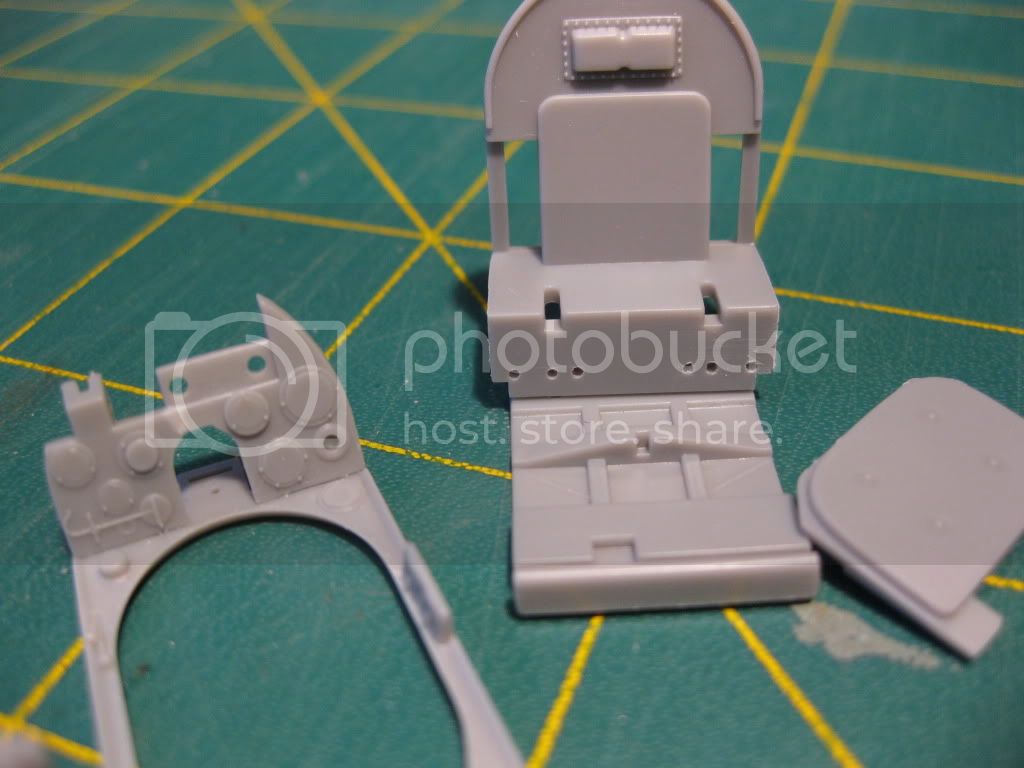
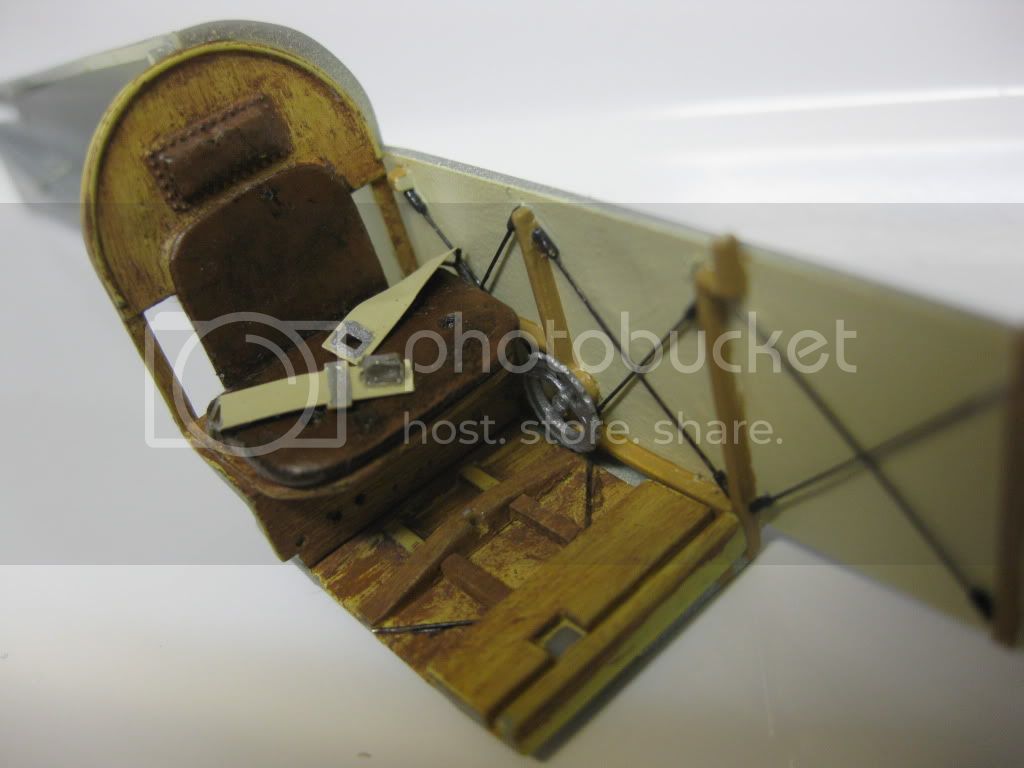
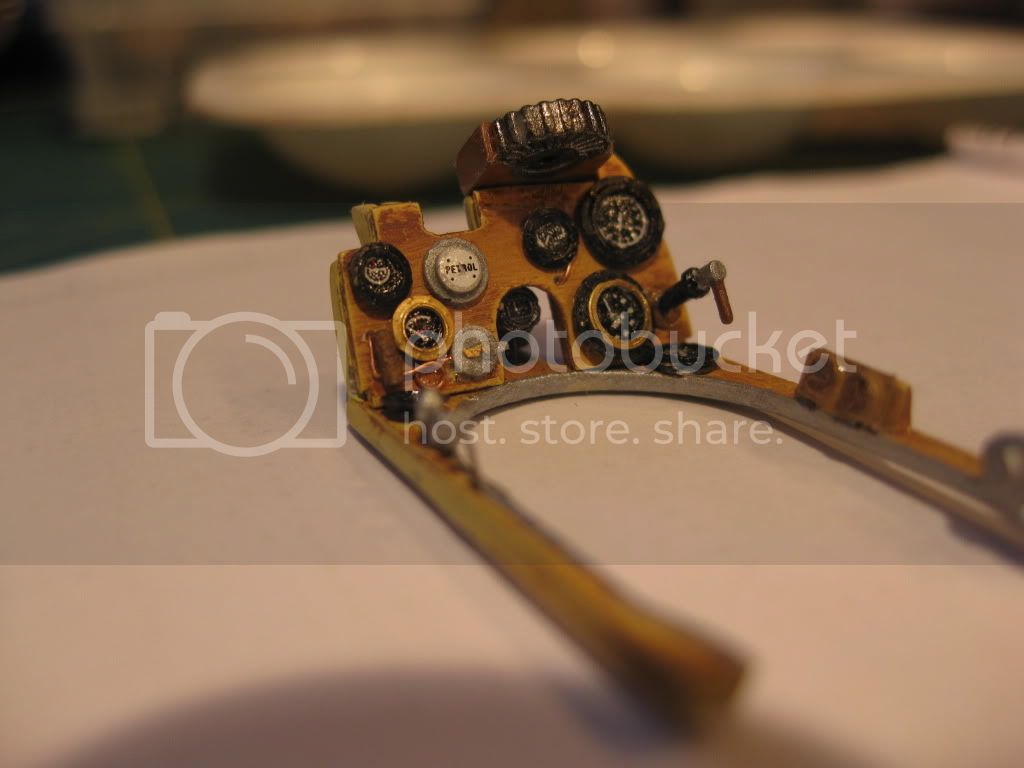
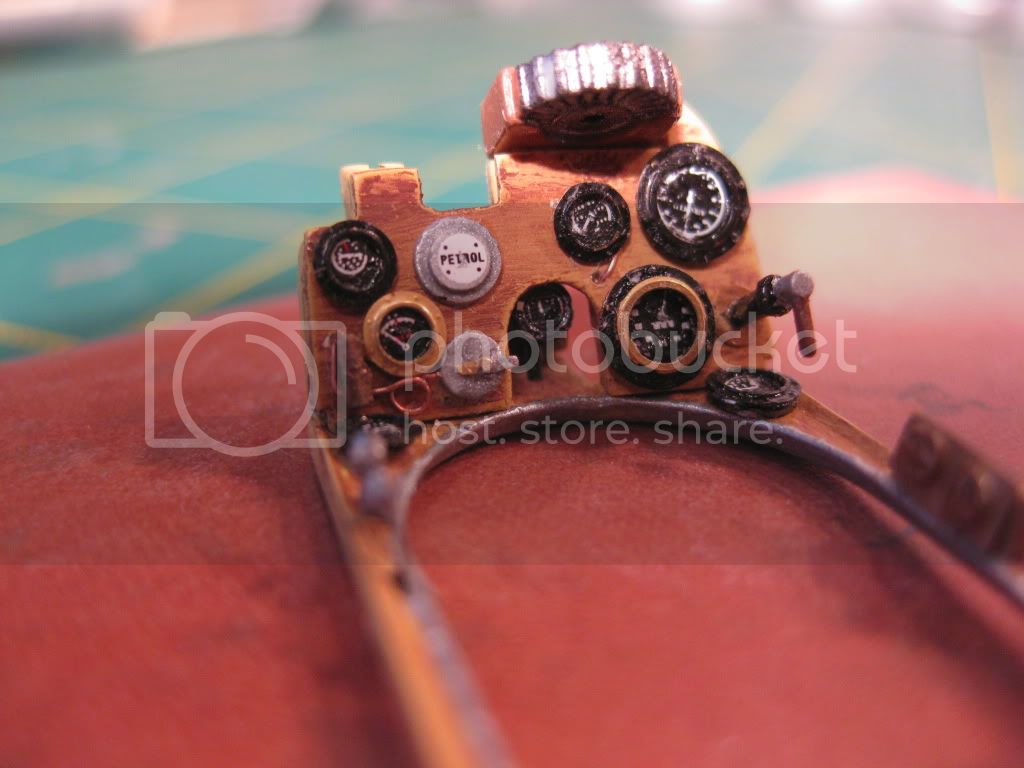
I plan to start with the cockpit components and forward fuselage interior work including a full install of flight control cables and a scratch built instrument panel. The engine won't be getting much attention as I plan to build her "buttoned up". If I can come even close to Lance Kreig's techniques I'll be a very happy modeller indeed! Have to keep reminding myself, "build clean, build clean,.......slow down and build clean!"

Cheers (and more to follow soon)
Lance


Mgunns
_VISITCOMMUNITY
Arizona, United States
Joined: December 12, 2008
KitMaker: 1,423 posts
AeroScale: 1,319 posts
Posted: Wednesday, February 01, 2012 - 01:37 PM UTC
Hello Lance: Look your off and running. A few words of caution from someone who has built this, almost twice. Ensure to study the instructions as there are some ommissions that suddenly appear later on. Example being the angled floor board and other items in the cockpit. Be sure to read ahead and note those before starting. It will save you some headache. Also, if you are going to use the Eduard PE, be sure you remove enough plastic on the inside of the fuselage to accomodate the PE. It is a real tight fit to begin with and the PE throws the geometry of the kit off. Have a care. Following those hints it is a great kit and builds up nicely. I have the cockpit conversion for this kit as well, and at some point will be building it. But my thinking is, I have an SE5 and there are a lot of types I don't have, so I build the ones I don't have to avoid duplication, but that SE5 is a great kit that doth beckon, as do all of them.
I will be looking forward to seeing your build progress.

Best

Mark
lcarroll
_VISITCOMMUNITY
Alberta, Canada
Joined: July 26, 2010
KitMaker: 1,032 posts
AeroScale: 1,025 posts
Posted: Wednesday, February 01, 2012 - 02:35 PM UTC
Mark,
I read your Blog on the 2009 WNW build and took serious note of your comments on PE etc. I've already determined that I'll have to be very careful with the cockpit area and keep all add ons "inside the profile". Two questions if I may:
Did you ever finish her; and
How did the Squadron After Market Conversion cockpit top cowling work with the WNW Kit? (Mine hasn't arrived yet but, as mentioned, the Encore part doesn't fit at all)
I'm only at the initial start point, scraping detail and pin marks off the interior fus. walls and got a coat of int. linen on them this PM. Also a little initial work on the instrument panel and seat assembly. Promises to be quite a build and thanks for the heads up on the problems you encountered.

Cheers,
Lance
gajouette
_VISITCOMMUNITY
Texas, United States
Joined: February 01, 2007
KitMaker: 365 posts
AeroScale: 356 posts
Posted: Wednesday, February 01, 2012 - 05:51 PM UTC
Lance,
I'm looking forward to seeing the first progress on this new project.No doubts about it will be great work.
Highest Regards,
Gregory Jouette
Mgunns
_VISITCOMMUNITY
Arizona, United States
Joined: December 12, 2008
KitMaker: 1,423 posts
AeroScale: 1,319 posts
Posted: Thursday, February 02, 2012 - 01:12 AM UTC
Hi Lance:

Here is what I got, not sure where I got it, as it was a year ago.

The instruction sheet

The exhaust

The cockpit


I did get it finished, and made field expedient repairs after it fell off the shelf due to violent drumming by our drummer during a rehearsal.

I have employed Al Williams as the test pilot for many of my builds. Here he stands proudly being photographed by a paparazi

Enjoy
lcarroll
_VISITCOMMUNITY
Alberta, Canada
Joined: July 26, 2010
KitMaker: 1,032 posts
AeroScale: 1,025 posts
Posted: Thursday, February 02, 2012 - 04:14 AM UTC
Mark,
Same one (True Details) I've ordered.(From Squadron on sale at $9.99) The Encore cockpit coaming is much longer, extending to the firewall and as I mentioned earlier, and is too wide to fit the WNW fuselage. This one should do the trick nicely.
Nice "SE"; doesn't show major repairs at all. (suggest you get a new, less energetic drummer for your group!) Thanks for sharing.
Cheers,
Lance
Mgunns
_VISITCOMMUNITY
Arizona, United States
Joined: December 12, 2008
KitMaker: 1,423 posts
AeroScale: 1,319 posts
Posted: Thursday, February 02, 2012 - 04:24 AM UTC
Hi Lance:

Alrighty then. I will be watching with interest as you progress through your build. As you can see, I took too much off one corner, but a little putty will take care of that. I am going to use the remnants of the first one I tried. I managed to melt parts of it under a space heater, mistakenly trying to speed up the drying time. What an idiot!! So, now I can salvage a $59.00 model!! I am finishing up "Flying Fury" about McCudden. A good read.
Best

Mark
mtnflyer
_VISITCOMMUNITY
Alberta, Canada
Joined: March 08, 2009
KitMaker: 394 posts
AeroScale: 360 posts
Posted: Thursday, February 02, 2012 - 04:34 AM UTC
Hi Lance. I quite like your chosen subject. The addition of a fallen enemies spinner gives it extra novelty. As there were other modifications to the real one, modeling this example creates an air of uniquiness.
Outstanding subject matter. I'll be following this one with great interest.
lcarroll
_VISITCOMMUNITY
Alberta, Canada
Joined: July 26, 2010
KitMaker: 1,032 posts
AeroScale: 1,025 posts
Posted: Thursday, February 02, 2012 - 04:42 AM UTC
Made the initial plunge into the build yesterday; some minor progress to report.
The fairleads for the steerable tailskid were drilled and cut out on the aft fuselage halves as they were not part of the kit mouldings.

The moulded internal fuselage bracing wires which will be visible in the cockpit were removed and will be "scrath built" in the next step. I also added one missing wood frame member on the forward end using scrap styrene.

The instrument panel and seat assembly components were assembled and at this point I succombed to a bout of AMS; the instruments were removed after the base coat, a new panel face scratched from sheet styrene, and individual instruments will be installed using a punch set for bases, a mix of kit and Aeroscale Instrument decals, and Aeroclub PE Bezels.


Today's schedule includes work on the instrument panel which I base coated and woodgrained last night and phase two of the afore mentioned AMS attack.....the seat cushions apparently need replacing in someone's demented mind! I also hope to get a good bite out of the fuselage sides and bracing wires. I sprayed the CDL first thing this A.M. so it should be ready to work if life's little challenges don't trash my day's plan. No "real world" work scheduled until the 20th so I hope to get some steady and significant progress completed on this project.

Cheers,
Lance
Kornbeef
_VISITCOMMUNITY
England - South East, United Kingdom
Joined: November 06, 2005
KitMaker: 1,667 posts
AeroScale: 1,551 posts
Posted: Thursday, February 02, 2012 - 08:42 AM UTC
Good to see you diving in the deep end and letting the AMS have free rein Lance.

Looking forwarsds to your next update.

Keith
lcarroll
_VISITCOMMUNITY
Alberta, Canada
Joined: July 26, 2010
KitMaker: 1,032 posts
AeroScale: 1,025 posts
Posted: Thursday, February 02, 2012 - 10:57 AM UTC

Quoted Text

Hi Lance:

Alrighty then. I will be watching with interest as you progress through your build. As you can see, I took too much off one corner, but a little putty will take care of that. I am going to use the remnants of the first one I tried. I managed to melt parts of it under a space heater, mistakenly trying to speed up the drying time. What an idiot!! So, now I can salvage a $59.00 model!! I am finishing up "Flying Fury" about McCudden. A good read.
Best

Mark


Mark,

I read Flying Fury again last year, sort of confirmed my interest in doing his "kite". Real man, and sadly like so many others of his generation, never got to enjoy his youth let alone a long life.
I'm glad the kit can be salvaged; I'm guilty of similar gaffs so don't be too hard on yourself!

Cheers,
Lance
lcarroll
_VISITCOMMUNITY
Alberta, Canada
Joined: July 26, 2010
KitMaker: 1,032 posts
AeroScale: 1,025 posts
Posted: Thursday, February 02, 2012 - 11:31 AM UTC

Quoted Text

Hi Lance. I quite like your chosen subject. The addition of a fallen enemies spinner gives it extra novelty. As there were other modifications to the real one, modeling this example creates an air of uniquiness.
Outstanding subject matter. I'll be following this one with great interest.


Thanks for your comments Guy, it is "one of a kind" although it's been modelled many times. I'm looking forward to the next steps and the arrival of the conversion set, a new approach for me.
Cheers,
Lance
Mgunns
_VISITCOMMUNITY
Arizona, United States
Joined: December 12, 2008
KitMaker: 1,423 posts
AeroScale: 1,319 posts
Posted: Thursday, February 02, 2012 - 11:32 AM UTC
Lance:

Doesn't the Eduard PE come with the brace wires? I know the set I had did come with the brace wires as part of the PE. Check it before you get going too far.

Best
Mark
lcarroll
_VISITCOMMUNITY
Alberta, Canada
Joined: July 26, 2010
KitMaker: 1,032 posts
AeroScale: 1,025 posts
Posted: Thursday, February 02, 2012 - 11:37 AM UTC

Quoted Text

Good to see you diving in the deep end and letting the AMS have free rein Lance.

Looking forwarsds to your next update.

Keith


I've given up; it cannot be ignored so I'm just going to accept it and enjoy the pain!! Beer will help during the interludes....

Cheers,
Lance
OEFFAG_153
_VISITCOMMUNITY
Västra Götaland, Sweden
Joined: February 19, 2010
KitMaker: 1,473 posts
AeroScale: 1,450 posts
Posted: Thursday, February 02, 2012 - 07:58 PM UTC
Hello Lance,

Interesting choice of subject – I've not seen any builds with this conversion yet – looking forward to yours. Also very impressive stack of background material.

Best Regards

Mikael
lcarroll
_VISITCOMMUNITY
Alberta, Canada
Joined: July 26, 2010
KitMaker: 1,032 posts
AeroScale: 1,025 posts
Posted: Friday, February 03, 2012 - 12:49 PM UTC
I managed to get one full and one half day on this build, at least have some progress to log.
The internal bracing (that will be visible on the completed model) was added using guitar wire and, again where visible, Bob's Buckles tubing. I also got the seat assembly more or less completed replacing the cushions with scratch styrene ones and the belts are the WNW Kit supplied PE's. The Eduard SE5a PE Set had much nicer belts however they appear to be modeled after the Re-builds/Replicas out there which have full harnesses as opposed to the original lap belt only config. The seat assembly is "posed" at this point.

And another view, sorry about the less then optimum photos.

The Instrument Panel proved to be a fairly major undertaking. I used a mix of the kit and Aeroscale Decals for the faces (finished with a drop of Future), bases made from styrene with Waldron punches, and bezels from the Aeroclub PE Sheet. In retrospect I wish I had tried the Eduard PE ones first; they appear to be a real quality item and they'll definitely get tried on the second SE I want to build.
I added most of the copper line "plumbing" on the face, PE Engine and Rad cooling controls, and "scratched" a fuel control for the main panel. On examining the photos I've discovered I mounted the Airspeed Indicator at an angle however I think once the coaming is in place it will pass!
In all not as "crisp" a result as I had hoped for but given the close quarters and really fiddly small components it will have to do! The panel layout doesn't match the original kit exactly; I used a couple of photos of the real vs. Rebuilt Museum examples. The spare lewis magazine box for example can be seen in higher, center, and left side (up to the Vickers mounting bracket) locations compared to the kits placement. I suspect all are correct, field modifications "in theatre" were very common.


That's all I have for now, made a lot of headway and hopefully can continue to do so. Next, since I'm more or less going to be following the Kit Instruction sequence, I'll be getting the cockpit assembled and control cables etc in place.
As always, thanks for looking and all comments/observations/ suggestions most welcome!
Cheers,
Lance

mtnflyer
_VISITCOMMUNITY
Alberta, Canada
Joined: March 08, 2009
KitMaker: 394 posts
AeroScale: 360 posts
Posted: Friday, February 03, 2012 - 01:53 PM UTC
Outstanding progress so far, lance. Thats instrument panel looks good with the AM bezels. I wish I had some, but don't, so I'll have to work with fine copper wire.

I can see that you are progressing in talent. Looks good on you.
Jessie_C
_VISITCOMMUNITY
British Columbia, Canada
Joined: September 03, 2009
KitMaker: 6,965 posts
AeroScale: 6,247 posts
Posted: Friday, February 03, 2012 - 02:42 PM UTC
I like the worn edges you've achieved on the instrument panel. It really makes it look used.
lcarroll
_VISITCOMMUNITY
Alberta, Canada
Joined: July 26, 2010
KitMaker: 1,032 posts
AeroScale: 1,025 posts
Posted: Saturday, February 04, 2012 - 03:08 AM UTC

Quoted Text

Lance:

Doesn't the Eduard PE come with the brace wires? I know the set I had did come with the brace wires as part of the PE. Check it before you get going too far.

Best
Mark


Mark,
Sorry, missed this earlier. The PE does include the fus. bracing wires however I've never had any luck/decent results with these well intended items, they always end up bent or sagging. Probably my "fat finger" disability however I use guitar wire for that reason, strong,straight, and doesn't bend.
Cheers,
Lance
gajouette
_VISITCOMMUNITY
Texas, United States
Joined: February 01, 2007
KitMaker: 365 posts
AeroScale: 356 posts
Posted: Saturday, February 04, 2012 - 05:00 AM UTC
Lance,
She's looking good my friend.The instrument panel and shelf nicely detailed. What did you use for the turnbuckles on your interior rigging? I can see this all is leading to one excellent conversion project.
Highest Regards,
Gregory Jouette
lcarroll
_VISITCOMMUNITY
Alberta, Canada
Joined: July 26, 2010
KitMaker: 1,032 posts
AeroScale: 1,025 posts
Posted: Saturday, February 04, 2012 - 05:44 AM UTC

Quoted Text

Lance,
She's looking good my friend.The instrument panel and shelf nicely detailed. What did you use for the turnbuckles on your interior rigging? I can see this all is leading to one excellent conversion project.
Highest Regards,
Gregory Jouette


Greg,
Thanks for the encouragement. The turnbuckles are Bob's Buckles 0.5mm brass tubes of the 1.5mm length. They are CA'ed in place with no "eyelets" used. I am a great fan of Mr. Bob's Buckles however I havn't tried his recommended procedure of returning rigging "monfilament" (I personally use fishing line;2,4 and 6 pound test) back thru the buckle prior to gluing. I just bought an optivisor and intend to try the "return" technique with this build.
Cheers,
Lance
lcarroll
_VISITCOMMUNITY
Alberta, Canada
Joined: July 26, 2010
KitMaker: 1,032 posts
AeroScale: 1,025 posts
Posted: Sunday, February 05, 2012 - 10:51 AM UTC
I managed to get a lot of time on the build this weekend. Progress is slow as always as this stage is completing the "fiddly bits" as Kornbeef terms them.
If you recall I stated last update that the Airspeed Indicator got mounted crooked on the instrument panel but I would "live with it" as such.
Enter AMS and one interrupted sleep and it became quickly "NOT!!!"
Following is the result, got a little ugly but the original base, instrument, and bezels were salvaged and properly re-installed. Excuse the grainy photo; too close methinks but as it shows, the ASI is now presentable in orientation. (I've replaced this photo with a slightly better one; hopefully it looks a little less like a disaster!"

The rest of the bench time went to completion of the cockpit; mainly installing the flight control cables. All were completed to spec with the exception of the aileron wires which were terminated under the seat where the first pulleys were located. These, along with the aileron bellcrank are not at all visible with the cockpit coaming installed. A "dummy" fairlead was installed behind the seat to capture and firmly anchor the various wires. It will also serve the same purpose for the rudder, elevators, and tailskid control wires prior to closing up the fuselage.


I see the dreaded "Digital Eye" has exposed a few touch up spots for me; never fails to amaze me what these little cameras can expose! The Very Pistol and floor will get a little attention tomorrow.
I added a little "wear and grunge" here and there to the floor and repositioning the forward aileron bellcranks further forward created a little as well which I thought worked out perfectly!


I also got the PE floor section installed and rigged the opening under the nose on the outside; I'll include a photo in the next update.

Next I'll start to concentrate on the engine and fuselage ahead of the firewall, Also can start working on the other major components while I wait for the Conversion Kit with the coaming to arrive.
So far no major obstacles, the kit is superb and WNW never fails to impress. The fit is absolutely remarkable which appears to be the most common trait mentioned by anyone reviewing or building their products.
Much enjoying this experience to this point.
Cheers,
Lance
lcarroll
_VISITCOMMUNITY
Alberta, Canada
Joined: July 26, 2010
KitMaker: 1,032 posts
AeroScale: 1,025 posts
Posted: Monday, February 06, 2012 - 03:30 PM UTC
I recieved the True Details Conversion Set in the mail today; perfect timing as the fuselage is now ready to be `buttoned up`. I had a minor disaster moment, got my fat index finger in the wrong place at the precisely critical wrong moment and `pinged`the control column off; a little repair now required prior to closing the fuselage but thankfully a minor setback only.
The fuselage with the dummy fairlead for the flight control wires:

The Conversion Set; decals, exhausts, coaming, and a McCudden figure:

And the one piece that will be utilised, the coaming with the added cockpit surround. Note that this set is for McCudden`s previous airframe Serial 4853 however The coaming is produced to fit the WNW Kit thus this conversion set was required.

I now have two McCudden figures and, not being a figures guy, will be happy to send them to anyone who could or would use them.
I am presently working on the engine, will close up the fuselage tomorrow after the mentioned repairs, and things should now start to progress at a faster pace.

Cheers,
Lance
warreni
_VISITCOMMUNITY
South Australia, Australia
Joined: August 14, 2007
KitMaker: 5,926 posts
AeroScale: 2,201 posts
Posted: Monday, February 06, 2012 - 03:53 PM UTC
I'll take one Lance!

Nice work so far Sir!

One tip I have for you, the rigging on the SE.5a can be very confusing at times. Make sure you have all your planning done before starting. I am sure you will, but the SE.5a was the only WNW model that I got the rigging wrong on... so far..
JackFlash
_VISITCOMMUNITY
Colorado, United States
Joined: January 25, 2004
KitMaker: 11,669 posts
AeroScale: 11,011 posts
Posted: Monday, February 06, 2012 - 04:35 PM UTC
I am looking forward to this build. The instrument panel is a great start!
 _GOTOTOP